
When we moved to this house, we still had the farm, and still had to keep up both yards and landscaping. We knew that eventually, we would lose the storage at the farm and would need somewhere to store the mowers, leaf blower, weed eater, spreaders, sprayers, and all the other garden implements.
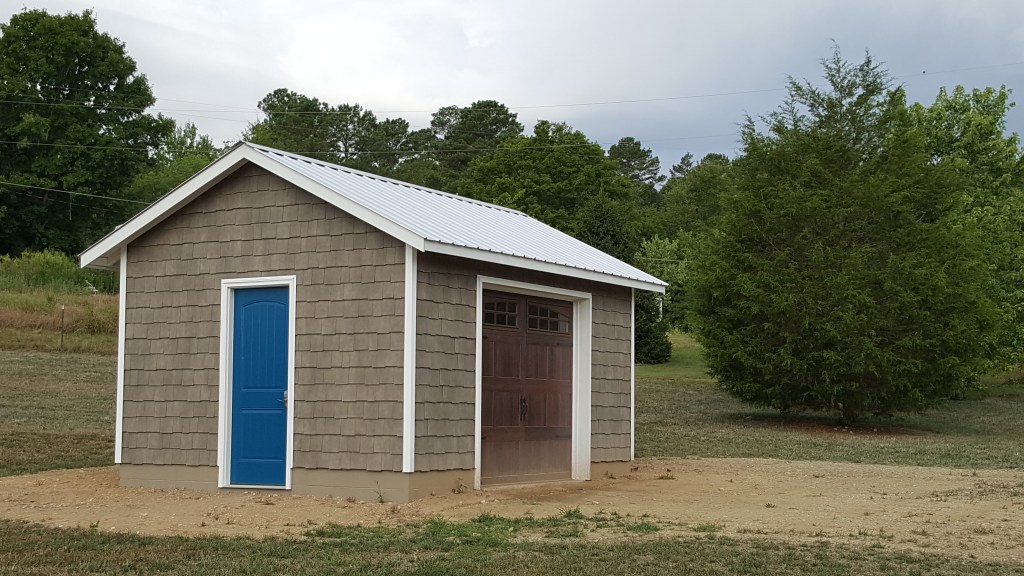
I knew that I didn’t want to store it in the garage because of all the dirt that would get tracked into the house as a result. So, we started designing a garden shed that was big enough to hold all the essentials, but not so big that we would be tempted to store things that we didn’t need. We landed on a design that was 12′ x 16′–a total of 196 square feet which had the added advantage of not requiring a building permit.
We needed the shed to have a garage door so that we could pull the mower in, and to make access to other items as easy as possible. We also wanted a passage door for when we only needed to grab clippers, shovels, or something small. We clad 3 sides with vinyl staggered antique cedar siding, and the back is Hardie panels. The garage door on the shed is the same one that we used for the house. The passage door is painted with Soft Azure semi-gloss oil and we put a Galvalume roof and gutters on it. This little building really served as the template for what we ultimately did with the exterior of the house.
The inside is finished with OSB that we painted white. We also painted the inside of the roof and the roof framework white to keep the inside bright since there isn’t a light in the shed. Of course, it was July when we did the painting inside the shed and it was so hot. We used a Gladiator organization system, along with shelves, hooks, brackets, and mesh baskets inside the shed to keep everything handy and off the ground.
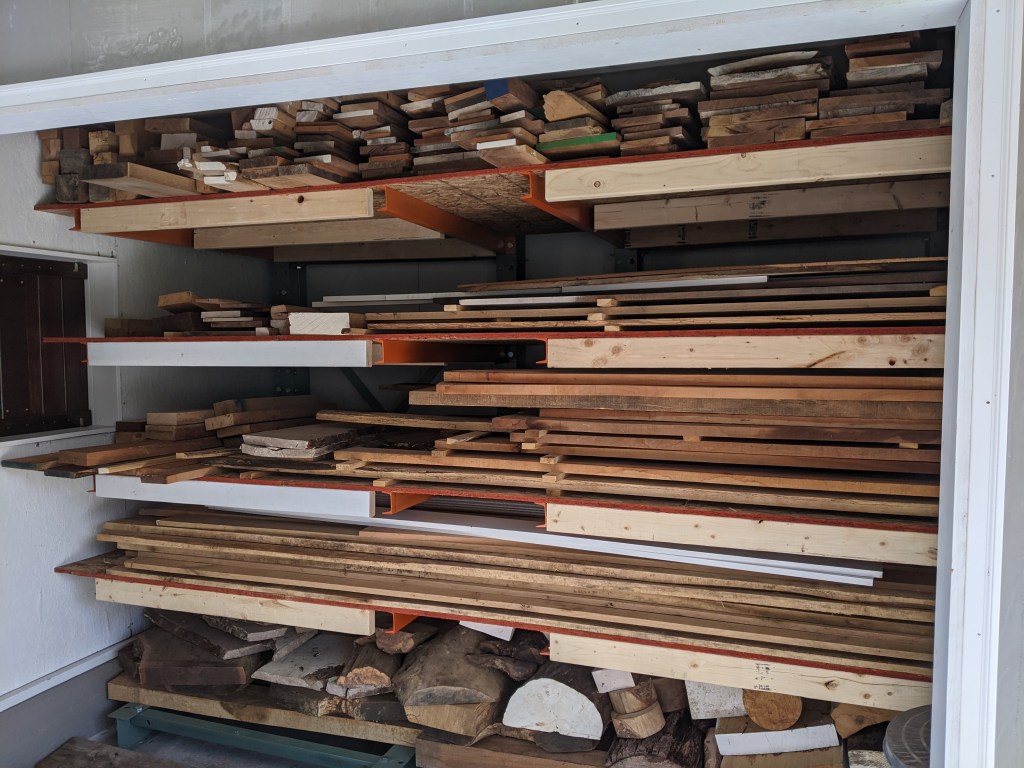
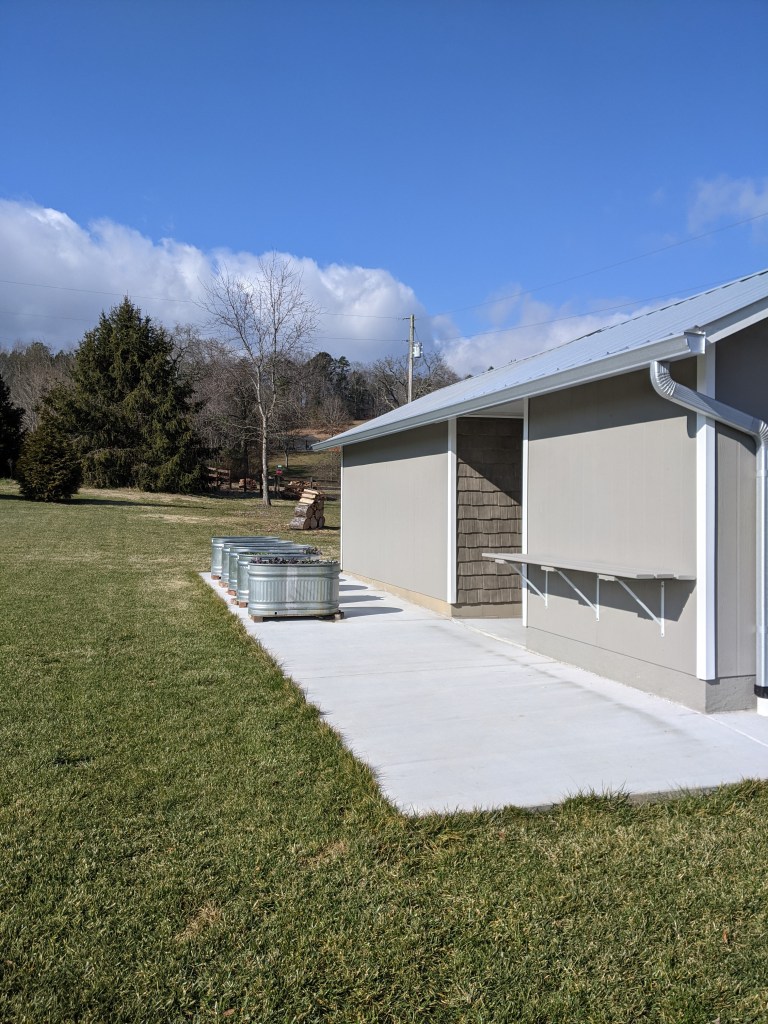
In the winter of 2019-2020, we started talking about where we could put a wood shed to store all the lumber that we have had in storage since we sold the farm. We looked at various locations on the property, and ultimately decided that what made the most sense was to build another small shed next to the existing shed and connect them with a breezeway. We also decided that the new shed would have a concrete floor and foundation wall, so we added concrete around both buildings so that we had room for raised beds on the south side of the sheds and so that grass wouldn’t get sprayed all over the building every time we mowed.
Of course, it seemed to take forever to get the first batch of concrete poured, and then we had to wait for them to come back and pour the foundation walls for the wood shed. This meant that we started building the shed in June, and like most of our projects, it ended up being unbelievably hot during the week that Mike took off to build the shed.
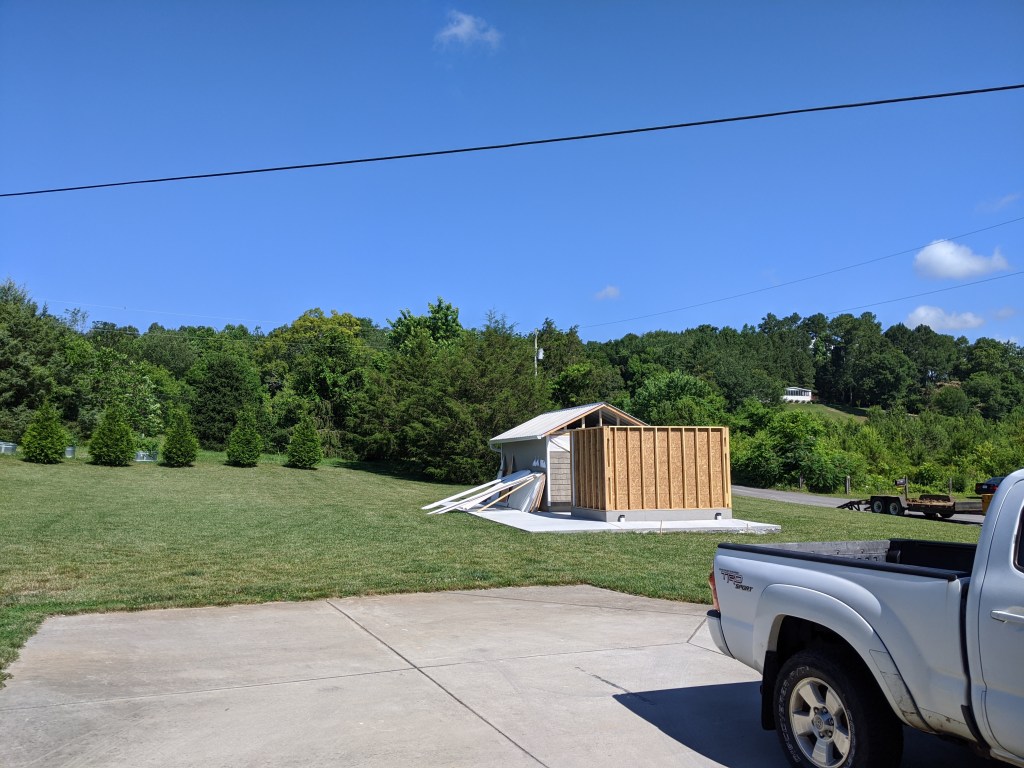
We had to line up the new build with the existing shed to ensure that they were aligned so that the breezeway between them would be level. We also had to remove the outer sheathing and siding in order to tie them together. Eventually we got the new shed and the breezeway completed, though there is still some touch-up painting that we will need to attend to this spring.
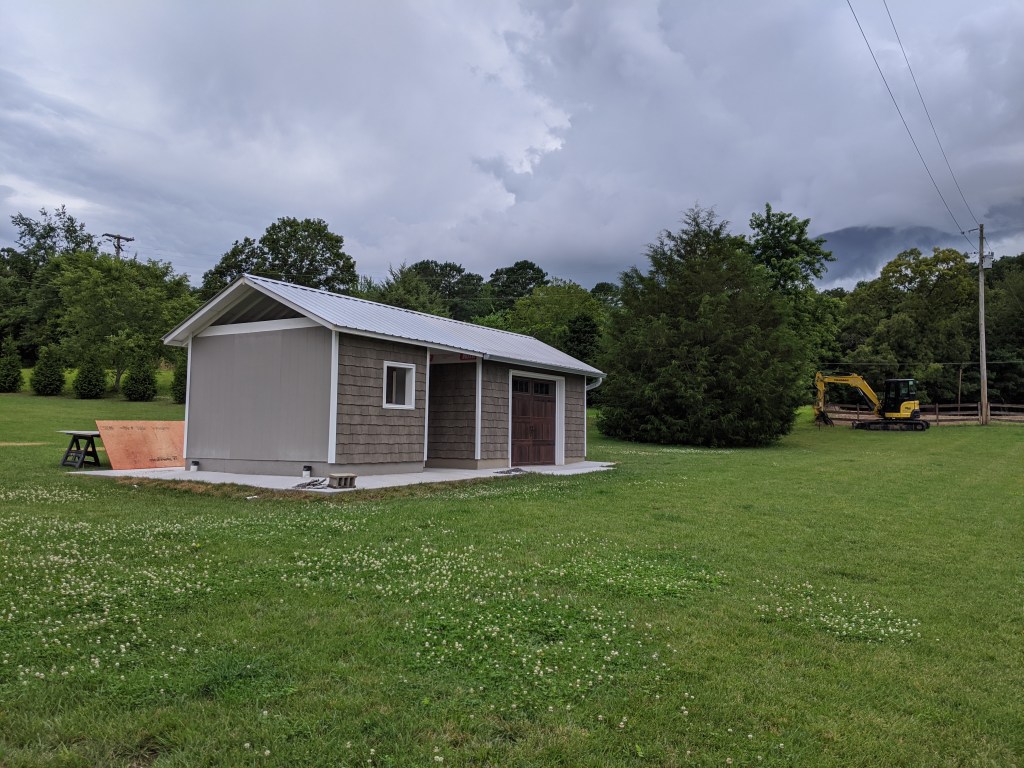
I wanted to have a window on the front elevation of the wood shed for possible access for very long pieces of lumber and visual interest, but unfortunately, the wood rack and the wood isn’t very attractive, so we built a pair of faux shutters to hide it from the street.
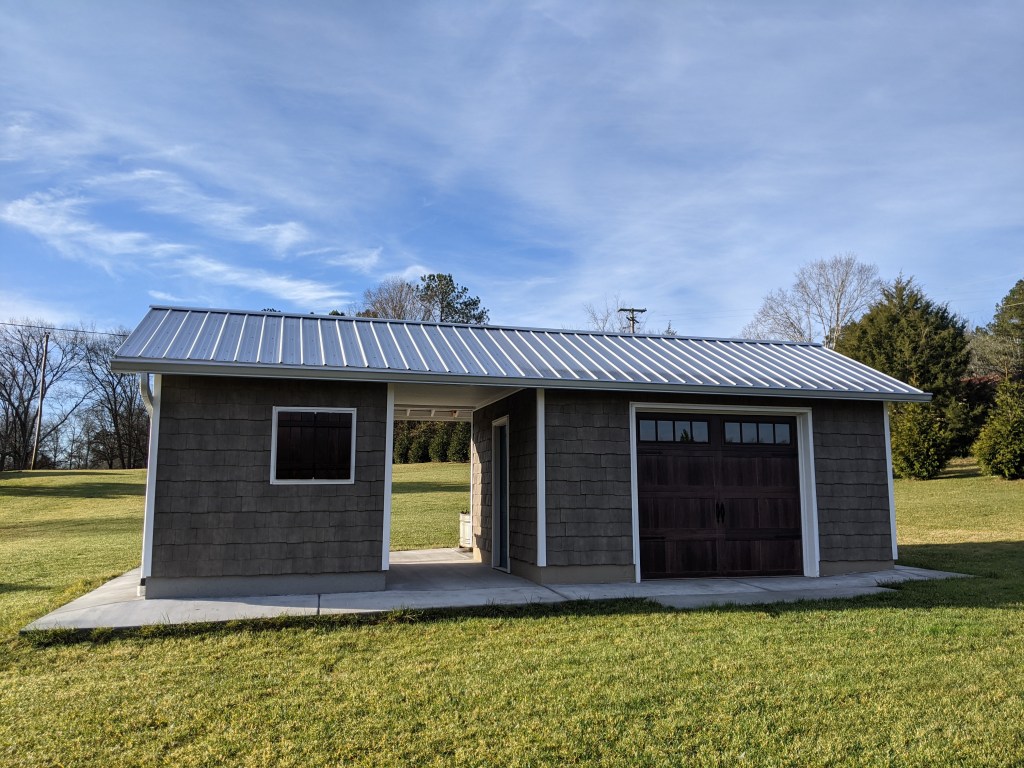
This little shed is a workhorse here at the river. We store all our dirty gardening stuff; we have organized wood storage for Mike’s woodshop; and we have raised beds and a potting bench on the south side. While it was a lot of work to get it all done, it was so worth it.

You did a good job on the shed.
LikeLiked by 1 person