
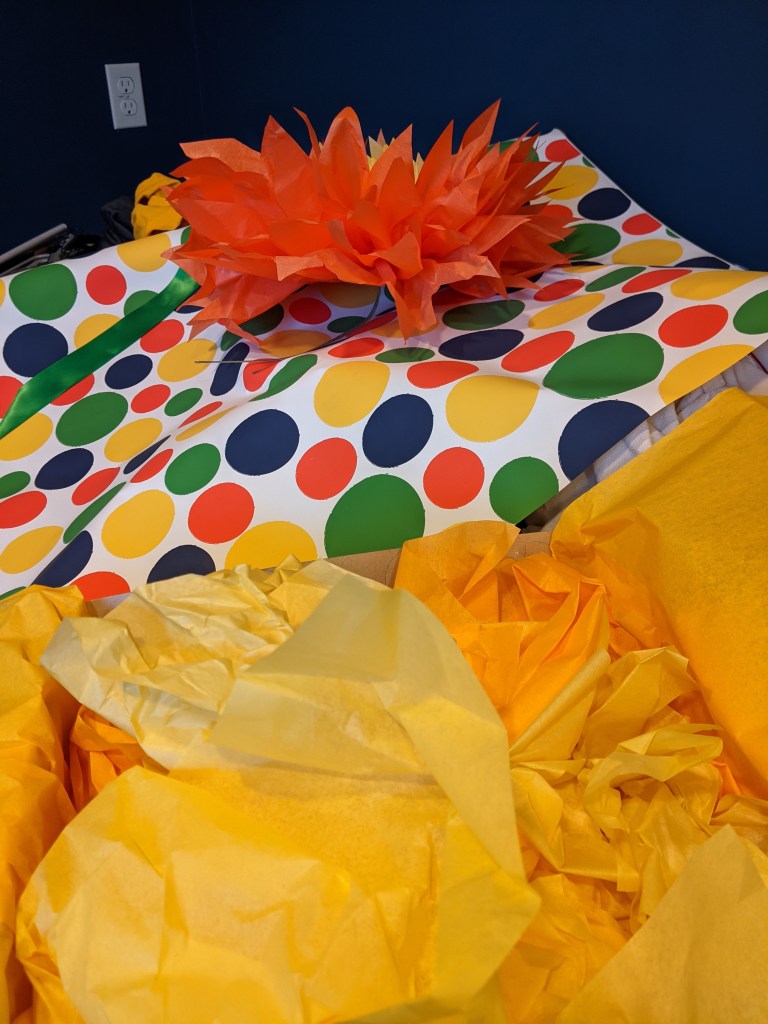
We have a bridal shower coming up and the items I ordered for it came in this week. It’s a casual shower and as I was looking through my wrapping paper, I found a colorful polka dot printed paper. (I didn’t really want to do a typical bridal paper, which is good because I don’t have any.) I lined the box with yellow tissue paper and as I was looking through the tissue paper to find more in the yellow family to pack the box with, I noticed that I had an orange paper that matched the orange in the gift wrap, and a yellow too. That gave me an idea.
Make a tissue paper flower for the top of the box! (It obviously isn’t really a garnish, but one of our friends called it that when I did something similar for a baby gift.)
I learned how to make these several years ago and have made them for parties, to top gifts, and to decorate for Easter. They are really pretty simple.
First of all, find a good quality tissue paper that is the right color for your project. If you use a thin one, you will become really frustrated as you work to separate the layers of paper in the final step of the process. One of my very favorite sources for all items associated with gift wrap is Nashville Wraps (www.nashvillewraps.com). They have a HUGE selection of tissue papers.
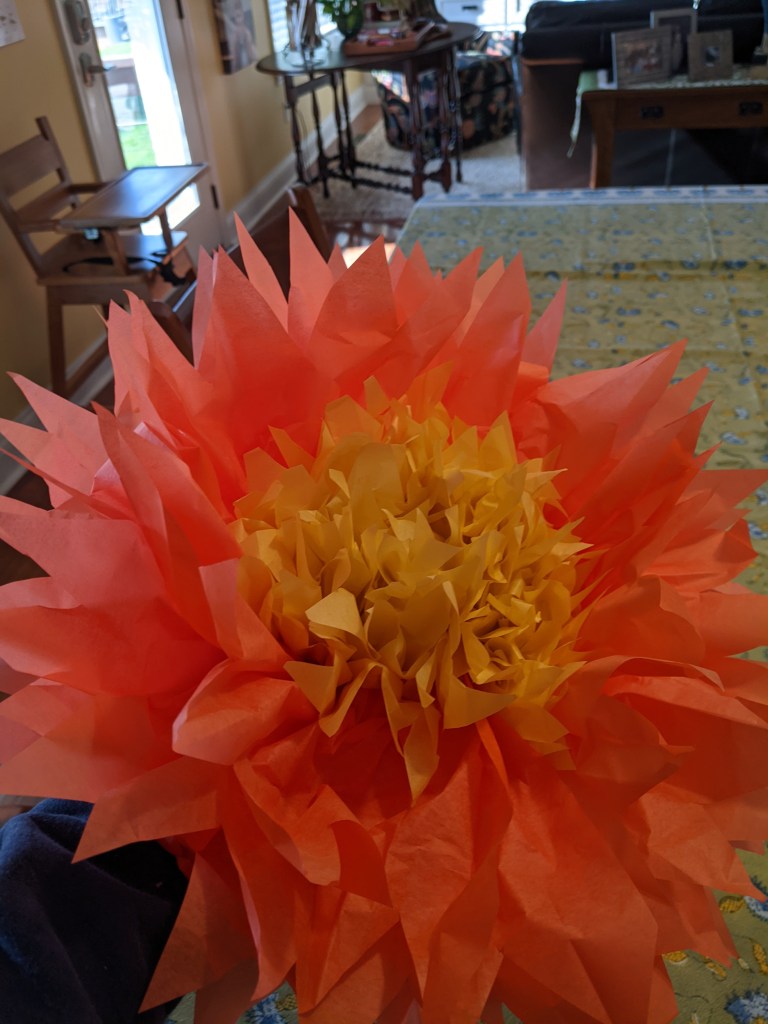
Next, you will want to cut your inside color a little narrower than the outside color. When you cut your petals, do not cut too deeply or you will tear the paper when you separate the layers–super frustrating. You can make a jagged edge like this, or one that is more rounded. Or you can do jagged on the inside and rounded on the outside. This is completely up to you. I used a total of eight pcs of tissue paper for this project–four yellow and four orange. This is what it looks like when you finish:
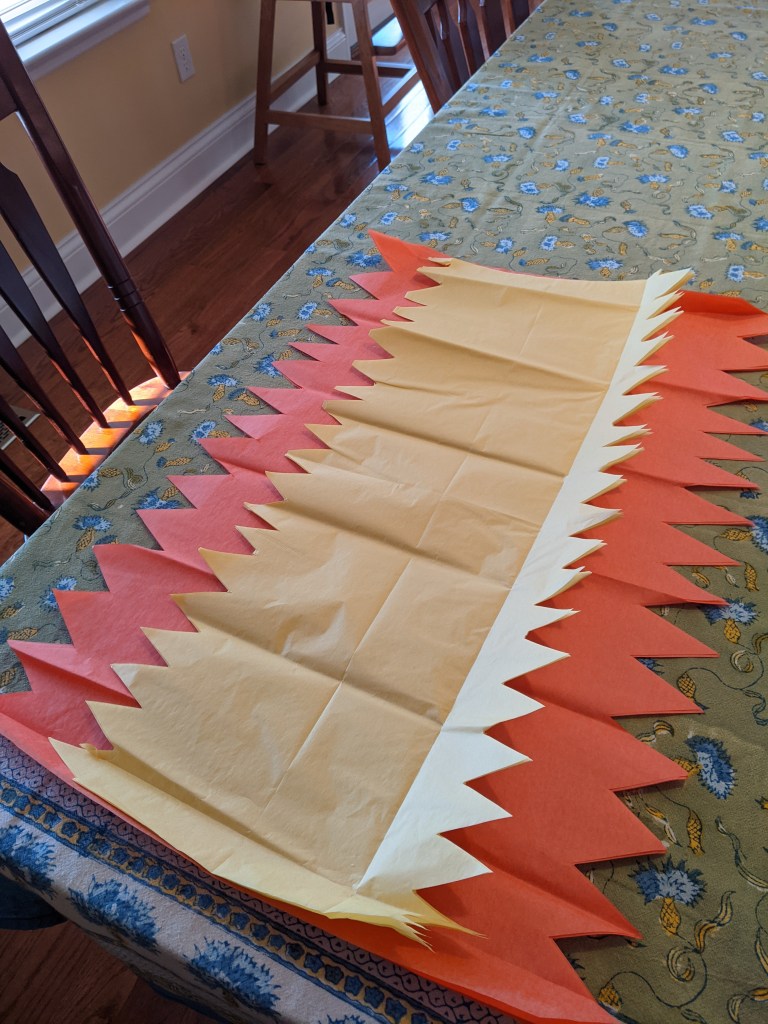
Next, you are going to start at one of the narrow ends and fold it up like the fans you used to make in grade school. Like this:
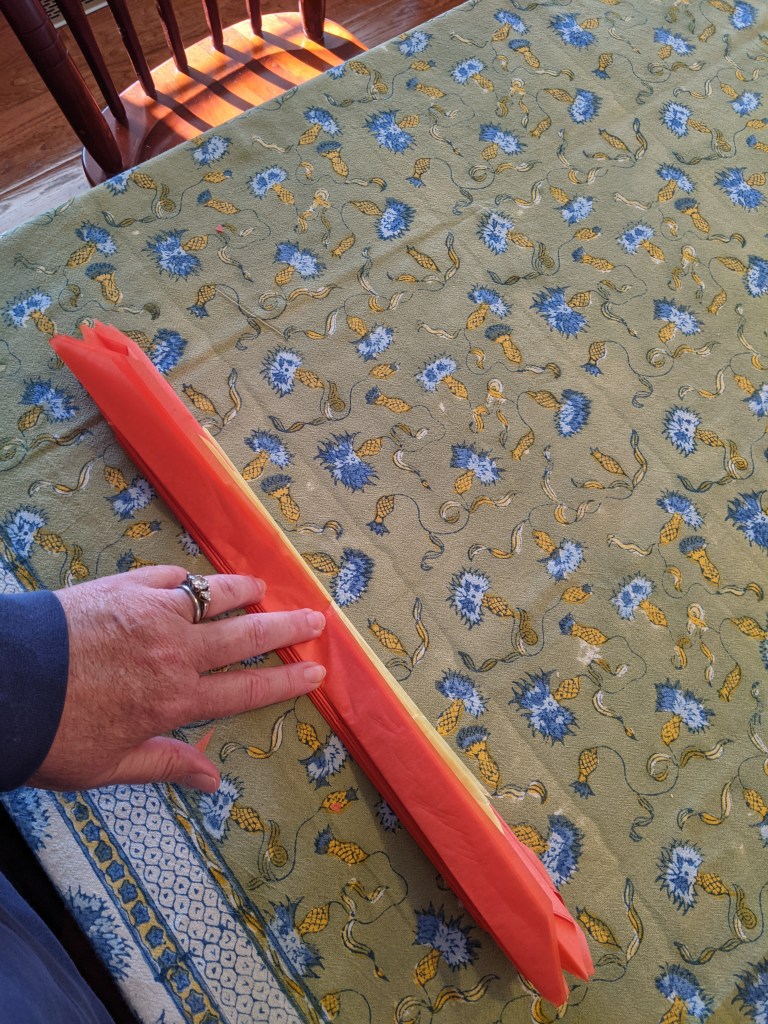
Then you need to get a floral wire and put it around the middle of the flower and twist it tightly to secure the folds and the flower. The wire end go on the bottom of the flower. Like this:

At this point, open up one side of the flower like a fan.
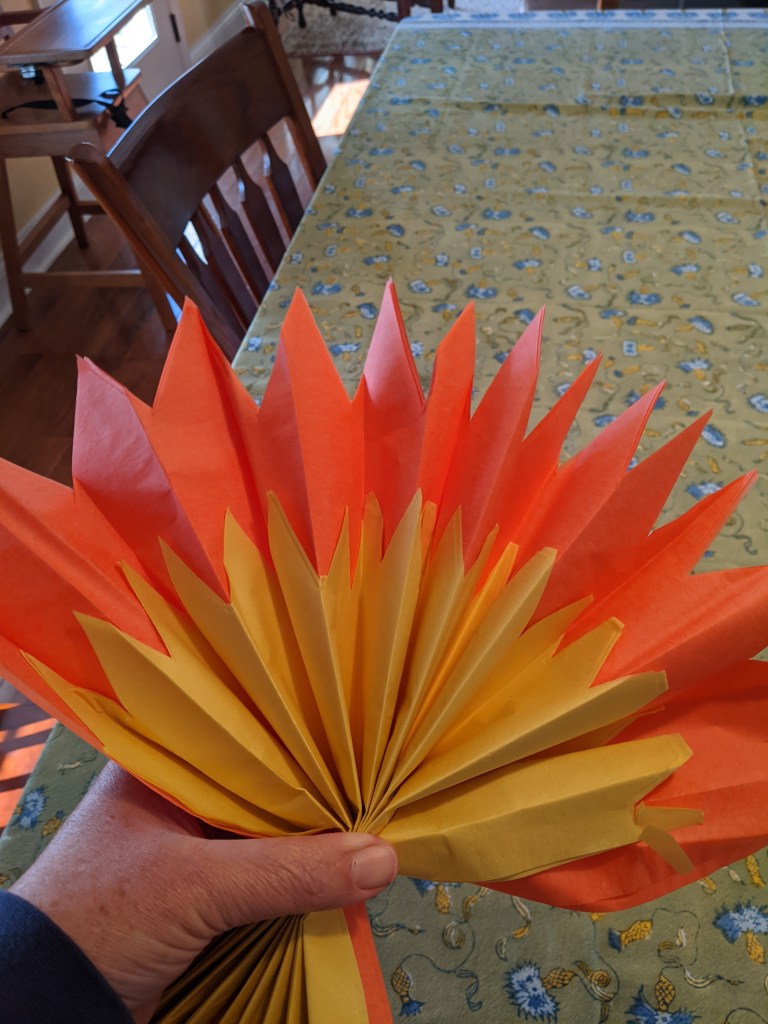
Carefully lift the top layer of tissue paper.

Continue lifting each successive layer of paper until you have all the inside layers lifted. Repeat the process on the other side of the flower.
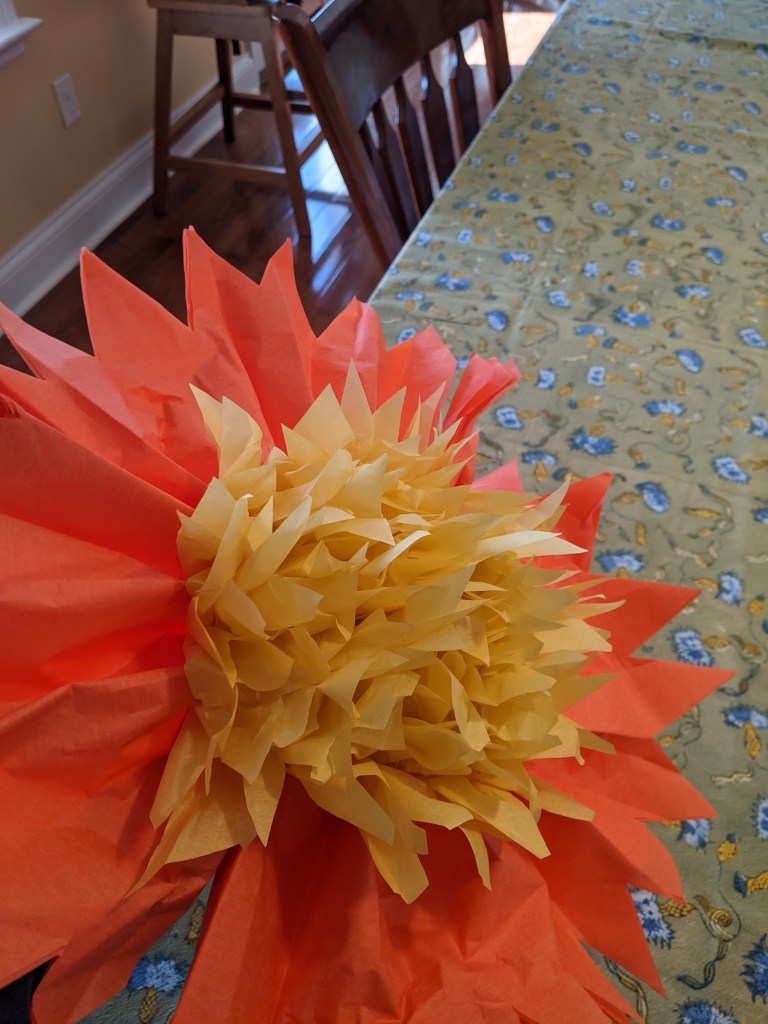
Now it’s time to start on the outside layers. Start on one side and lift the layers carefully until both sides are complete.
Here are my wrapping components all assembled:
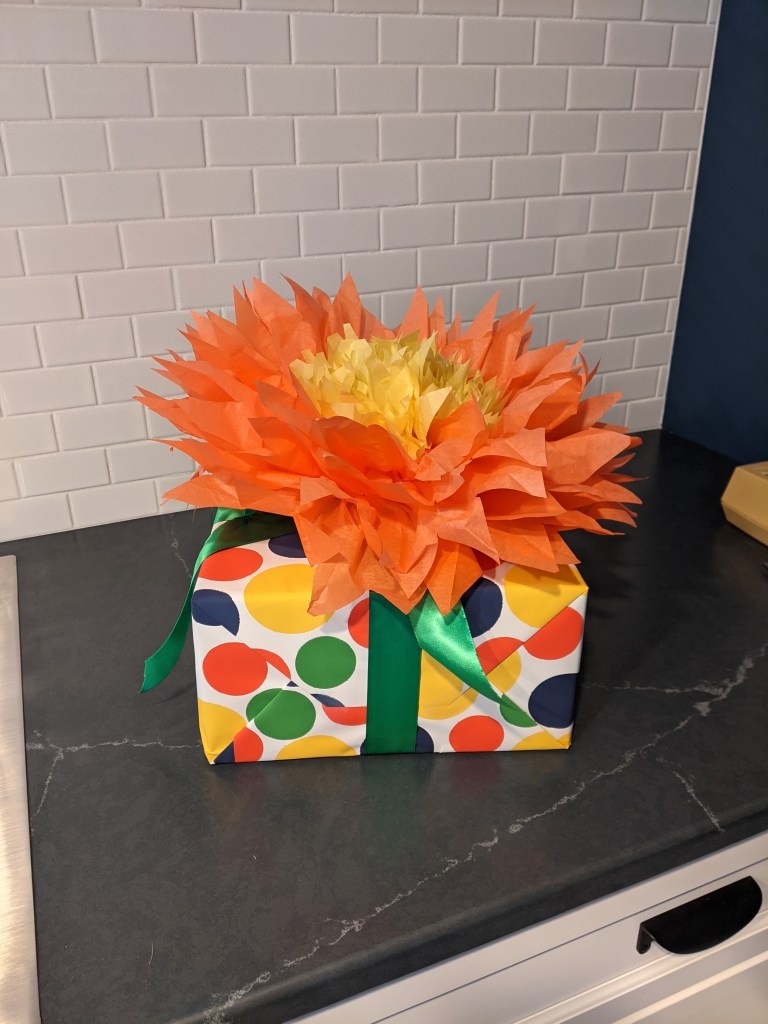
And here is the finished package.
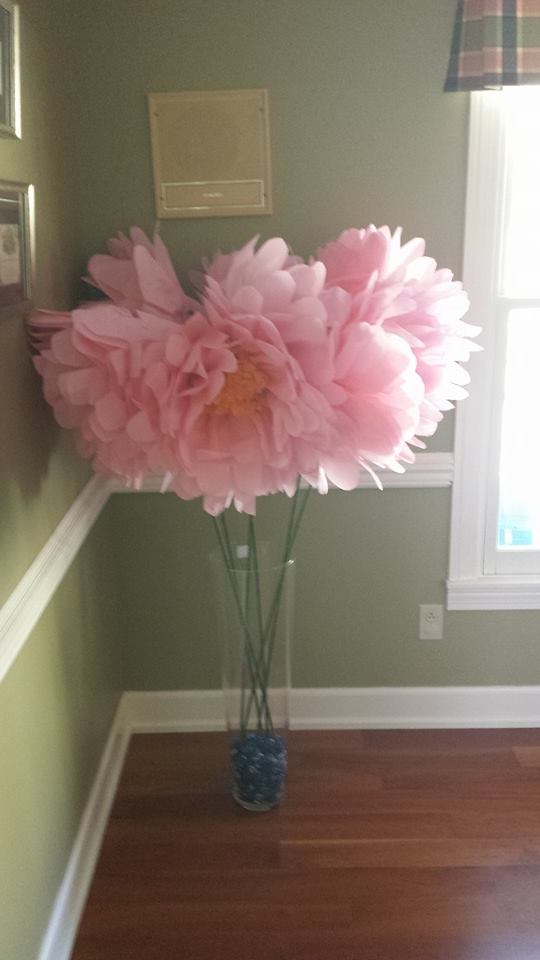
This is especially cute for a bridal shower if the hosts collect the bows to create the bouquet for the bride to use at the rehearsal. They are also great for gifts for little girls who absolutely love them. You can use this same technique to create party decorations. Here are some that I have done in the past. These are from Easter several years ago:

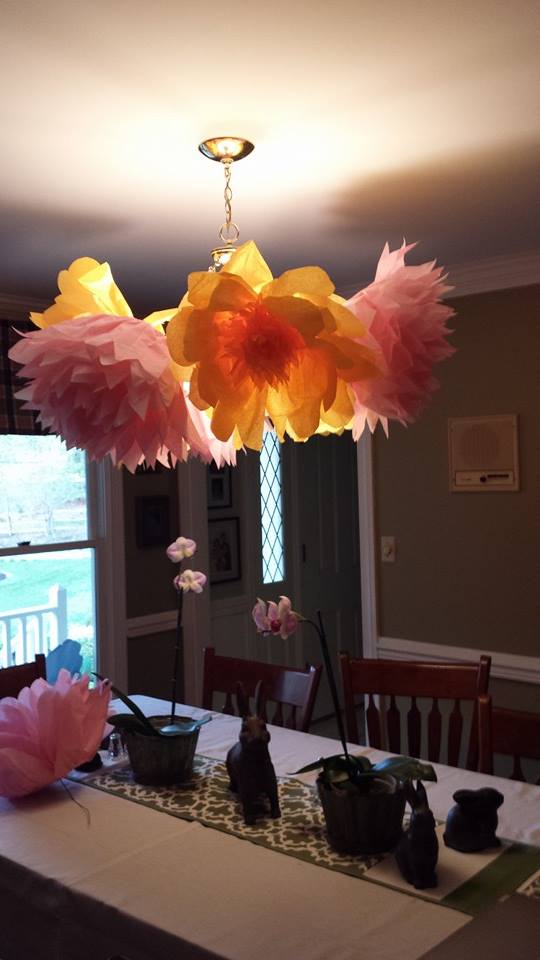
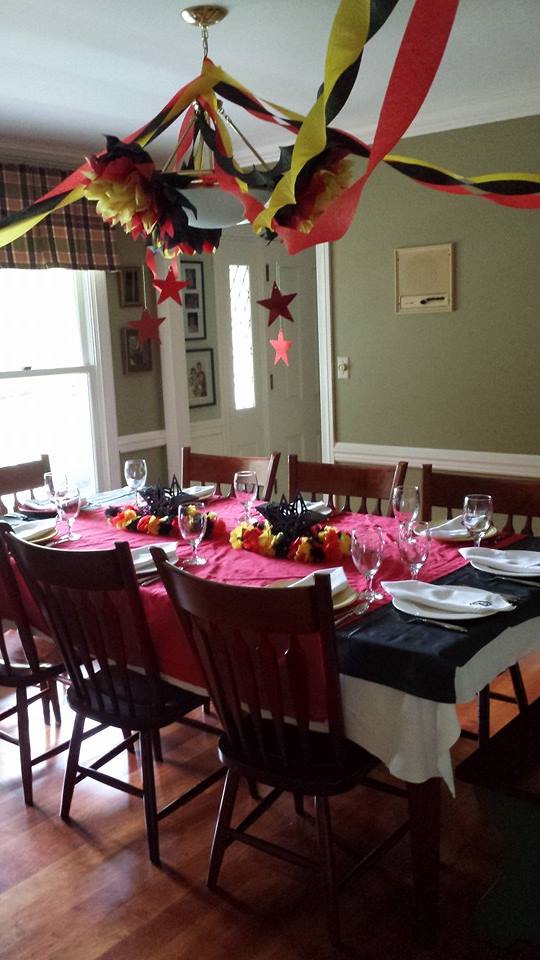
And these are from a couple of birthday parties–the first for our teenage niece and the other for her brother–a big fan of German soccer:

Here is a link to a YouTube video that shows how to make these: https://www.youtube.com/watch?v=eXwHHDPg_I0&ab_channel=ArtsnCrafts4u.
Happy crafting!

They are fun to do.
LikeLiked by 1 person
I think so too–such a cute thing for decorations and it’s really inexpensive and doesn’t take much time.
LikeLike