
I’m going to copy a bunch of the posts about this project in this single post, so if you’re new, or have missed some posts, you’ll be able to catch up on it all. And, it’ll be a walk down memory lane for me.
August, 2022:
We are starting the process of finishing out our basement to give us more entertaining space and space that is easily accessible for our parents because there aren’t any stairs. We are going for a 1930’s English Pub look. The first thing we did was find some really cool antique doors in Toledo, OH. We drove up there in March of 2022, I think, to pick them up. The couple that we bought them from had restored an 1800’s house and they had collected a lot of stuff to use in it including a bunch of doors that they didn’t end up using and had held on to for 40 years or more.
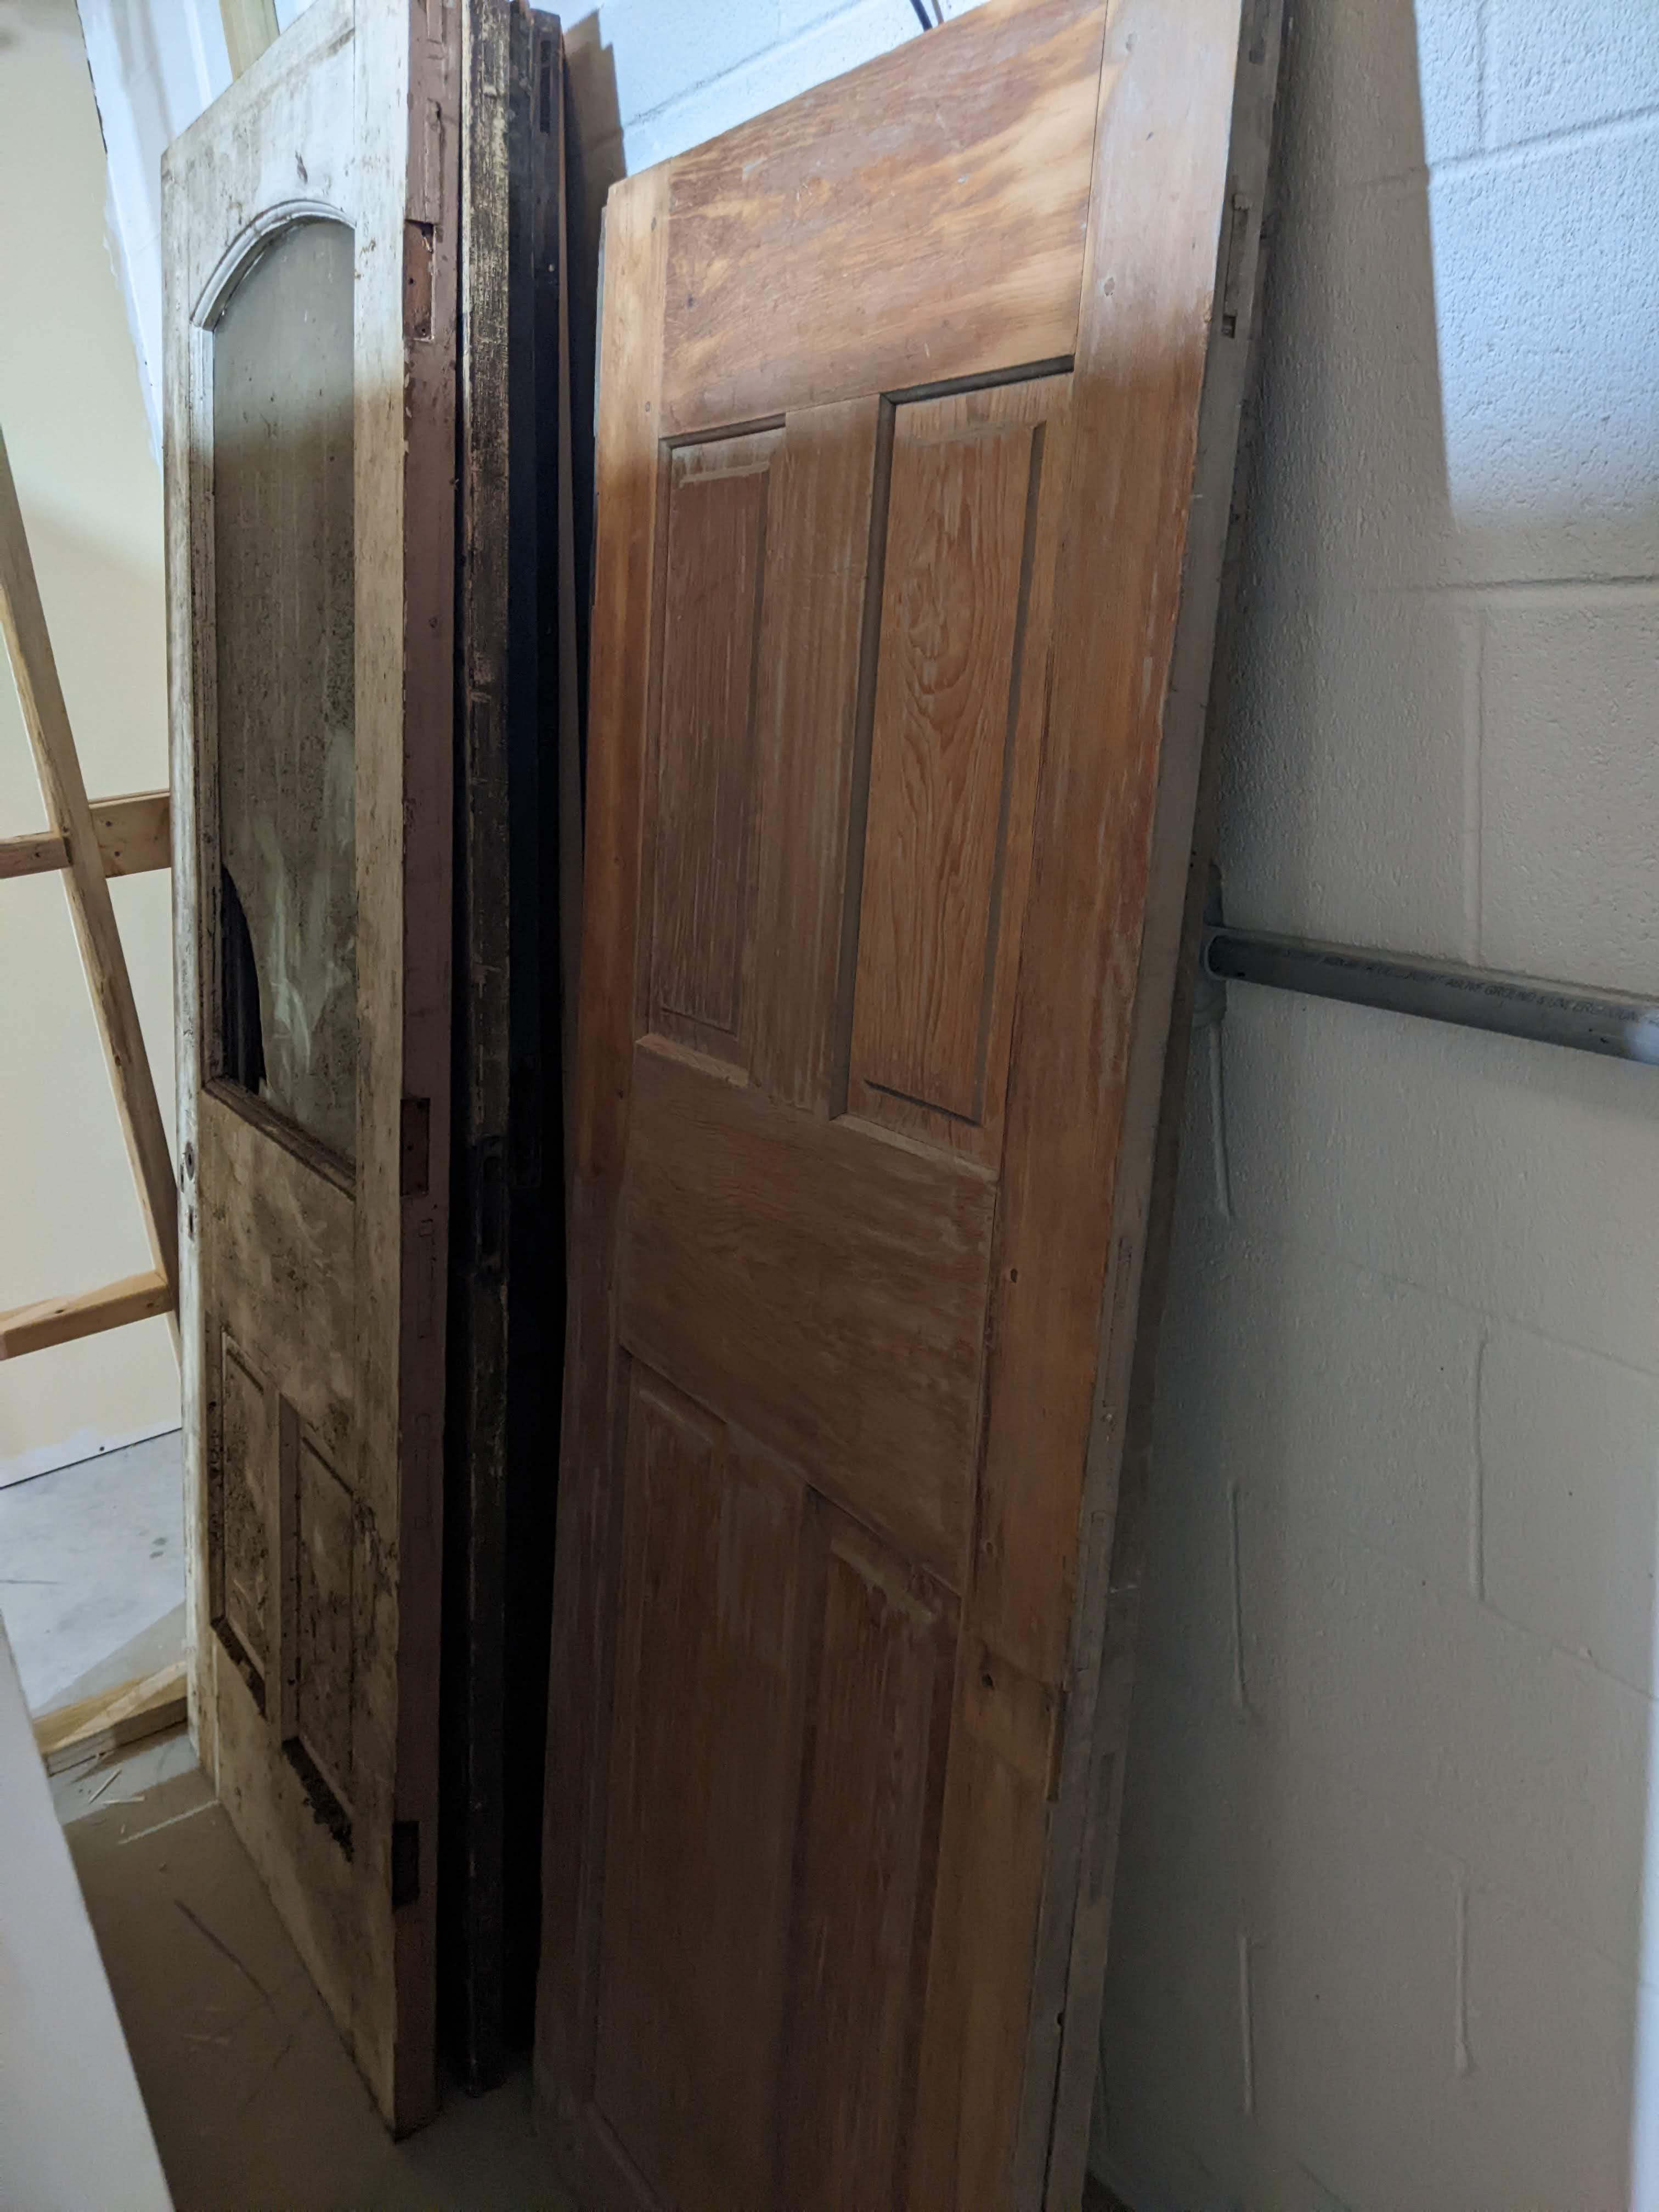
These doors are unlike anything I have seen. They are two vertical panels and they don’t have a drop of glue in them. They have REALLY long mortise and tenon joints that are pegged together. The guy we bought them from was told when he bought them originally, that they probably date from the 1840’s or so. The style wasn’t popular for long. You can also tell that they are really old by the way that the door knob mechanism must have worked–it must have been external, not internal like modern doors. While we were there (and had a trailer with lots of room in it), we looked around his garage, wood shop, and other building at some more stuff. We bought the 7 vertical panel doors on eBay and we picked up 5 more plus some hardware and an industrial shaper while we were there.
I know that seems like a LOT of doors for a basement, but I will explain why we need so many. We built a closet at the bottom of the stairs to store all the canning supplies, and all the home canned stuff, plus the little deep freeze, and to hide the electrical panel. That took three doors.

We also needed doors for what will be a closet under the stairs and the store room (we recently changed gears, and this is going to be my husband’s office).
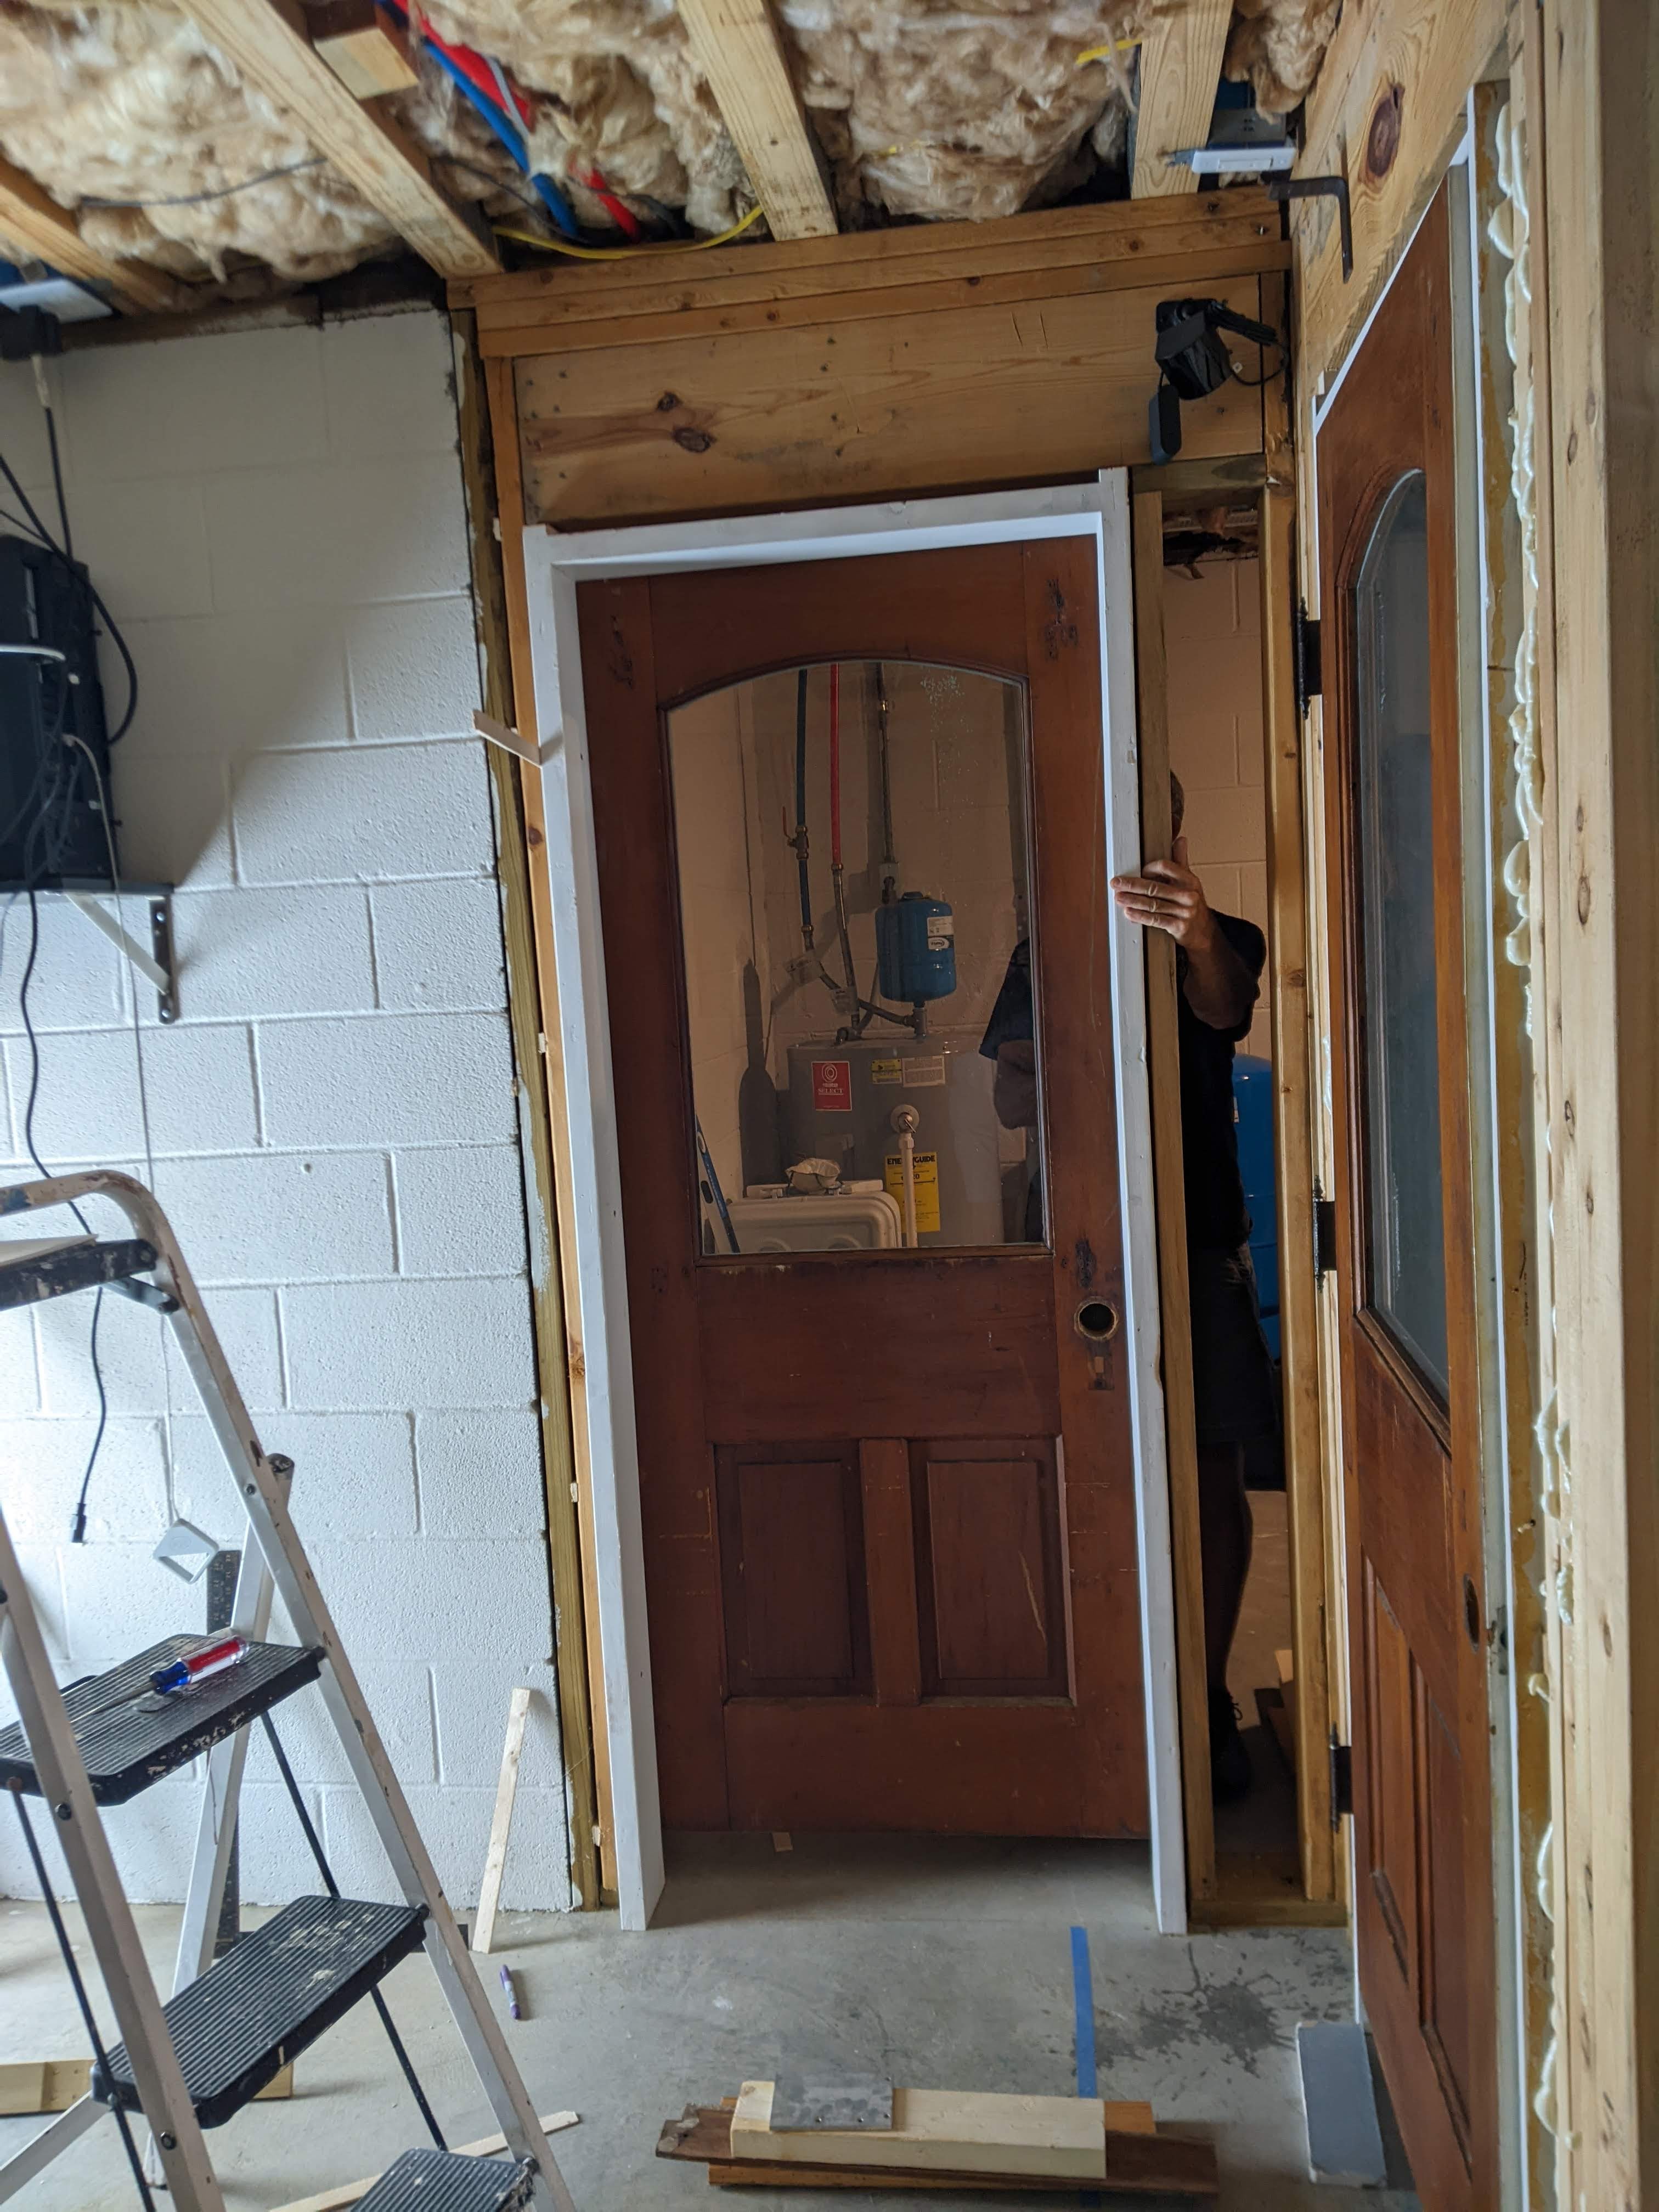

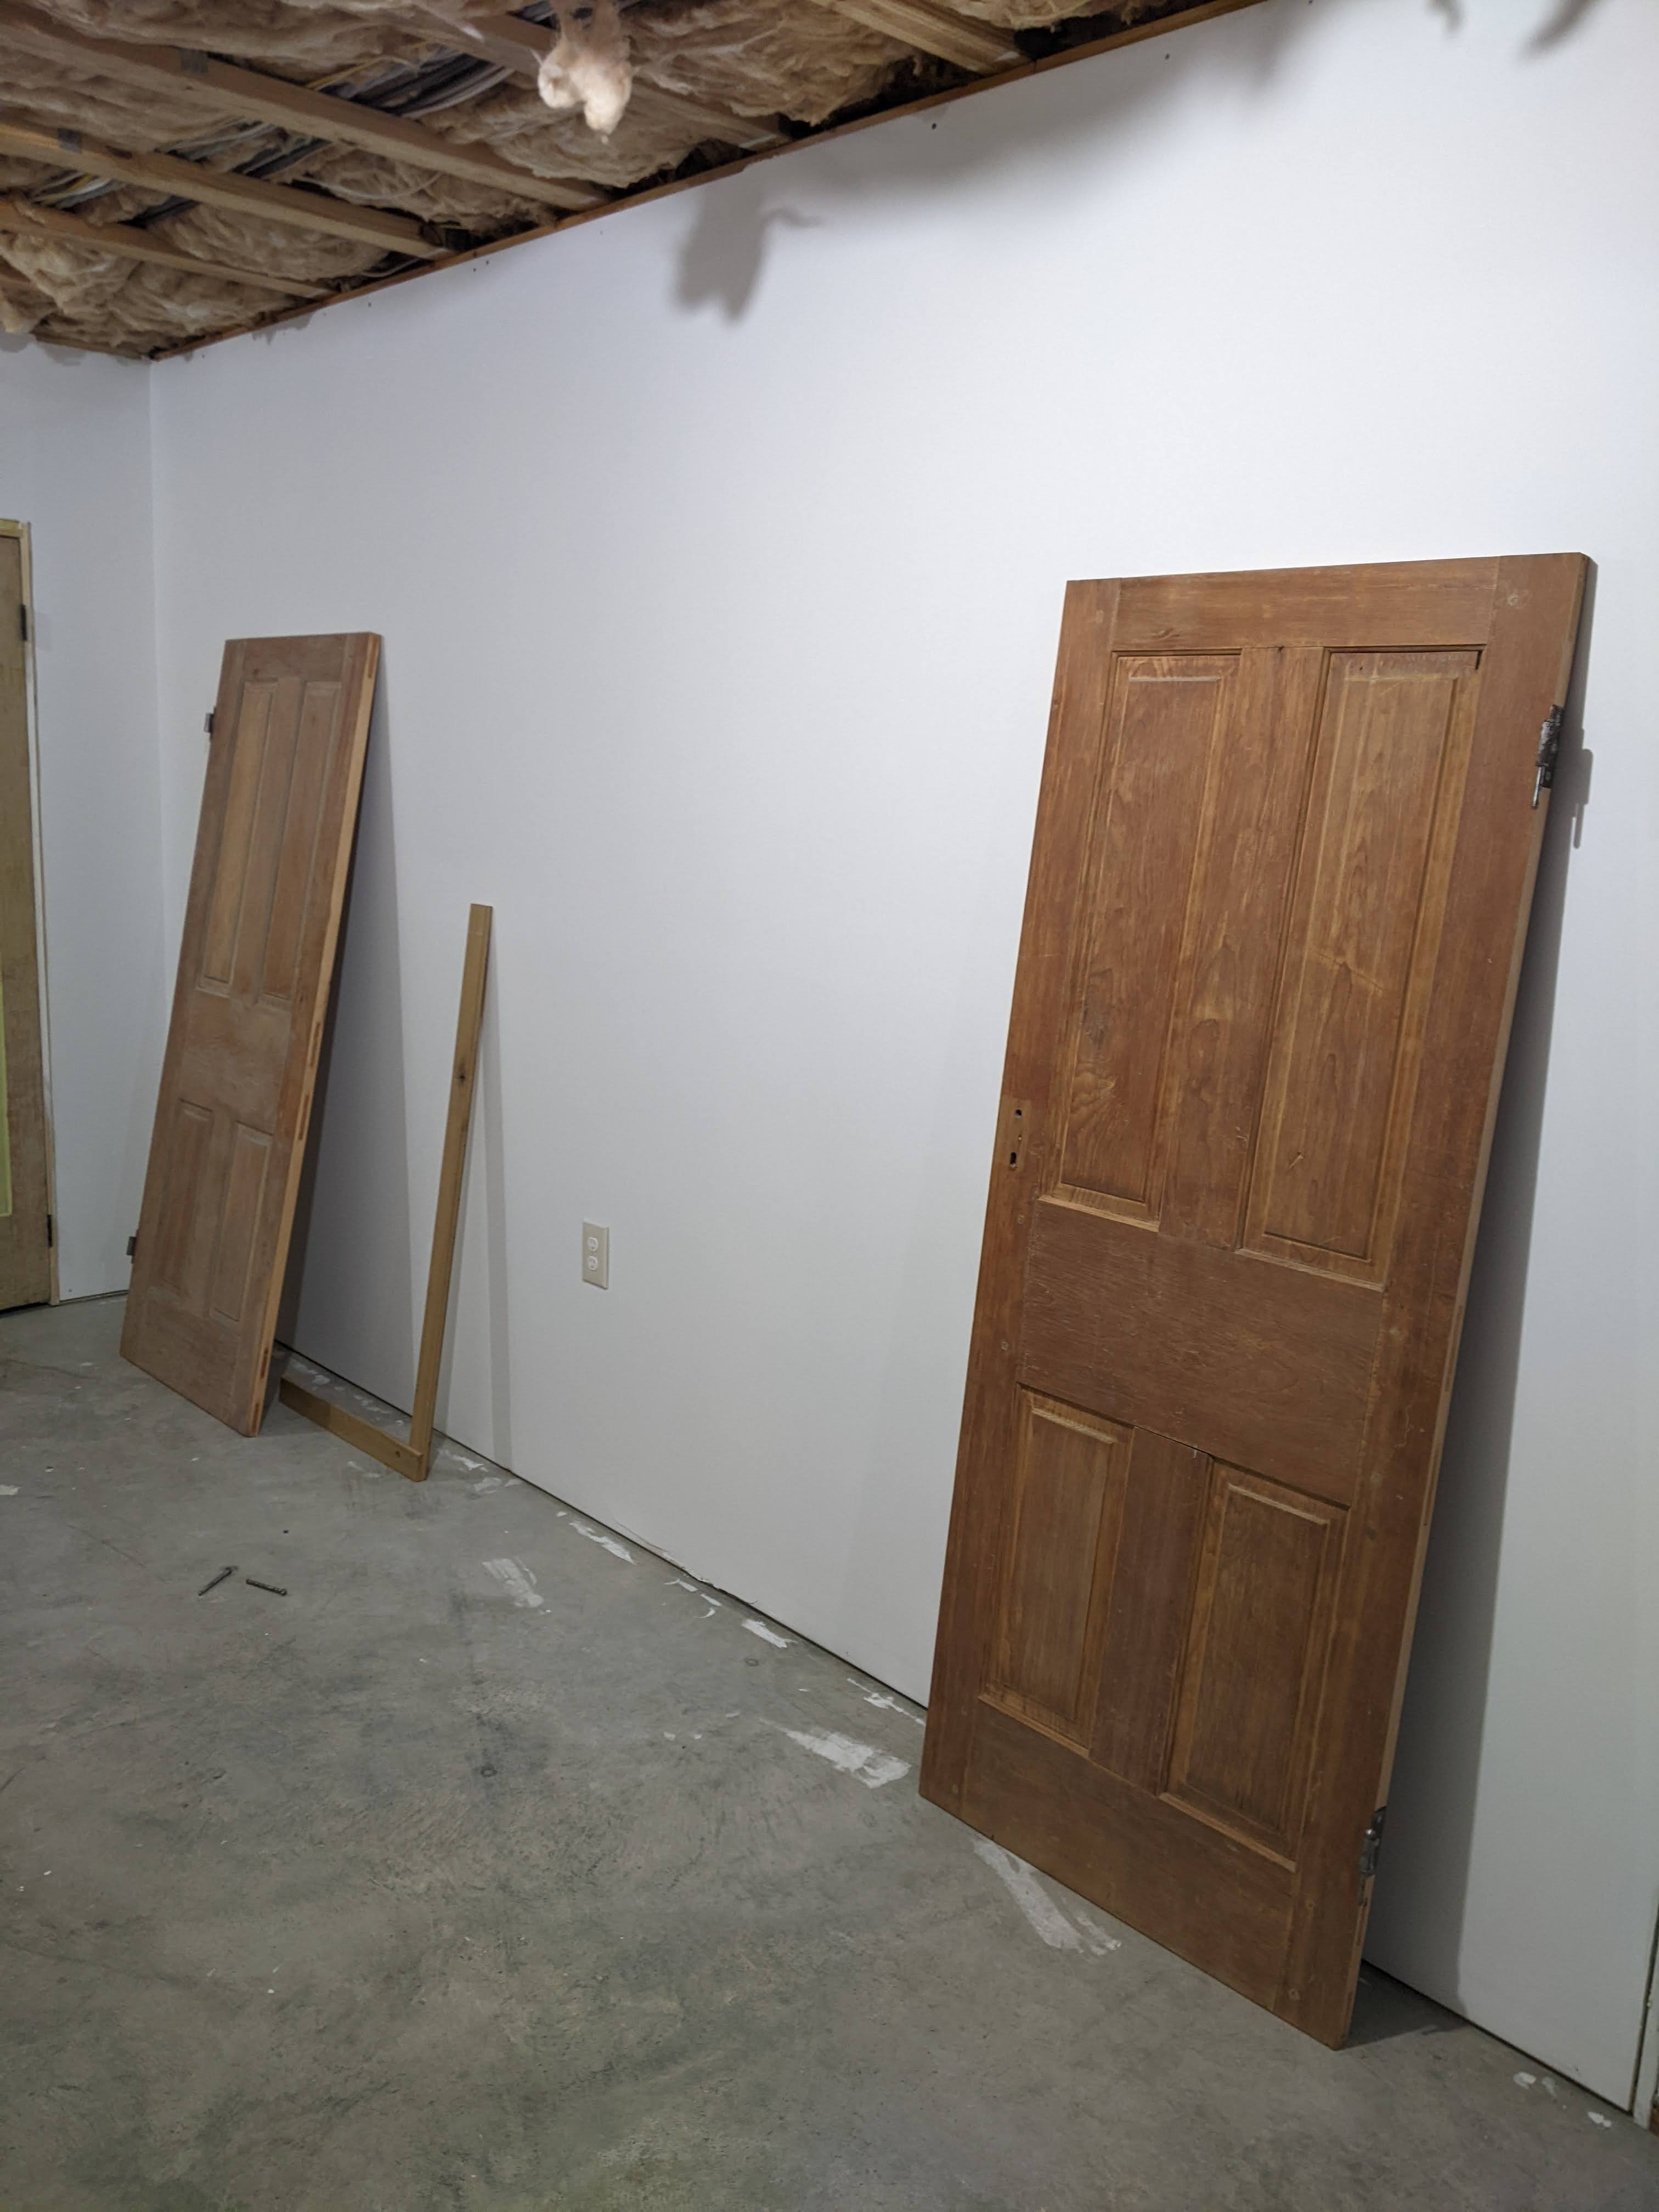
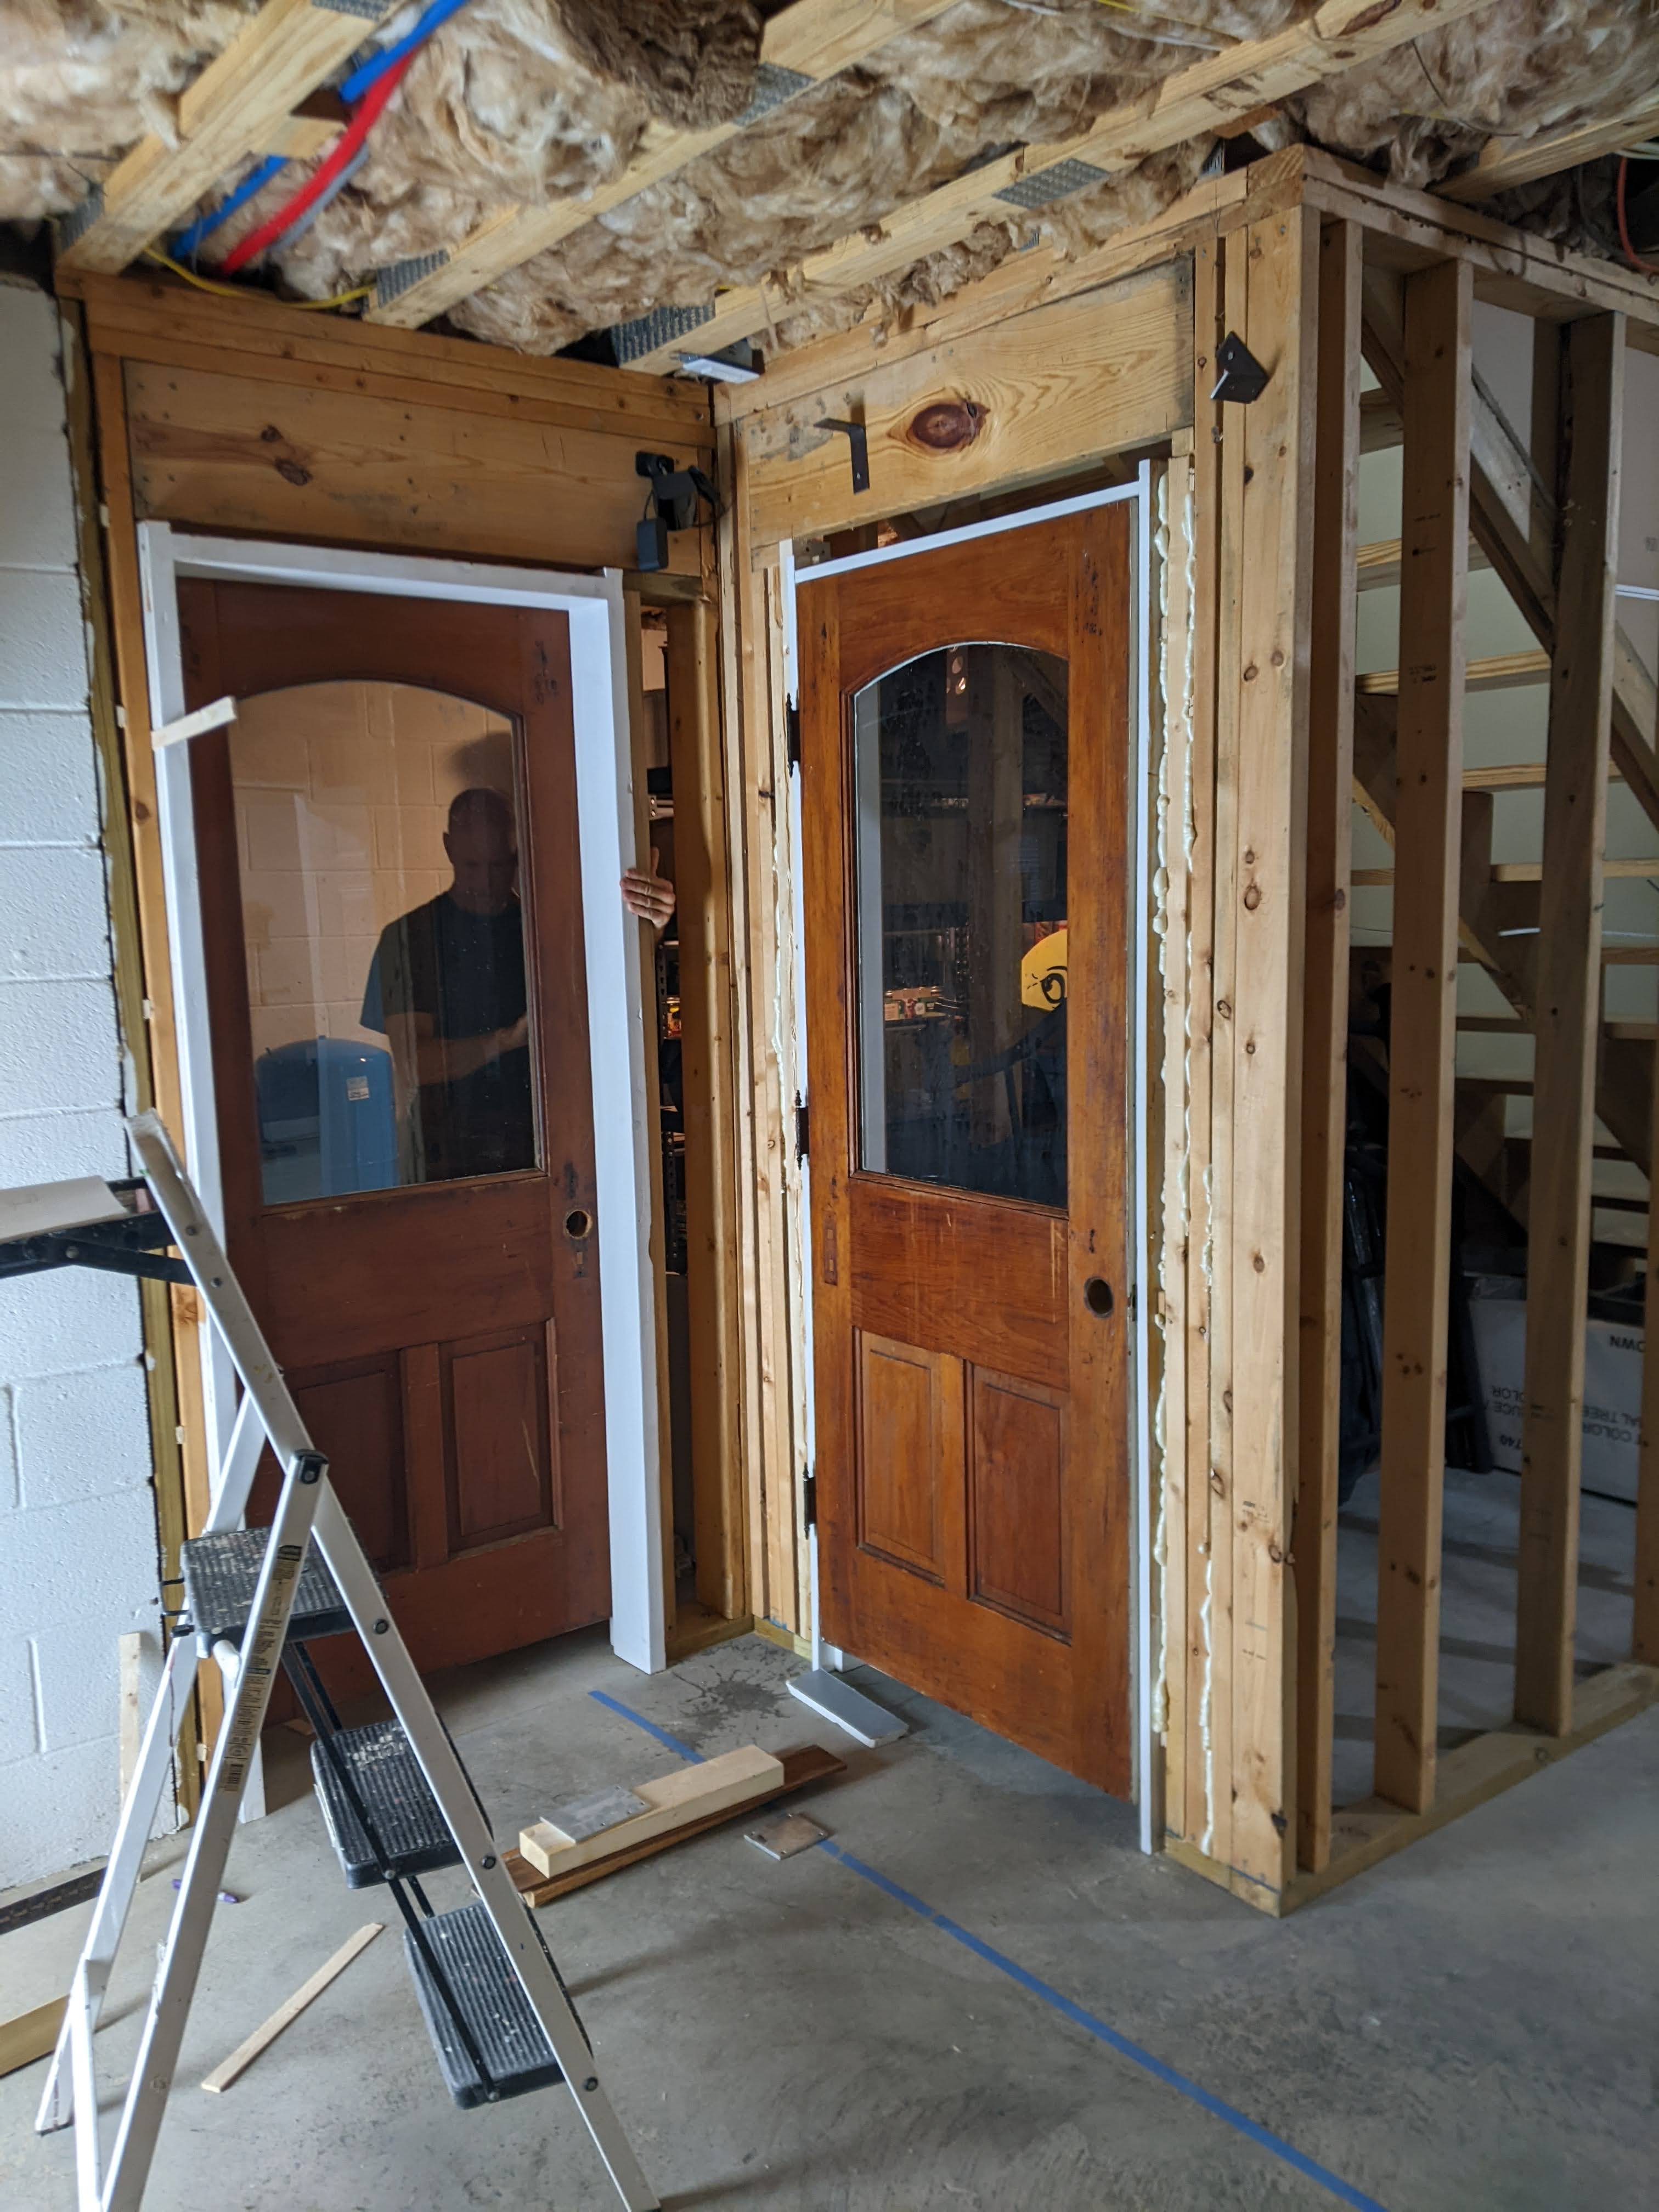
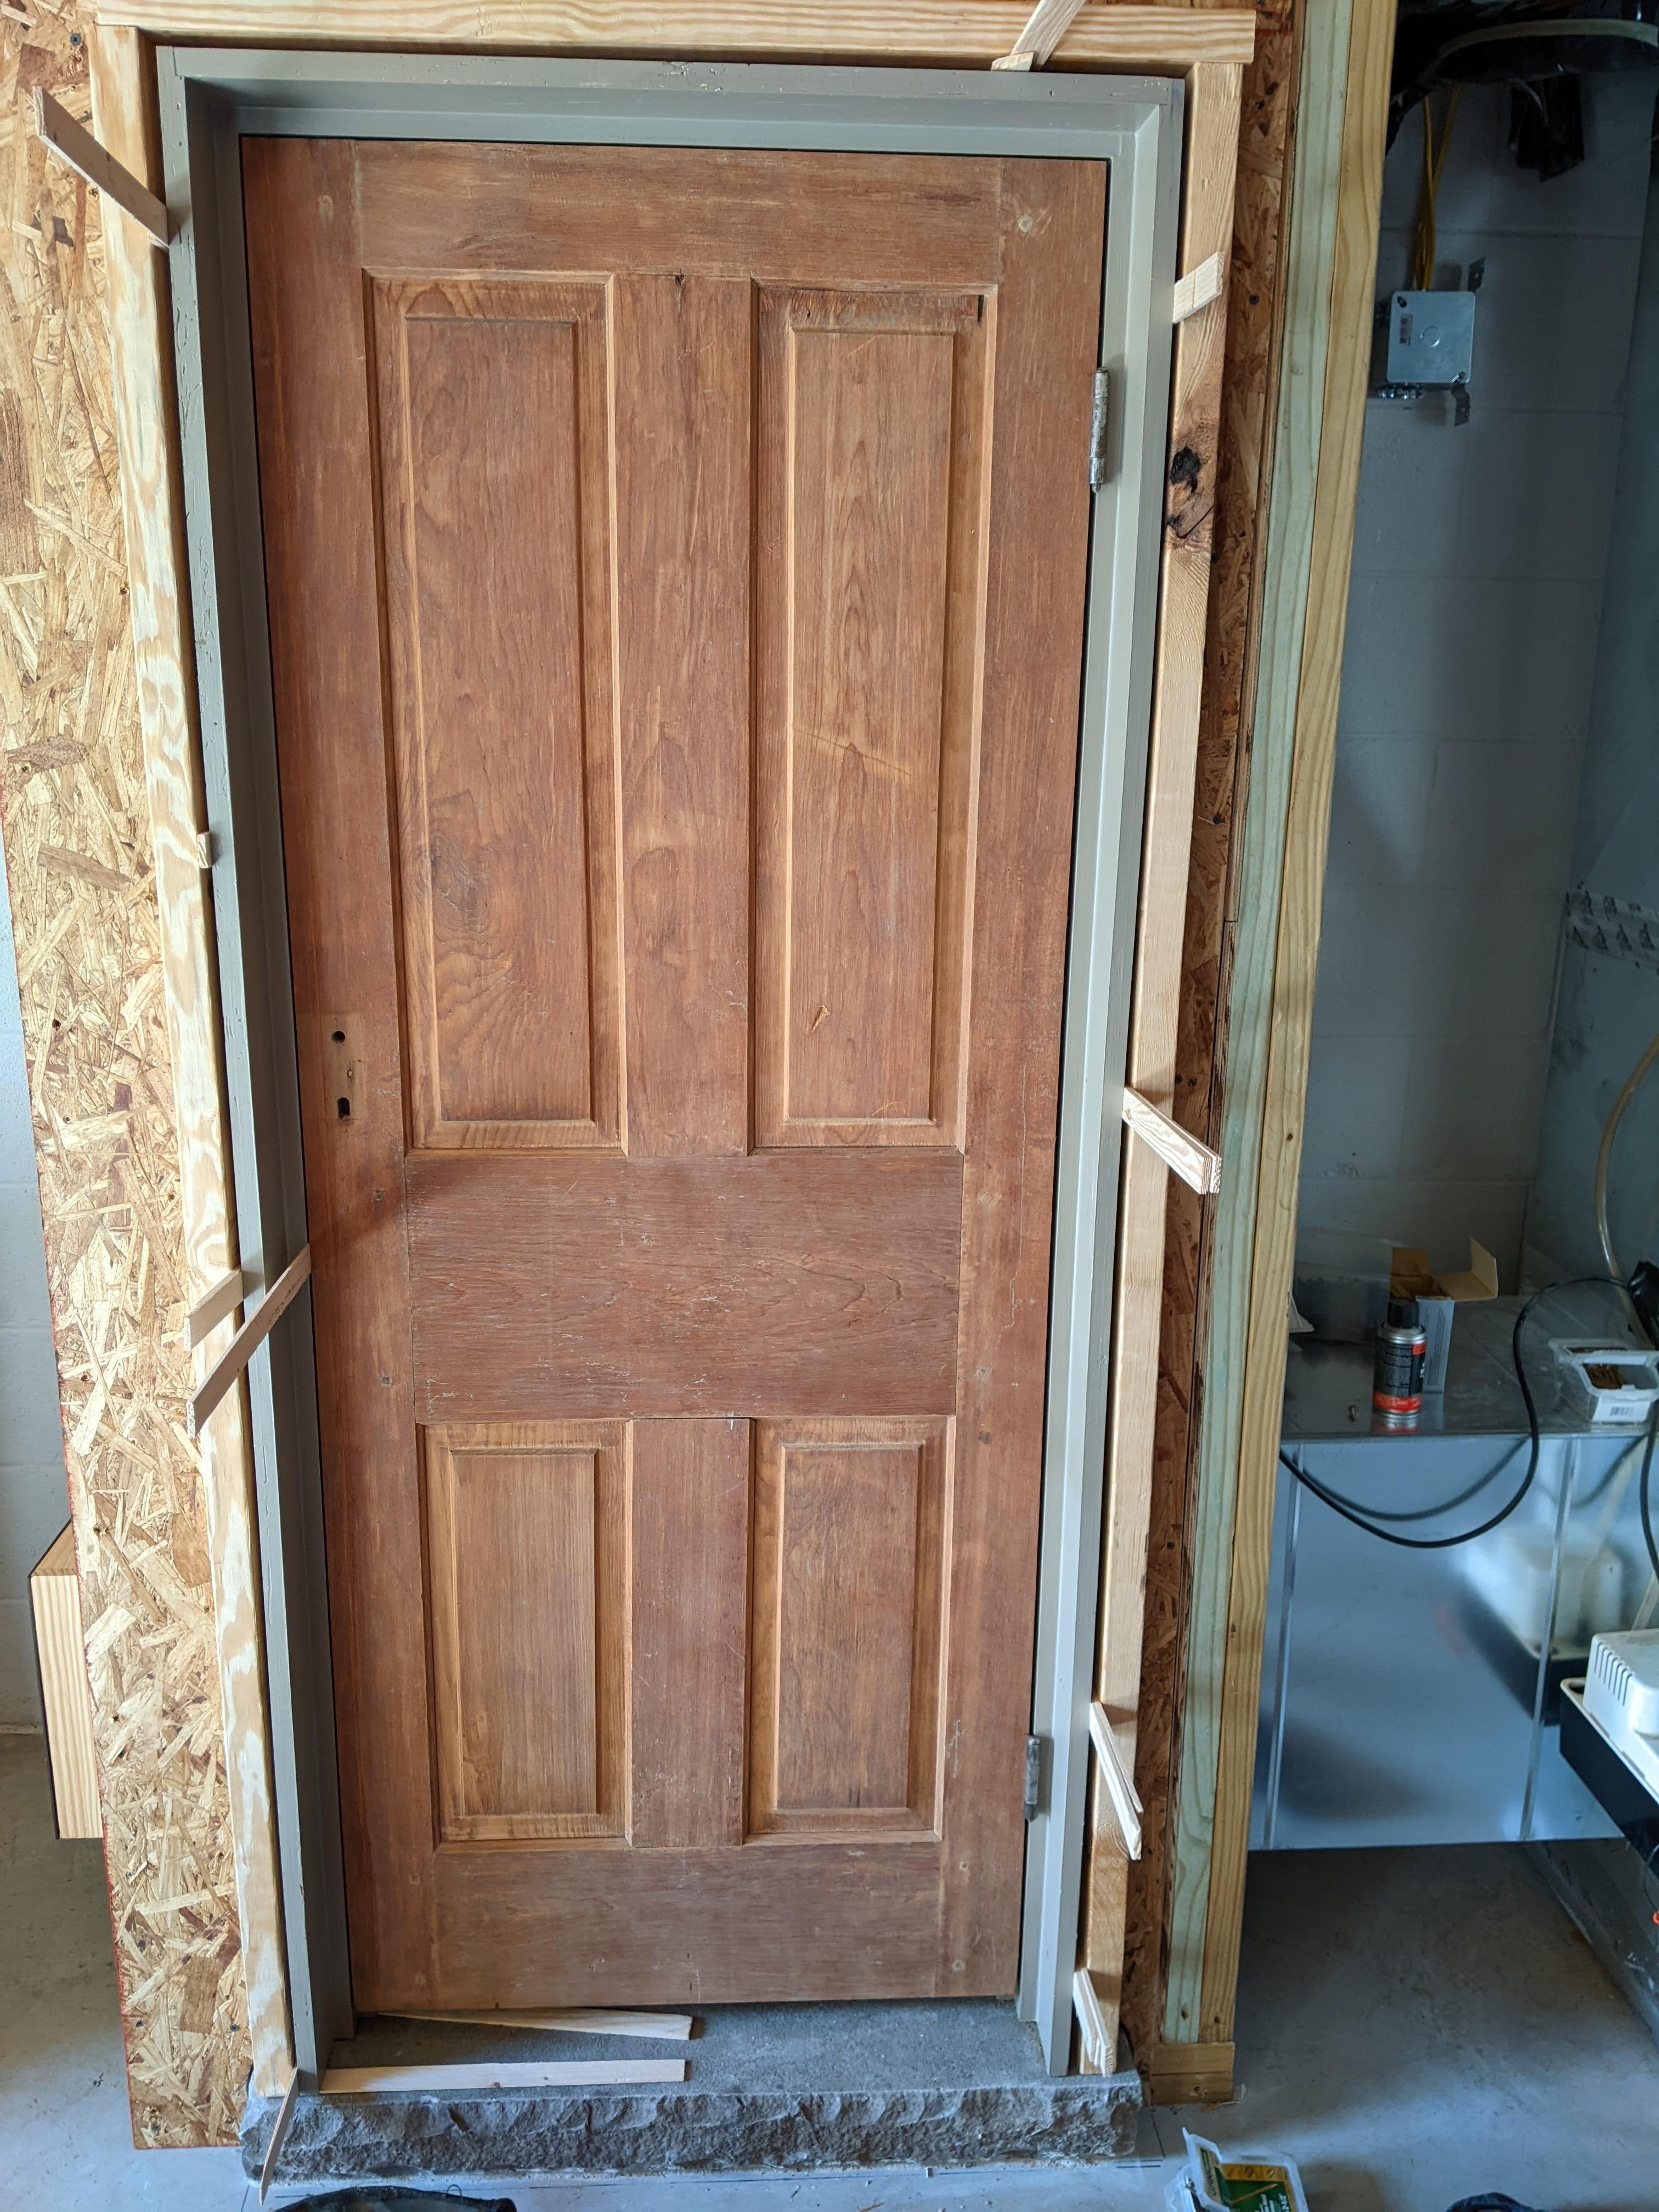
These are the original exterior doors from the 1800’s farm house that they replaced with something else. We will frost the glass on these so you can’t see in. We are just going to clean these doors, because we don’t want them to look new. These two doors are the only ones that came with door jambs. My husband had to build the ones for the closet, and will have to build jambs for all the rest as well.
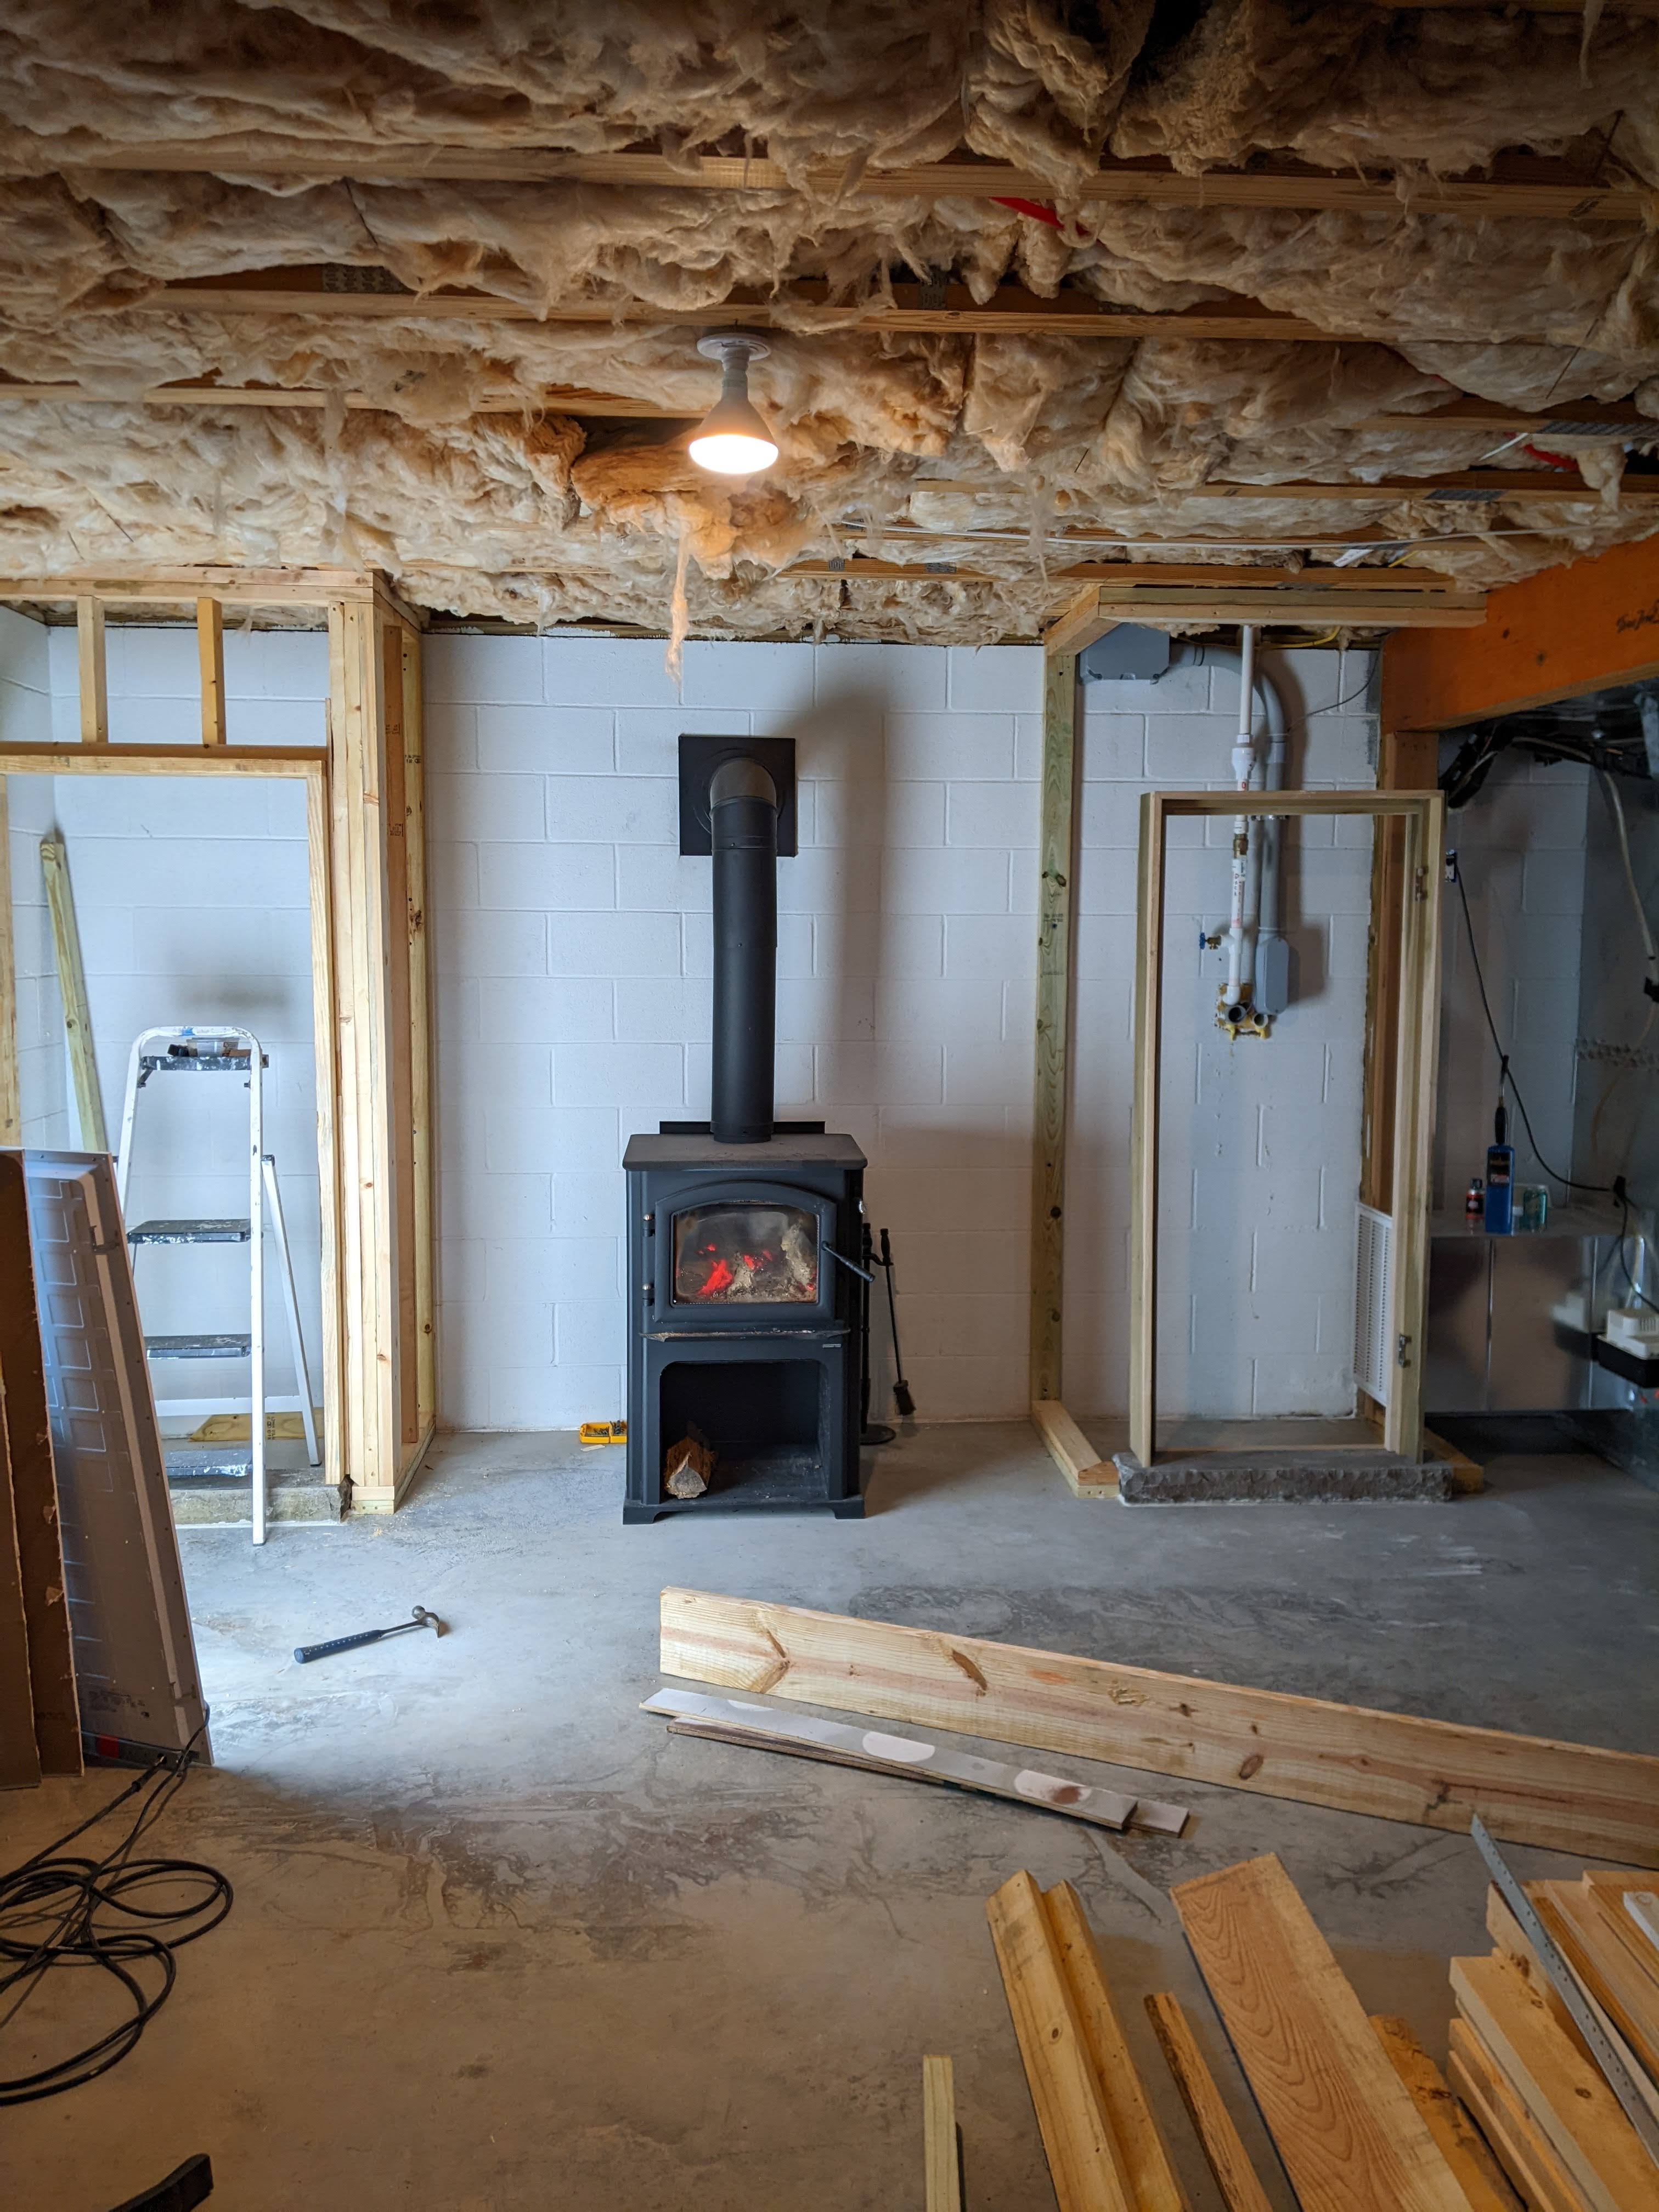
So that takes care of 5 doors. How are we going to use the rest of the doors? There are two doors that are not quite 6′ tall. We are guessing that those were closet doors, and that is what we are going to use them for. We have a place on one side of the wood stove where the utilities that go down to the dock come through the wall that we need to maintain access to, so we are building a closet to hide them. Since we want that to look intentional, we are building another closet on the other side of the wood stove.
My husband will use the other exterior door that we bought for his office. The glass is broken, so he wants to replace the glass with something that obscures the view–like ribbed glass. We need two doors for the bathroom–one for the closet to hide the HVAC unit, and the other for the entrance. We may build a toilet room in that bathroom, which would use another door. (These plans have changed.)
So that leaves 1 or 2 of the doors that we bought in Toledo. We also have 3 doors that we picked up along the way. 2 are five panel doors that we will tip on their sides and use to clad the outside of the bar in the kitchenette/bar. So as of right now, we have 2 or 3 doors that we don’t have specific plans for. It seems amazing to us that the basement is going to use that many doors.
So stay tuned to see the rest of the project.
September, 2022:
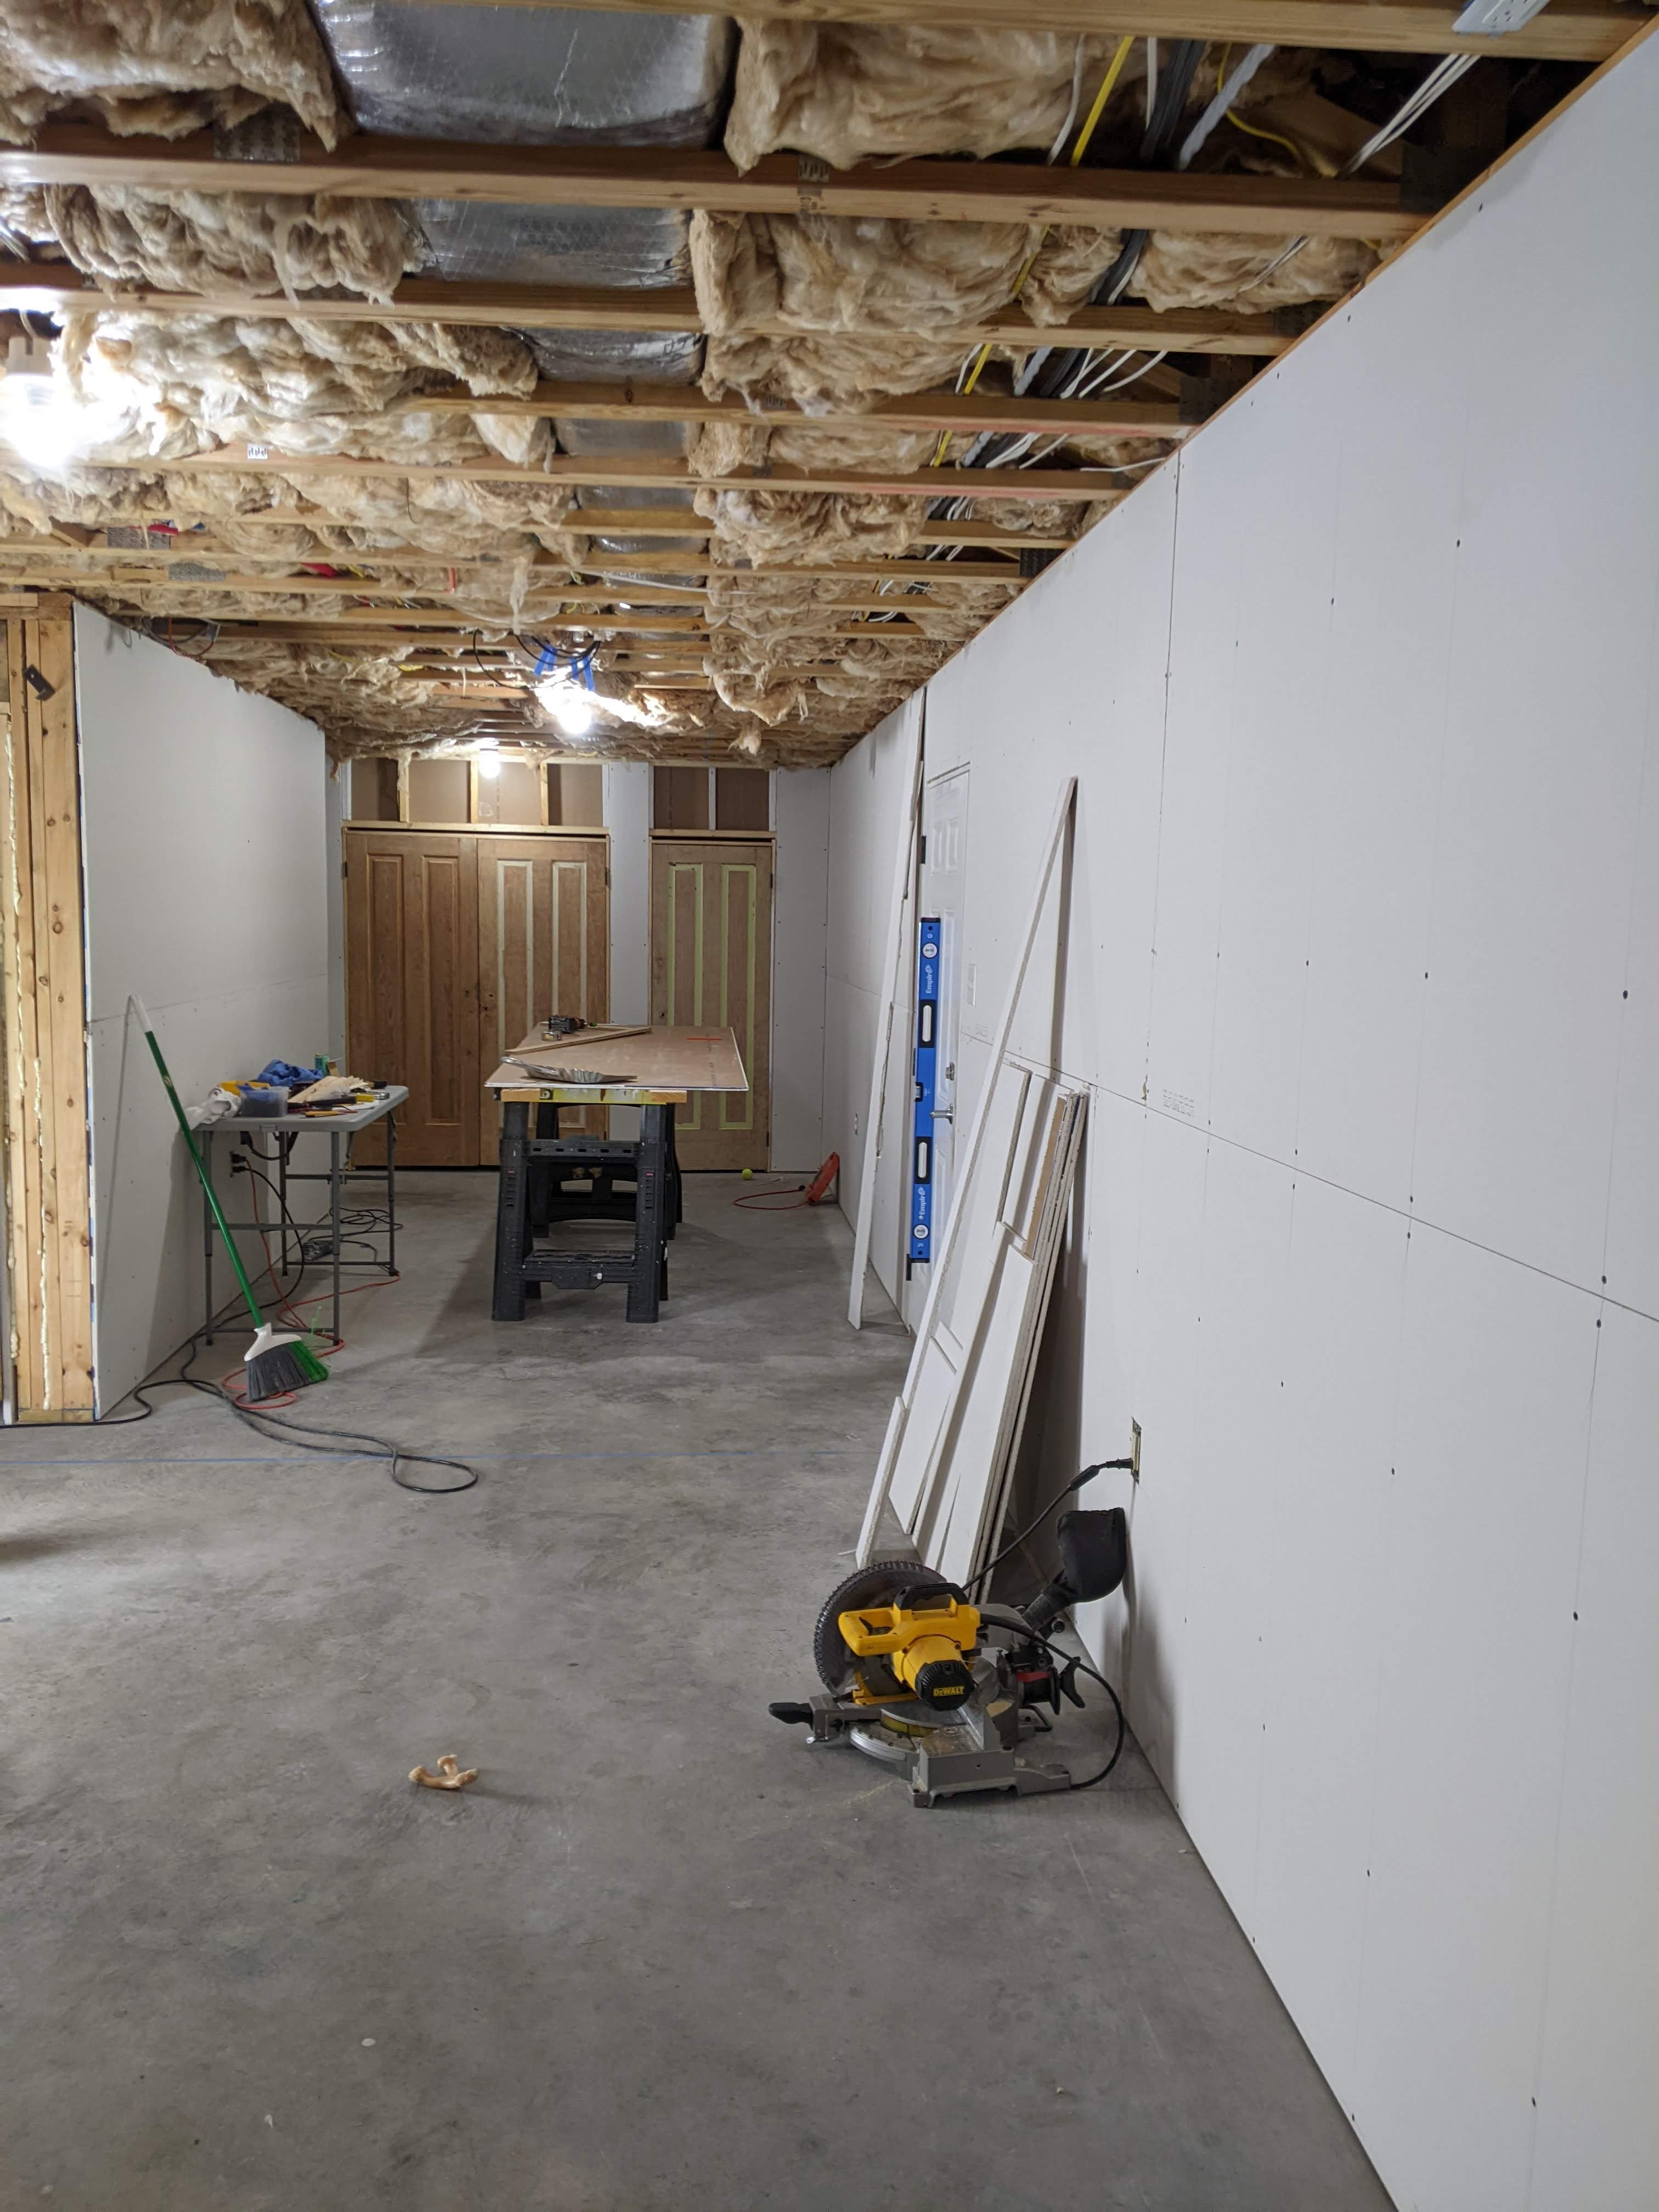
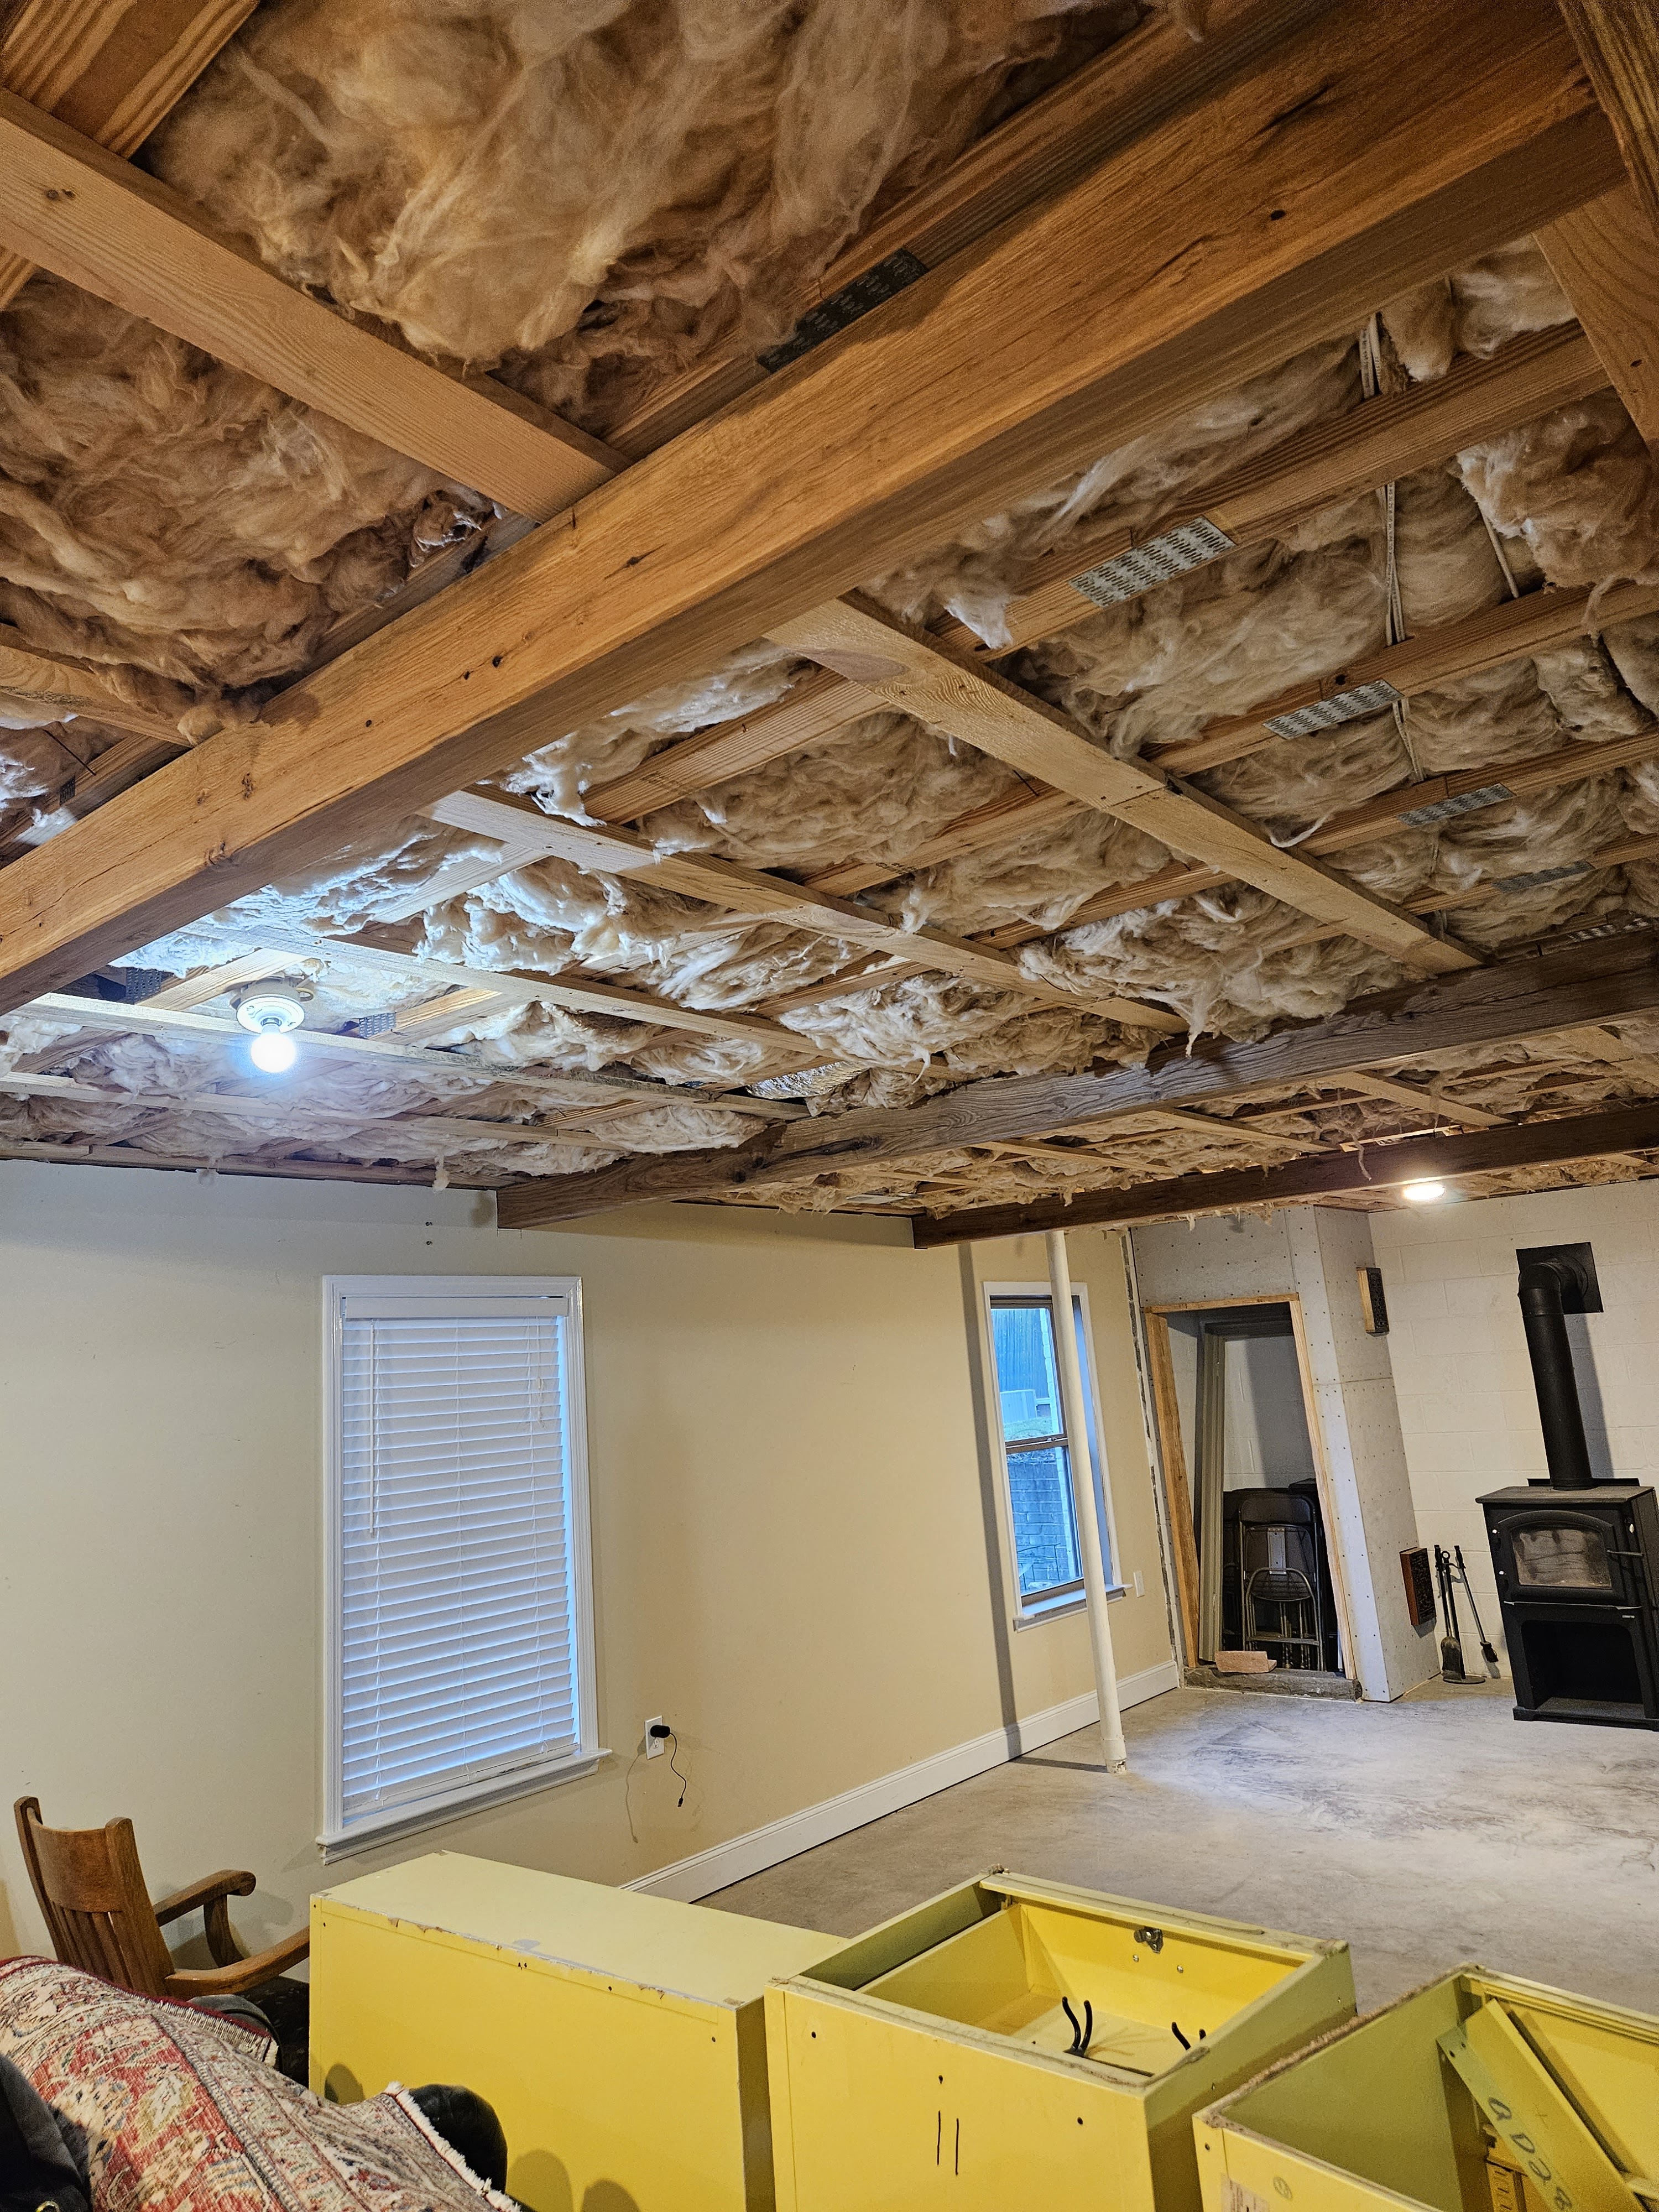
In our basement, some of the walls were drywalled and painted when we bought the house, but others were not, and we have a lot of walls that are cinder block that we have painted with dry loc paint.
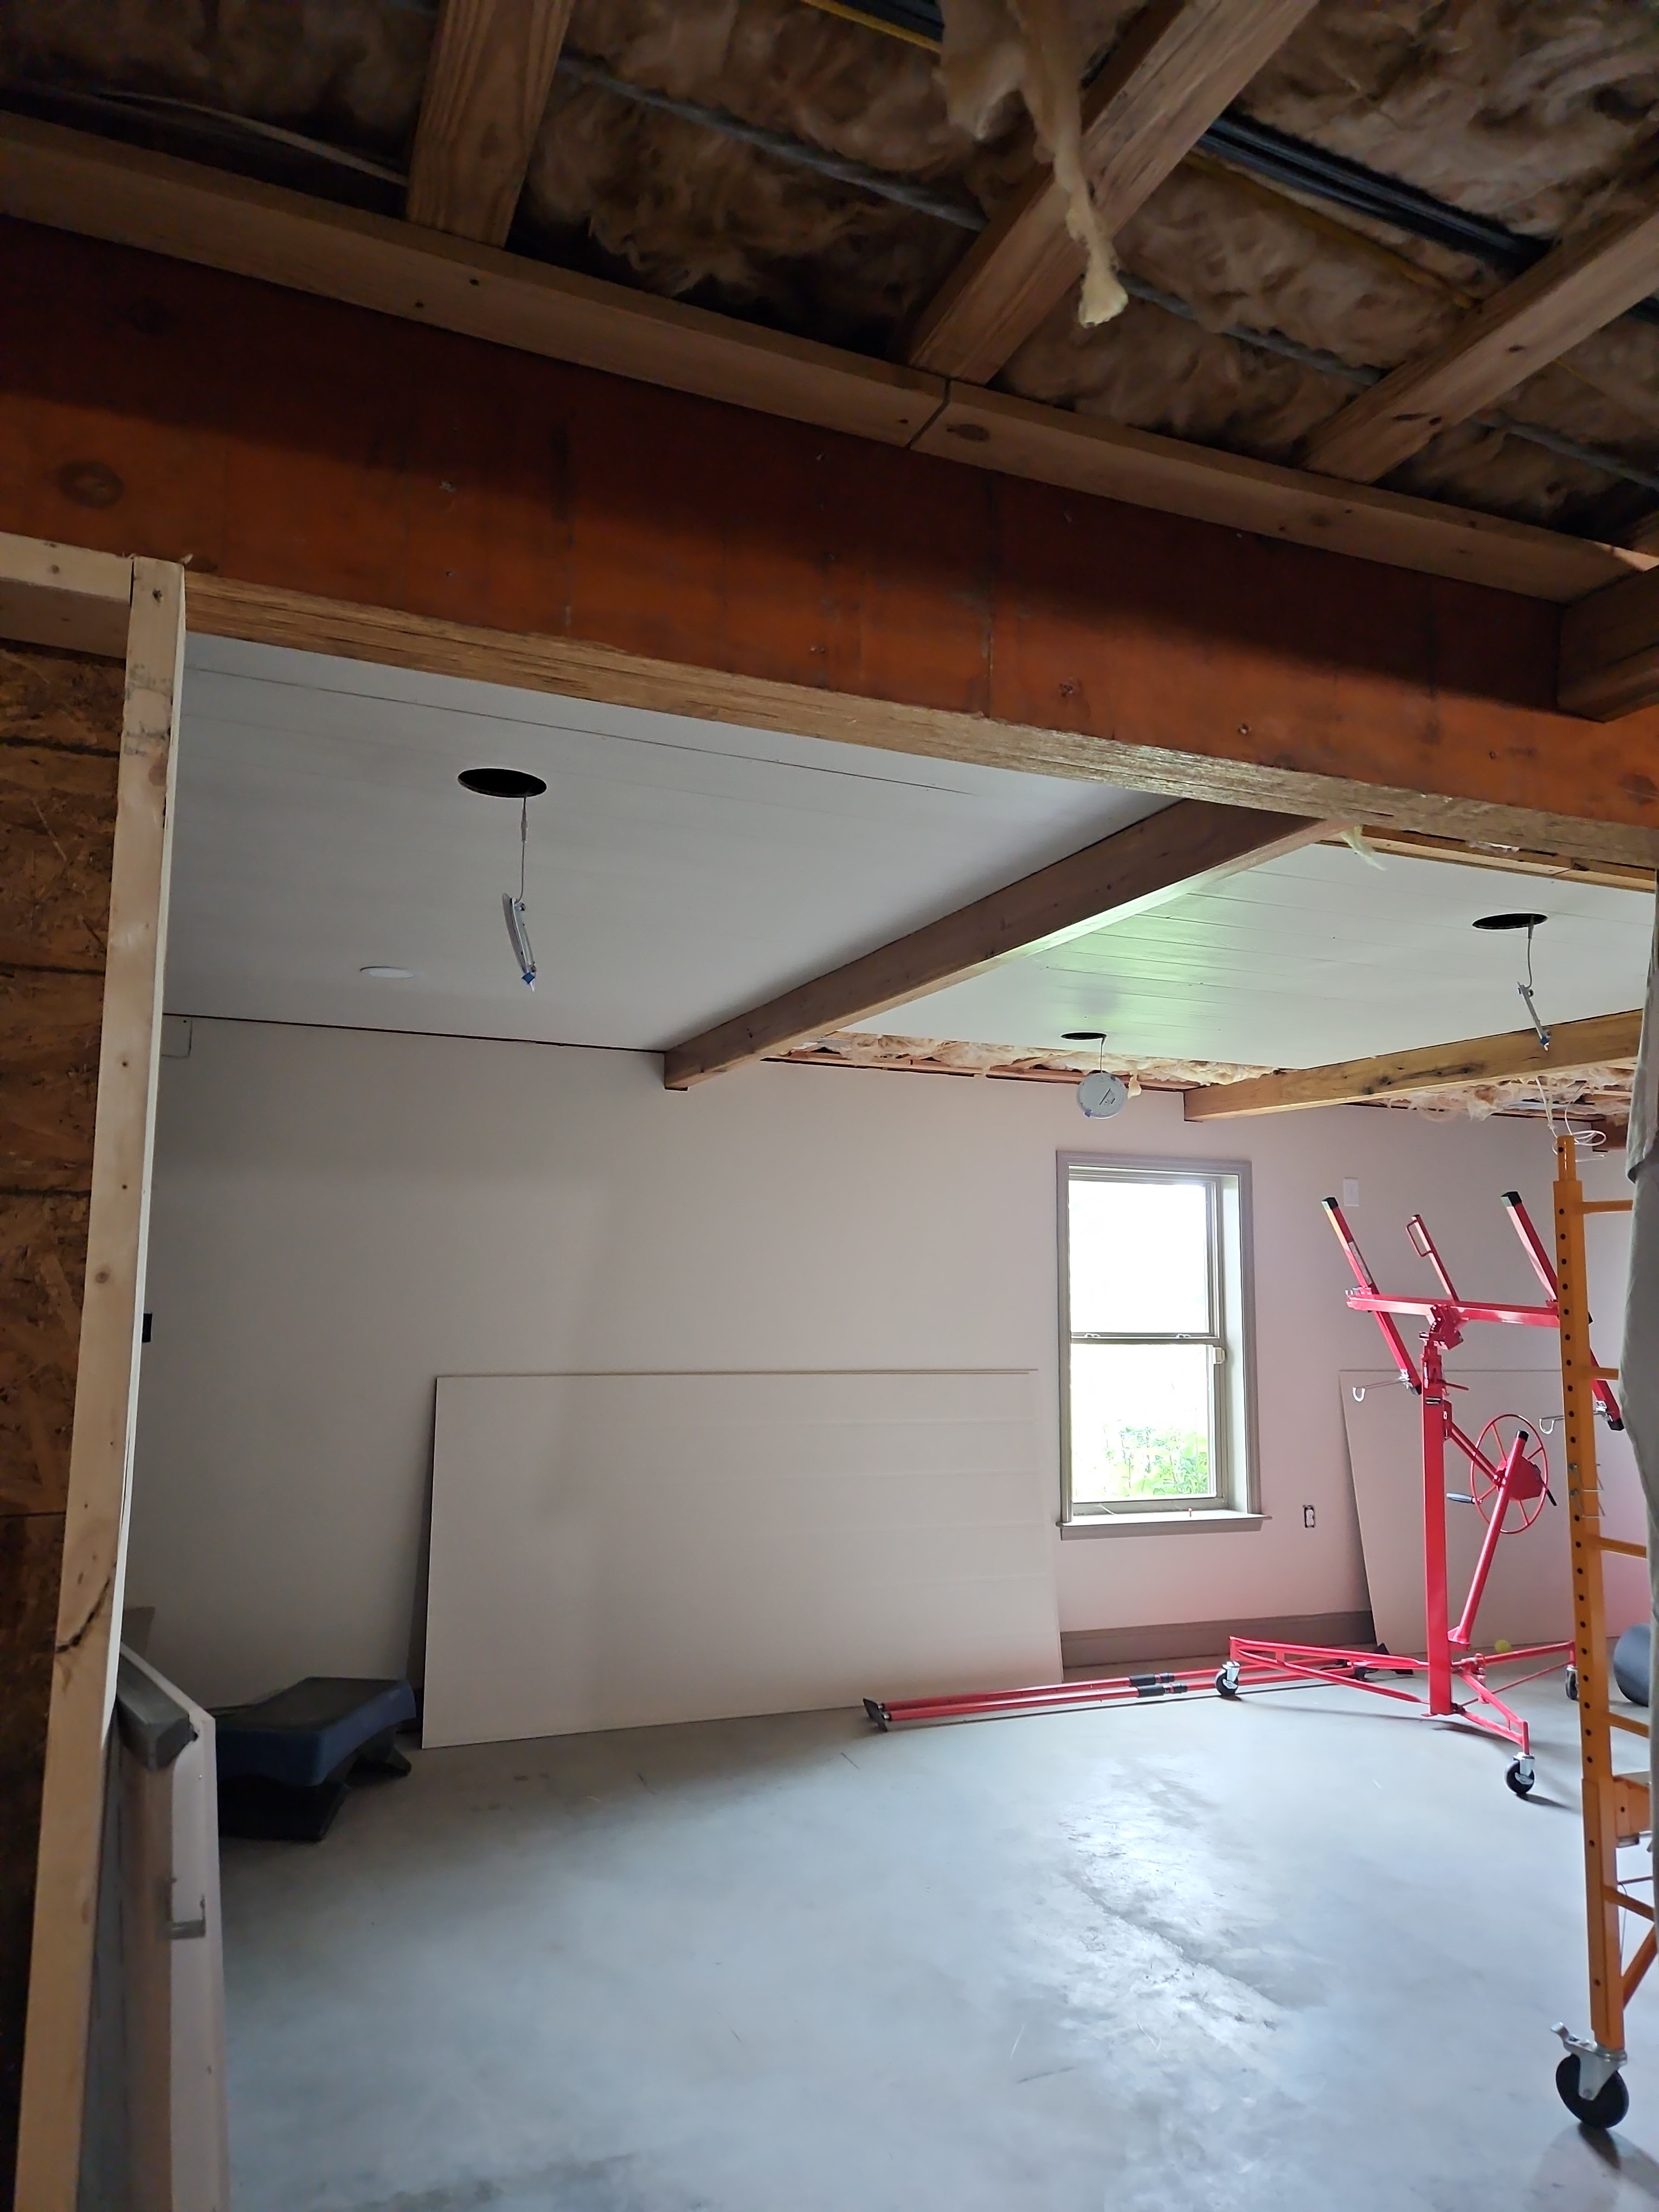
My husband has wanted to hang the drywall because the exposed insulation just sucks the light out of the room because it is dark and not at all reflective. So, we ordered drywall when we ordered the materials to frame out the closets in the basement. Also, in preparation for hanging drywall, we have watched multiple videos on YouTube about how to do it properly, and tips and tricks for the easiest way to do it. (Yes, we are the most glamorous people you have ever seen.)
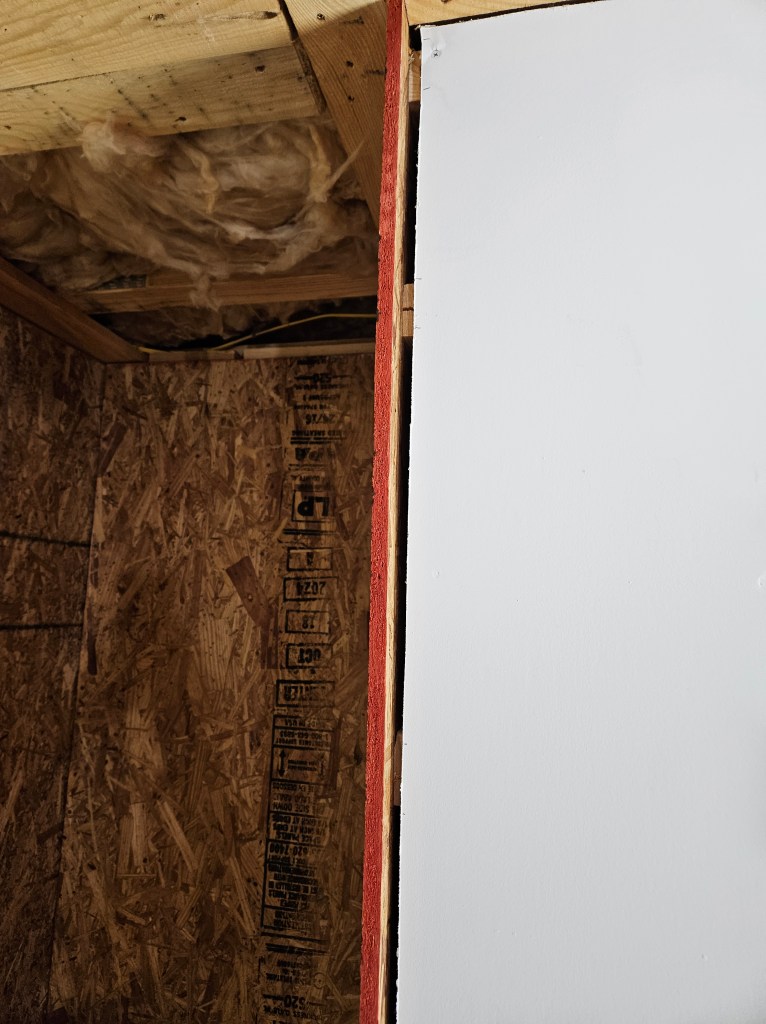
The closet that we framed out and hung doors for required some additional framing in order to hang drywall–mostly we had to add short pieces of 2 x 4s over the doors so we had something to attach the drywall to. Once we had that done, we started hanging the drywall.
Here is a before and after:
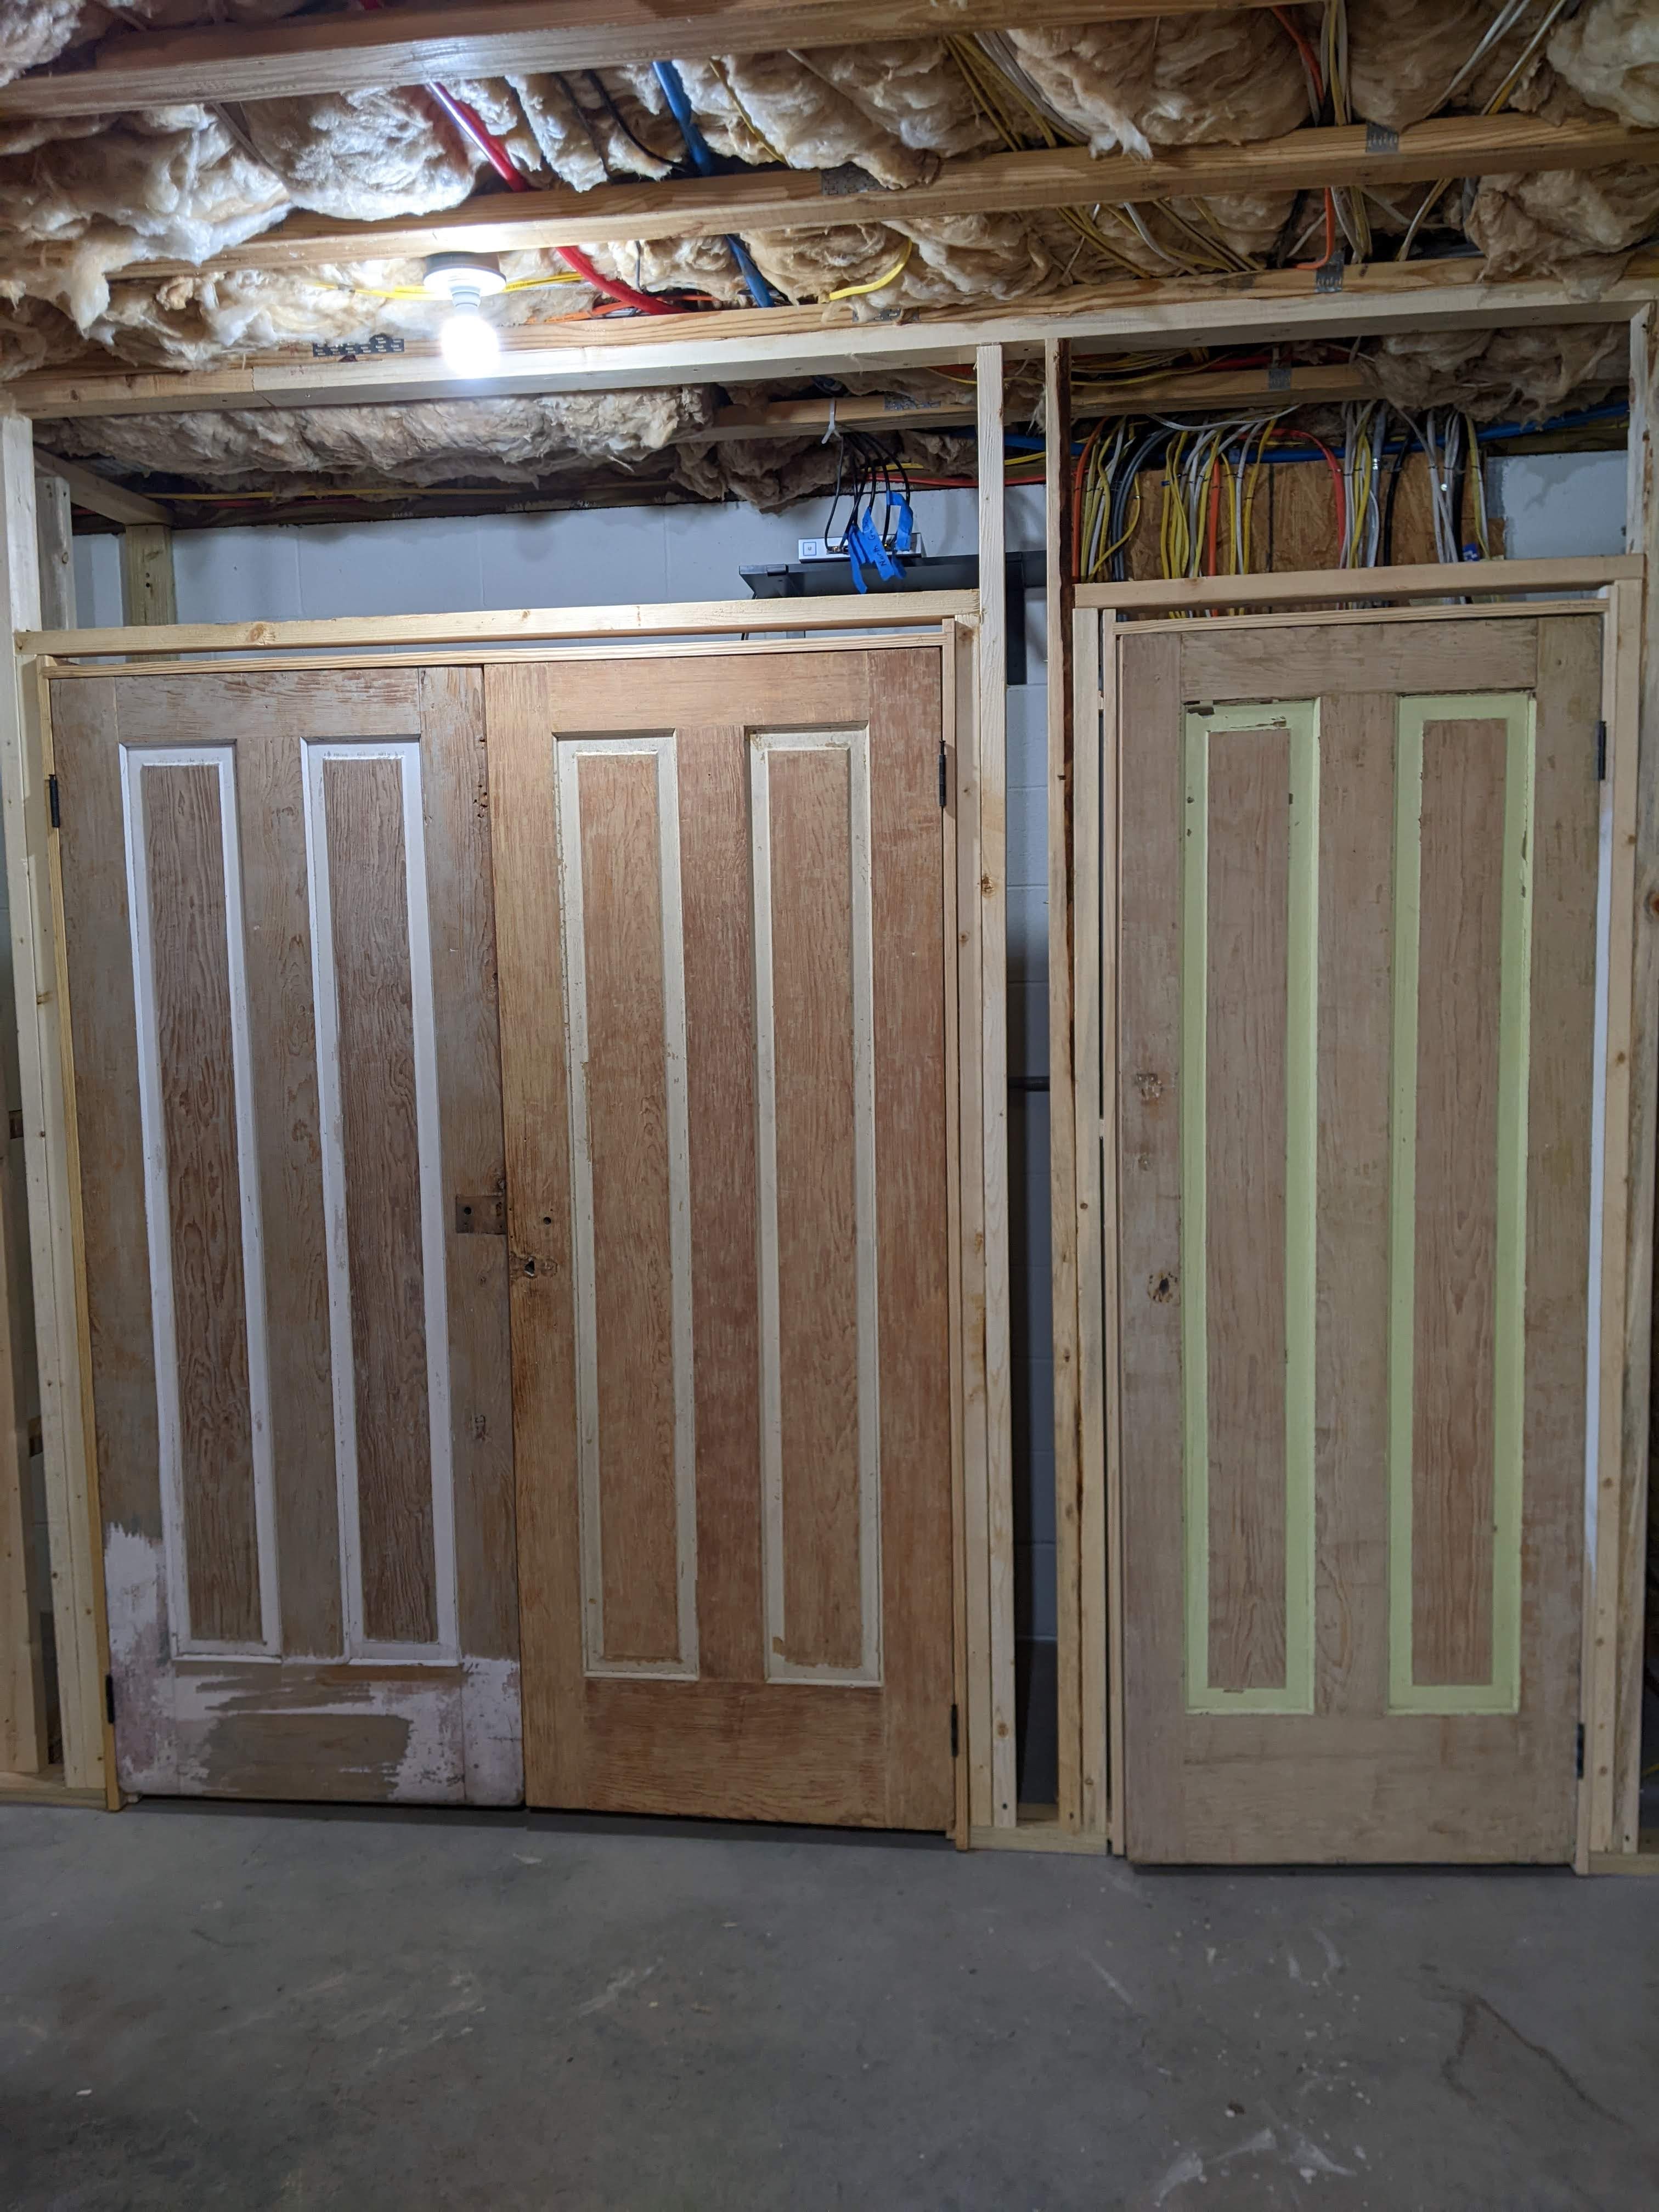
We didn’t do above the closet doors on the outside because we need to install a couple of LED strip lights inside the closet.
It’s amazing how much brighter it is with the same lighting.
January 23, 2023:
We have not made much progress on the basement with my surgery and then the holidays, but picked it up again this weekend. The weather this weekend was really cold and windy, and then also rainy/misty on Sunday, so a perfect weekend to stay inside.
We have one long block wall in the basement that forms one of the walls of the storm shelter under our front porch. When they framed the storeroom on one side of this block wall and the room that will be Mike’s office (New plan is that will be the bathroom), eventually, on the other side, they didn’t take into consideration that in order to fur out the block wall, the stud walls for the storeroom and the office needed to be proud of the block wall by about 2″ so that the finished drywall would be one smooth continuous plane.
So we started thinking about what we could do to solve this problem because it would be difficult to reframe the doorway into the storeroom, and we didn’t want to have to reframe the office (bathrom) wall. We talked about using thin brick veneer, but decided that we aren’t talented enough to maintain a straight level line across a 20′ span. So then we looked at stone veneer, and decided from a cost and capability standpoint, that was the right material. The stone will end up about 1/2″ proud of the finished drywall, but we can live with that.
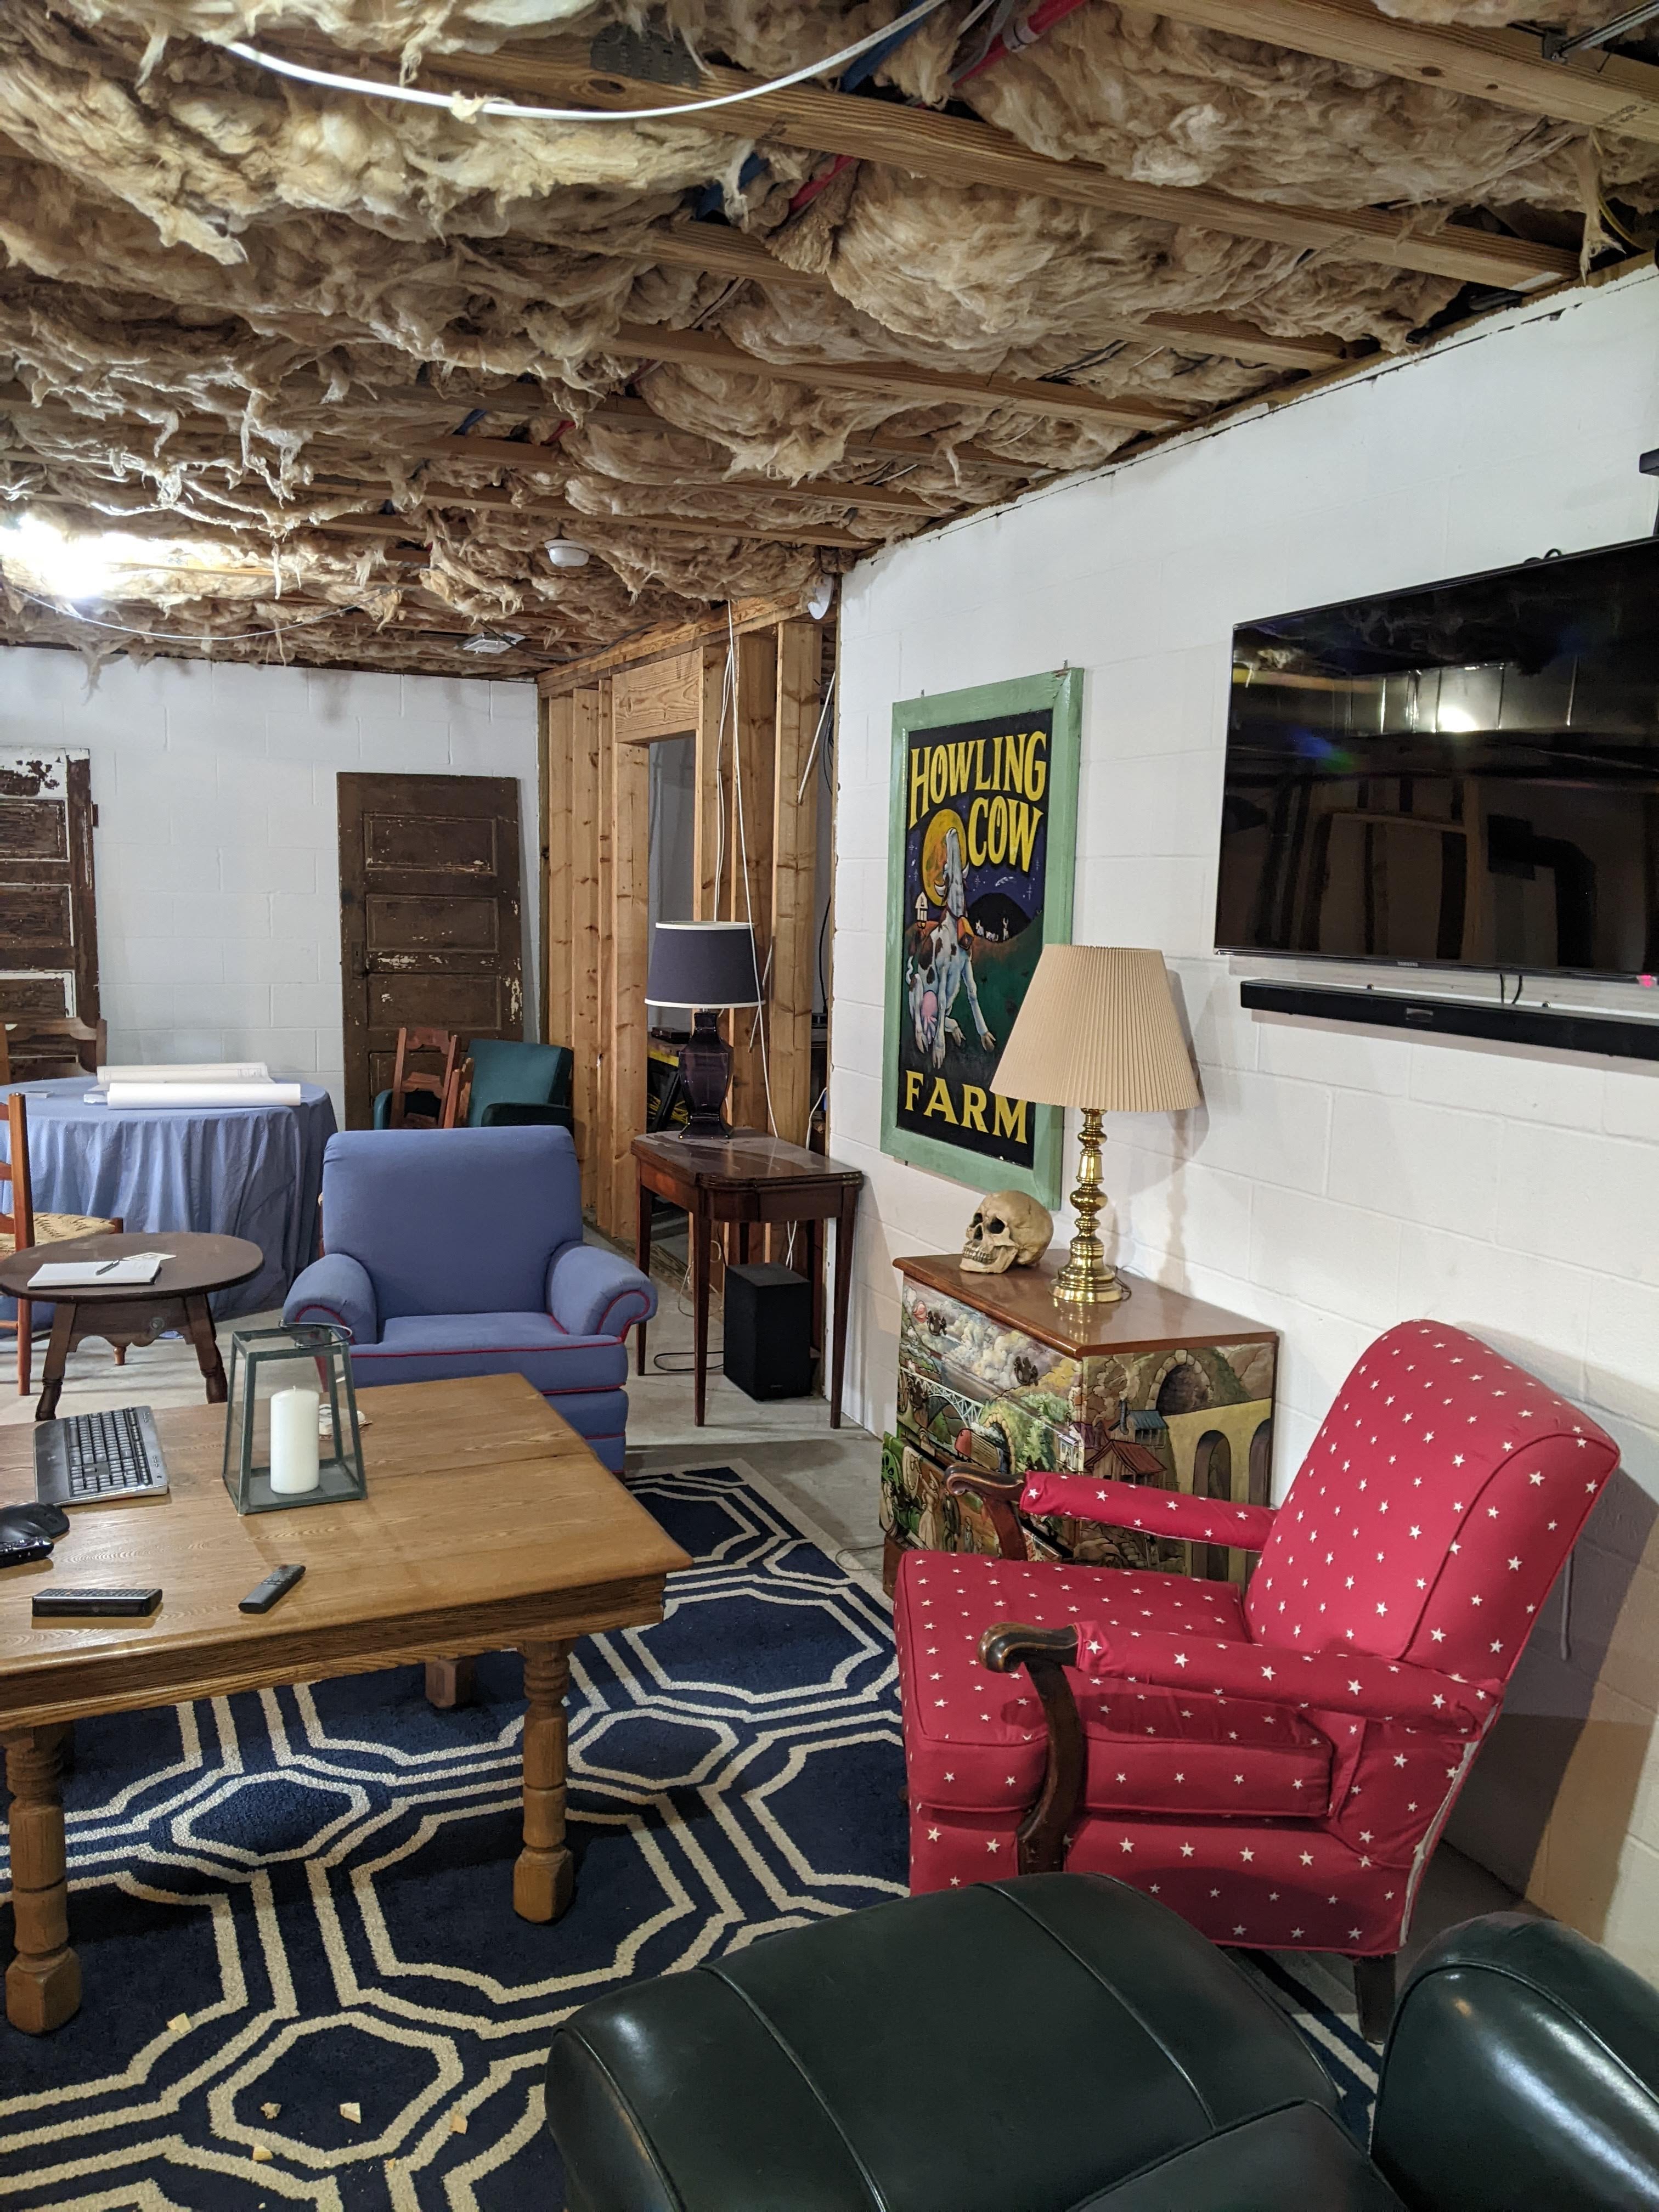
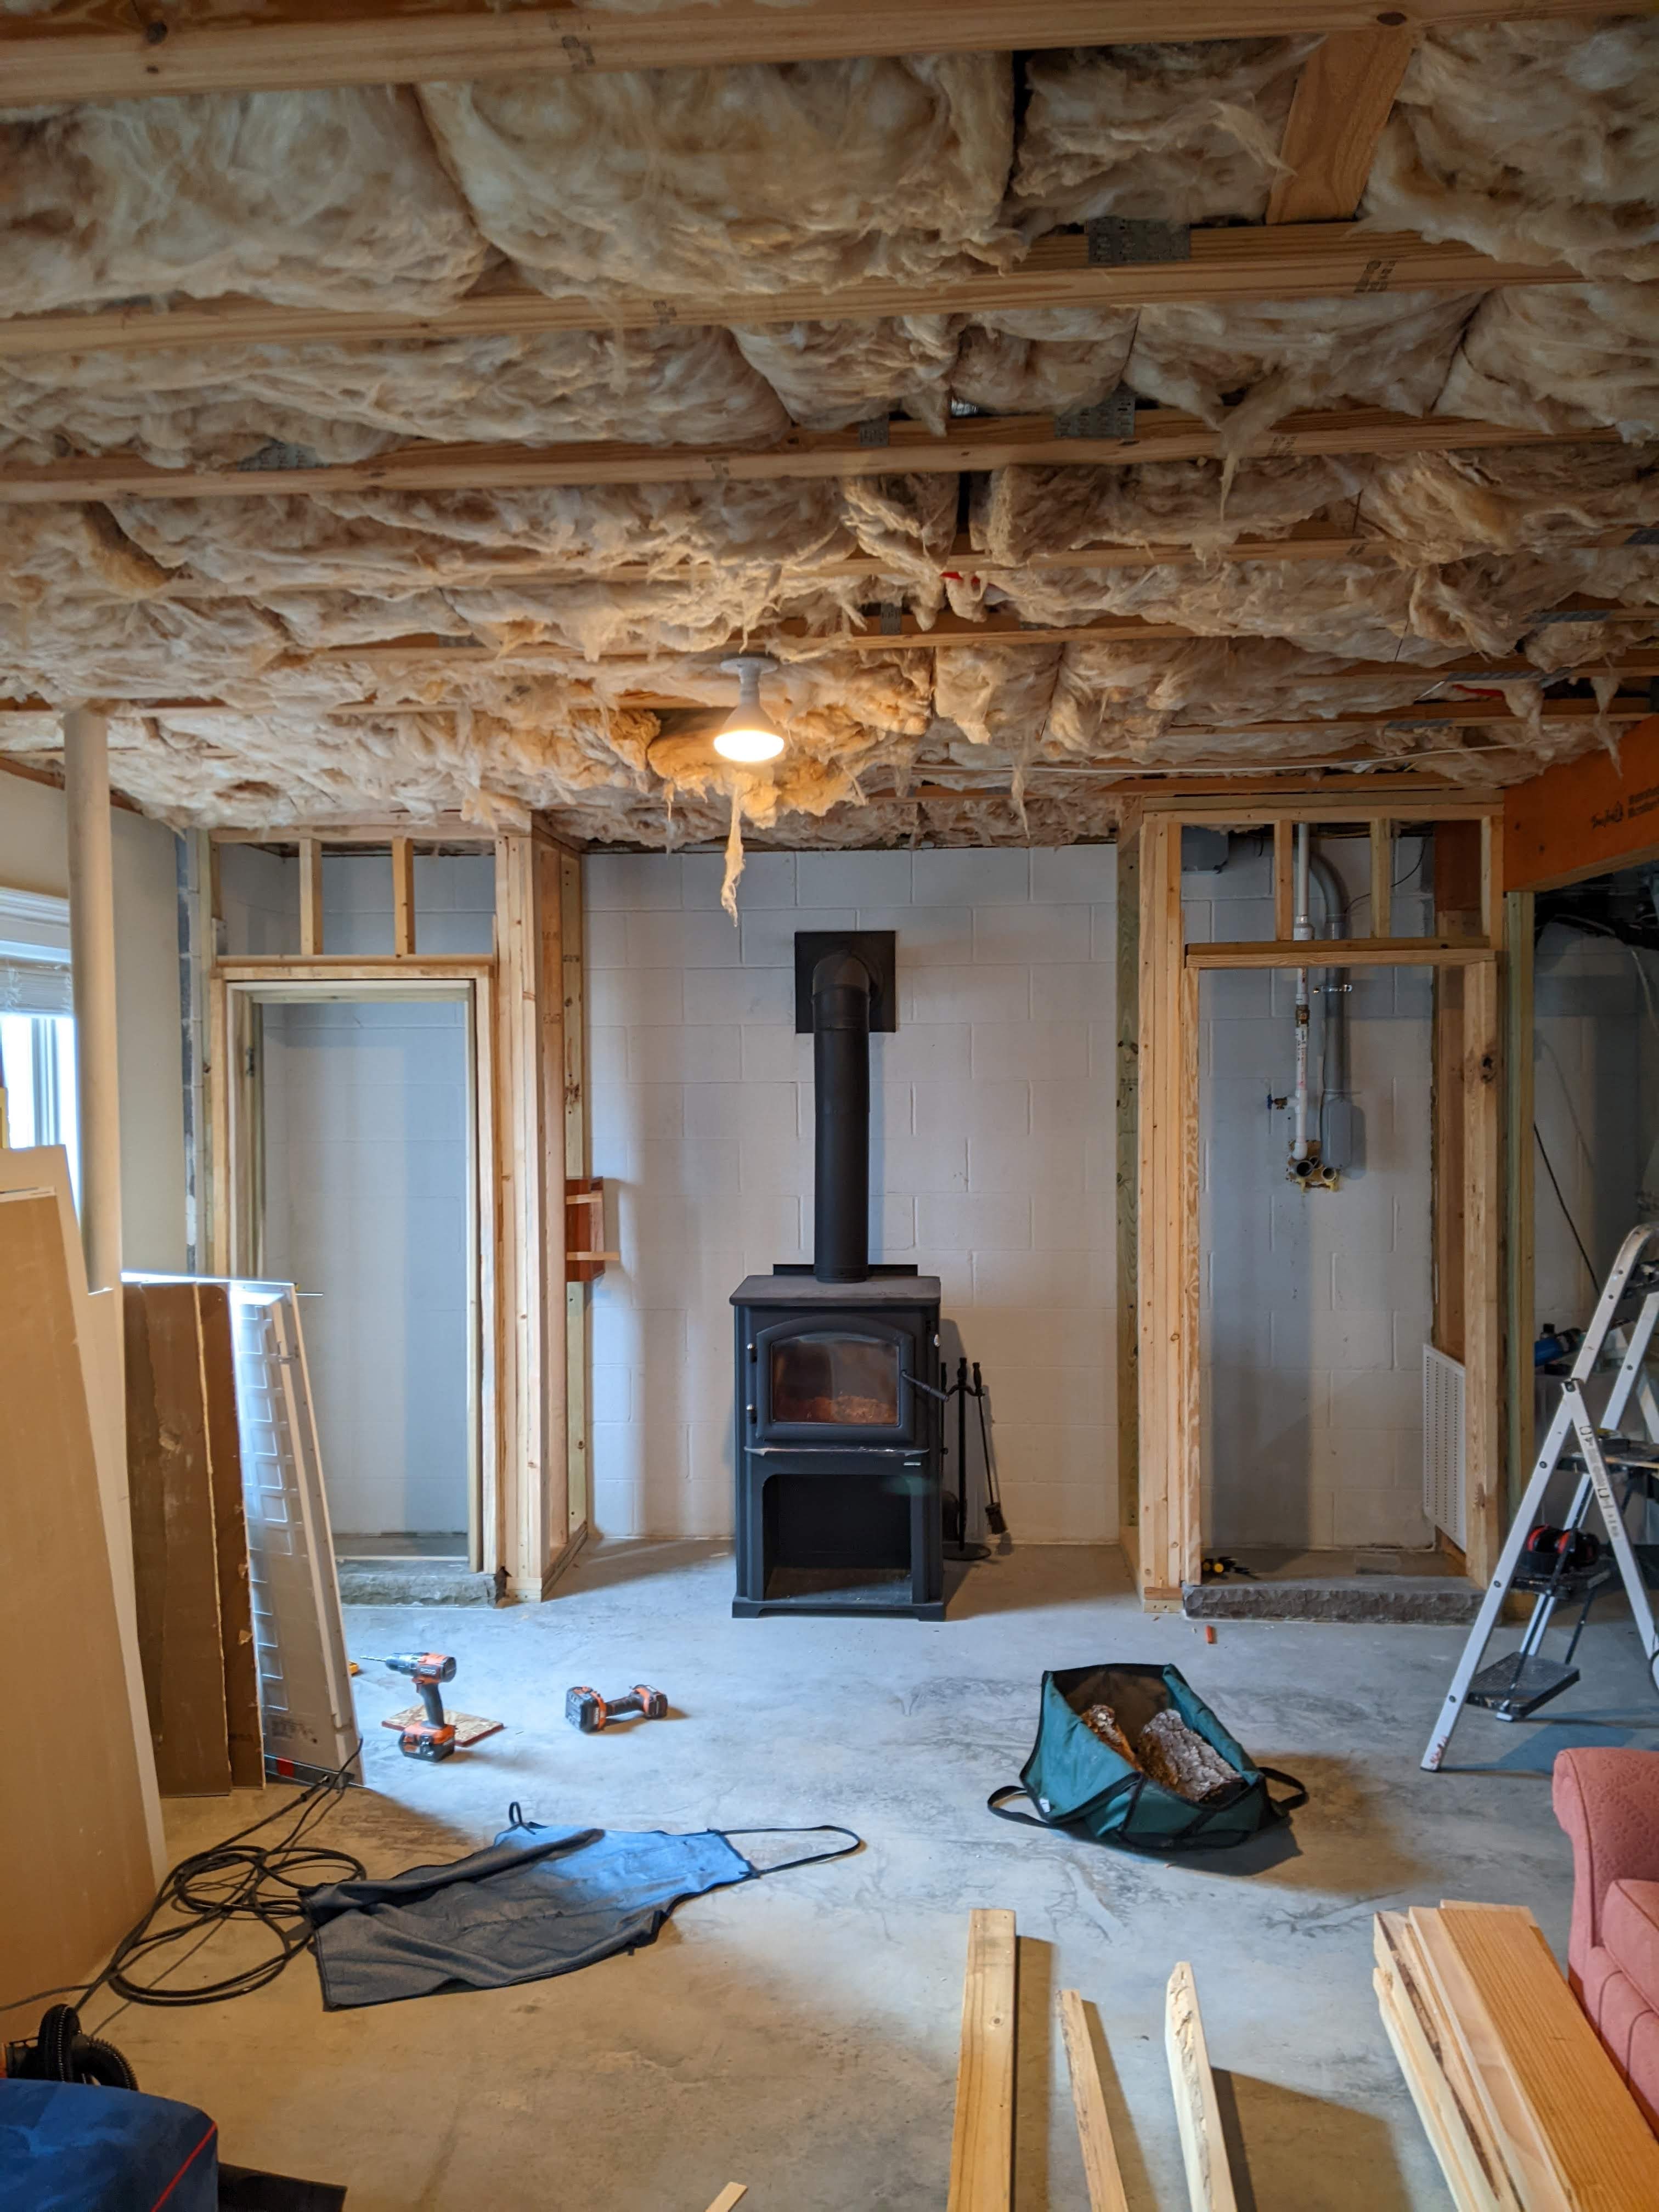
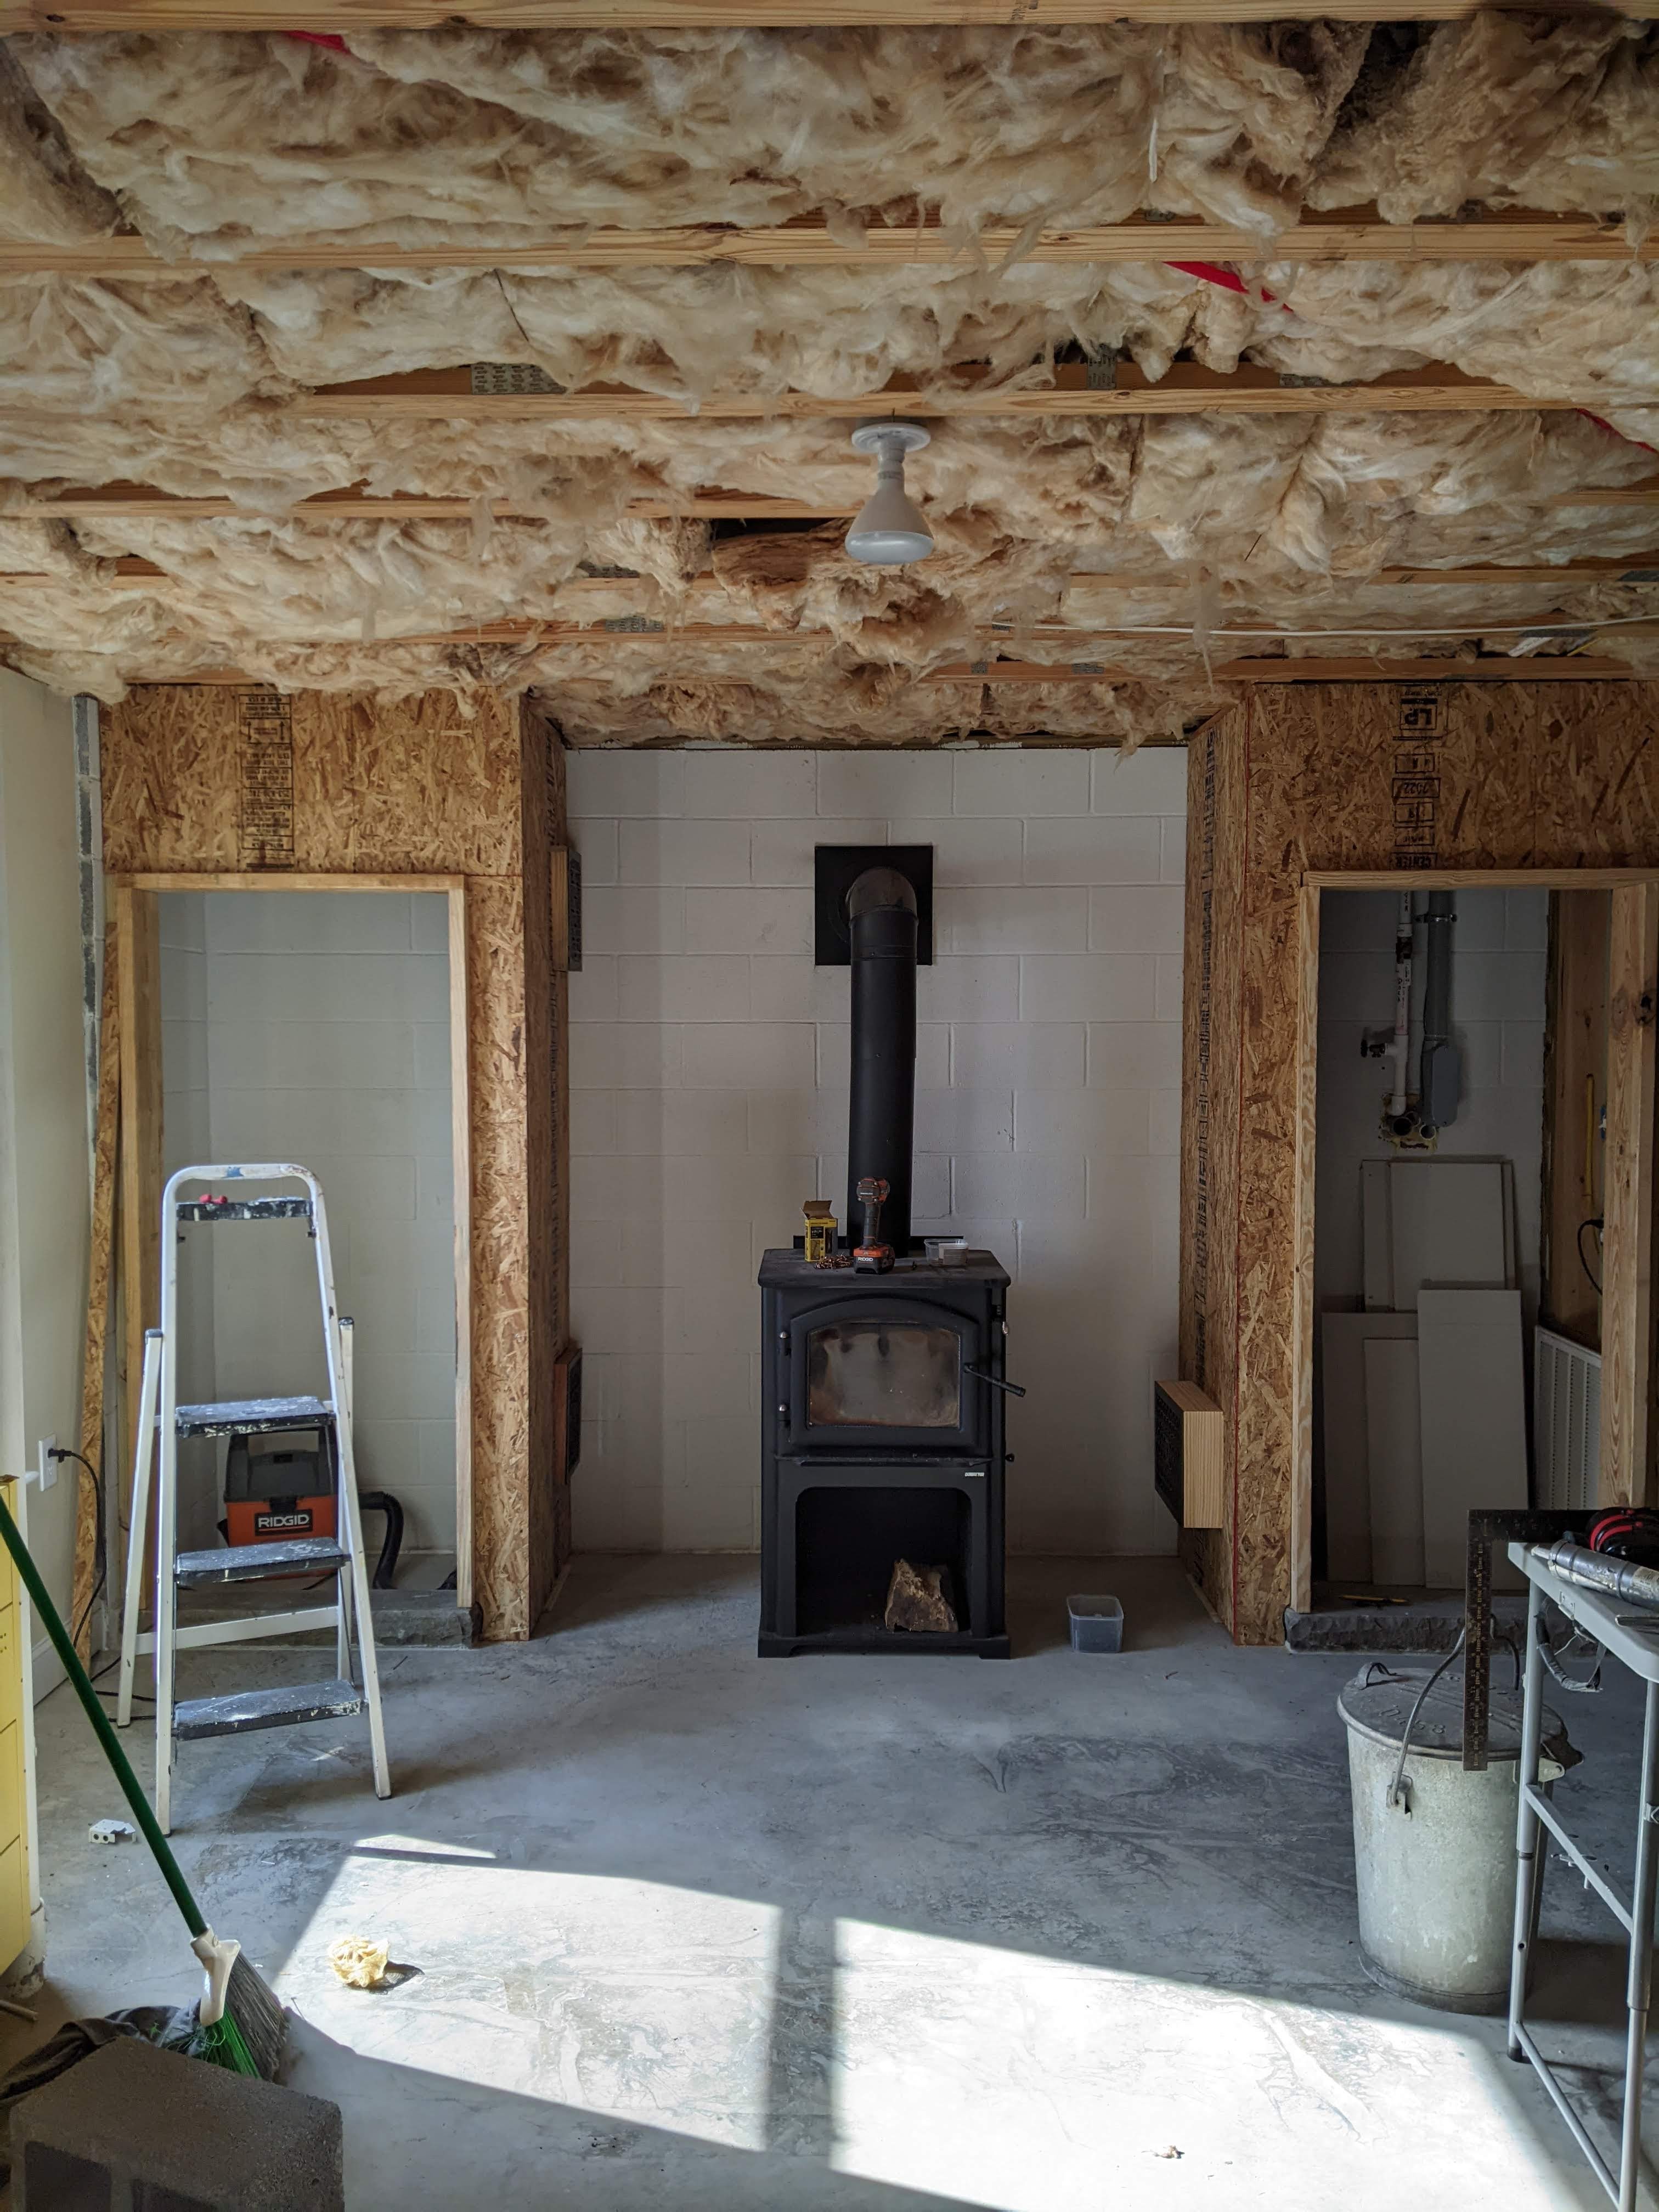
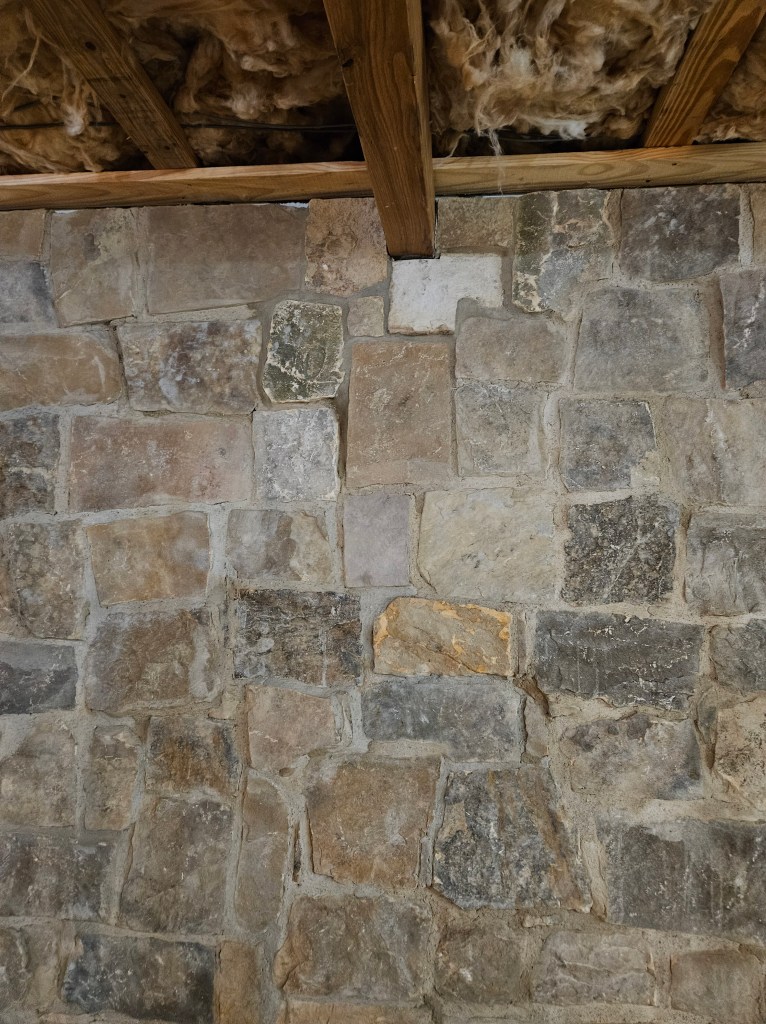
We also have a section of block wall that will be part of the “living room” in the basement. We put a wood stove on this wall in 2021 to serve as auxilliary heat for the upstairs, but it also is the primary heating source for the basement which can be pretty cold, as basements tend to be. On this wall, you can see where utilities that go down to the dock come through this wall. We decided to build a closet around this area since we have to maintain access to it. Because we had to build a closet to the right of the stove, we also built one on the left so that it looks intentional. There are going to be enough weird basement things that we’ll have to build around and can’t disguise that we are trying to disguise what we can.
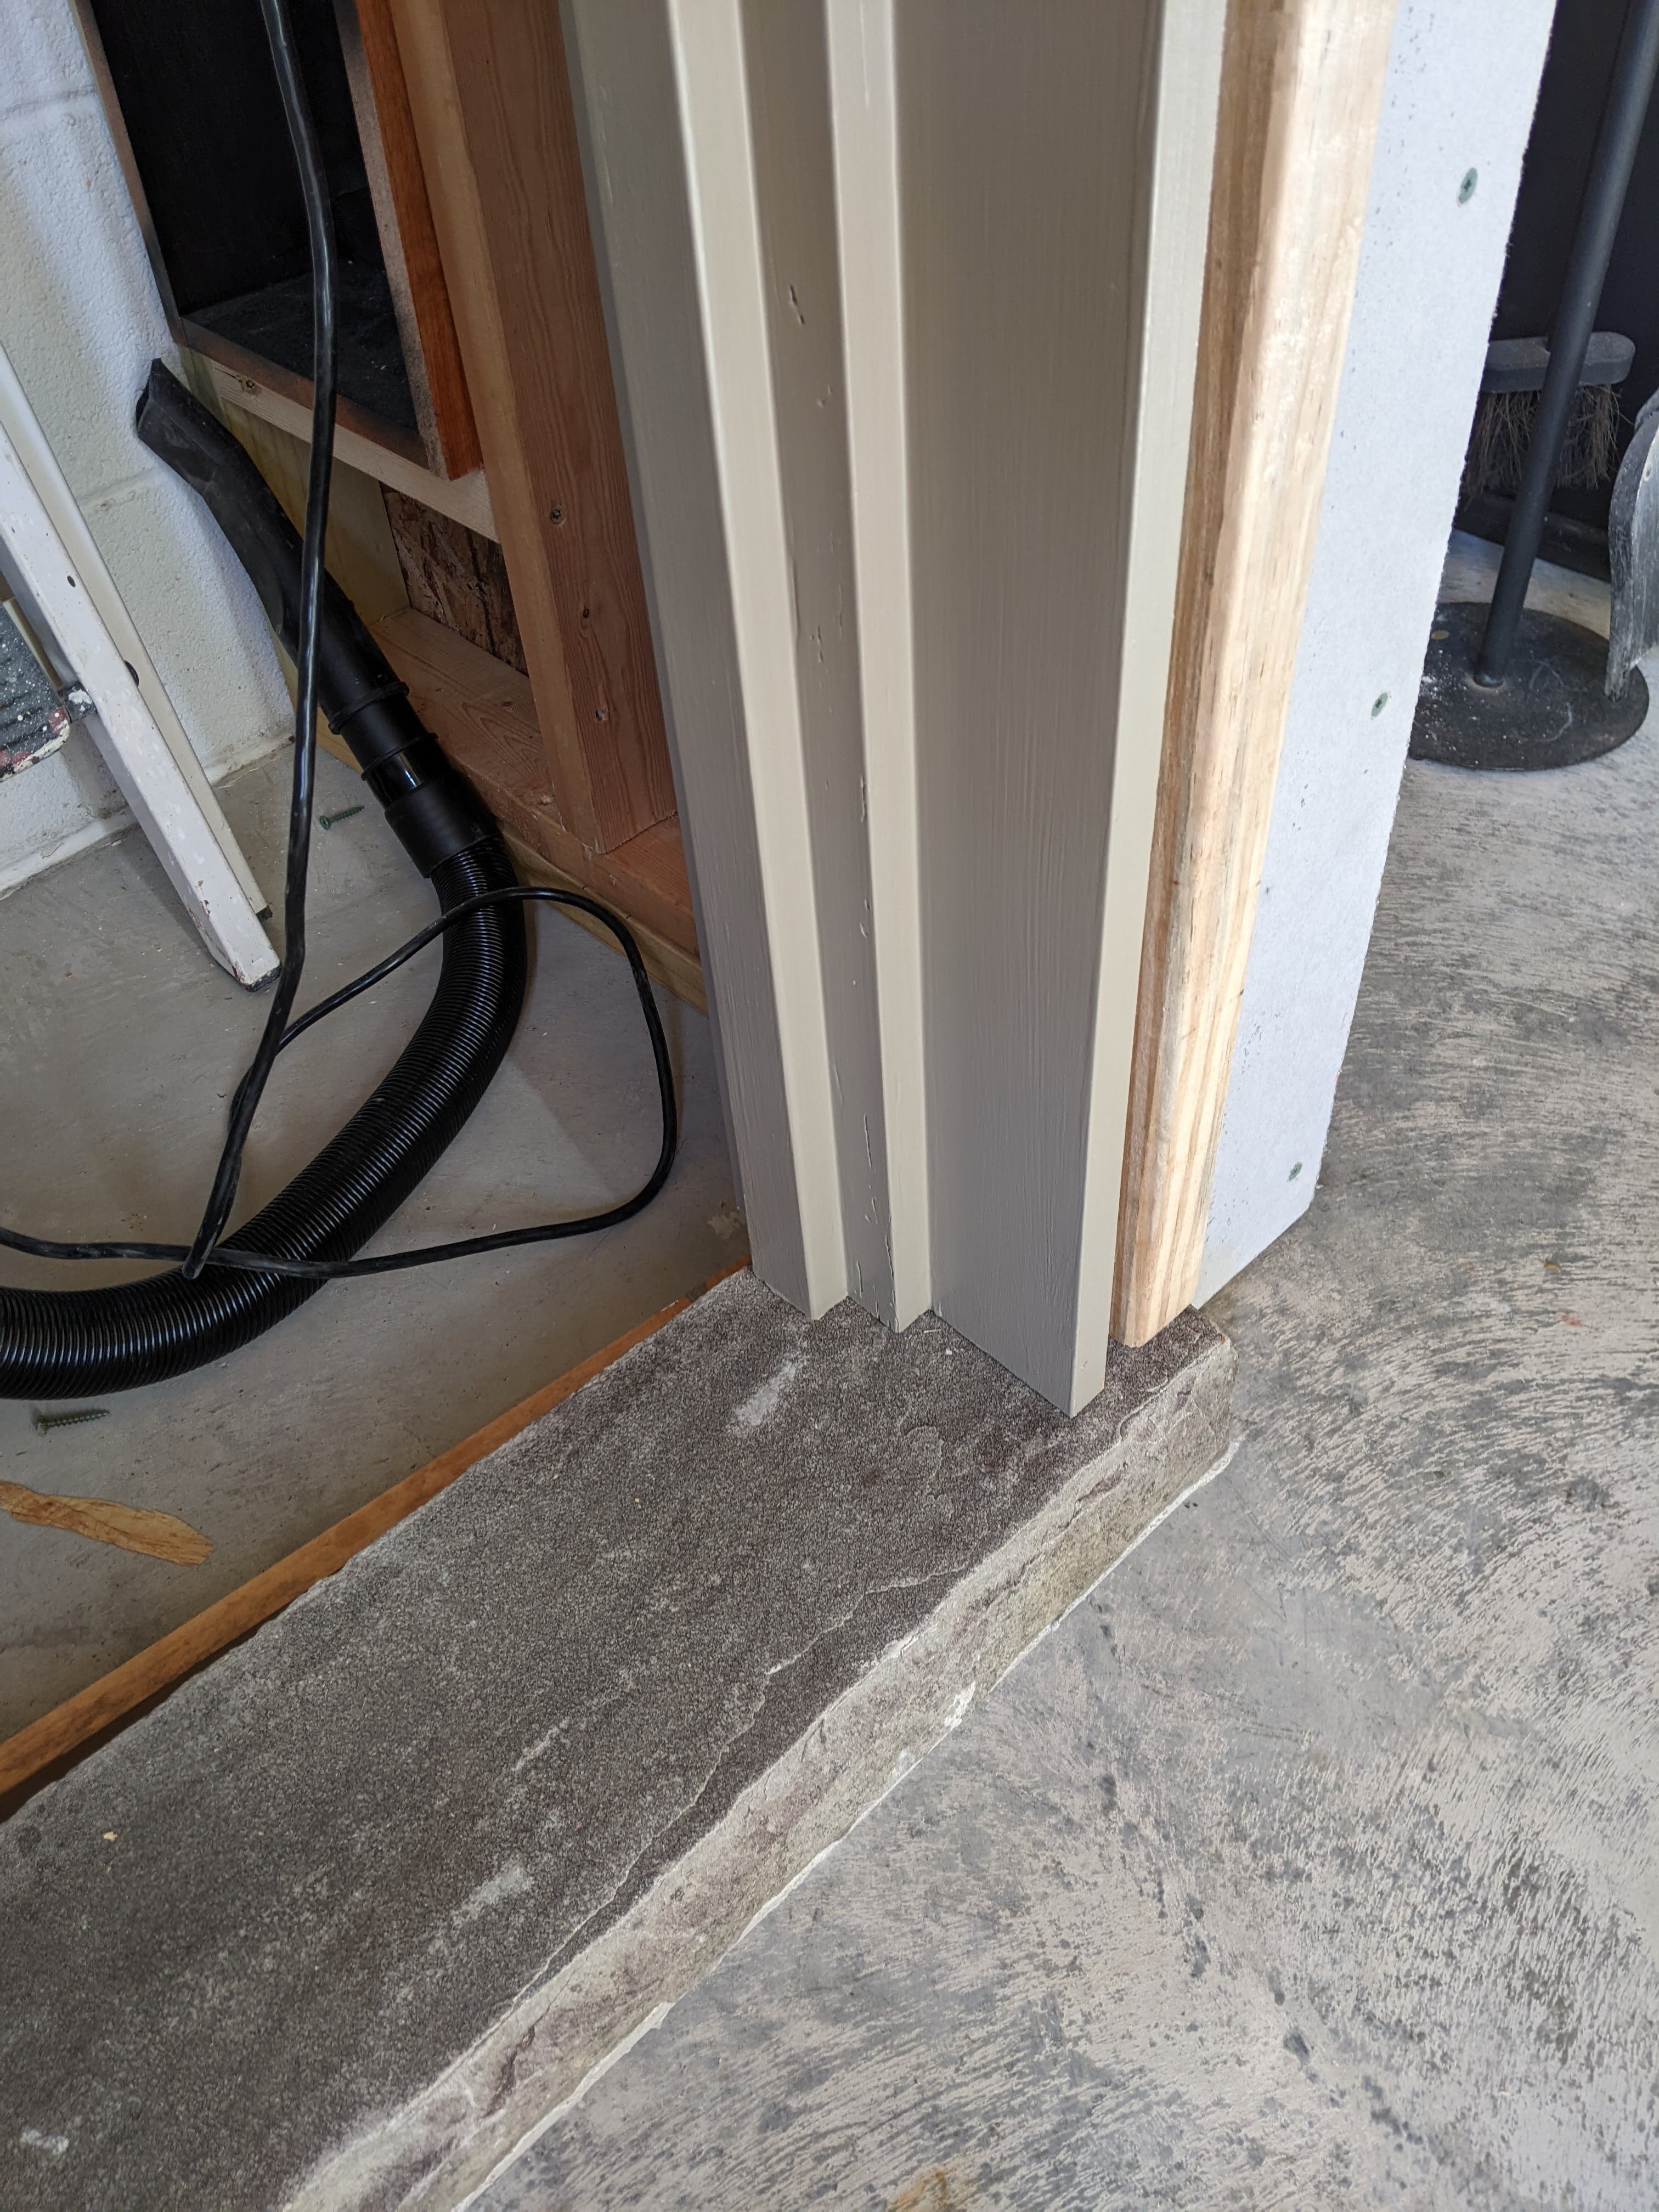
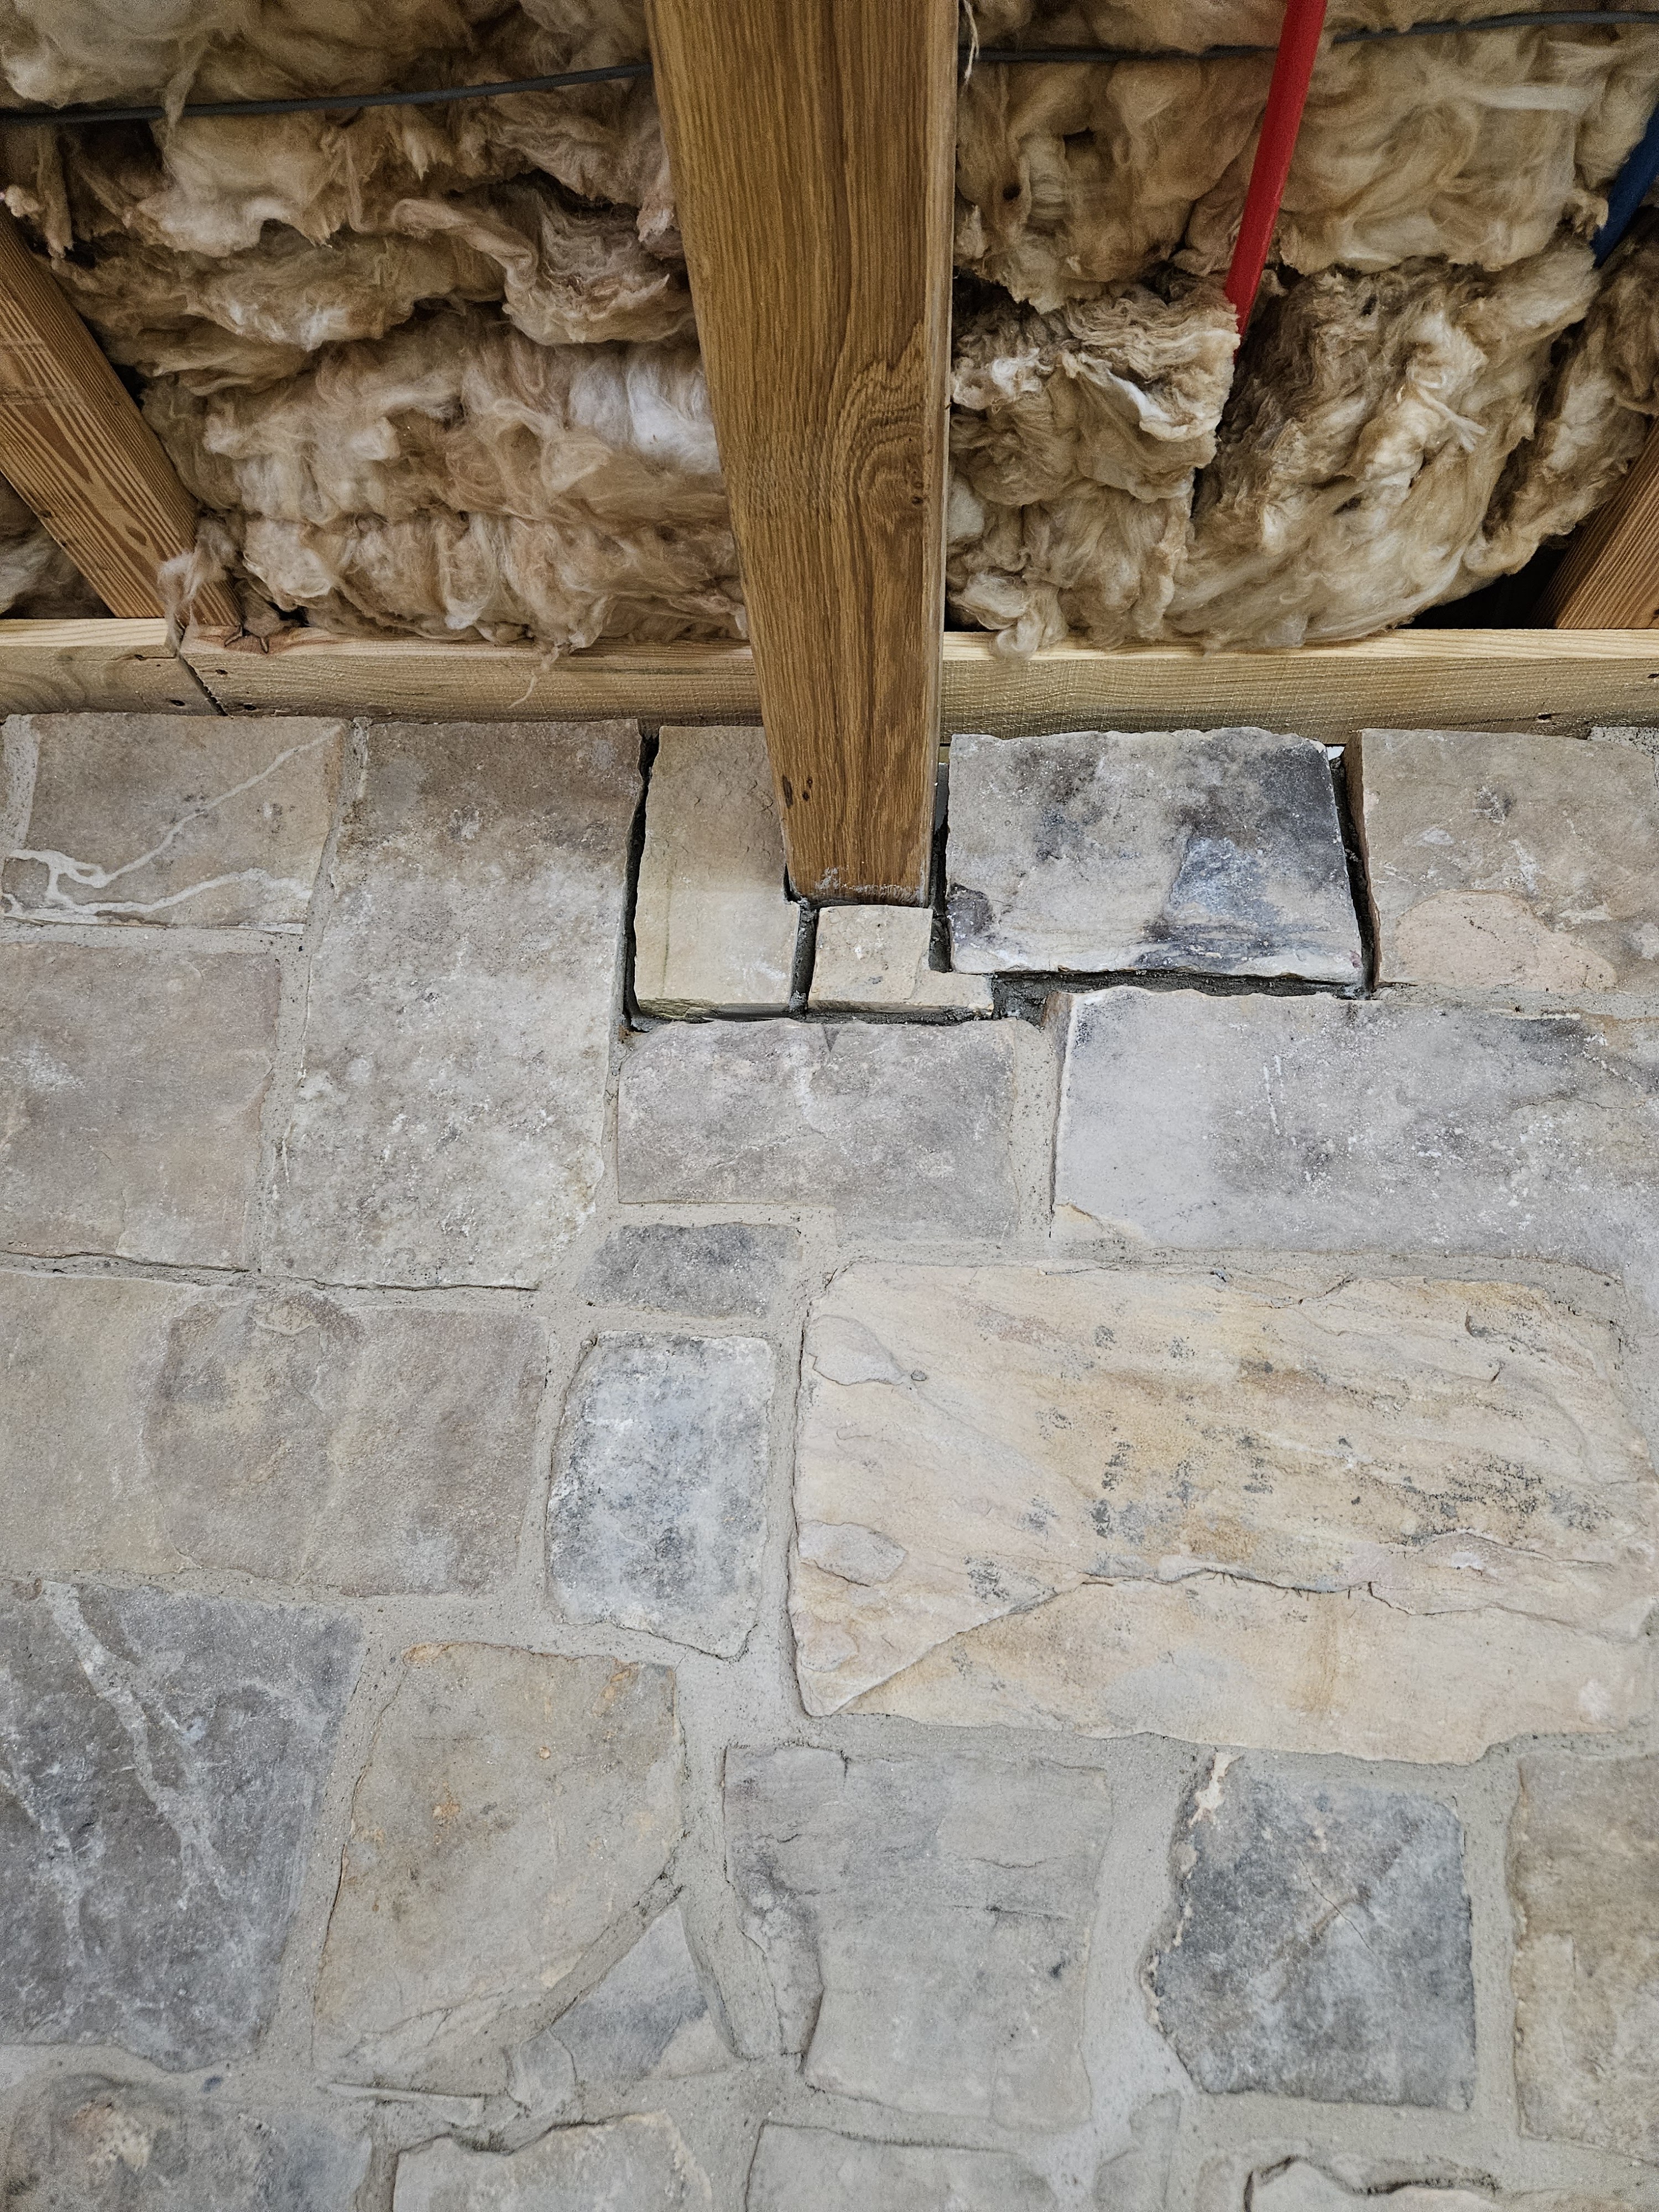
Back in the summer, I started looking for a source of the stone veneer product. Ultimately, we went to a local stone quarry in August that does some cut stone, and also stone veneer. We were primarily looking at the stone veneer product to see the colors and the thickness of the product so we knew what we were looking at from a construction/framing standpoint. However while we were there, we also looked at the cut stones because we had toyed with the idea of putting a stone threshold in these two closets to give them an authentic “root cellar” look and also because the doors are really short. (The doors were clearly meant for a closet or cupboard because they are about 70″ tall. ) The quarry had a couple of cut pieces of stone that were the right size–and they were only $40 for the two pieces. Unbelievable!
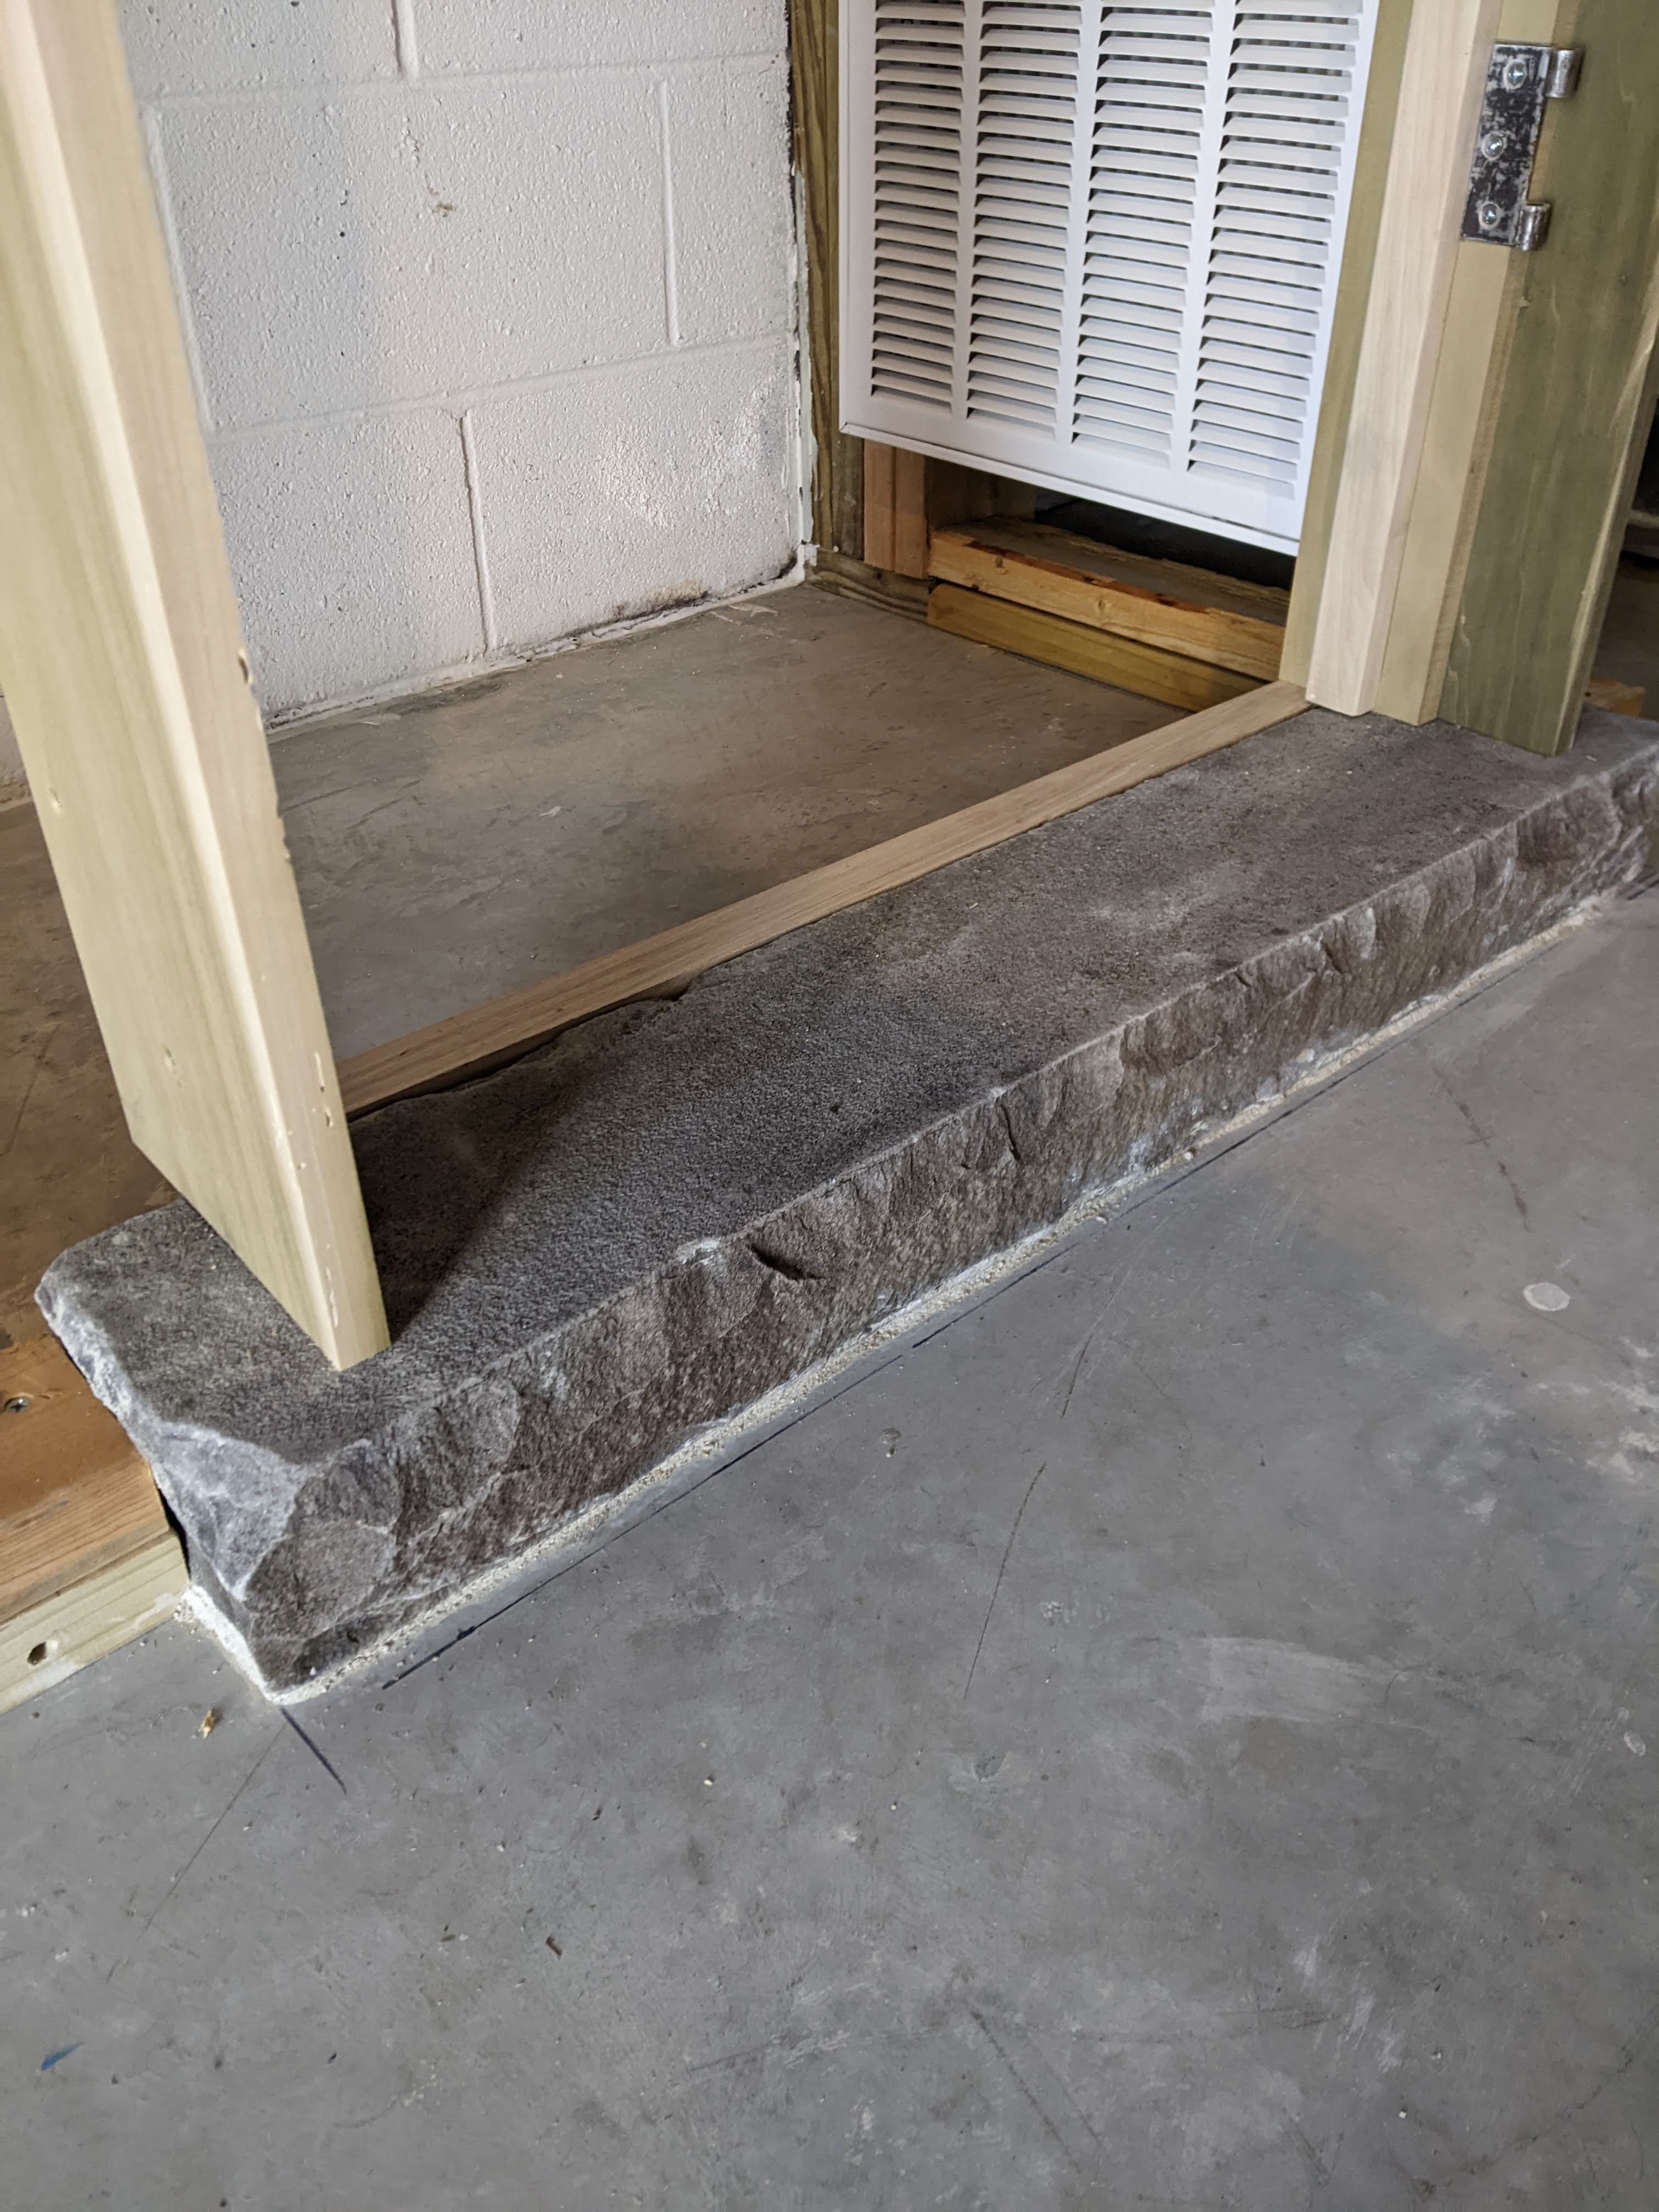
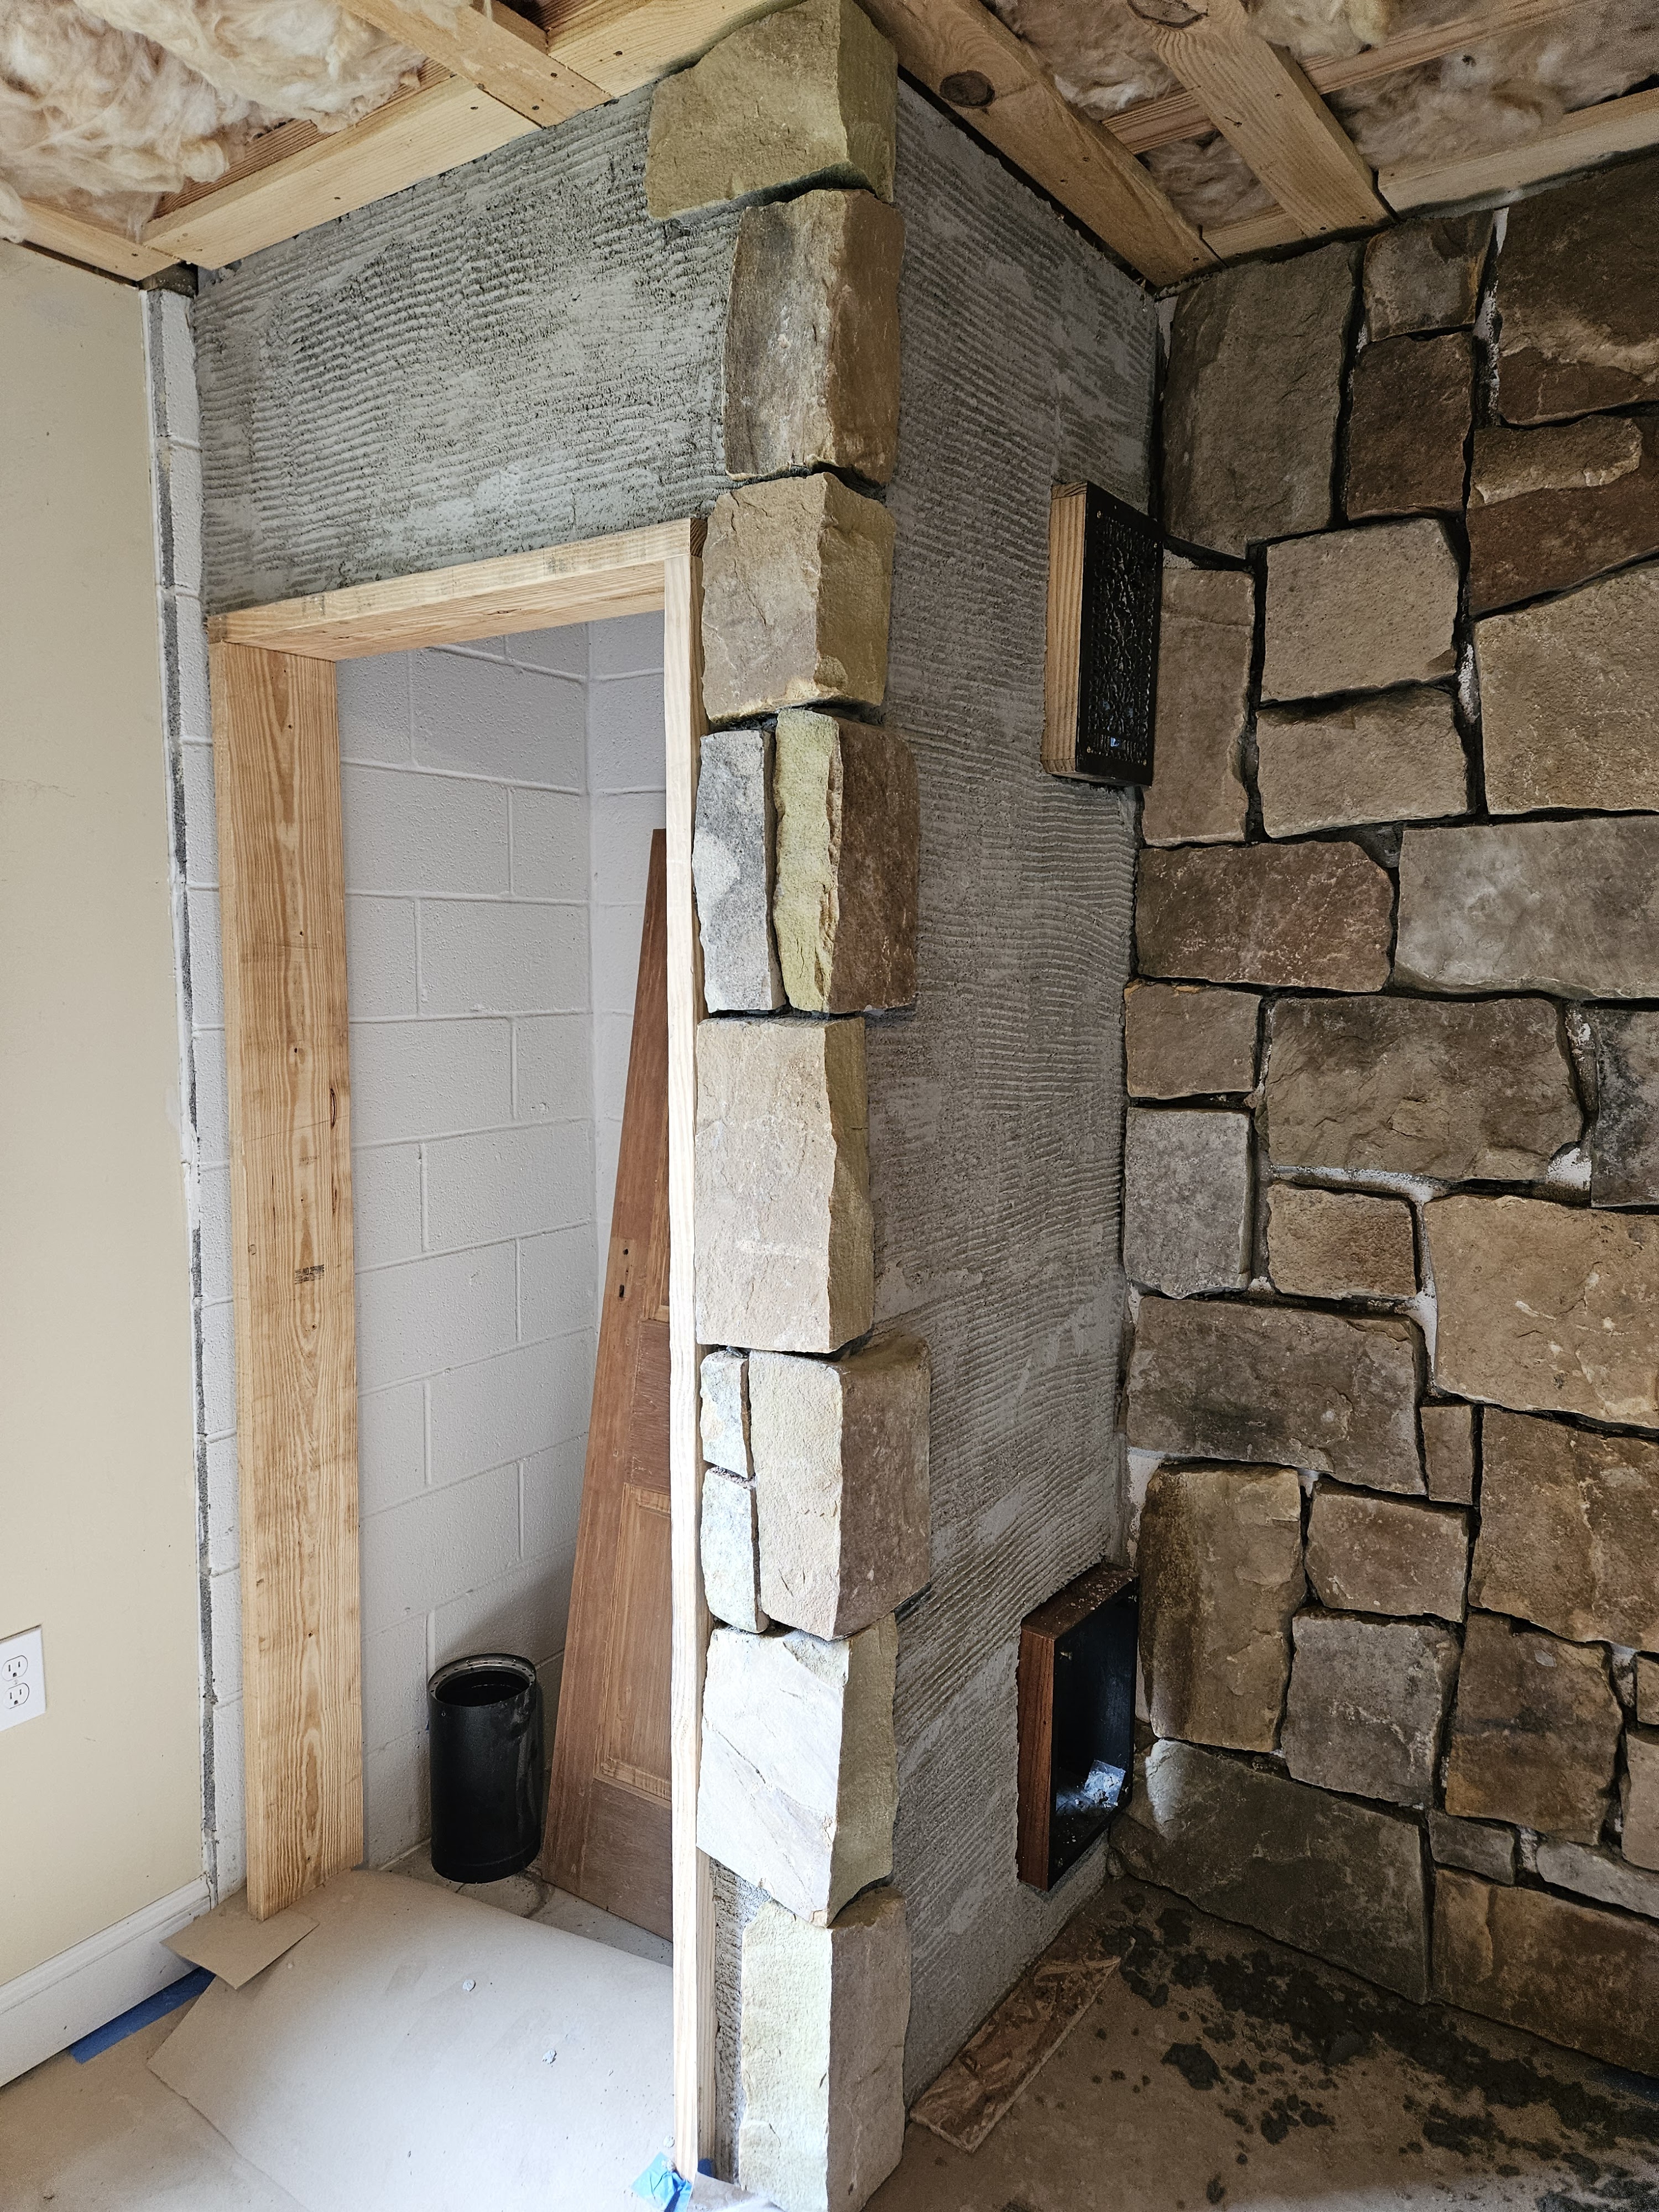
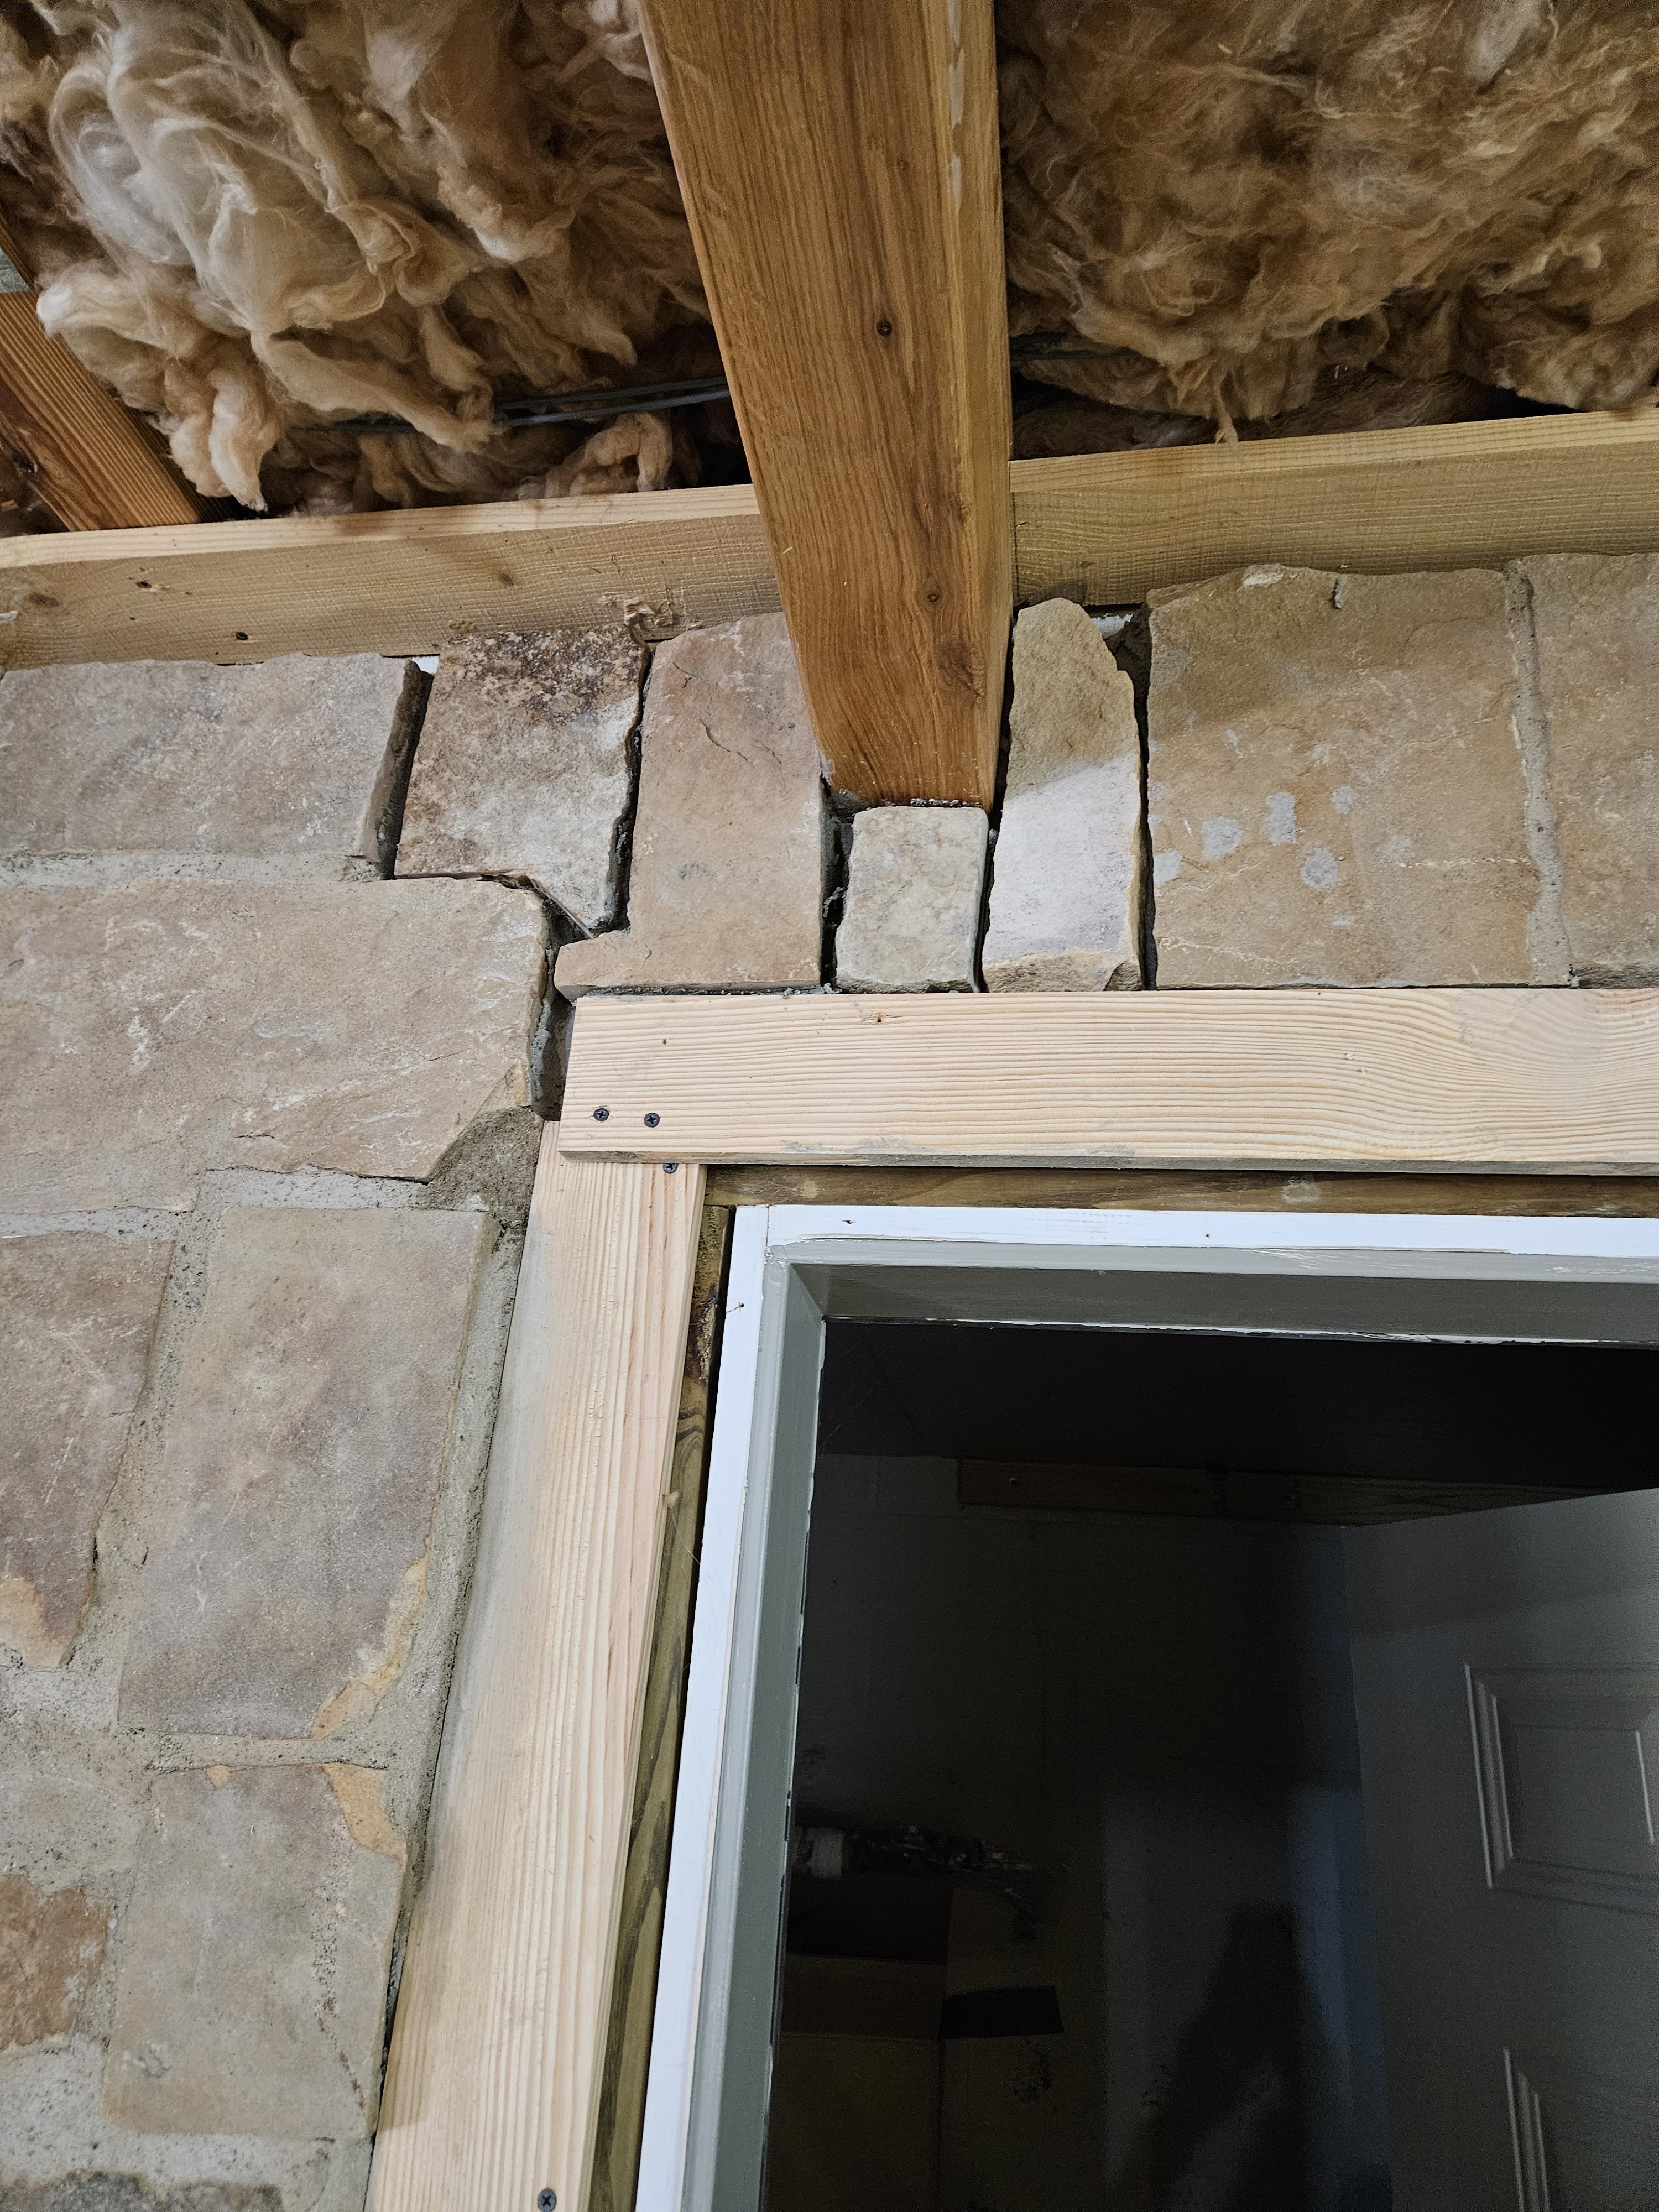
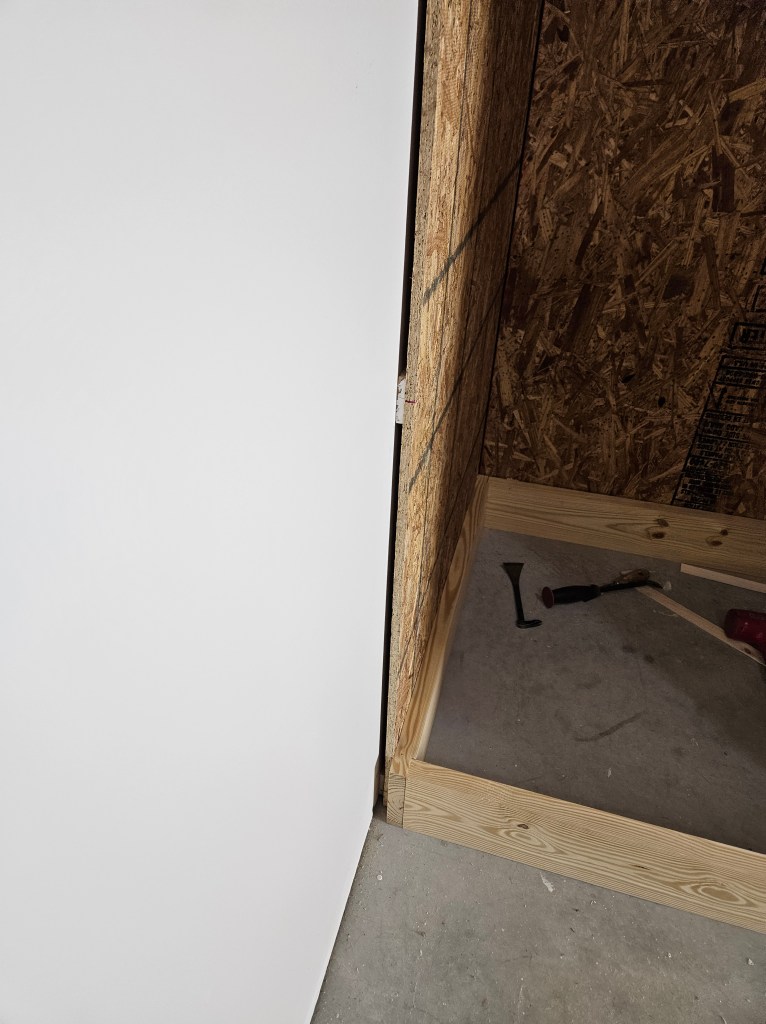
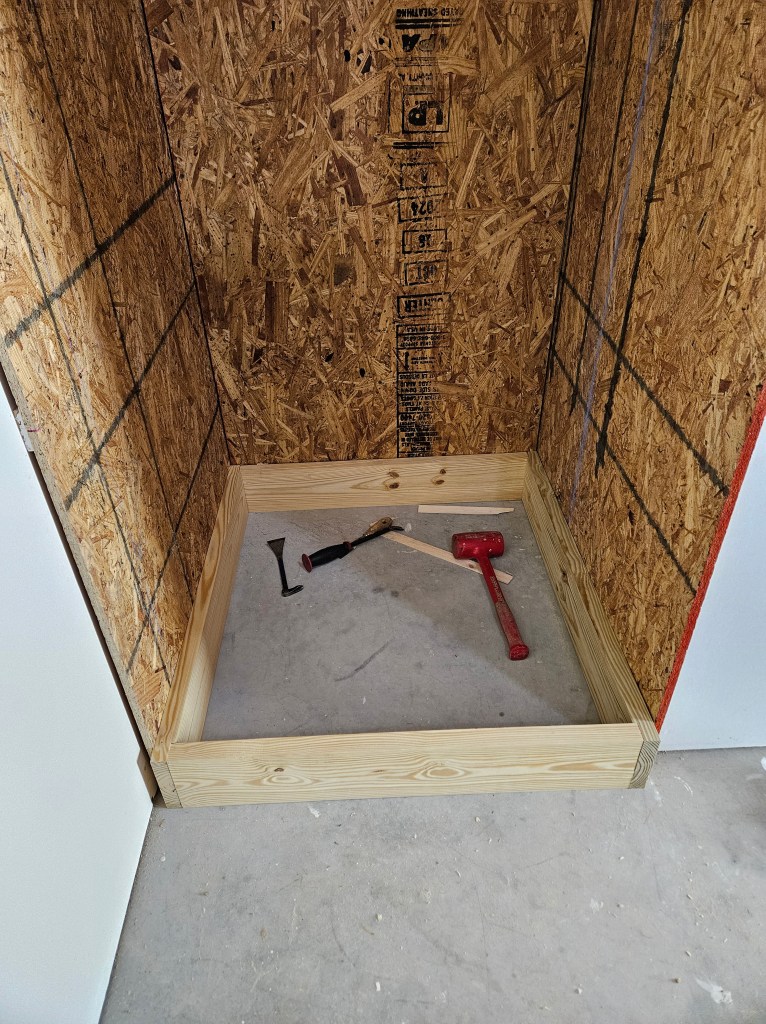
Those had to go down first. My husband mortared them to the floor so that they can’t move, and then started framing around them. He also had to build the frames for the antique doors that we are using for these closets so that we could build an envelope for them.
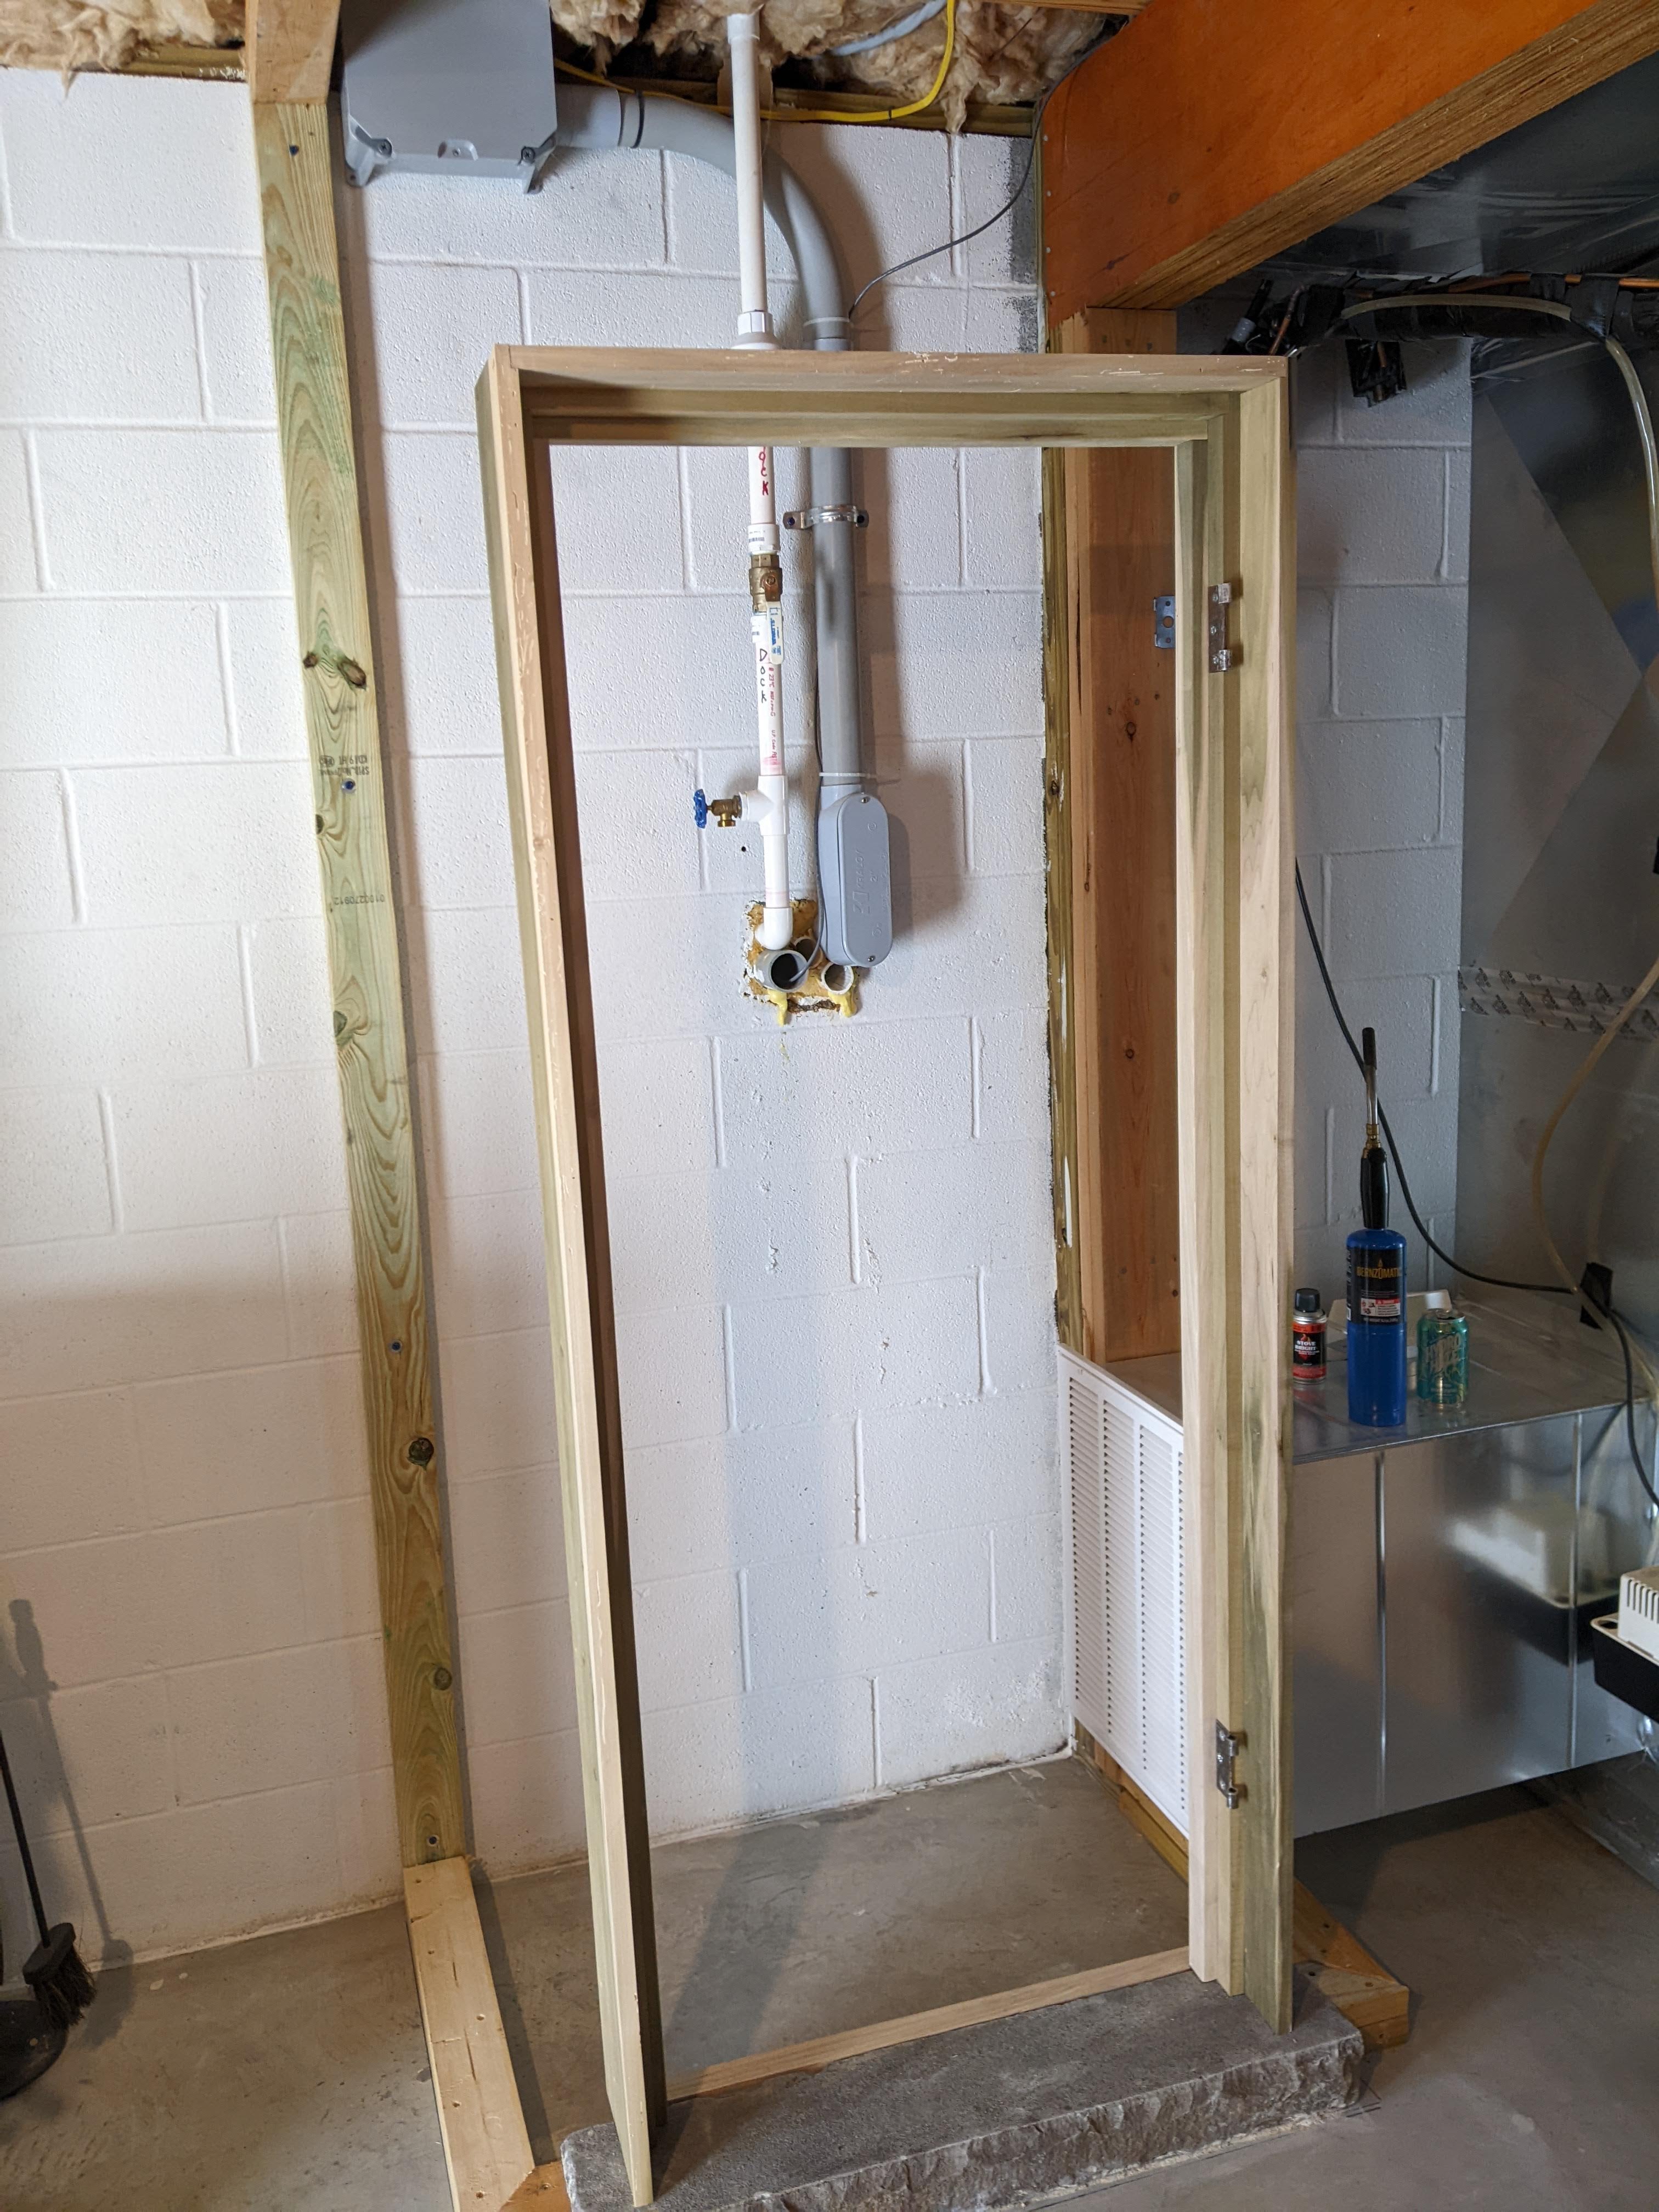
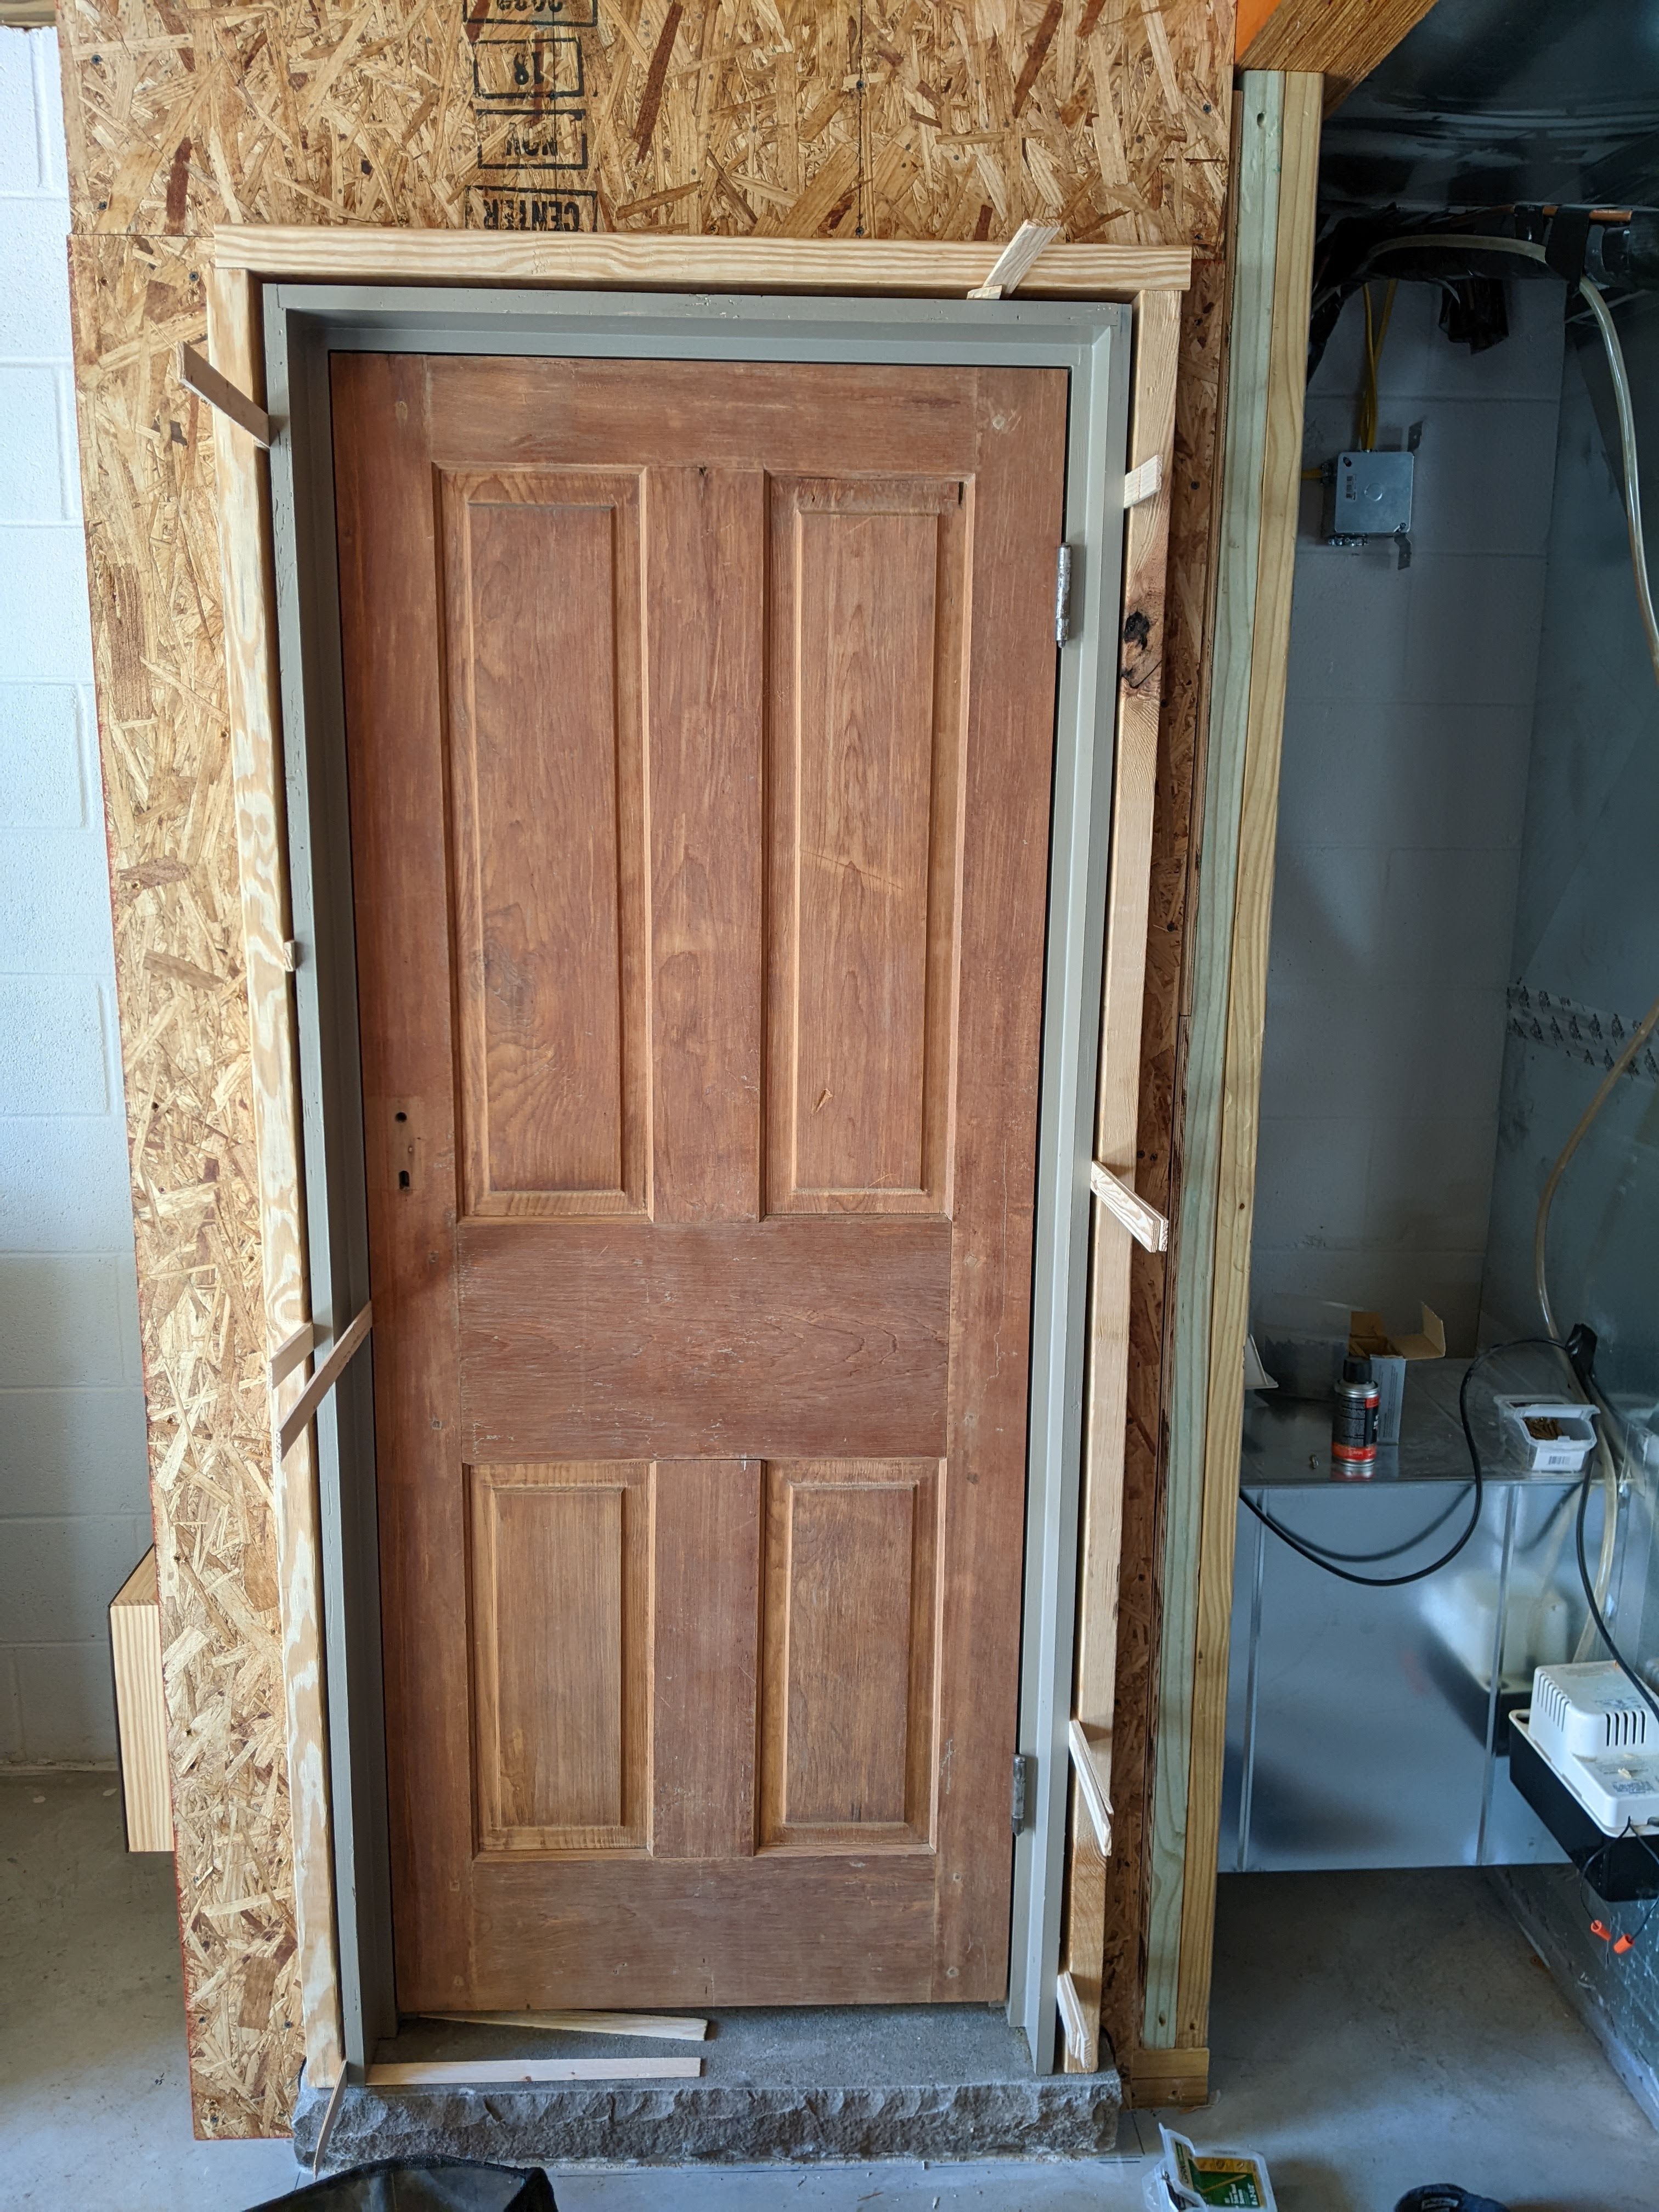
Here is the door frame sitting in place on top of the threshold. Mike built the door frame extra deep so that a good bit of the stone threshold will show when the closets are complete. We decided that even though the stone veneer product is only 1-1 1/4″ thick, we were going to need to build some stout walls for the closets to ensure that they didn’t buckle under the weight of the mortar, stone, and grout. We plan to overgrout the stones to give it an old stone foundation kind of look, so even more weight than is necessary from a functional standpoint. Mike started the framing with a pressure treated 2 x 4 against the floor and exterior block wall, and regular 2 x 4s on the ceiling. Then he put another 2 x 4 on top of that. Then we added more 2 x 4’s to attach the OSB and cement board to.
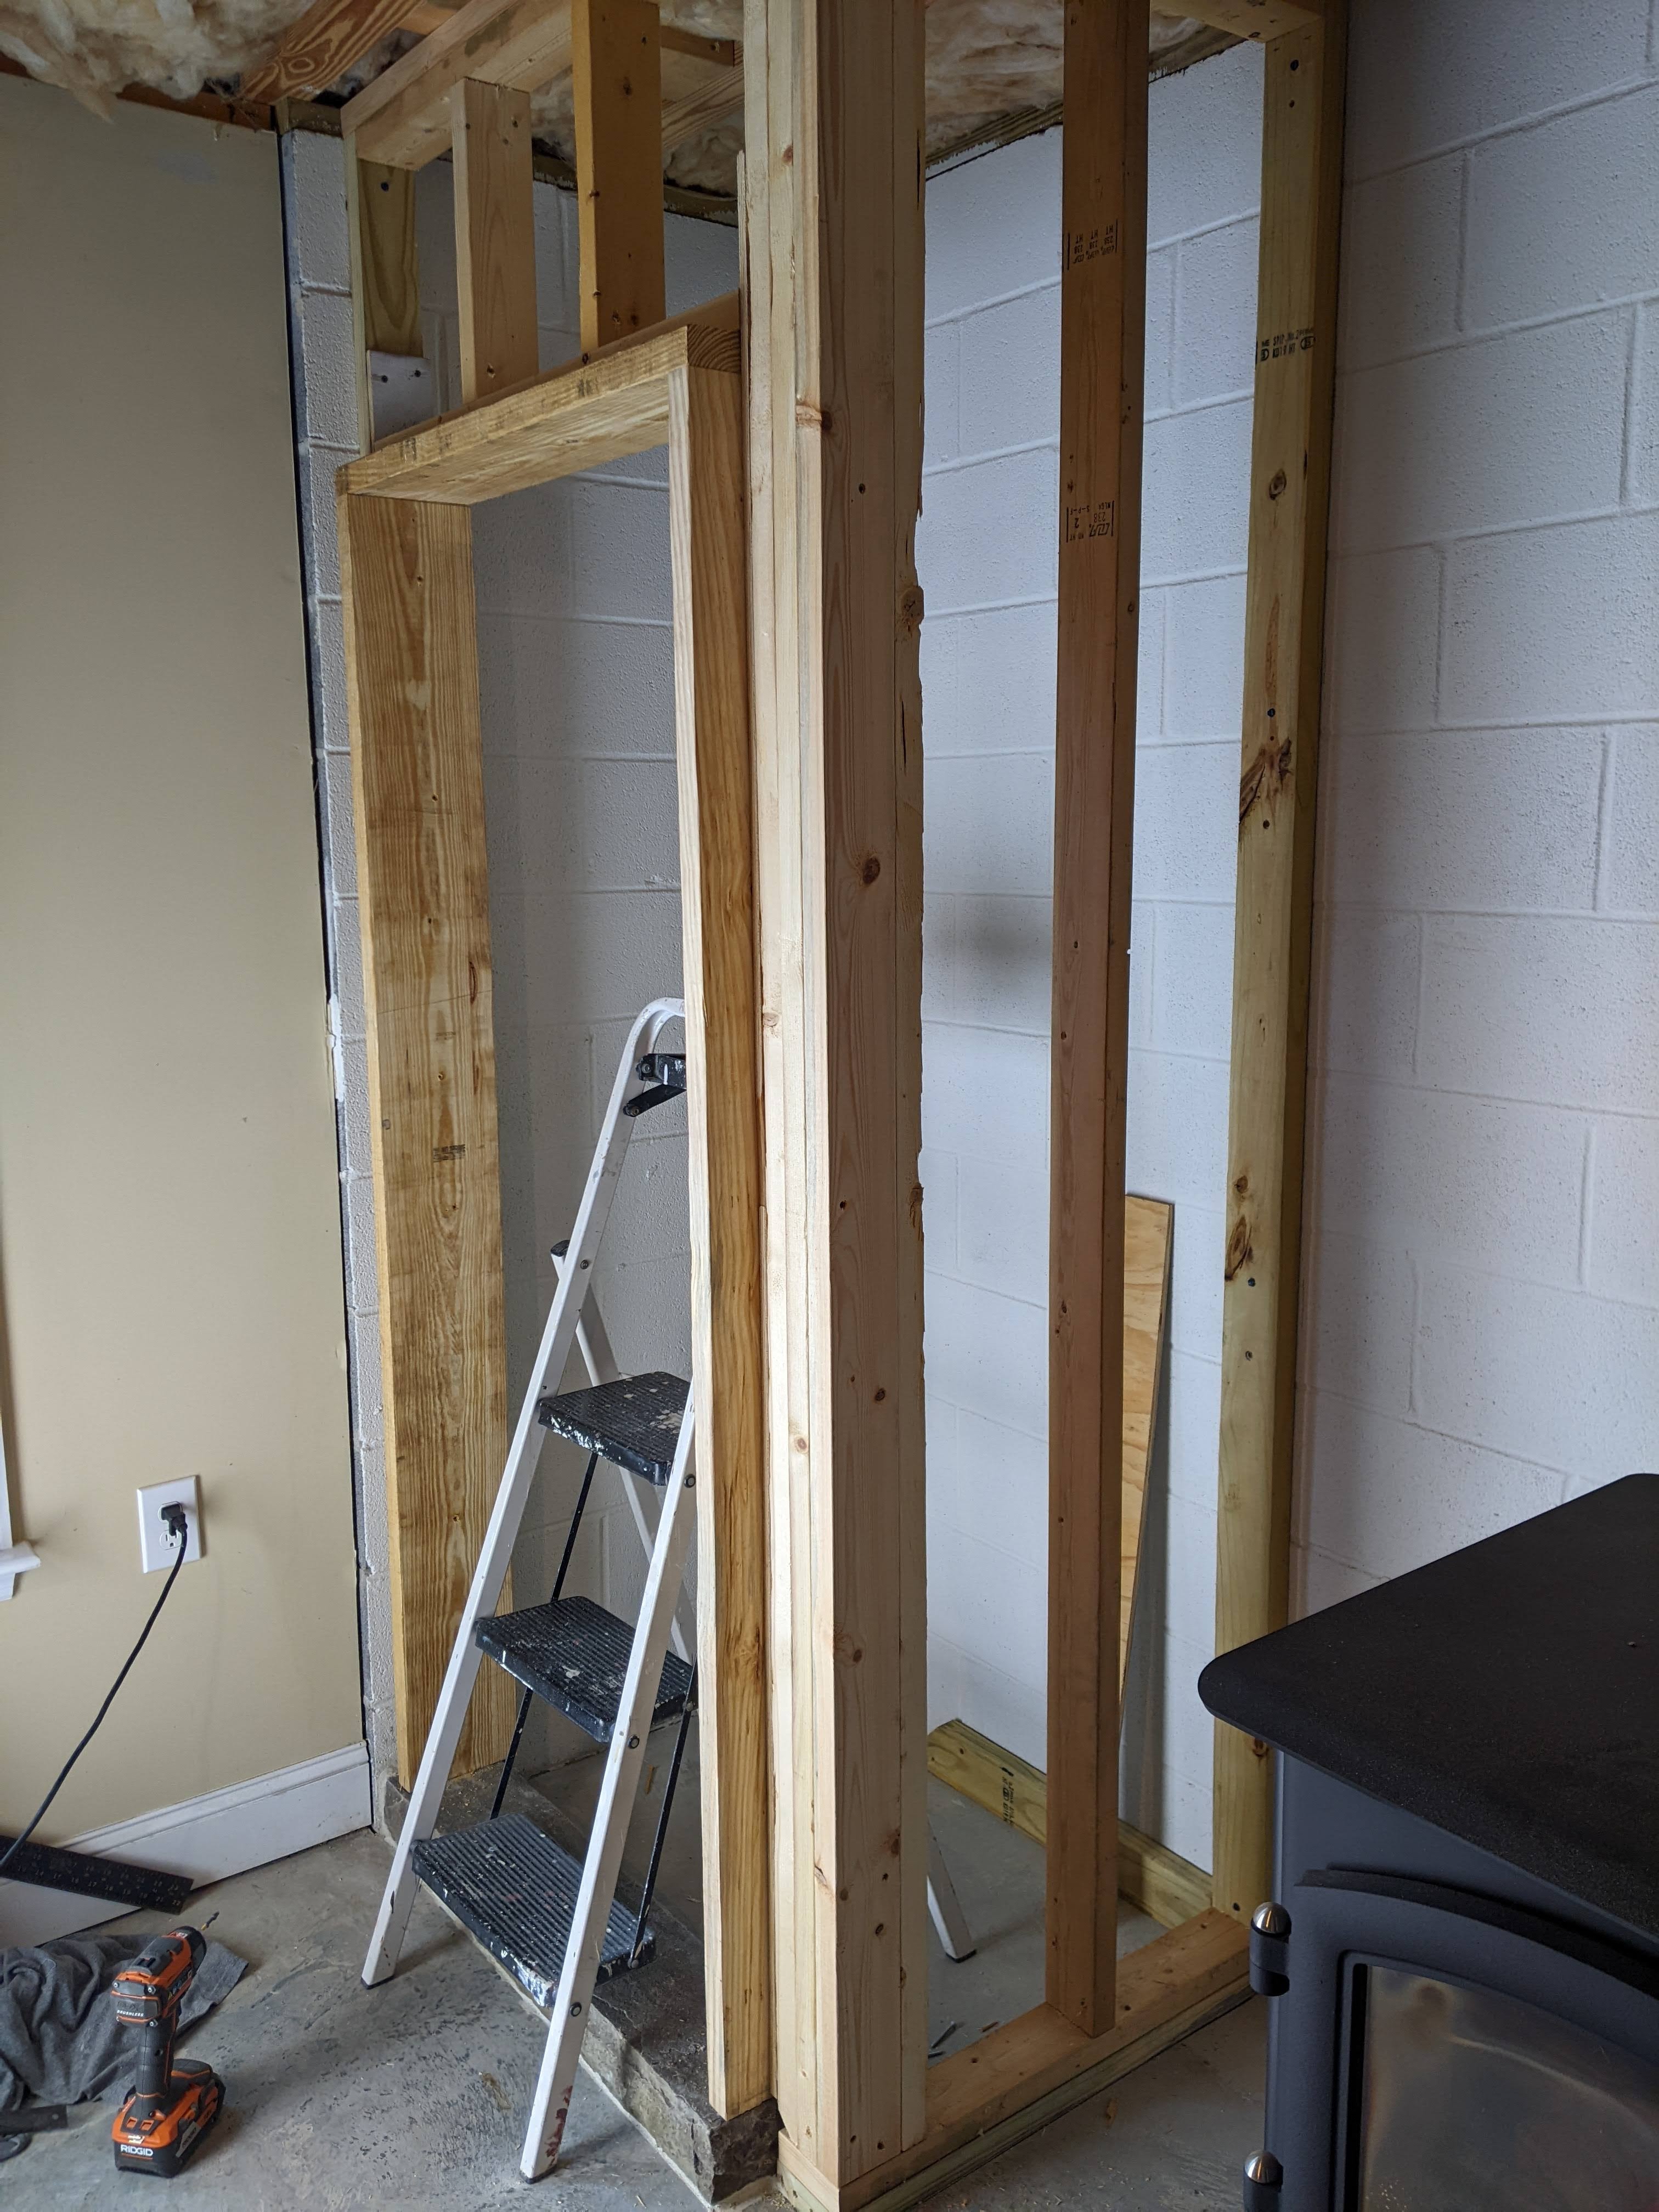
It’s hard to tell from the photos, but these closets are only about 6 square feet of floor space.
Both closets are just about framed up, but we have several more items that we have to take care of before we can close them up with OSB and cement board on the outside, and drywall on the inside.
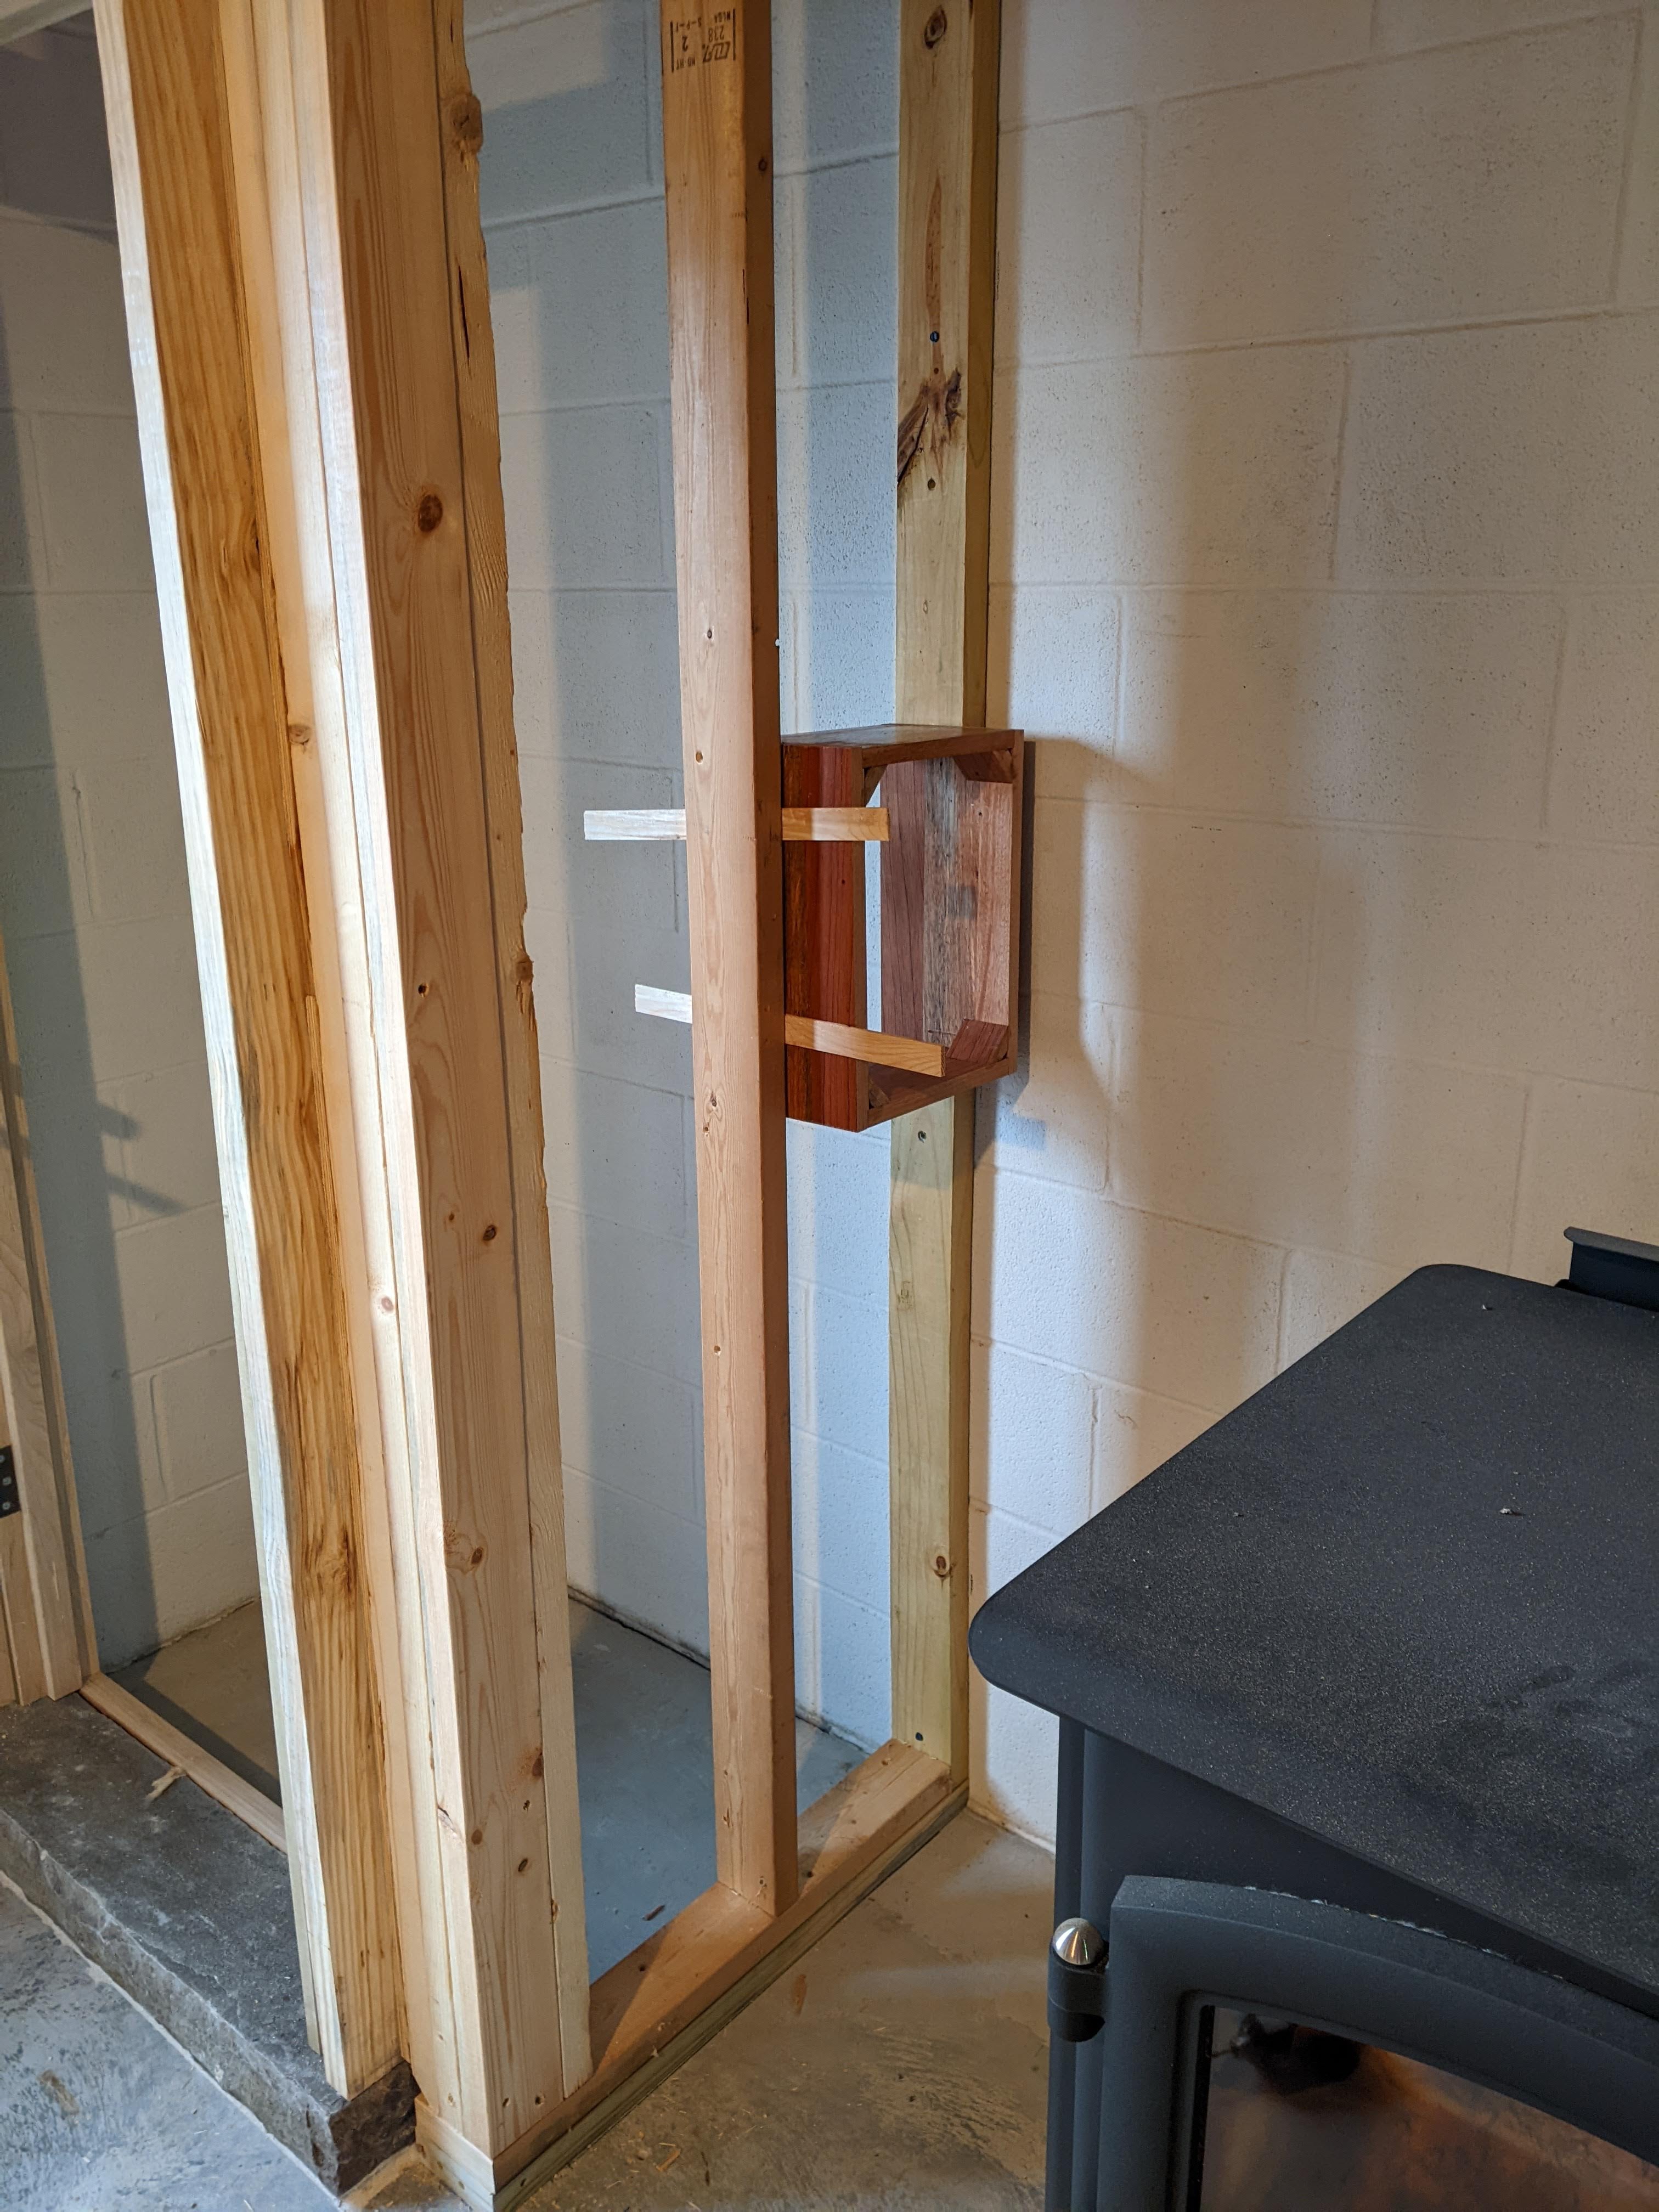
We are going to add a fan to the closet on the left of the stove to blow air across the stove to optimize the heating in the basement. We will also need to add an intake vent to that same closet. We built a box for one of the vents and dry fit it. Yes, it’s mahogany because that is what we had.
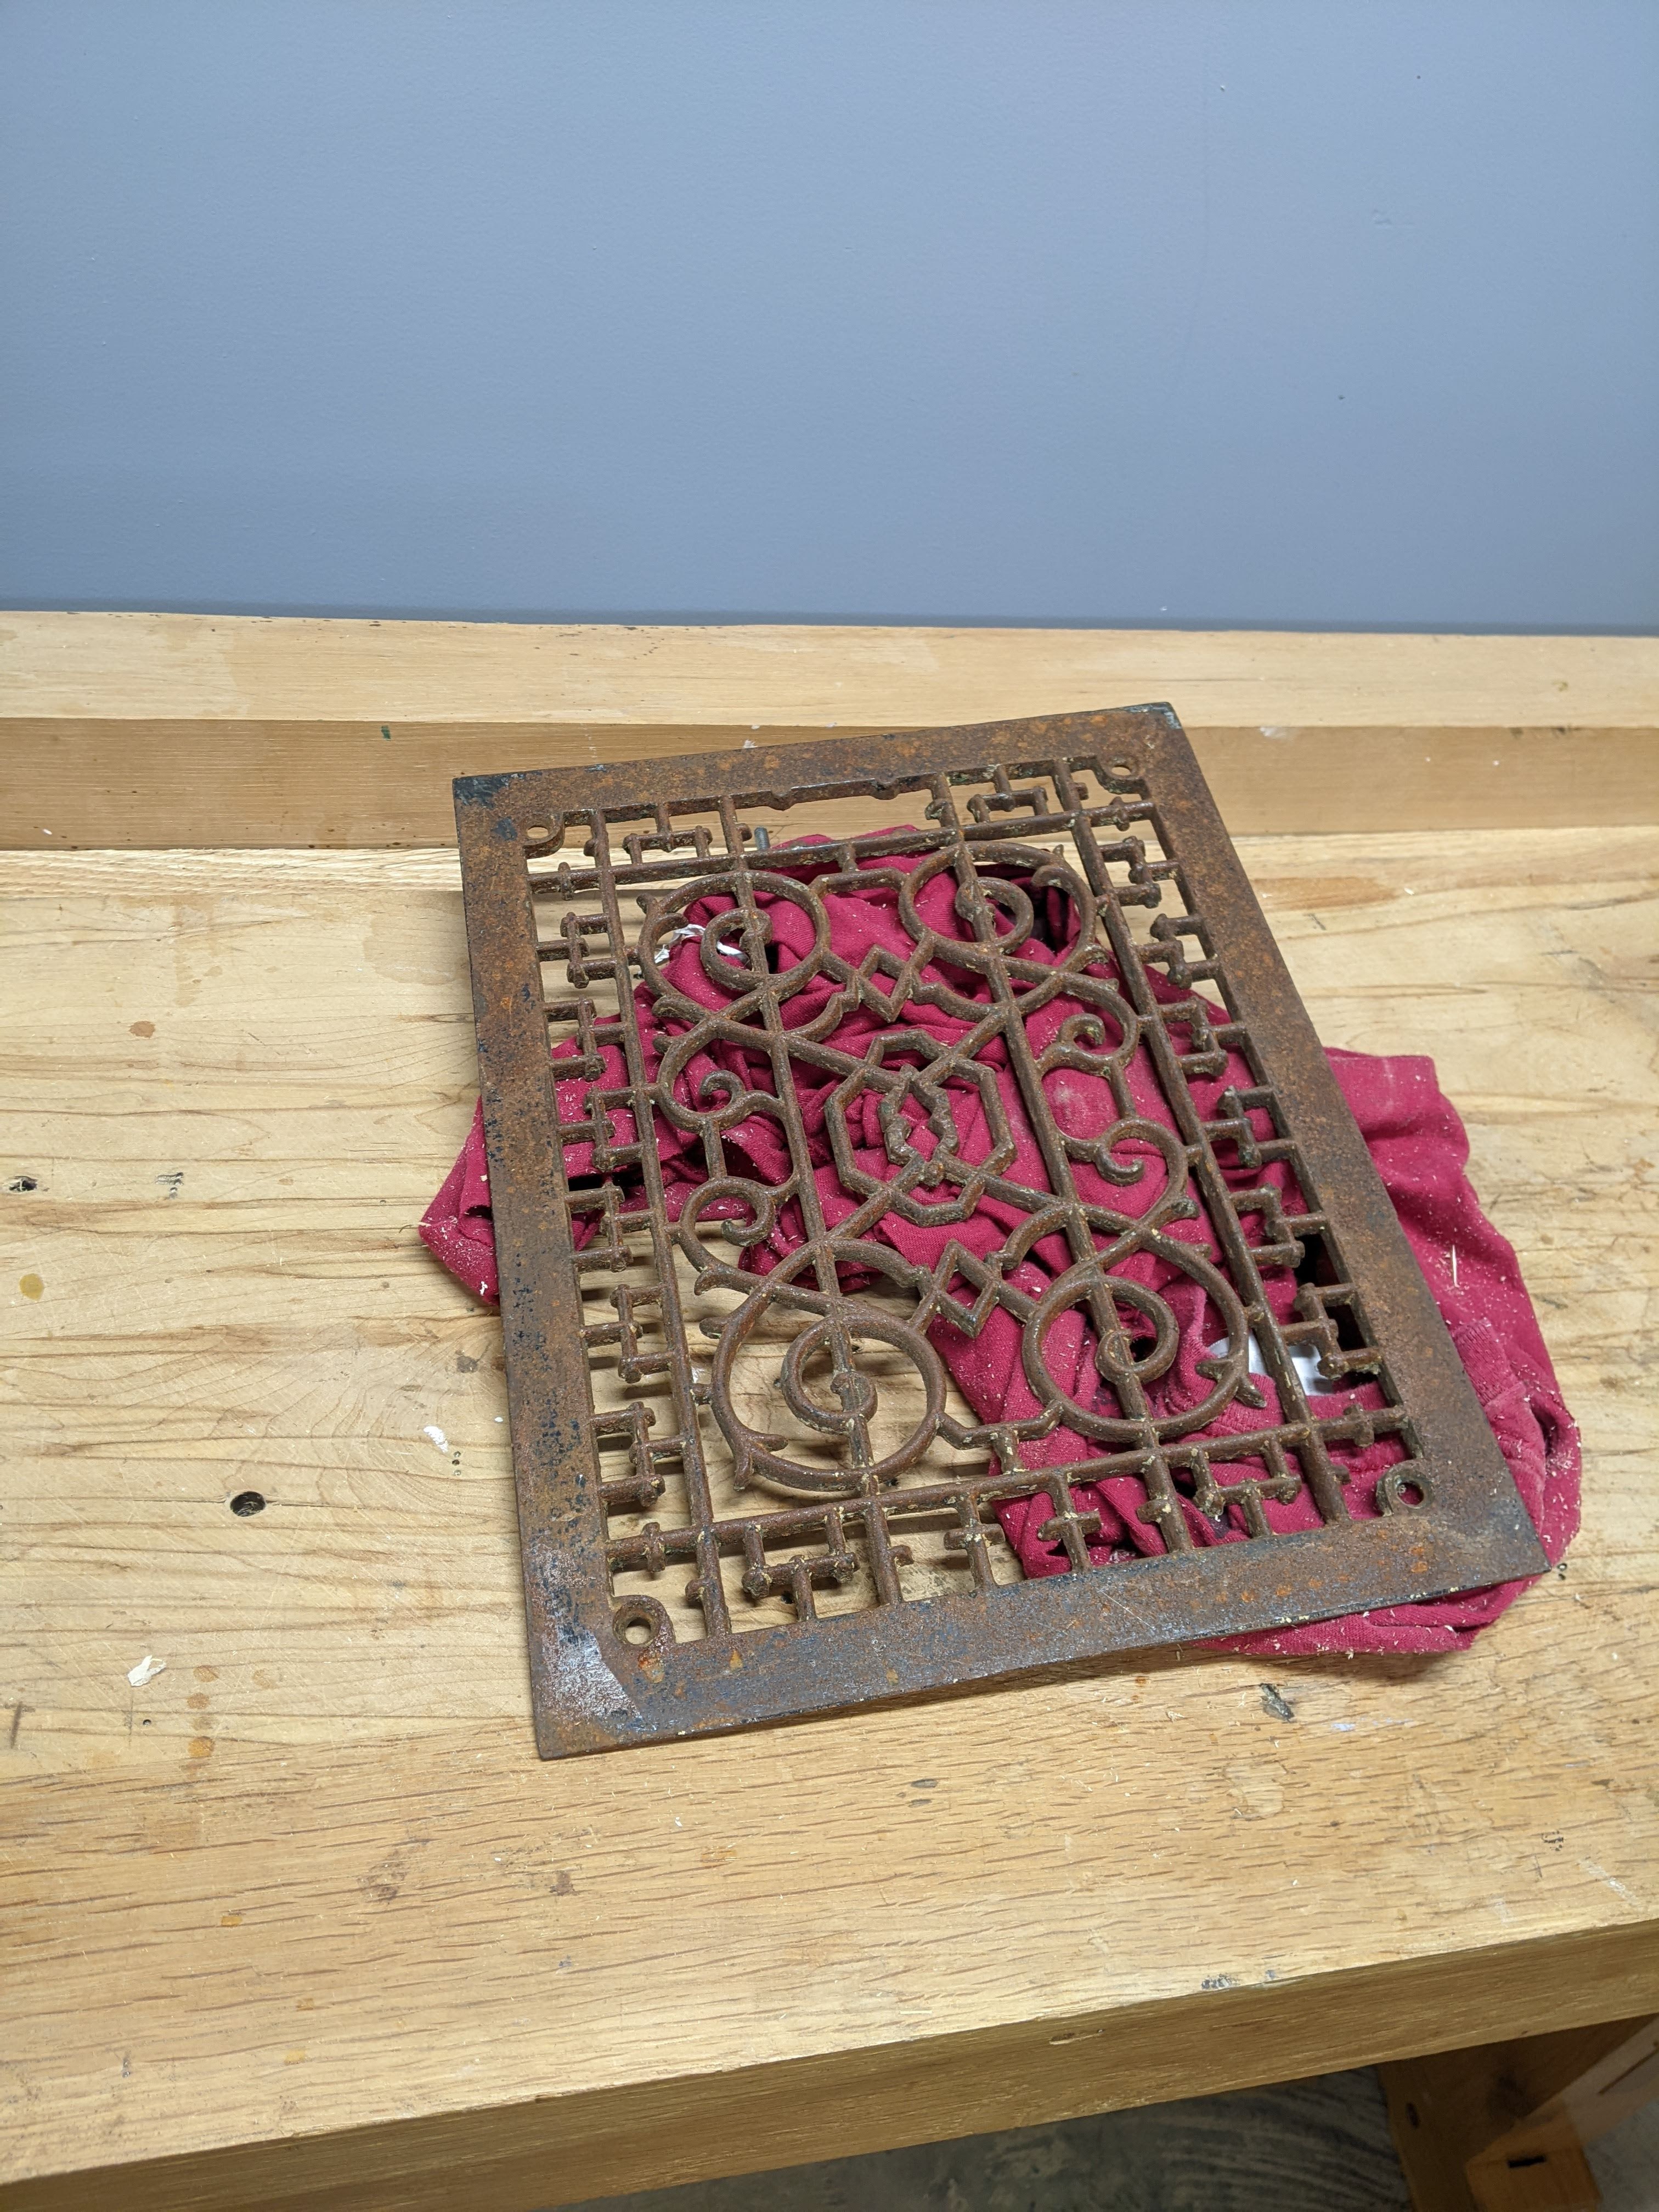
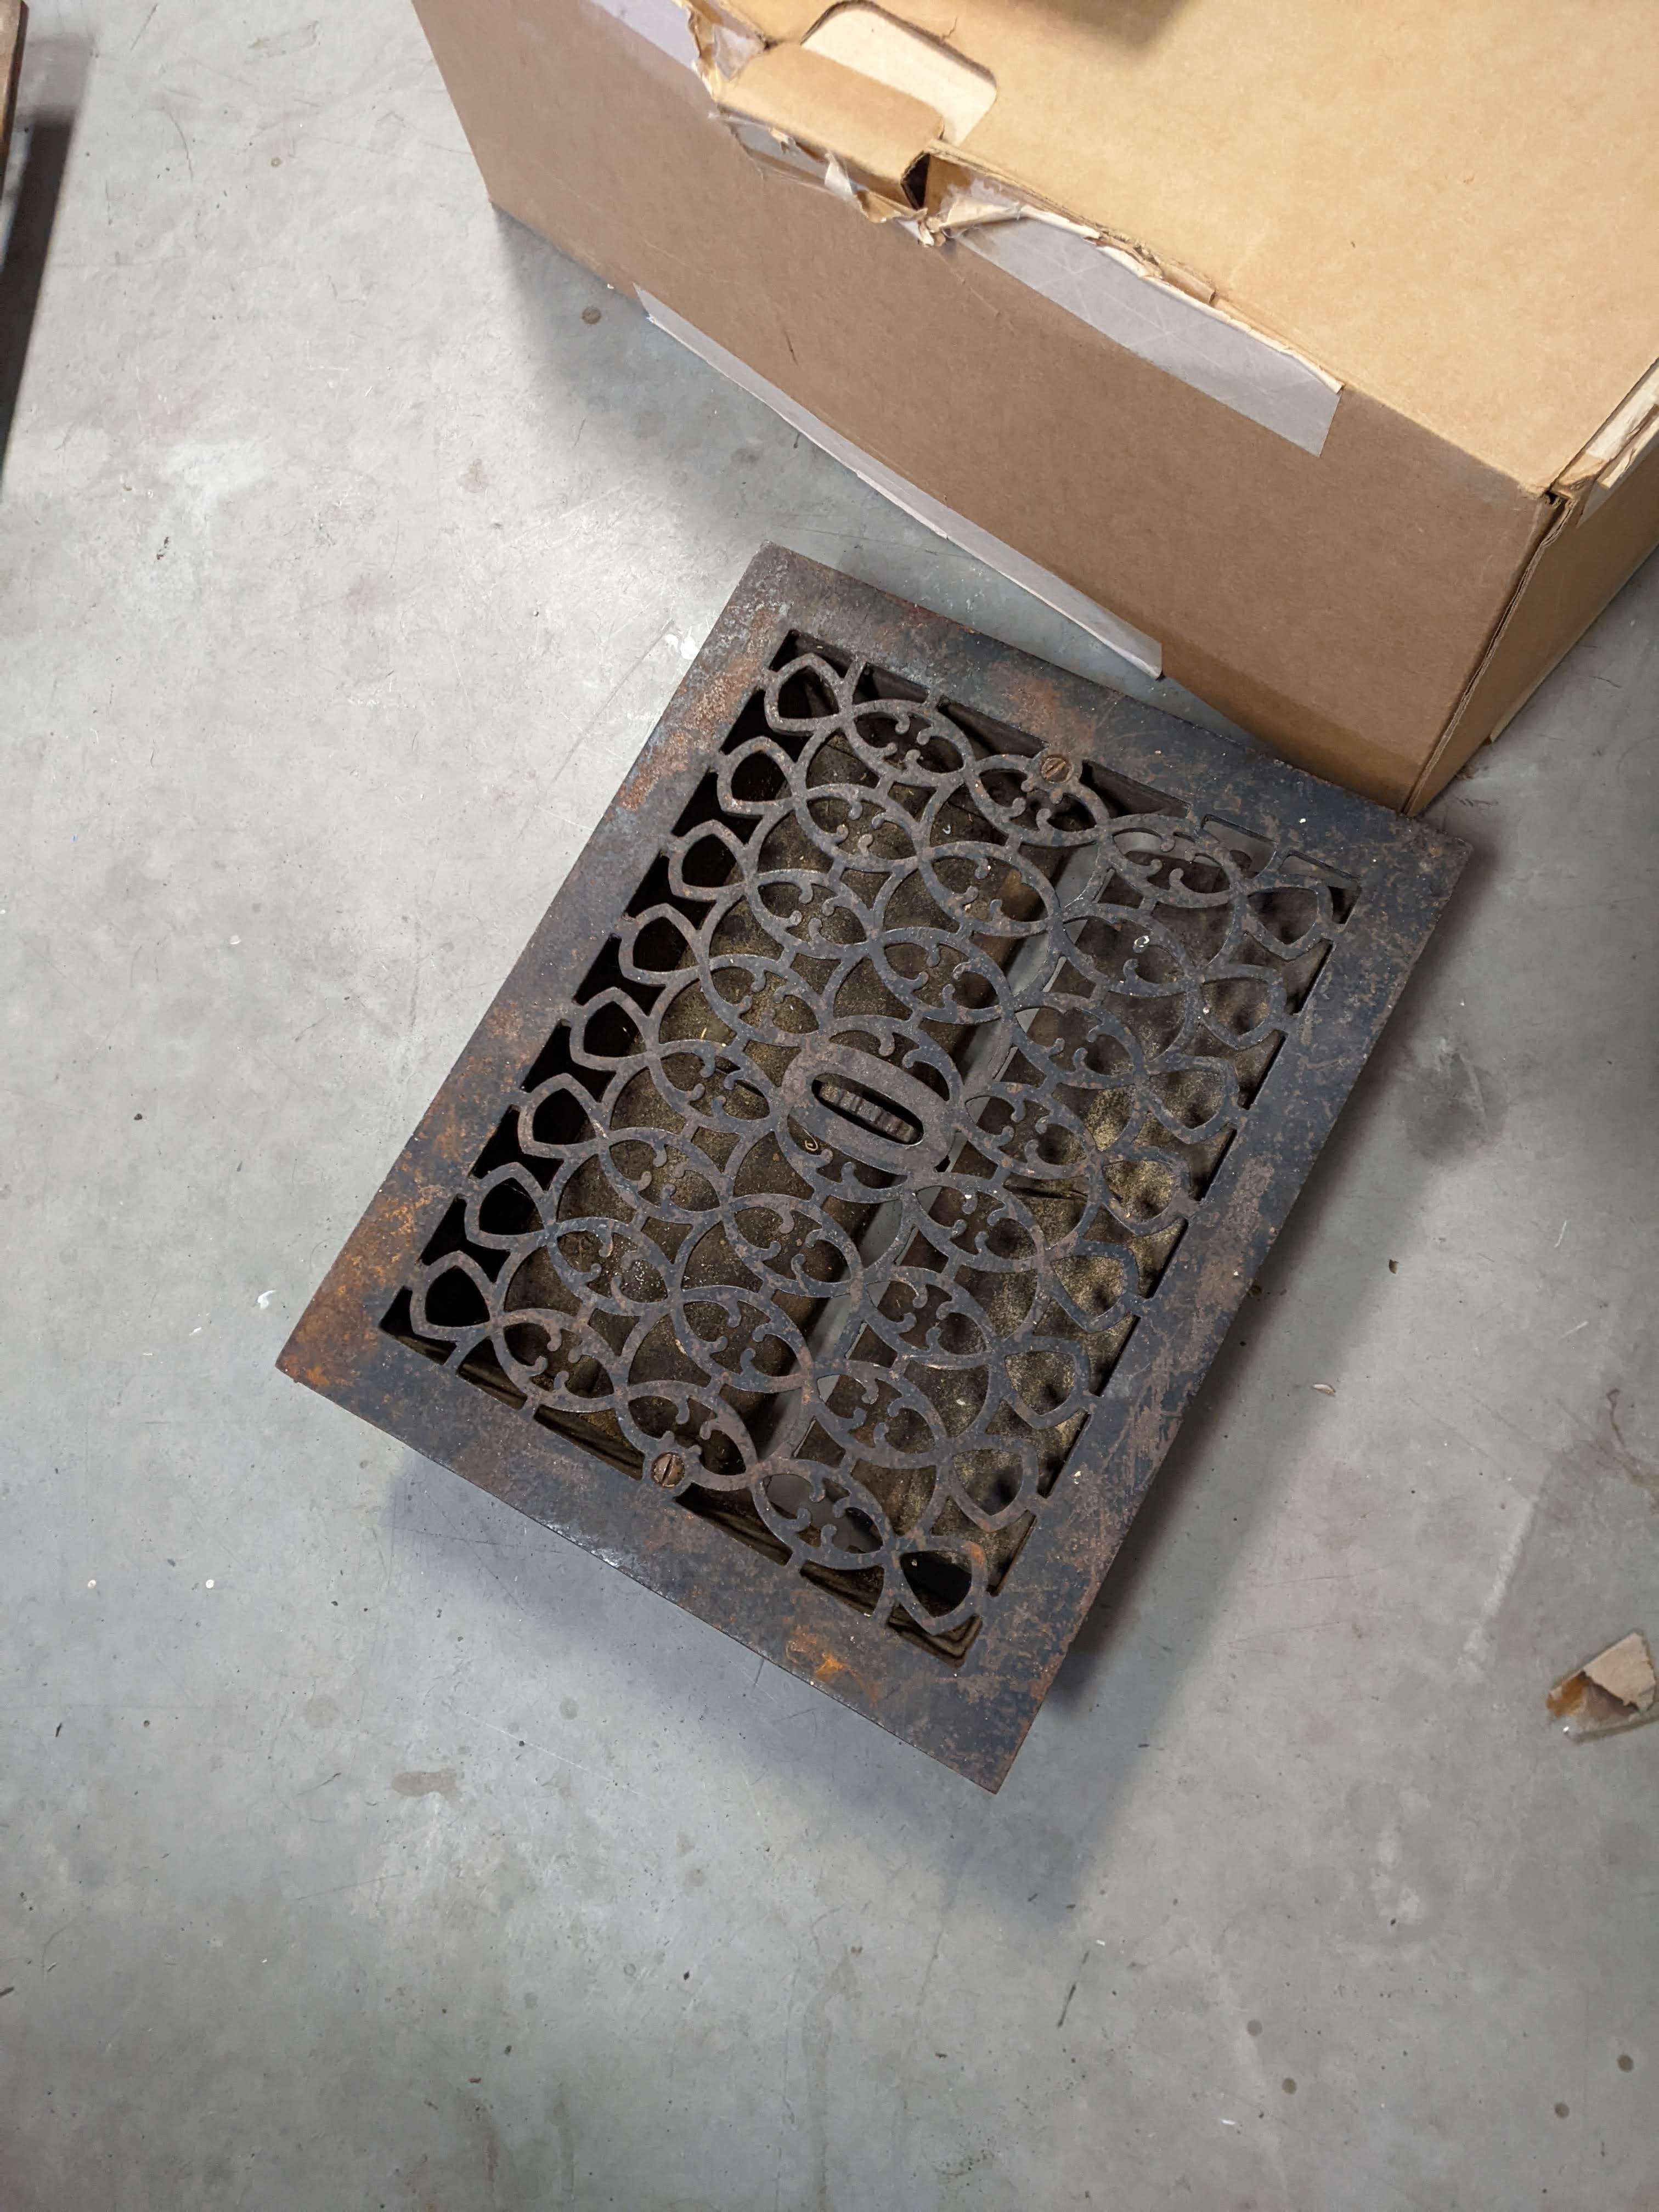
These are the vent grates for that closet. They are the same size, but not the same design. We need to take a wire brush to them and paint them and the boxes that they attach to black. Then we need to install the wood boxes into the framing before cladding the exterior and interior walls.
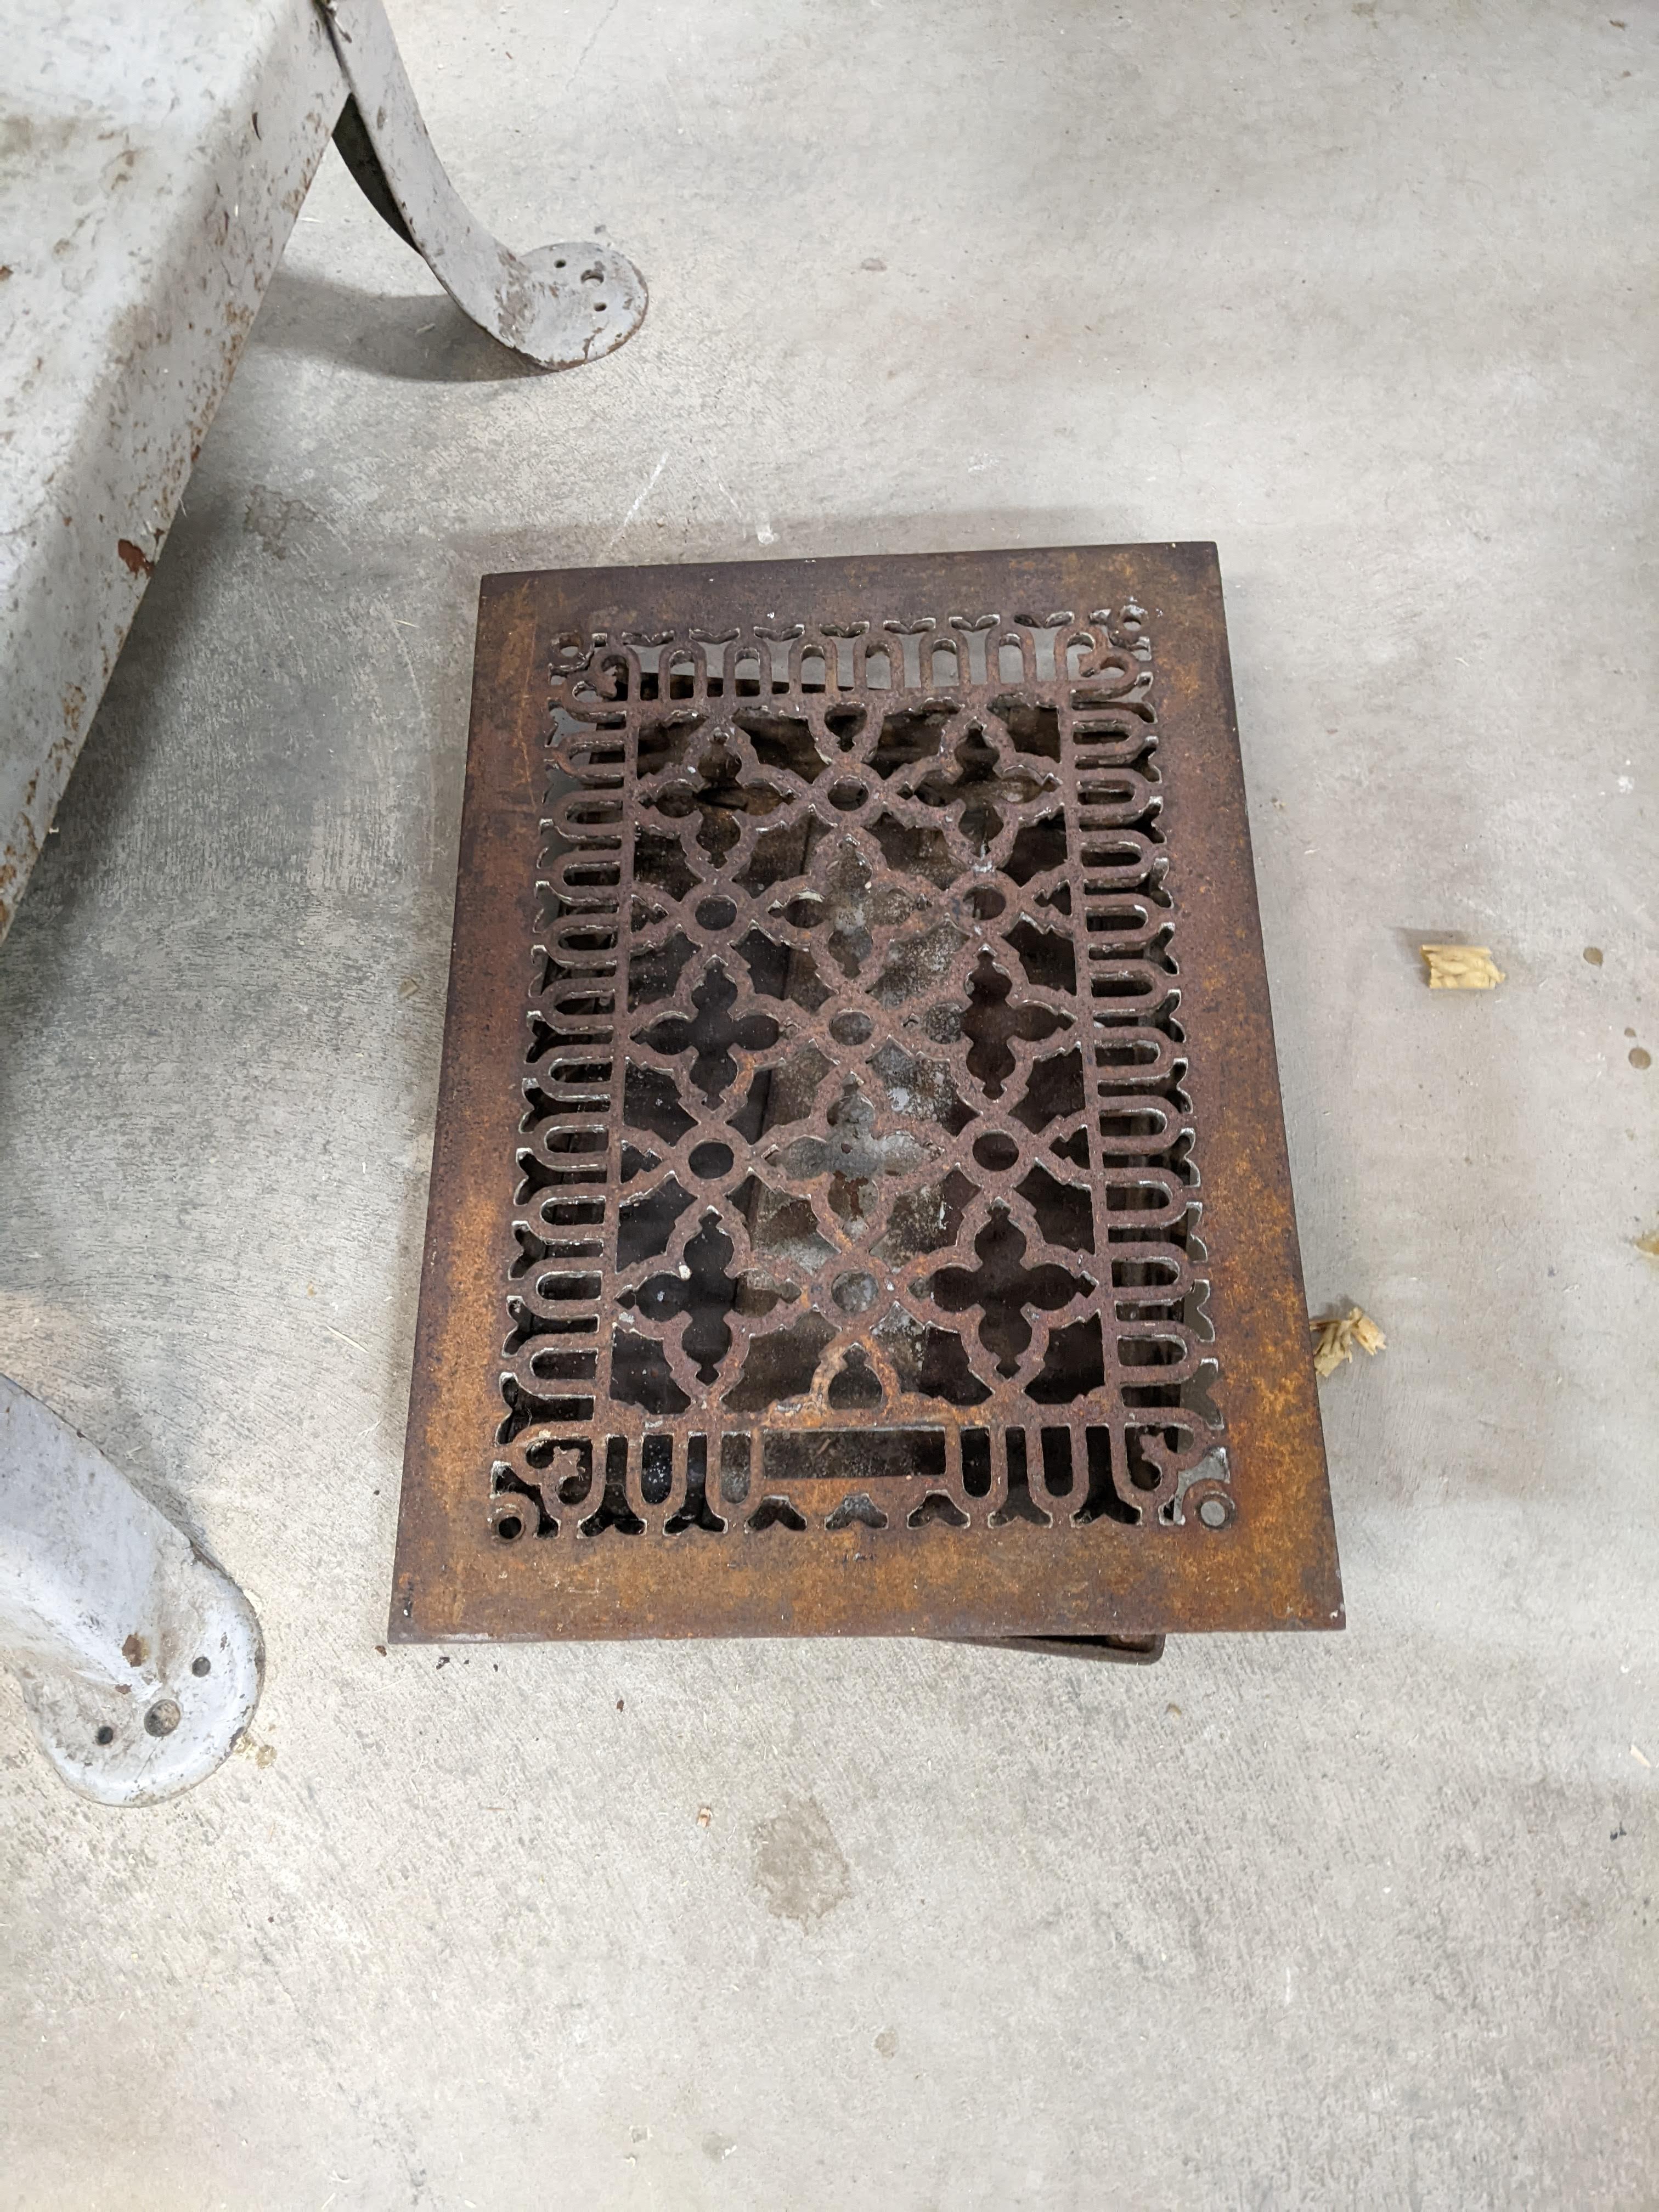
We will add a larger grate to the closet on the right for airflow to the air return for the HVAC unit which is now inside that closet. It isn’t strictly necessary for the unit to operate properly because there is a sufficiently sized air return upstairs, but it will help the heat from the stove circulate throughout the house. Here is a photo of it. It’s nearly twice the size of the other two and retains its louvers.
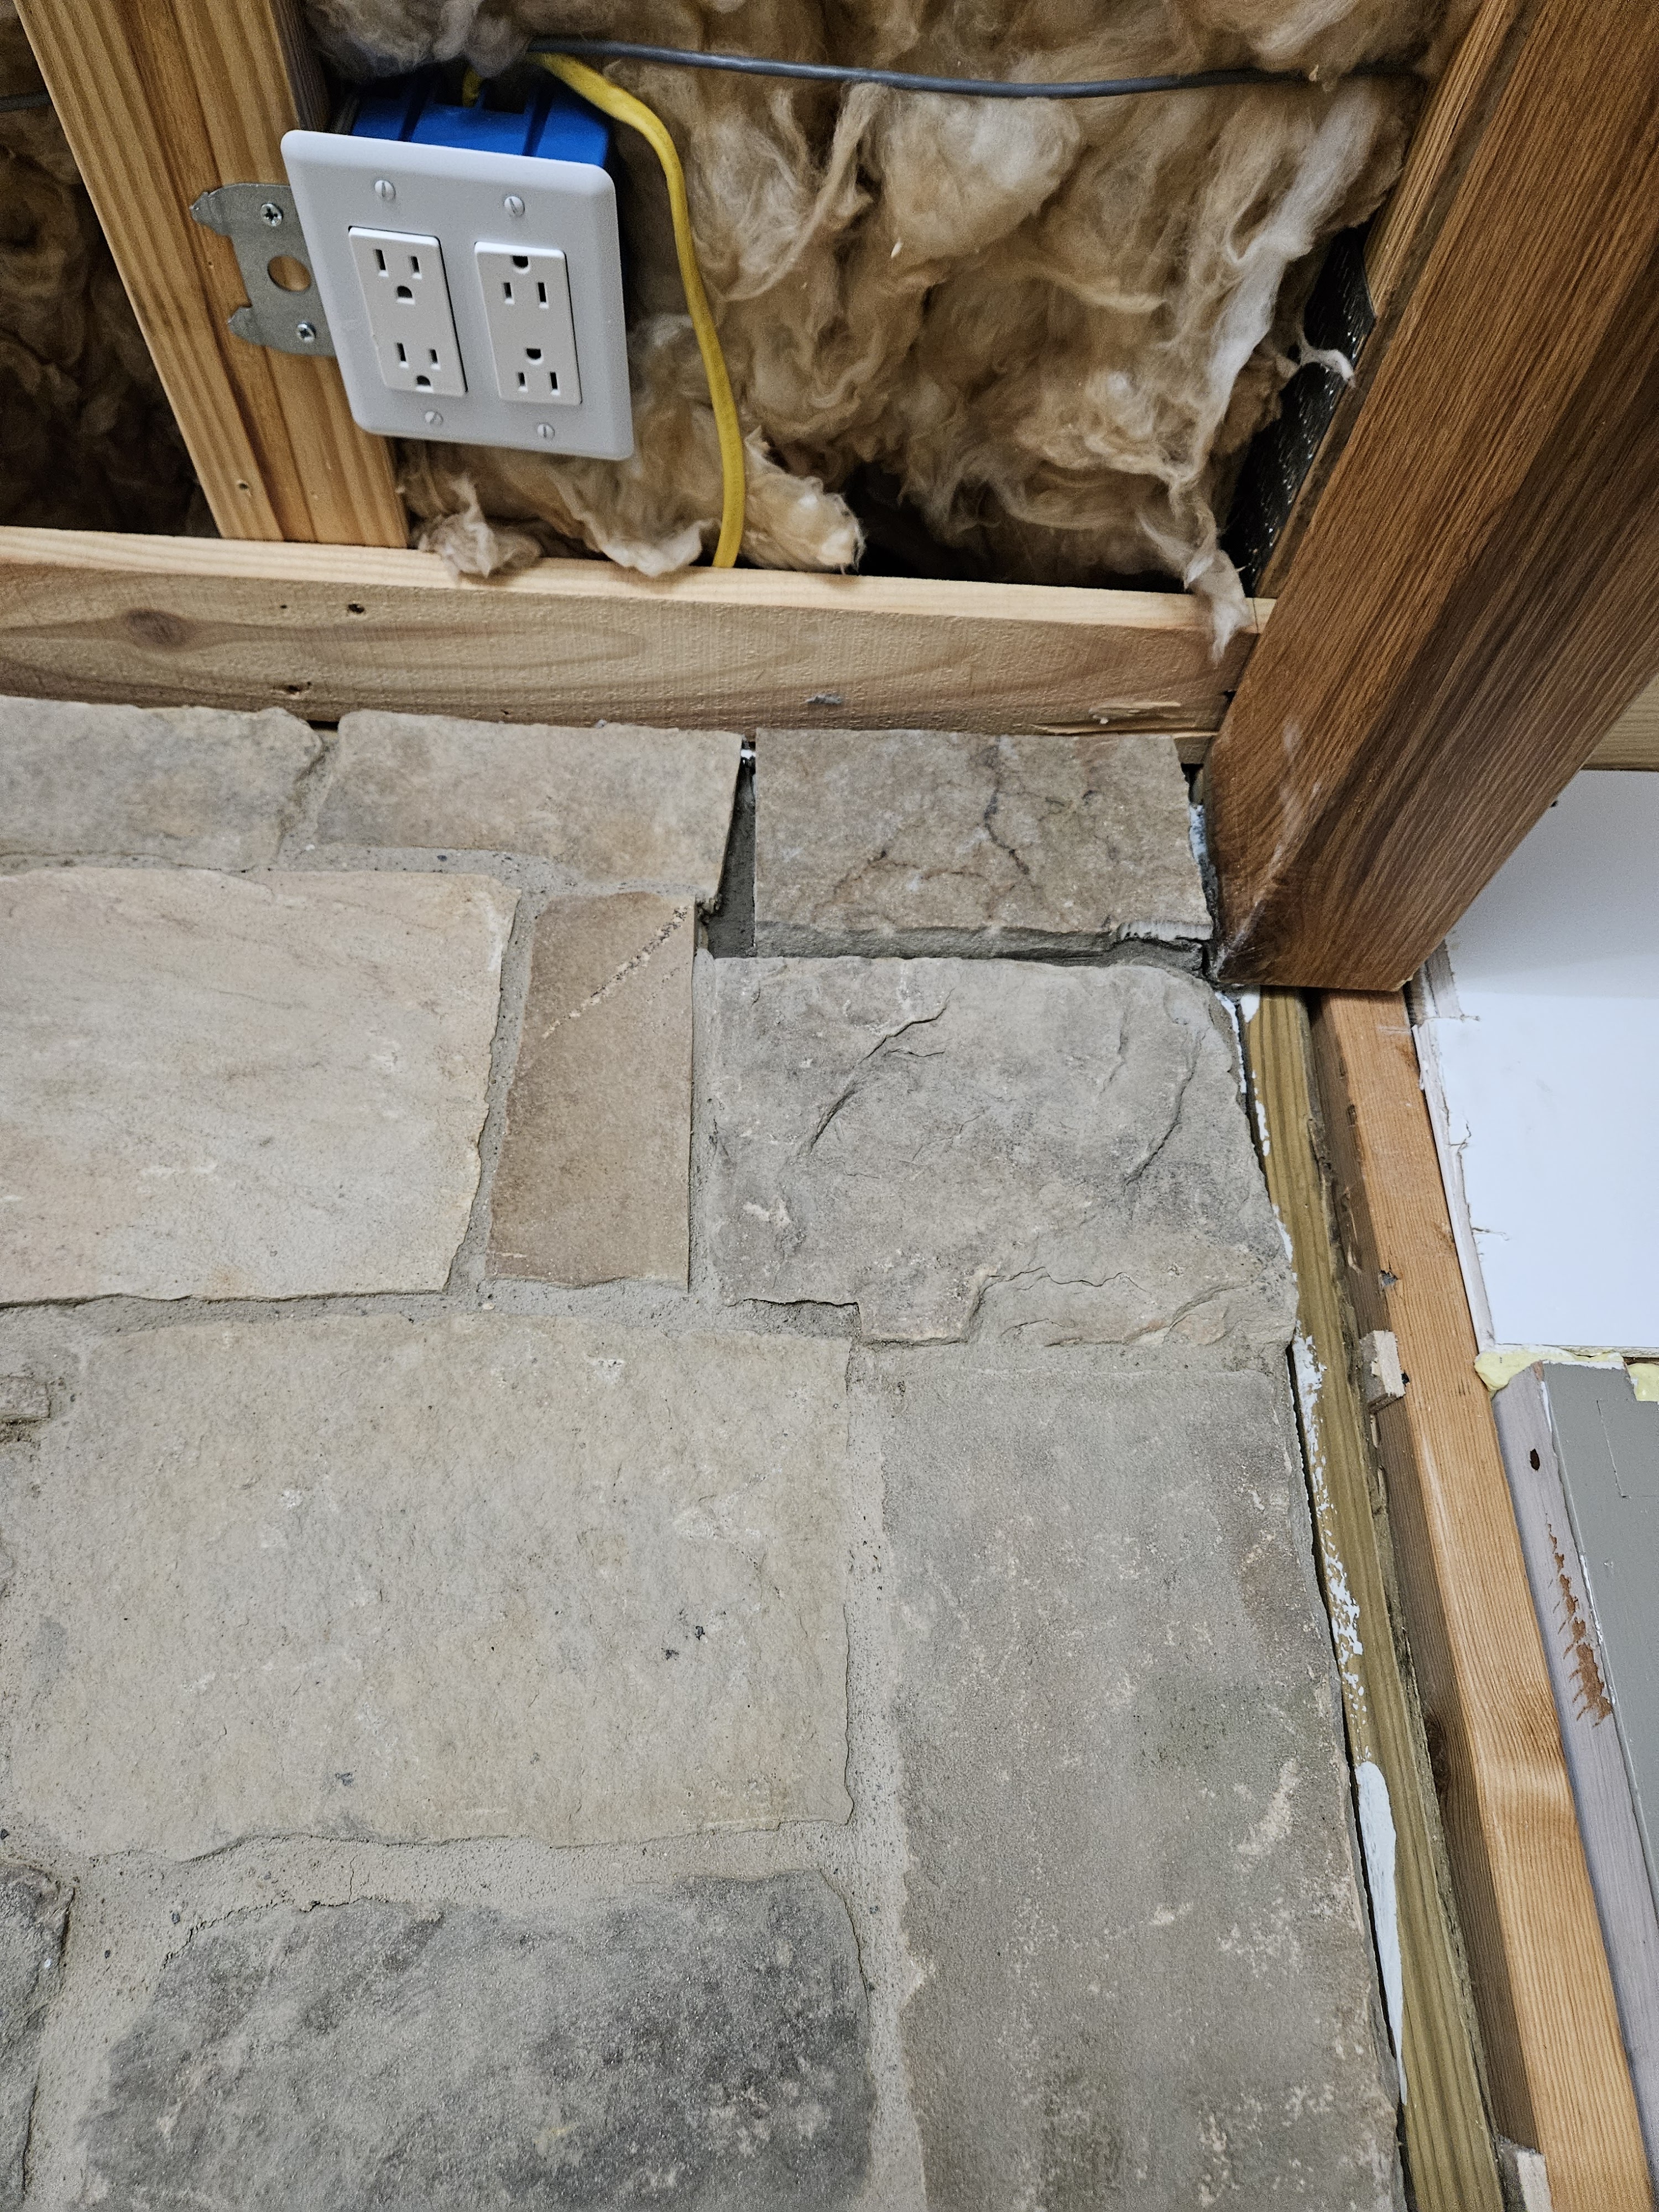
We need to bring power to both closets for the fan, a light, and an outlet in the closet on the left, and a light and outlet on right. (Mike plans to mount a shop vac inside that closet for easy cleanup of ashes and debris.)
At this point, I don’t think that we will put a floor down inside the closet, but we’ll see.
Our plan is to leave all the doors a natural wood color, but we are going to paint the woodwork. We want to avoid getting paint on any of the stone, so the door frames will need to be painted before we install them in the closets. We looked at the door color and the stone color last night and decided on Brushwood from ICI Dulux. I’m going to pick that up today.
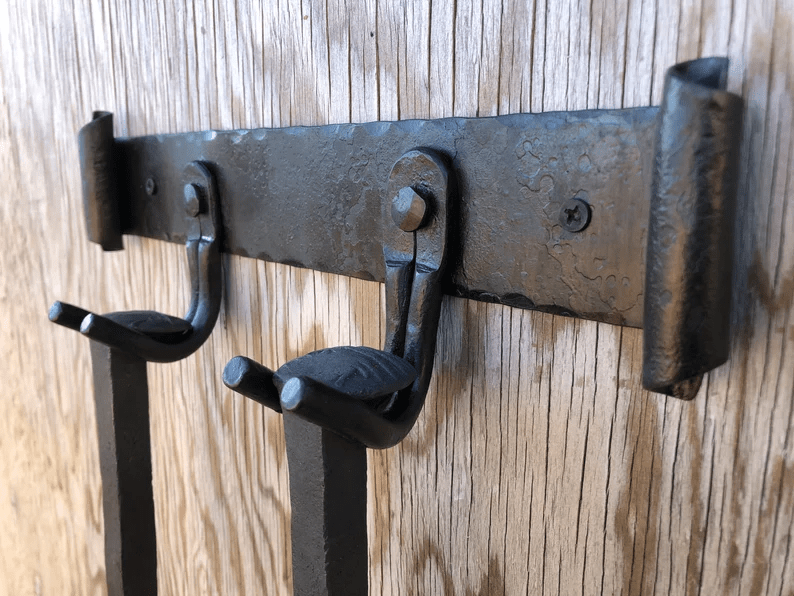
We also want a wall mounted fireplace tool set to keep as many items off the floor as possible. I found a set on Etsy that only comes with a poker and a shovel which is what my husband wants. We will need to figure out how to mount it securely before the OSB and cement board goes up. Here is a photo from the seller’s listing. I love the rustic look of it.
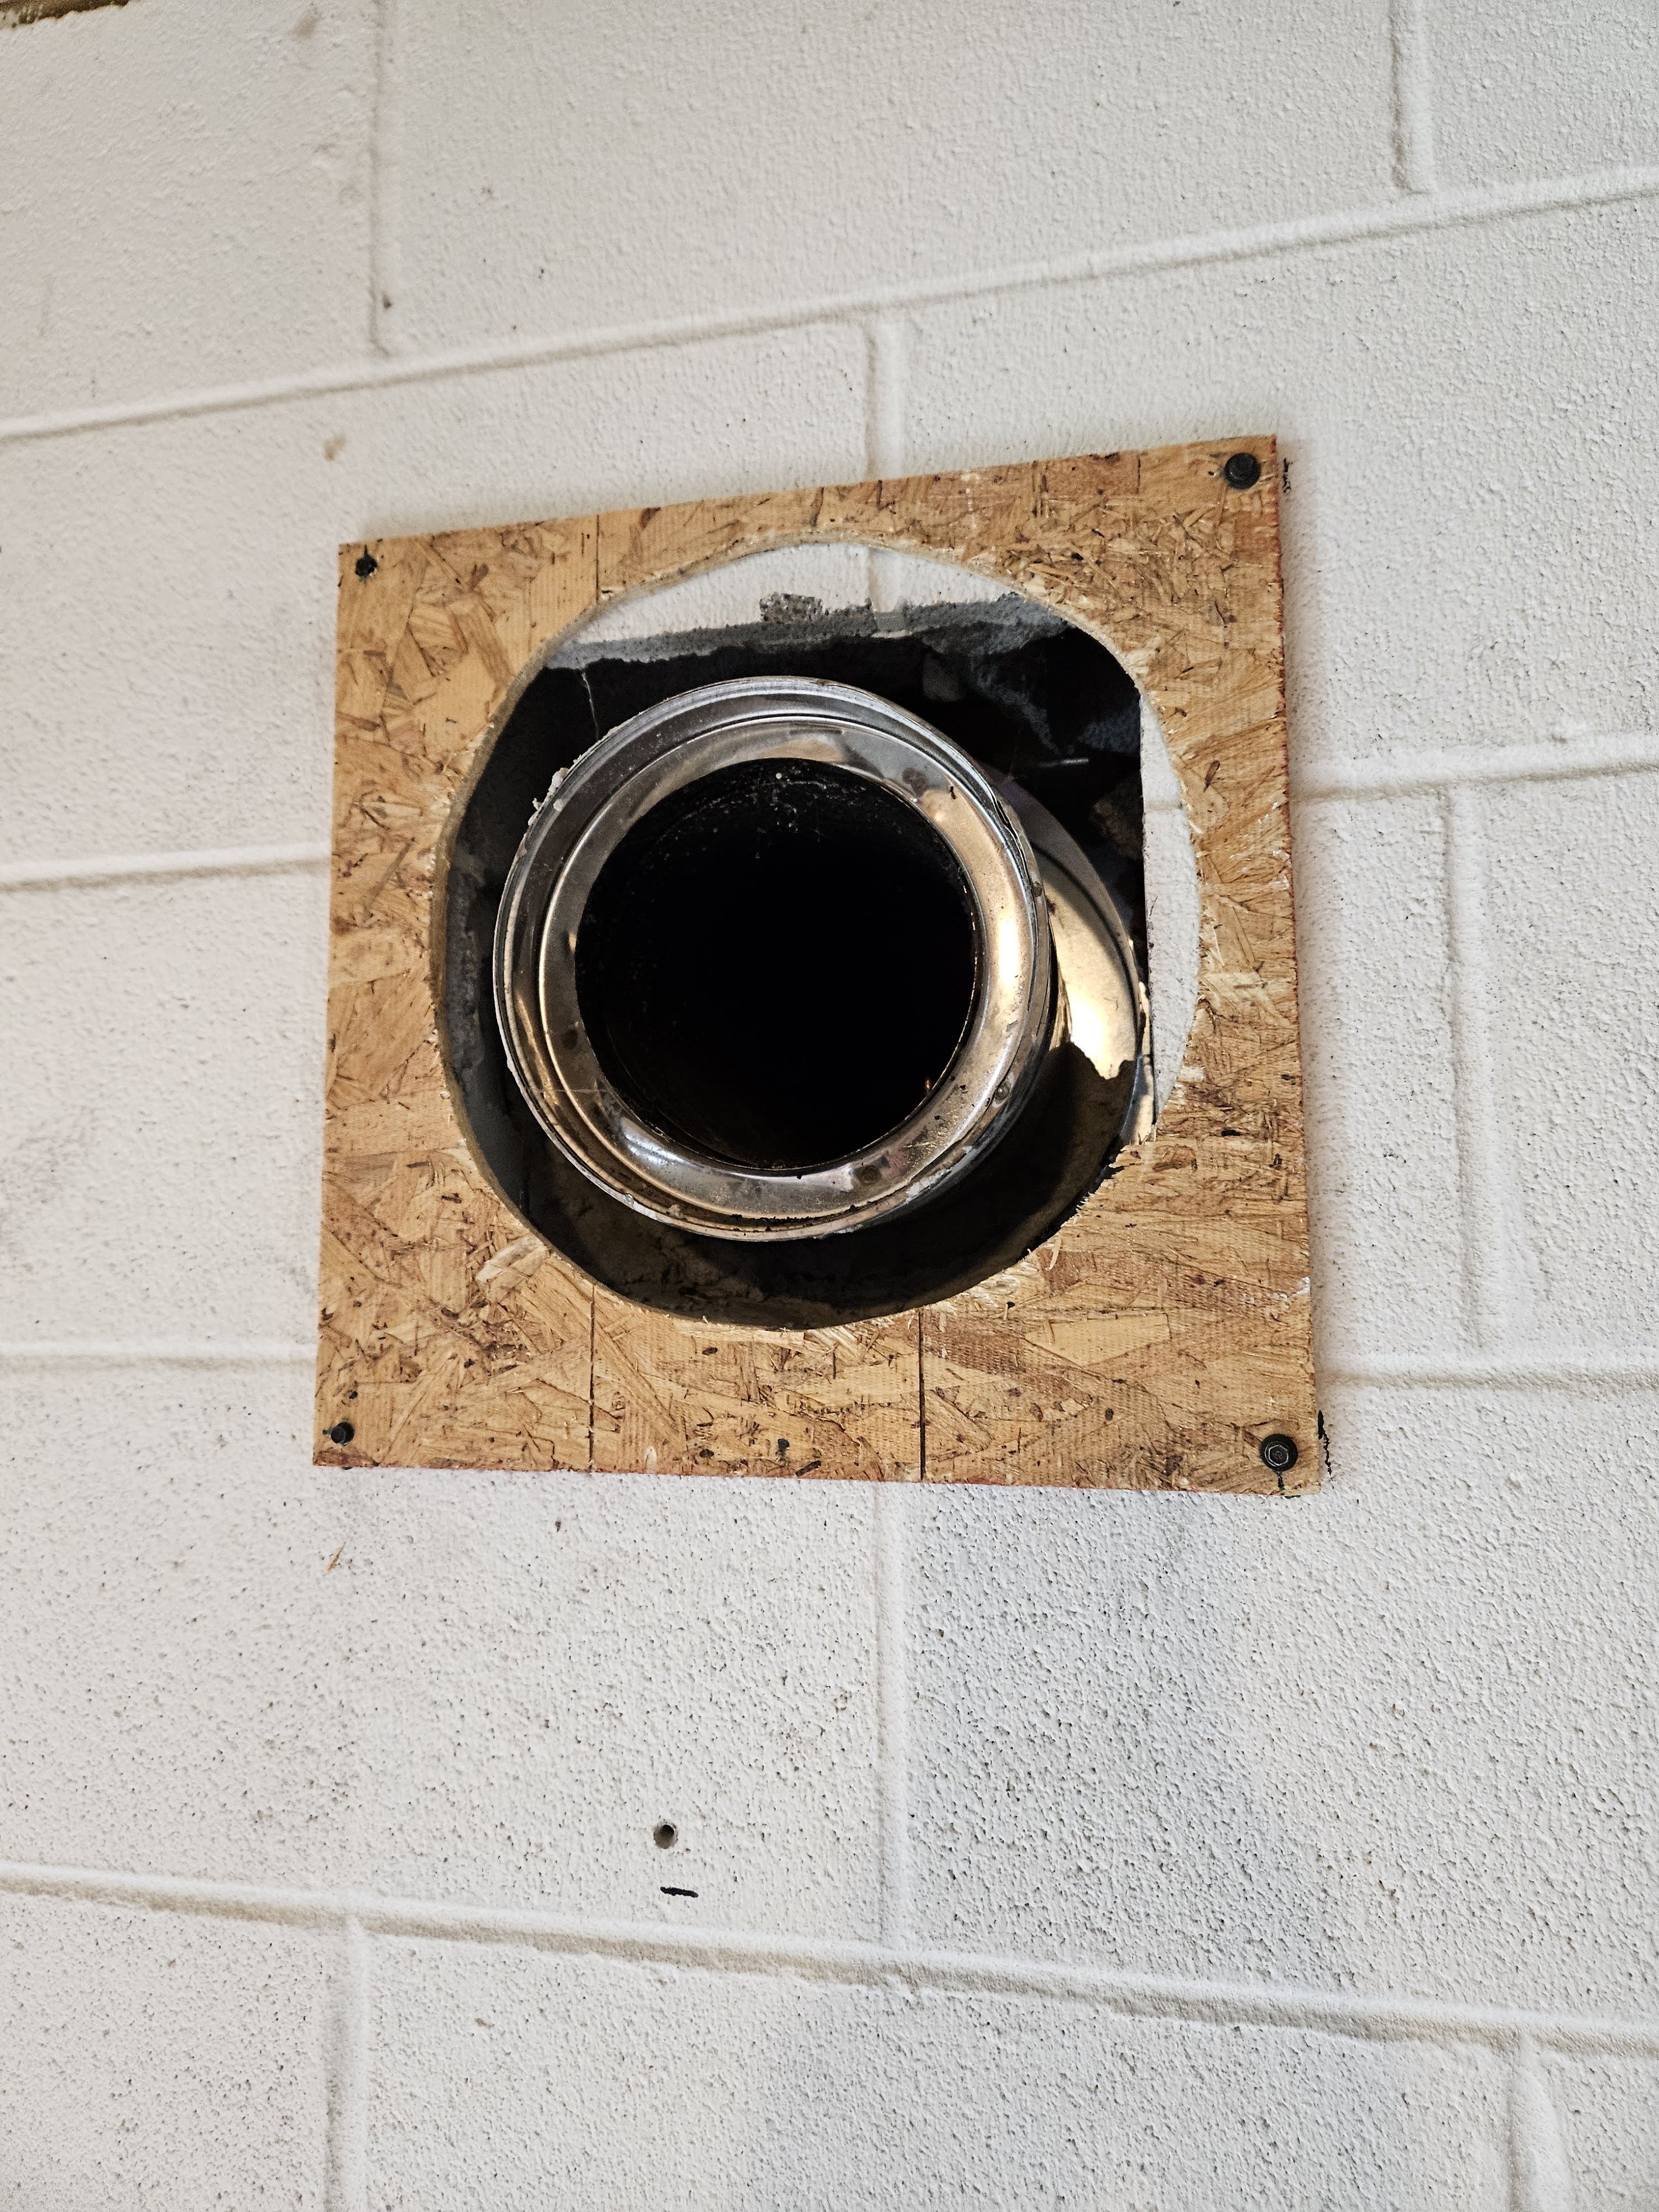
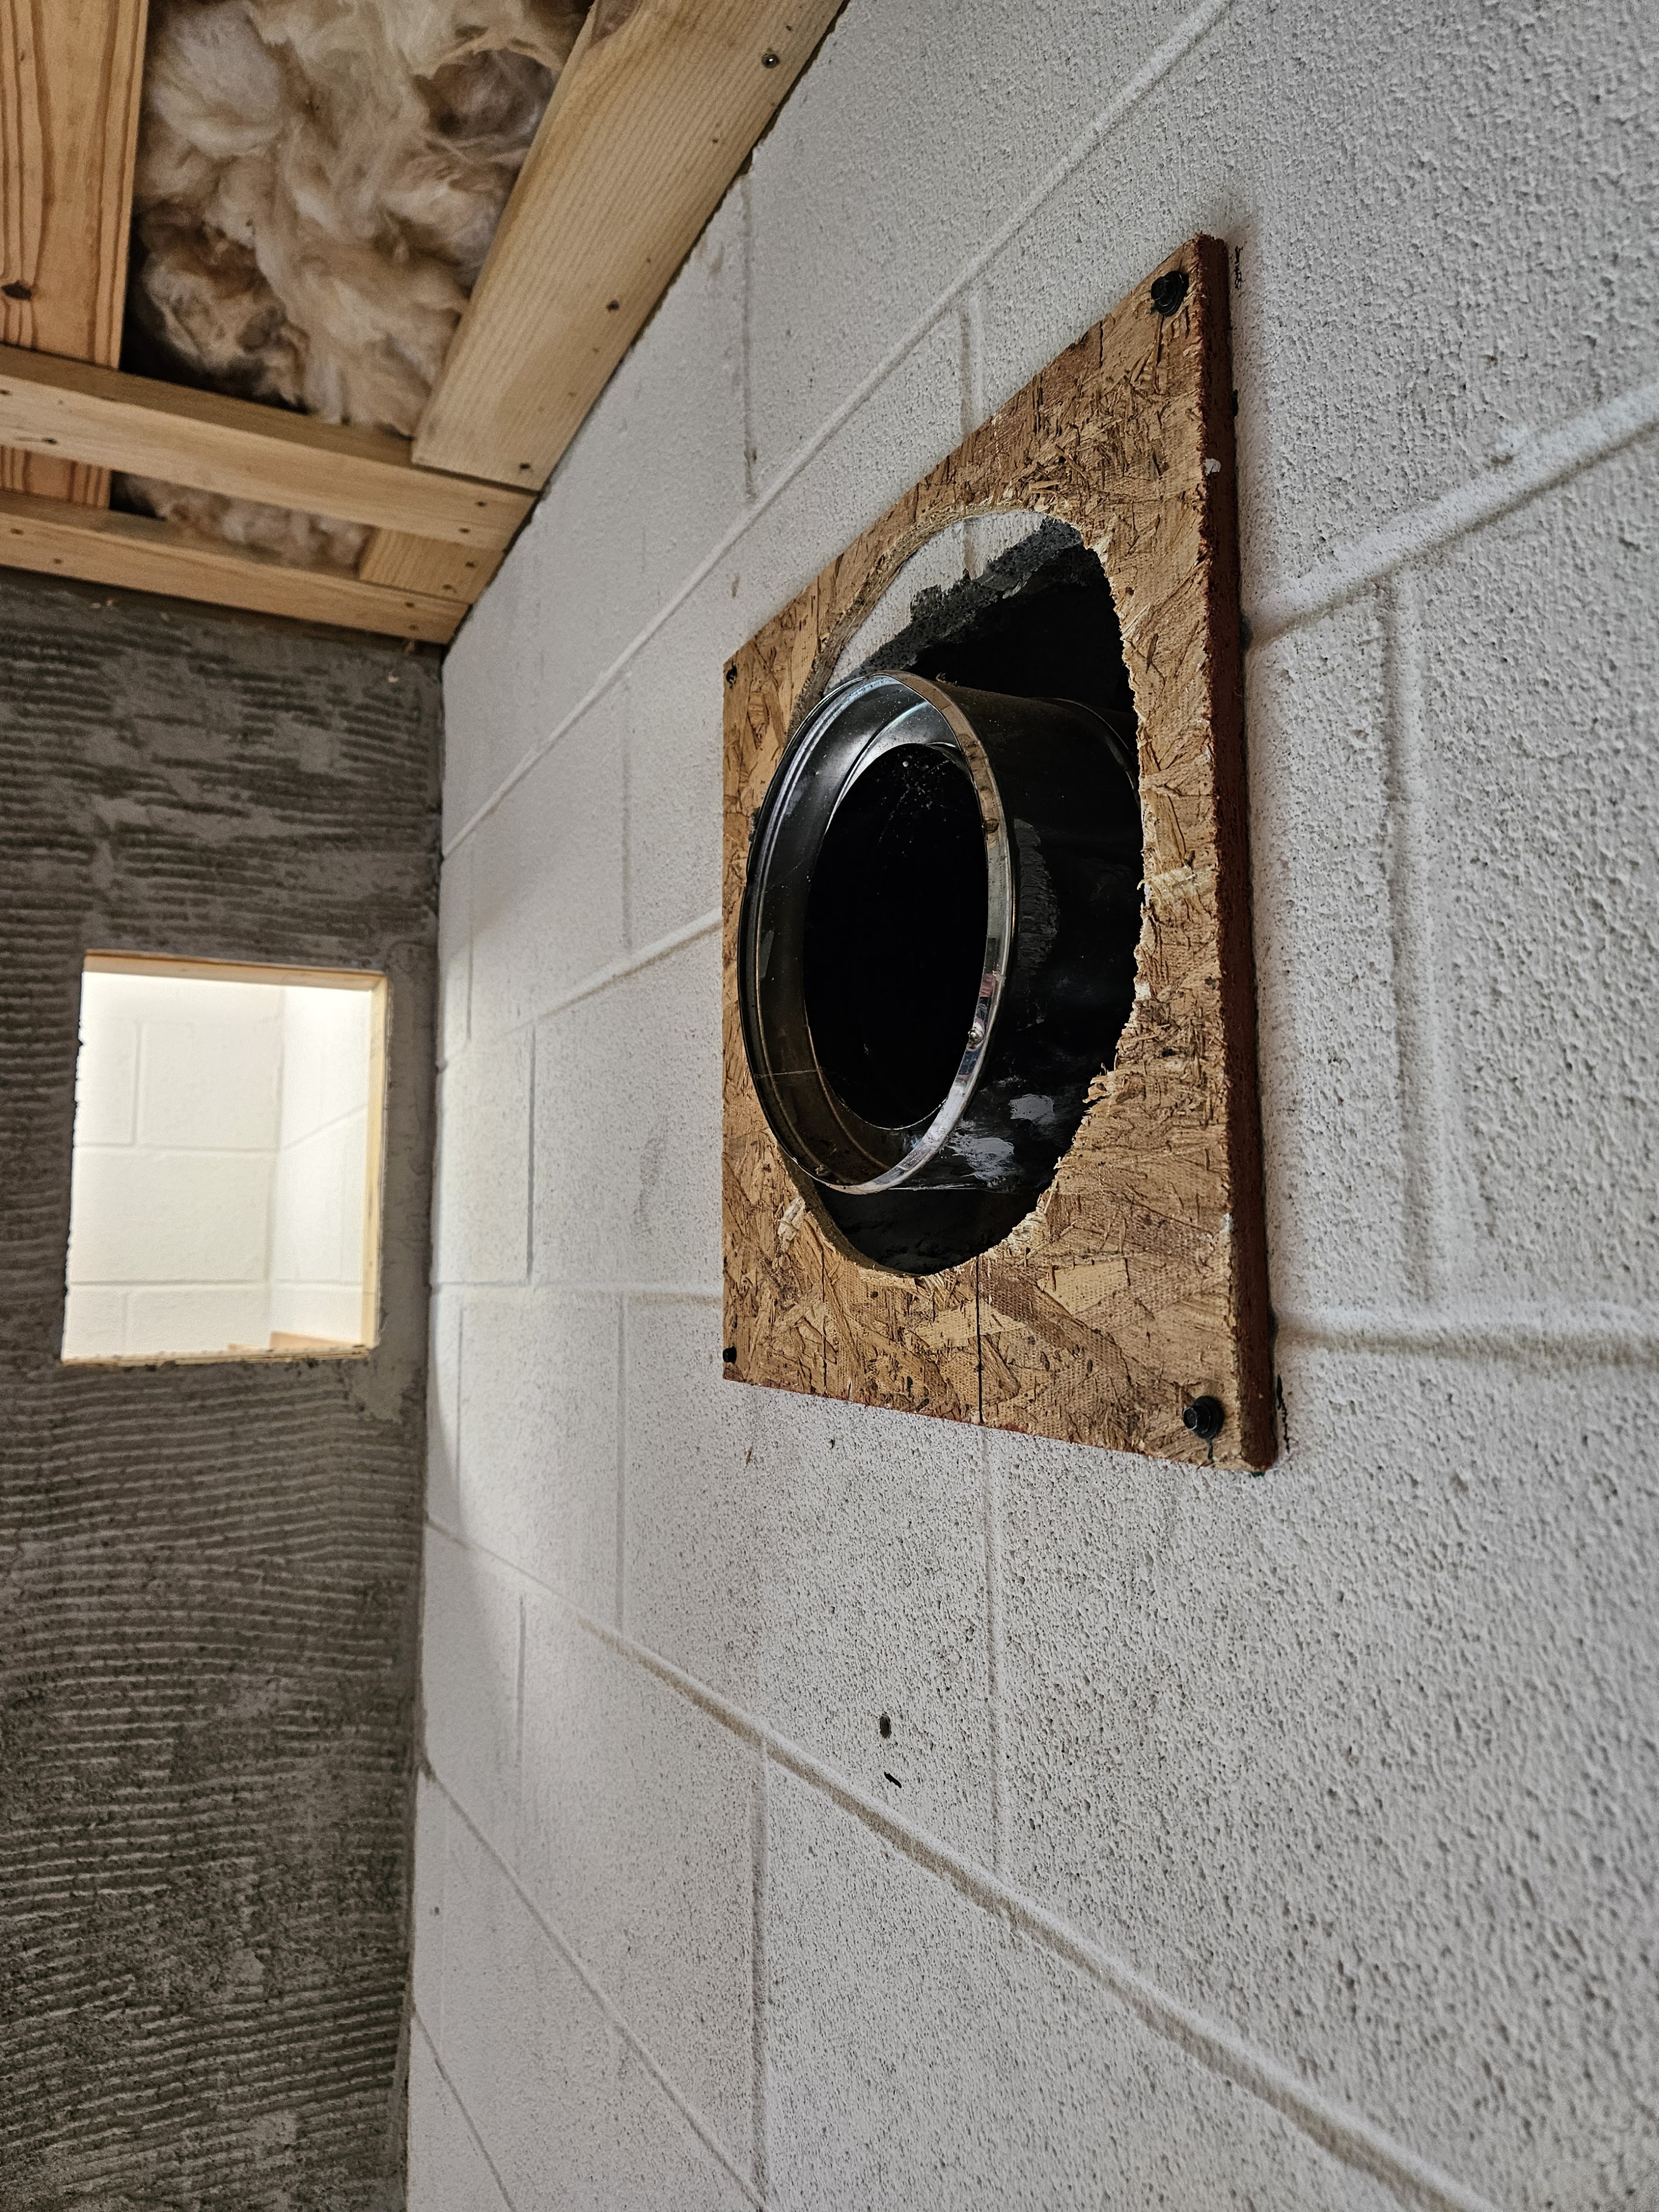
Finally, Mike has to install a pipe that goes from the outside to the stove to bring fresh air in to the stove. Right now, it is difficult to light the stove because the house is built tight and there isn’t much air incursion into the house directly from the outside.
Once all of that is finished, then we can put up the OSB and cement board. It’s definitely a lot of steps for two tiny closets that are only there to disguise the utilities to the dock.
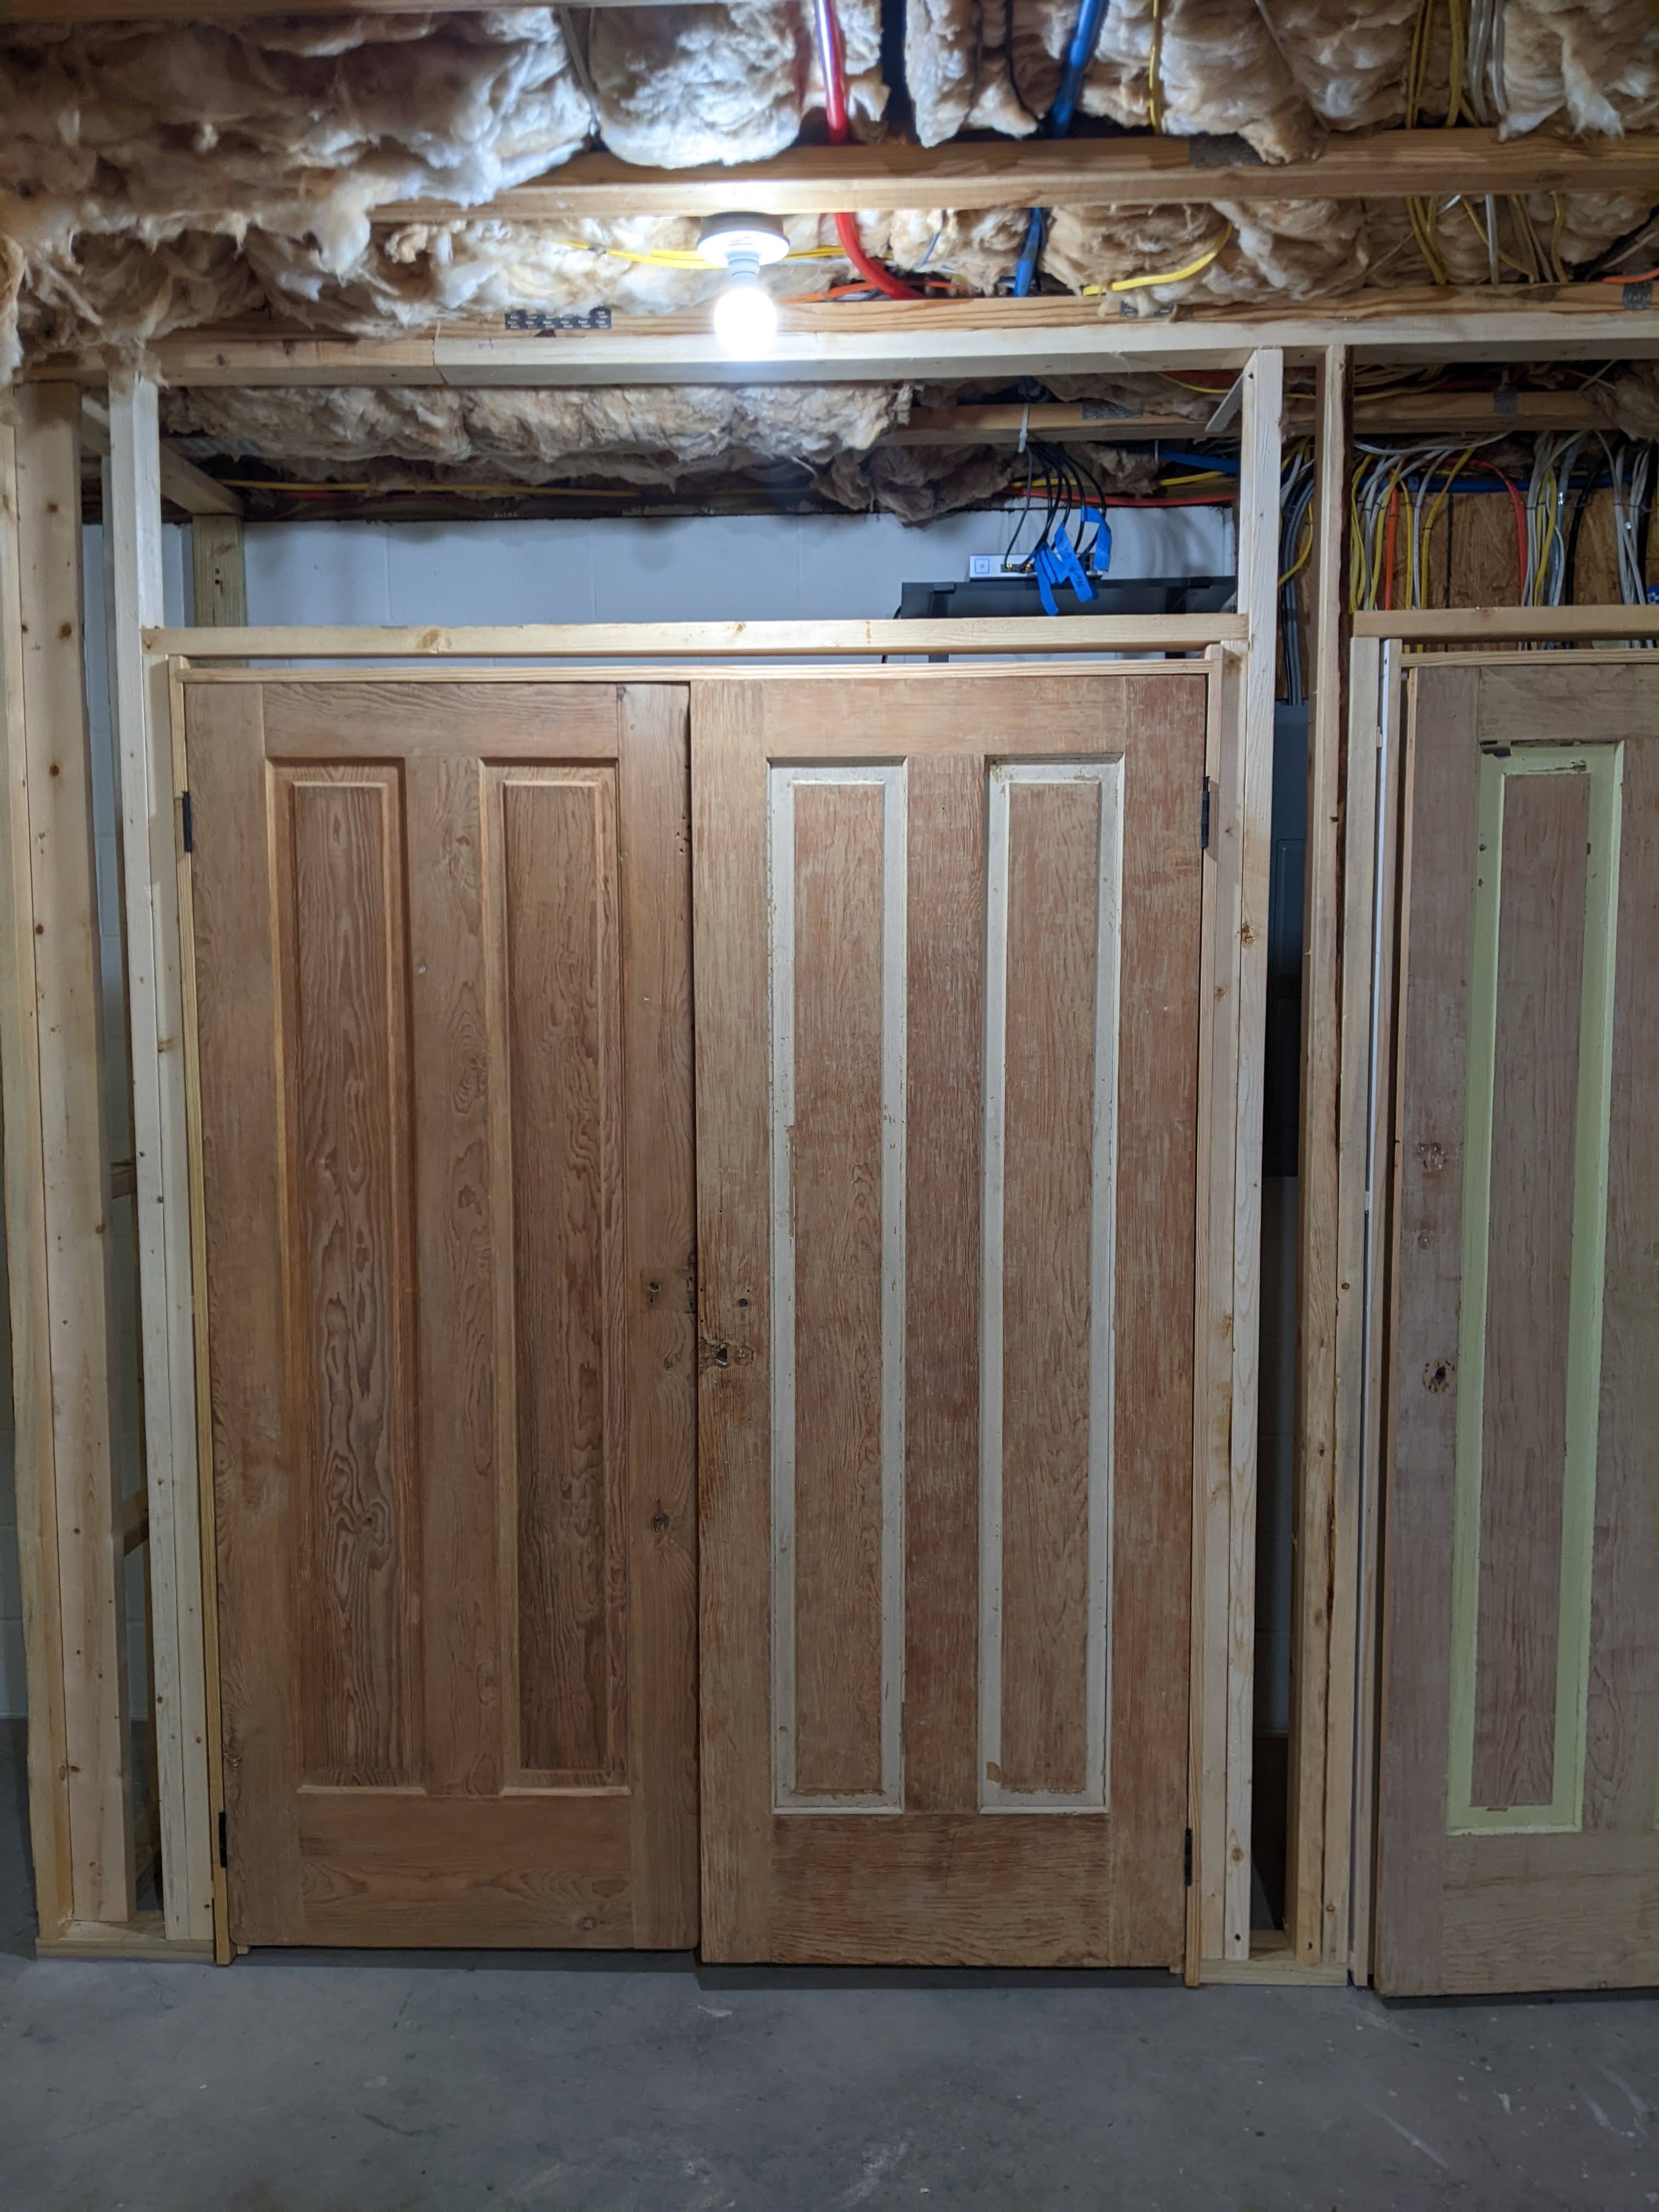
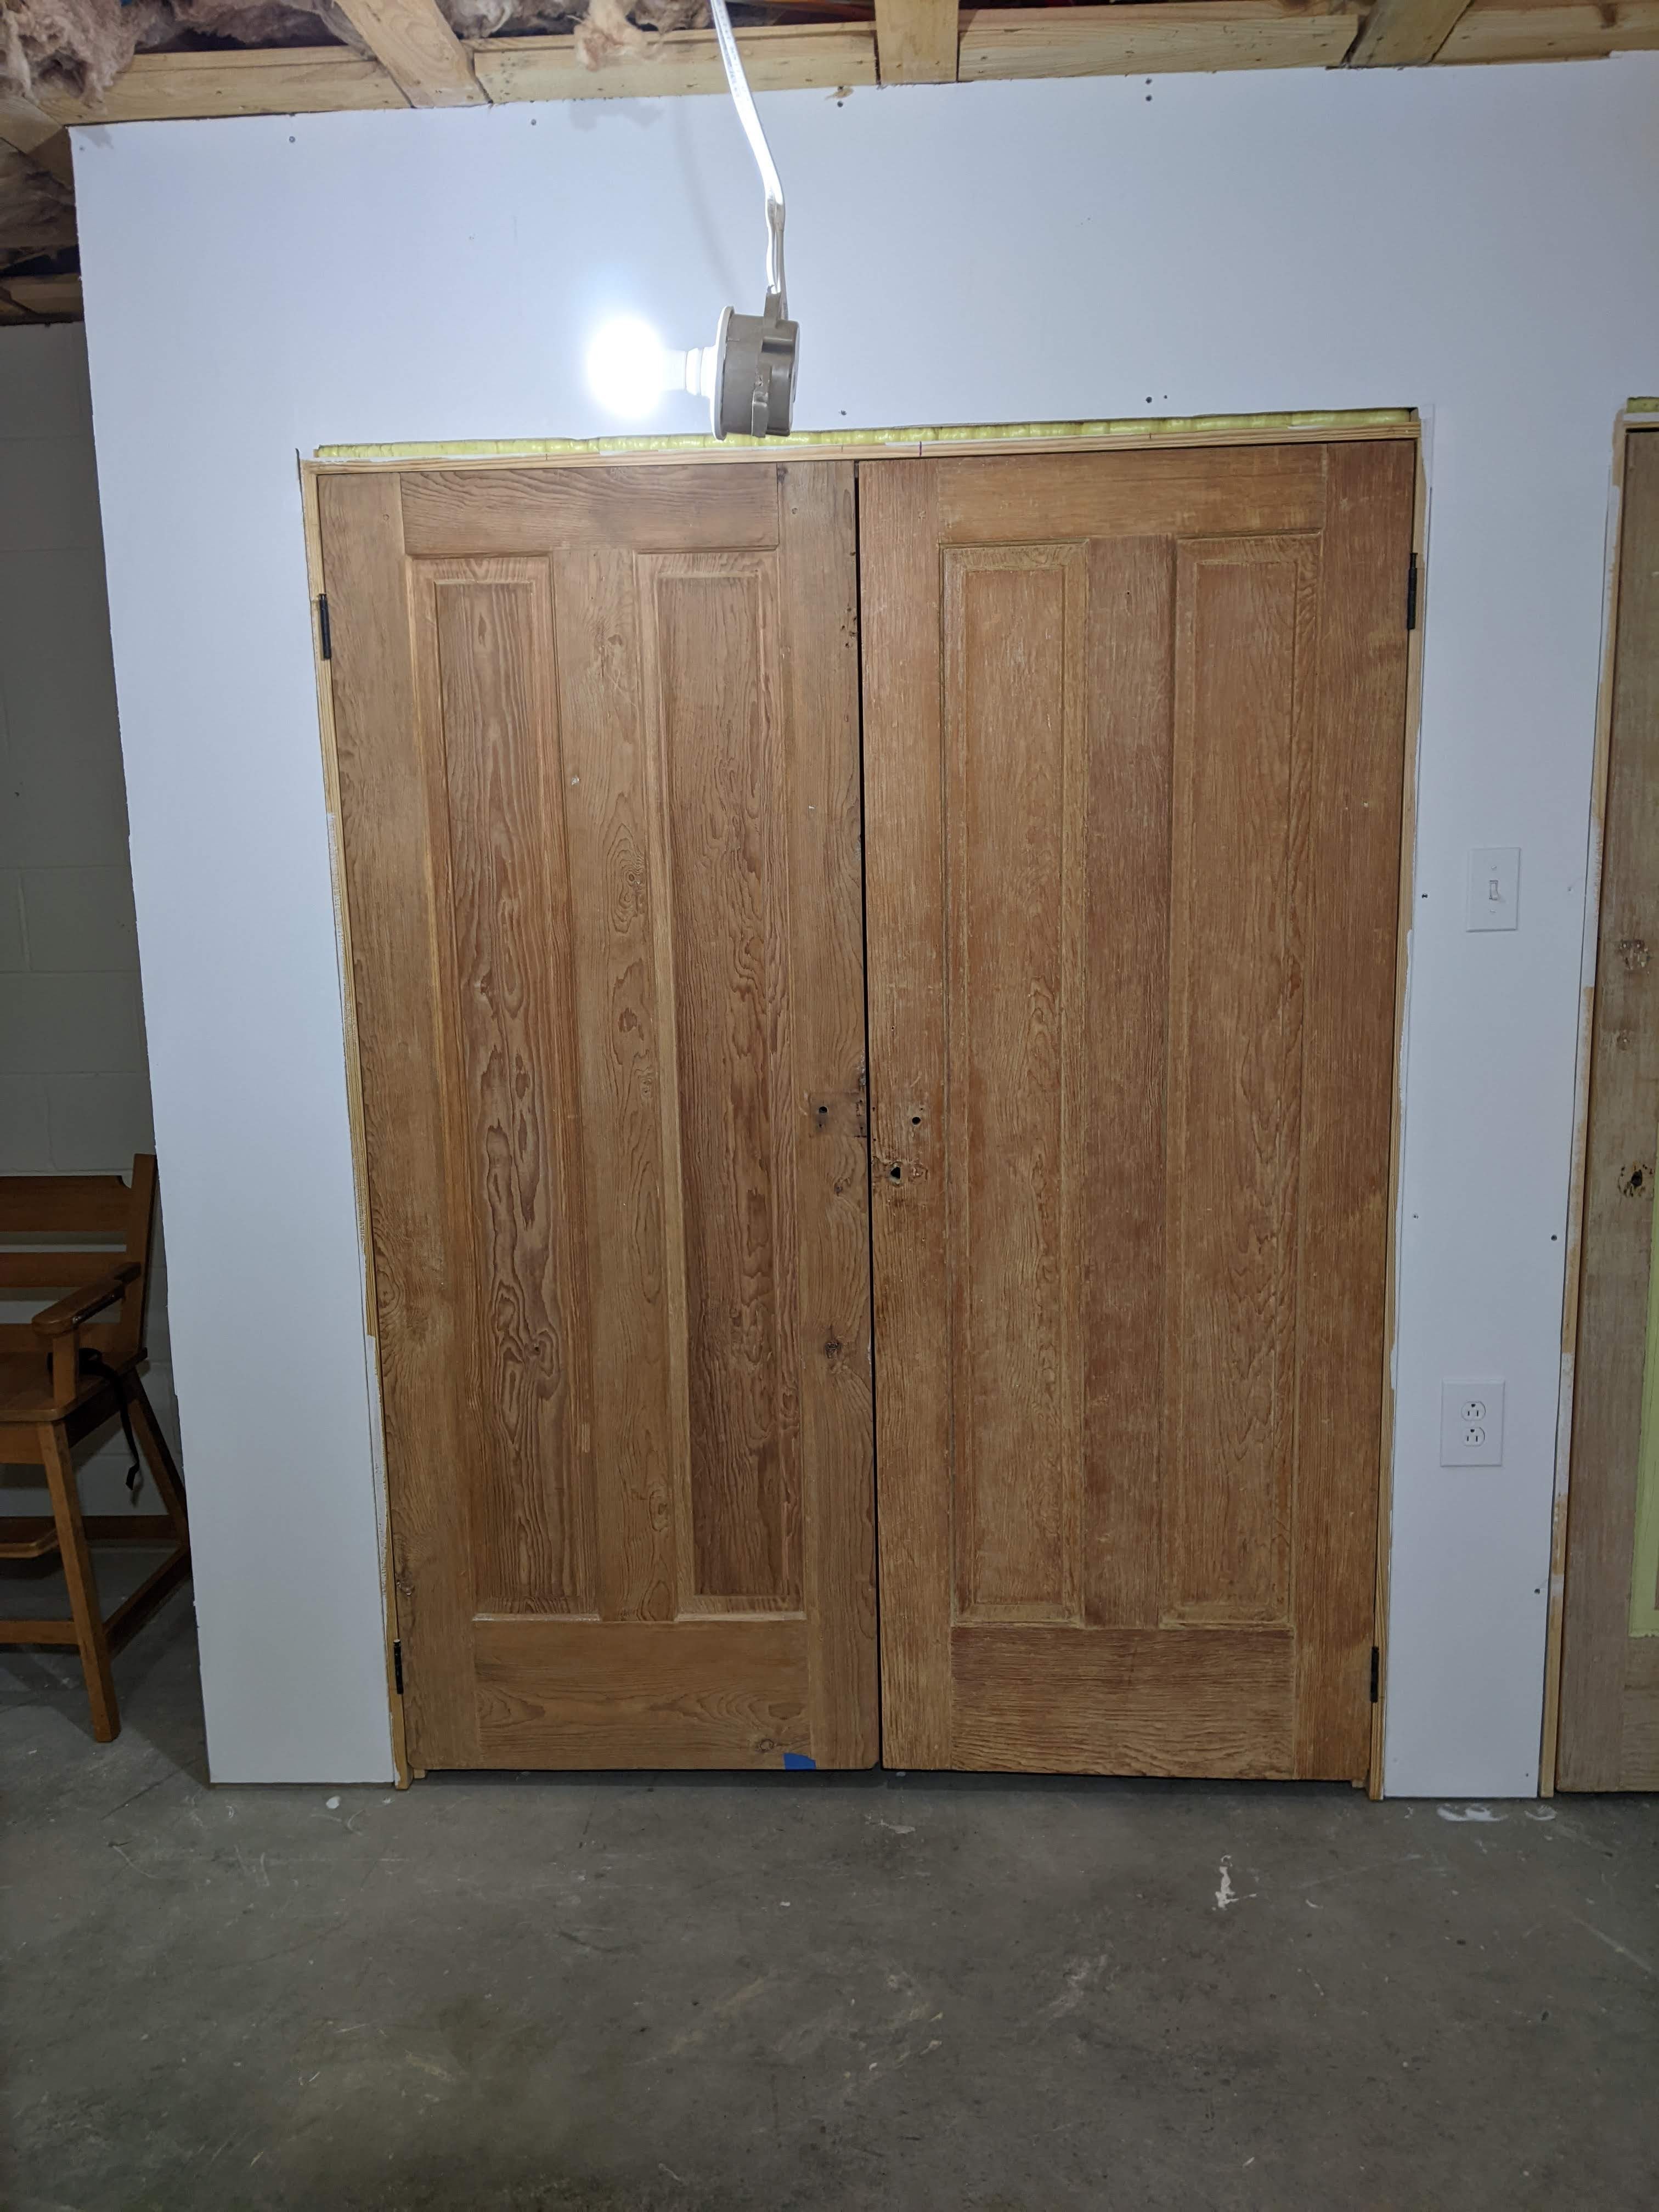
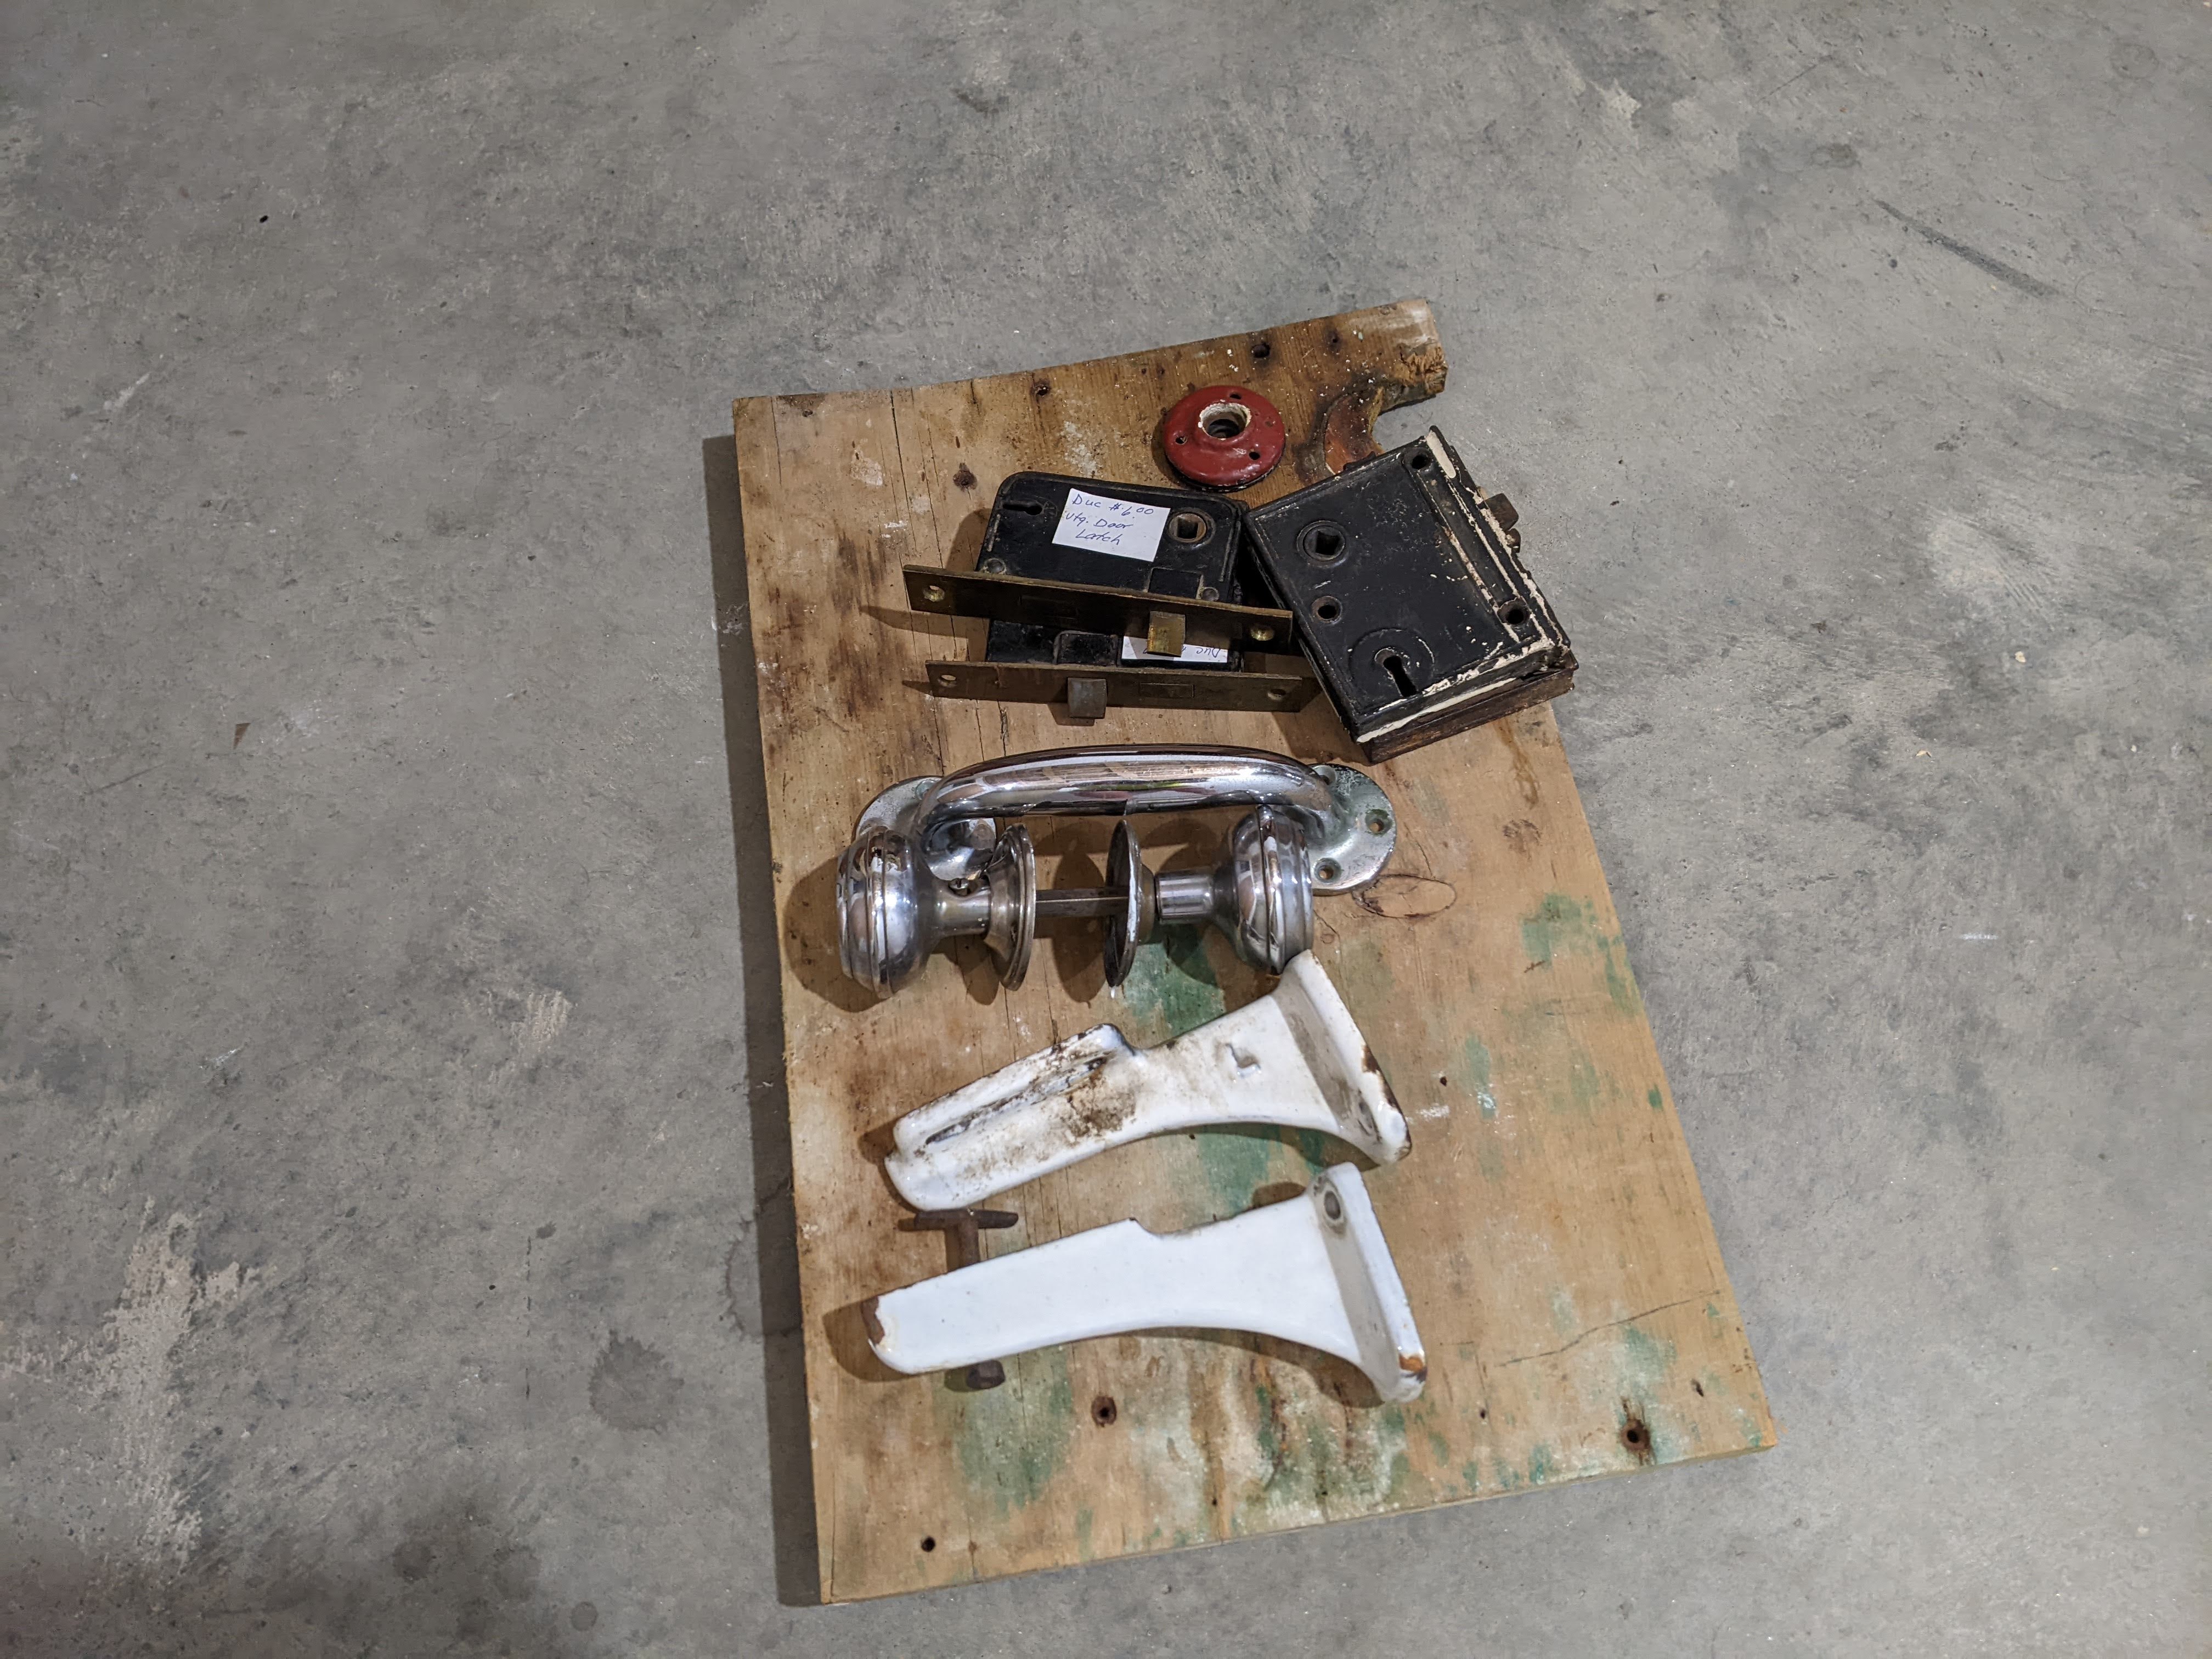
Here are our cute little closet doors. They were similar sizes, but not the same size, so Mike had to trim them to the same size. Surprisingly, these doors only had one coat of finish/paint on them, so they were relatively easy to clean up. We found some really neat antique brass handles for them. We believe that these doors are from the first half of the 19th century. You can see that their hardware was surface mounted (called a rim lock), and only the rod connecting the two knobs went through the door.
Here is where we left things at the end of the day yesterday.
Much more to come!
March 1, 2023:
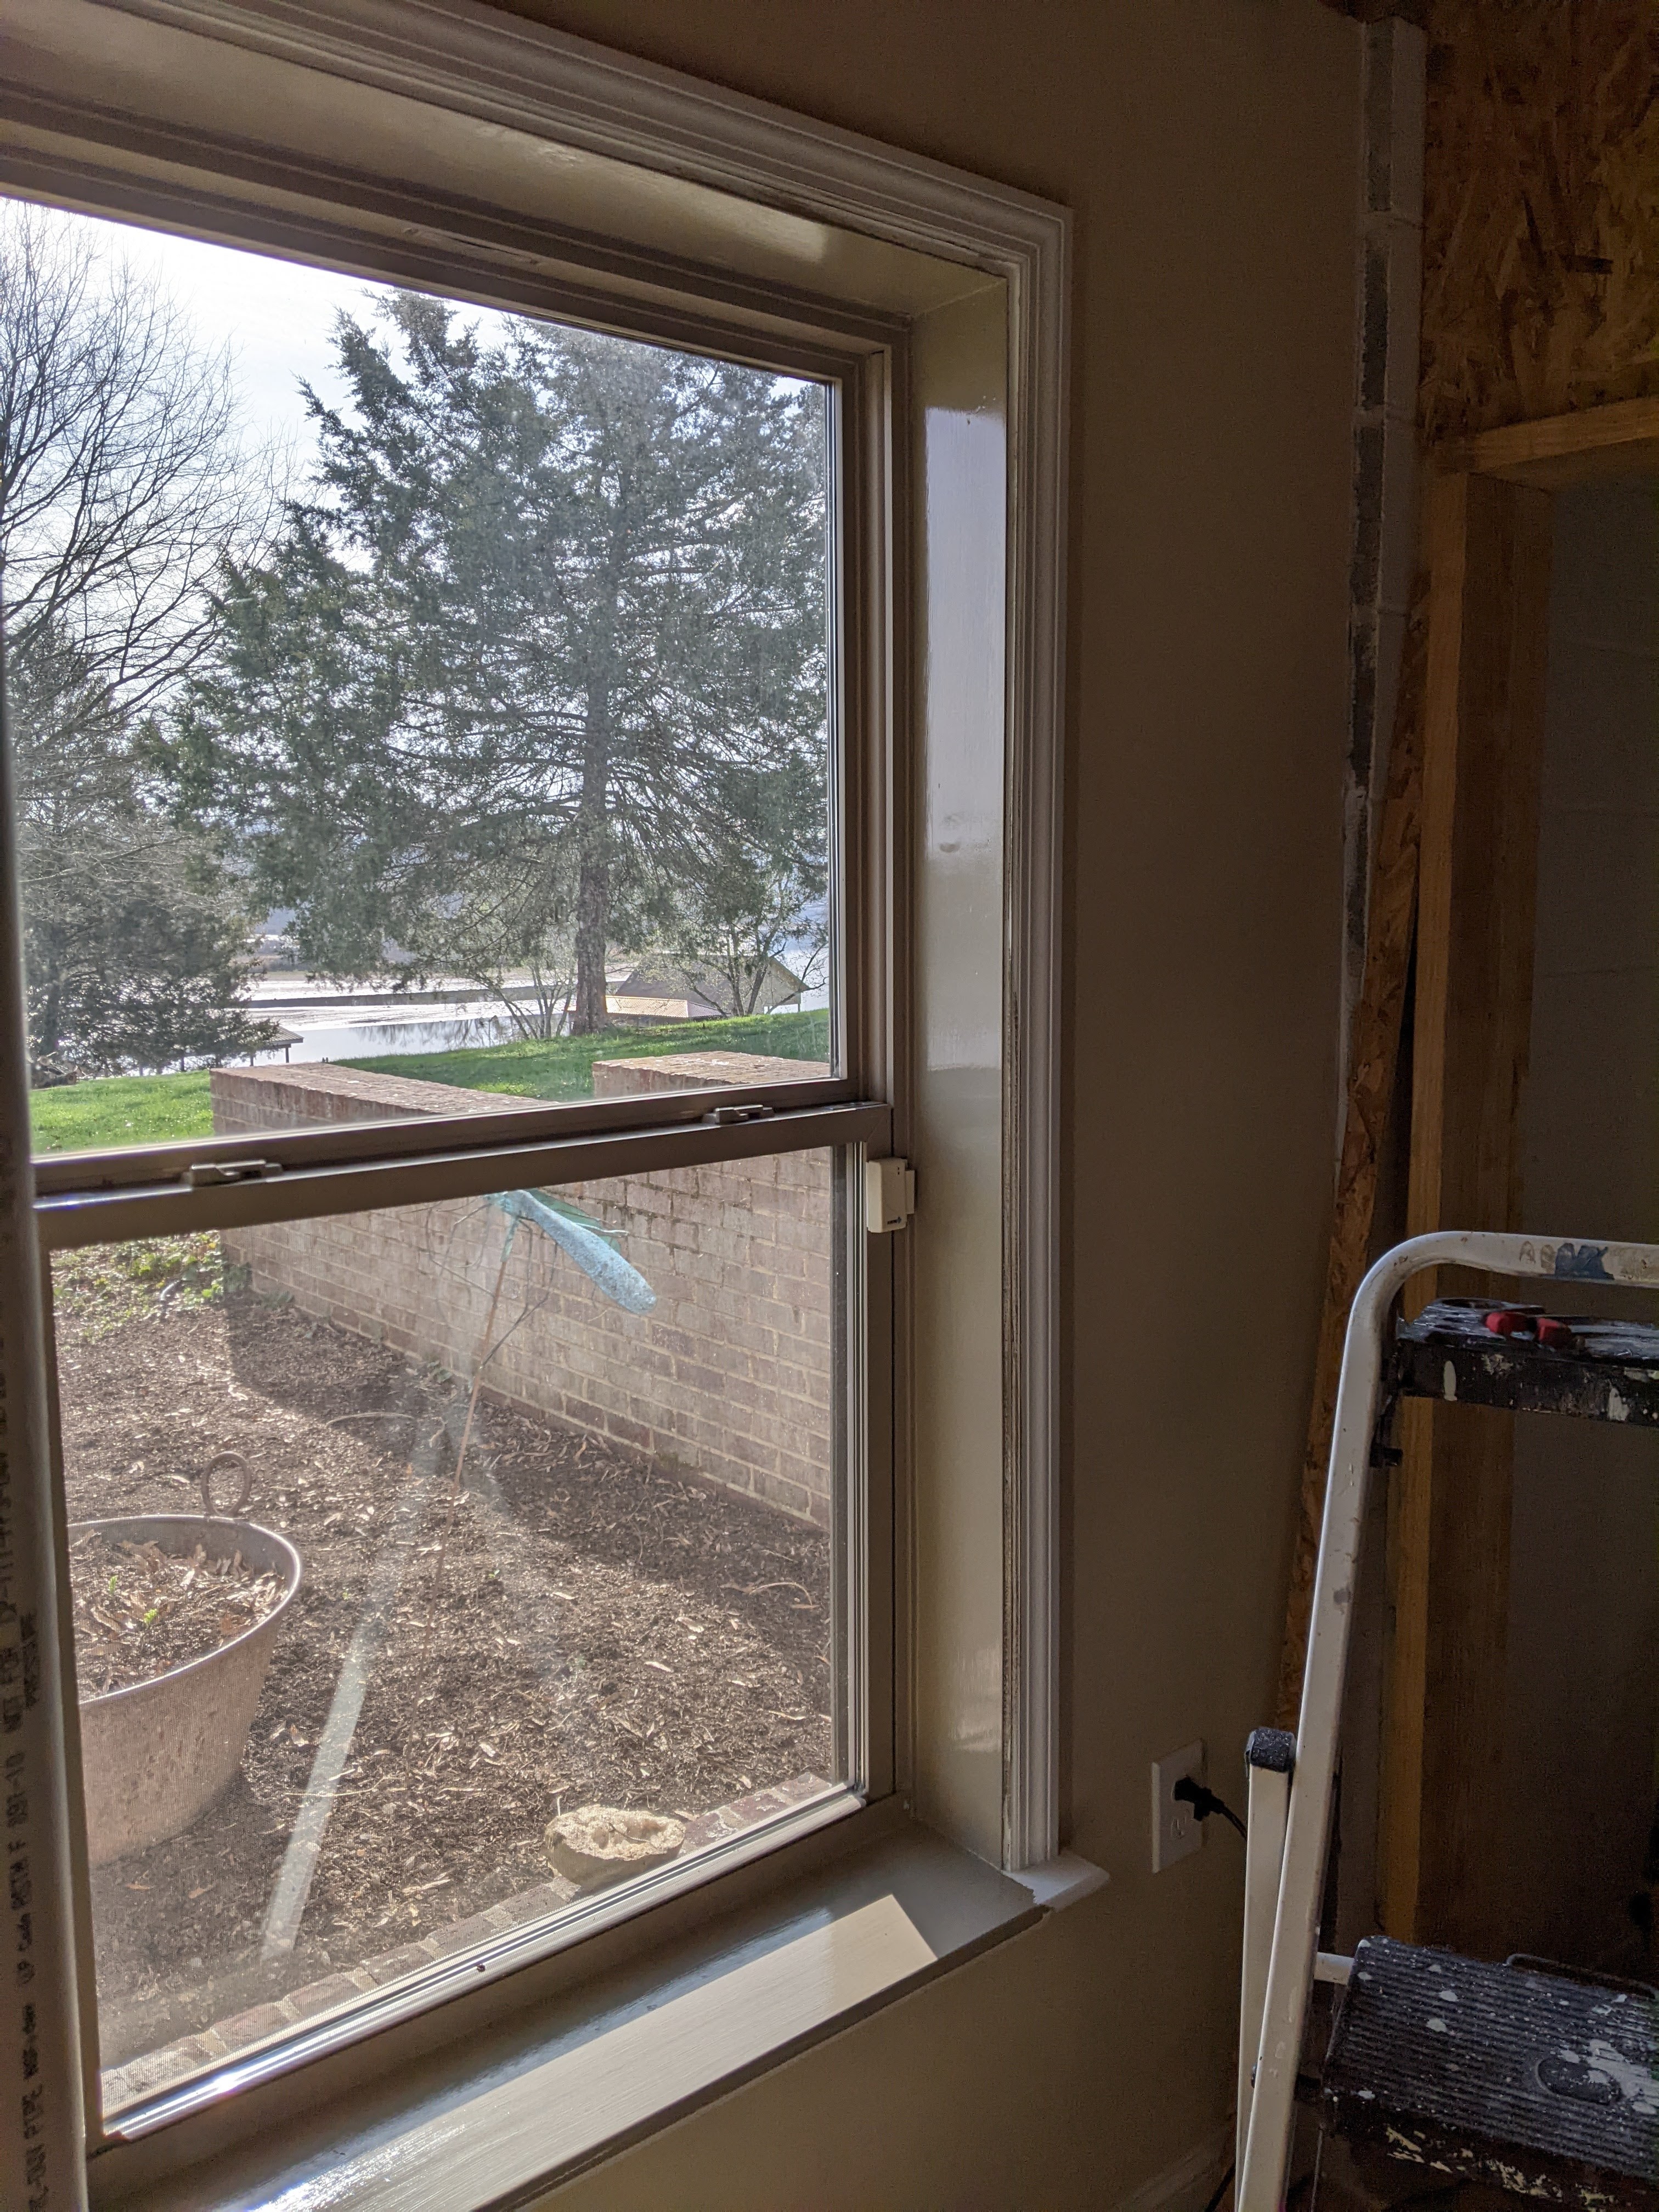
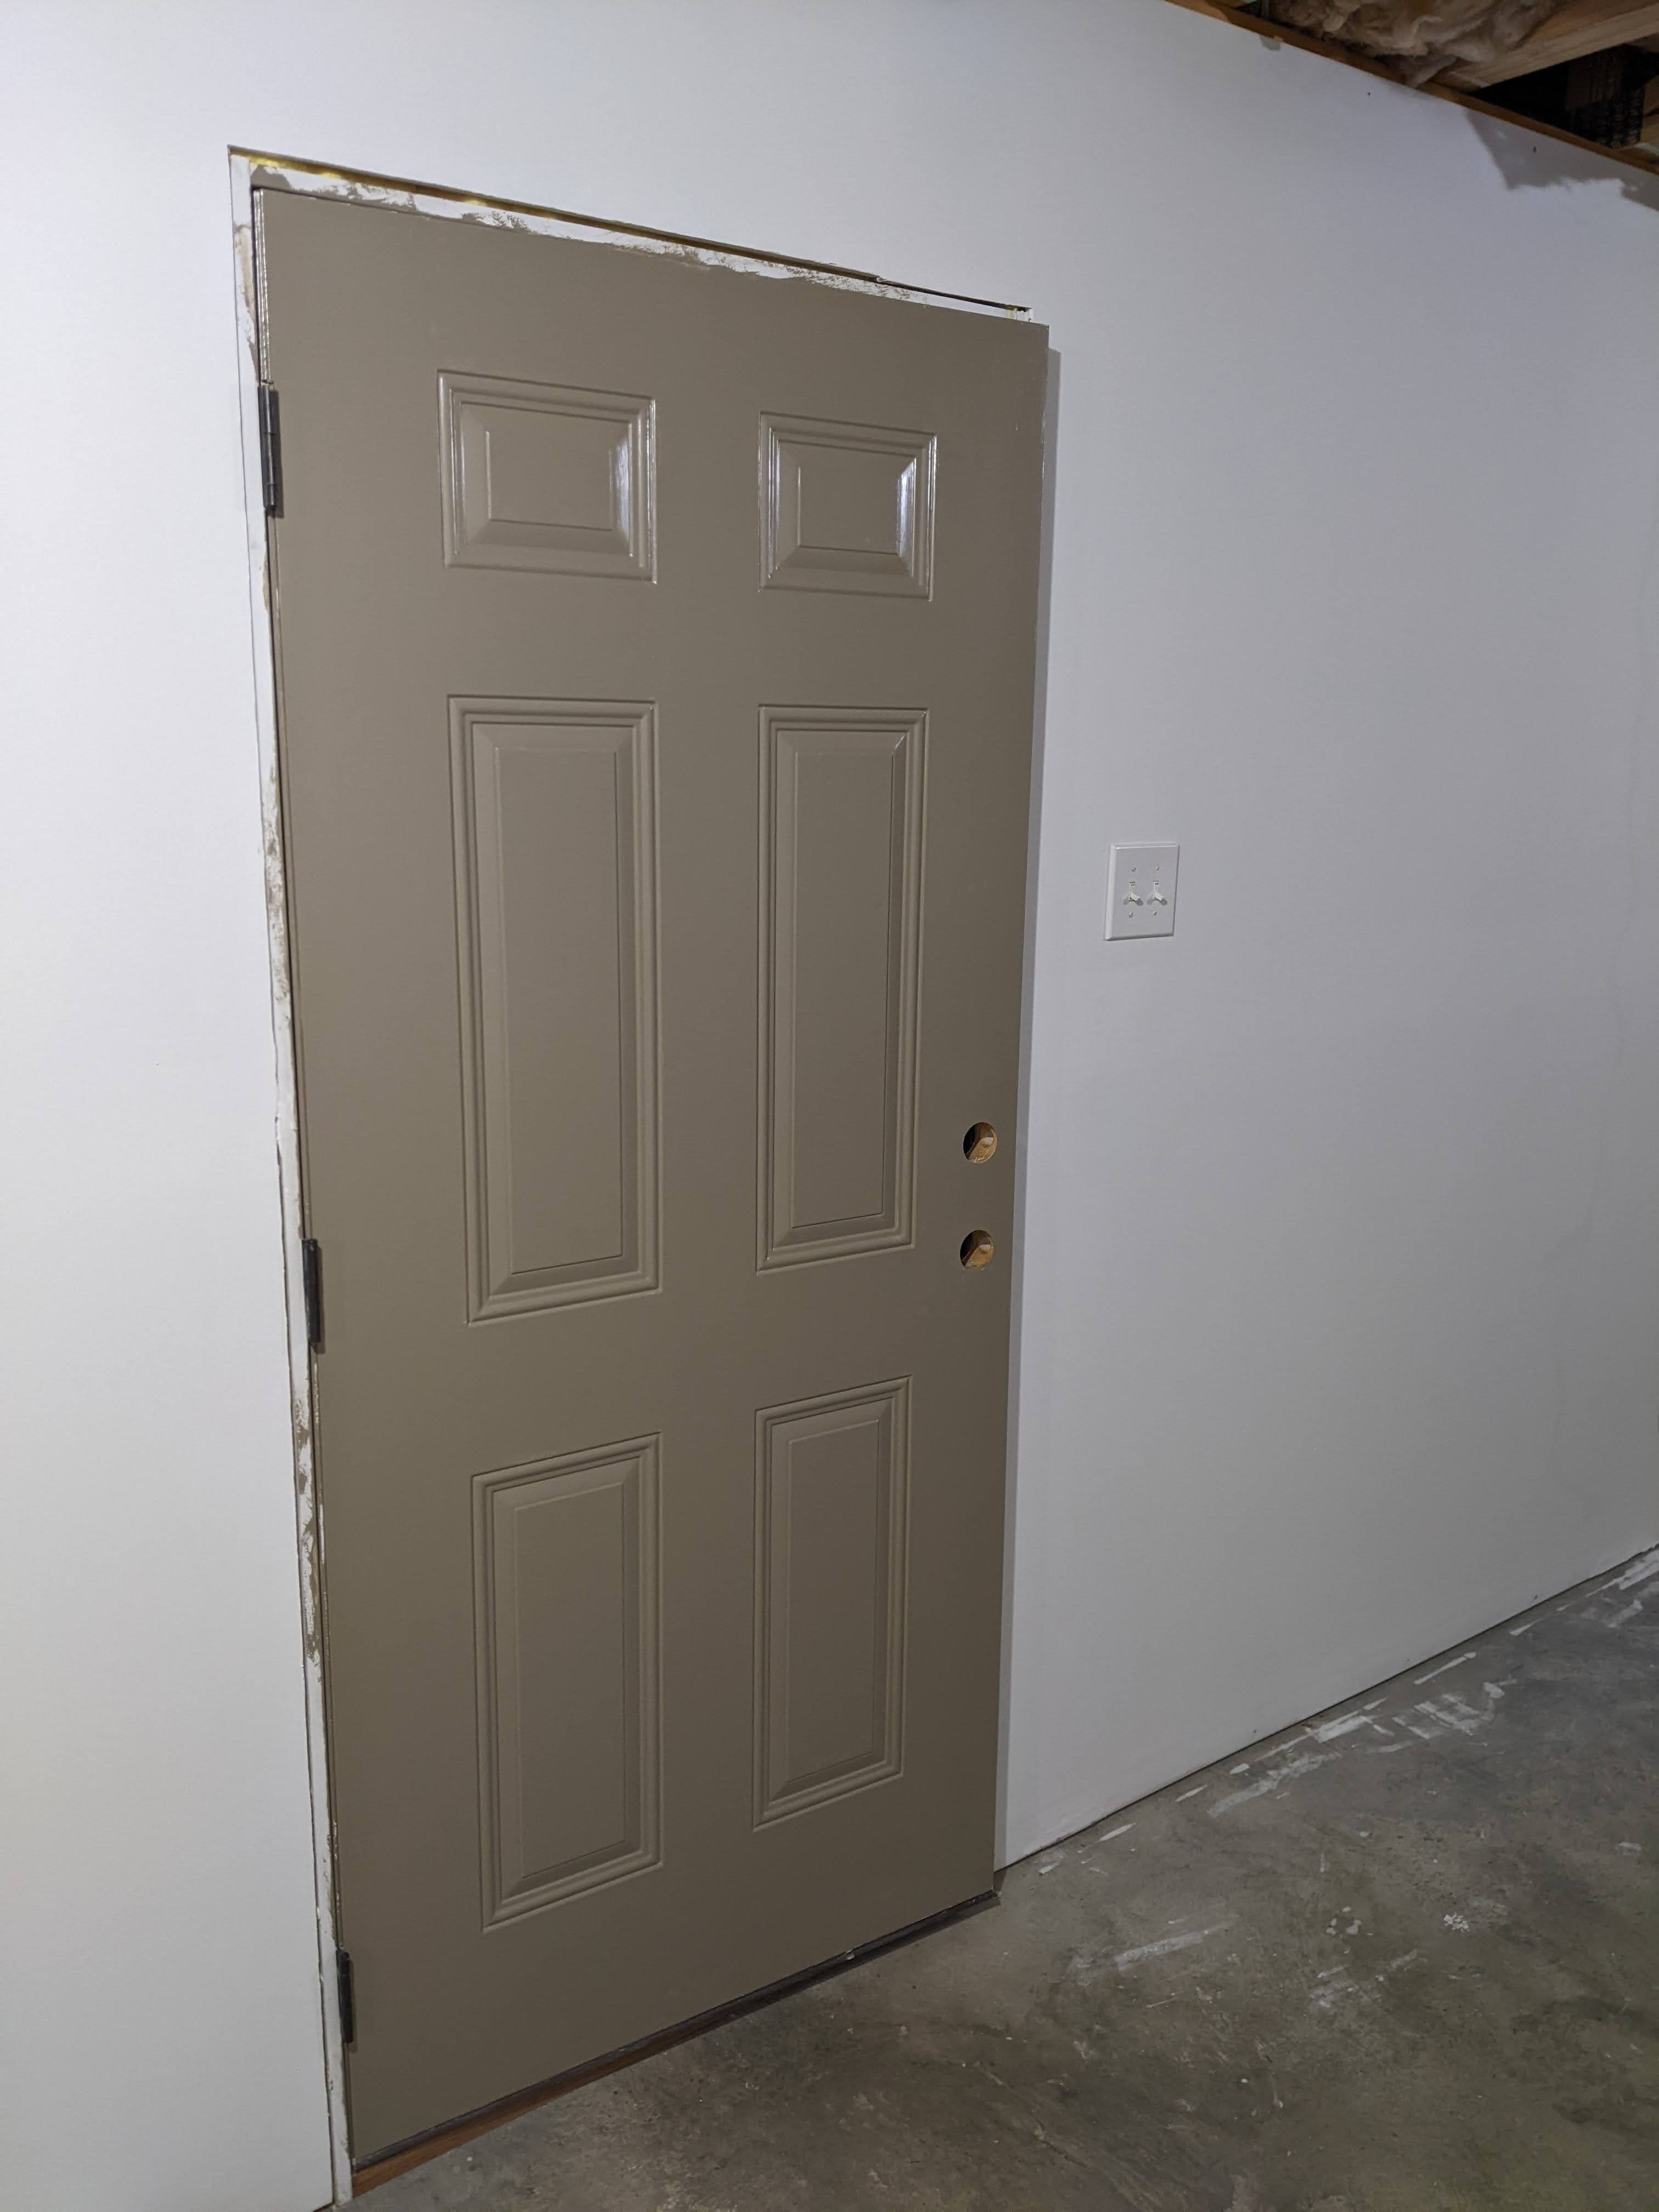
We picked out the trim color as I mentioned in my last post, and I have started painting door frames, a window frame, and the two existing metal doors that we are not planning to change out. This paint was a close out that I ended up getting for free and it is SO THICK that I have had to thin it with paint thinner pretty aggressively so that I can brush it on. I have also had to put it through a paint strainer to remove little crumbs of something, but I keep reminding myself that it was free, because otherwise I would be frustrated by this part of the process. Honestly, I have always had this problem with oil based paints and wish that I had been straining it all along, because the finish is so much better.
Now that the paint is up in places, my husband and I agree that we really like the color and that it looks “old”, which is just the look we are going for.
My husband finished the boxes for the grates in the closets by the stove and he cleaned up the grates and sprayed them with lacquer. (He has them dry fitted, but they are not in their final location as far as depth is concerned.) He also finished the electrical work in the closets–lights and outlets. He finally had some time over the weekend to install the OSB. It’s so much easier to see how that space is going to look and feel now that the walls are closed up. We hope to get the OSB finished this week and the cement board installed this weekend.
My husband has been working tons of hours for the past 4 months, but is finally going to get a break near the end of the month, so I have the stone veneer and exterior stone corners being delivered the 3rd week in March. During this week, we are going to work really hard to button up lots of unfinished details on what we’ve done so far and try to get all the stone veneer installed and grouted. Those details include: finish scraping all the closet doors and lacquer them and install hardware; install new door knobs on garage, storm shelter, storage room, and under stairs closet doors; paint remaining door trim; frost windows on doors to storage room and under stairs closet; touch up drywall work; install light fixture in storage room; put thin flagstone on floor under the stove; and I’m sure loads of other things…..
But before we can do that, we have a bunch of furniture to move…..
Wish us luck!
March 24, 2023:
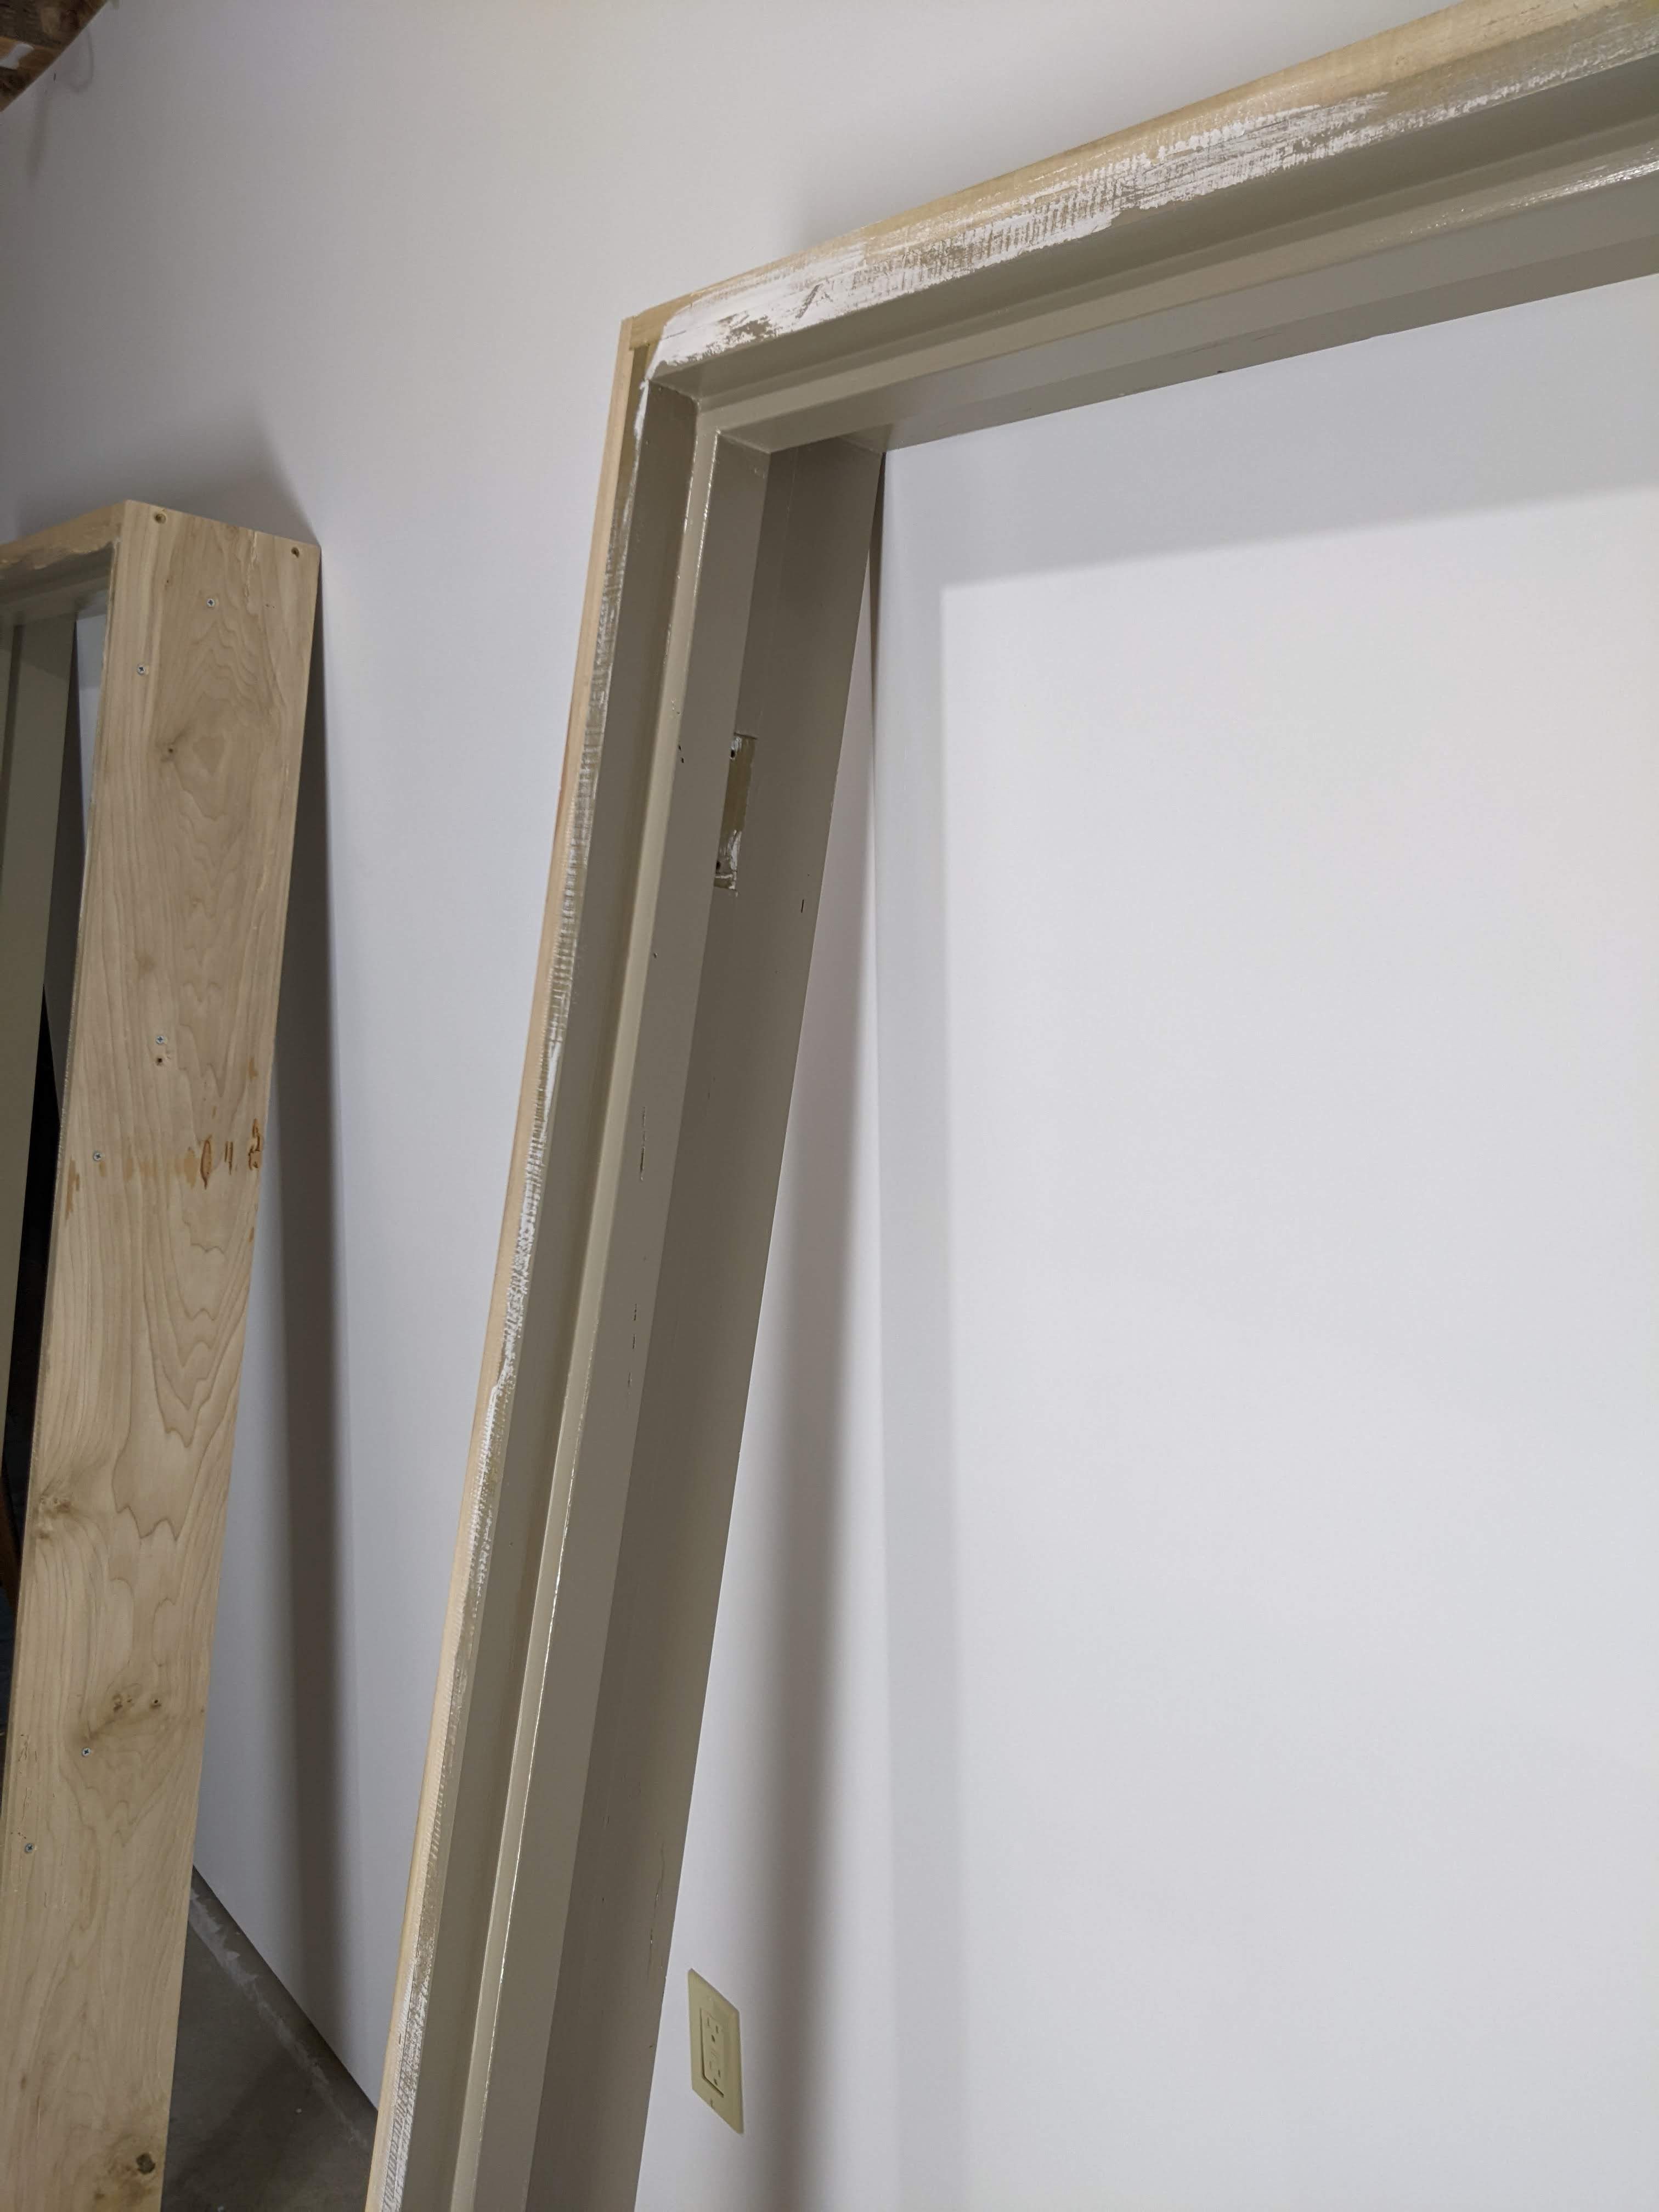
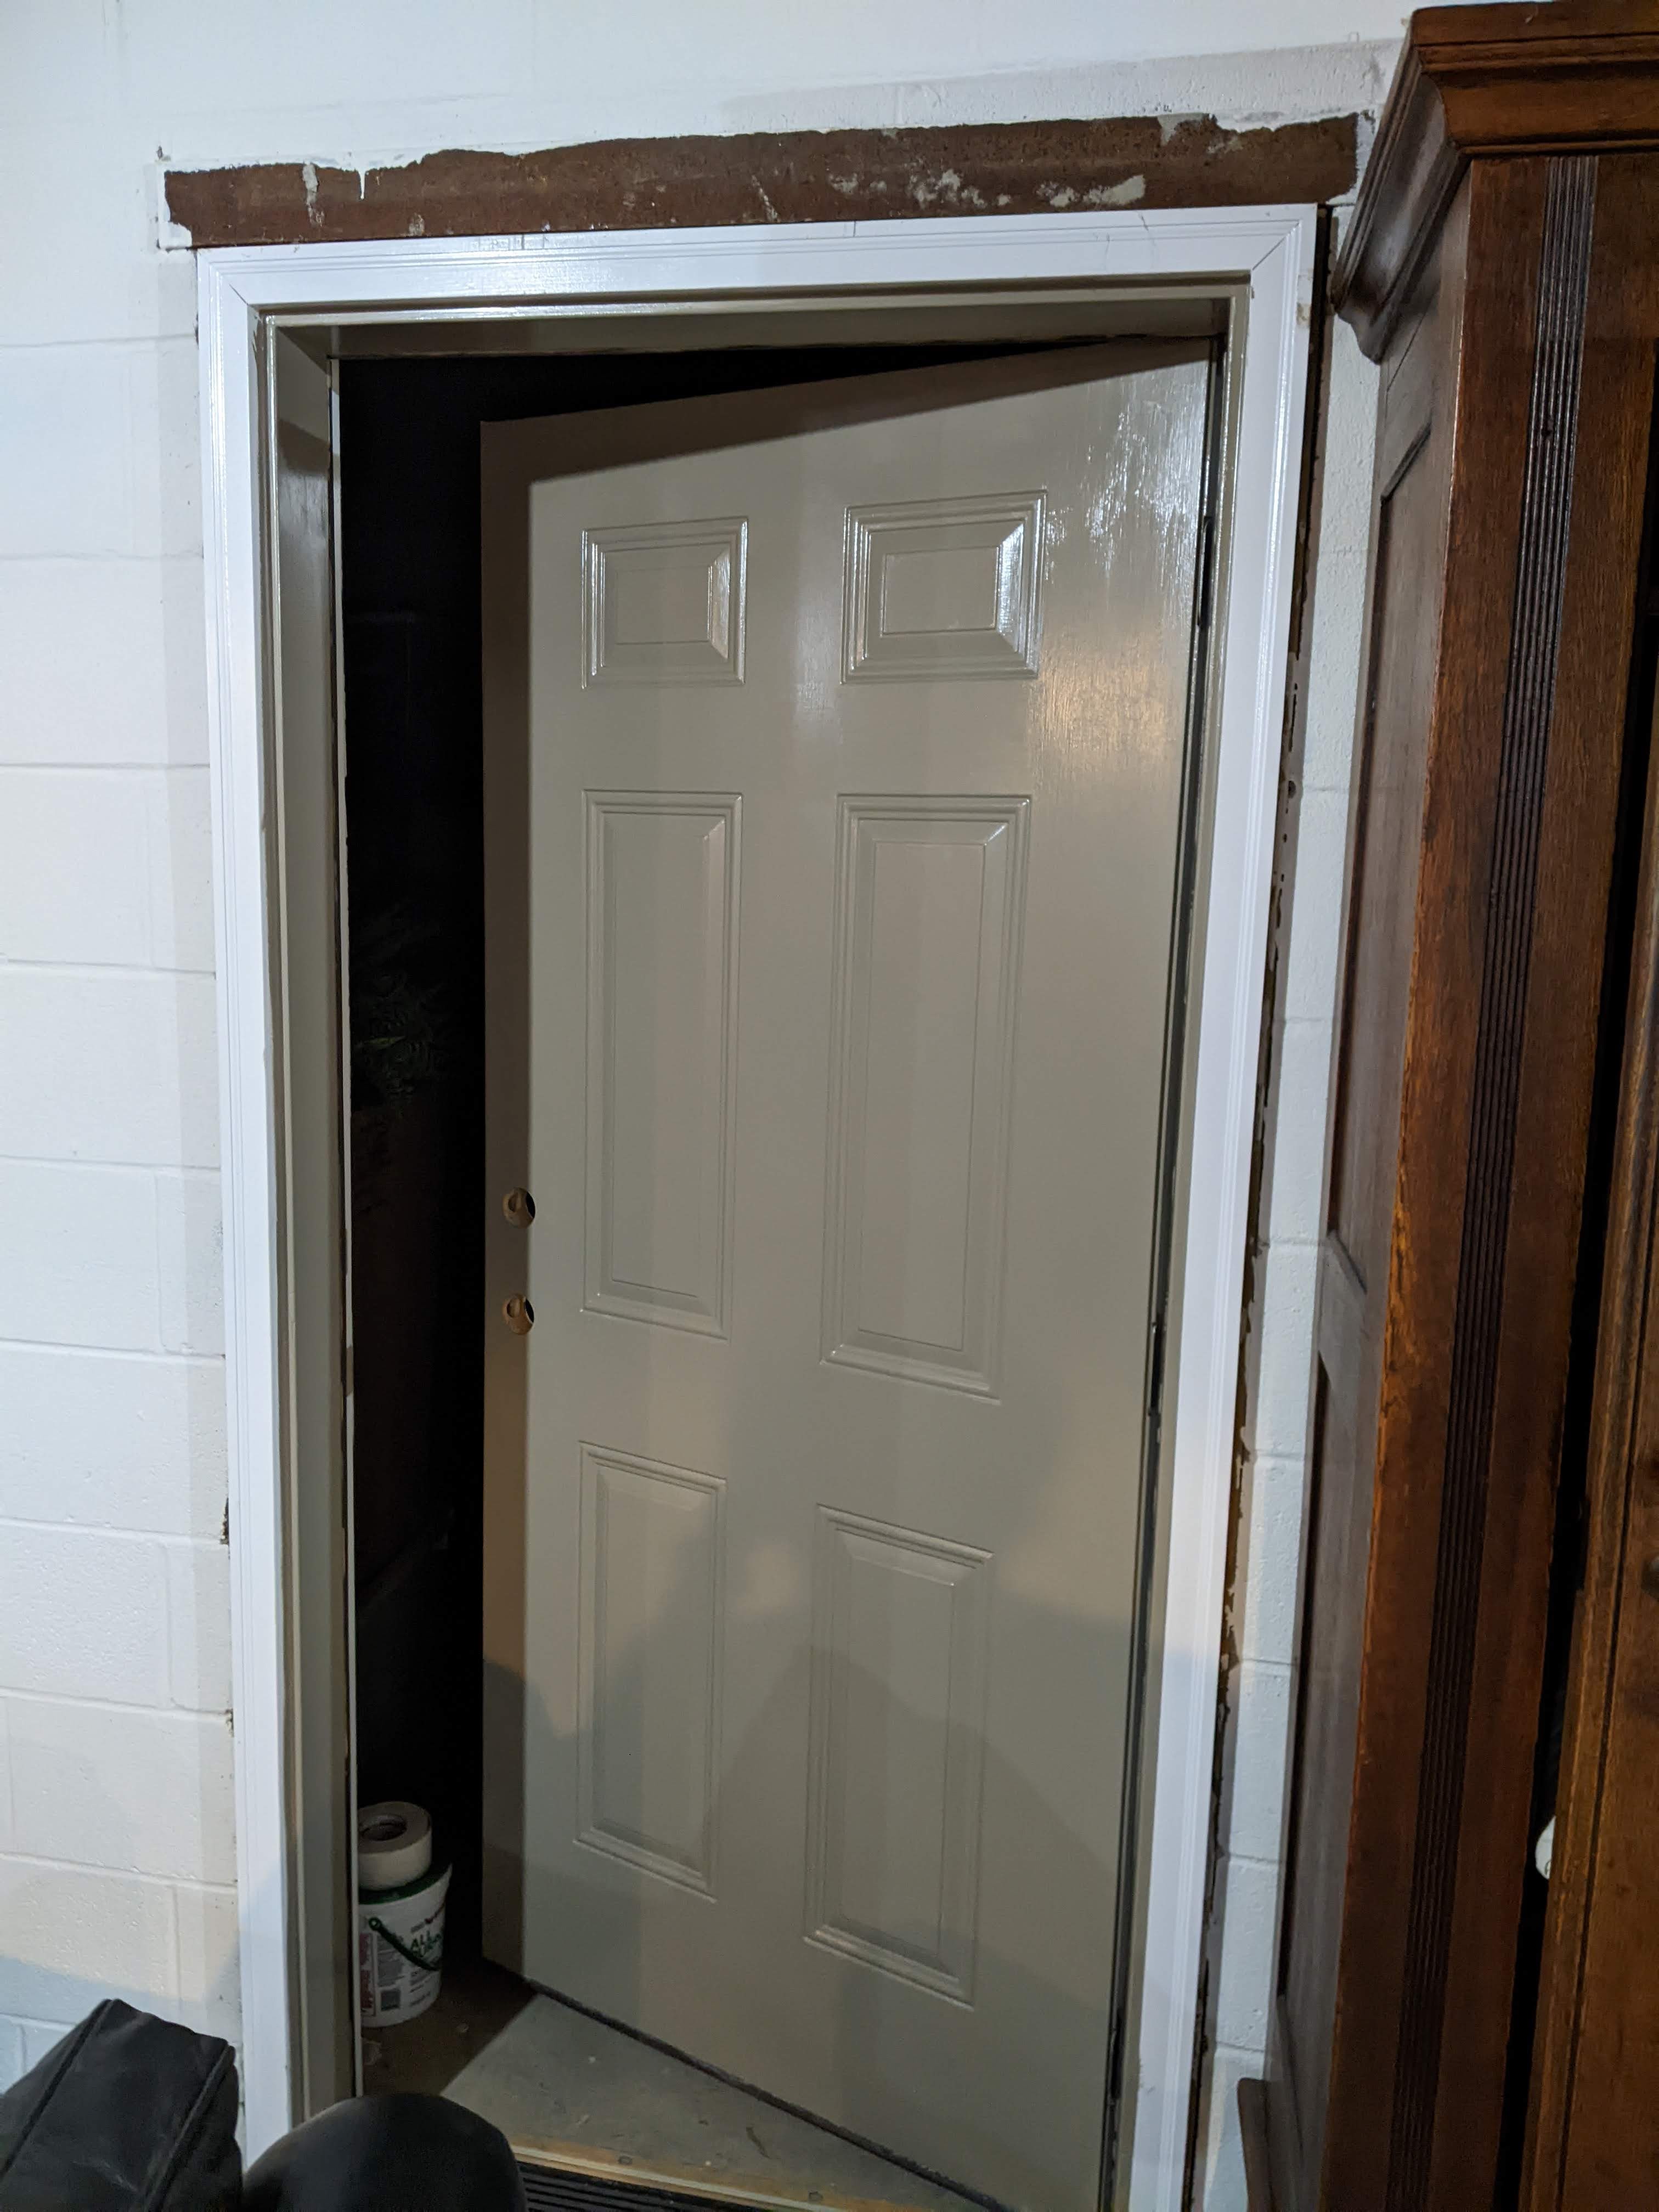
My husband put the door frames back in place last weekend and the trim color looks so good with the stone threshold and the color of the door (we’re going to do a tiny bit of sanding and then seal with satin lacquer.)
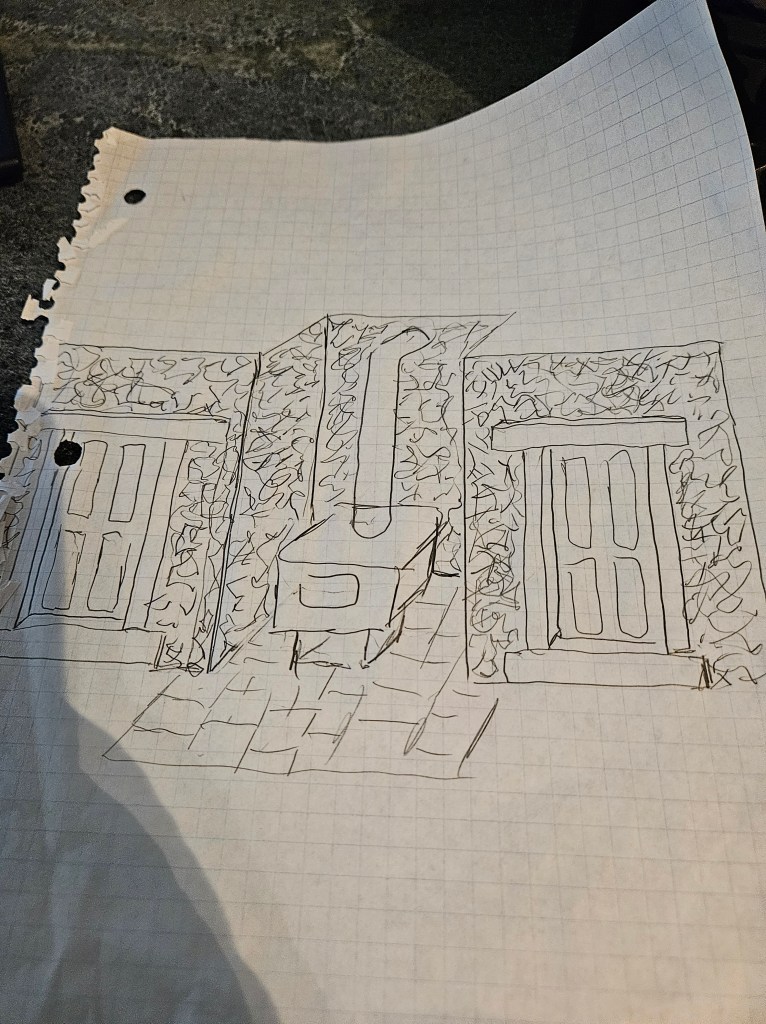
My husband sketched the wall with the wood stove to get an idea of what the finished project will look like.
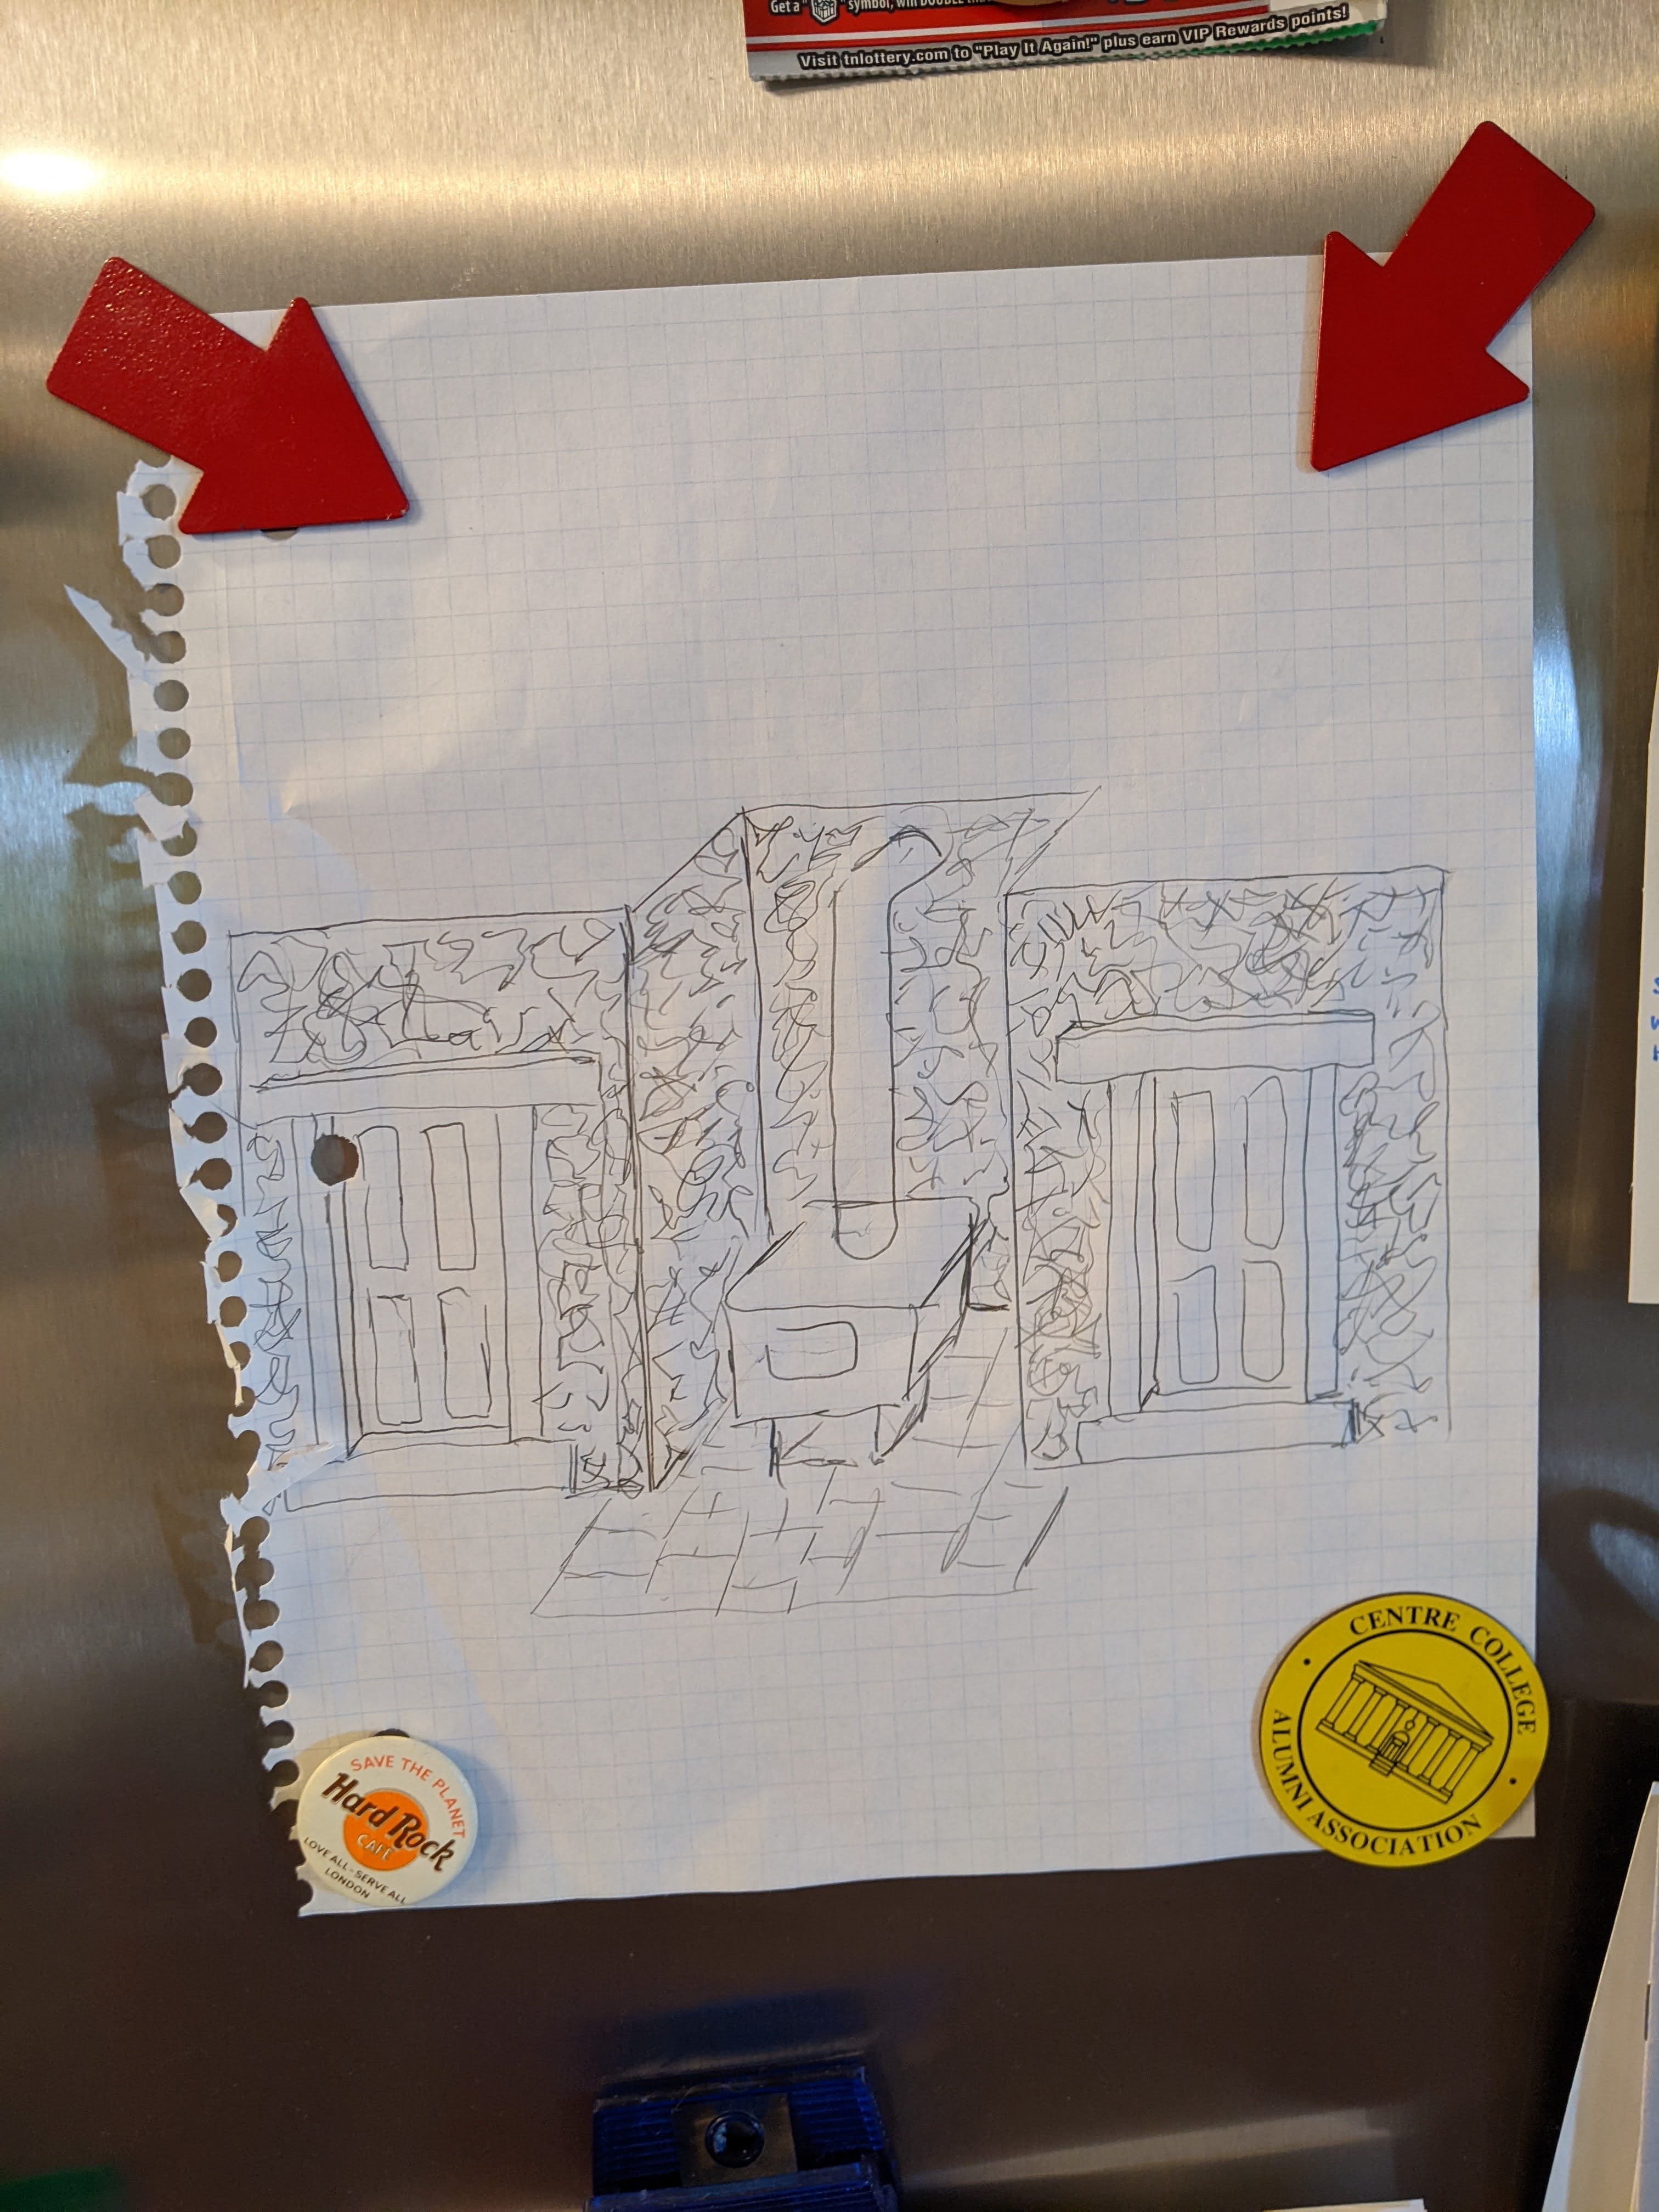
We are still thinking about whether or not we want to put beams above the doors. We have some cross bracing from an 1850’s barn that we could use. I worry that it may be too busy with the stone, the threshold, and everything. What do you think?
March 29, 2023:
All the projects in the basement are so long and I needed a quick win to provide a little momentum for the stone work that we are getting ready to start, so I decided to work on a couple doors.
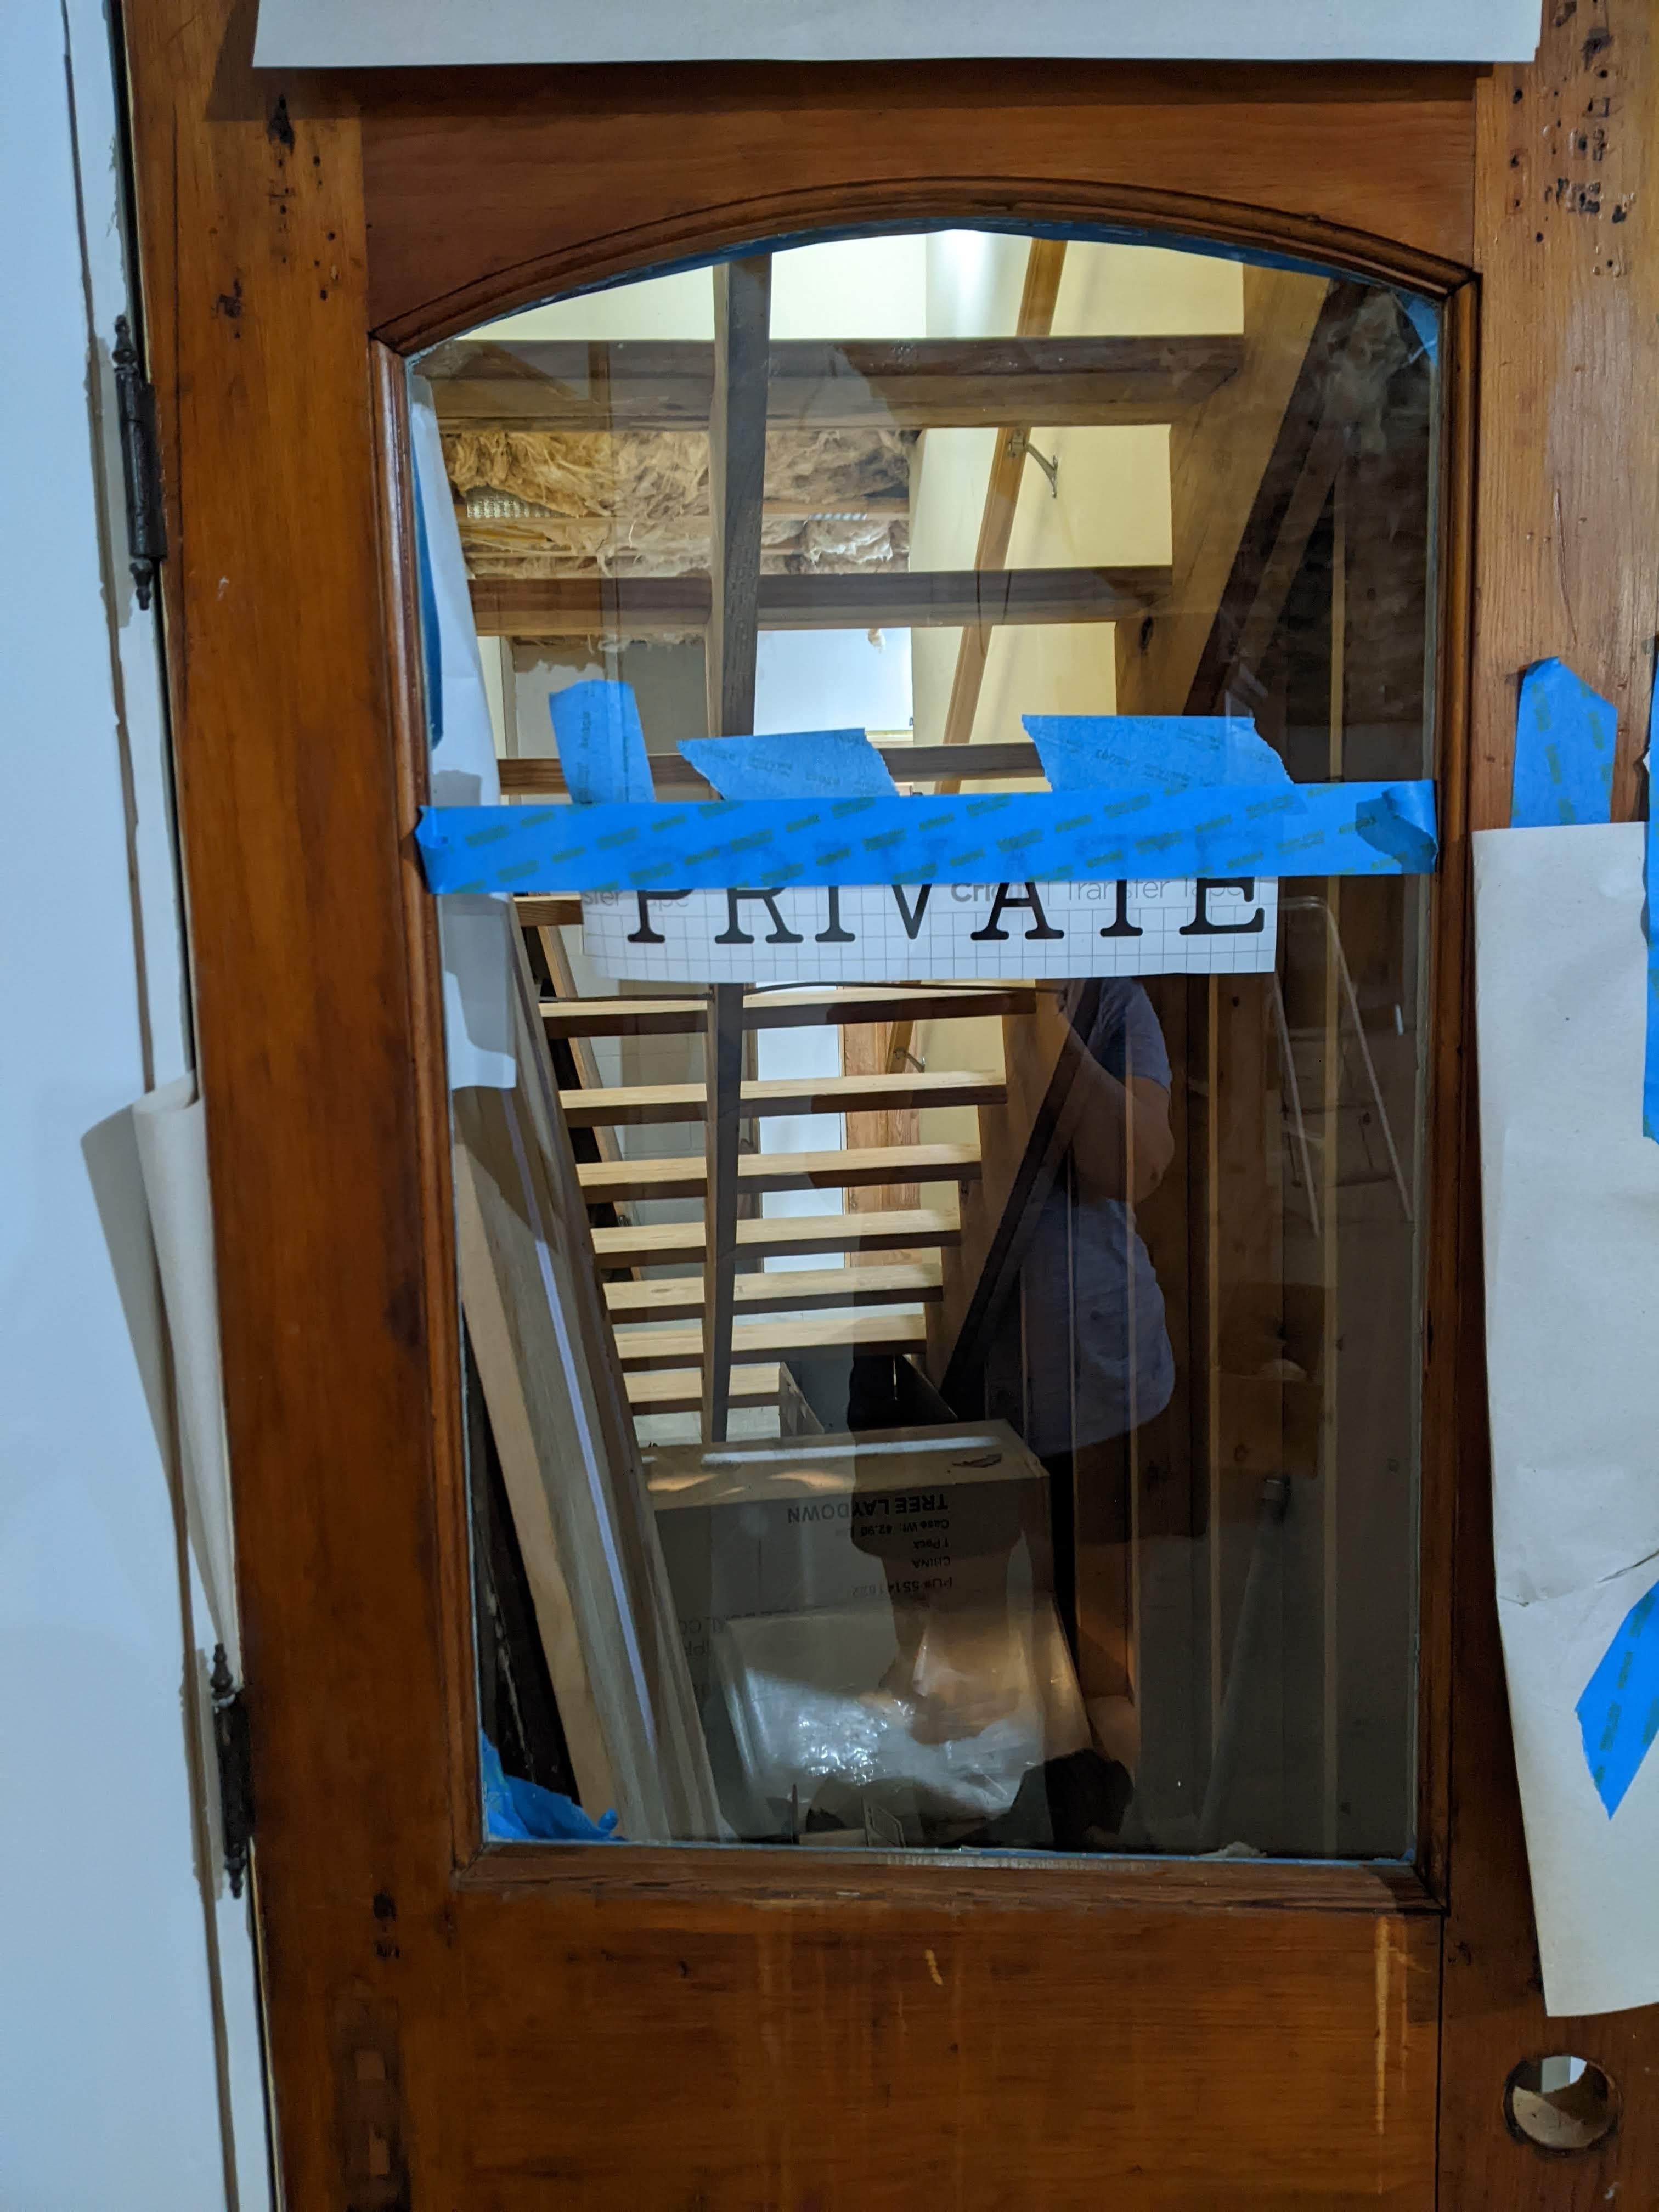
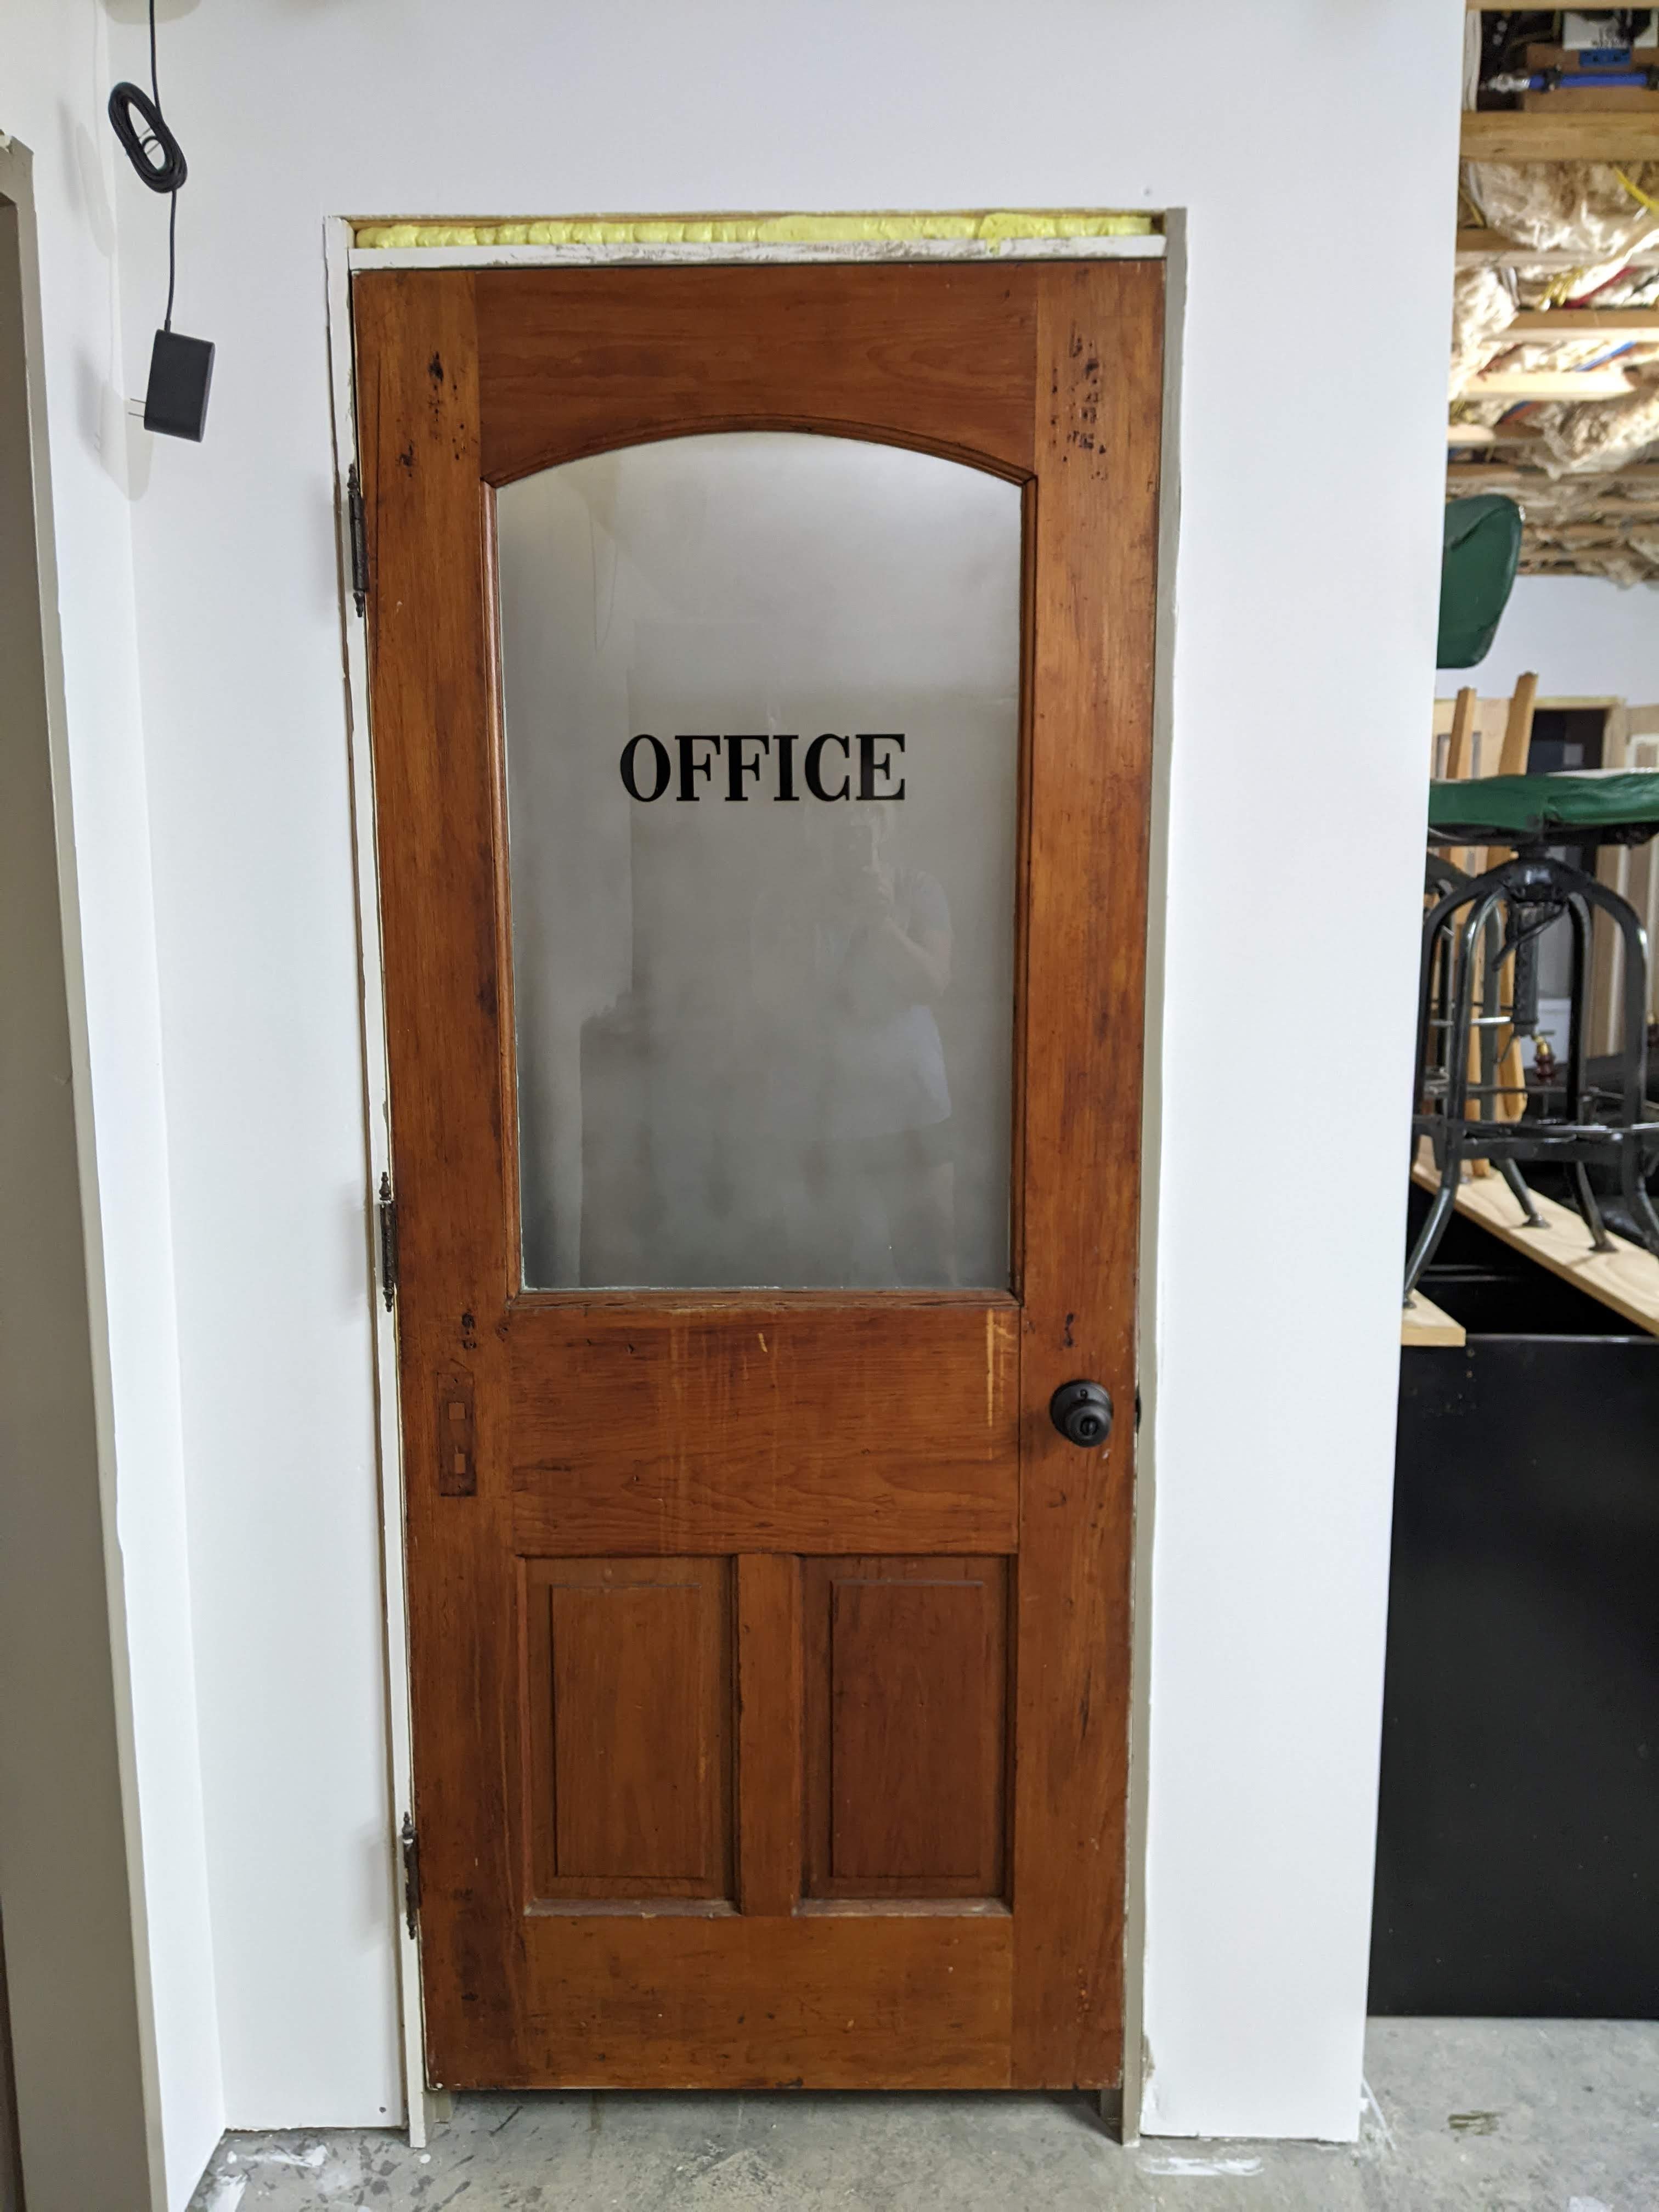
We are using two doors that used to be exterior doors for the closet under the stairs and the storage room right next to it. We wanted the glass to provide light into the rooms, but it’s unlikely that either the closet or the storage room (office) will be rooms that we want to be visible from the main part of the basement, so I am frosting the glass on the doors. Ideally, we would remove the doors from their hinges and take them outside to do this, but the doors are hanging on really old Victorian cast iron hinges and it’s a project to get them back on the hinges without over stressing the hinges which could break them.

The first thing I had to do was scrape the paint off of the glass on the inside of the door–because this is the side that I am going to frost. Then I wiped off the dust and vacuumed, and taped all around the window. I also had to clean the glass thoroughly with rubbing alcohol to remove any oil from my fingers to ensure that the frosting spray paint would stick to the glass. I put up more tape and paper to protect the surface of the door from overspray.
Then the doors were ready to start measuring and create a level line and center line so that I could apply the window decals (office and not an exit) to the doors. I measured 24″ up from the bottom of the glass and marked it in three places (on the backs of the doors so that nothing would be in the way when I applied the vinyl decals which go on the front of the door.) I also marked the center point of the window. Then I put up painters tape to mark the level line.

I took each decal and marked the center point and lined it up with the center point of the glass and the level line and used painters tape to affix it to the glass temporarily. Only the decal and the three pieces of painters tape are on this side of the glass.
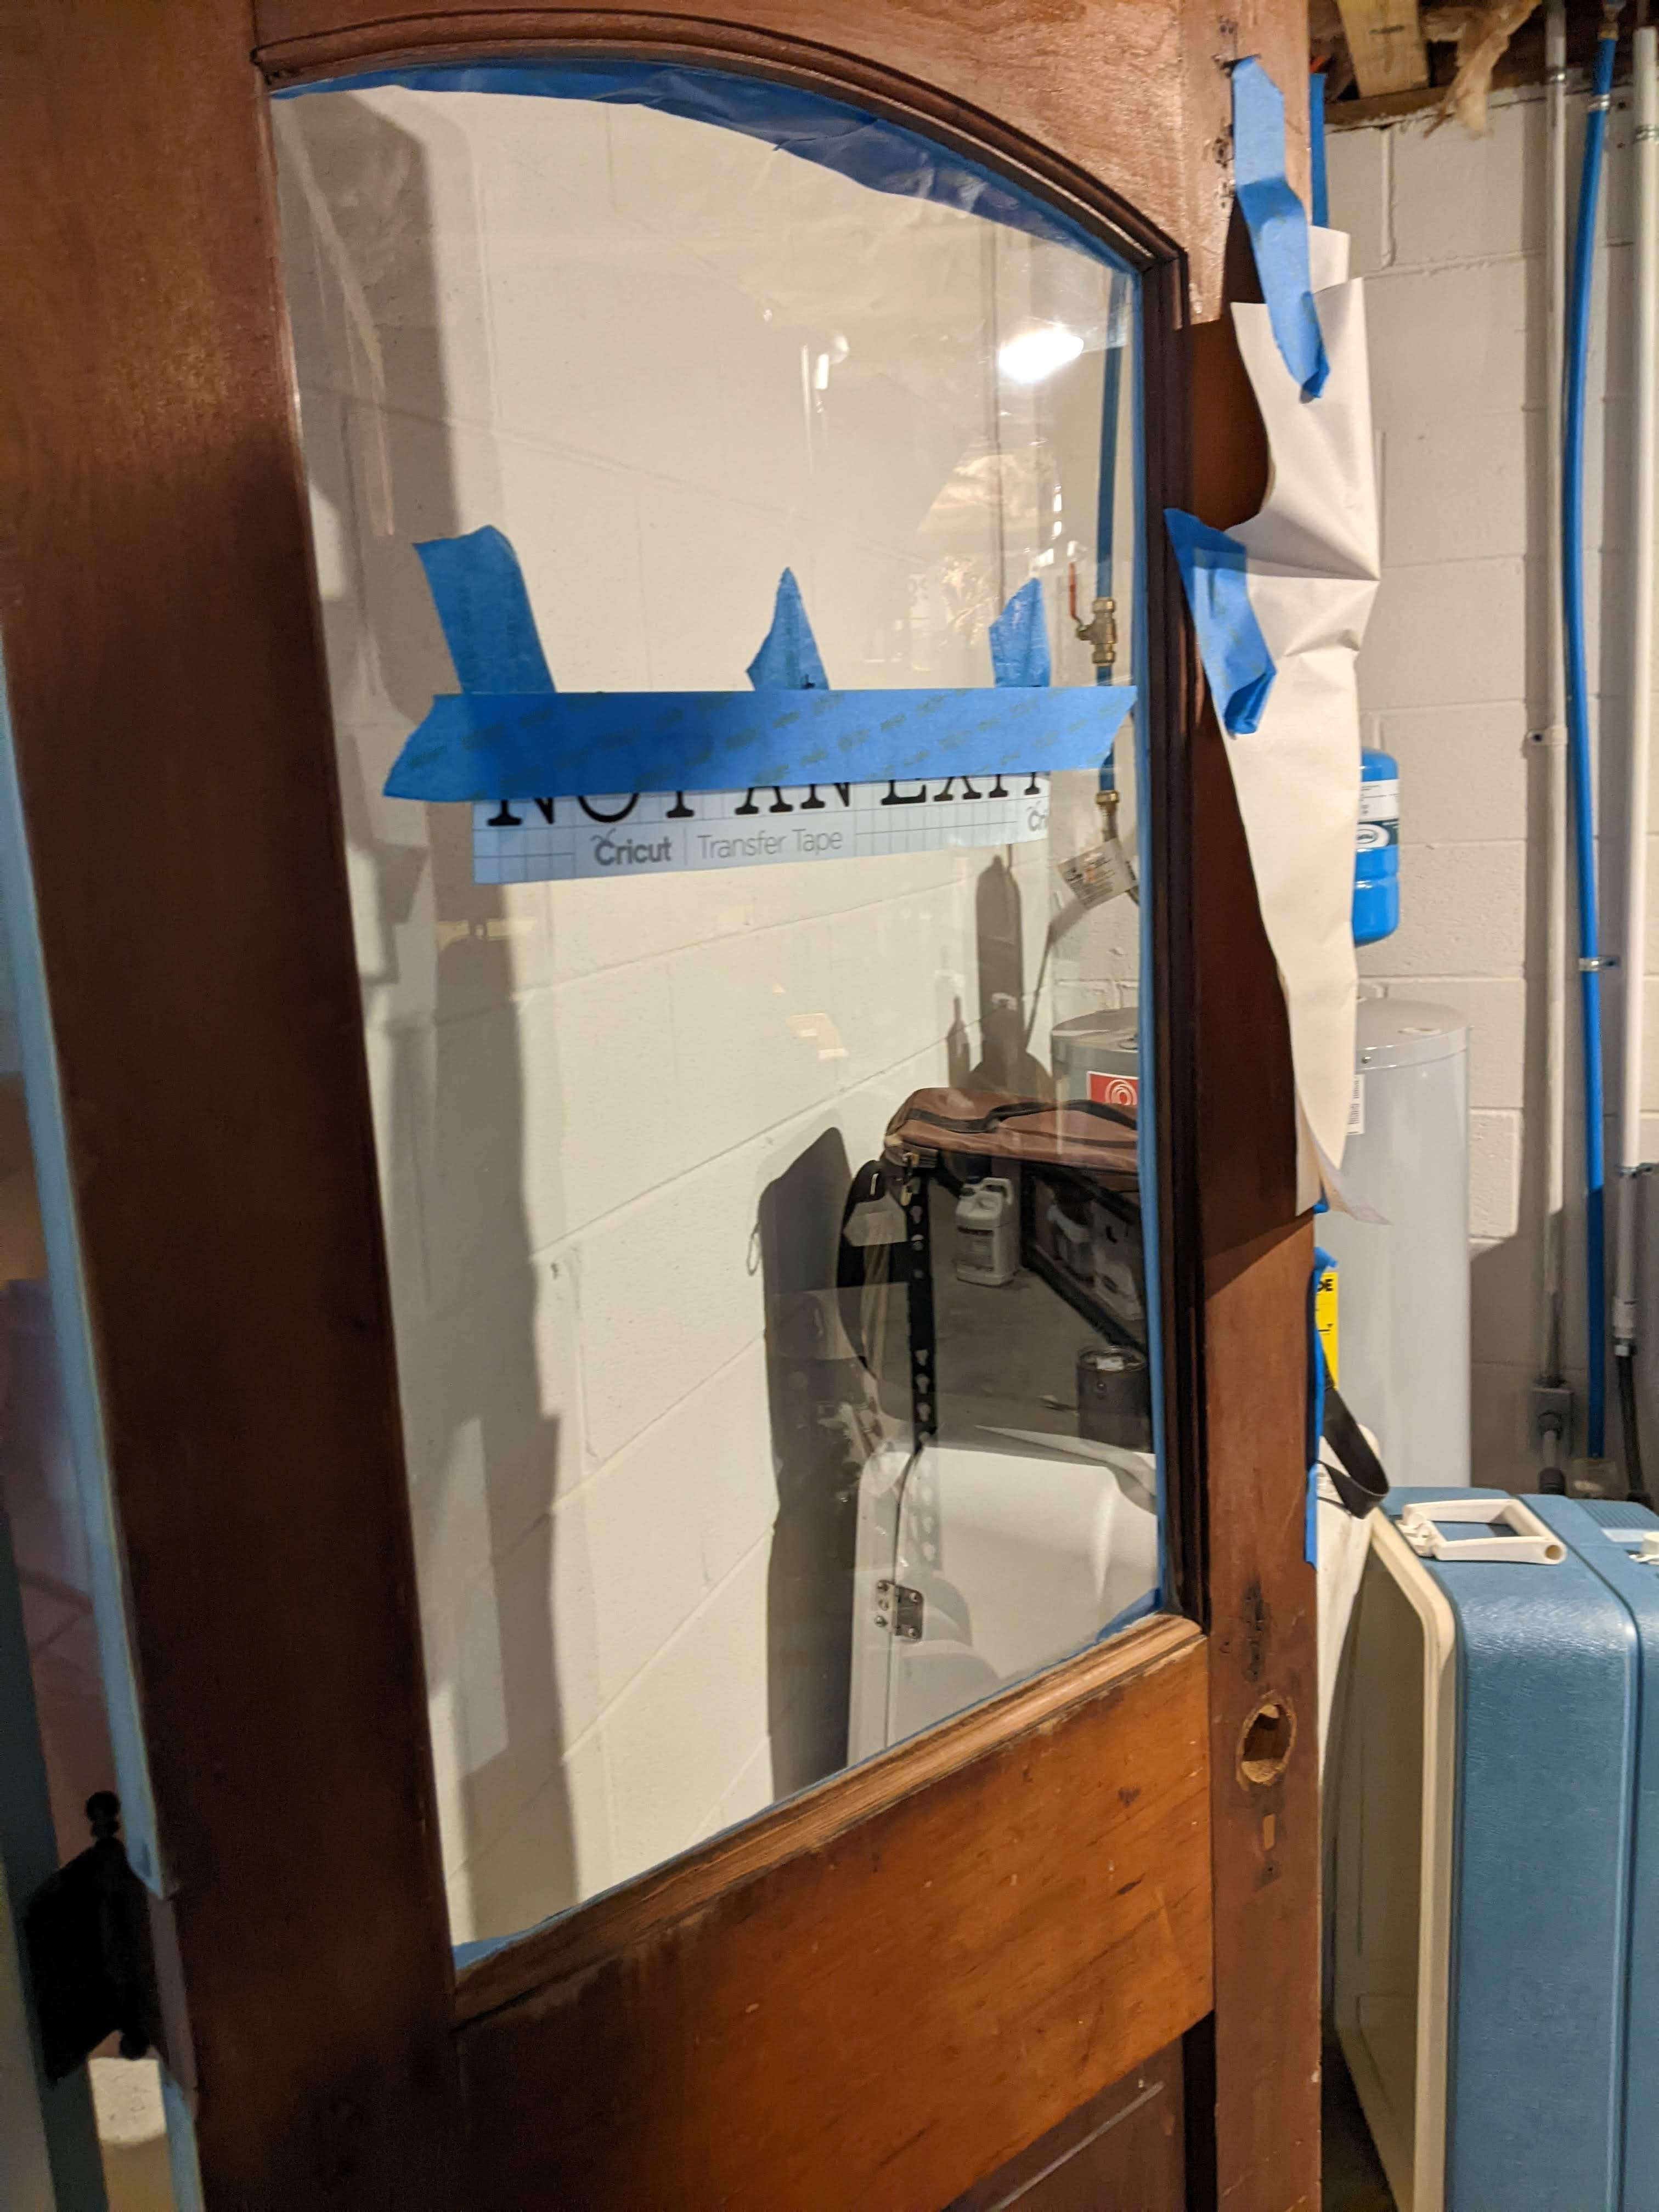
Then it was the moment of truth. I had to remove the backing from the lettering and affix it to the glass and then smooth it and remove the transfer tape. Nerve wracking.
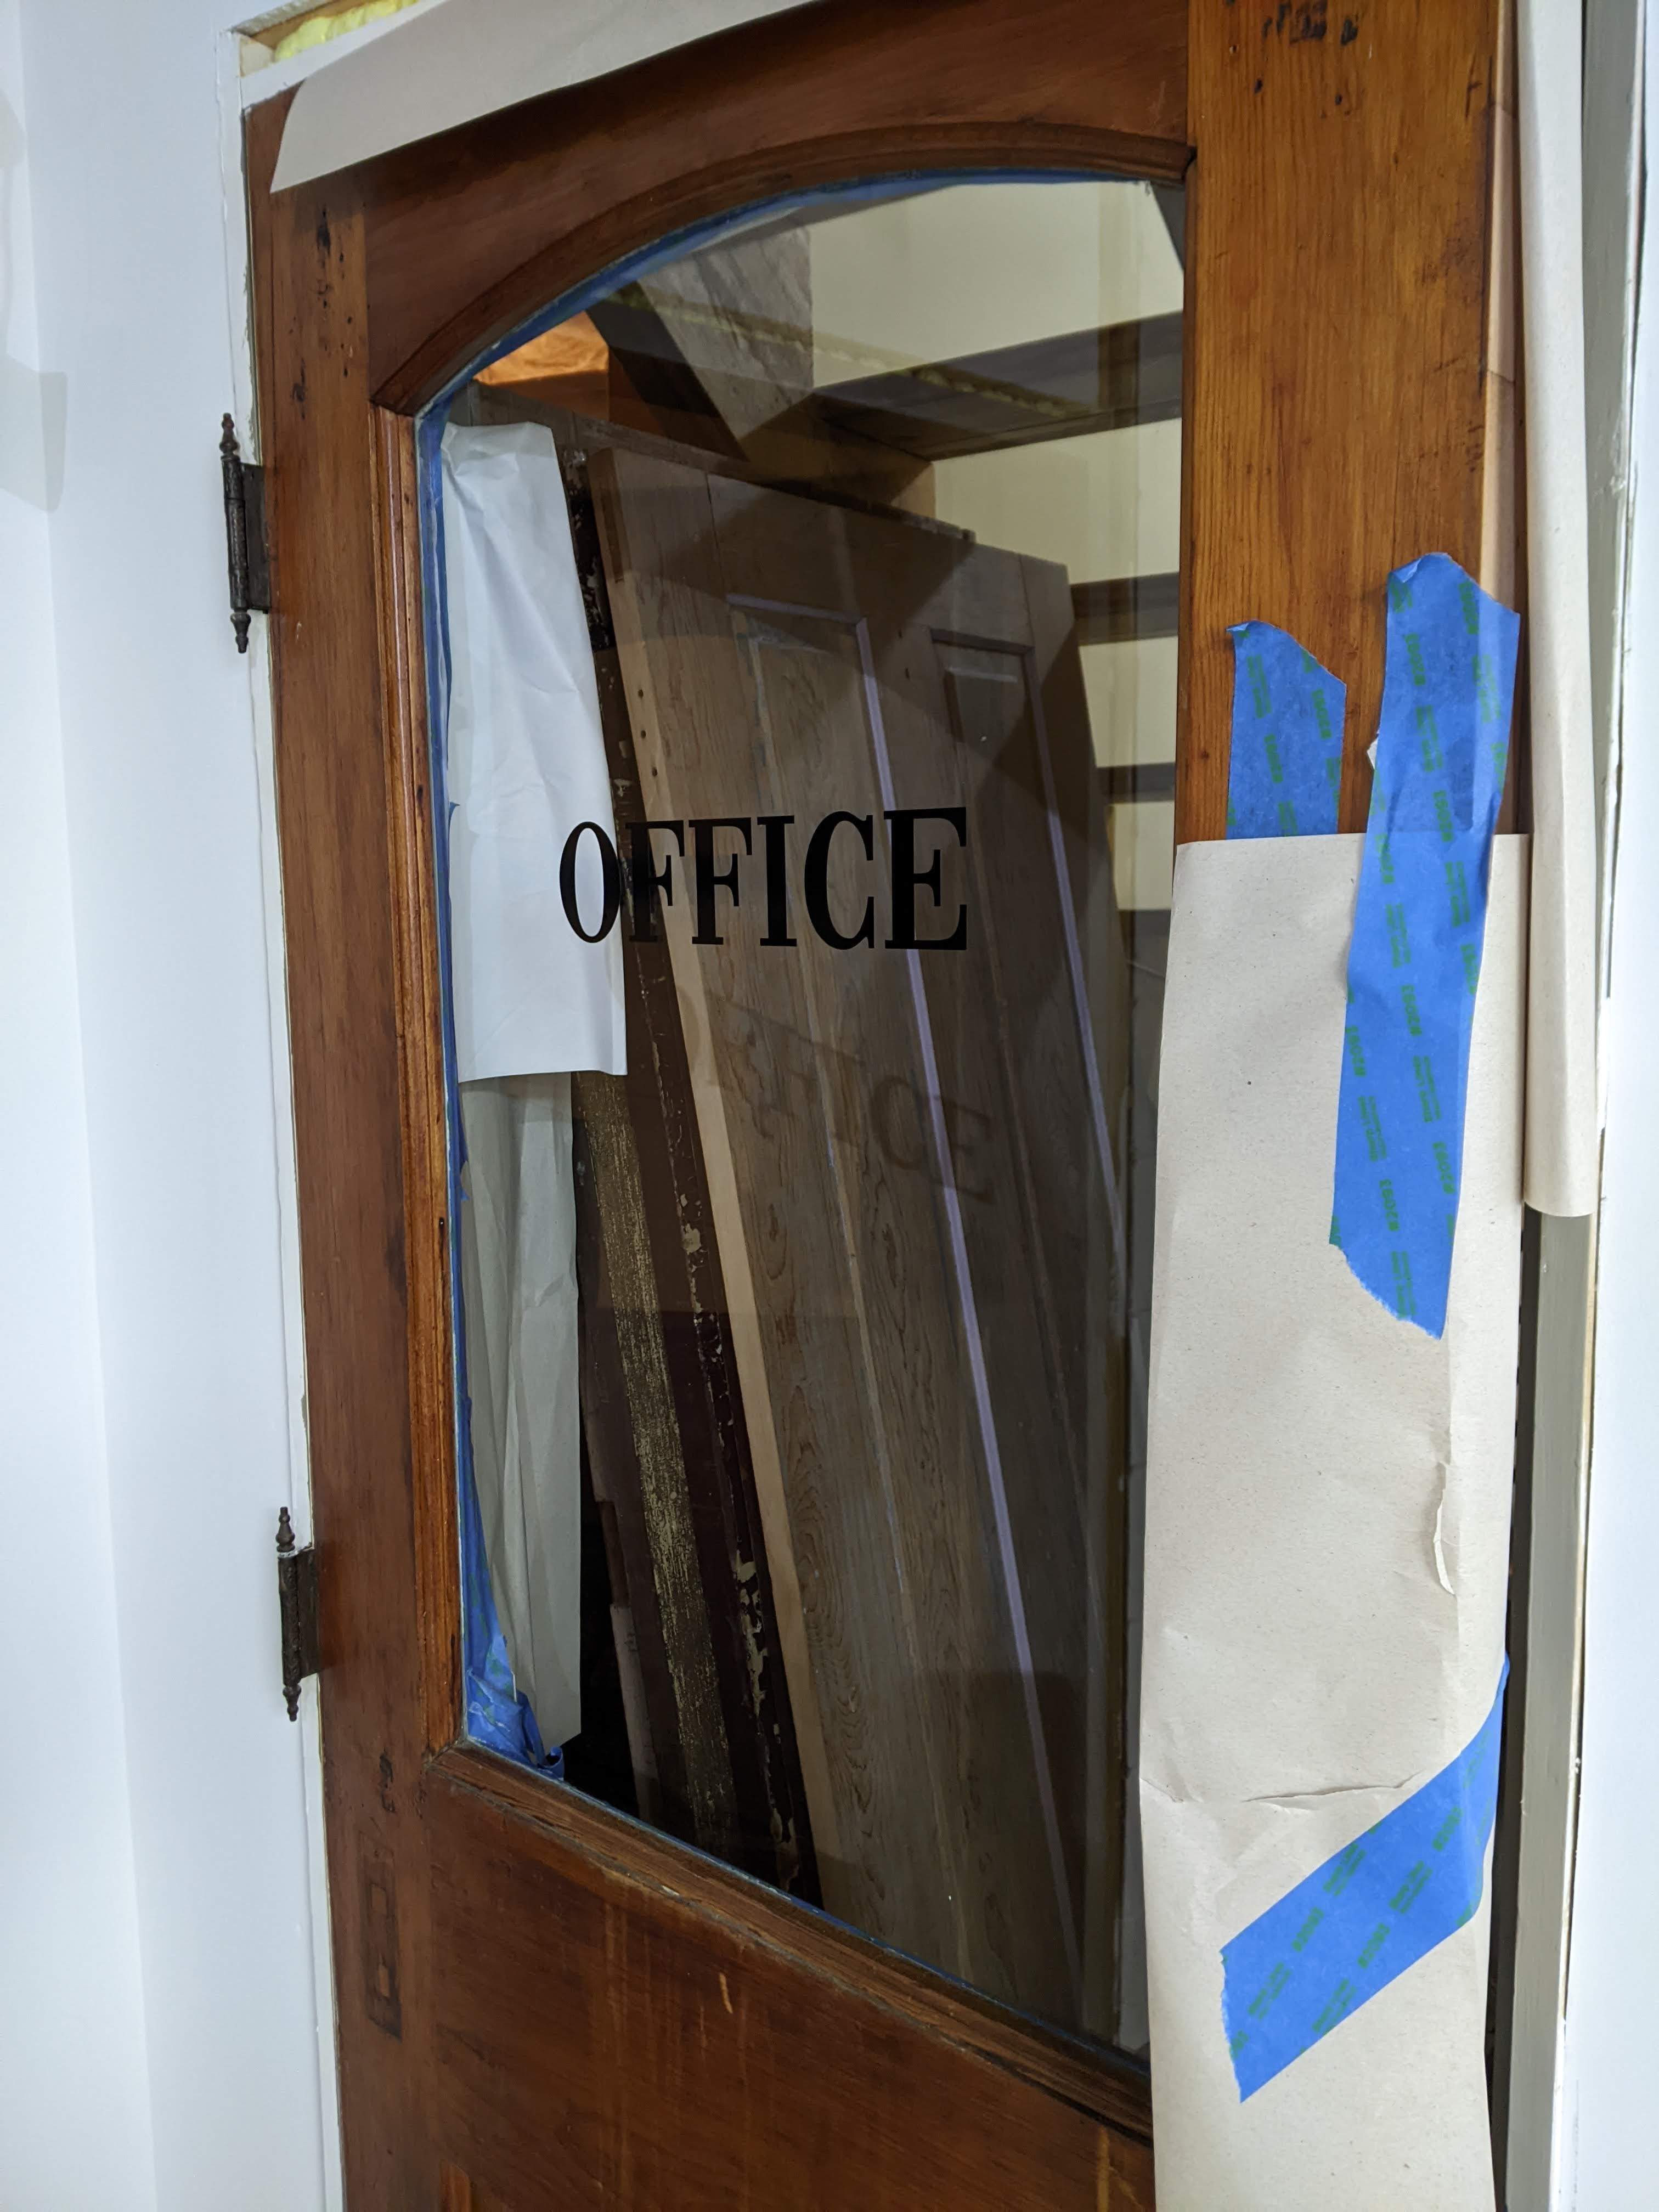
Next steps was to carefully wipe the glass one last time with rubbing alcohol to be triply sure that there wasn’t any oil from my fingers on the glass. Once the glass was cleaned and the alcohol had evaporated, I sprayed the glass on the back side of the door with frosting spray paint. Fortunately, this is extremely fast drying, because it required SEVERAL coats. (This stuff is really fumey, so be sure to use it outside, or open windows/doors.) I removed the tape and paper to reveal the final look.
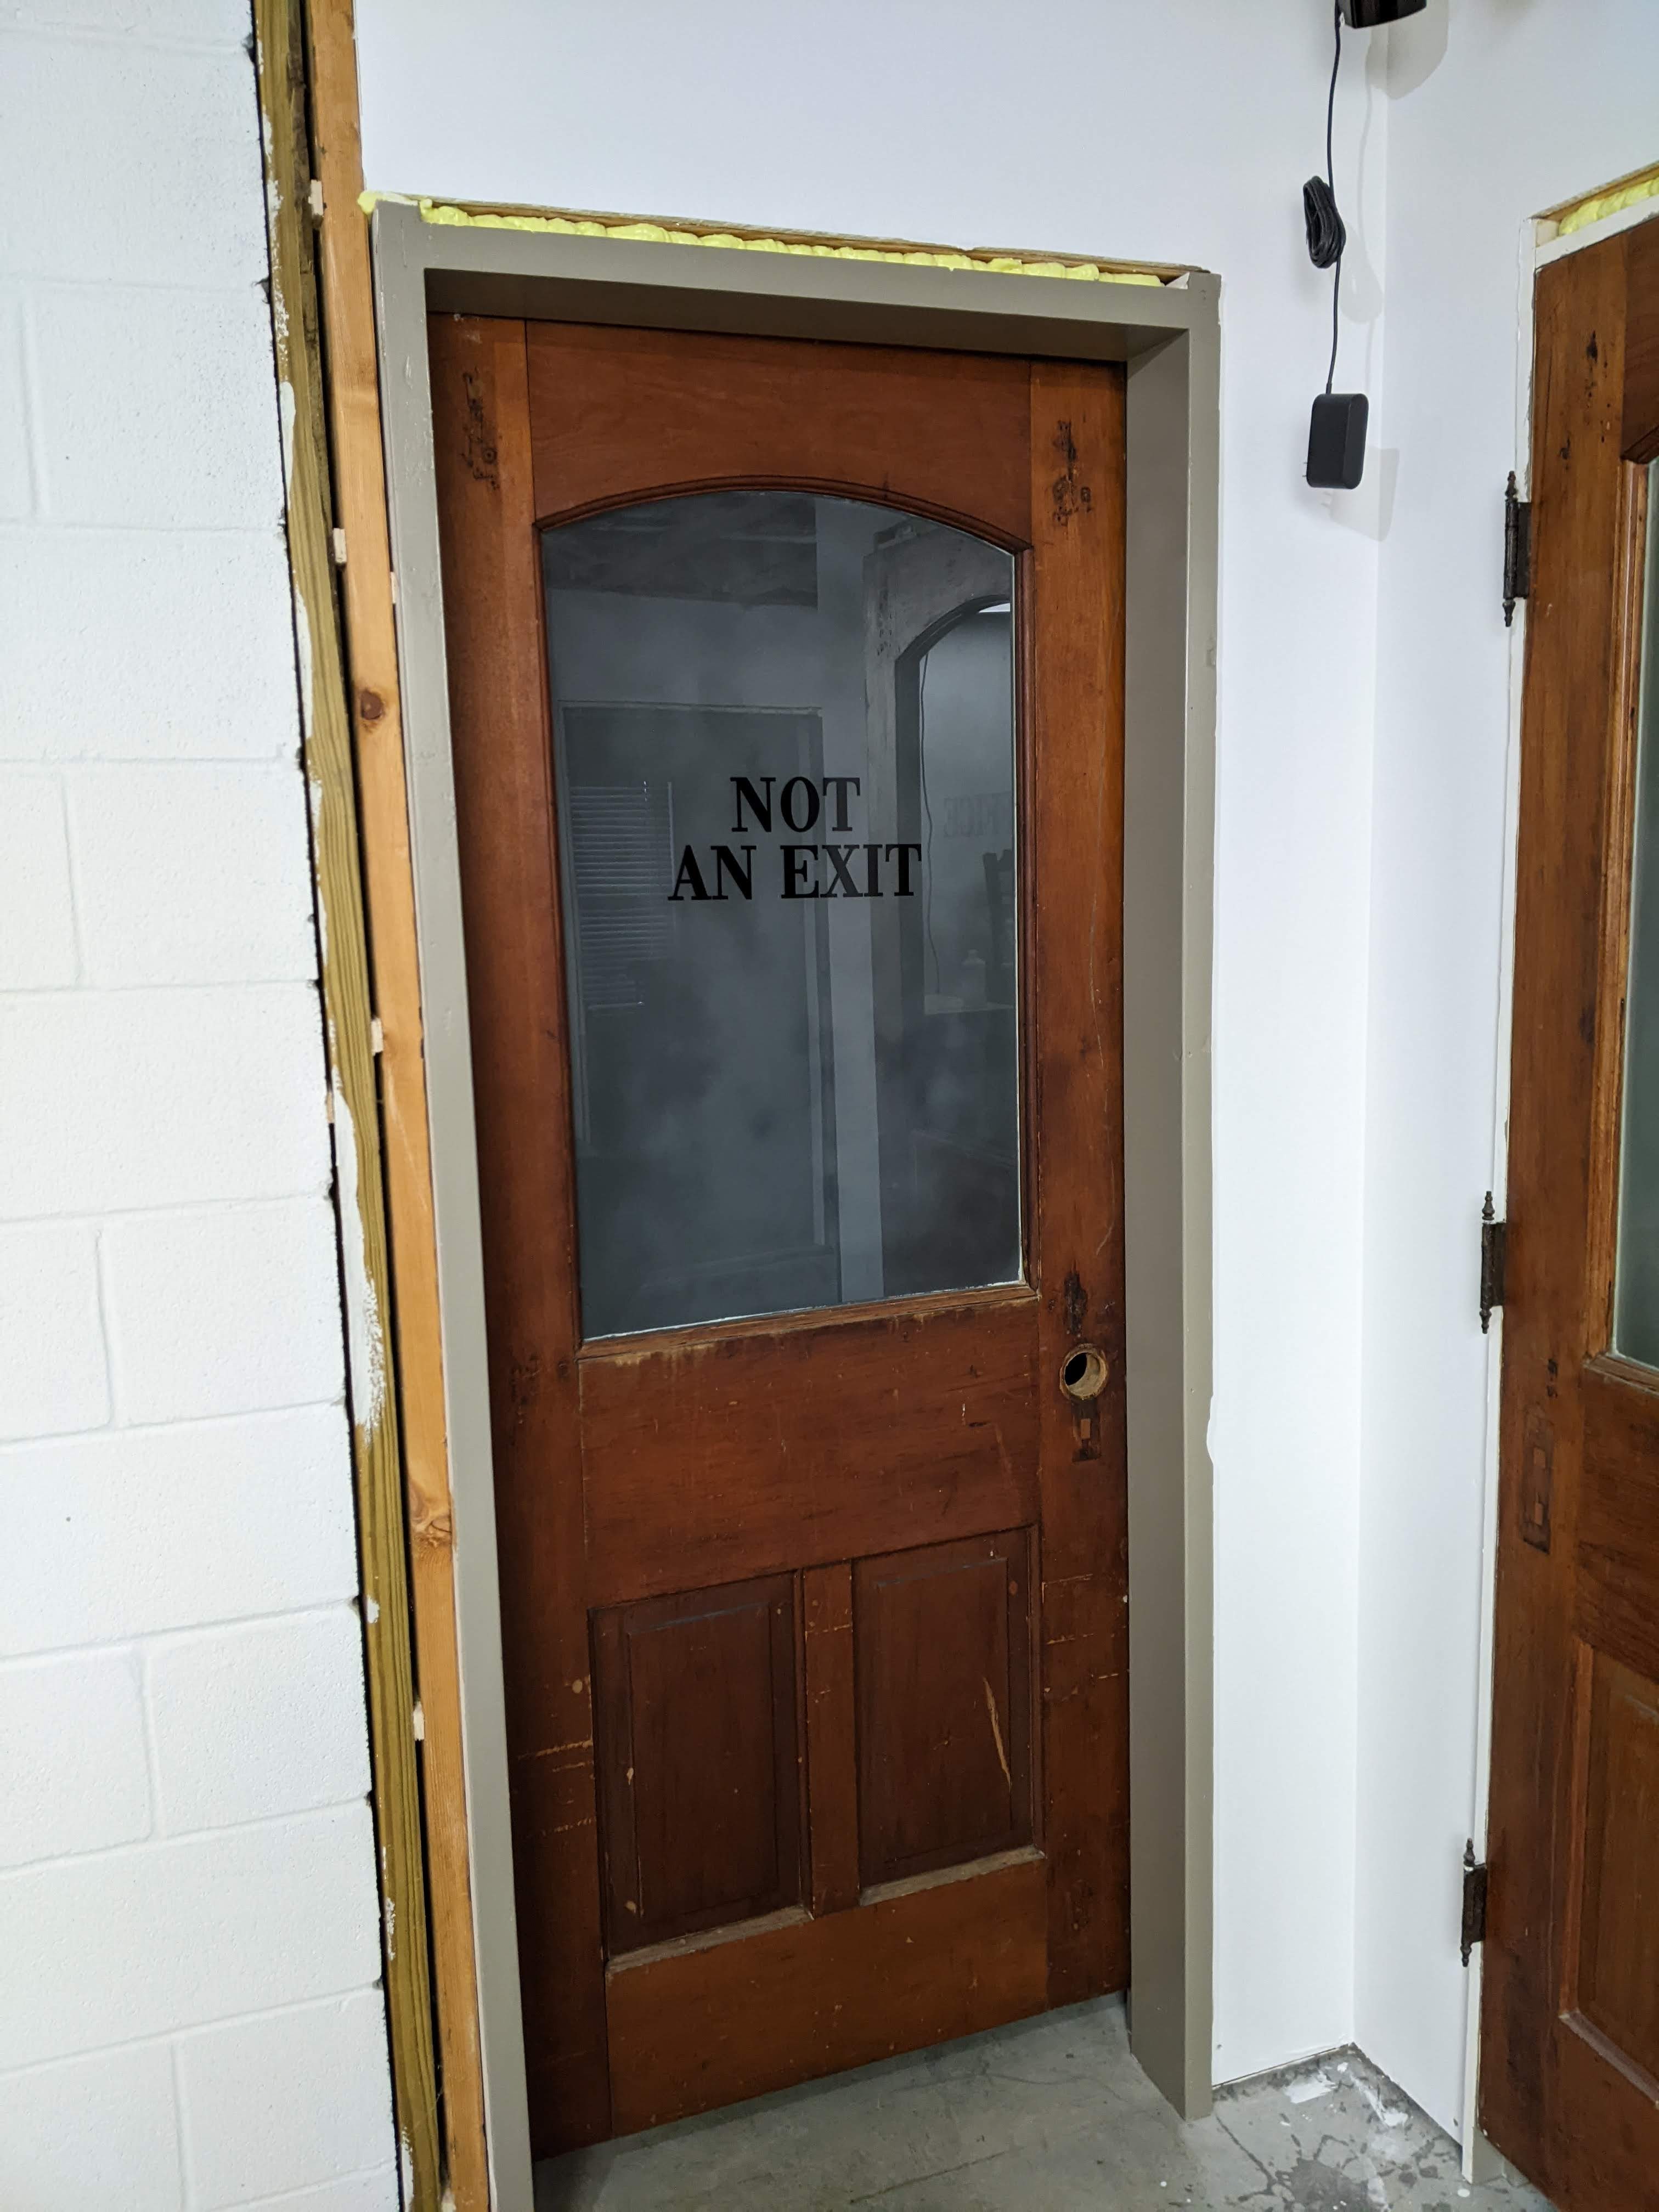
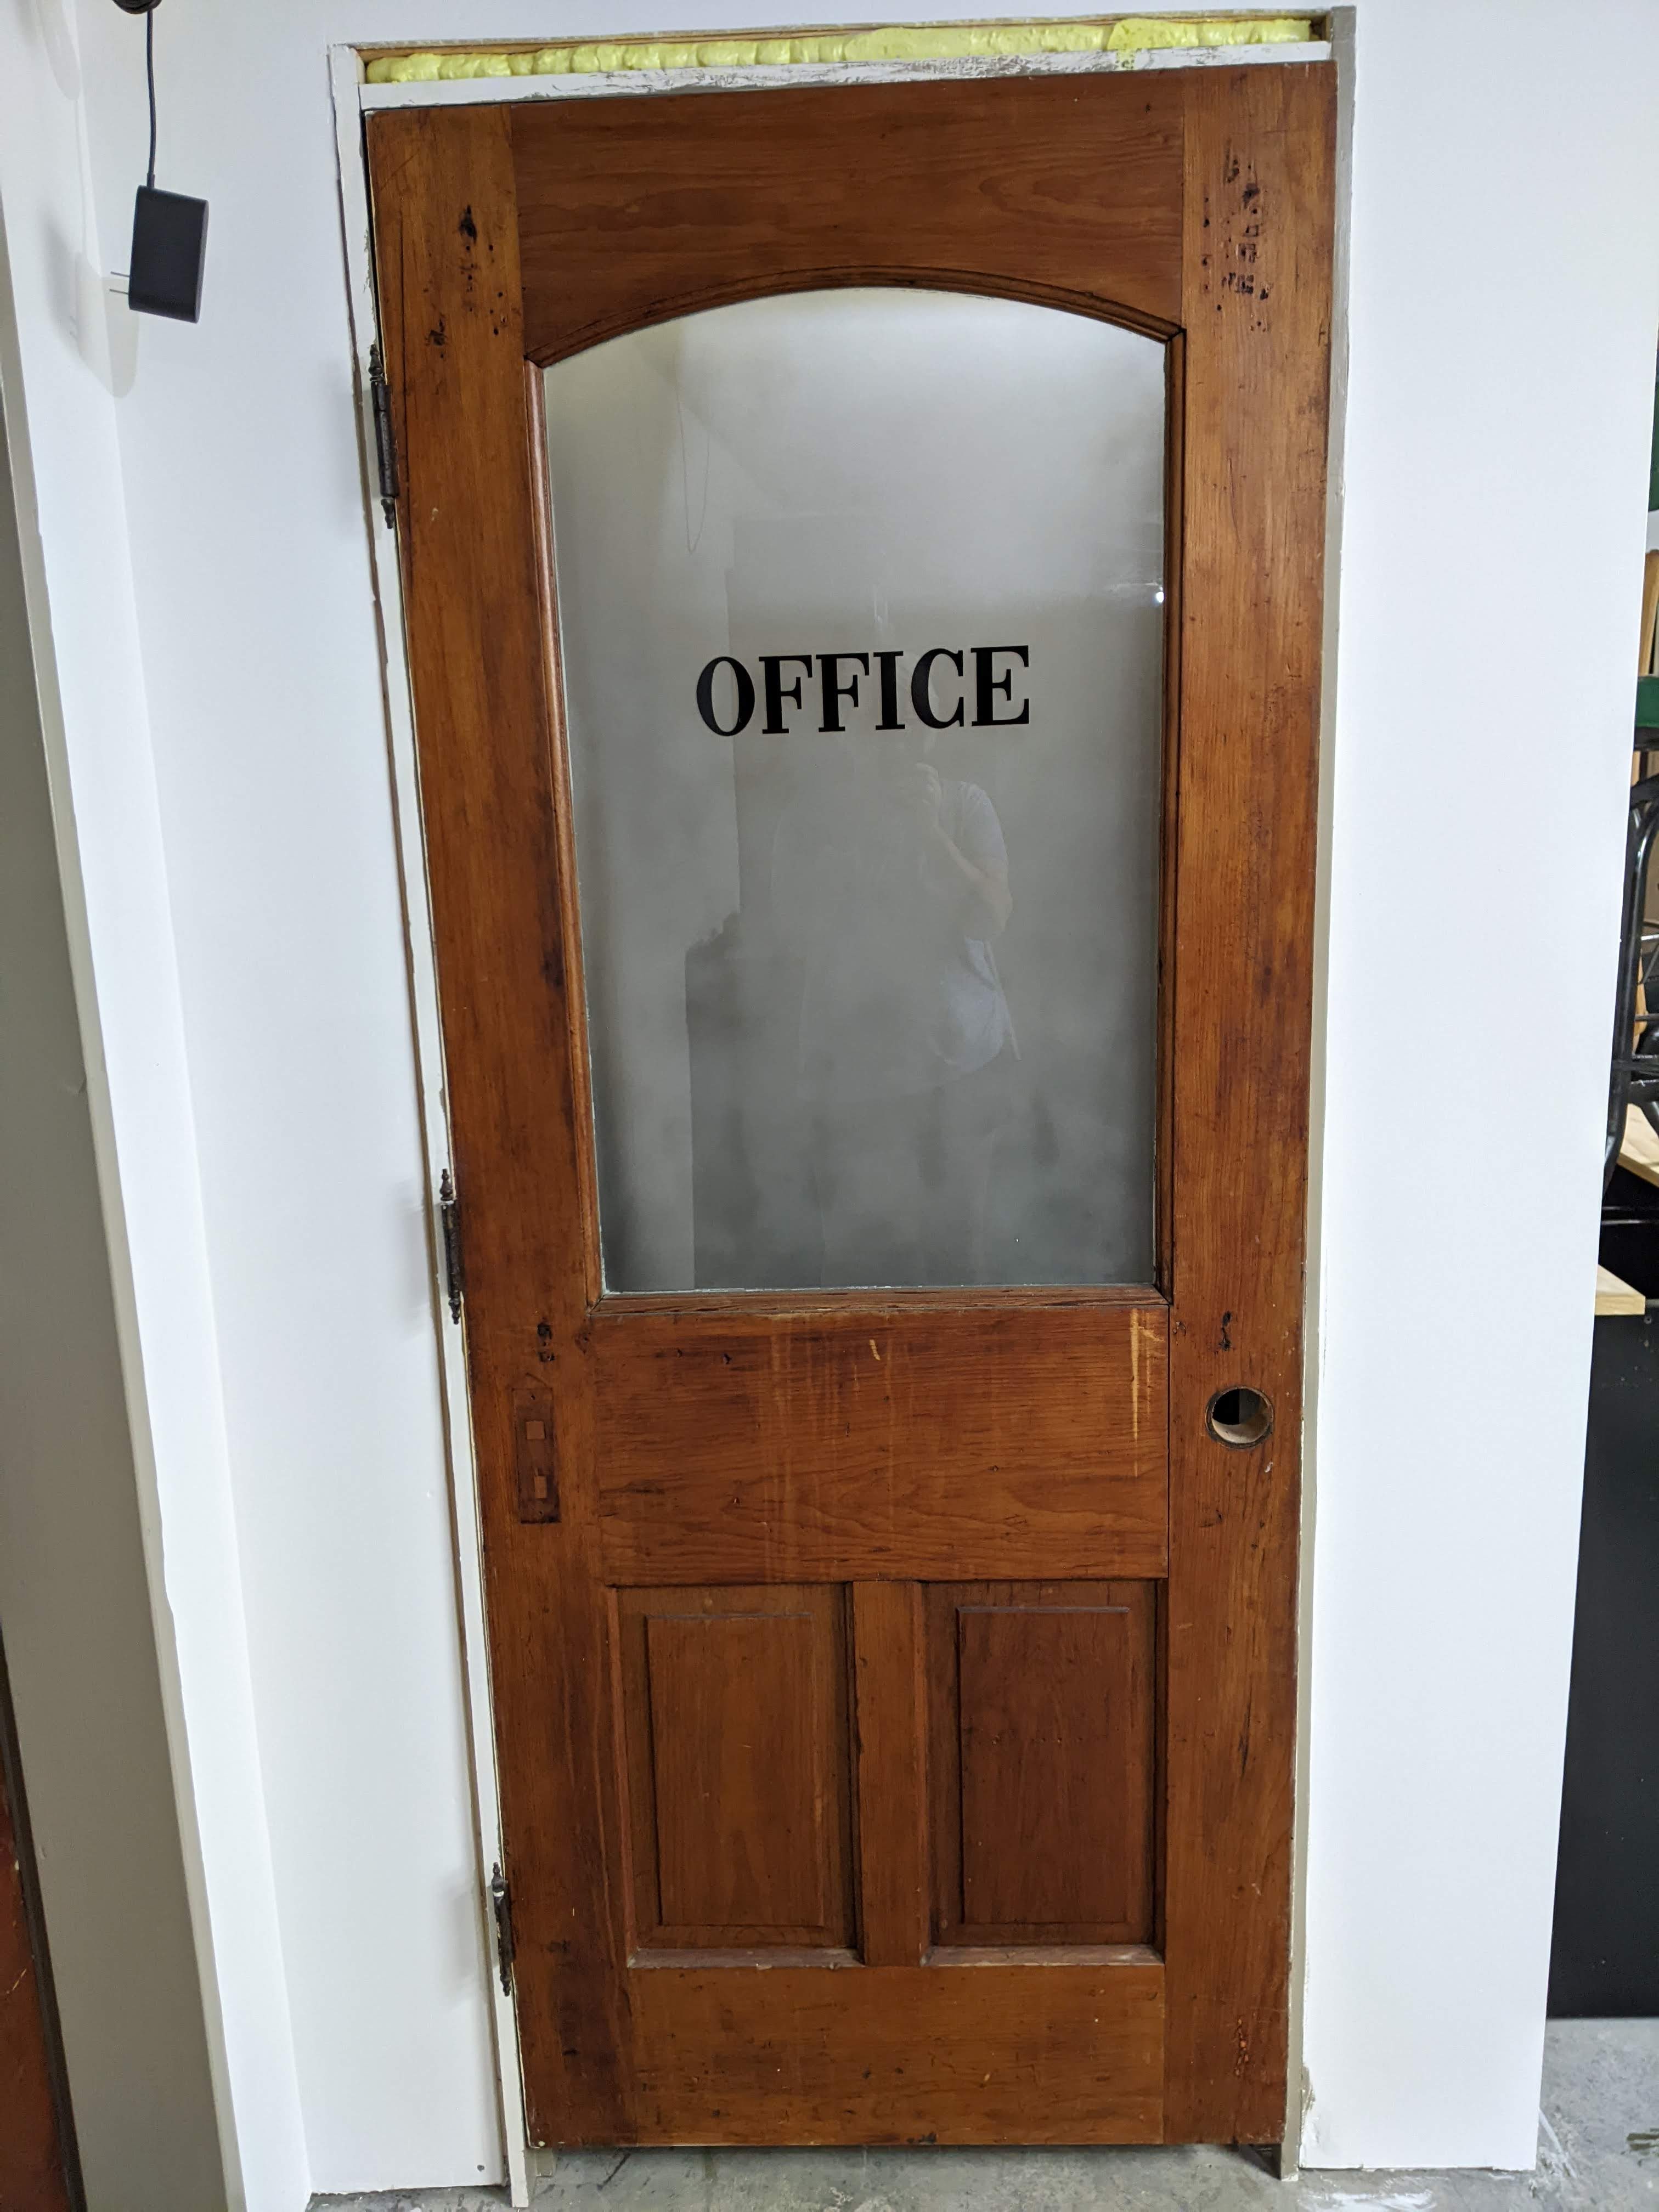
You might have noticed that the door now says Office instead of Private and the other door has Not An Exit on two lines instead of one. That is because I thought I knew what I was doing, but didn’t. Fortunately, I had another set of vinyl lettering, and as it turns out, I like the lettering better on this set than the set I thought I was going to use. Watch a YouTube video before you attempt this. It will save you some time and money.
Final step was to install the door knobs that I bought to go on the doors so that they will finally stay closed. I used oiled bronze because all the door hardware is going to be dark.
What do you think?
April 2, 2023:
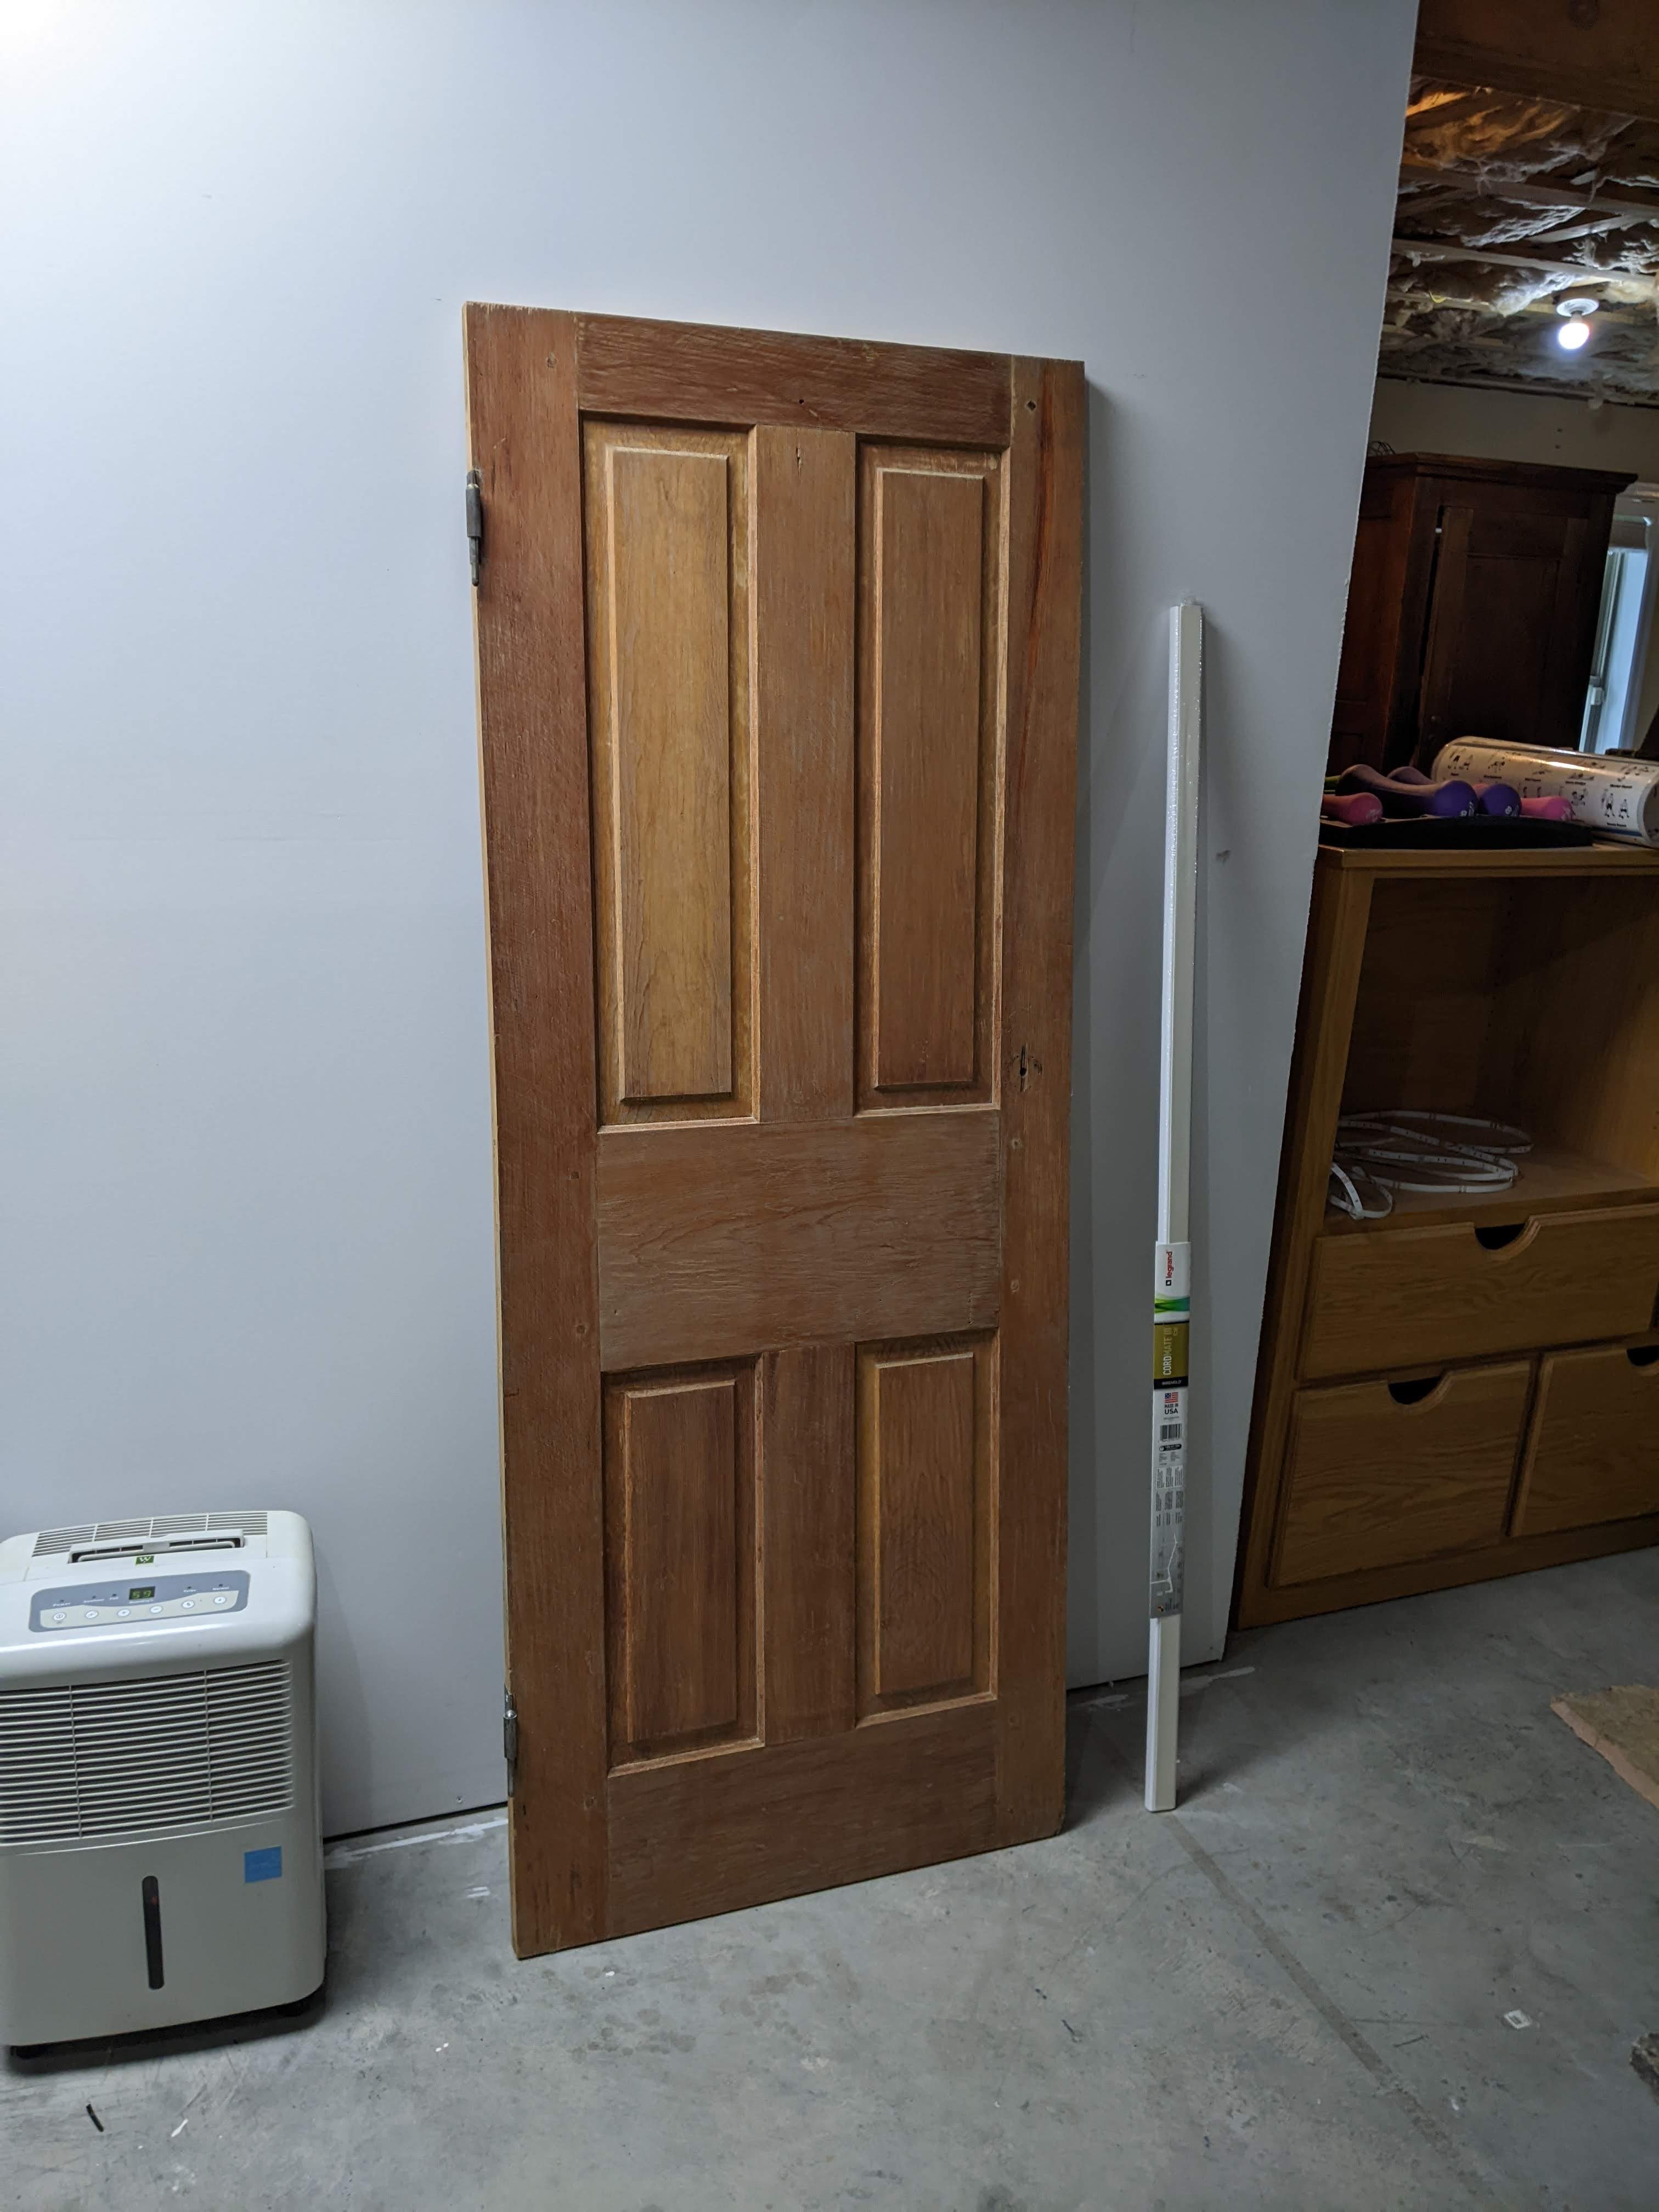
We are going for a 1930’s English pub vibe in our basement because we have low-ish ceilings and we have to use stone veneer on some of the walls, so that lends itself to that look. As a result, we decided early on that we were going to use antique doors. So last March (2022), I found someone who was selling a bunch of matched 2 long vertical panel doors, I think 7 total. When we went to pick them up from near Toledo Ohio, we found that he not only had the seven that I bought from ebay, but he had quite a few more. We prowled through all his outbuildings and came home with the original seven, plus three exterior doors with windows (one has a broken window, and I think it’s going to be the door to my husband’s office), and then two little doors that we are using for the closets on either side of the wood stove.
We asked Jim about the doors and he said that the two long vertical panels were popular only for a short time in the second quarter of the 19th century. He figured that they were close to two hundred years old. He couldn’t remember where he had gotten them because he had stored them in his shop for at least 50 years when he didn’t use them in the renovation/additions to his house. The two exterior doors that I used for the closet under the stairs and the storage room had been exterior doors on Jim’s house, but he replaced them at some point. He couldn’t remember anything about the two little doors. He said that he and his wife traveled all around northwest Ohio looking for items that they could use in their house–especially doors and molding.
These doors are not like modern doors in their construction. They are put together with mortise and tenon joints, but the tenons go all the way to the edge of the door.
The doors are pegged with wooden pegs to hold the mortise and tenon joints together.

This means that there isn’t any glue in the doors, which given their age and the chemistry of glue from that era would have disintegrated by now. All the really old doors that we bought used to have rim locks instead of modern door knobs. The mechanism was attached to the exterior of the door and only the rod holding the two knobs went through the door. There is a store in Waynesville, OH that sells refurbished antique rim locks and rim latches, but you can find modern ones on Signature Hardware’s website, among others.
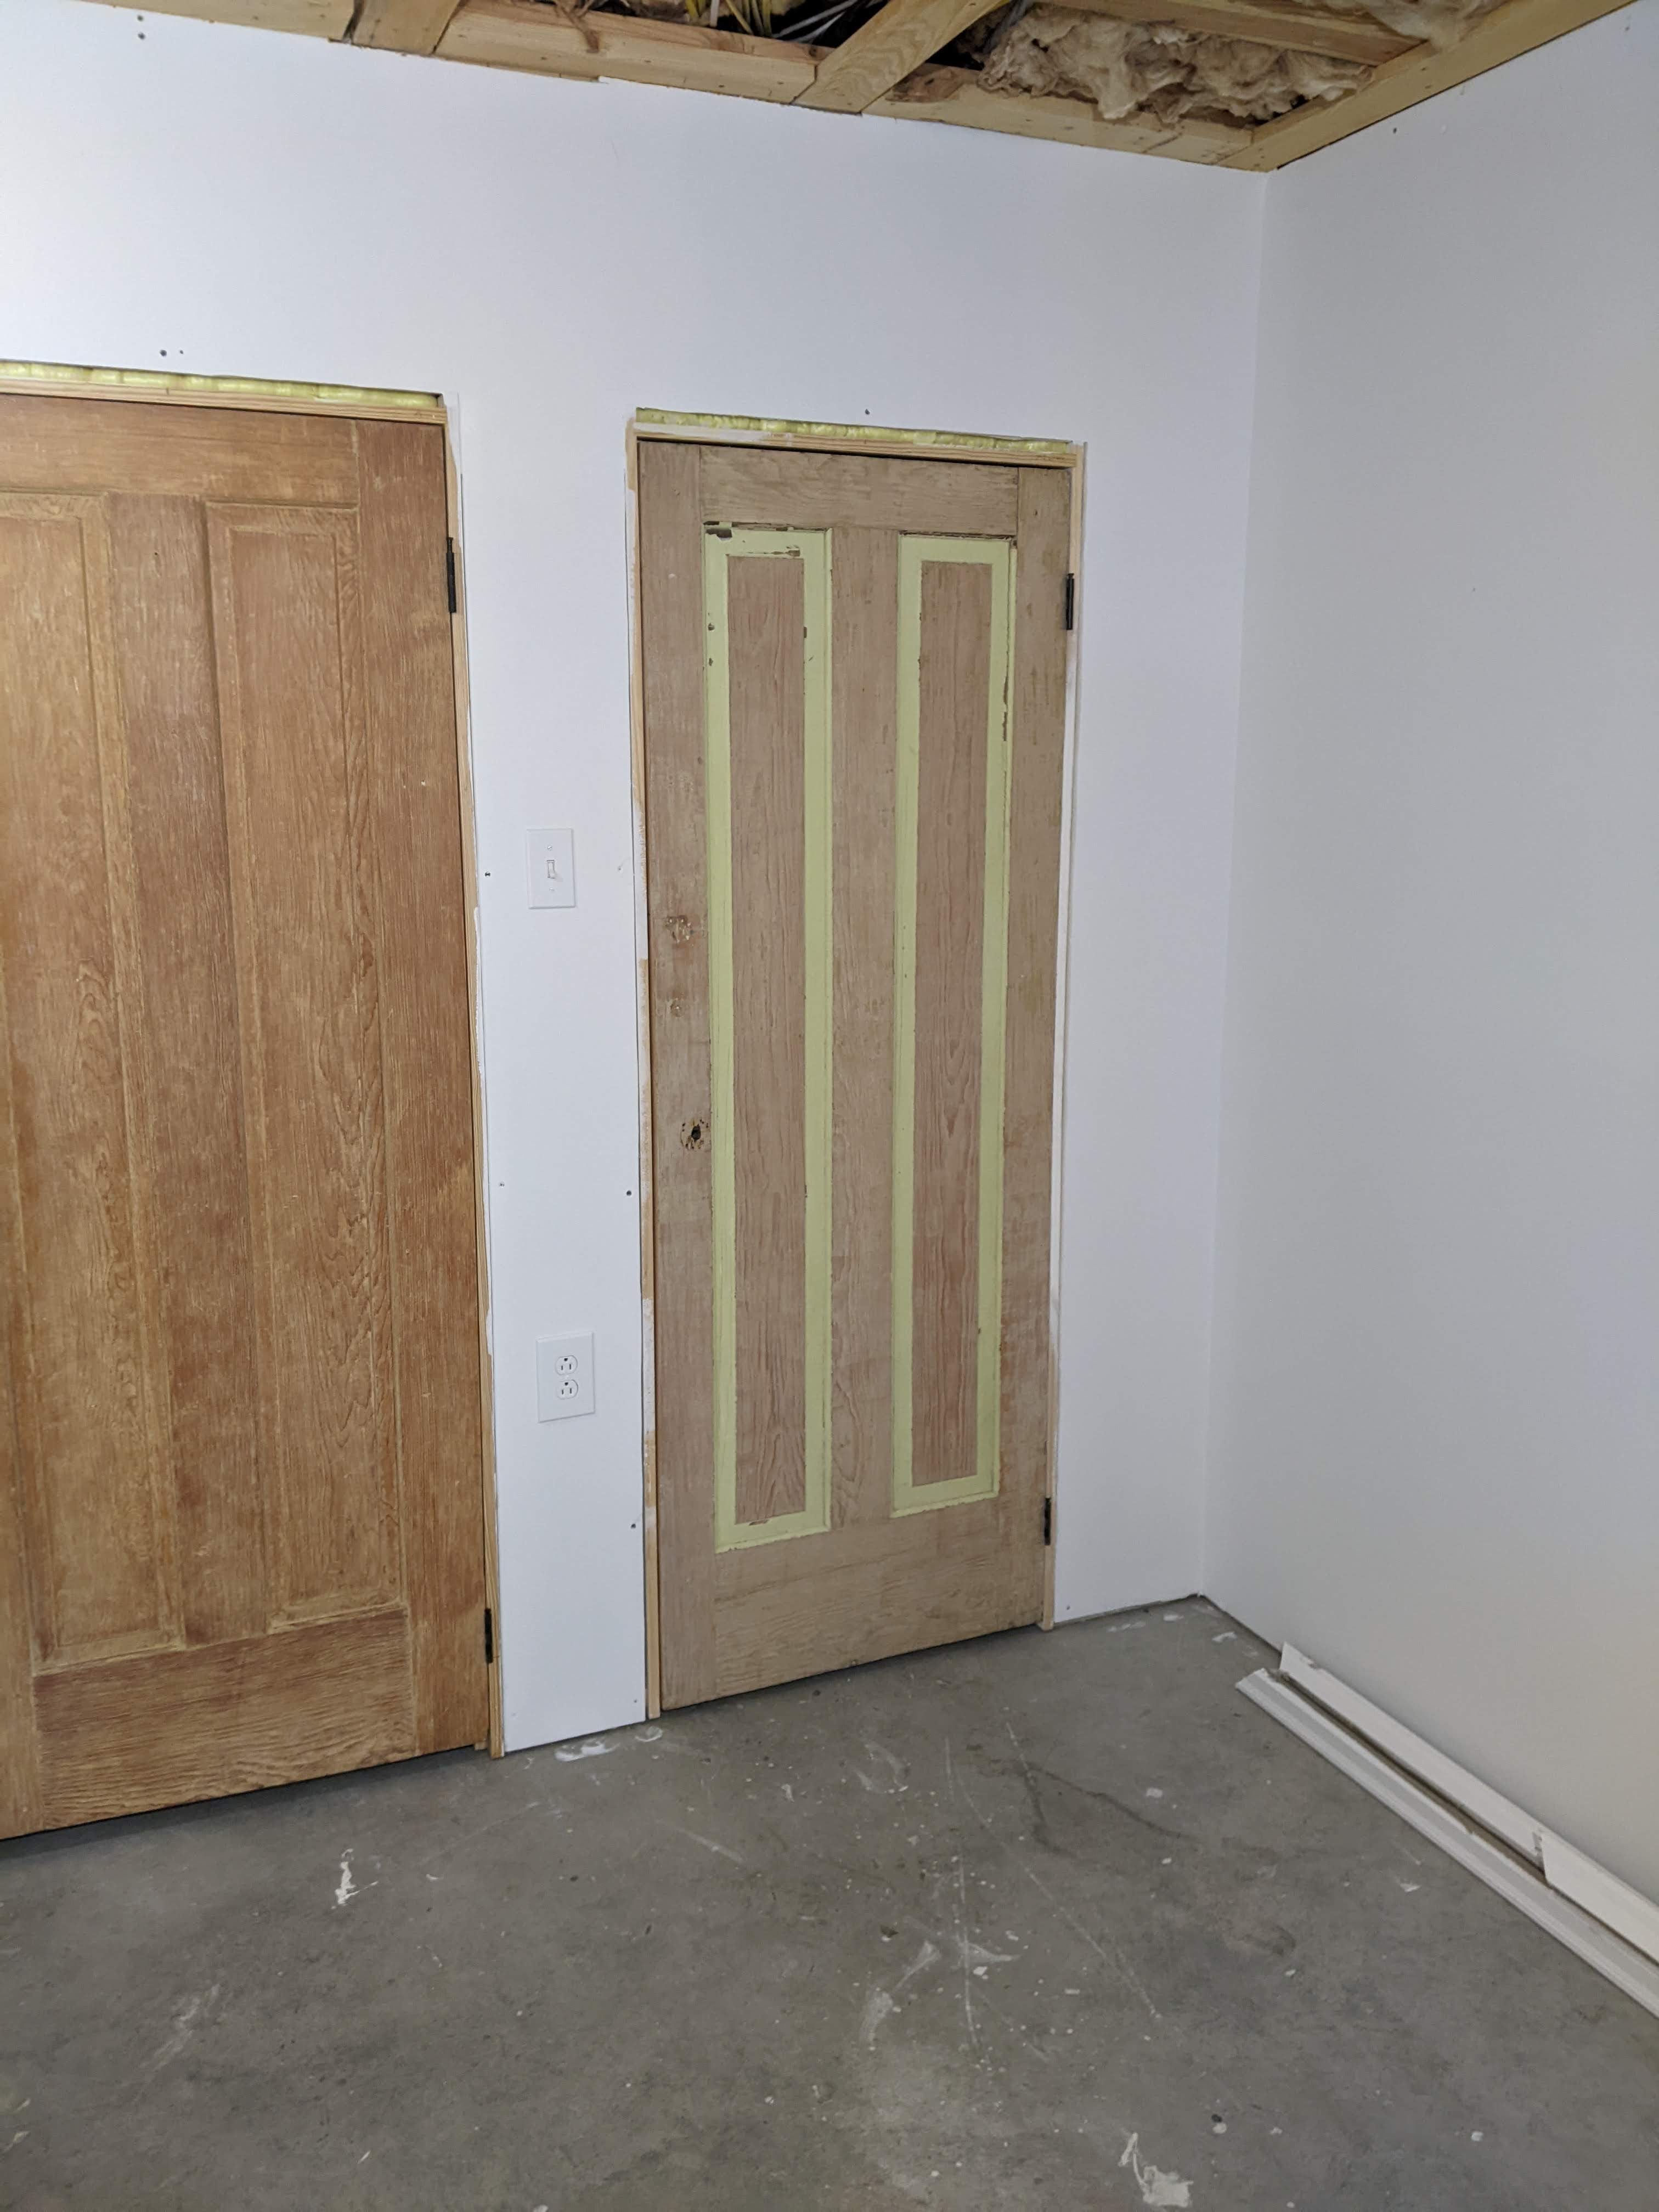
Unfortunately during their long tenure in a house they were painted a number of times, and there were some BOLD color choices like this orchid which was on top of blue, gray, tan, and the original shellac. One of the other doors has mustard yellow, and another one has acid green. I think that they all came out of the same house, so that was one COLORFUL house, and possibly also a little jarring.
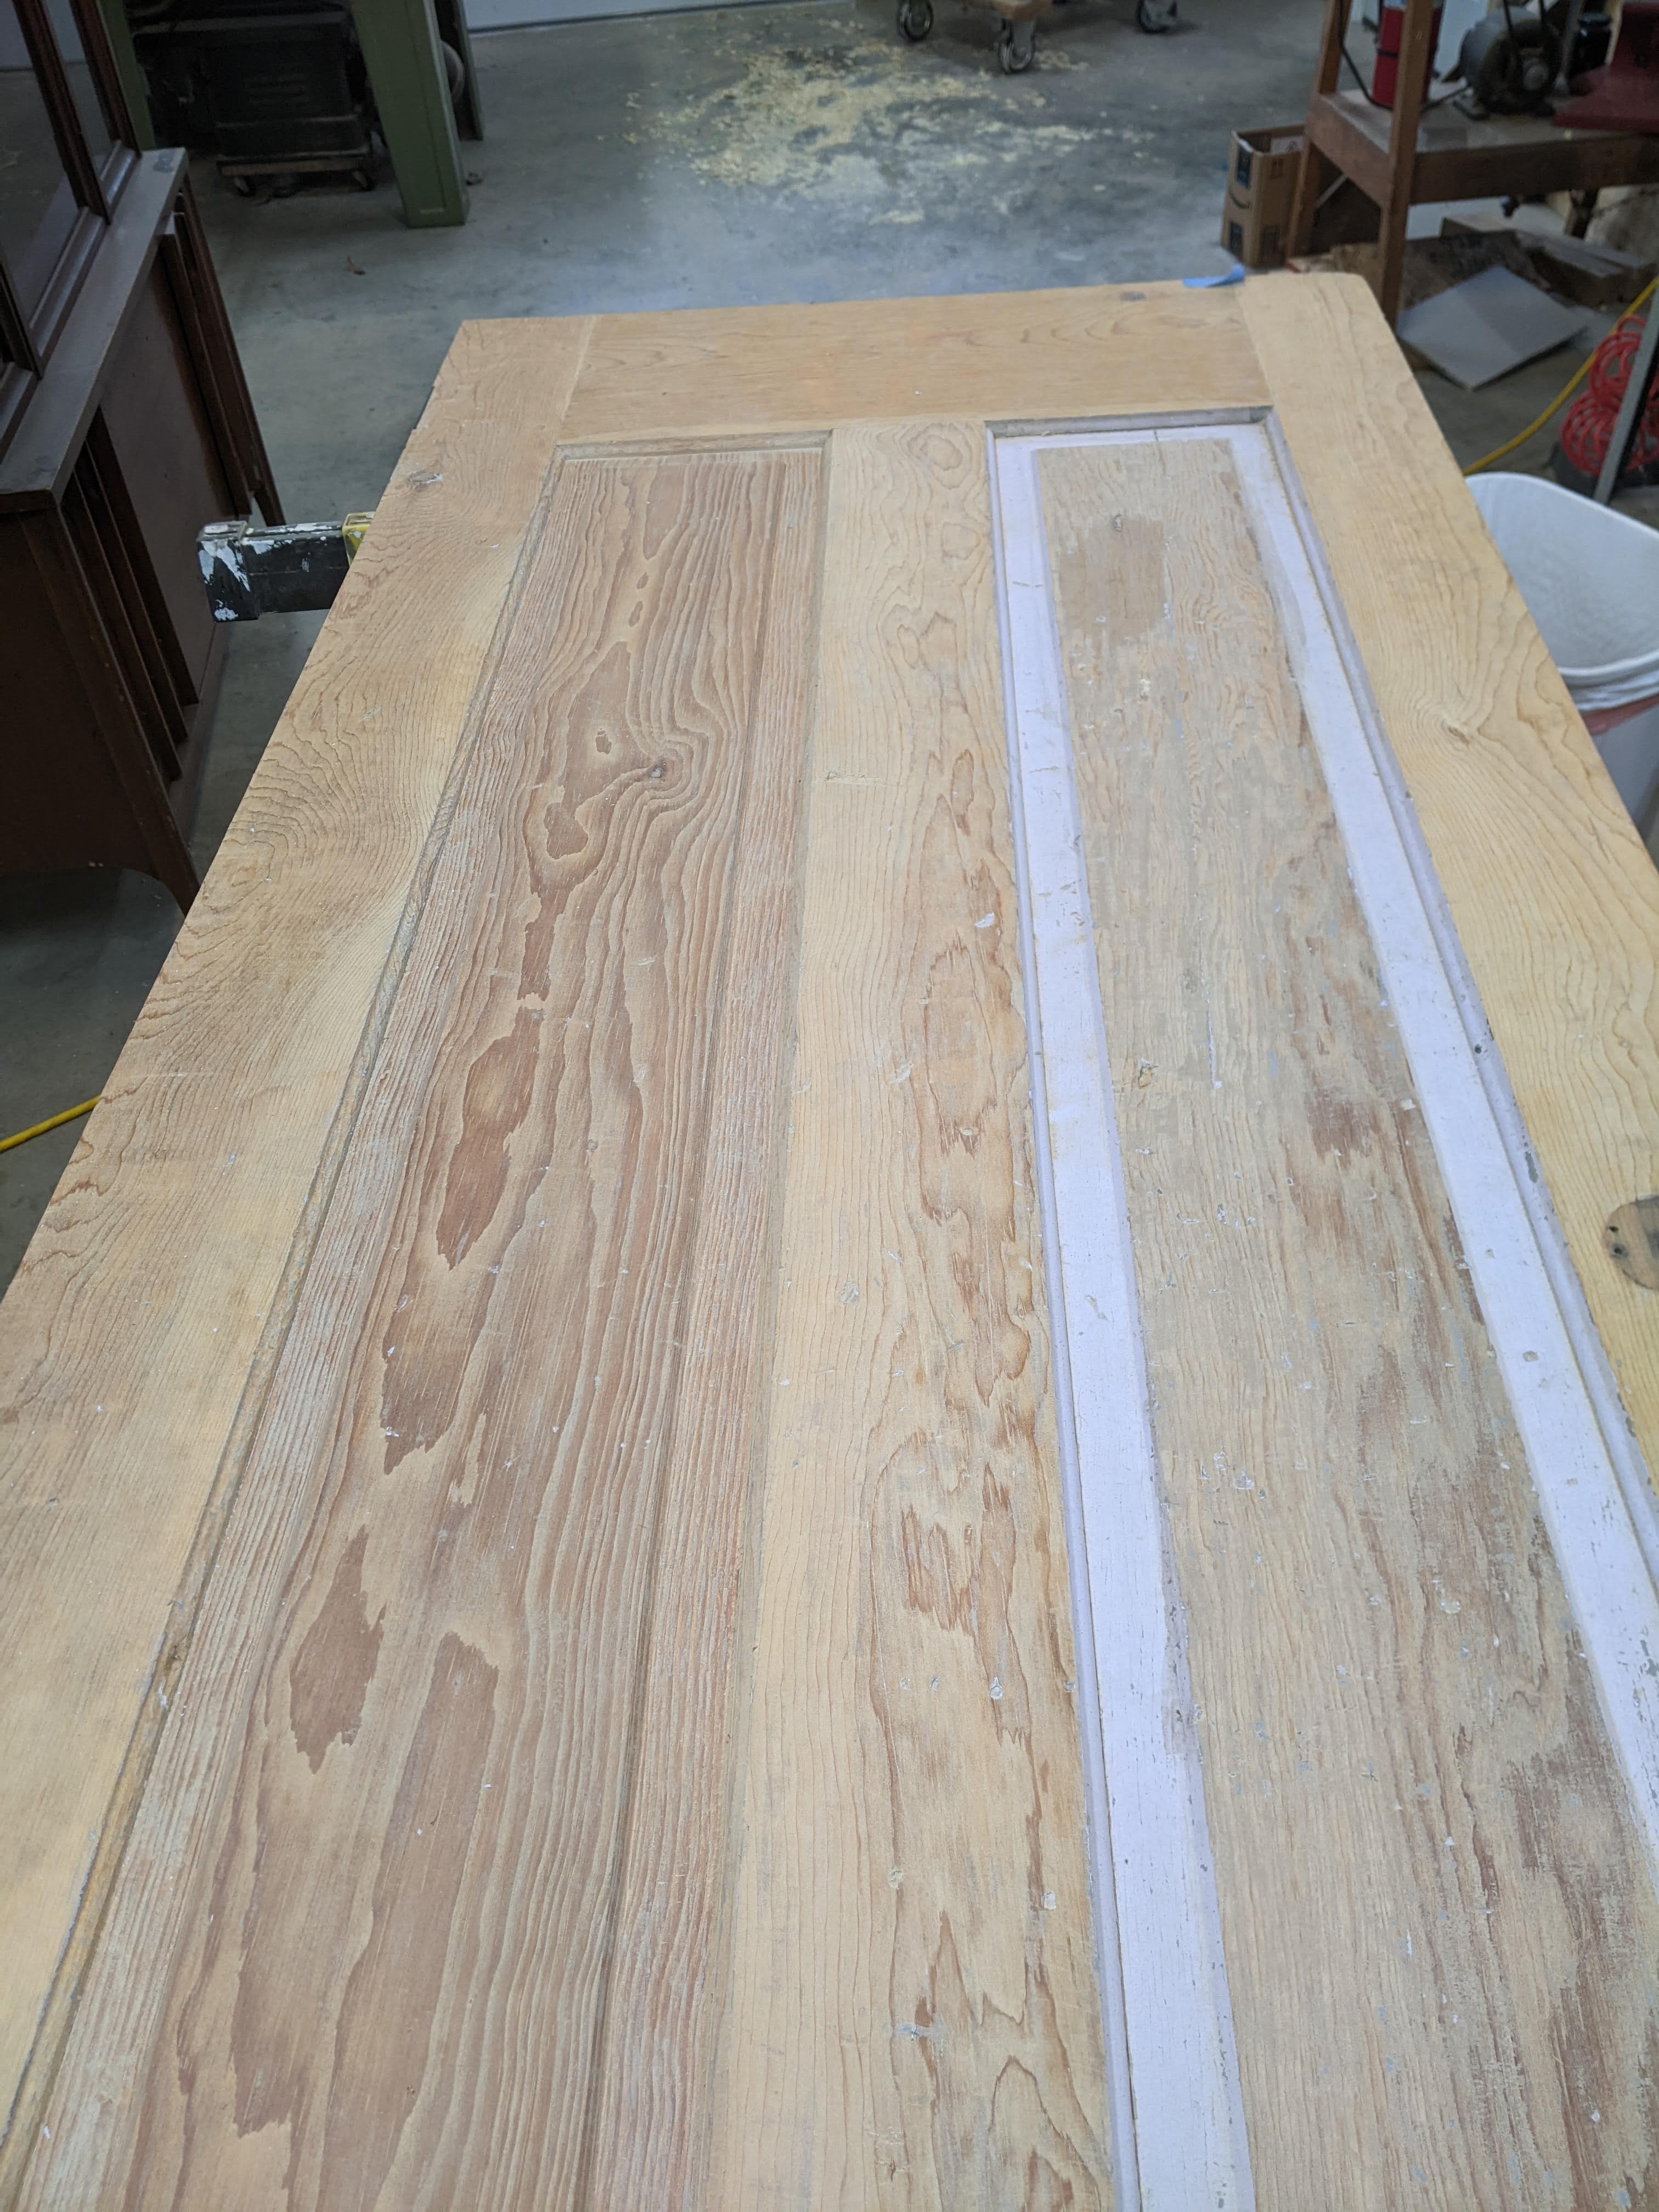
I haven’t tested the paint, but based on how it behaves, I’m sure that it’s lead based, so I wear a mask and glasses when I work on it and take a shower when I am finished. We are scraping the paint off of the doors because we are trying to preserve the patina and we tried Citristrip and it made a mess and we’re worried about getting paint in the grain of the wood.
Anyway, it is a long and tedious process. I did the big flat sections of the doors with a heat gun and scraper (I learned recently that you shouldn’t do it this way, so don’t.) last summer and now I am going back with the little scraper to get all the details. I had to do all the finish scraping on the large flat sections of the door above and one panel of the detail and that took about 4 hours. Fortunately, my husband already did the other side. So I will be doing a lot more scraping so that we can, at least, get the doors that are already hung completely clean and lacquered.
Fun times…..
April 6, 2023:
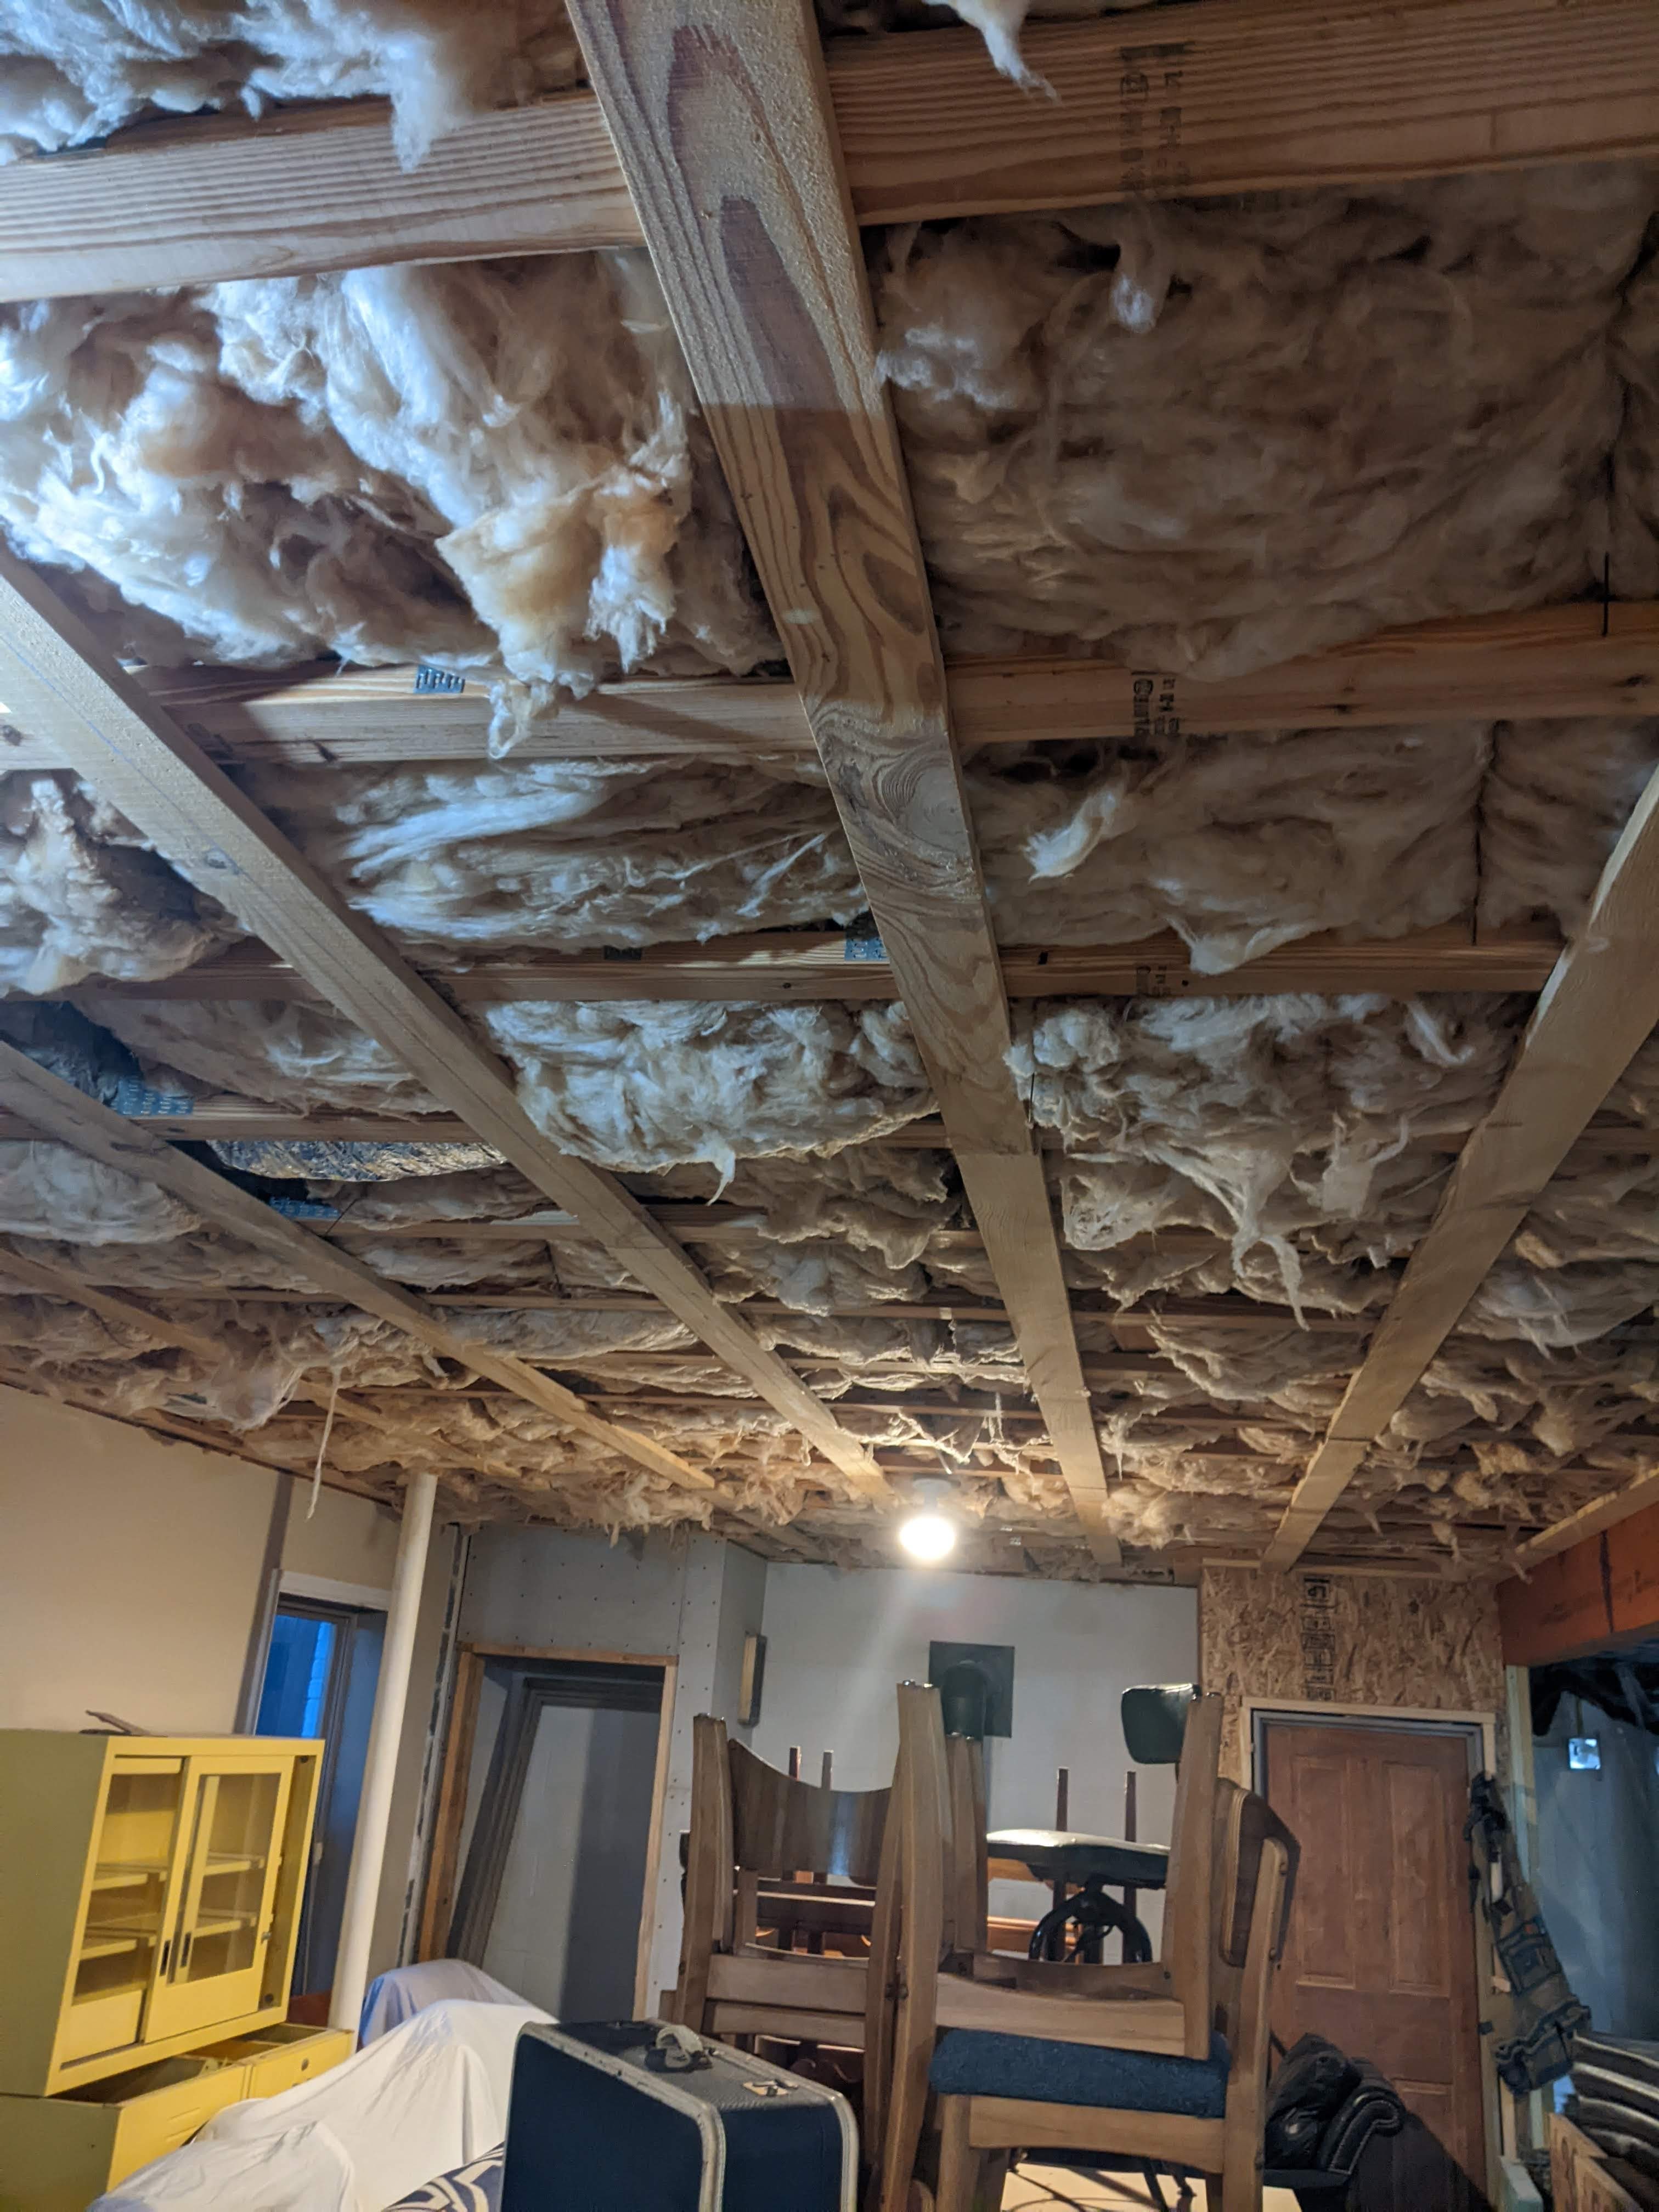
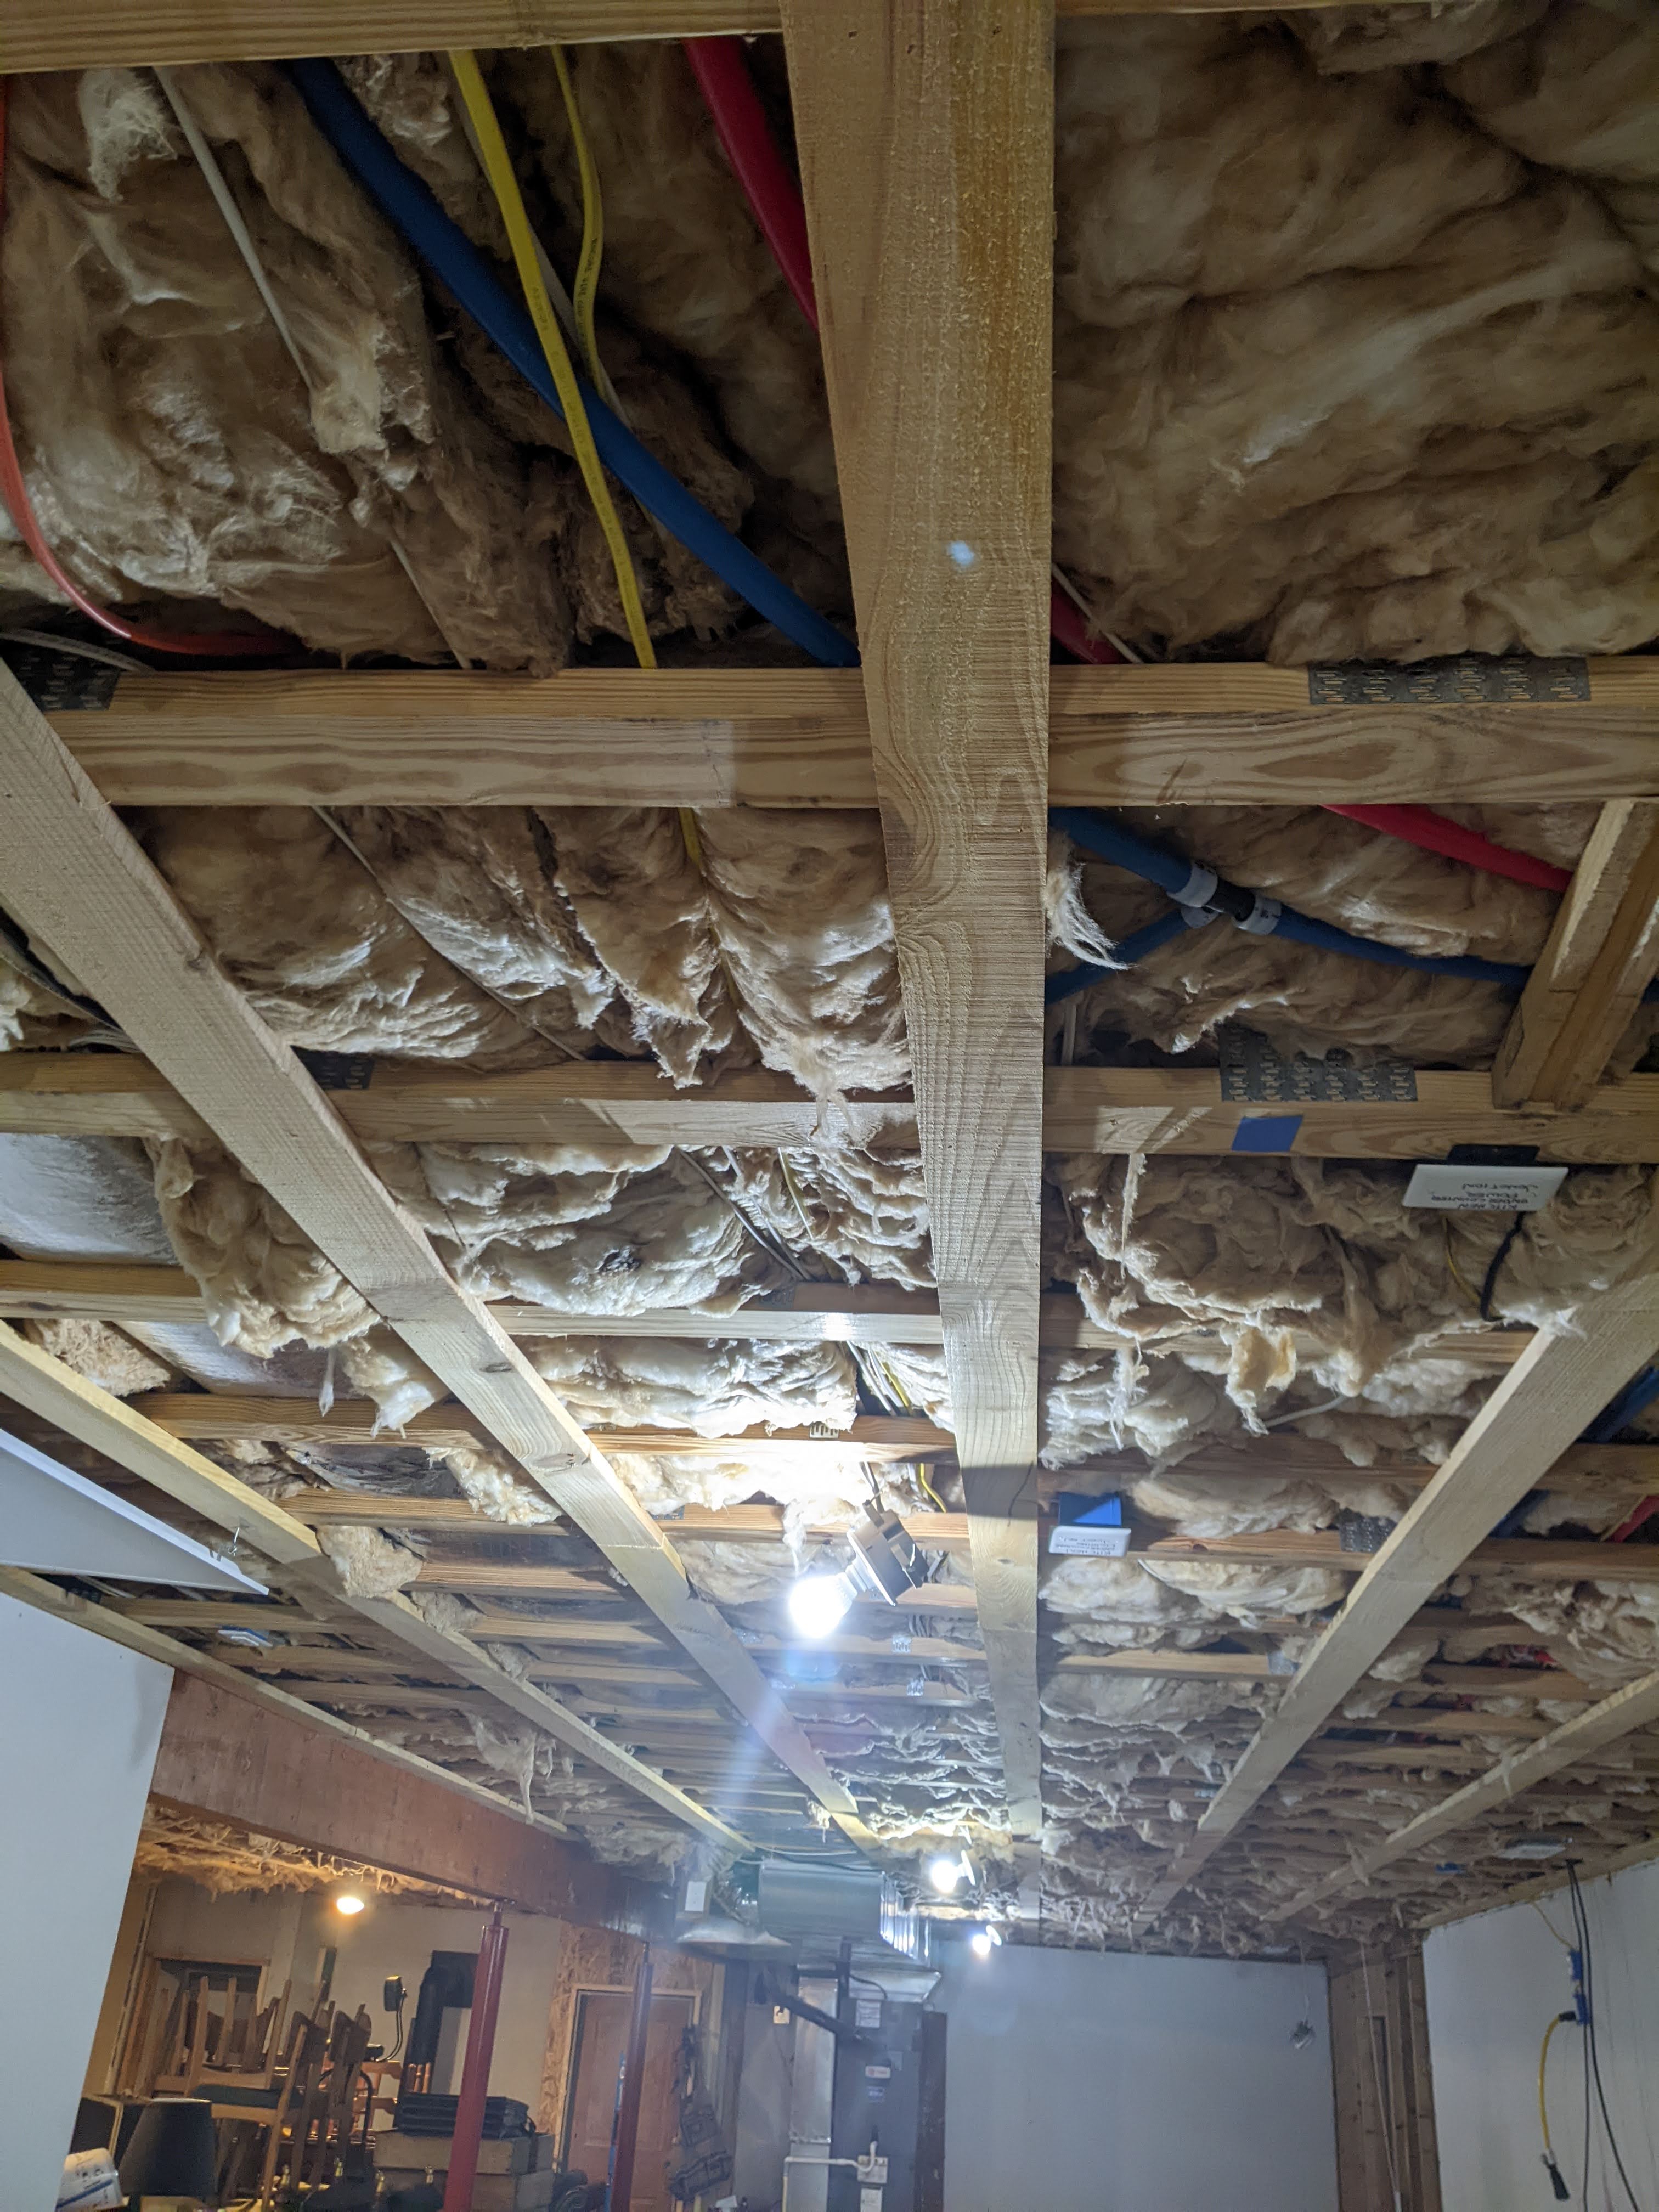
Well, I had hoped to be posting about the stone walls in the basement, BUT my husband cut lumber for the basement with a friend and he brought home the pine furring strips for the ceiling so that we will have a way to attach the beadboard to the ceiling when the time comes. So, in the long run, that saved us a lot of time because he only handled the boards once instead of unloading them and stacking them and then unstacking them and loading and unloading them to put up.
I bought him these handy things to hold the board in place while he nailed it.
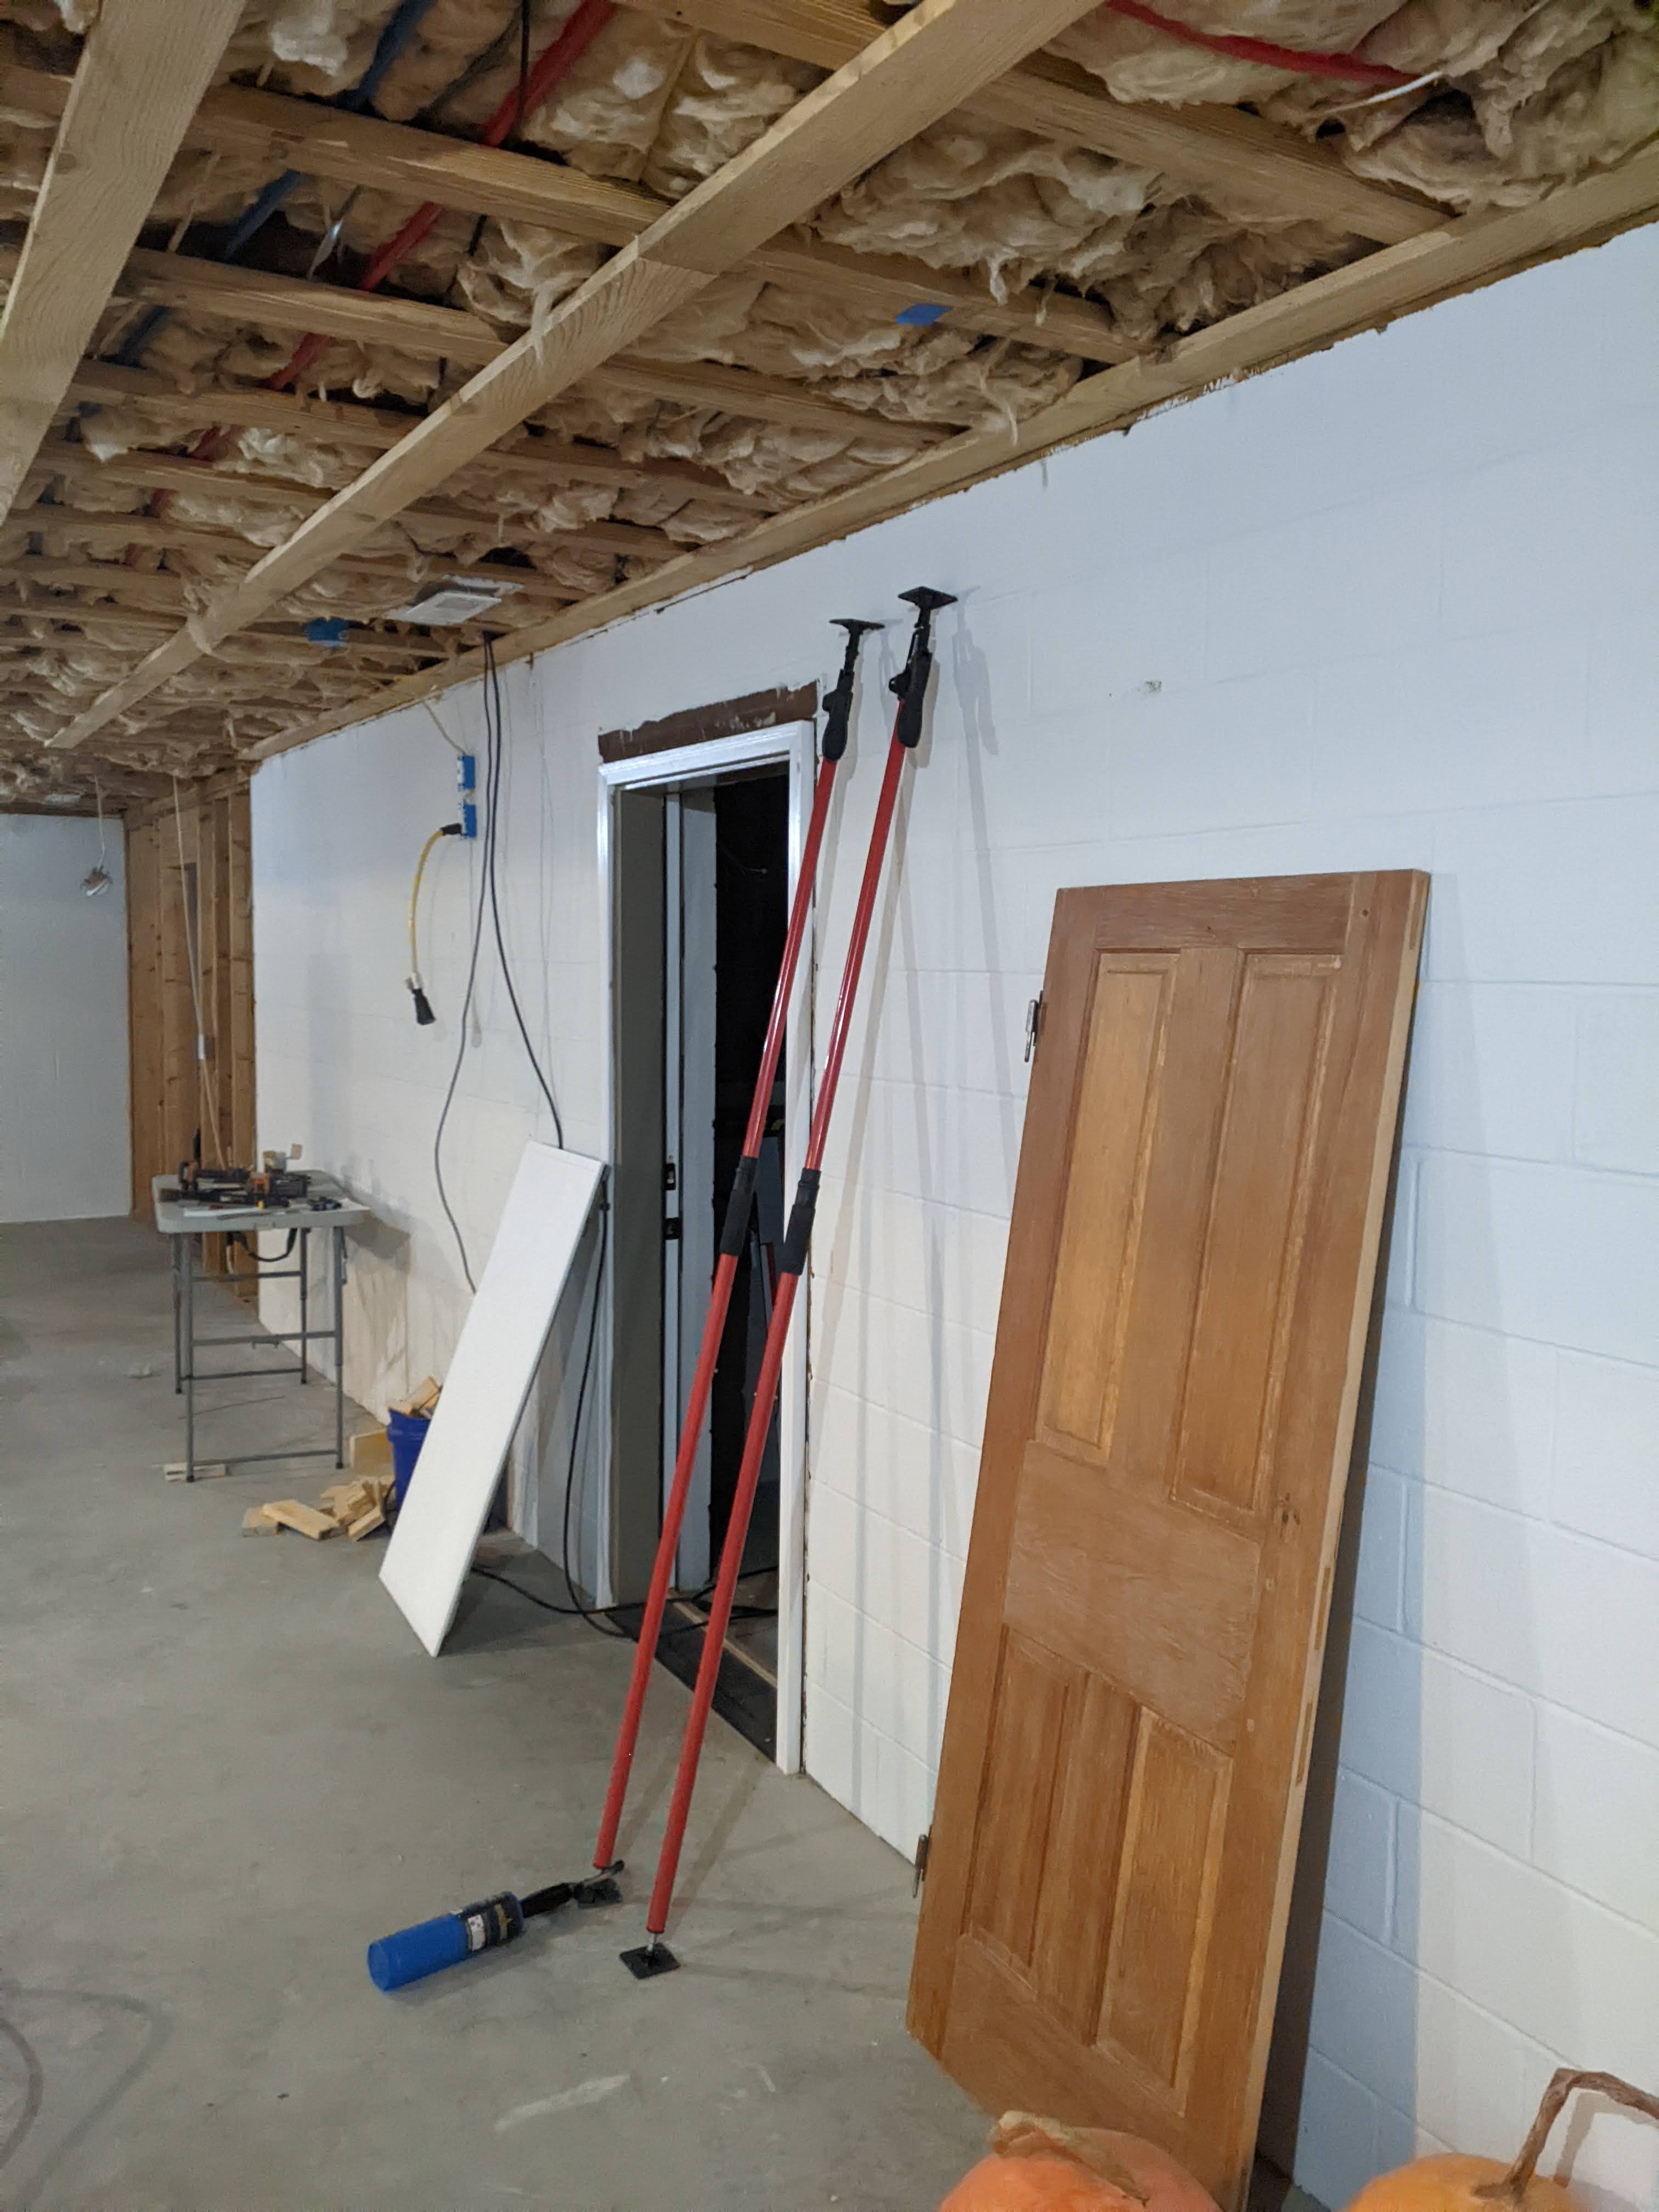
He was dubious at first, but said later that they really were a huge help. This would have been my job without them, so I was able to scrape more doors–the never ending project. Scraping doors is on my agenda for this week too.
Meanwhile, our stone veneer and corners is waiting patiently on the driveway.
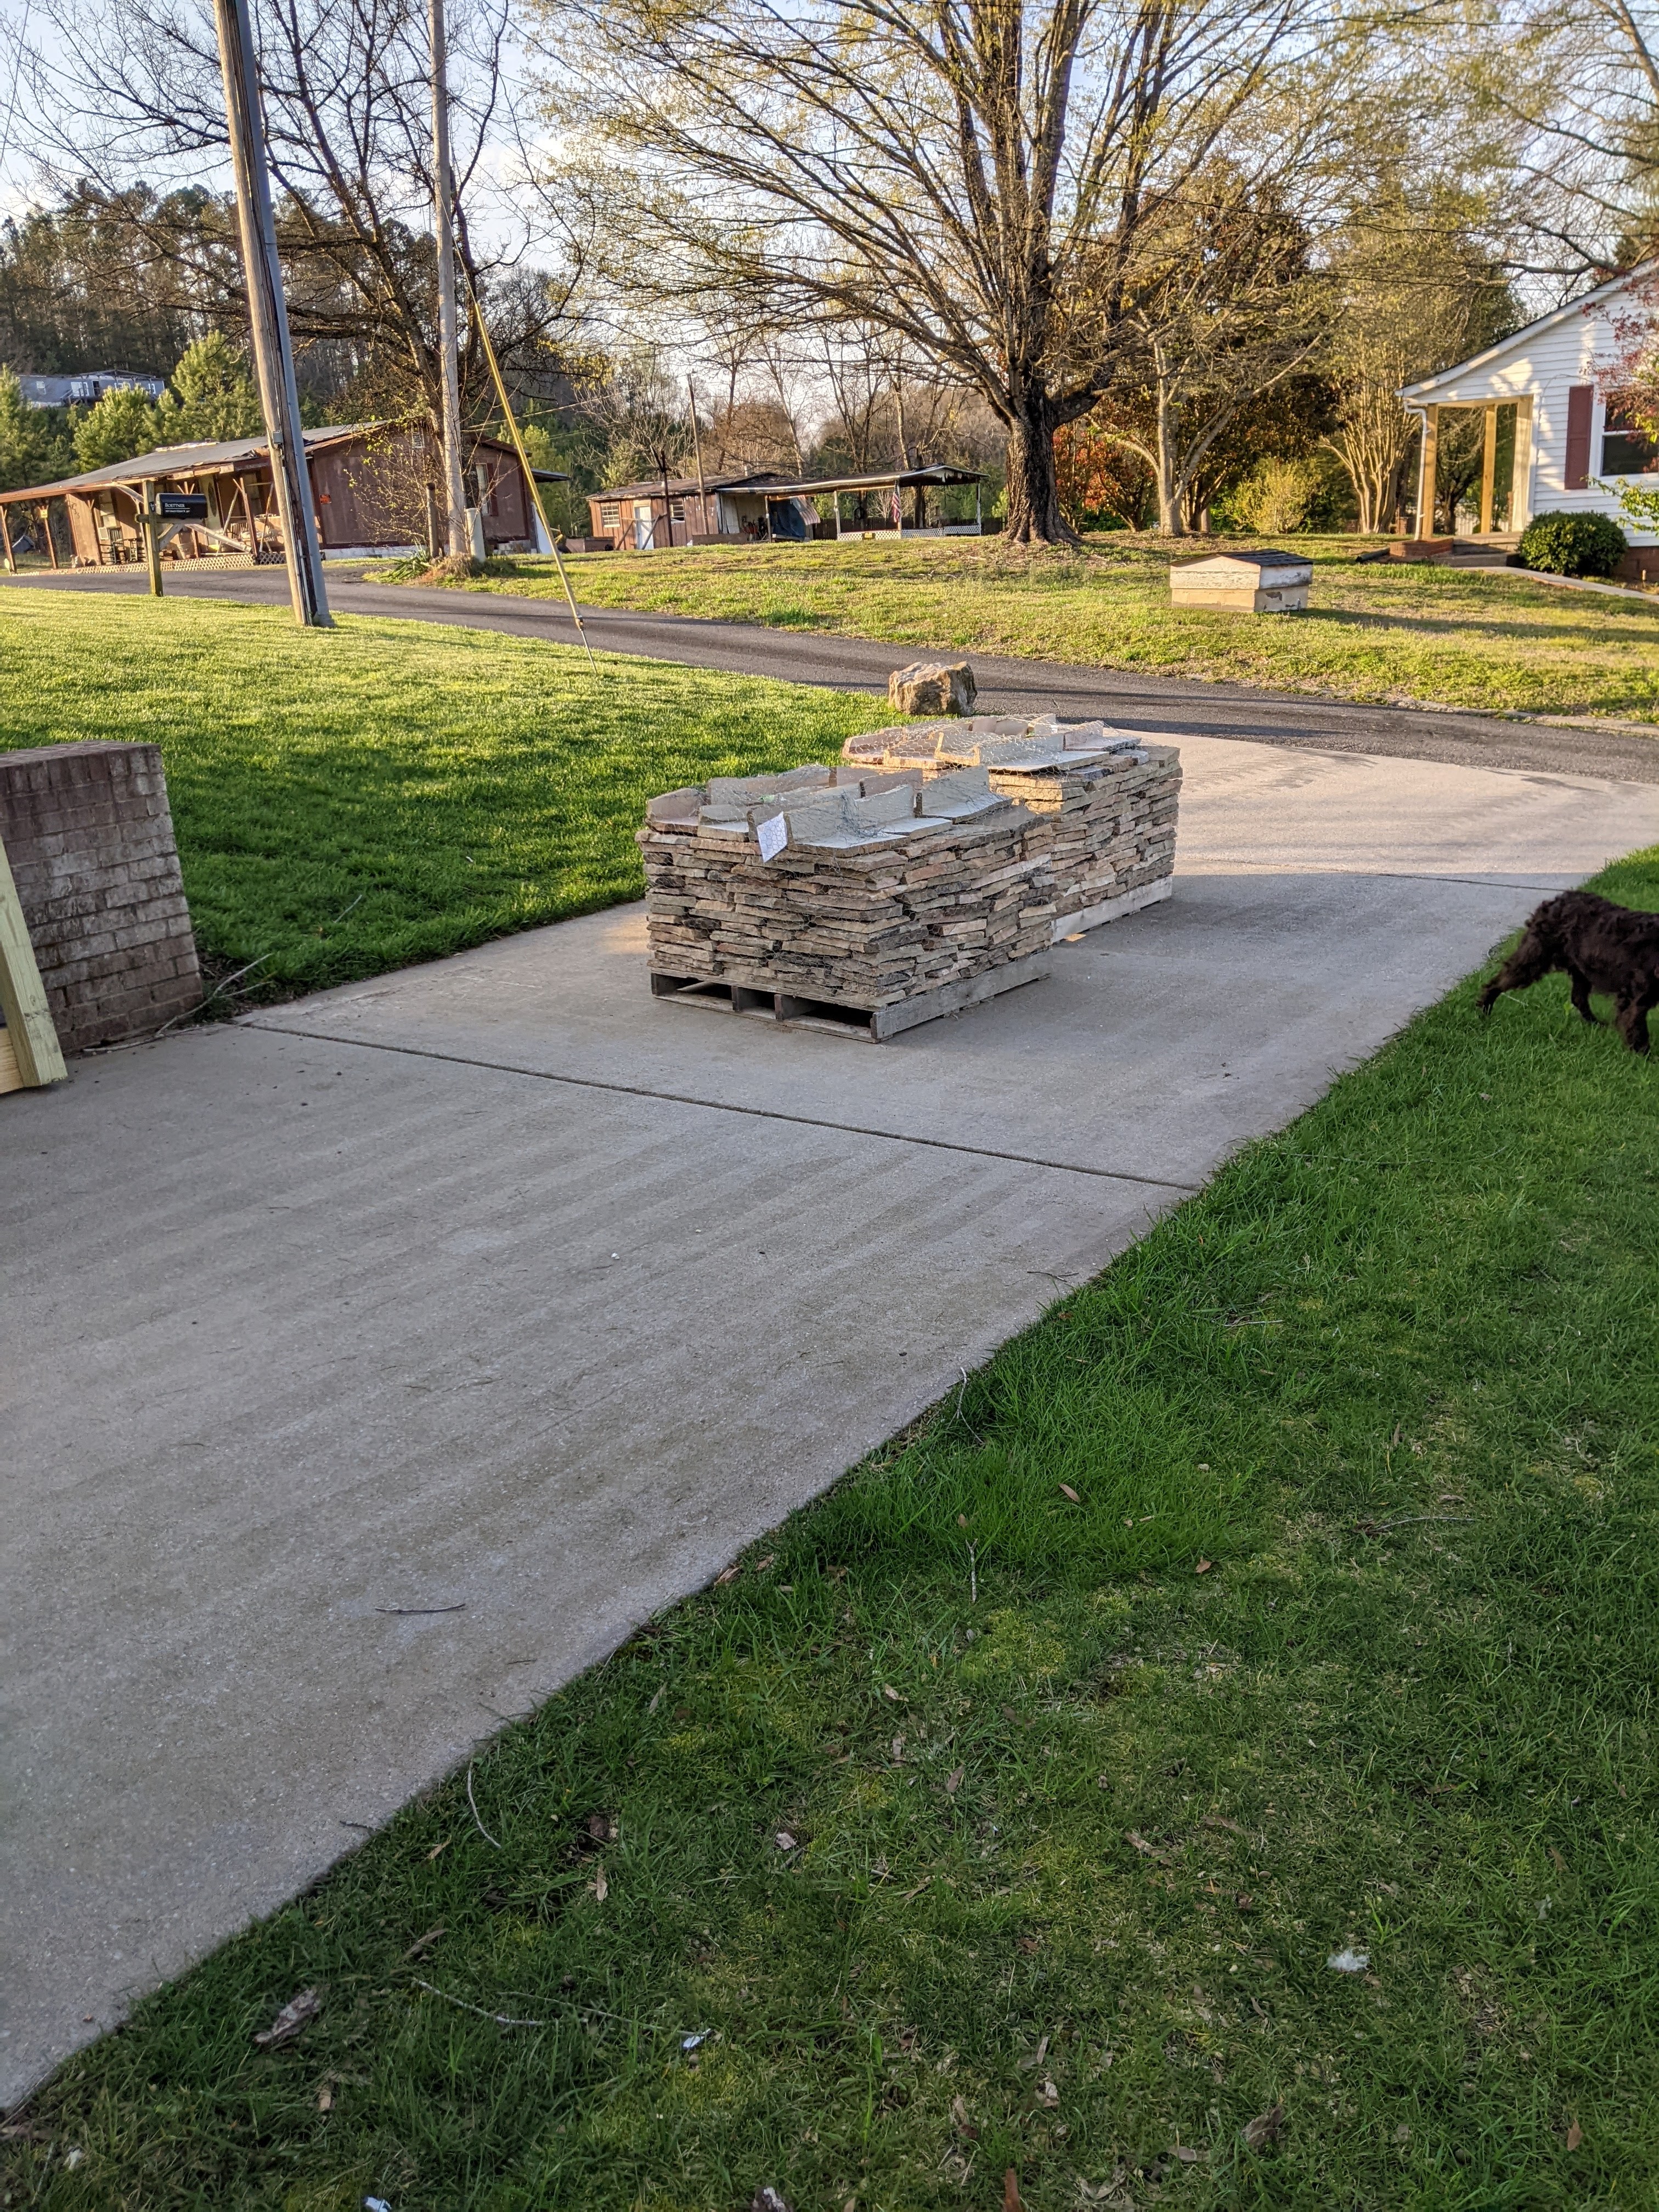
April 27, 2023:
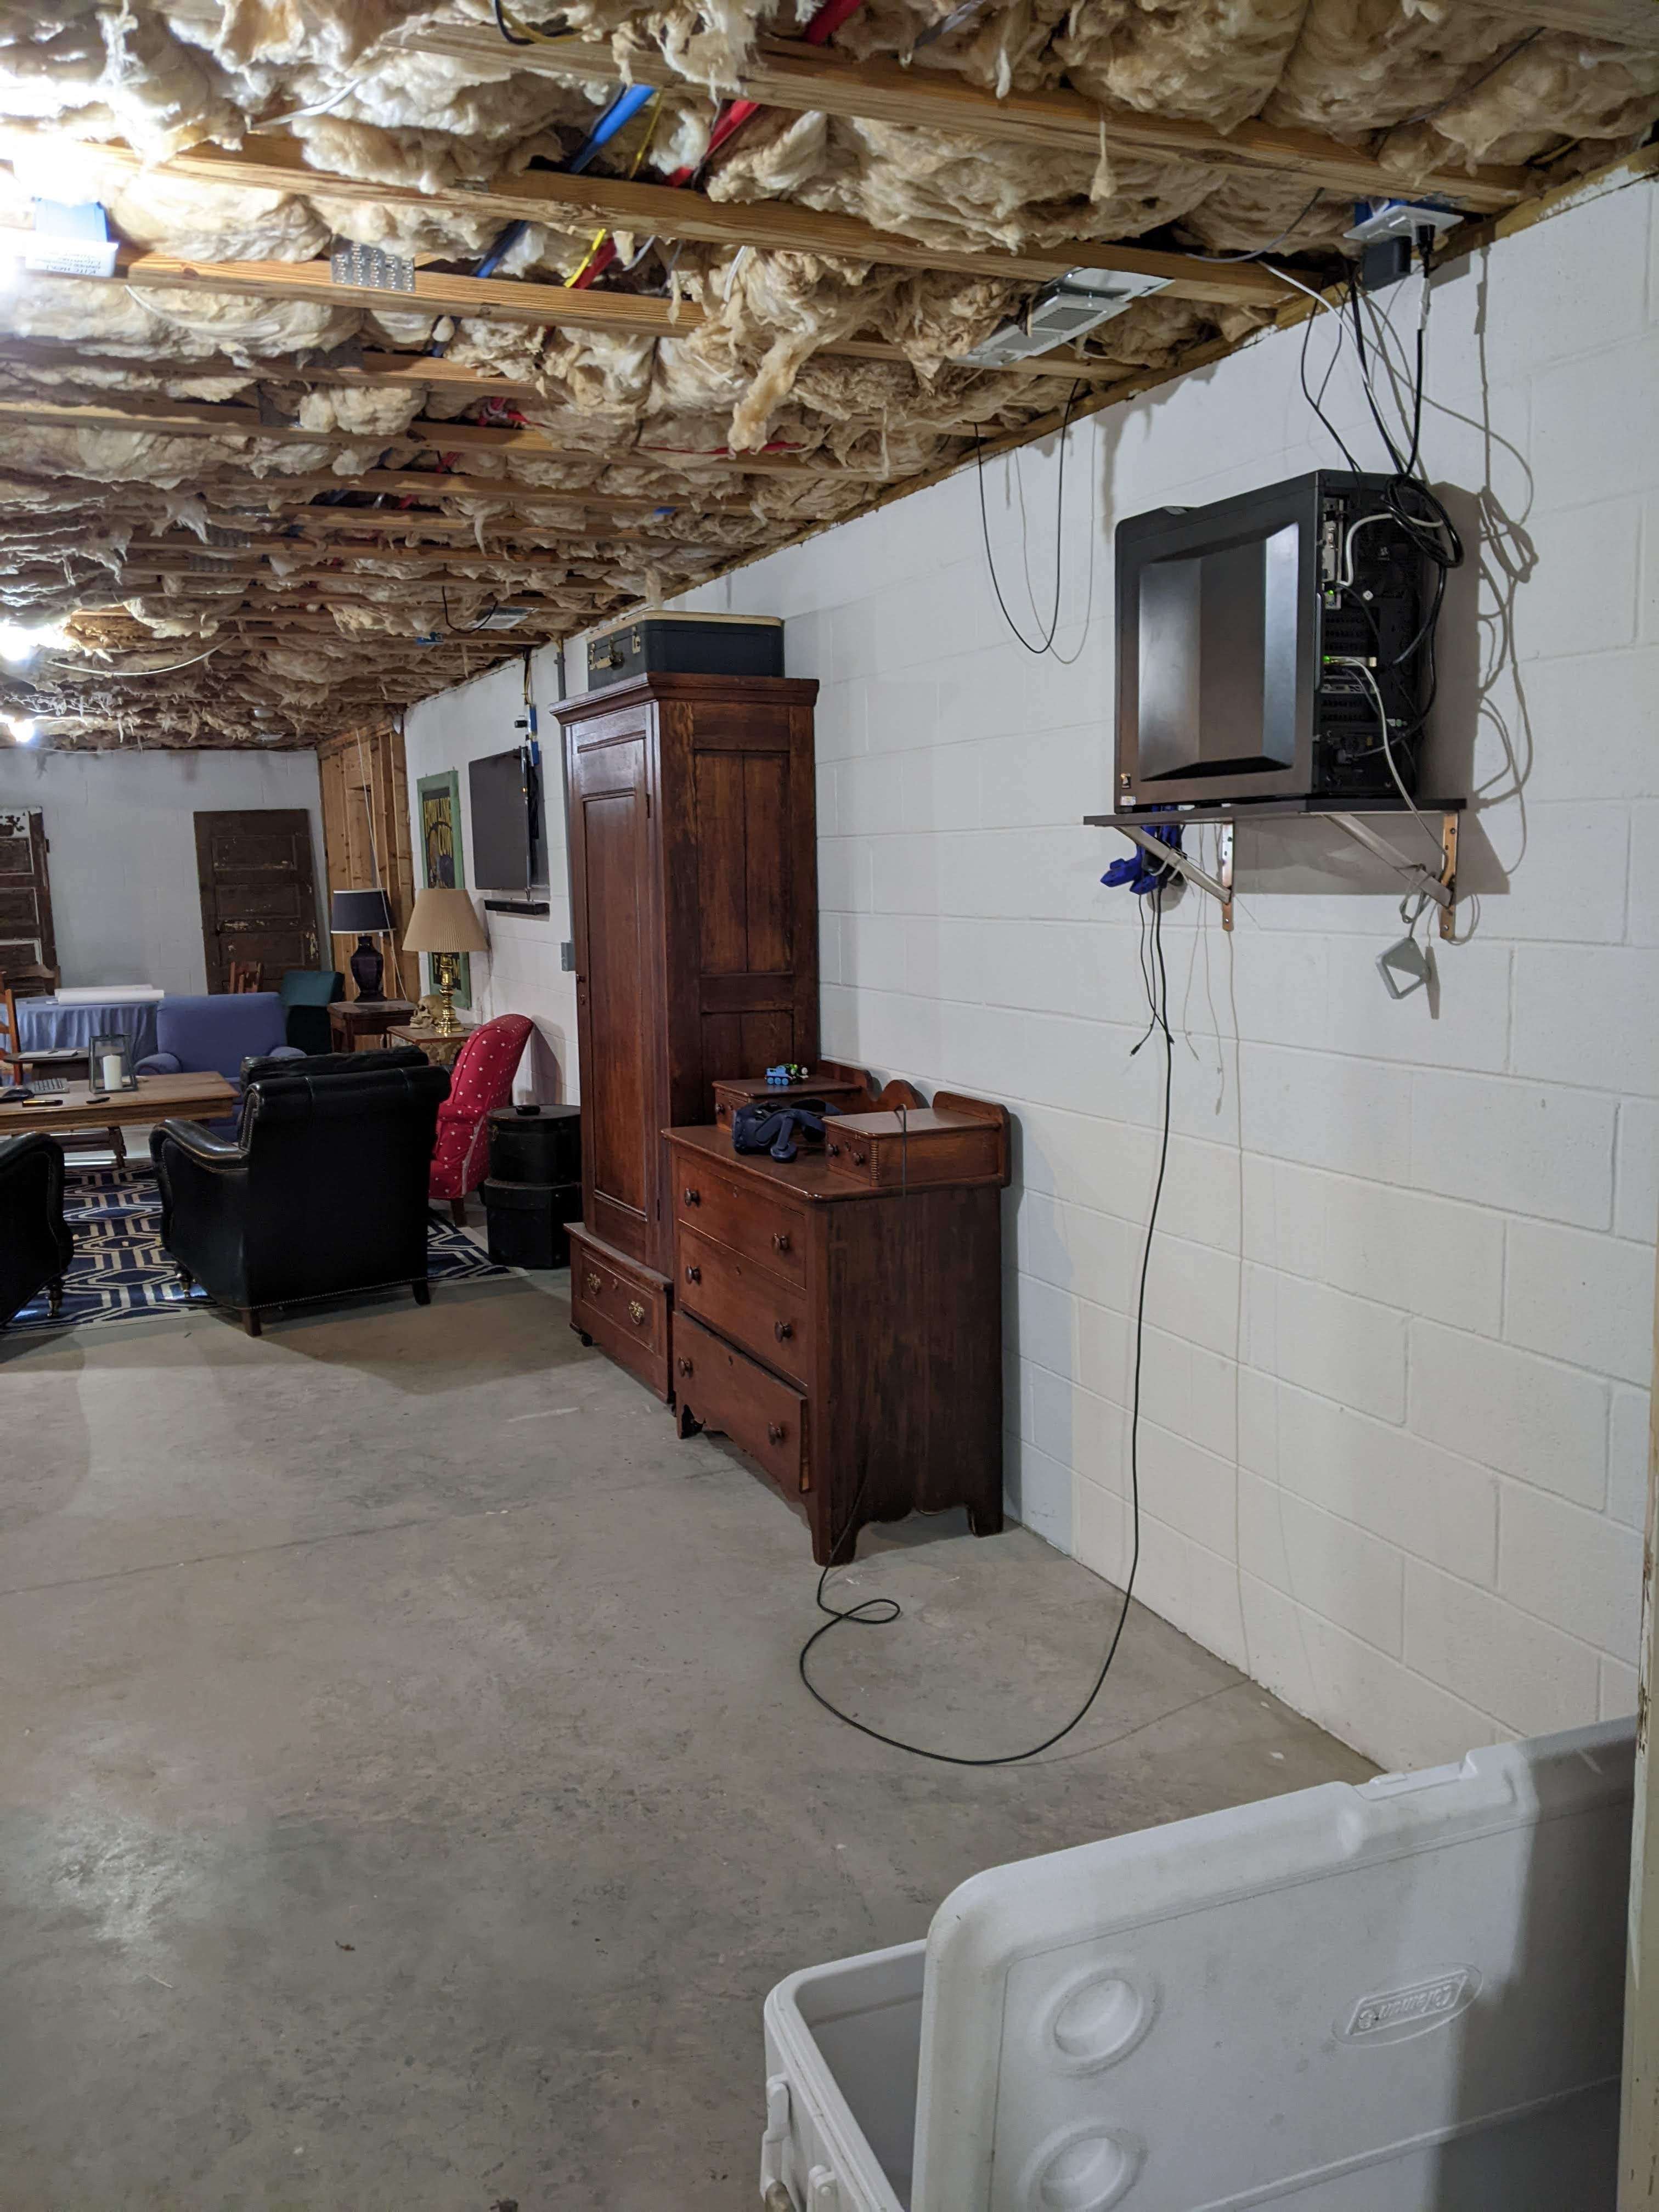
We have been slowly chipping away at the projects in the basement. I thought when my husband took a week and a half off of work that we would make a lot of progress, but he ended up spending that time cutting wood for the beams, molding, and furring strips for the basement ceiling and then installing most of the furring strips. Last weekend, my husband finished installing the outlets on the big block wall and removing a couple of outlets that he had installed for the television.

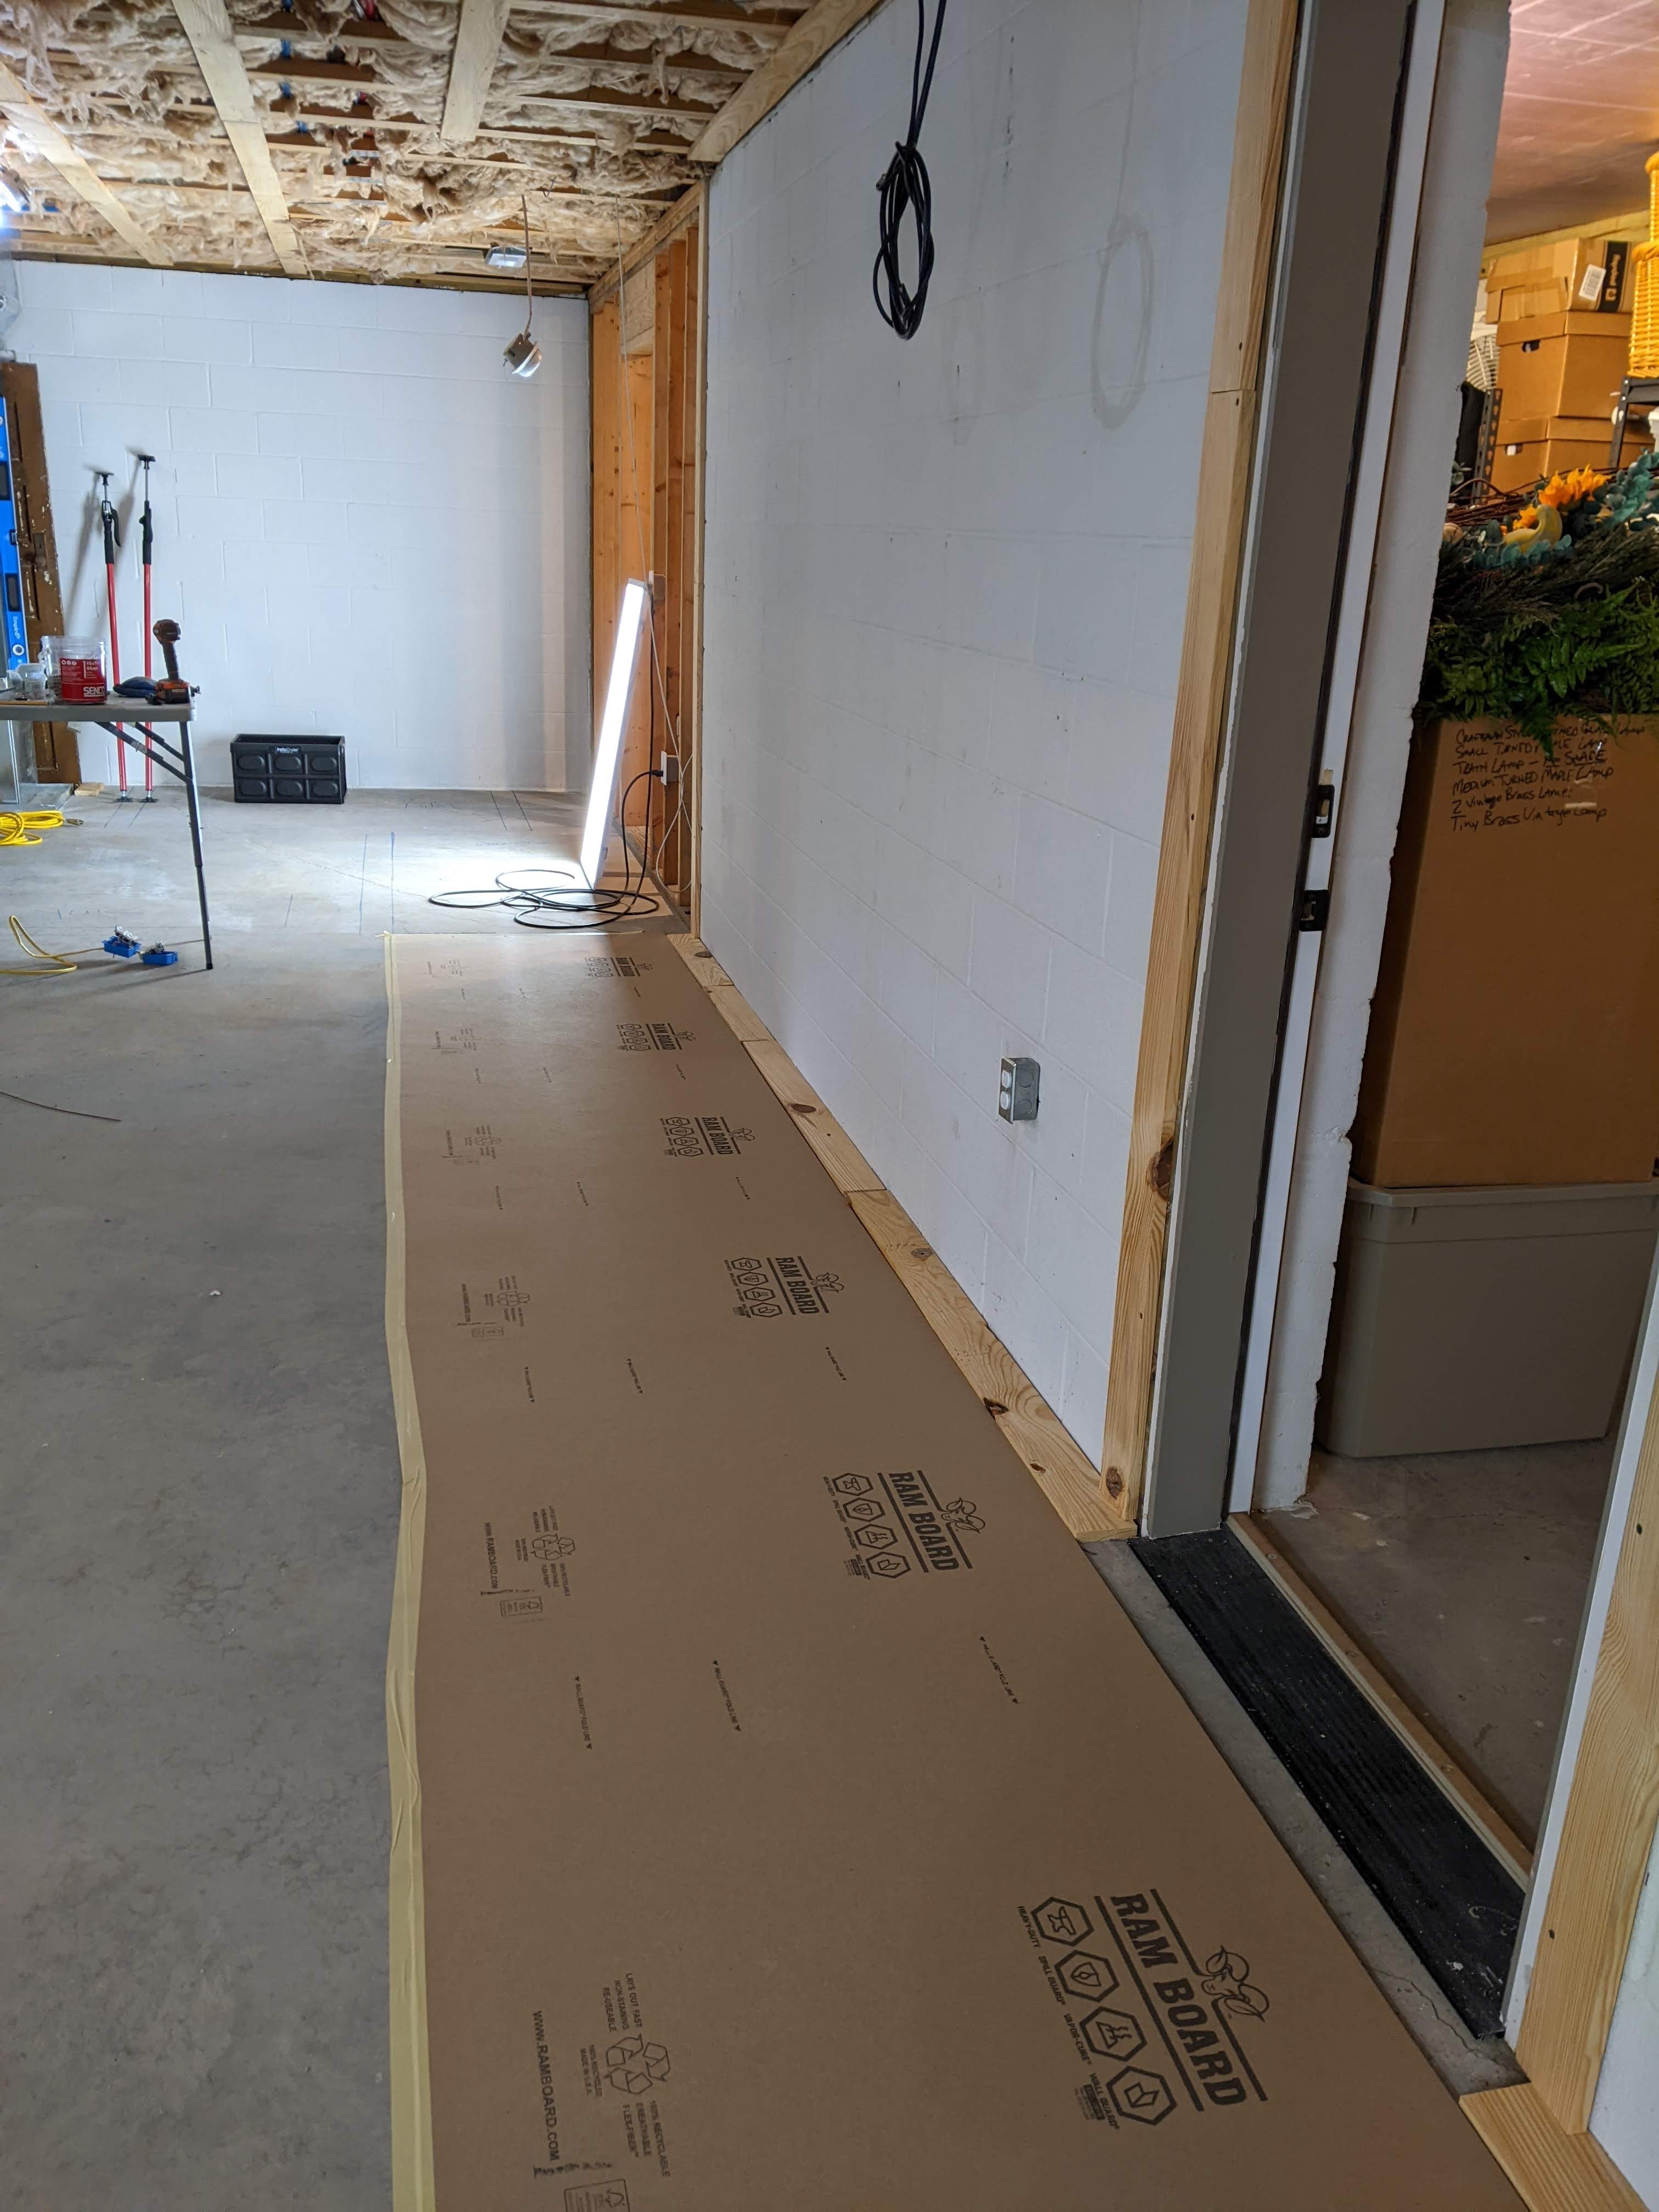
We jointed and planed some pine boards so that they were all the same thickness to use as spacers at the bottom of the rock and for door mouldings that will eventually be installed. I put down Ram board to keep the floor from getting covered with specks of mortar.

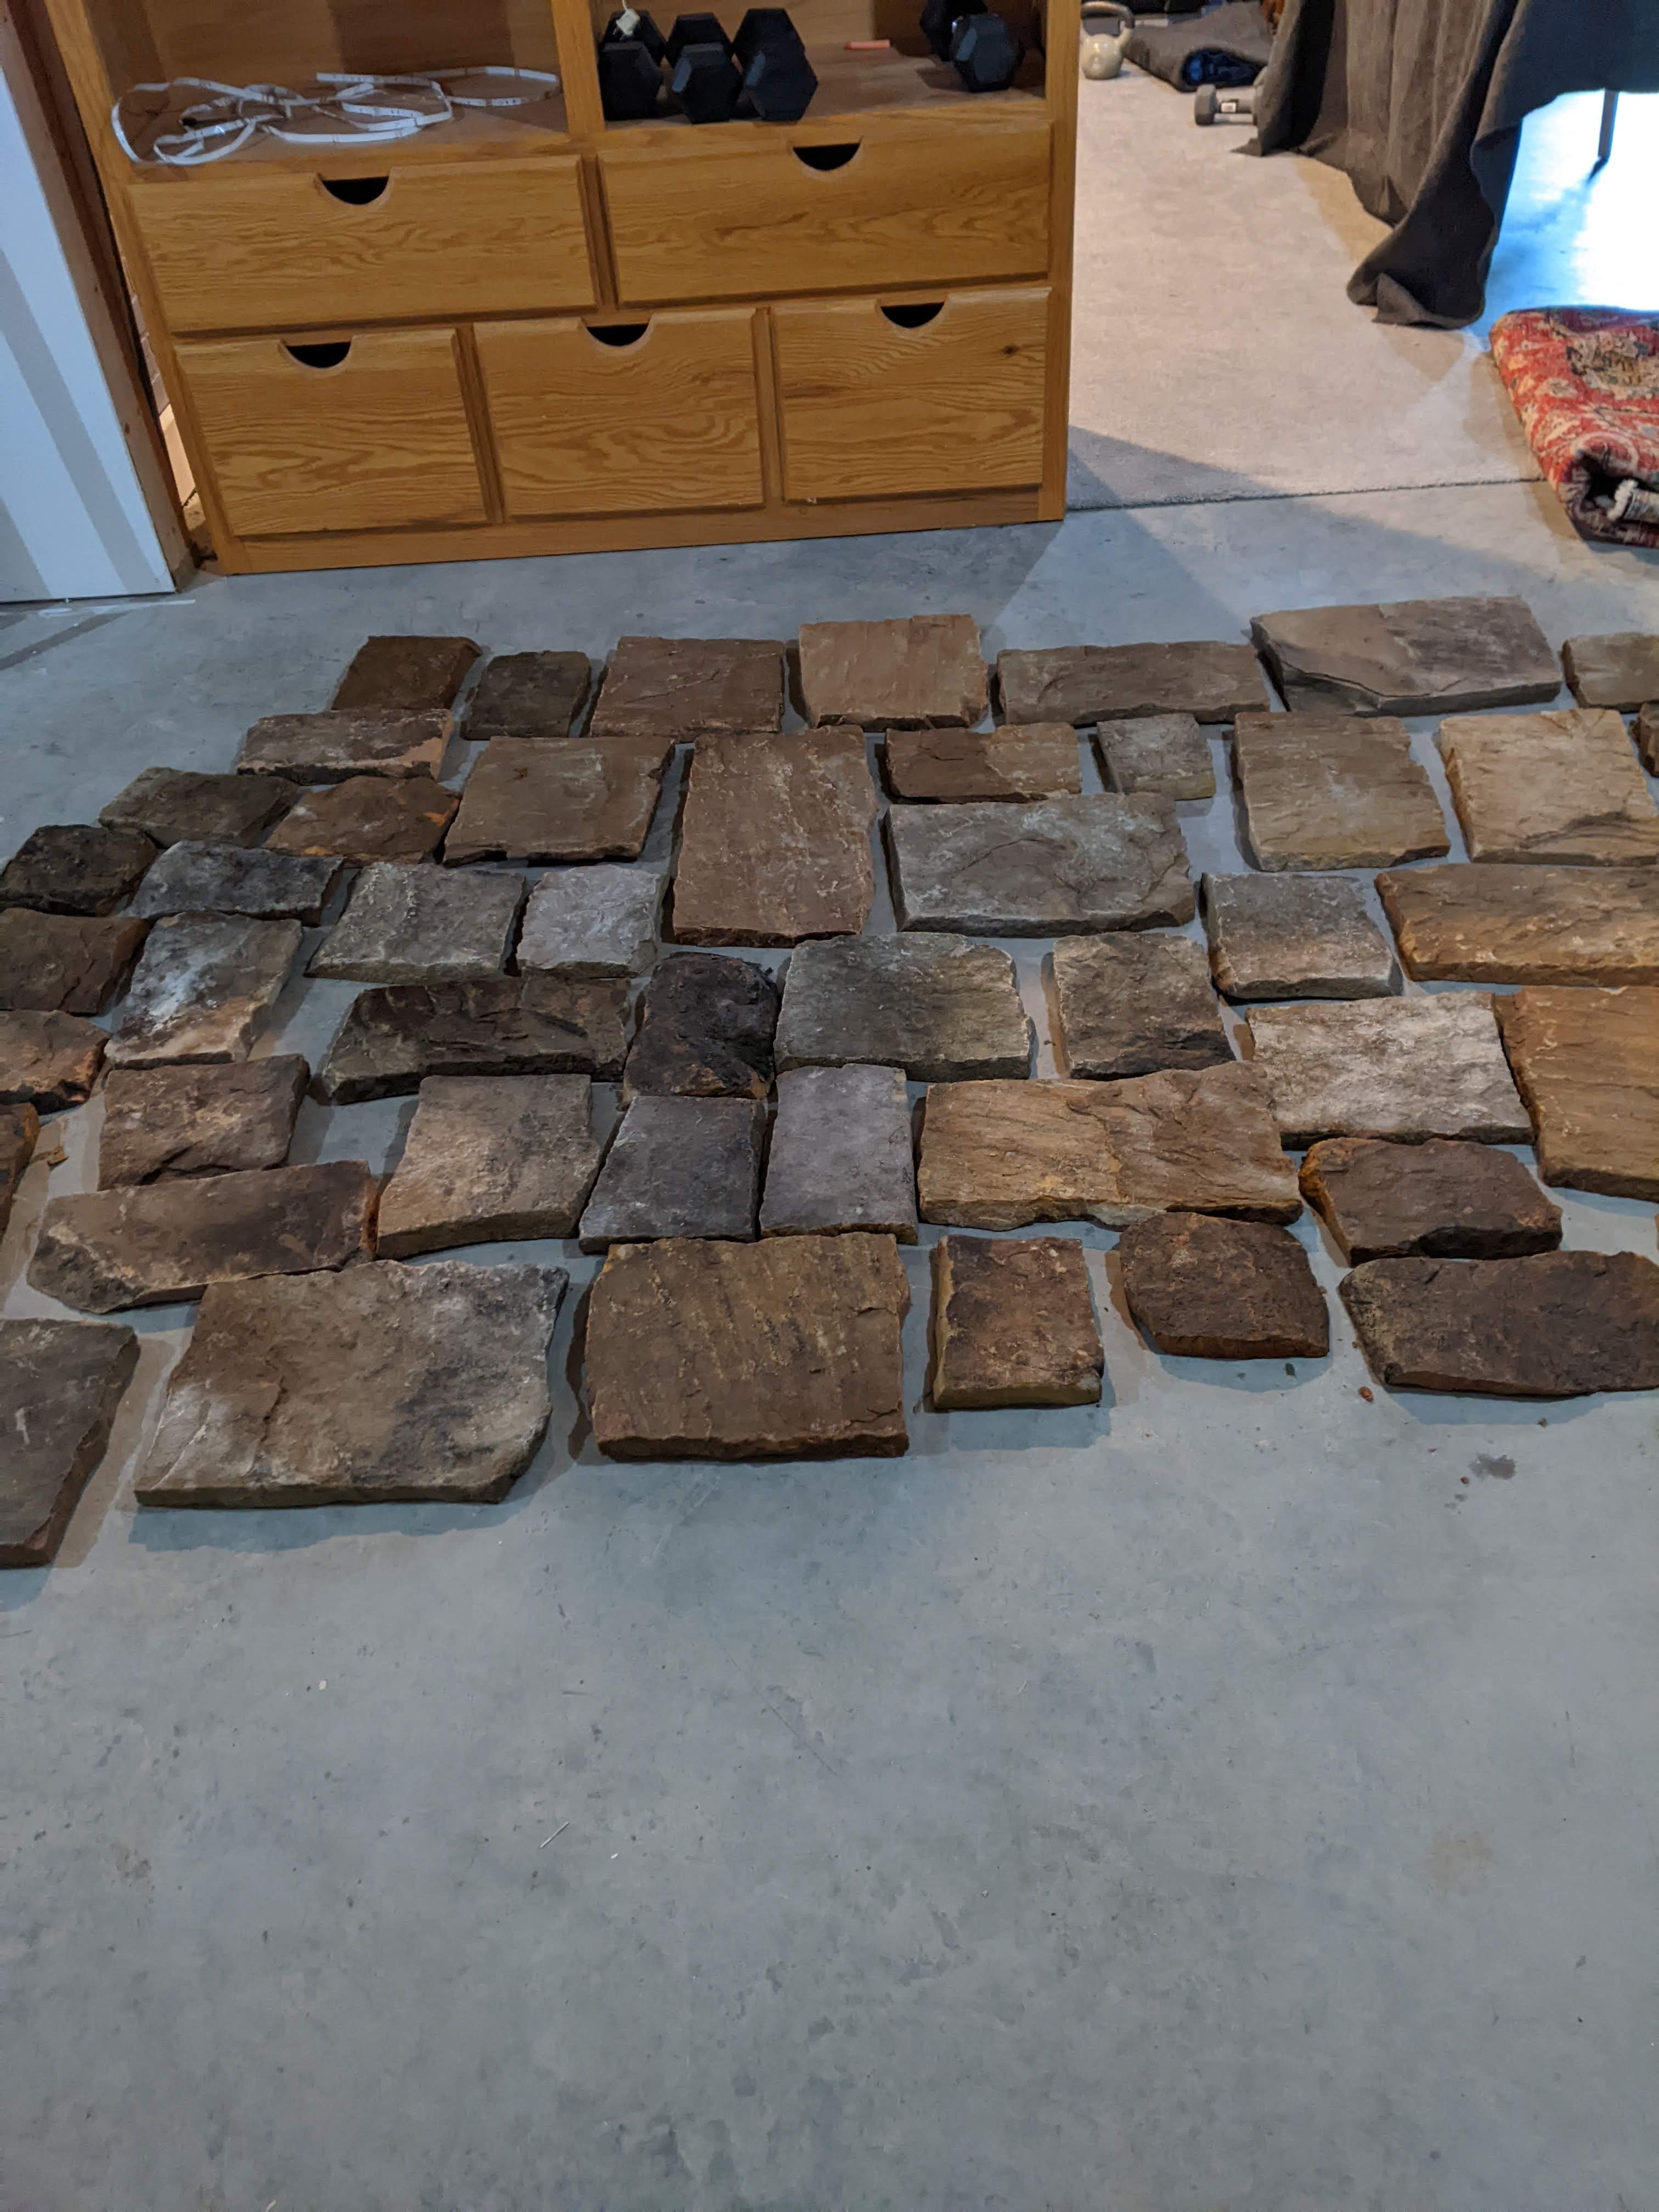
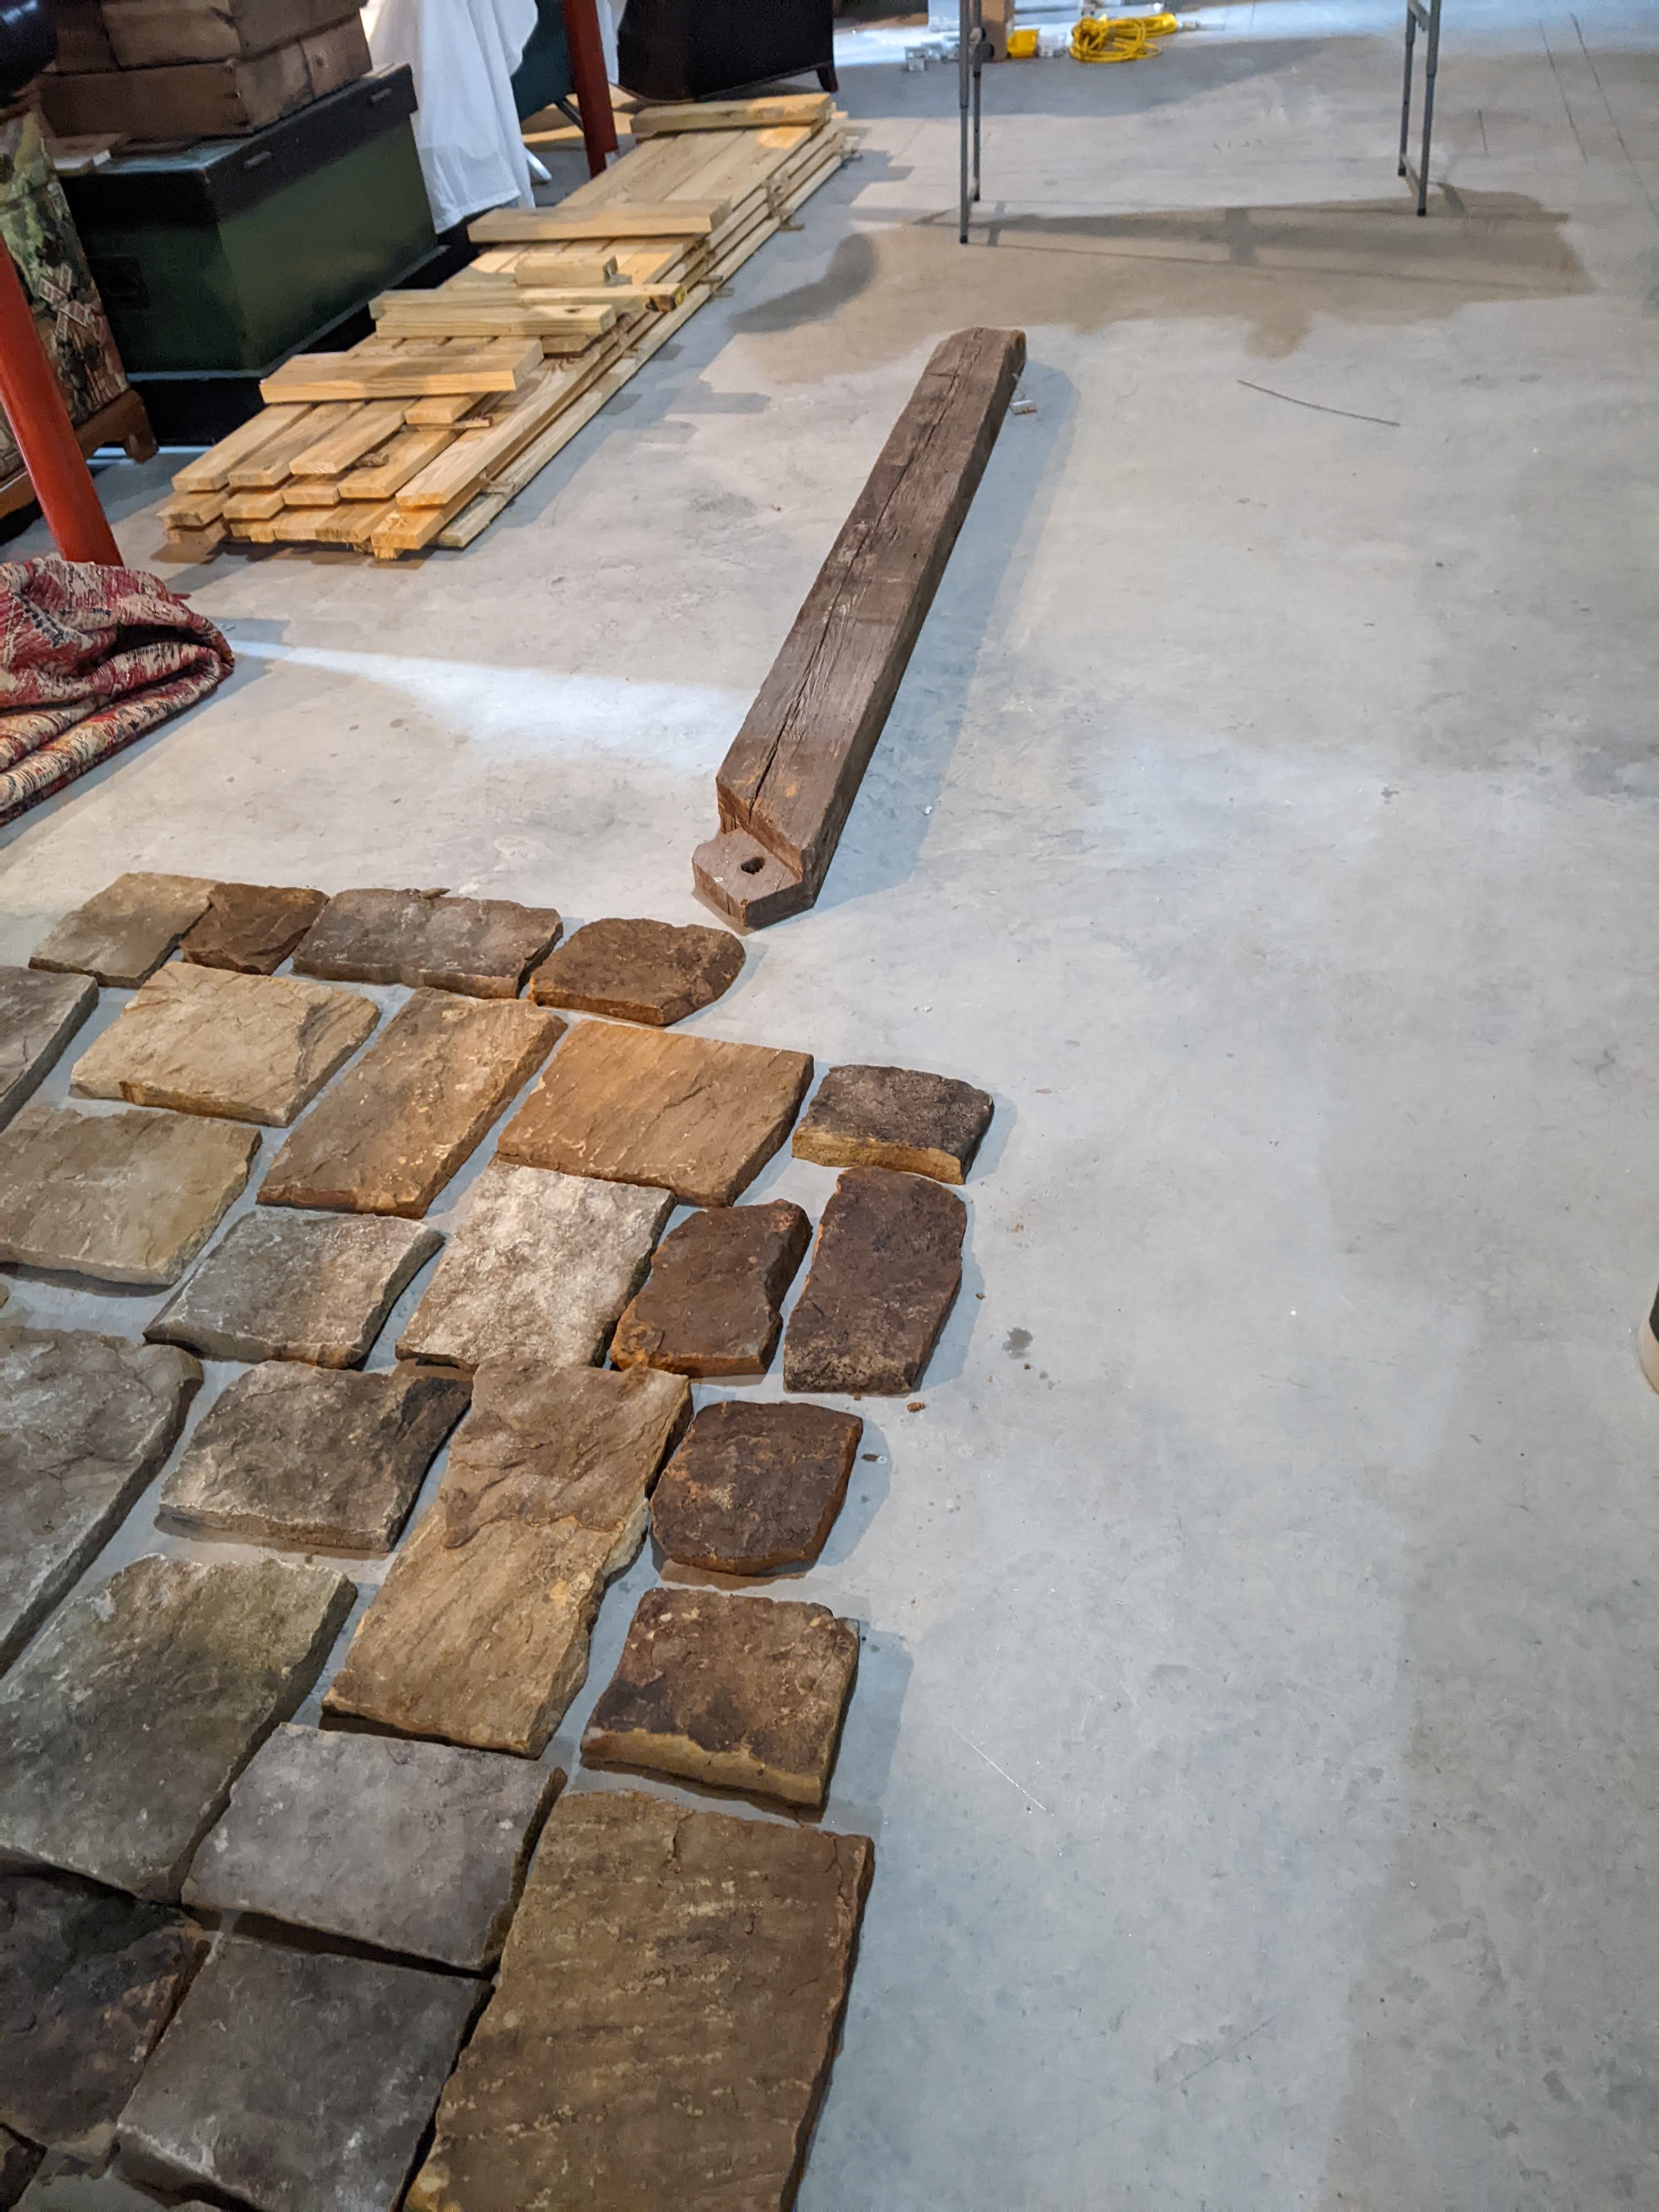
Once this prep work was complete, I took the wire netting off of the top of the pallet of stone veneer and washed it off and brought it in. This is three layers worth to give us a good variety of colors and shapes and sizes.
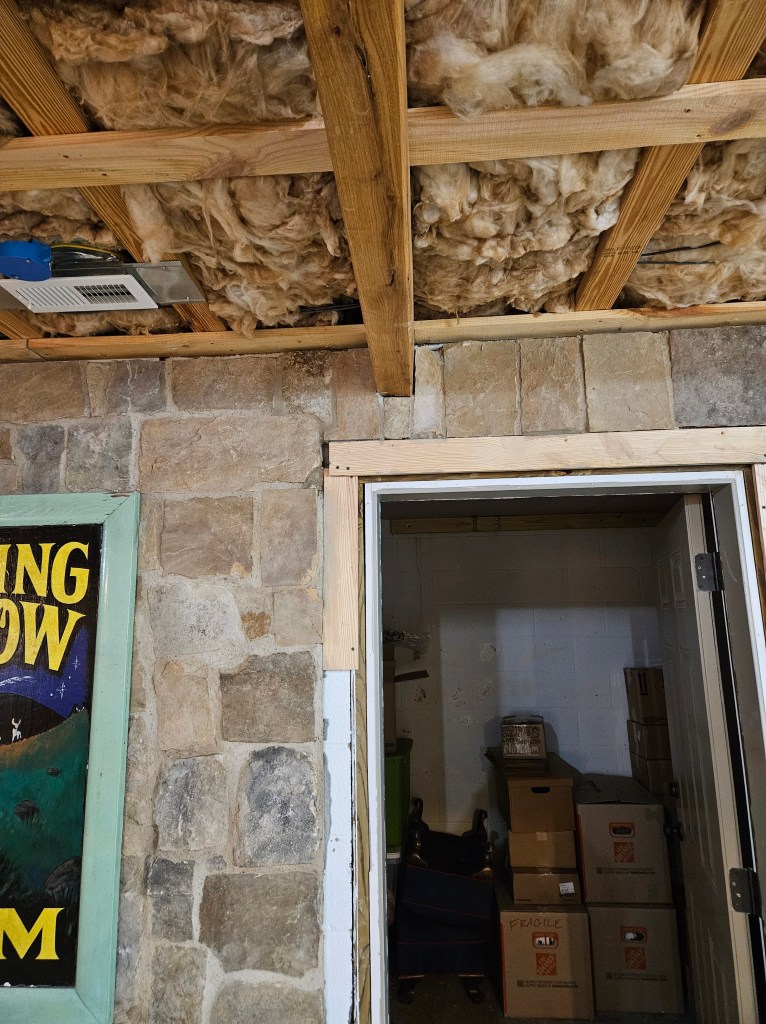
We decided that we are going to use the old barn beam as a lintel above the storm shelter door and above the closet doors by the wood stove (We ended up not doing this.). The color of the beam looks fantastic with the stone.
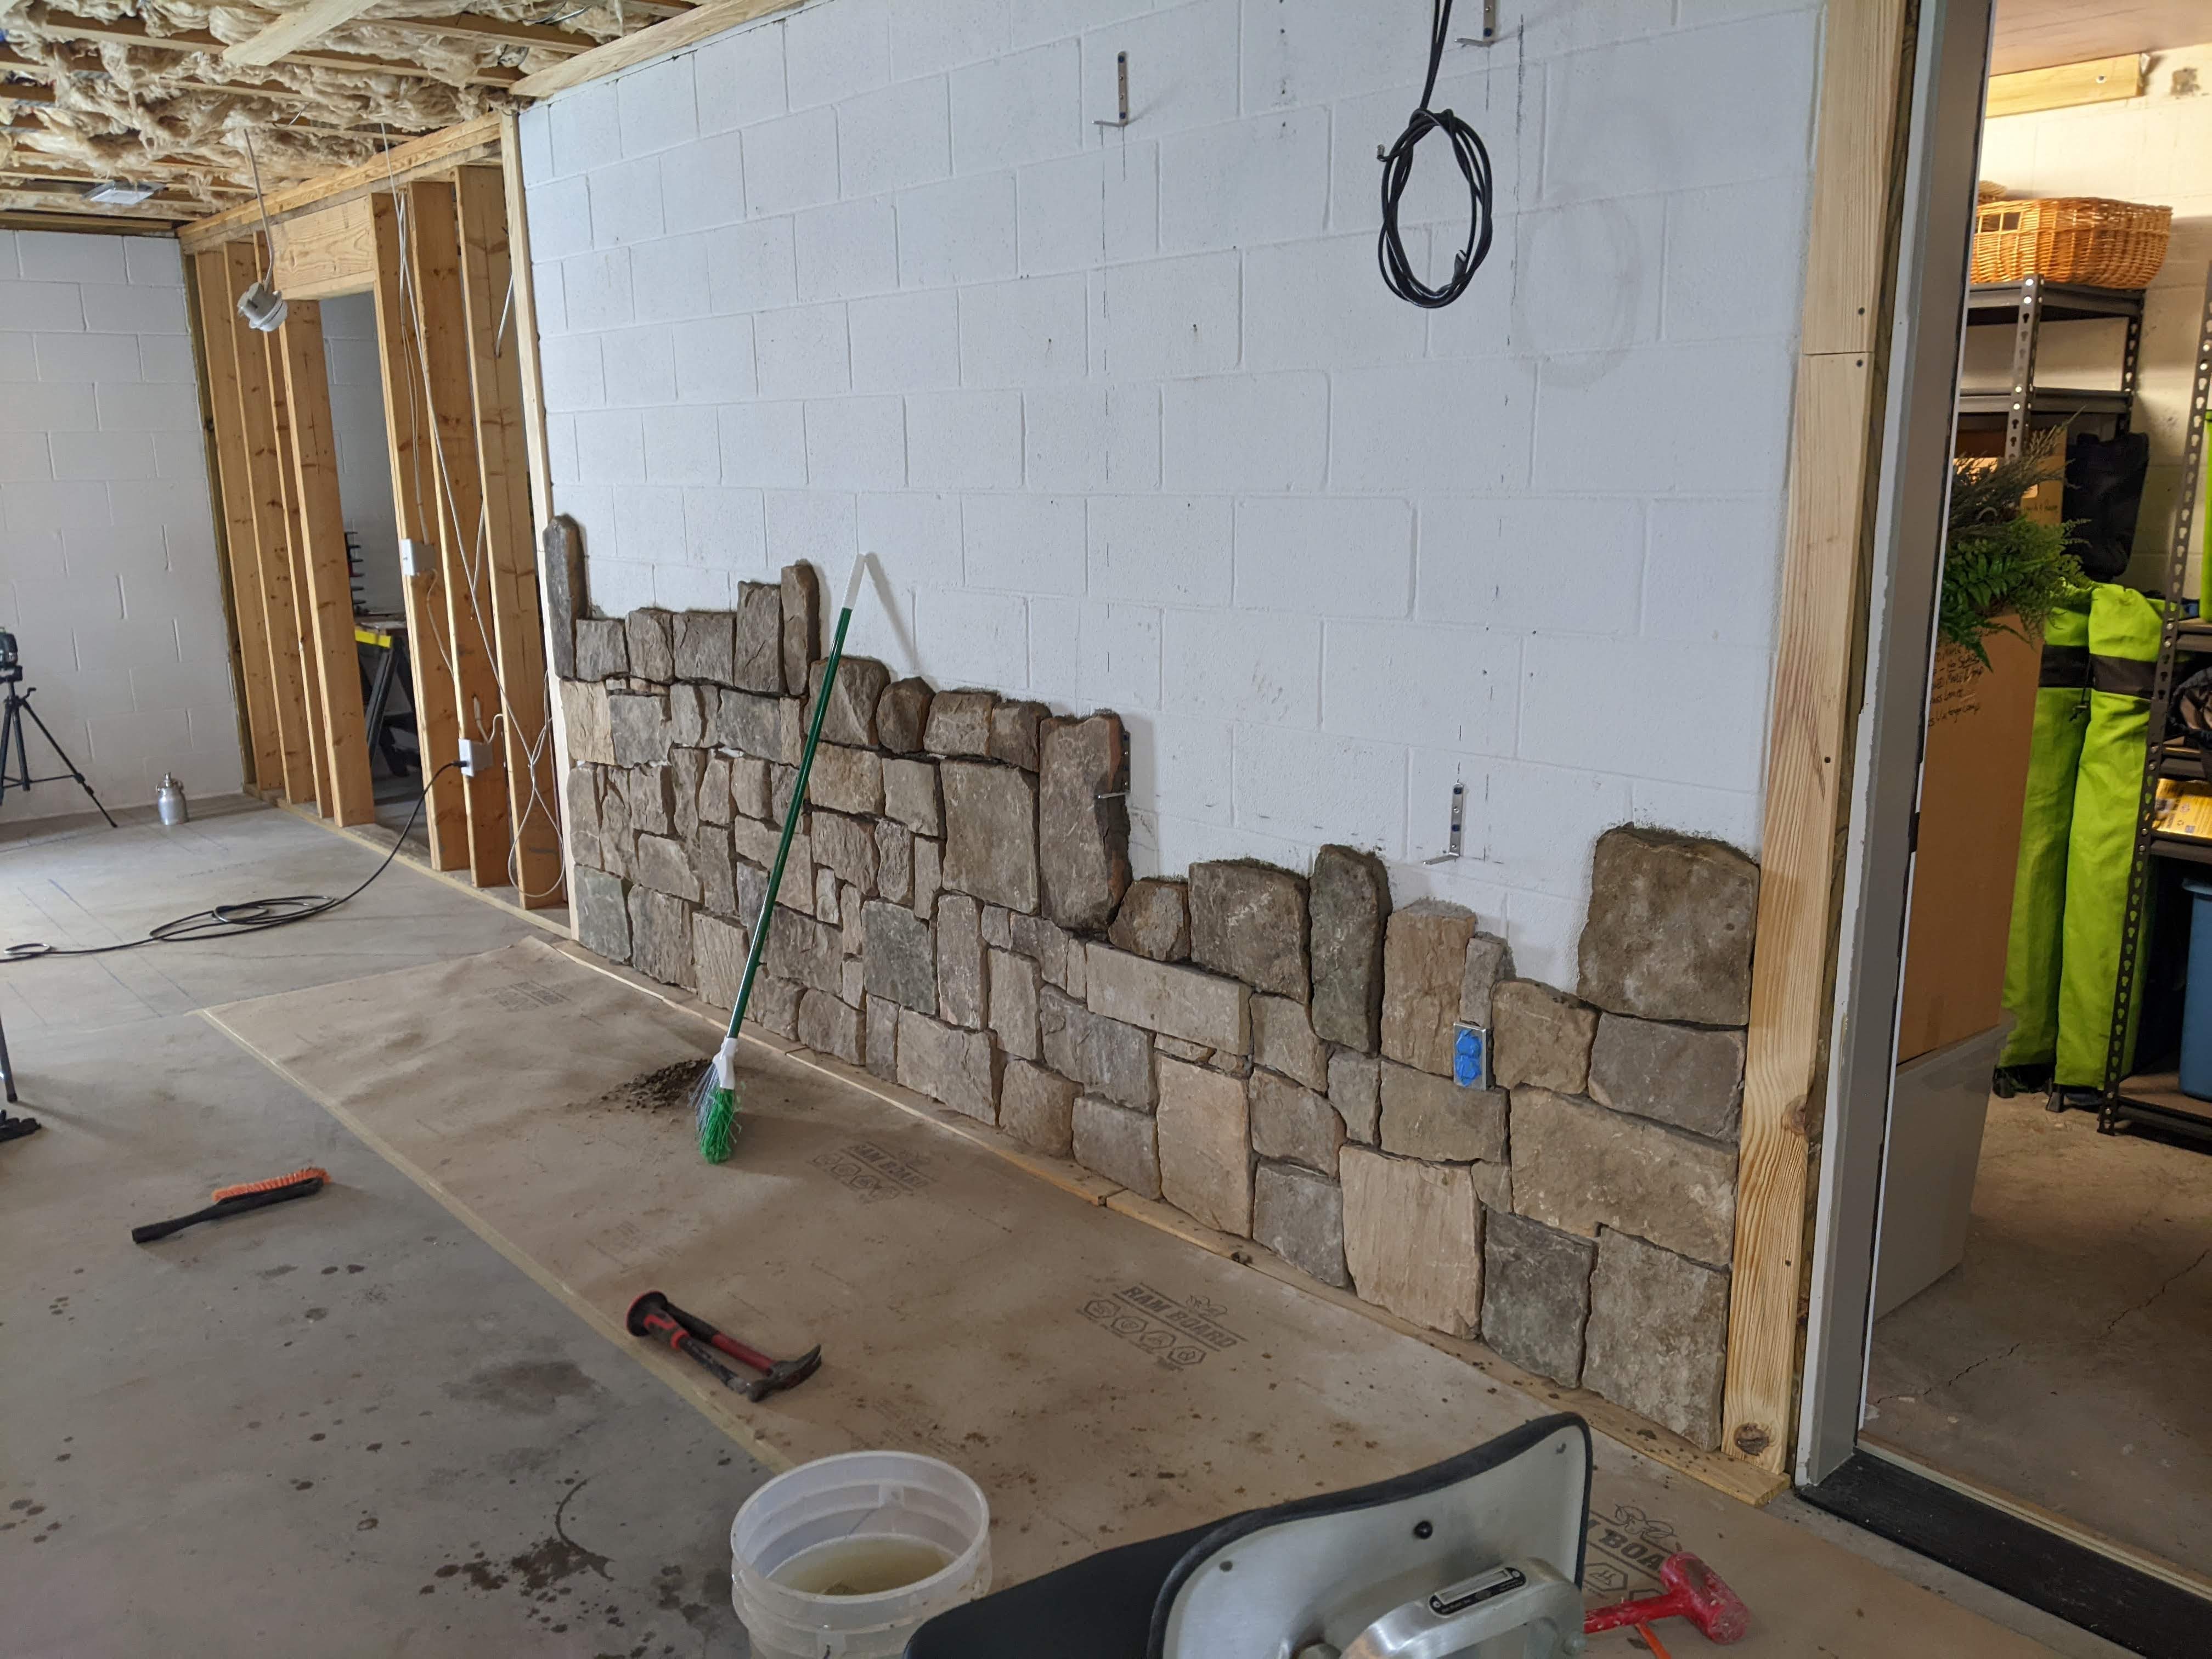
We are using Type S mortar mix to apply the stone. What we have learned is that we need to mix it to the consistency we like and let it sit for 15 minutes and then test it and mix in more water so it isn’t too dry to work with. We are back buttering the stone veneer with about 1/2″ of mortar and sticking it to the wall. (When we get to the closets, we’ll have to apply metal lath and a scratch coat.) We worked on it for about an hour on Sunday and we got this far:
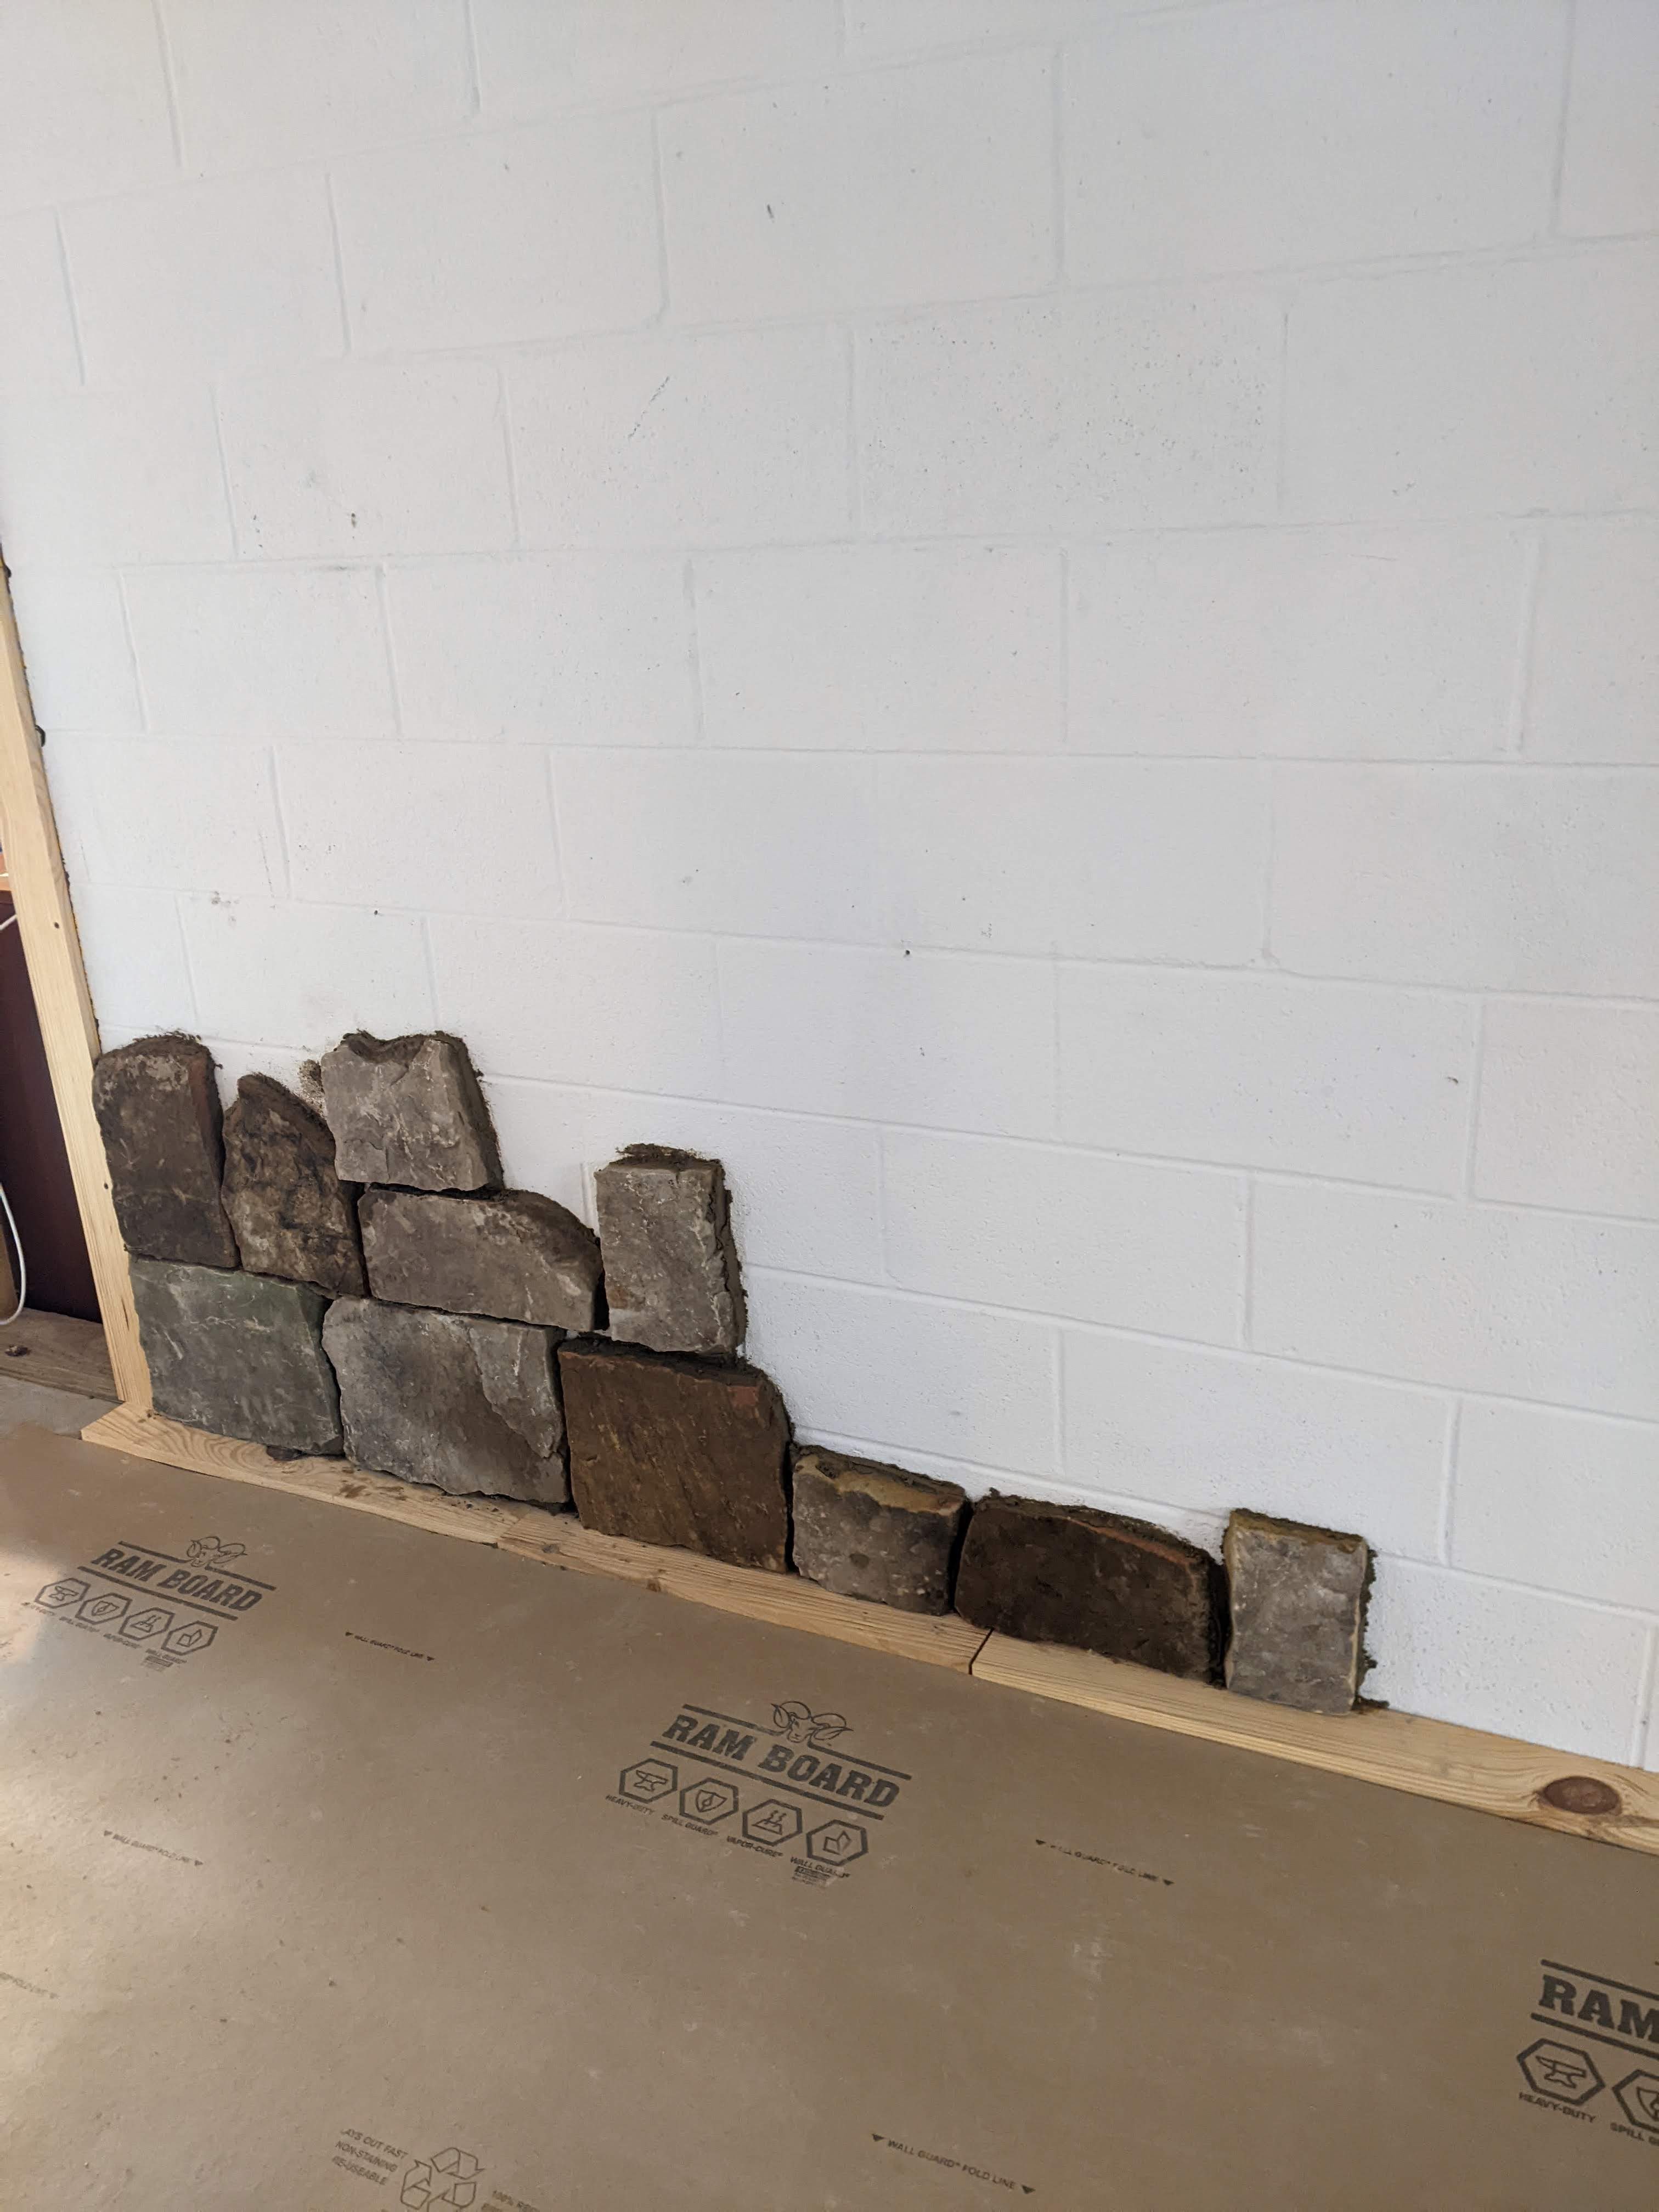
We decided to stop there and see how well it stuck before we started putting up a lot more. Everything seemed to work and we put up more on Monday night. Before we go too much further, we are going to install the hardware to hang the Howling Cow Farm sign and the dart board. My husband is also planning to go ahead and install the beams on the ceiling so that the stone will butt up to them.
I have also been working on the closet doors trying to get them cleaned and ready to sand, and finish and install hardware. In earlier posts, I mentioned that I thought that the doors were about 150 years old. The bottom coat of material is really thick and chalky and difficult to remove. On top of that is a varnish type material. After working with several doors, I think that they may have been grain painted to look like mahogany, walnut, or oak instead of white pine. We are going to leave them natural and we’re going to use a lacquer so that the finish doesn’t yellow over time. It’s good that we had two doors that were such a close match to use for this closet.
I will start working on this final closet door next week. It still has quite a lot of that bottom coat of material on it.
I also finished the other door for the closets by the wood stove. It’s such a cutie little door. Once we finish the big block wall with stone, then we’ll install both the doors and start the process of applying stone to the closet walls.
I really wish that everything was moving faster than it is, but we have such a specific look in mind that we don’t really have a choice to to do a lot of the work ourselves.
May 19, 2023:
We have a specific look in mind for our basement–a 1930’s English pub–and we’ve been on the hunt for era appropriate items that you might have seen in a pub at that point in time. I was hunting around for a trough sink and went down the rabbit hole of Etsy (did you know they sold such things? Me neither.) and I found lots of really cool old vintage items, but there was a specific sink that just wowed me from Hudson Valley House Parts.

I love the way the cabinet is rounded like the sink. We are planning to use this in the bathroom.
So, I was prowling around a little more on Hudson Valley House Parts’ website and found this tub.
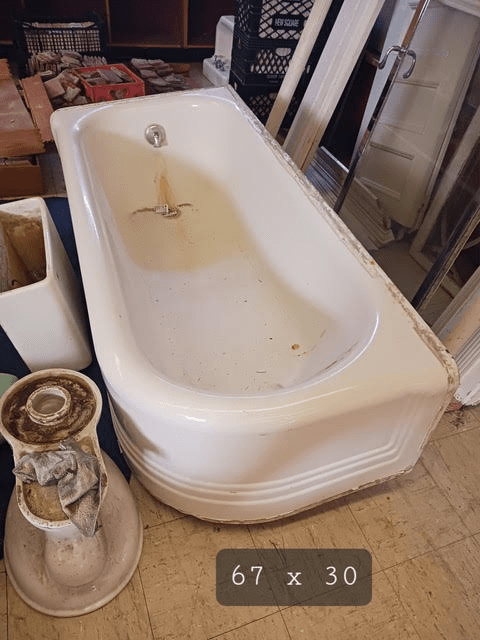
It is so art deco and fabulous!
The original plan was that when Hudson Valley House Parts had enough stuff coming south, they would deliver the items to us, but the guy (owner) who normally does the deliveries is having health issues. Our delivery date kept getting pushed out, so we decided to drive to Newburgh, NY (12.5 hours straight through) with a 6′ x 12′ U-Haul trailer to pick these beauties up. It was a lot of driving, especially with a giant trailer behind us.
We stopped a few times to prowl through antique stores and found these items:
We also stopped at the Lyndburgh Mansion in Tarrytown, NY–fabulous, highly recommend–on our way to Newburgh. After picking up our treasures, we wended our way back home stopping in Malvern, PA and then went to the Greenbrier in White Sulphur Springs, WV. Then finally we drove the rest of the way home.
Here they are in our house:
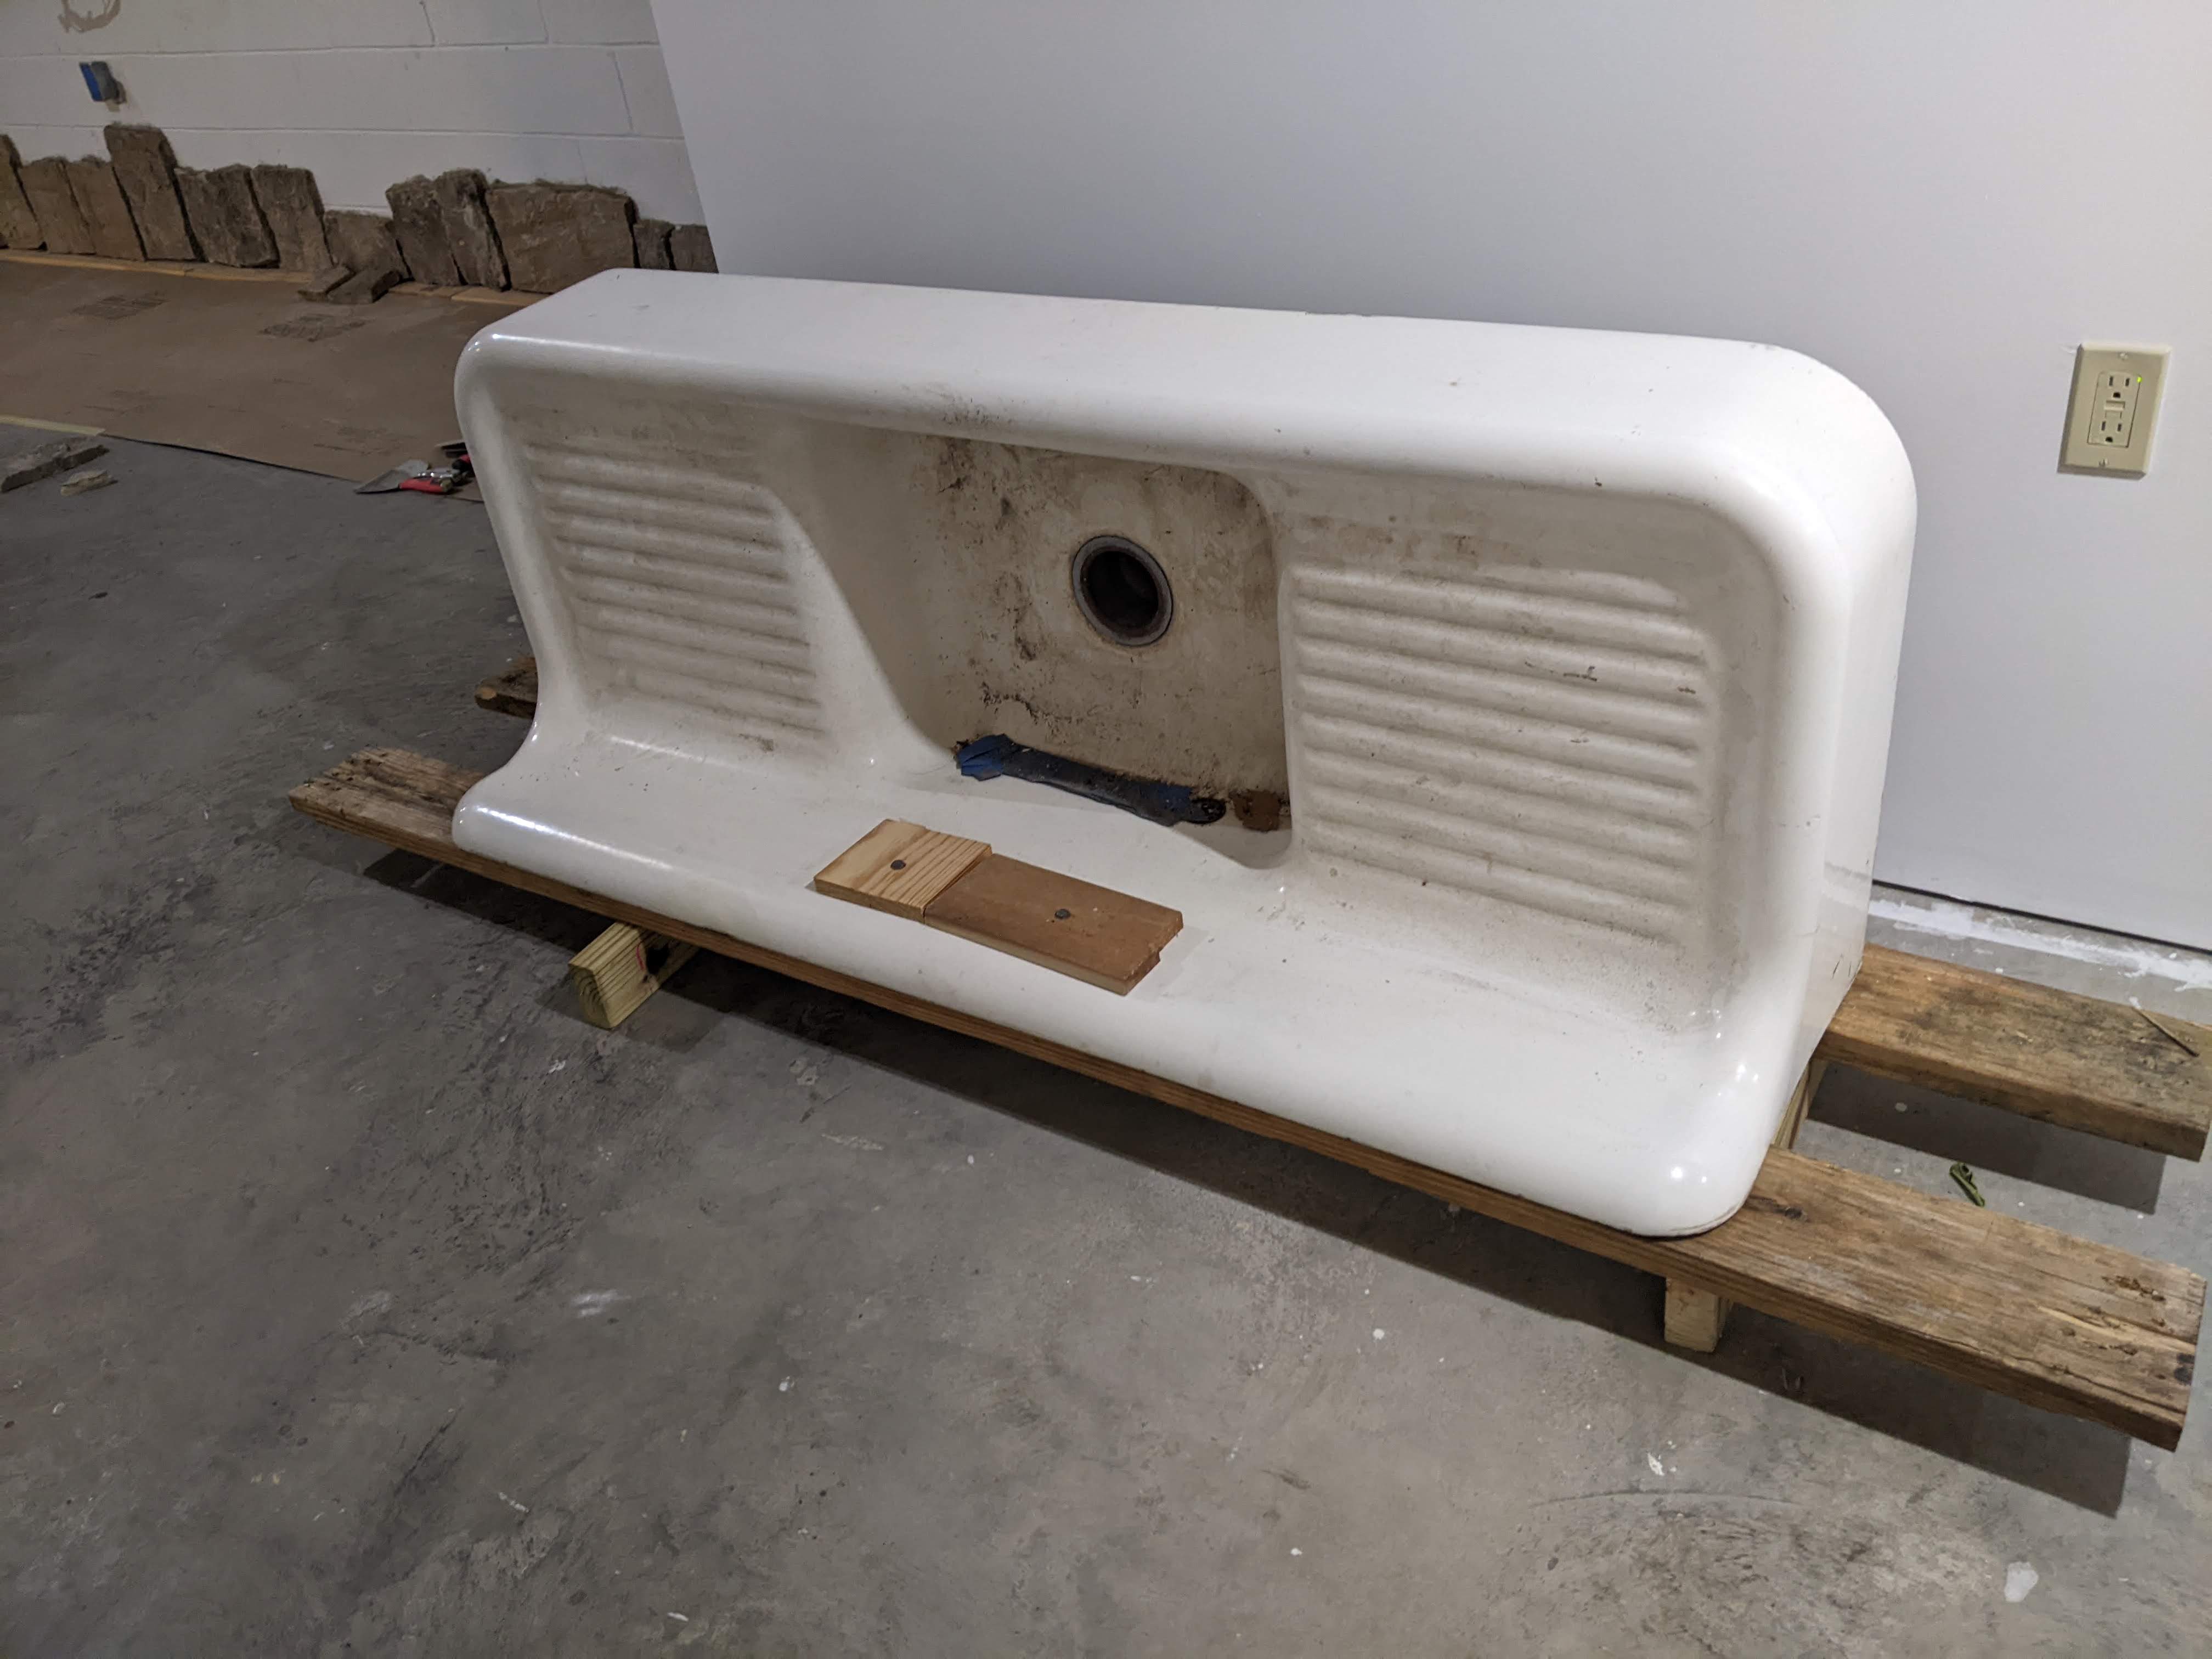
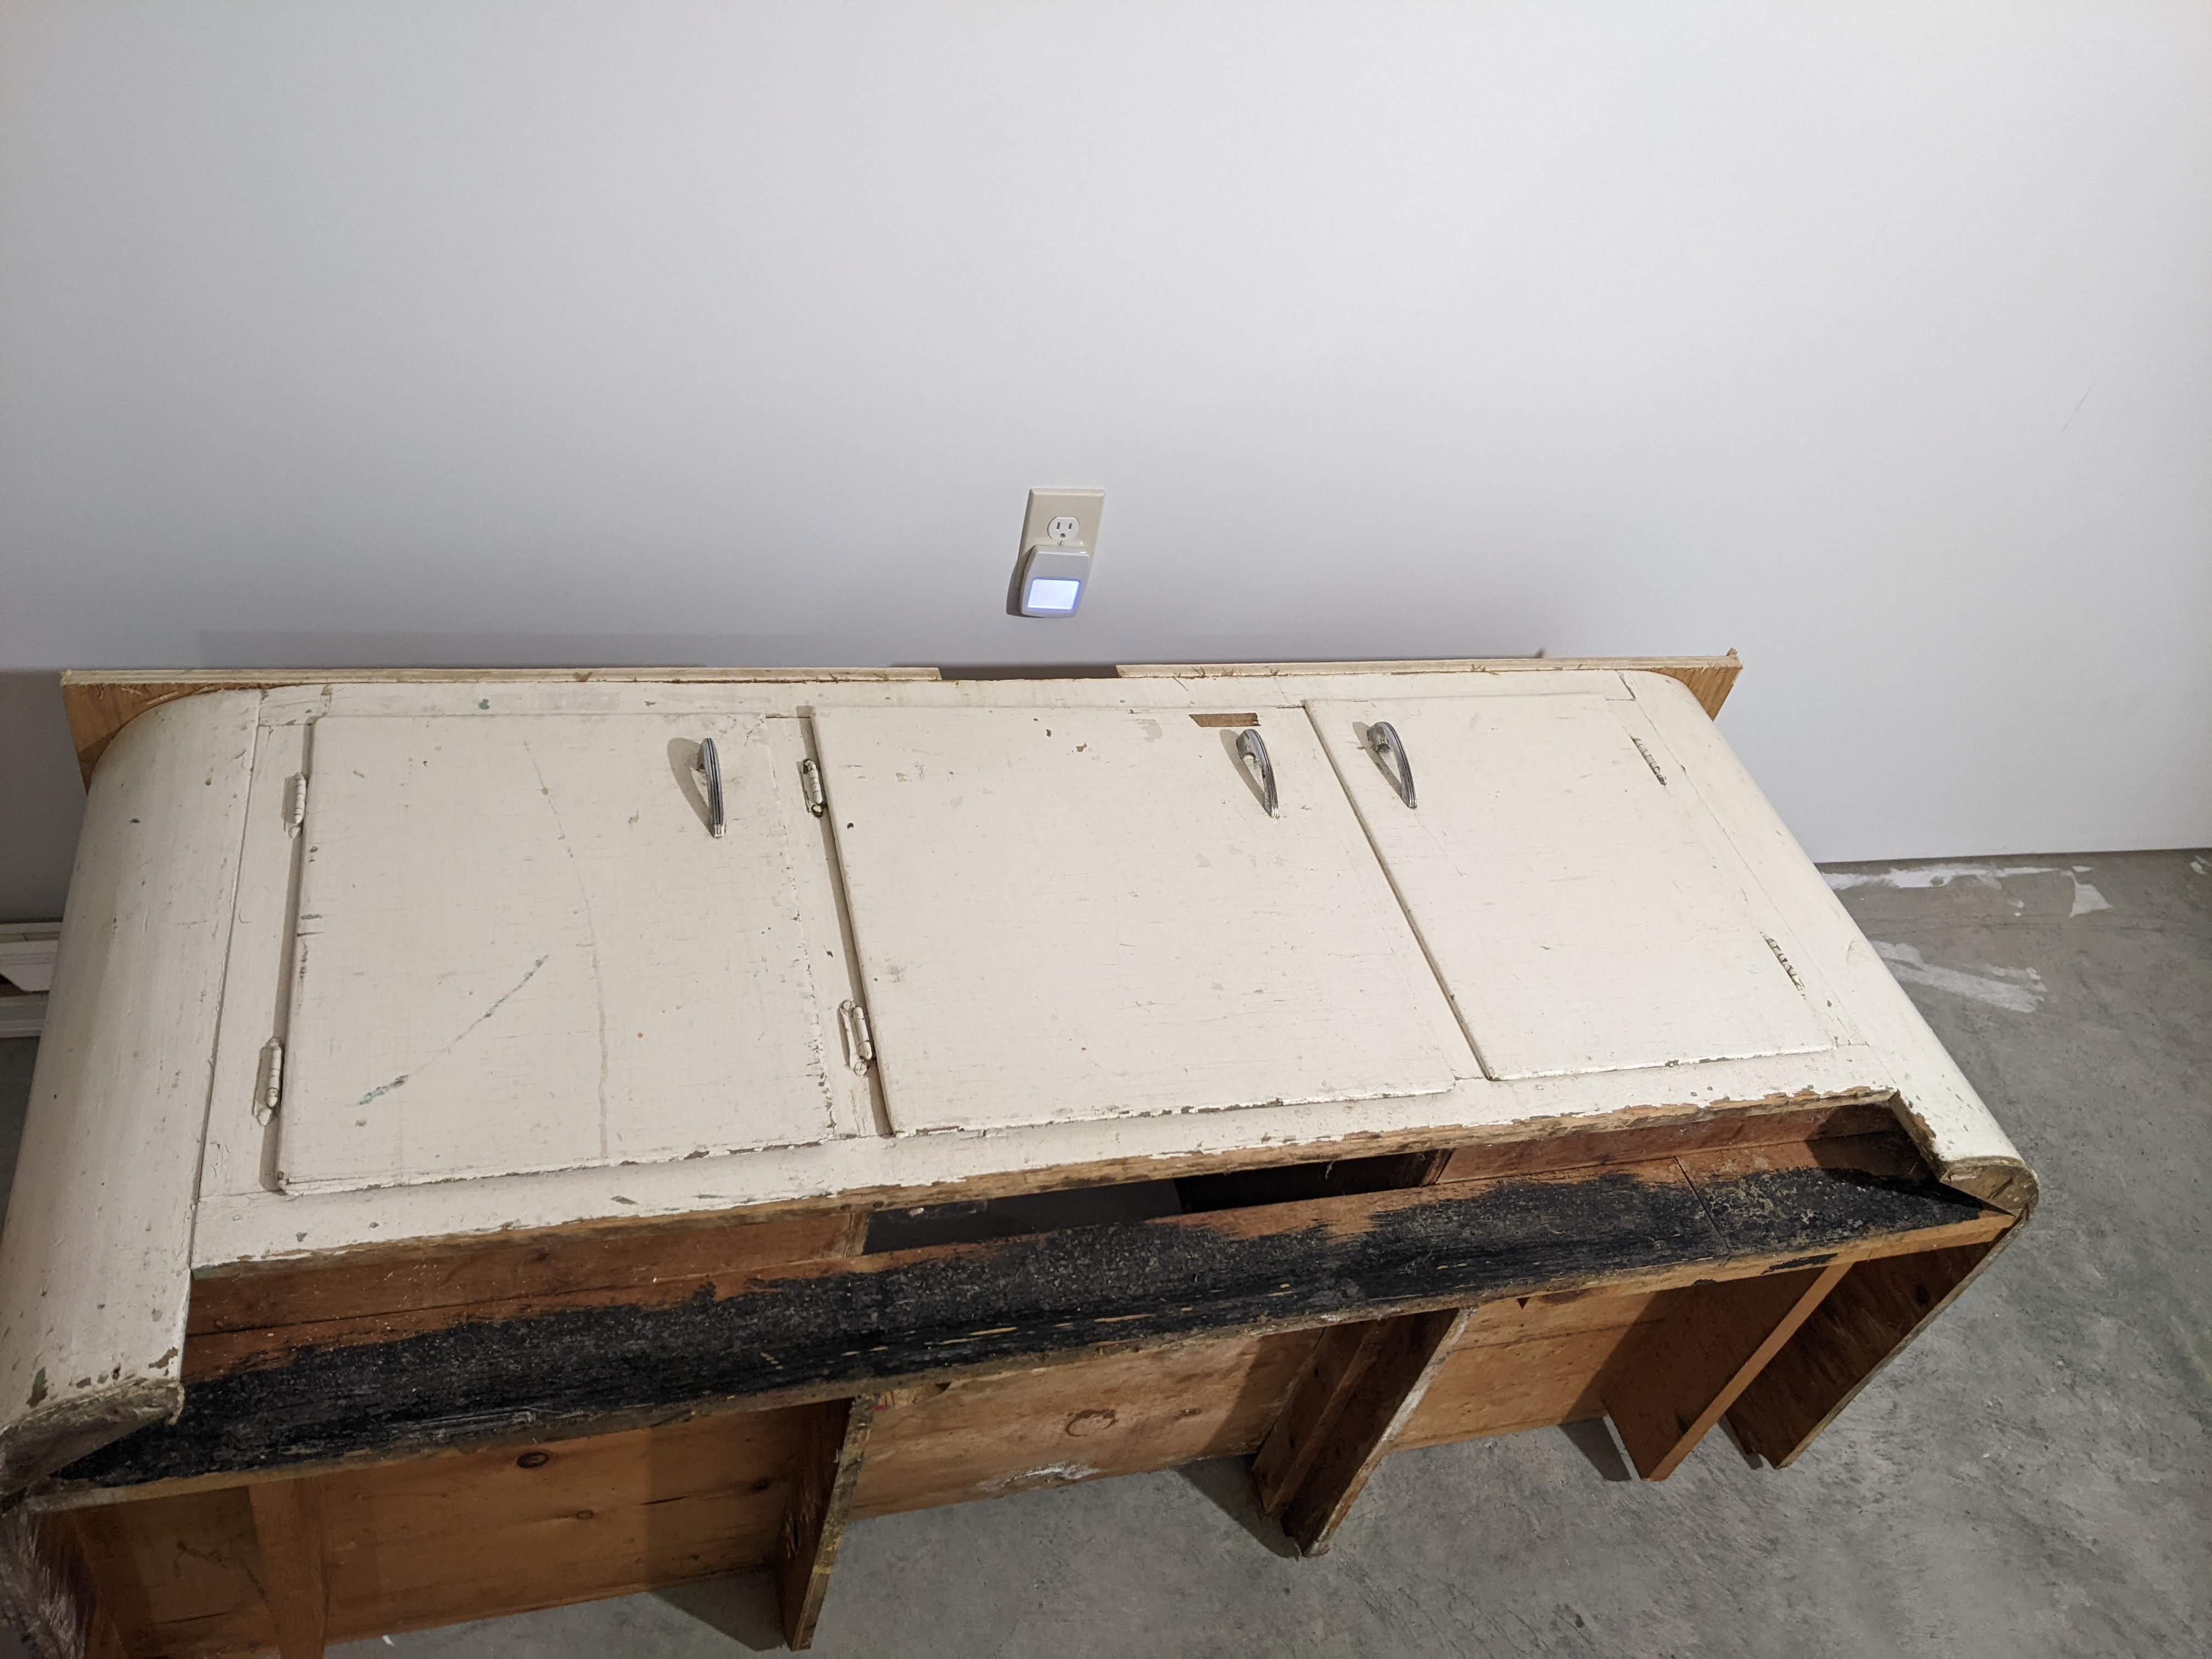
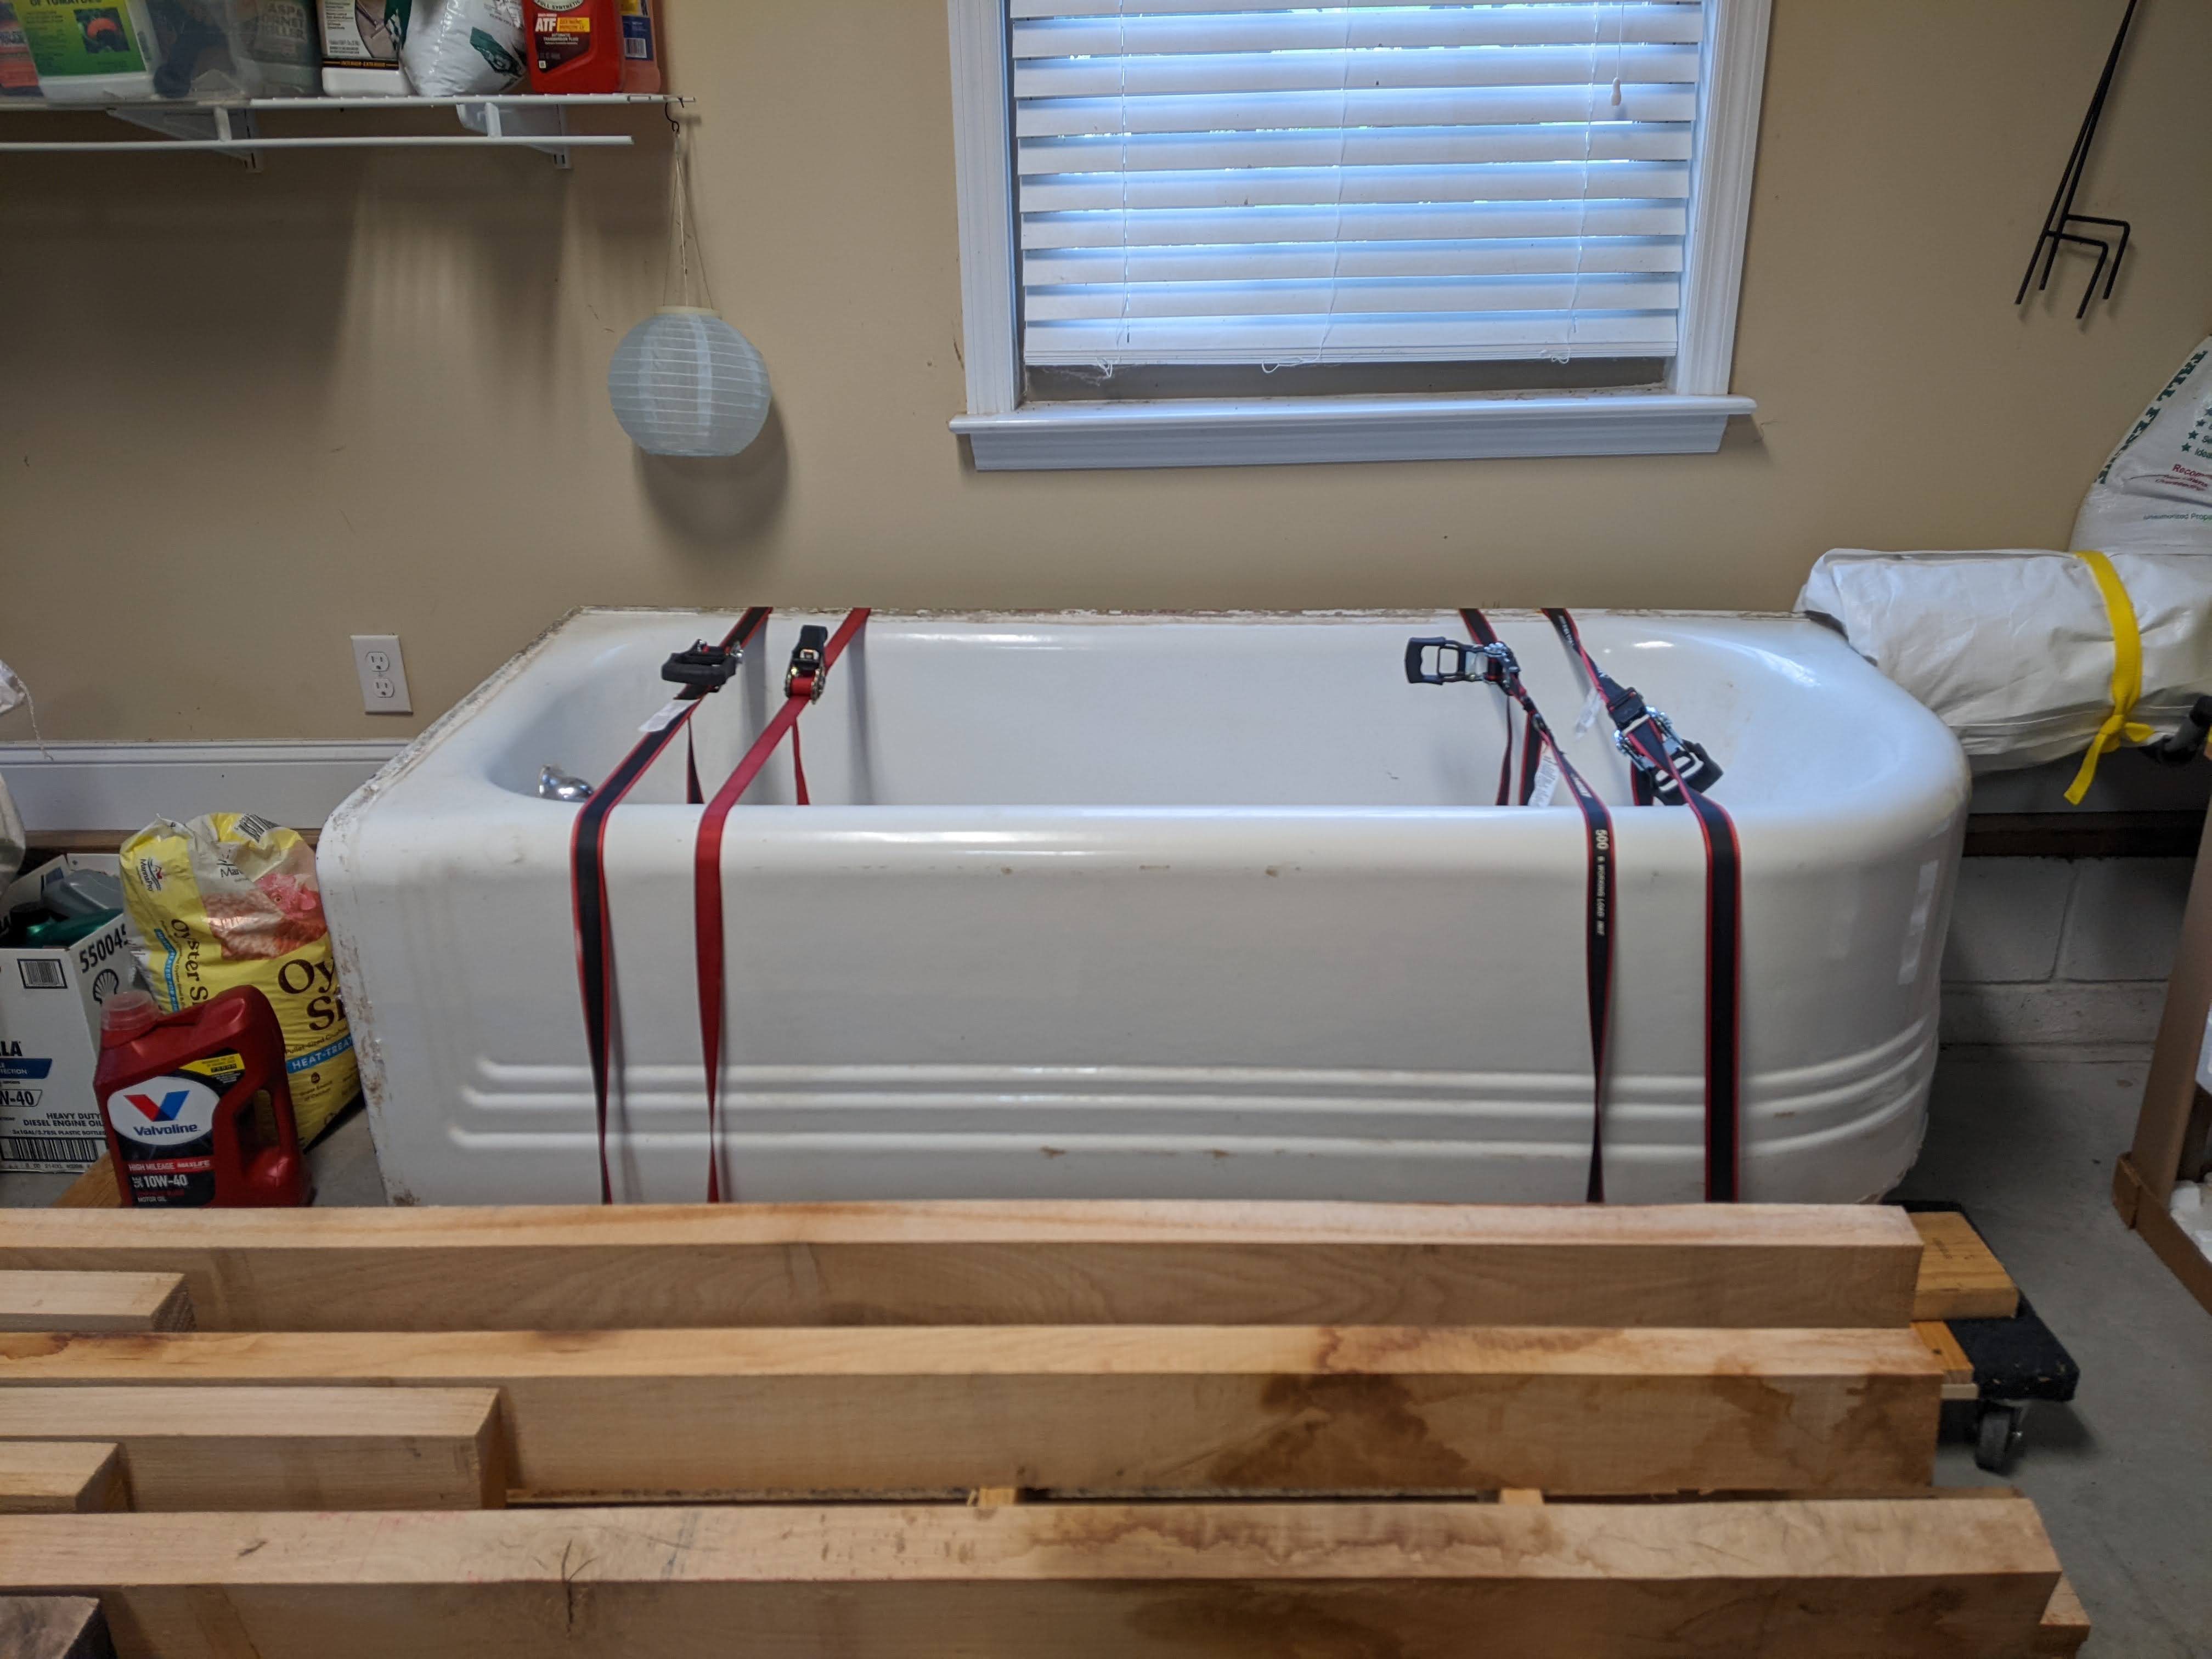
We definitely have some cleaning to do on them and I’m pretty sure that we are going to strip the cabinet and paint it back to its original green color. We’re going to reuse the cabinet hardware, but not the faucet. They are so fabulous.
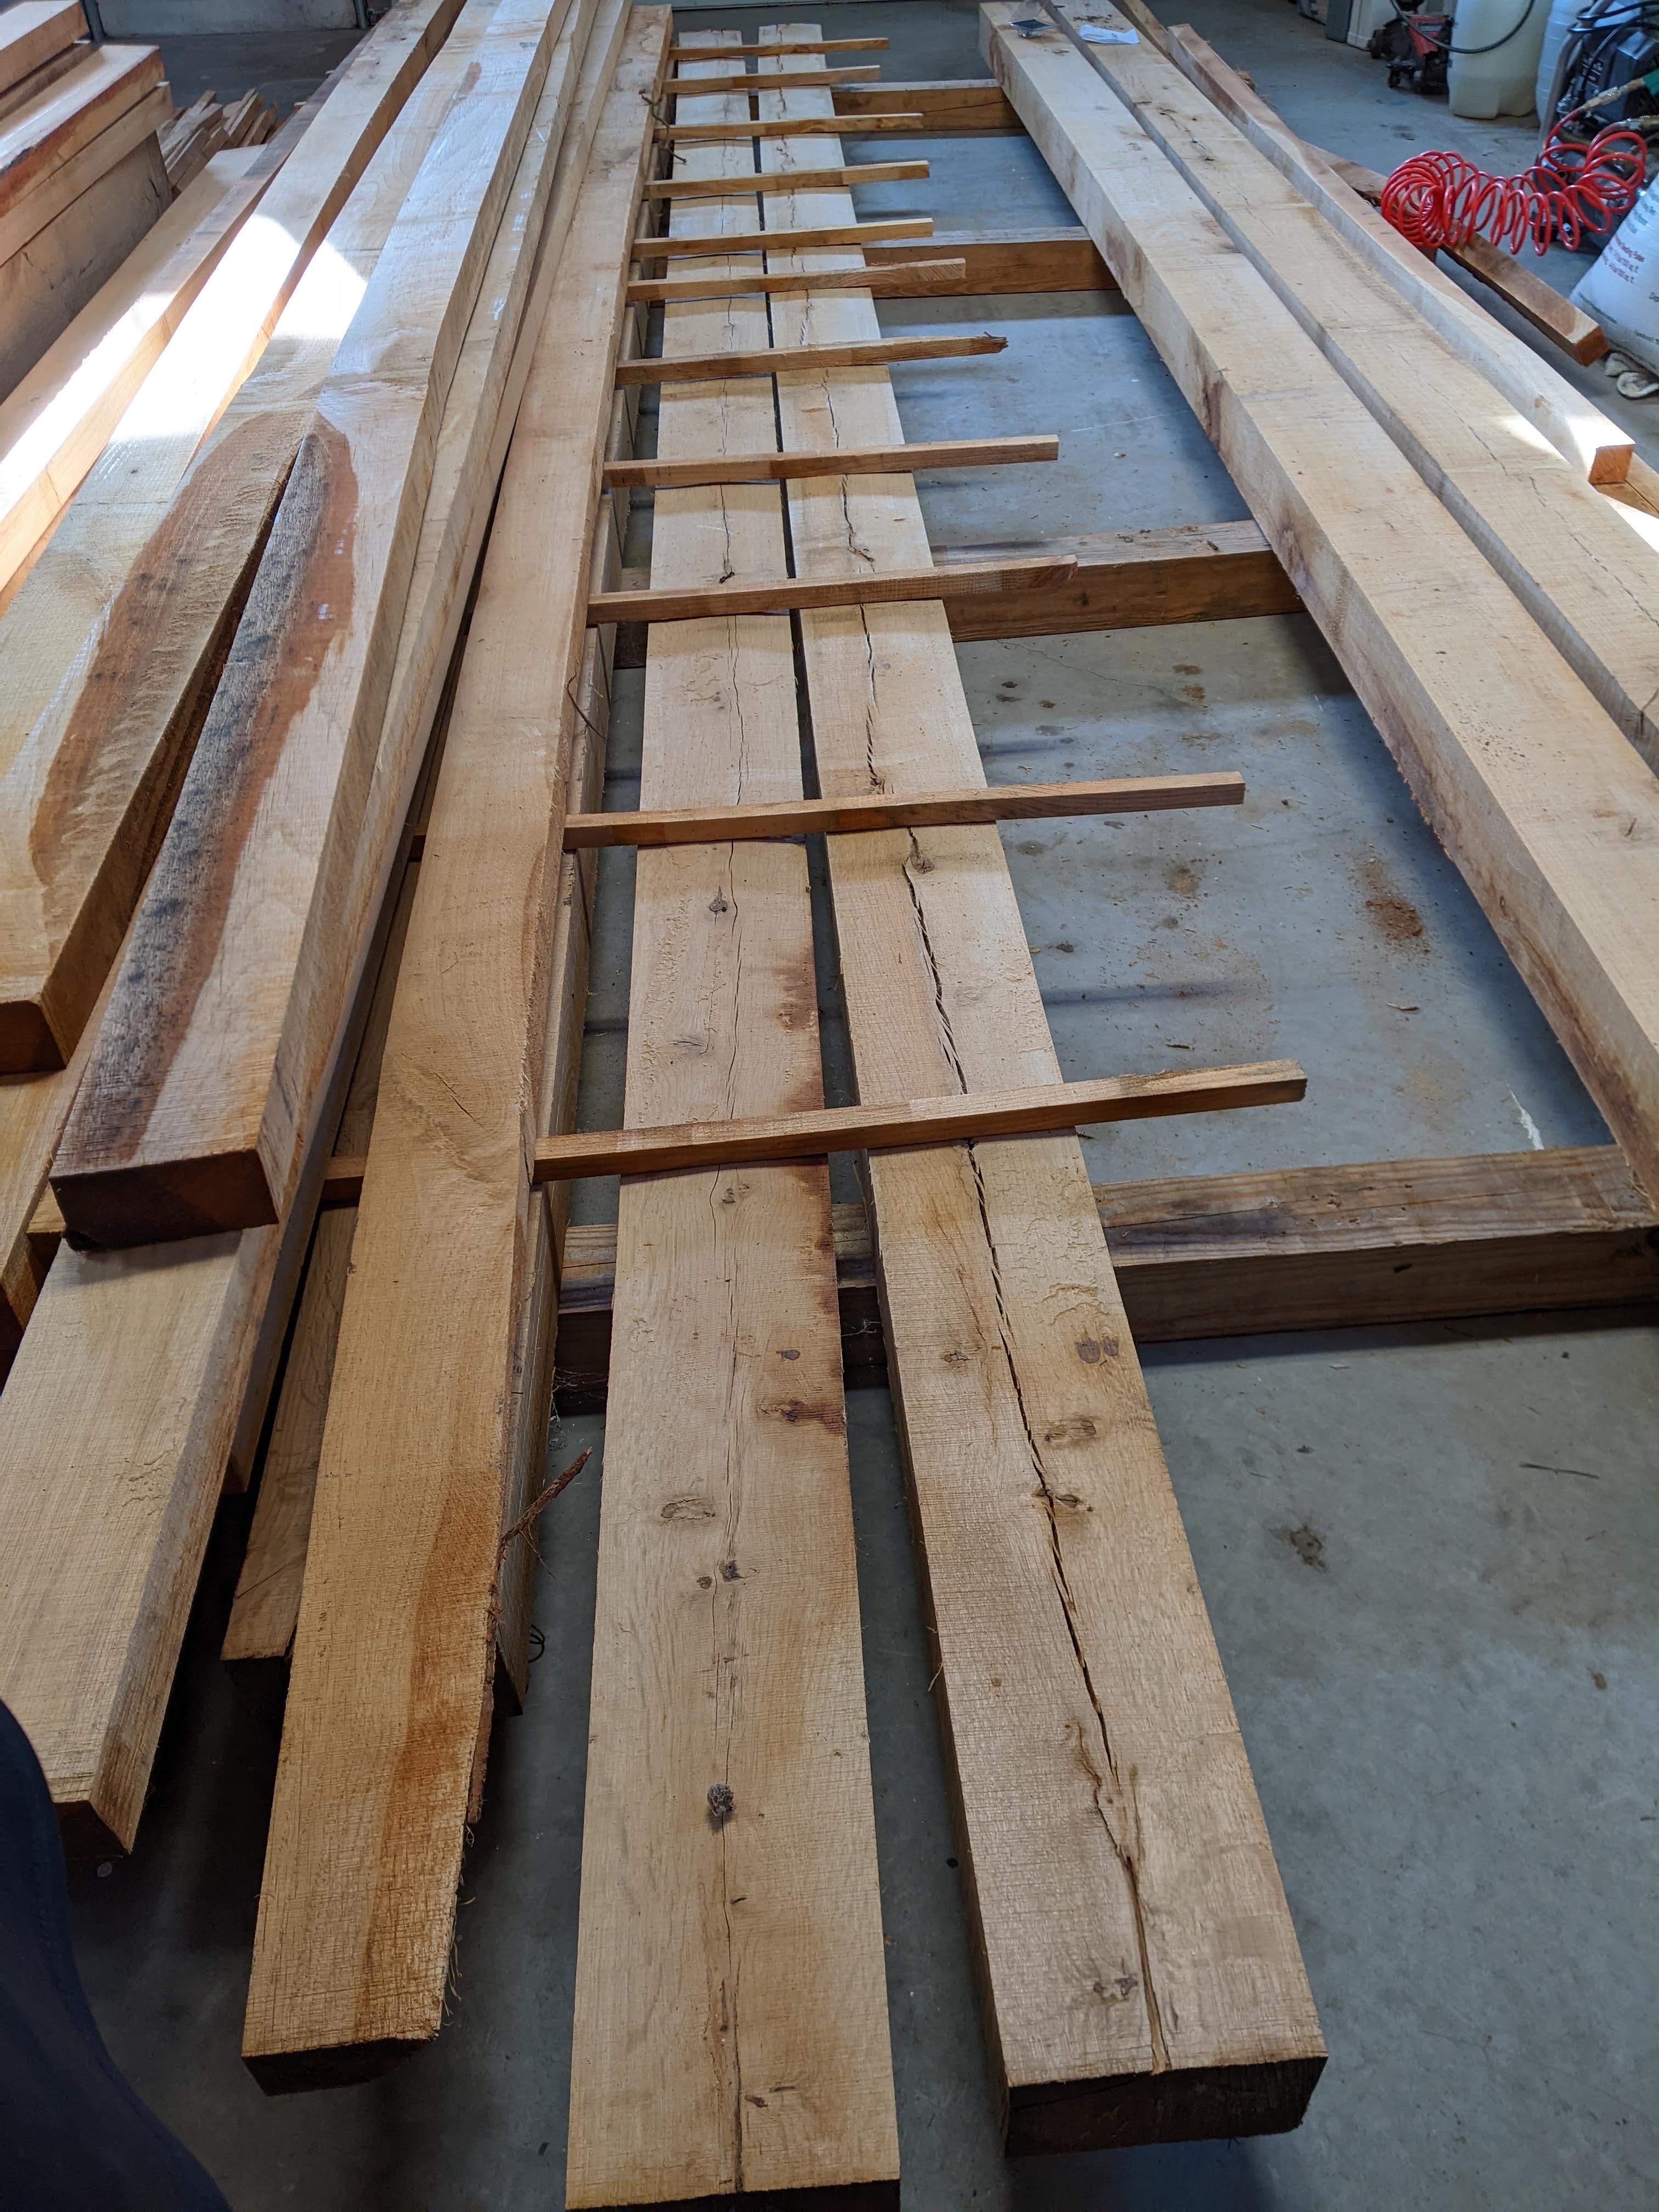
Closer to home, my husband worked with a friend cutting lumber for the basement project and last weekend he and my youngest son brought home the beams that we are going to use on the ceiling. I hope that they are installed before we have to put the jet skis in the garage this fall.
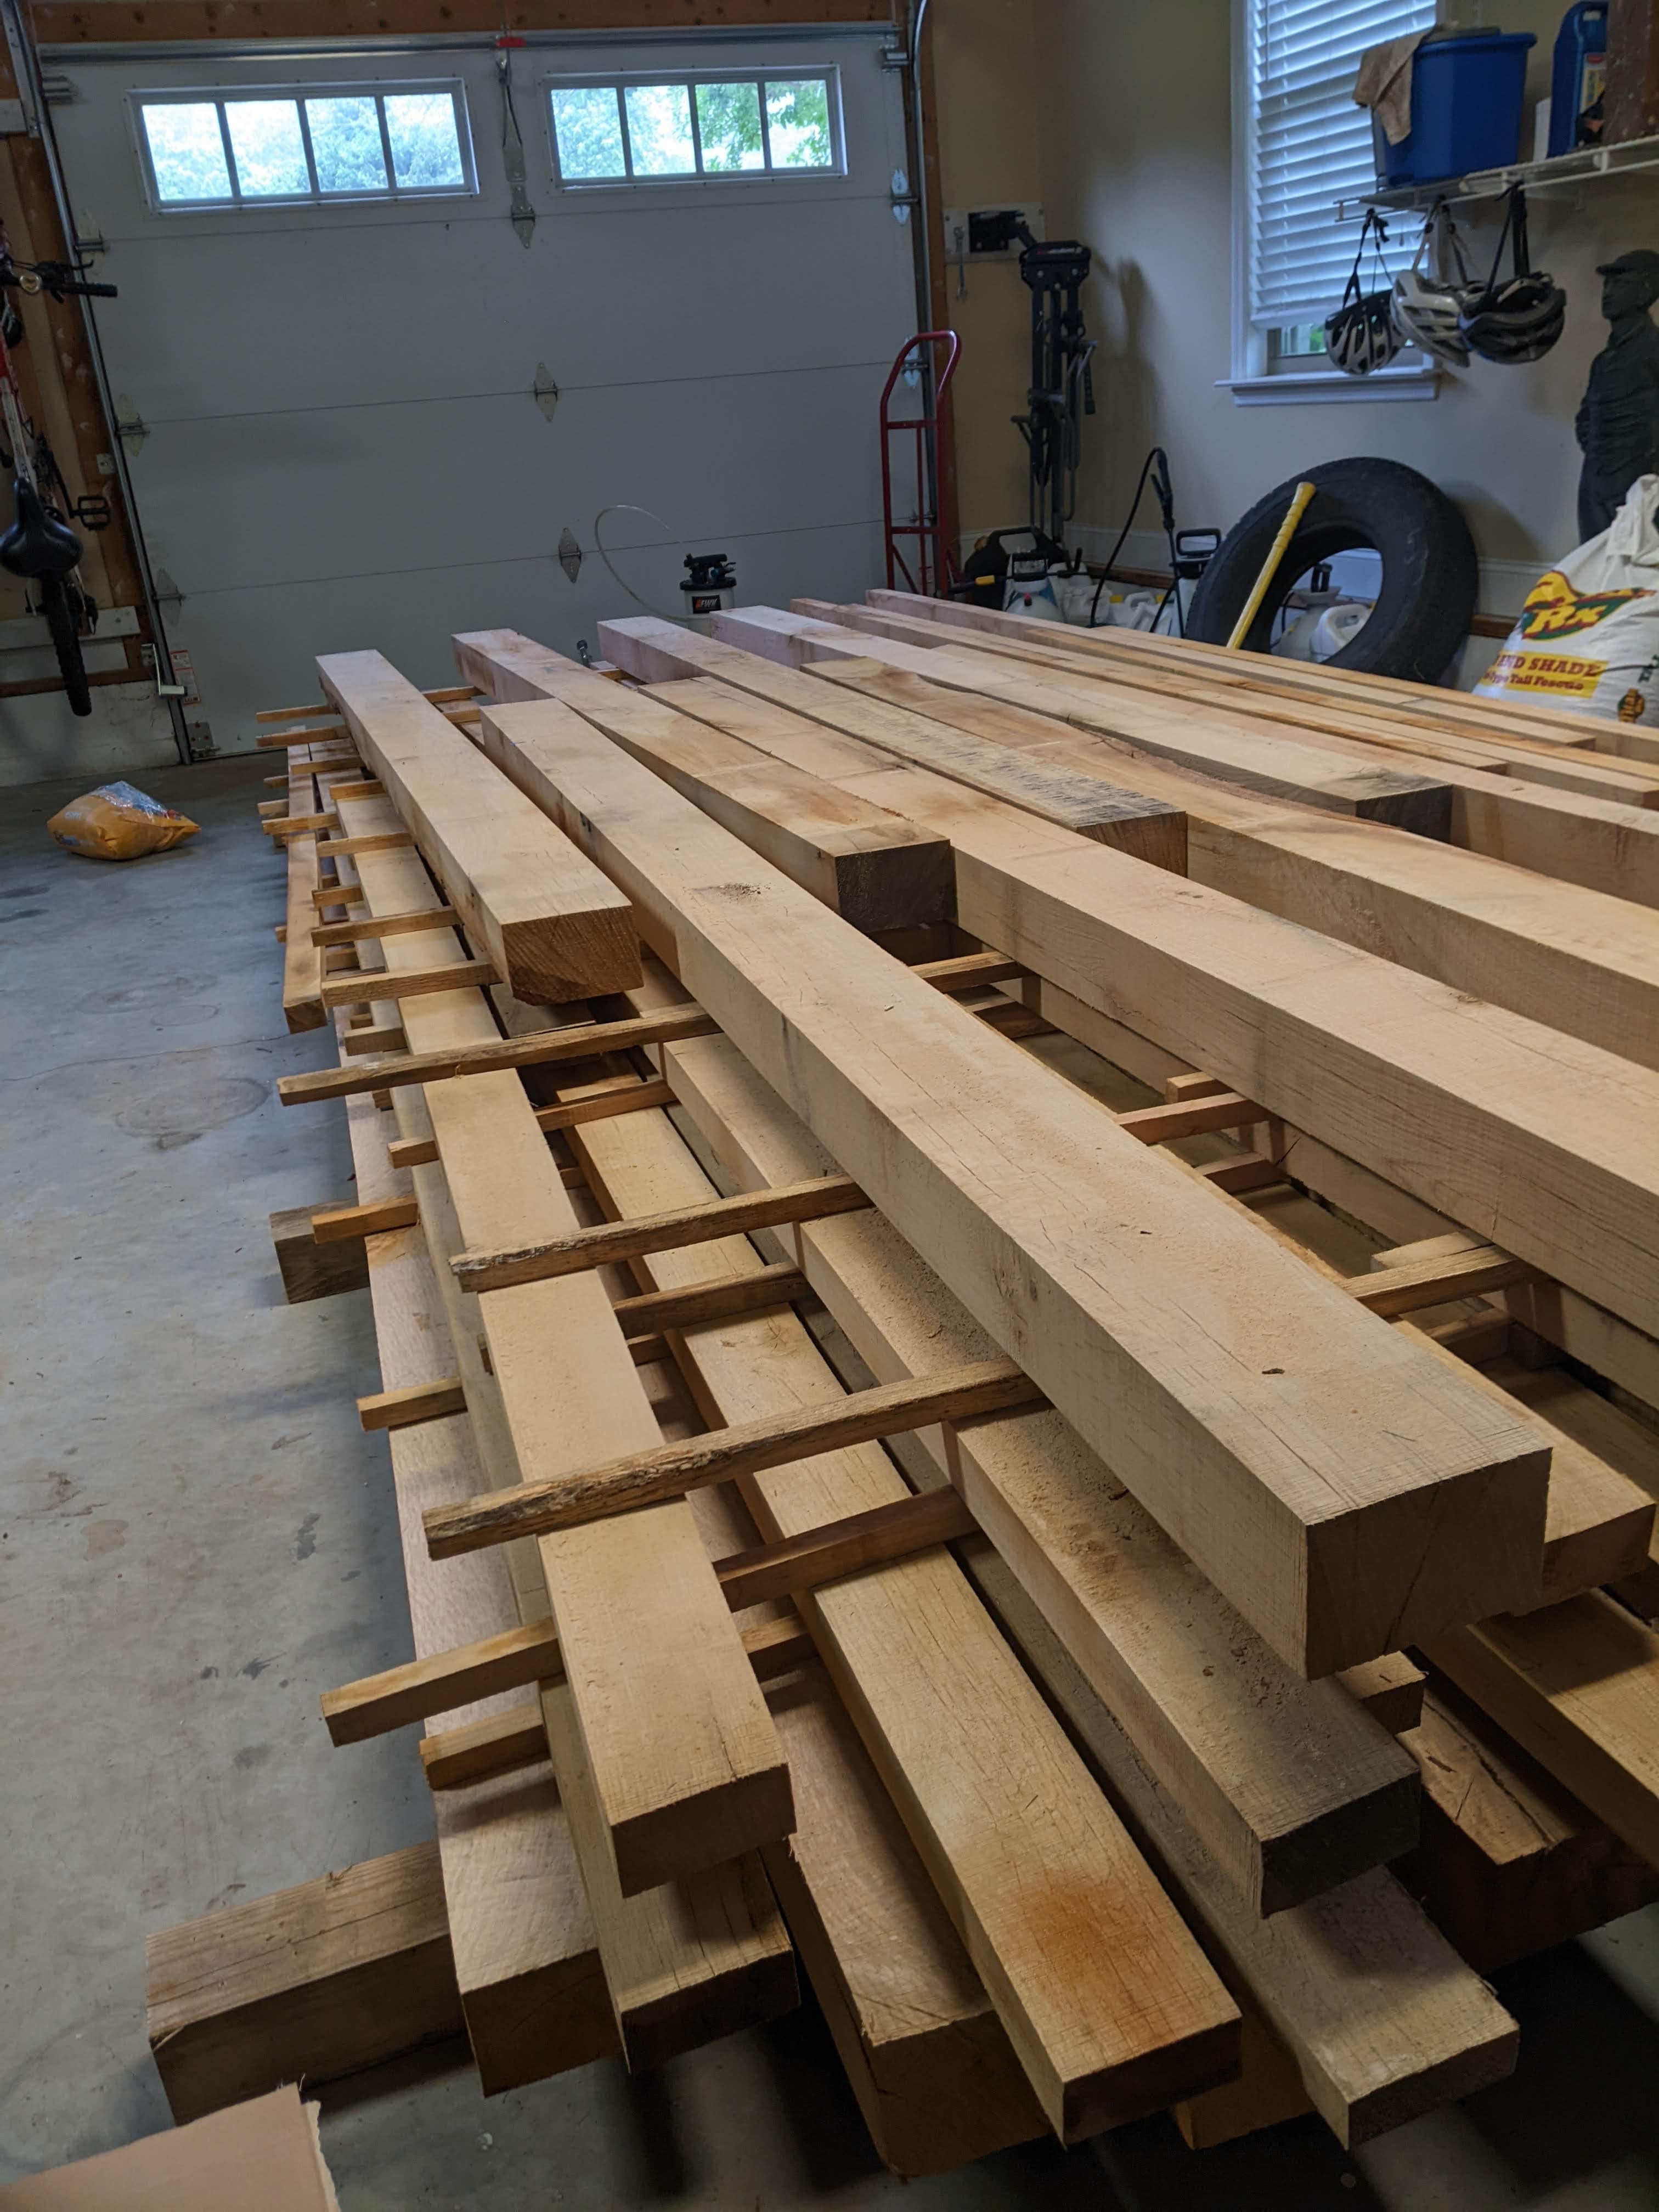
There are also oak 2 x 4s that we’re going to use to trim around the beams. They are still really wet, so they were HEAVY–and fresh oak isn’t the best smell.
We’re continuing to work on putting the stone on the large block wall in the basement, but it’s slow progress.

I was hoping that we’d get all the open projects buttoned up before summer started in earnest, but that doesn’t look likely. We need to get the pallets of stone out of the driveway.
May 30, 2023:
My husband was bound and determined to get all the stone up on the big wall this past weekend and we got close….but no cigar.
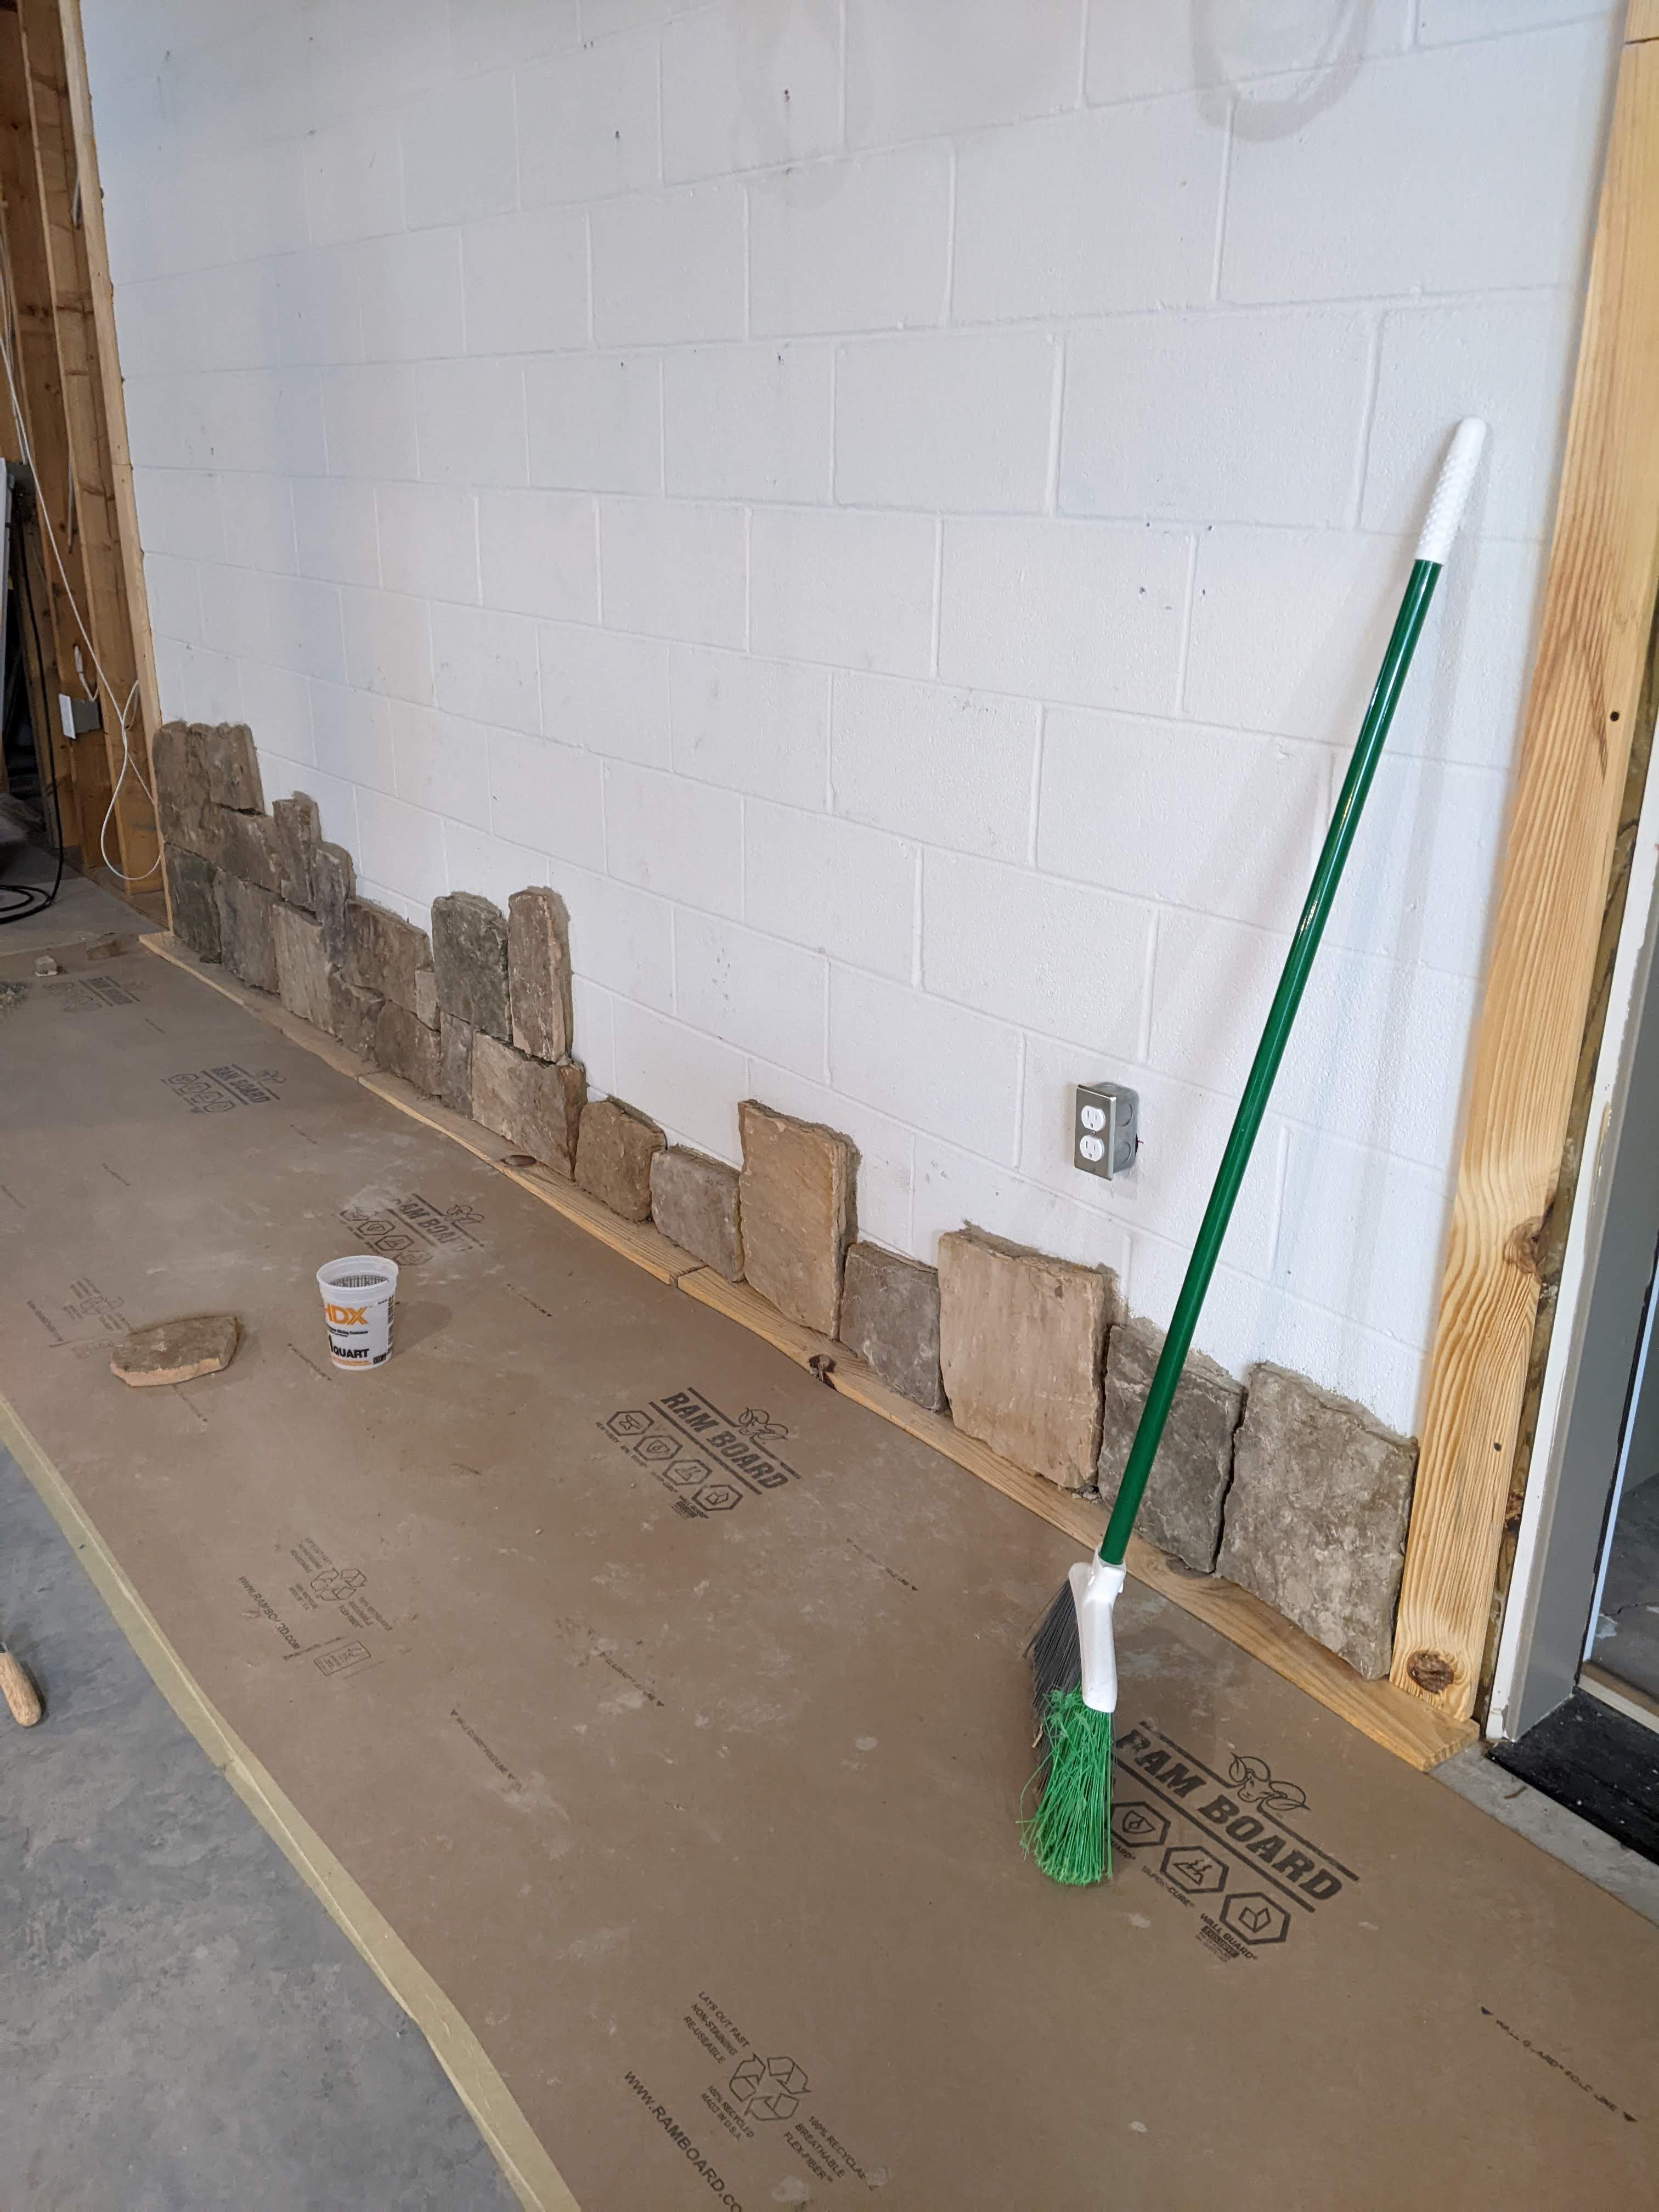
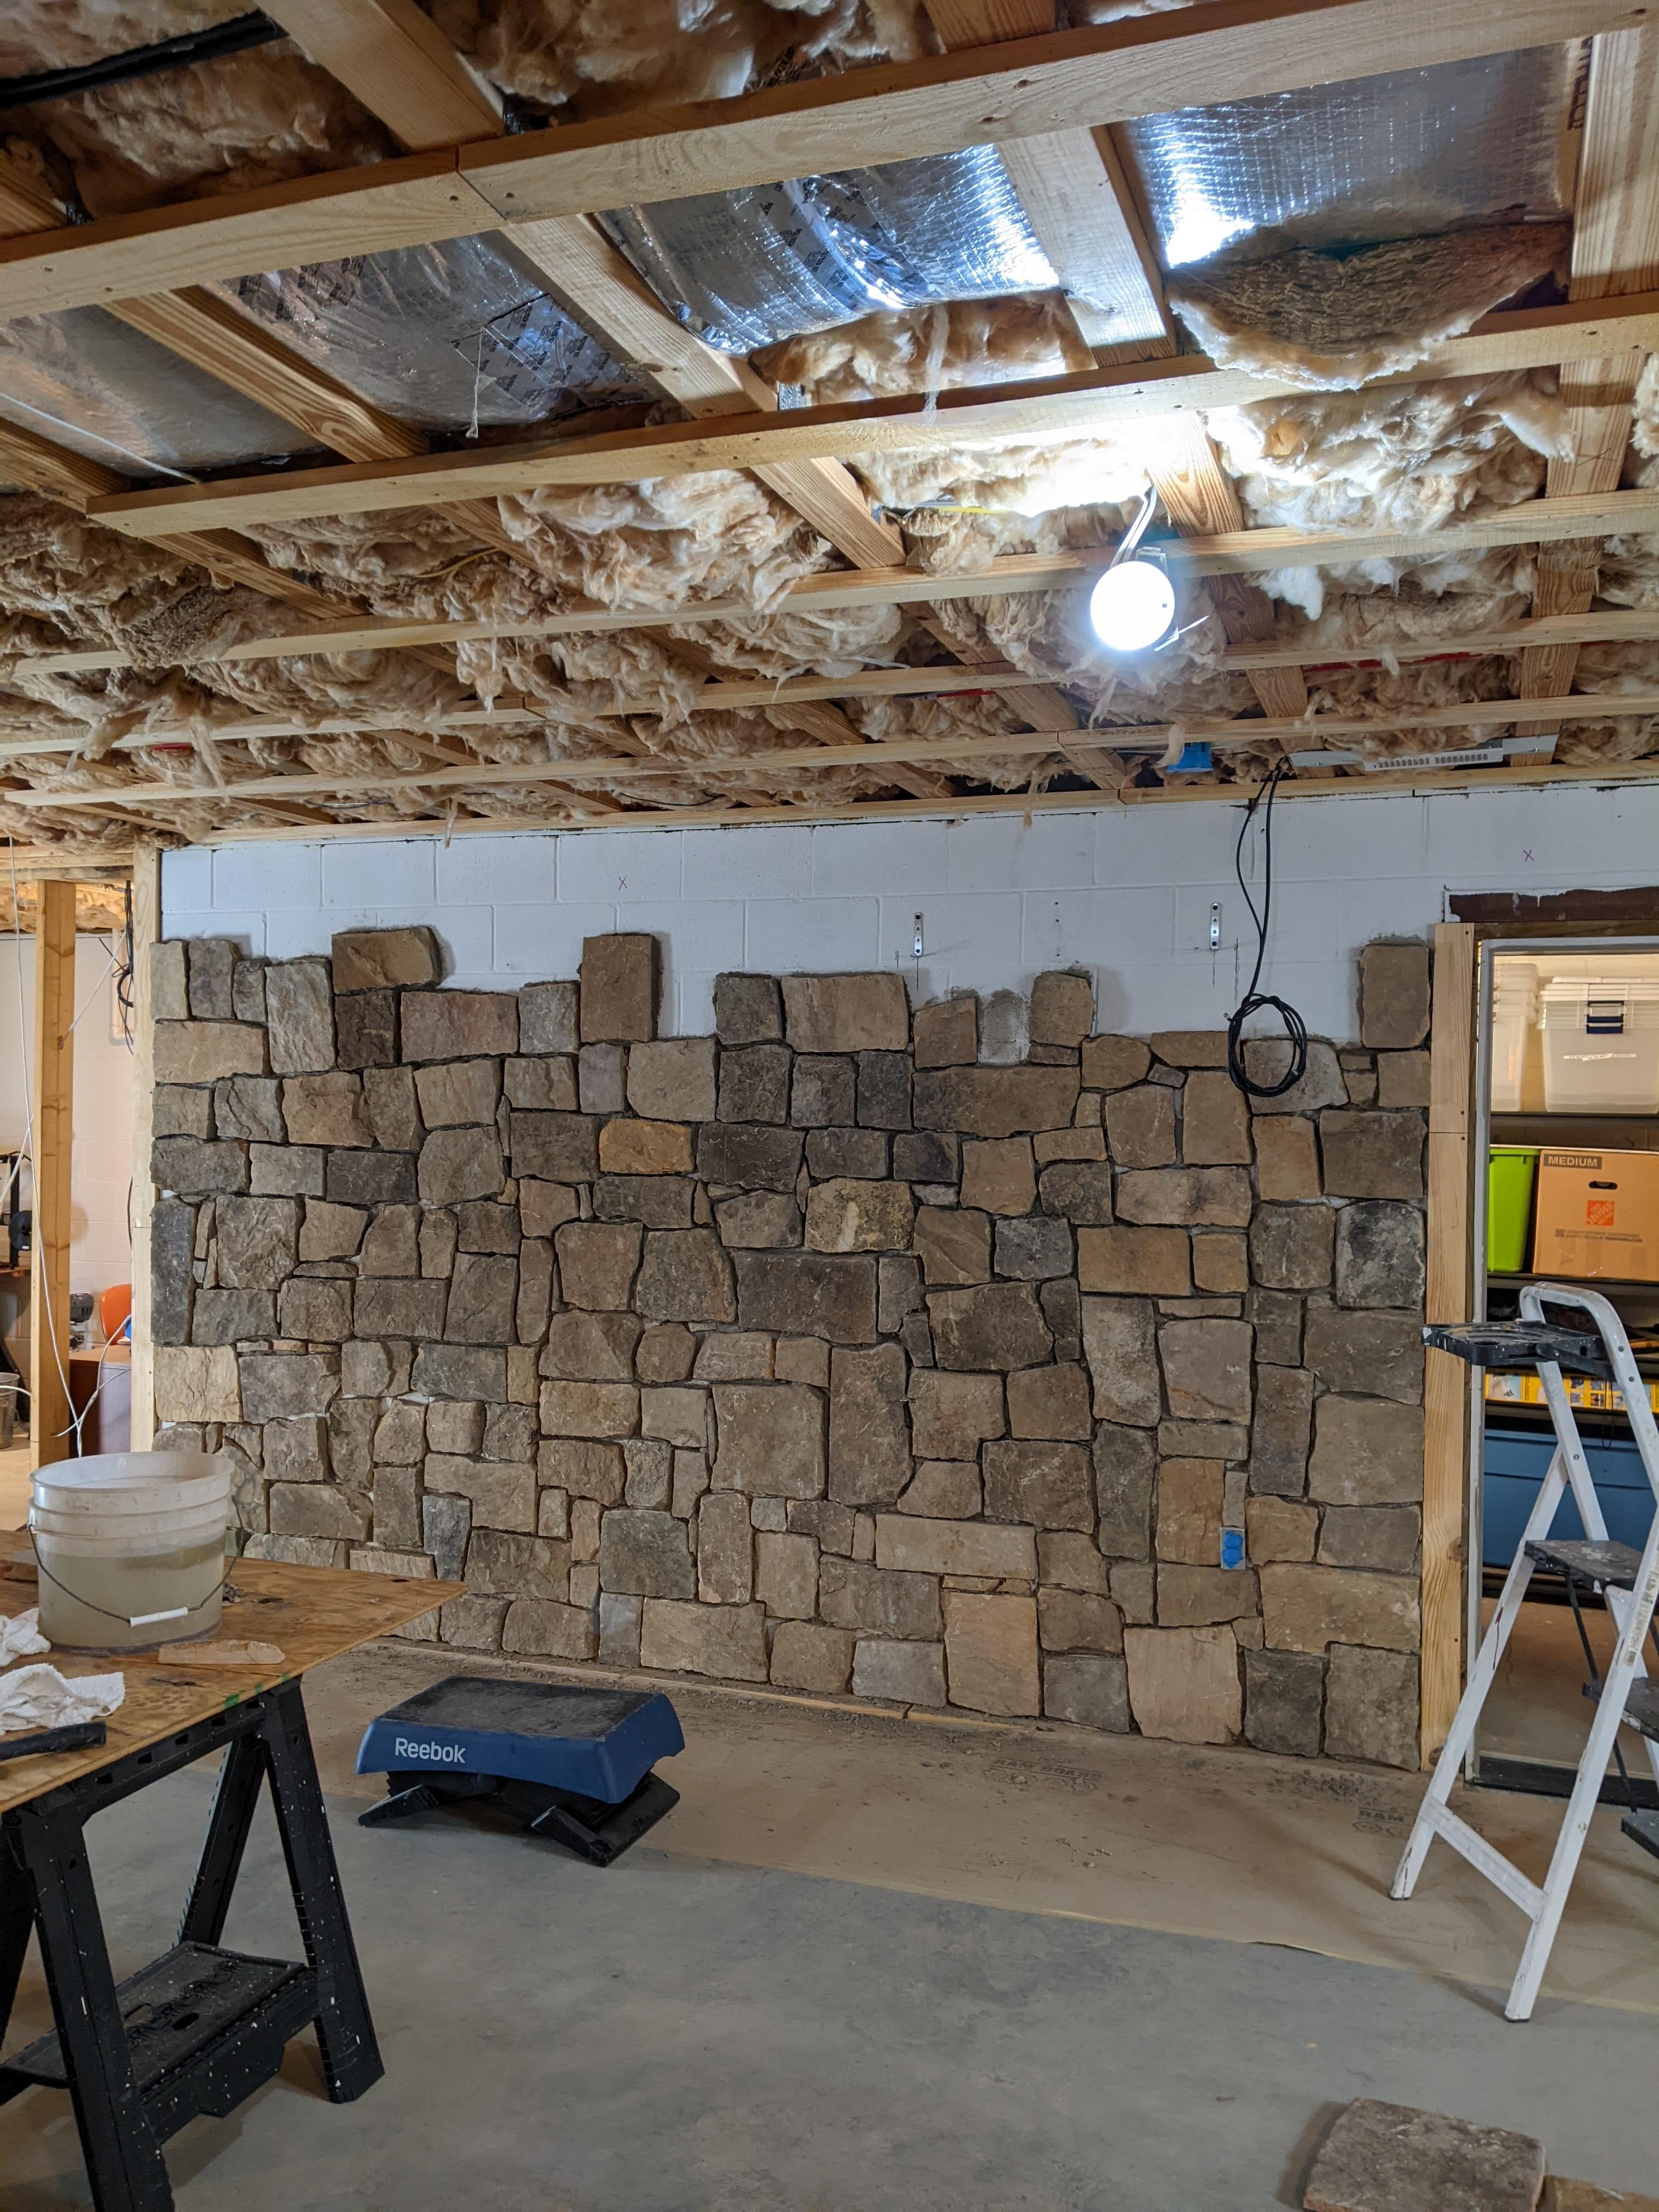
Here’s where we started on this side of the door:
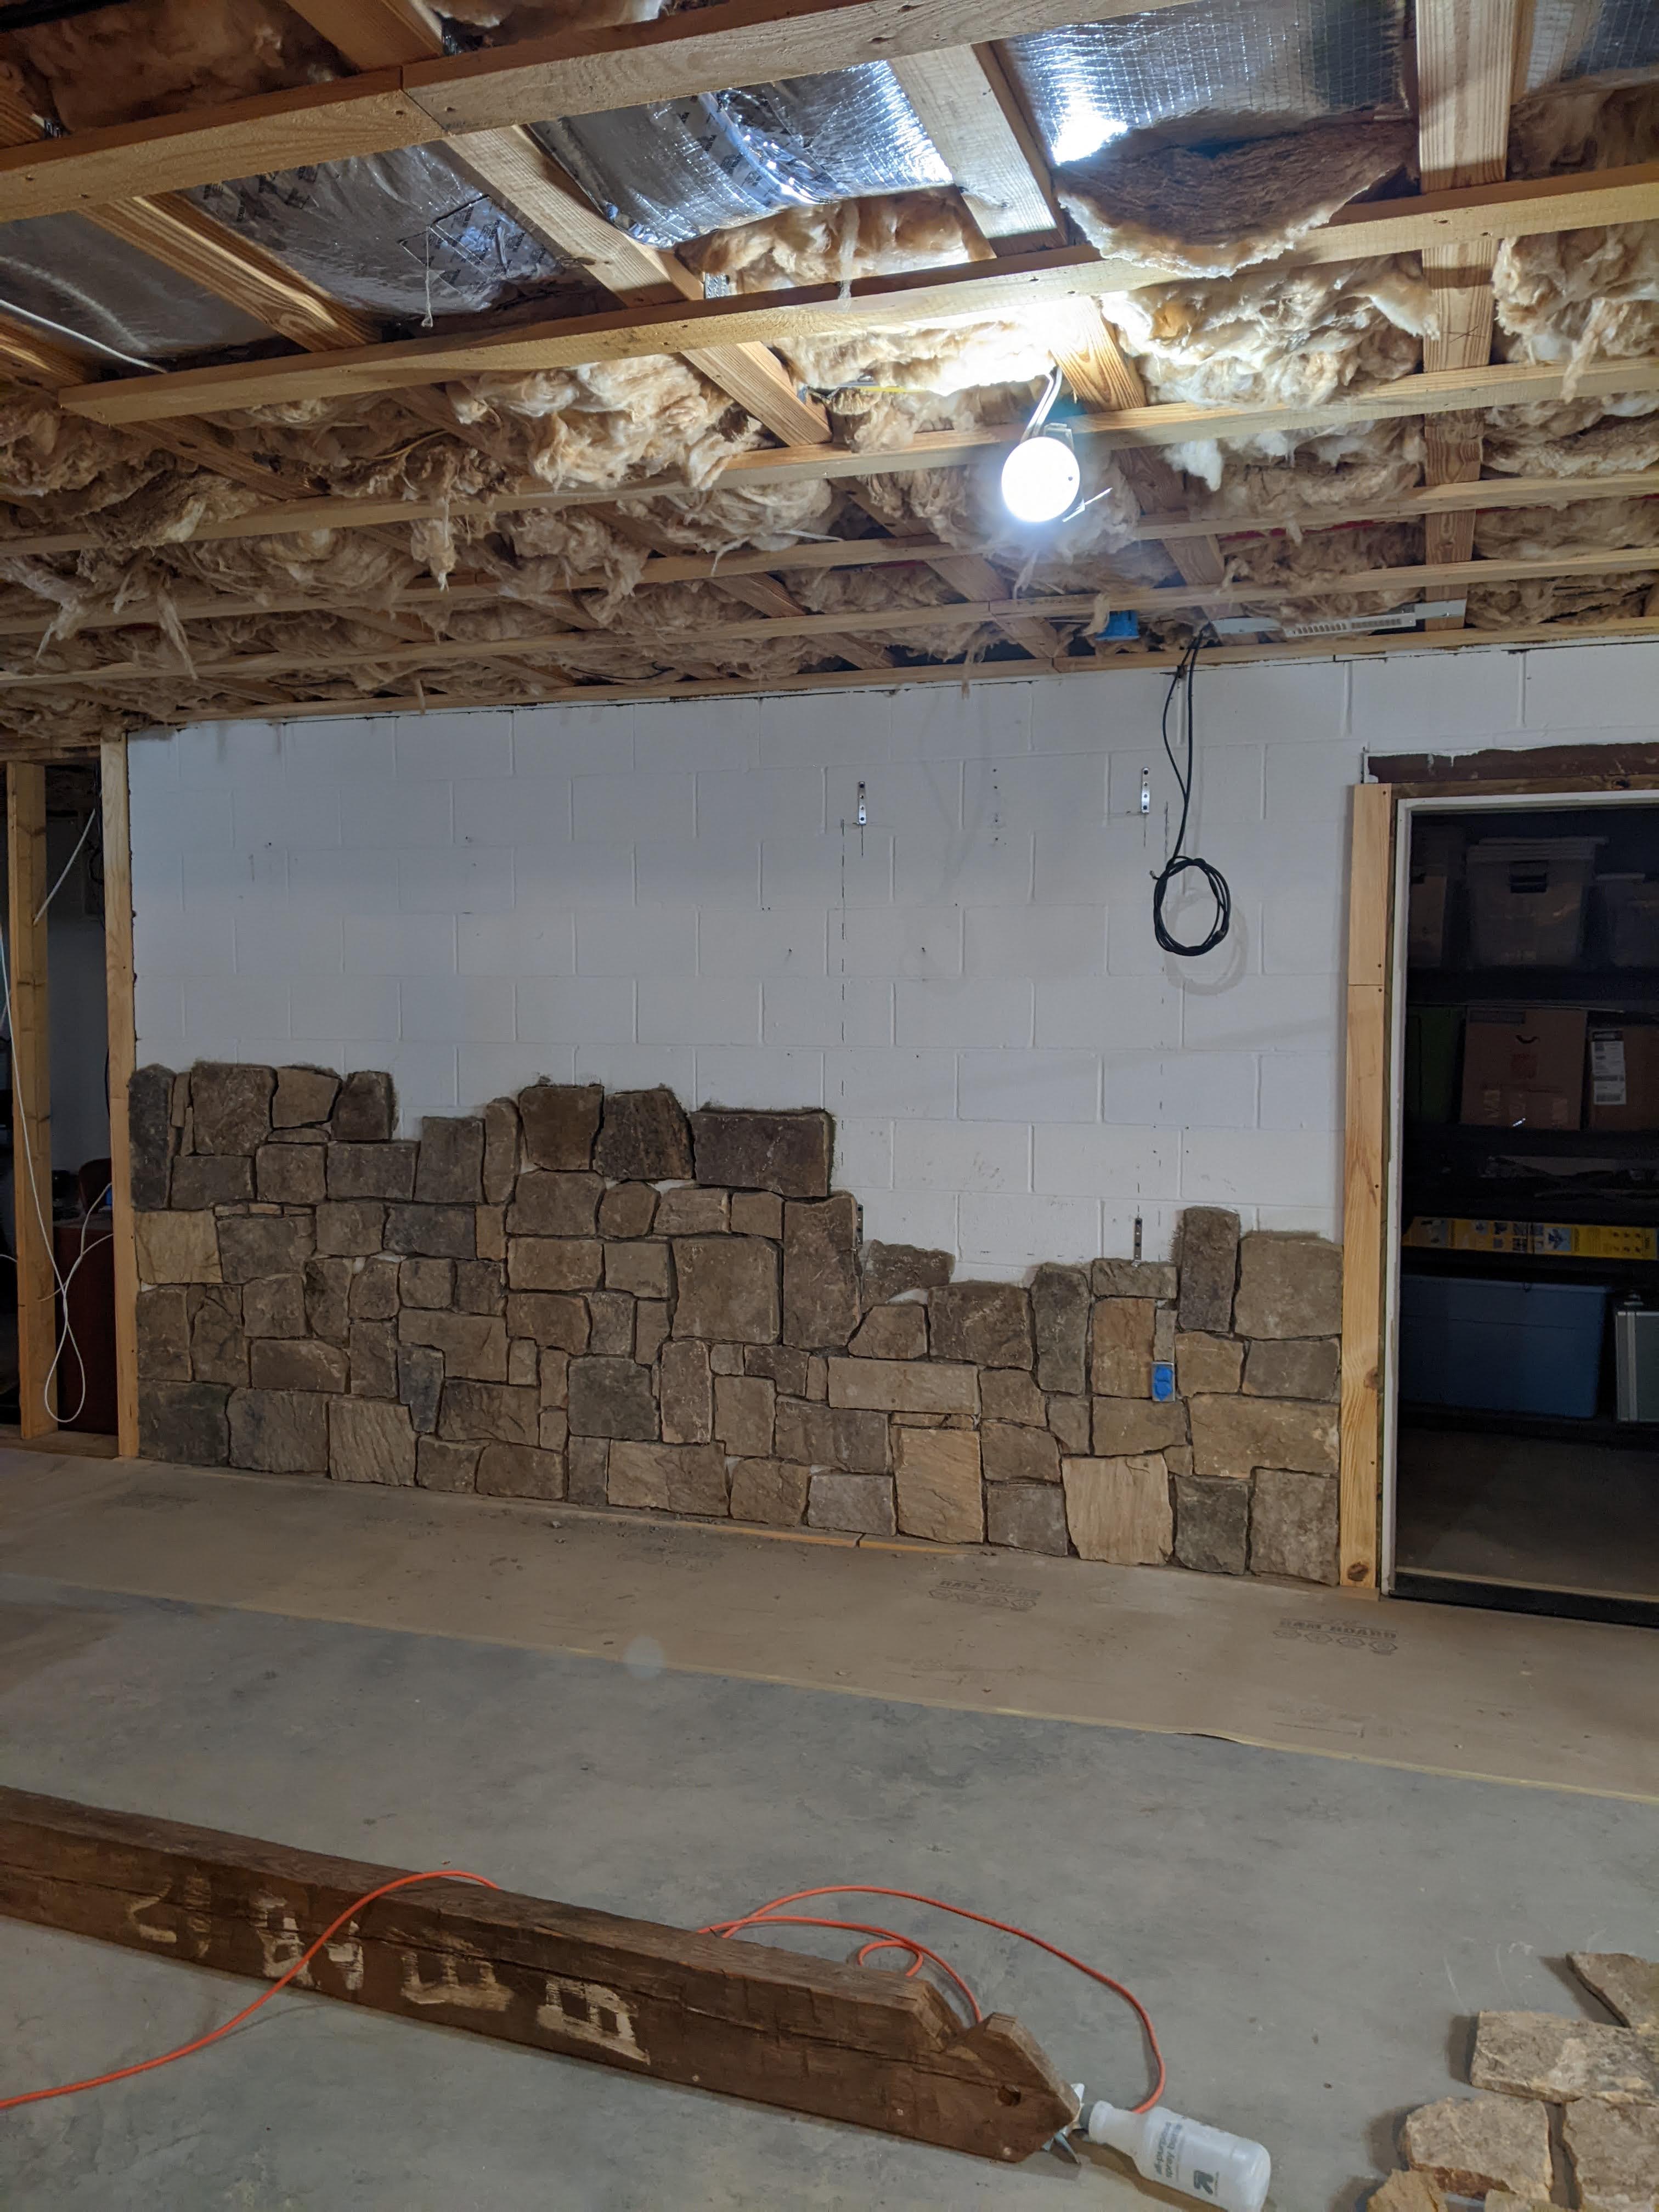
And progress:

Here’s where we started on the other side of the door:
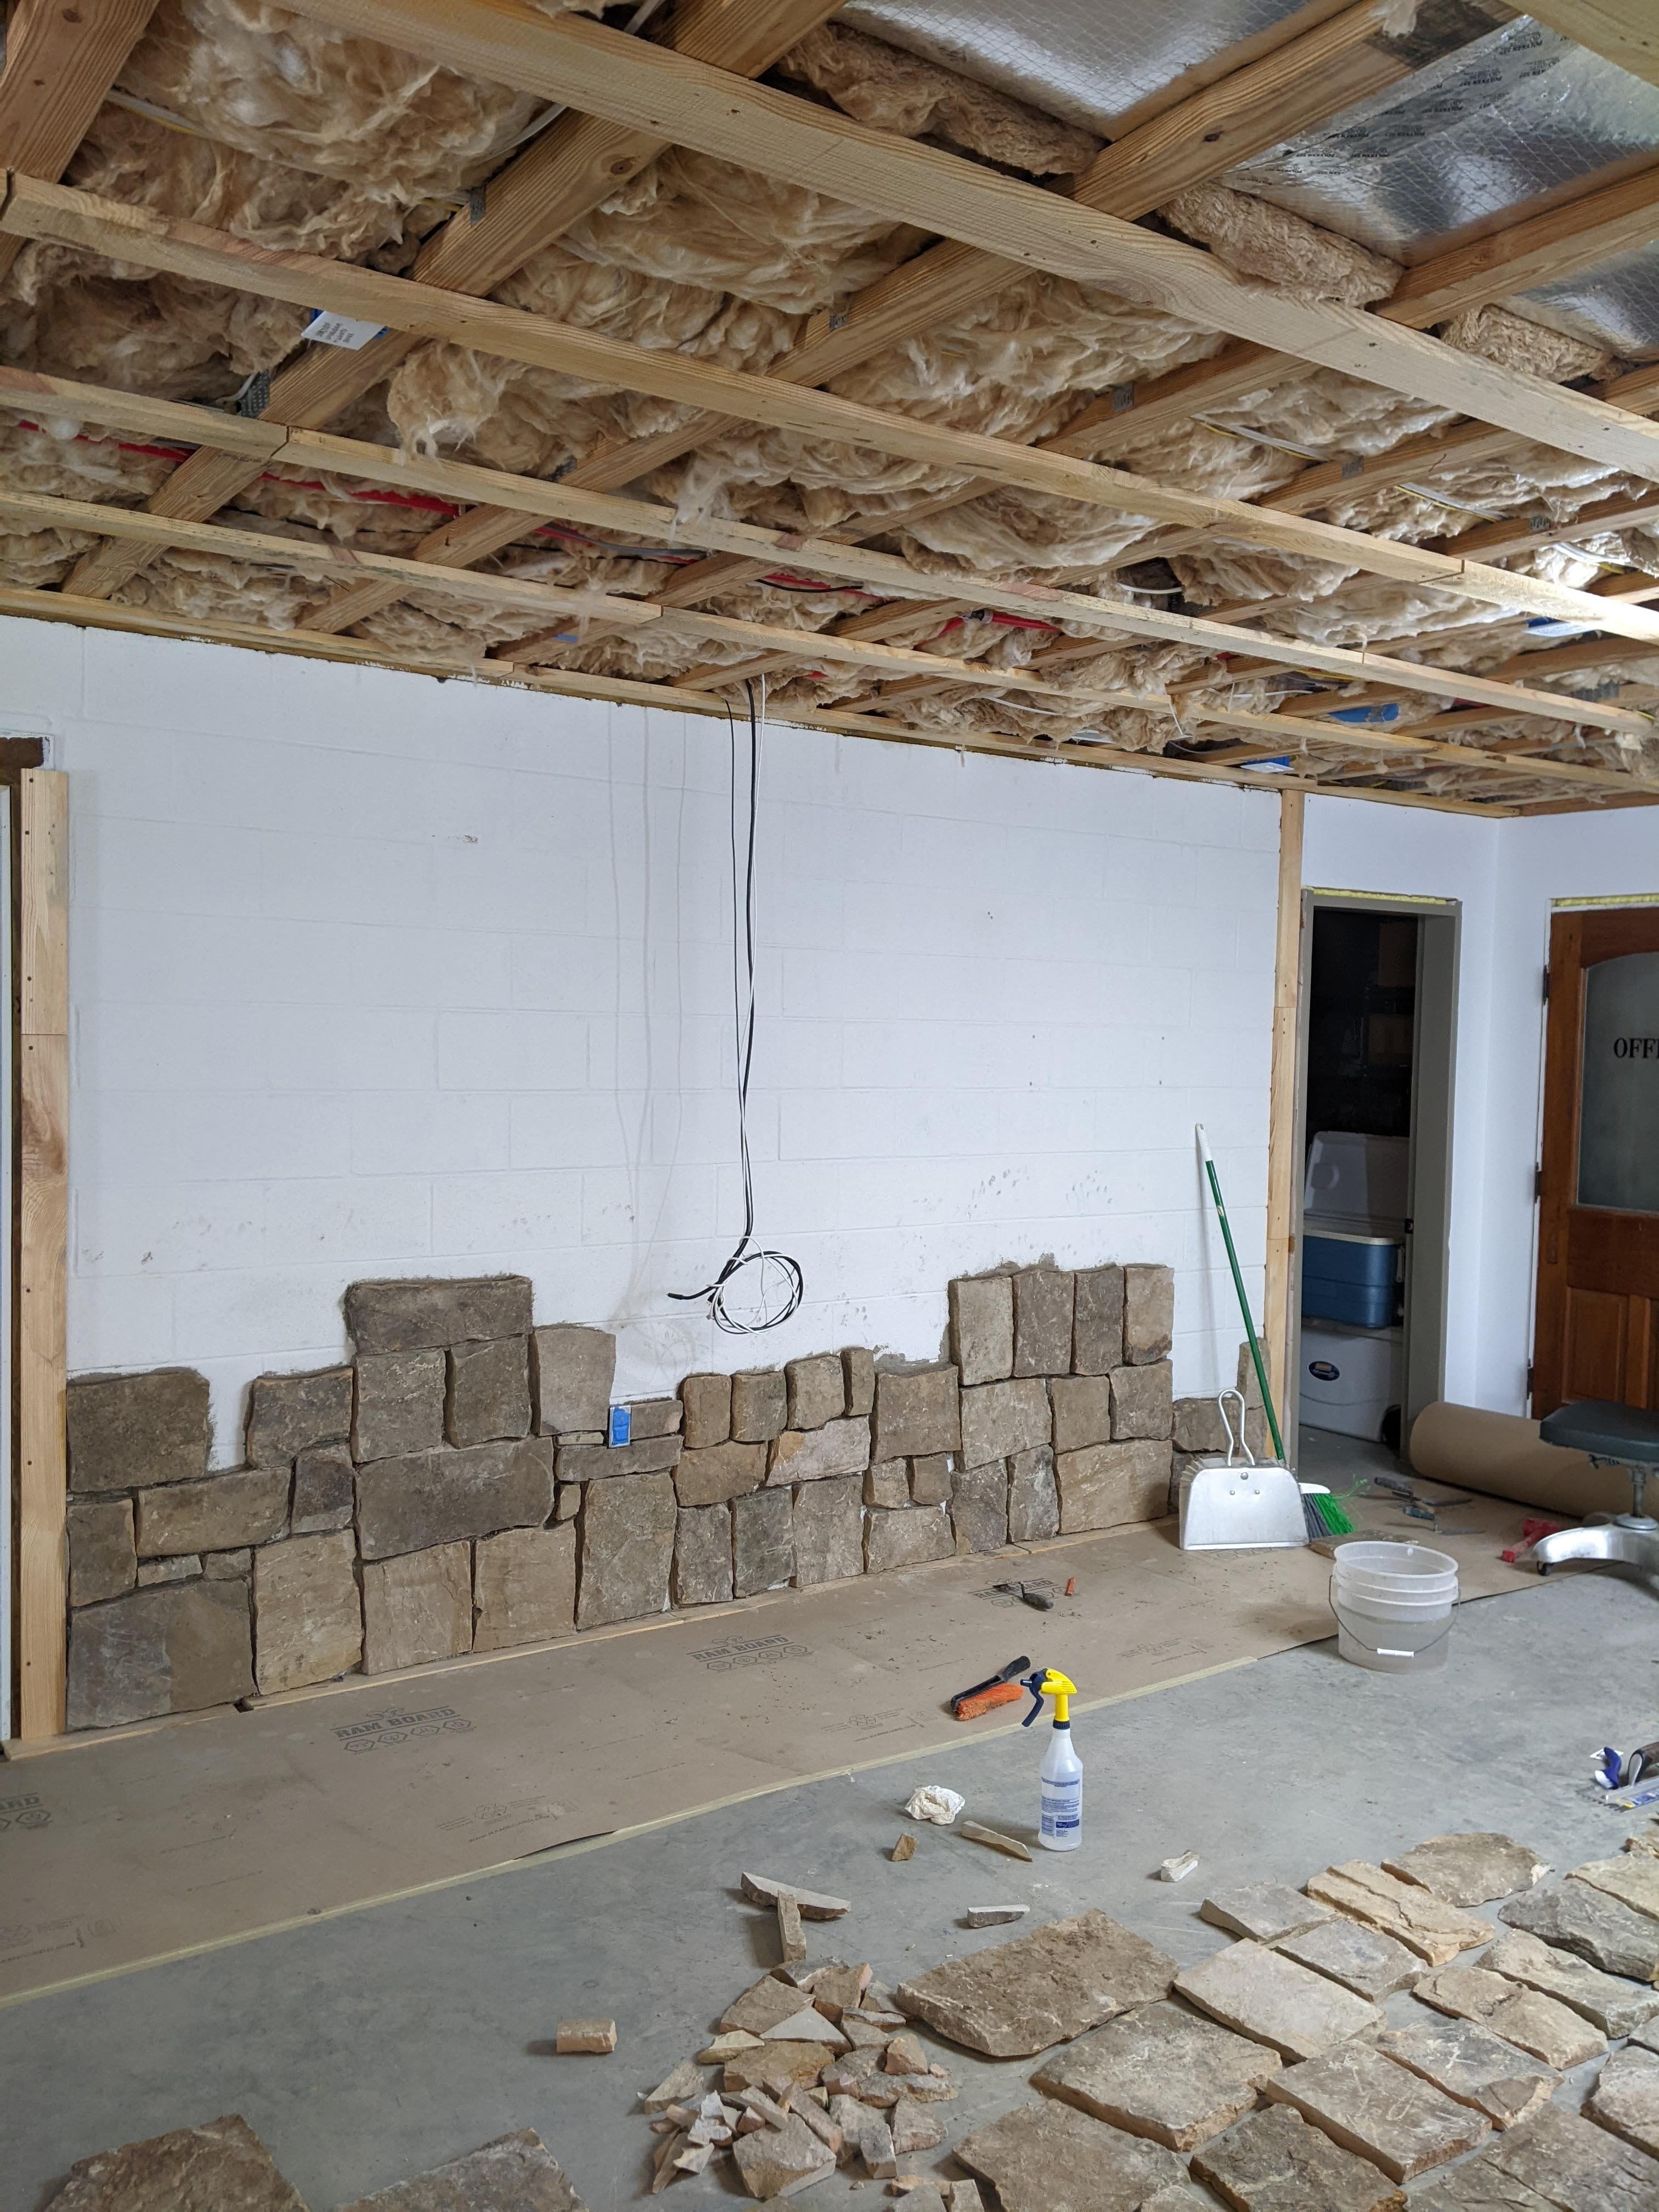
And the progress made:

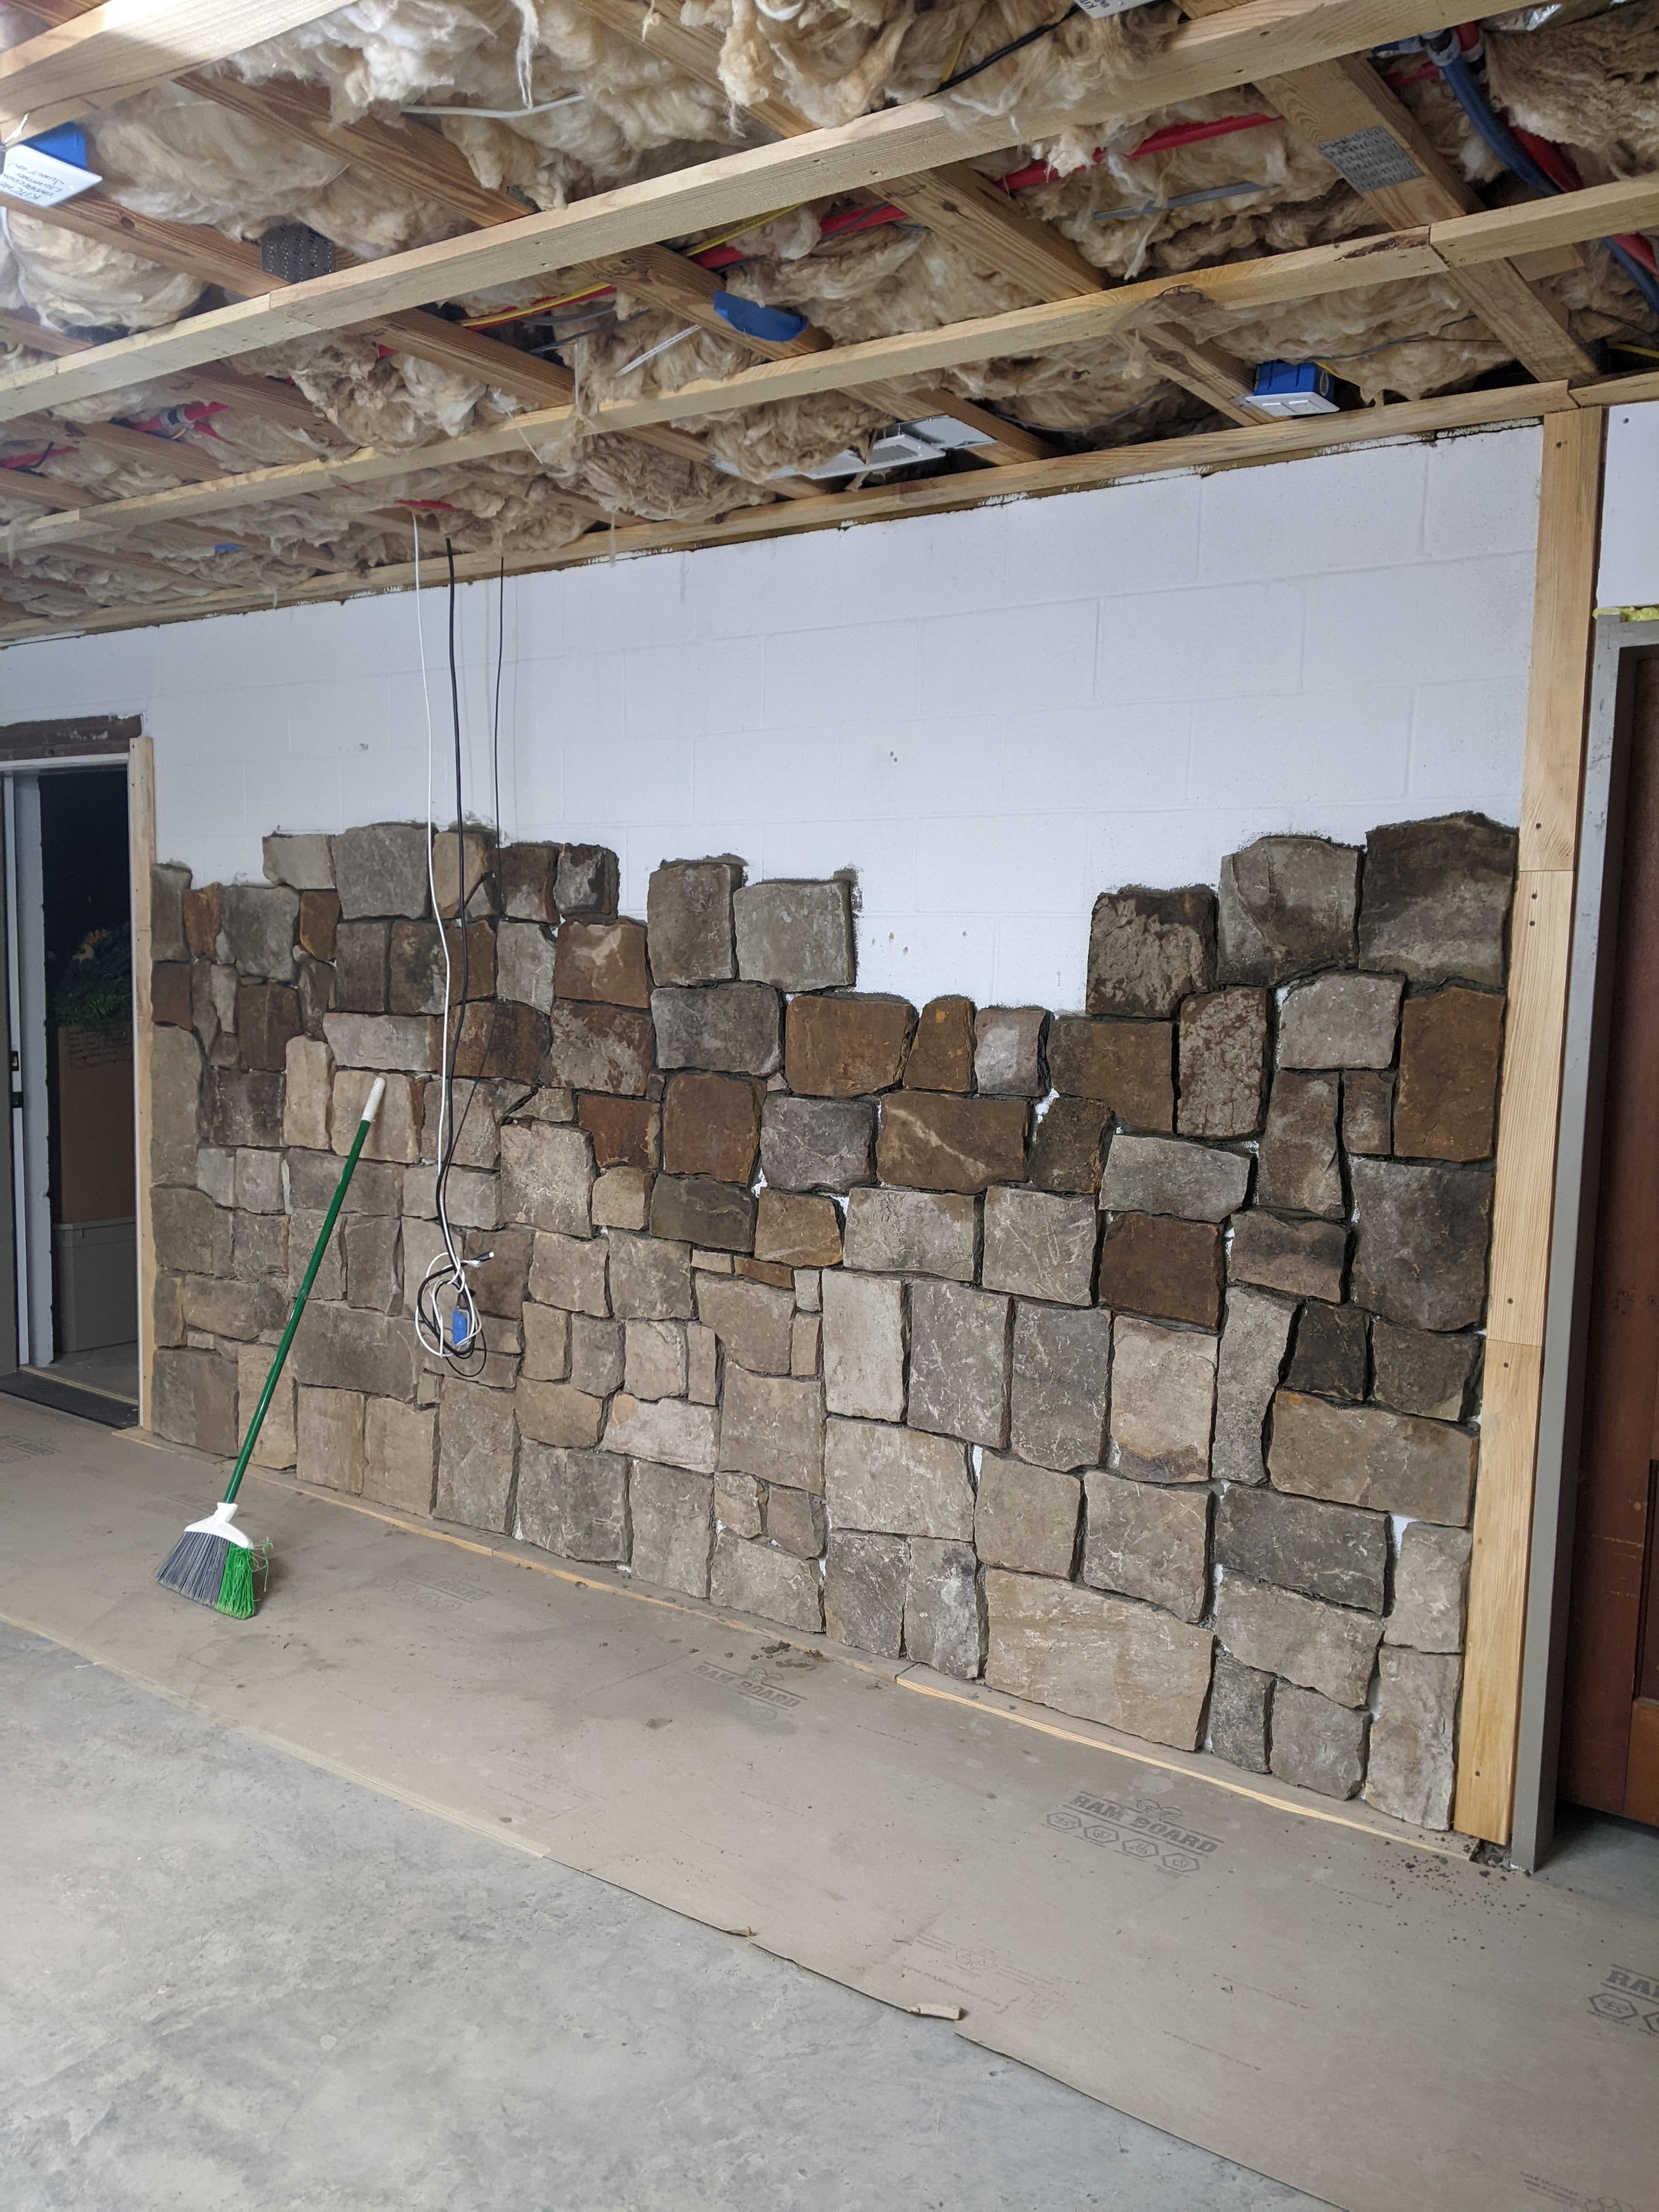
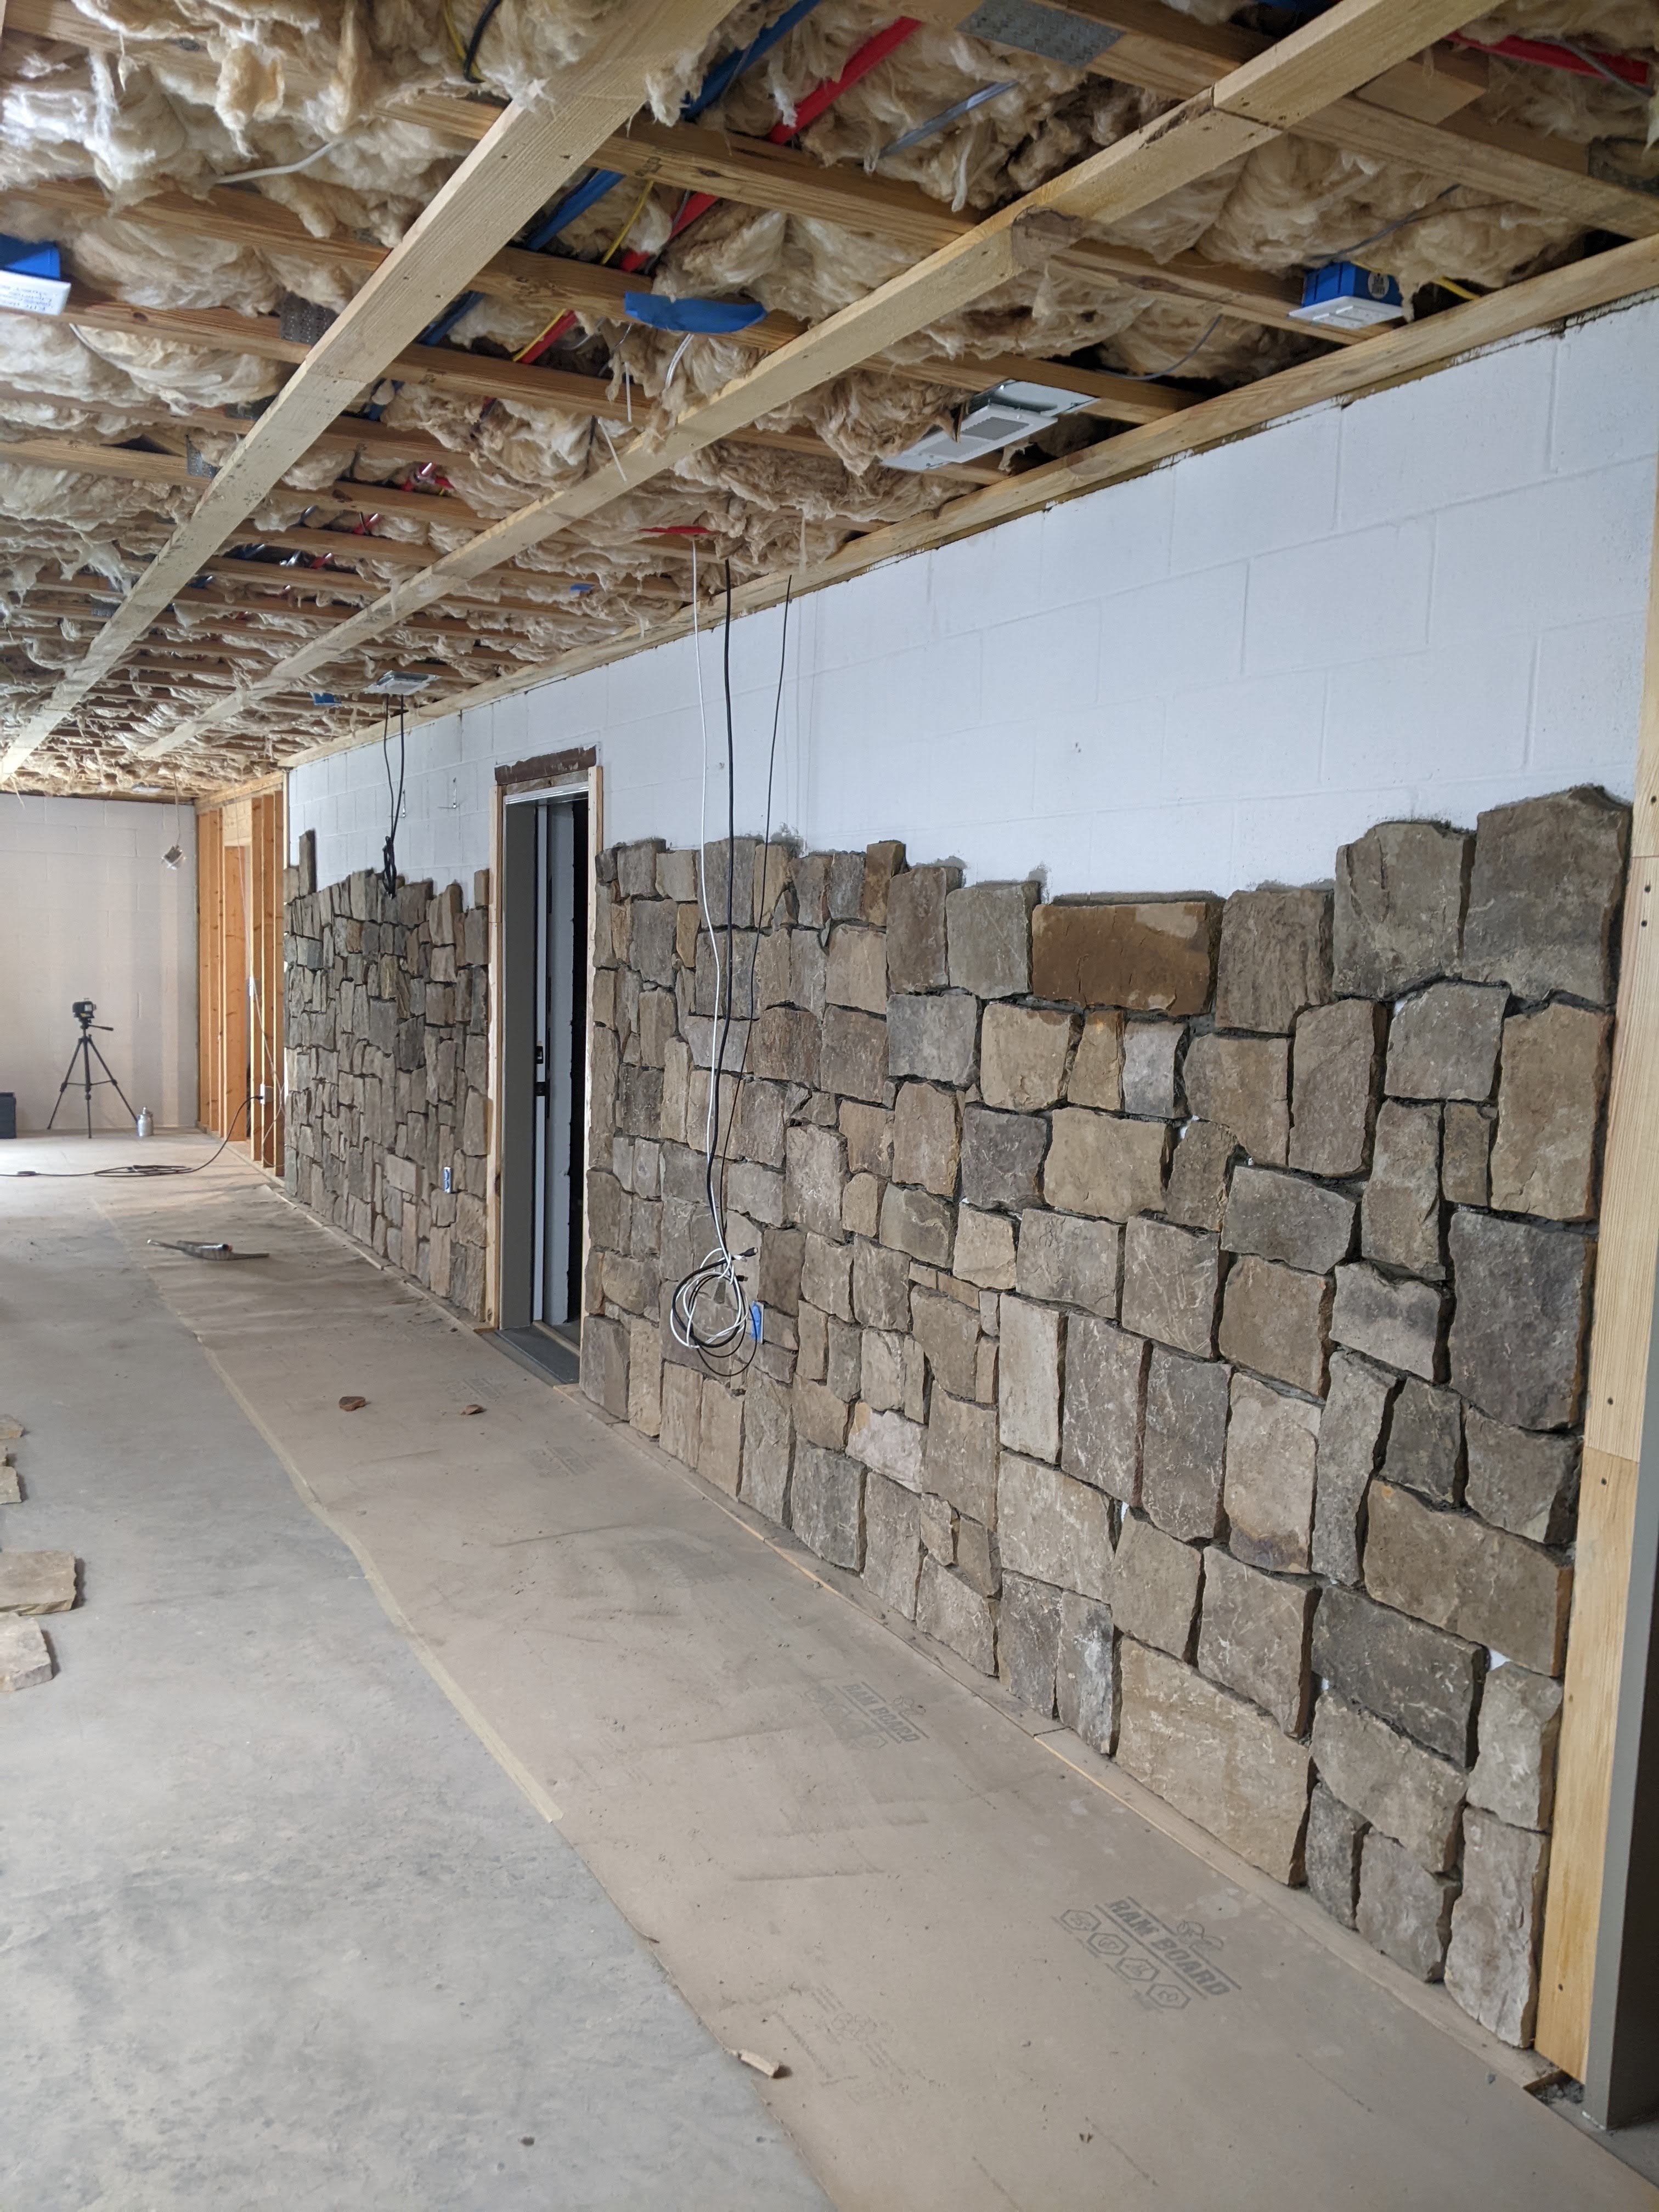
Here’s the whole wall as it stands as of the end of the holiday weekend:
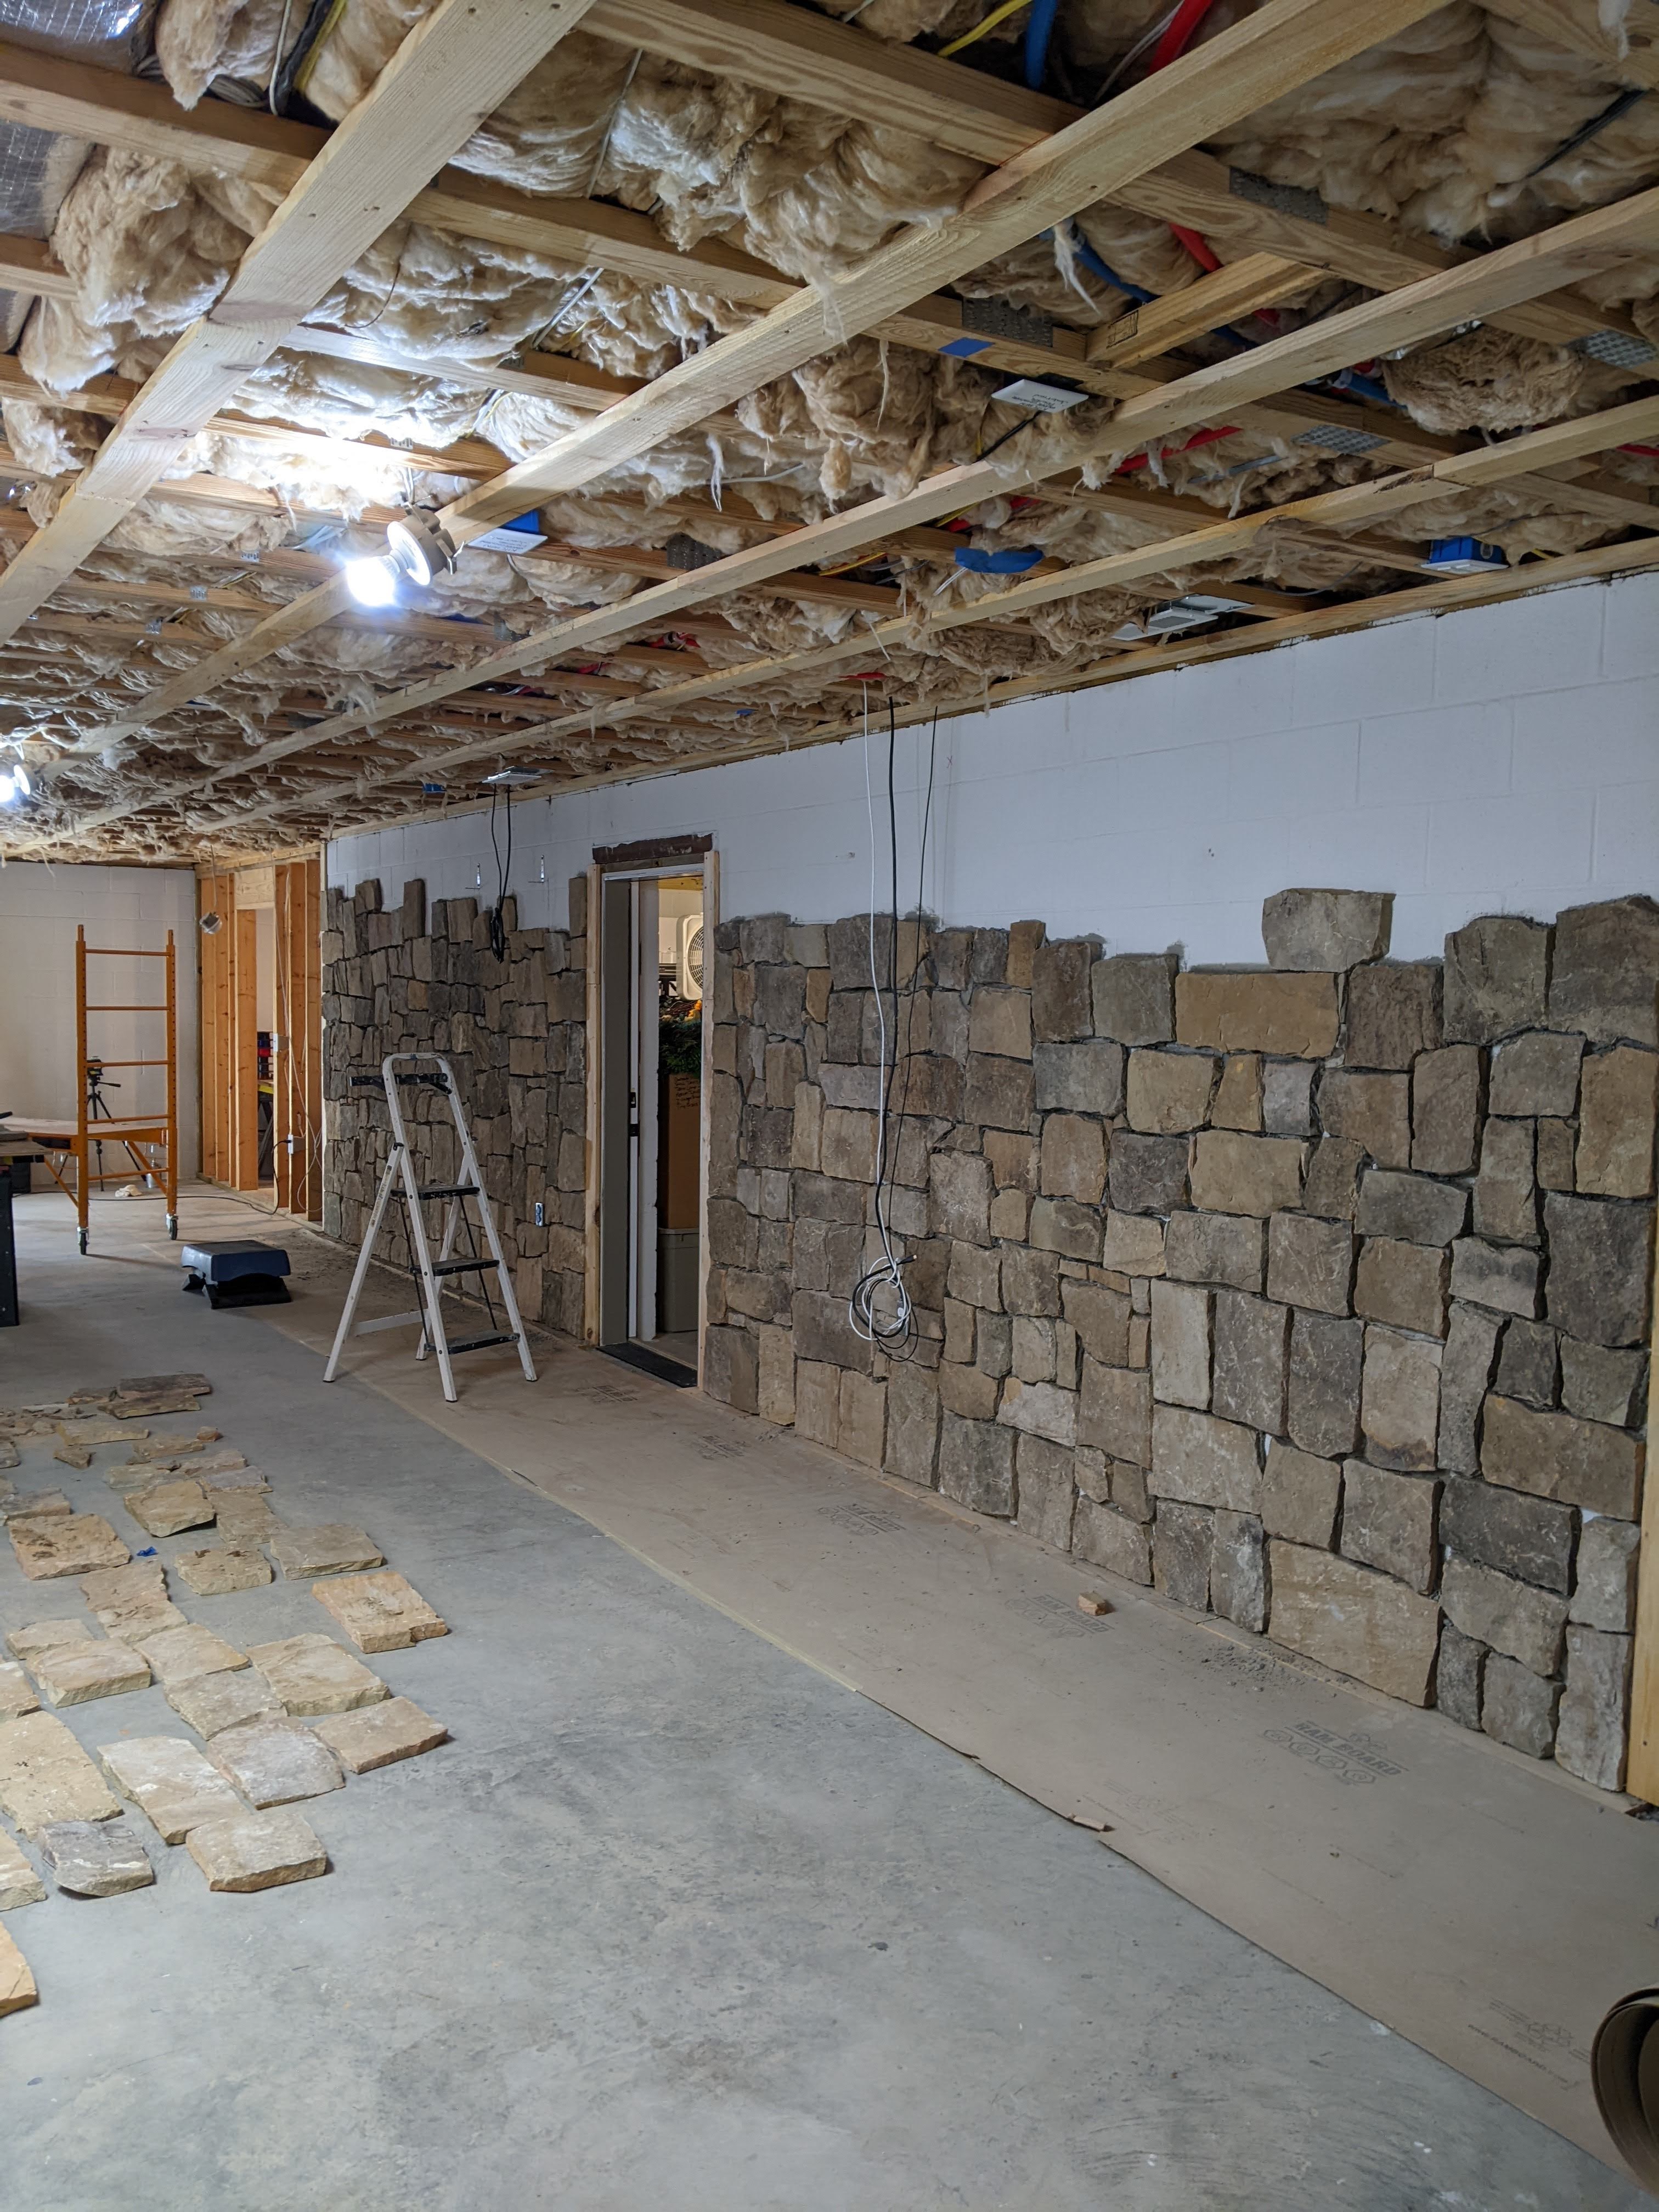
We opened the second pallet of stone veneer and have already used quite a bit. We’re going to work on it at night this week and see how far we can get. We won’t be able to get it all the way finished because we have to install beams and we need to leave ourselves room to maneuver them into place. We also need to put spacers in for the beadboard sheets that we are going to use for the ceiling.
We probably will start grouting next weekend. That will be an adventure because we don’t know what we’re doing, but we’ve watched videos and we have the materials and tools we need, so we’re going to give it a try.
I’m so tired….
July 10, 2023:
We are nearly finished with the giant block wall that we’re covering with stone veneer. And we’ve learned a few things that I’m going to share here.
First, there are not many YouTube videos for doing what we did. Secondly, we probably started with the hardest project of this type because of how large the wall is, and real stone is significantly heavier than manufactured stone, so getting it to “stick” is tricky. Third, the YouTubers are a bunch of damn liars.
First thing we learned was that, although everyone will tell you to use Type S mortar mix, you can’t actually get real stone to stick to a vertical wall with it. It’s like making a sandcastle on the back of the stone and trying to stick it to the wall. We learned that you need to use a 6:1 ratio of Type S mortar and Type N mortar.

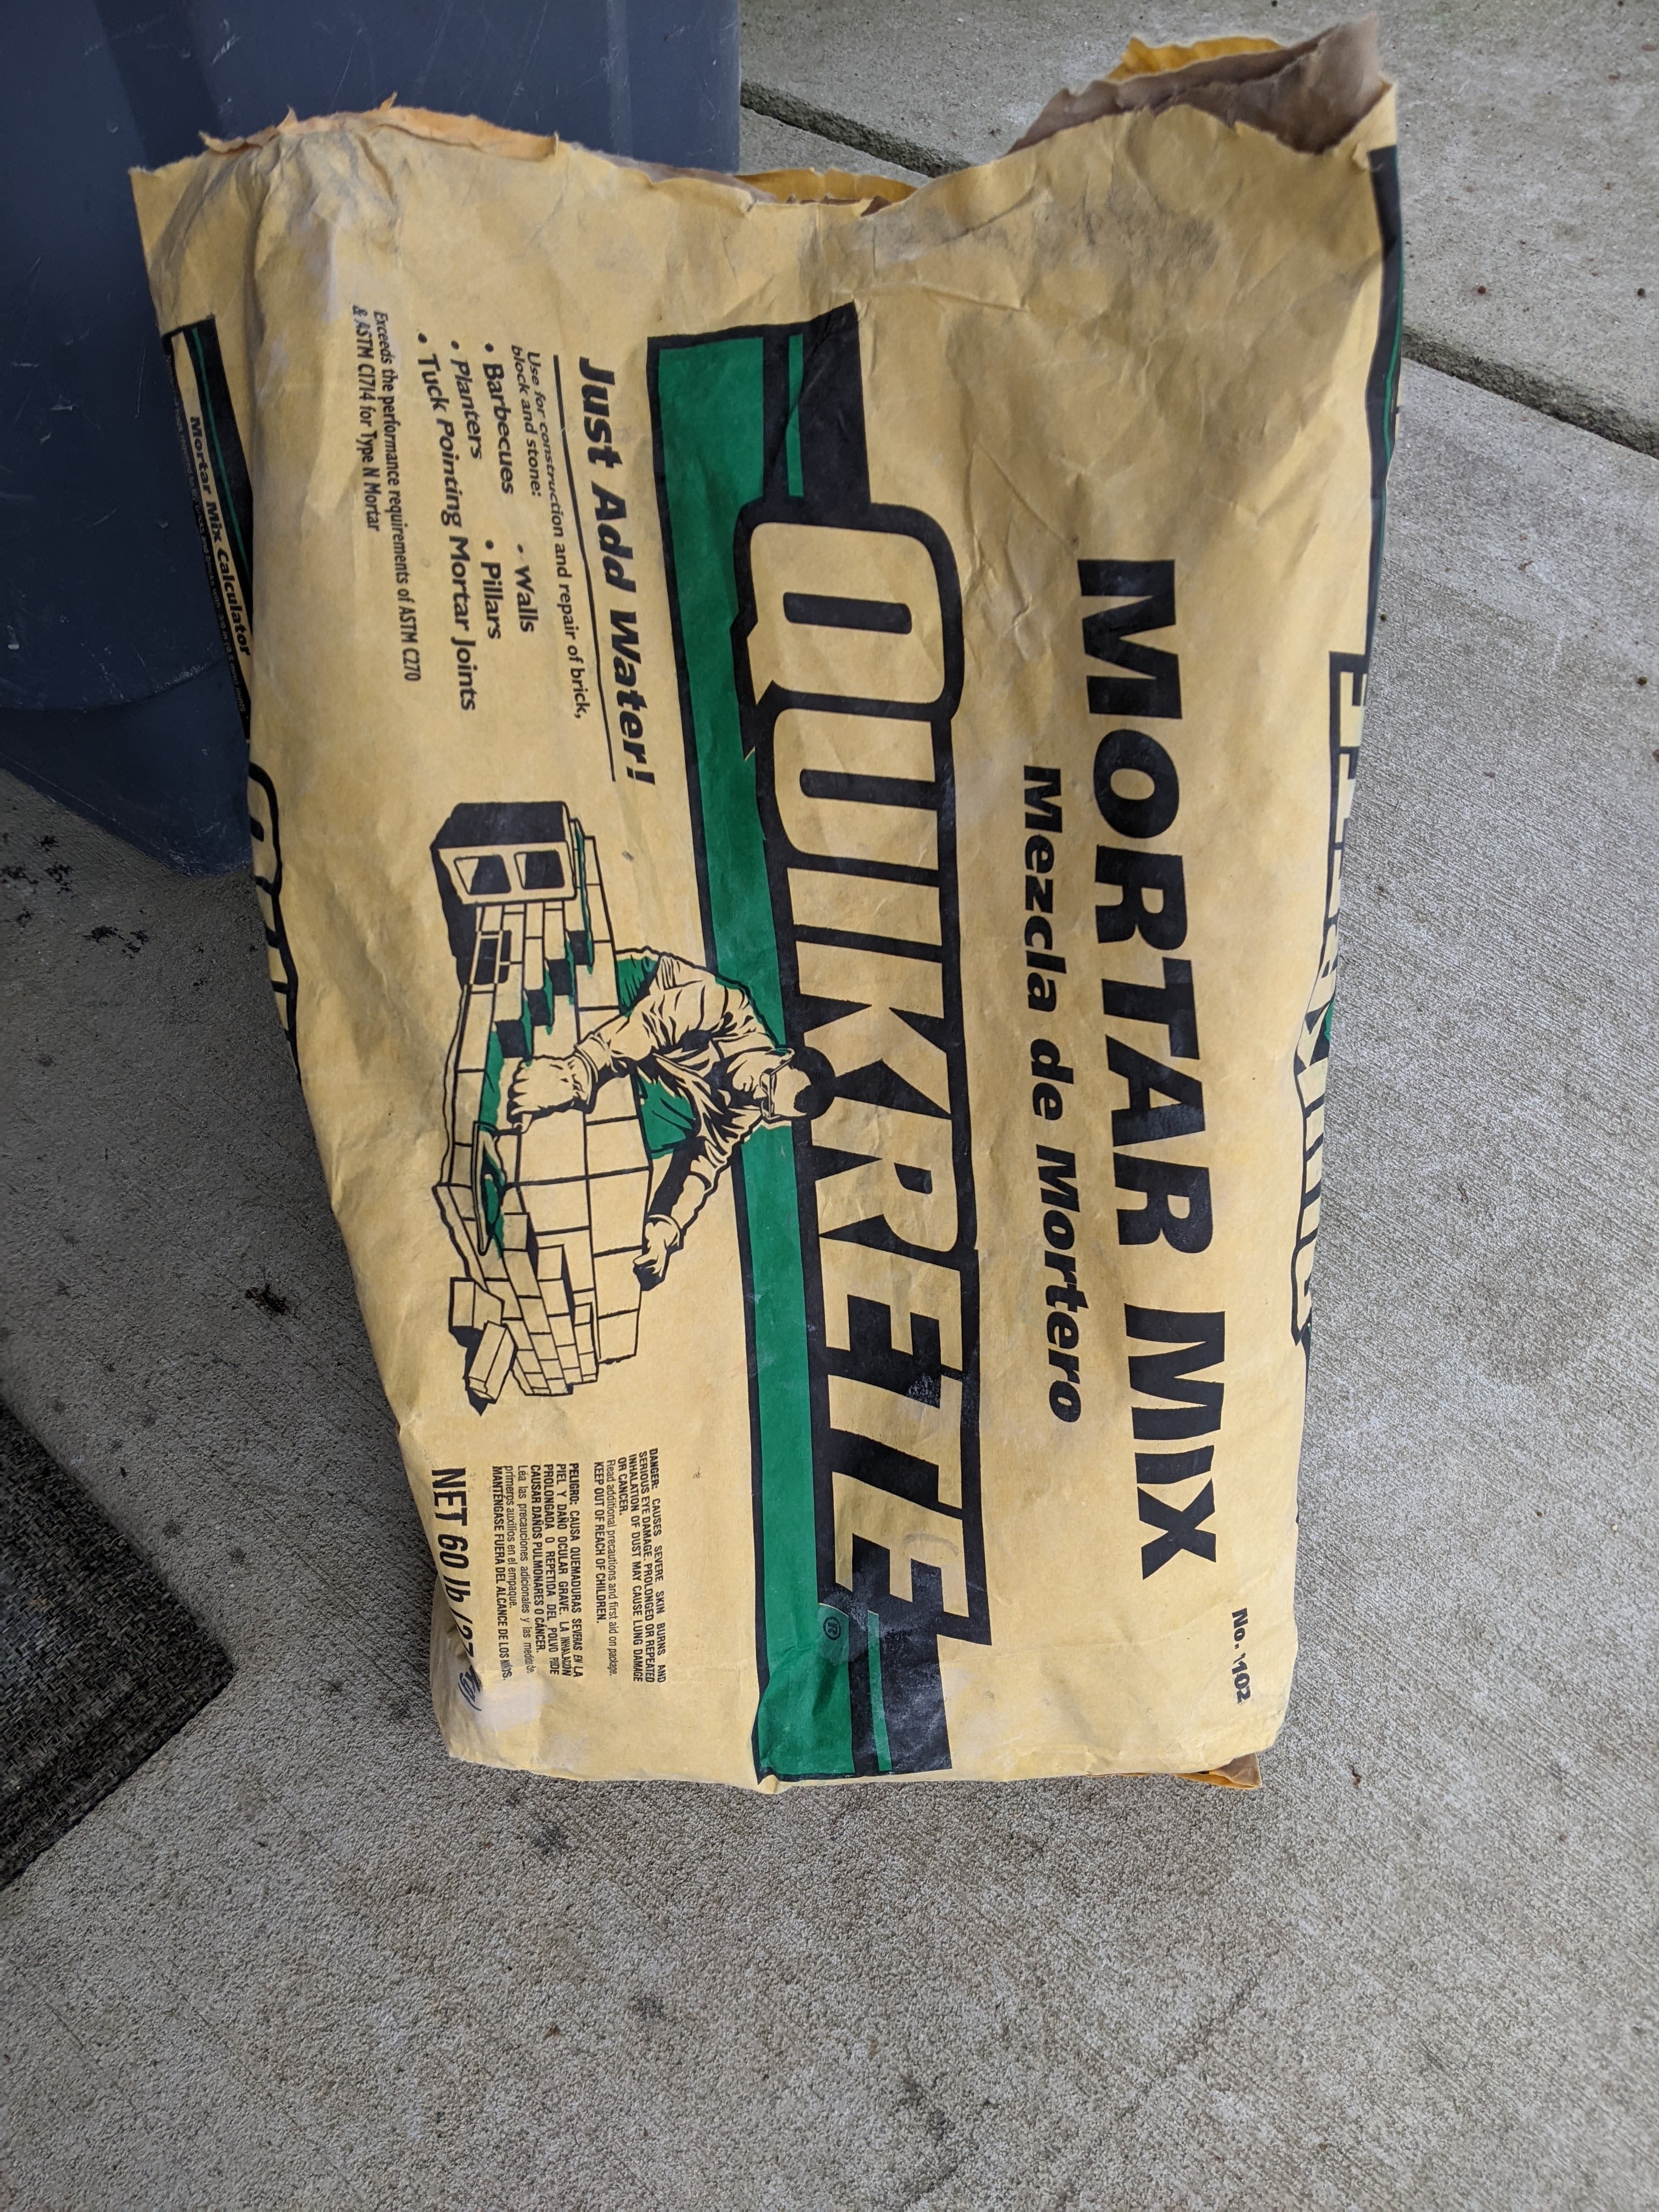
We bought the Type S at Lowes and the Type N at Home Depot. We also tried mixing portland cement with the Type S, but didn’t like that solution.
They will tell you that you to wet your stone with a spray bottle. That was way too fussy/cumbersome for us, so we got a bucket of water and a sponge and washed them. (Because we used natural stone, some of it was really dirty.) Wetting the stone will keep the stone from absorbing all the water from the mortar which causes it to dry too quickly.
We put down boards at the bottom of the wall as a spacer so that we can slide our flooring underneath, rather than trying to trim it to fit. We used a roll of Ram Board to cover the floor to keep the mortar off of it. We also used boards around door openings to get a straight edge to install the trim.
We have a big sign that I had made for our farm that we want to use on this wall and it’s HEAVY. I found some 3″ x 5″ brackets online that we installed under the stone to hold it. We almost got too far on the stone before we installed the brackets. They turned out to be the perfect size. Think about what you may need/want to hang on the wall before you install the stone, because installing it later is going to be difficult, if not impossible.
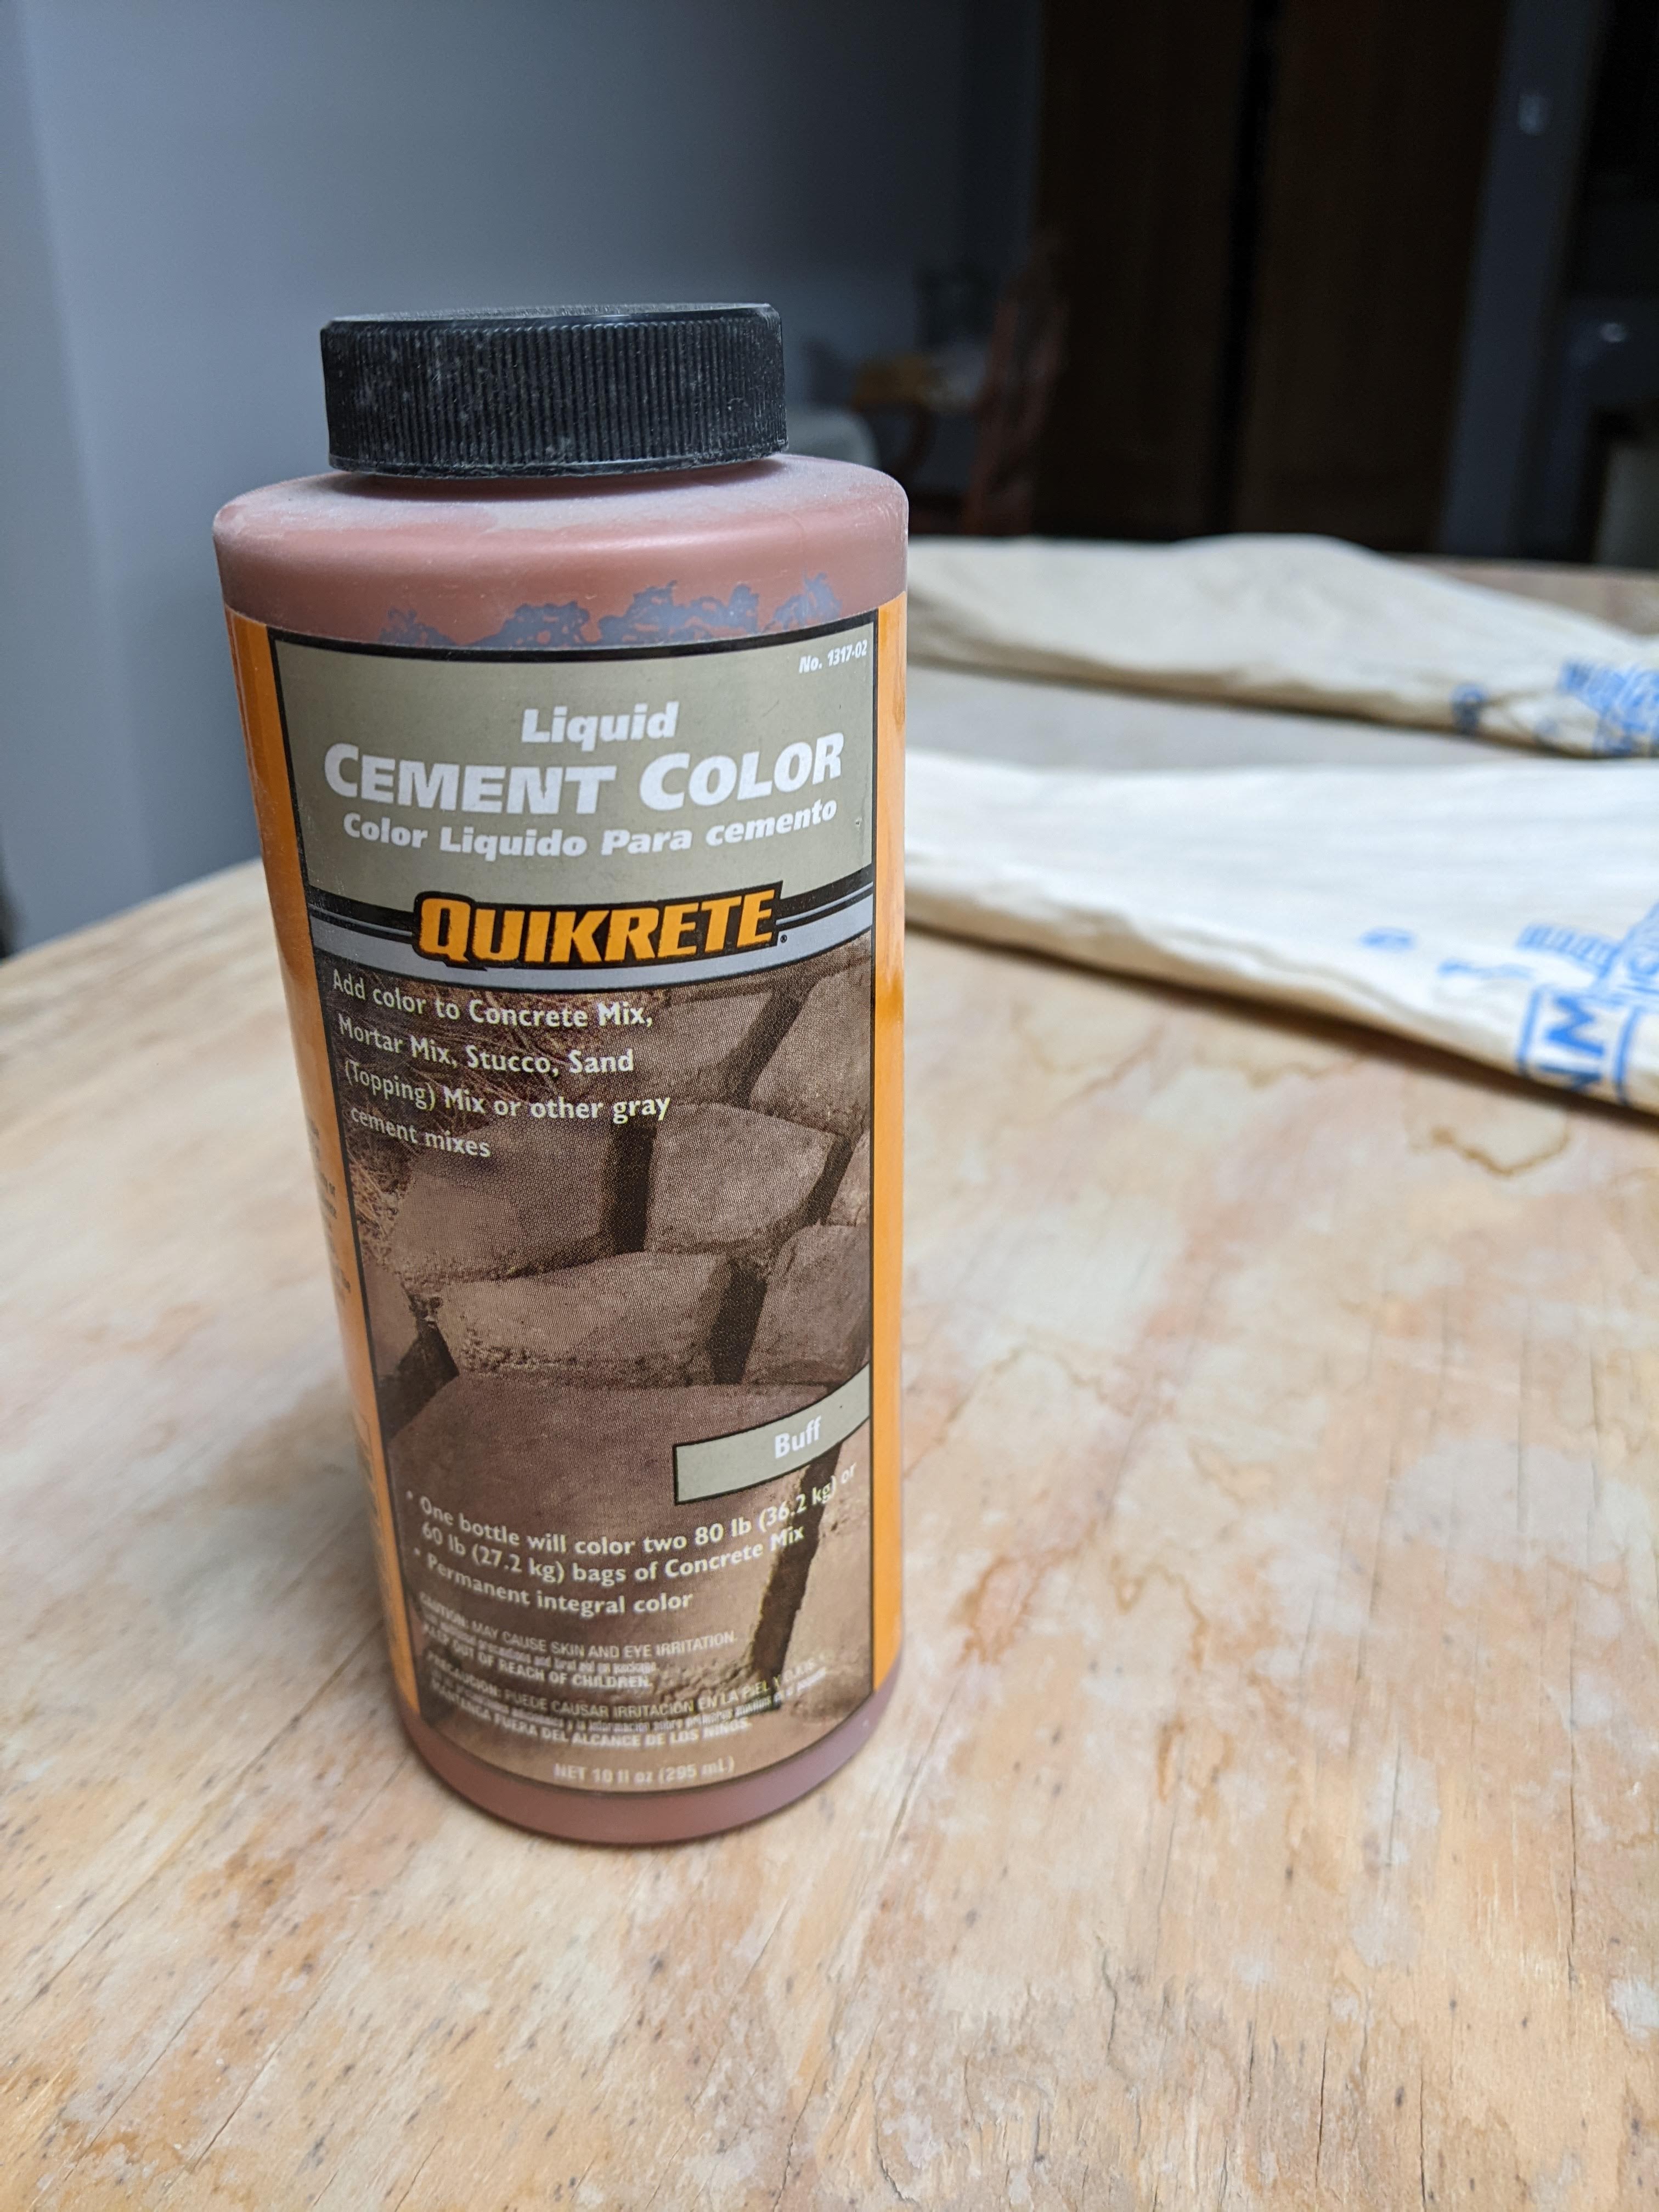
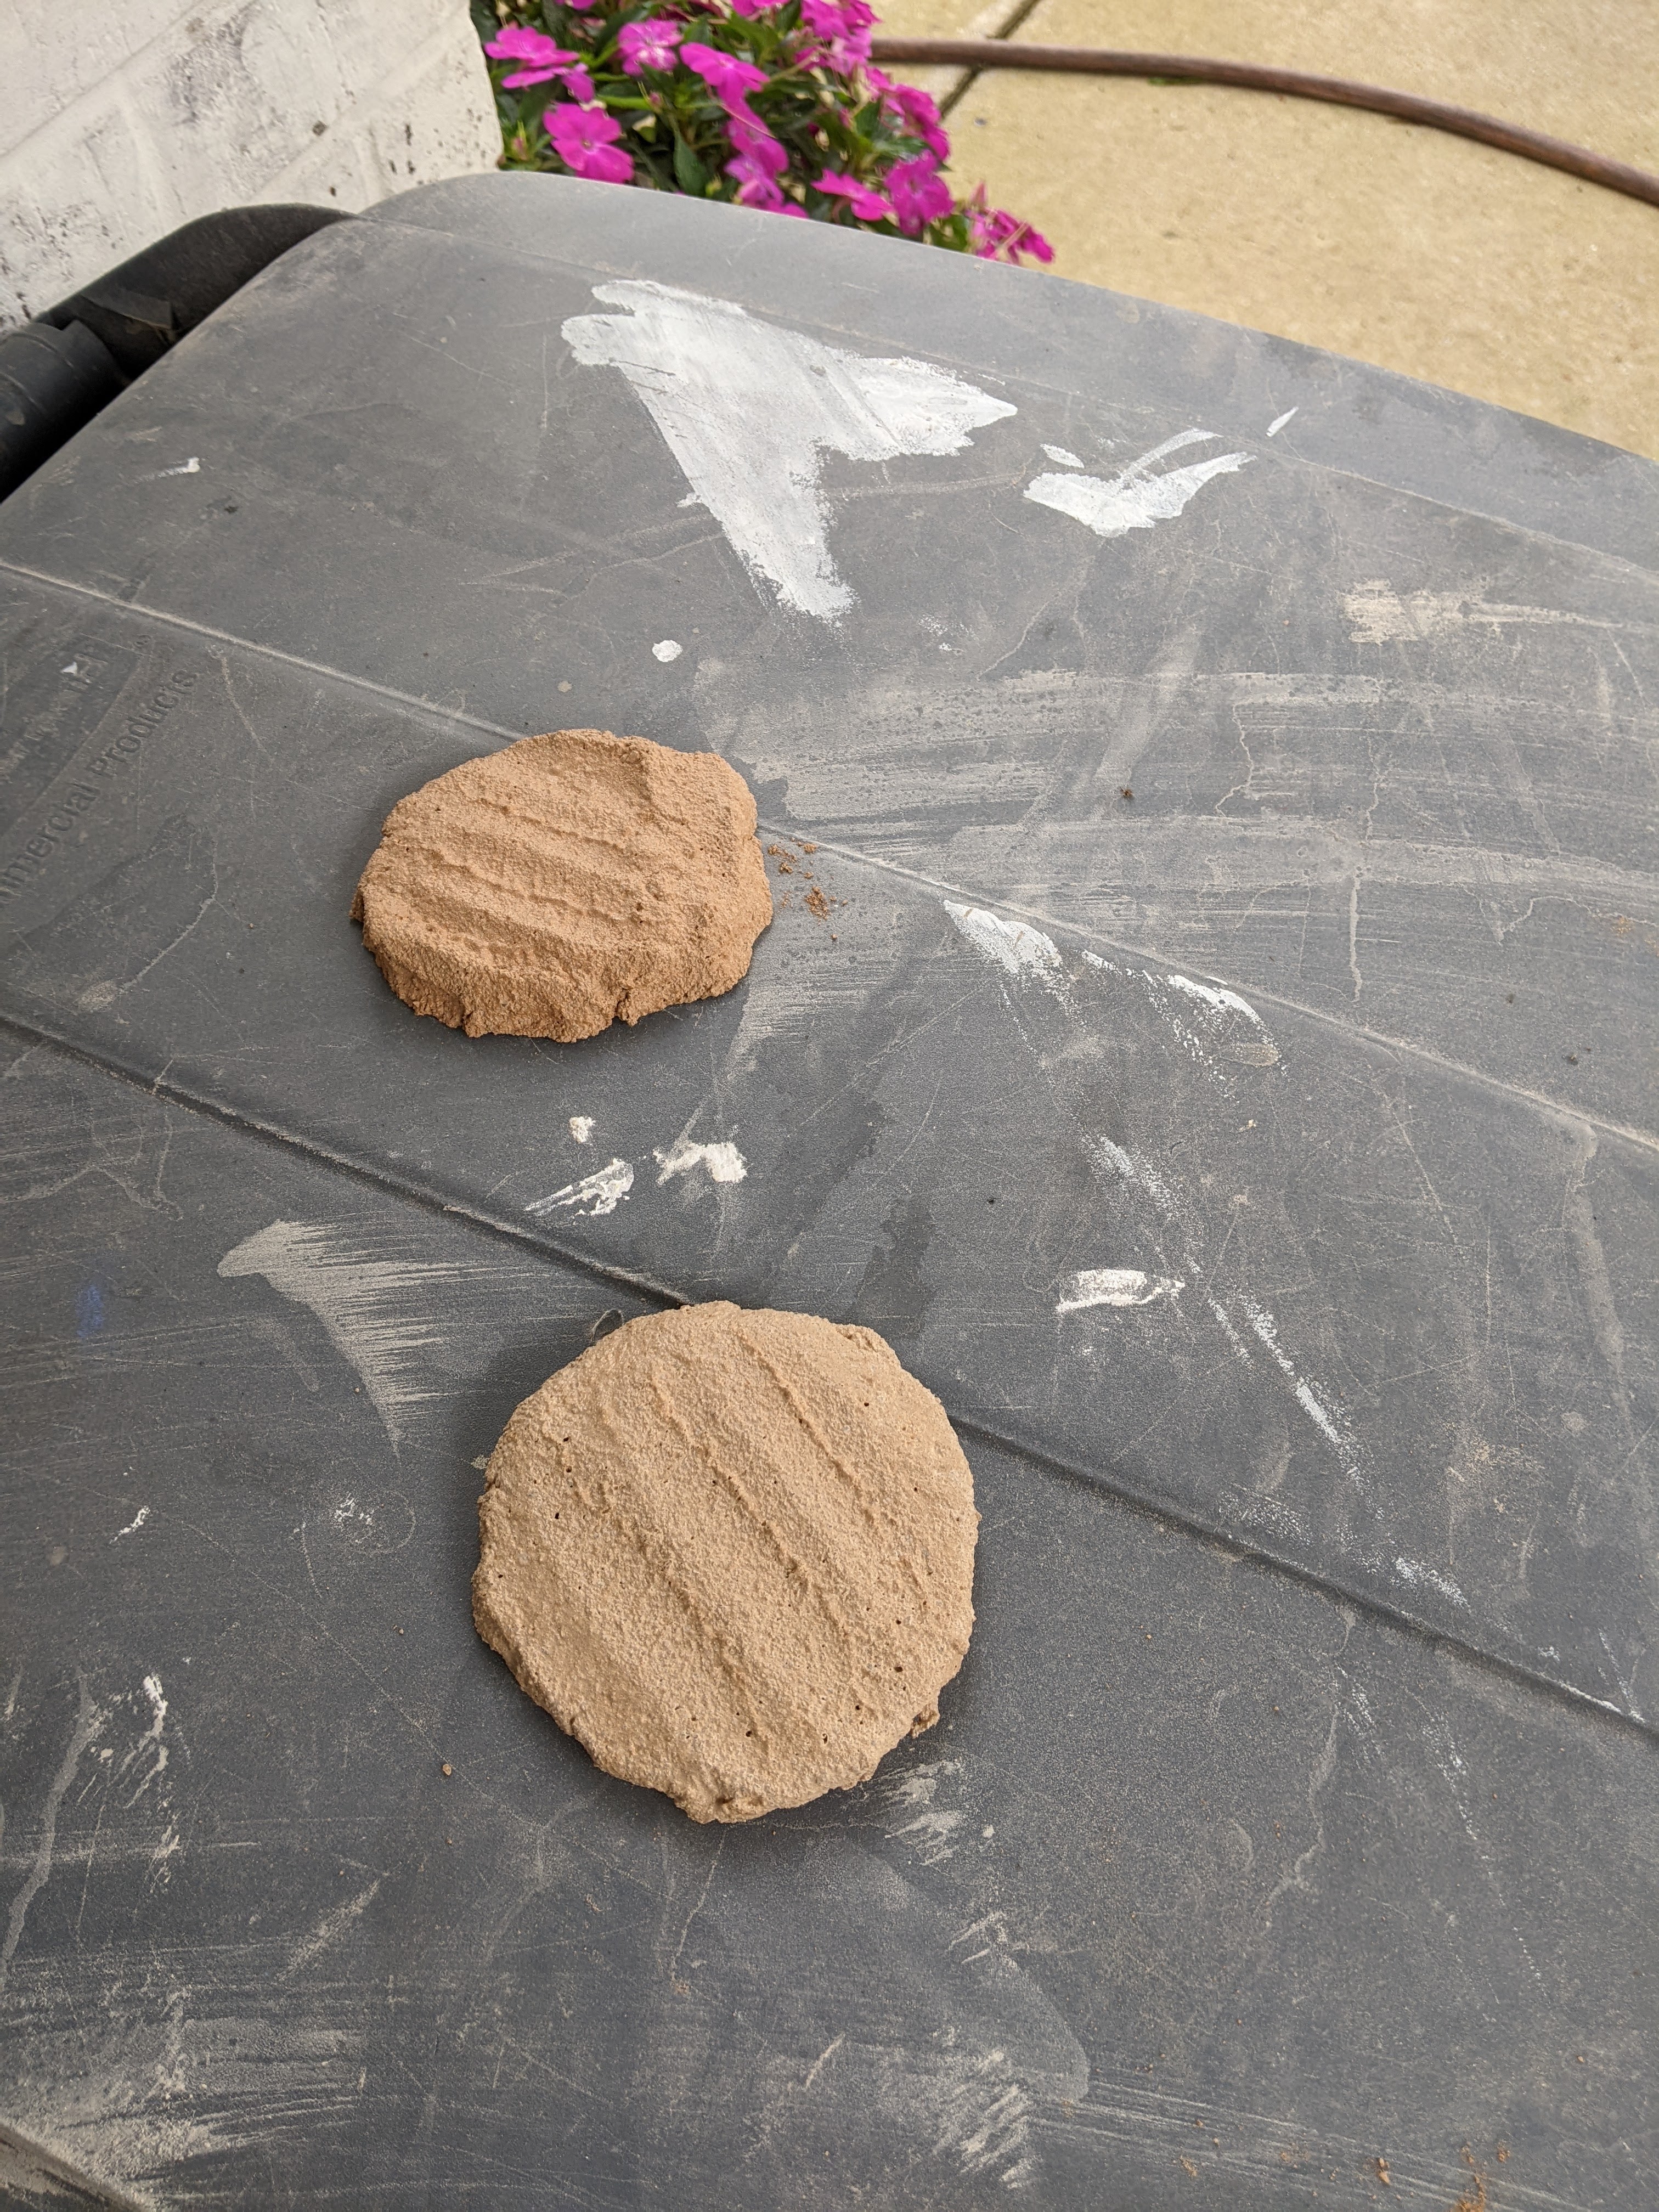
The mortar that we used was really gray and didn’t look great with the stone which has a warmer tone. We bought some colorant for the mortar and tested various levels of colorant on the last few batches of mortar that we used to put up the last row of stone. (My husband’s idea which was brilliant.) We started with a ratio of 1 bottle to 2 gallons of water. It was really orange. The second concentration was equivalent to 1/2 bottle to 2 gallons of water. It was still too orange. The last one was equivalent to 1/4 bottle of colorant to 2 gallons of water, which was perfect.
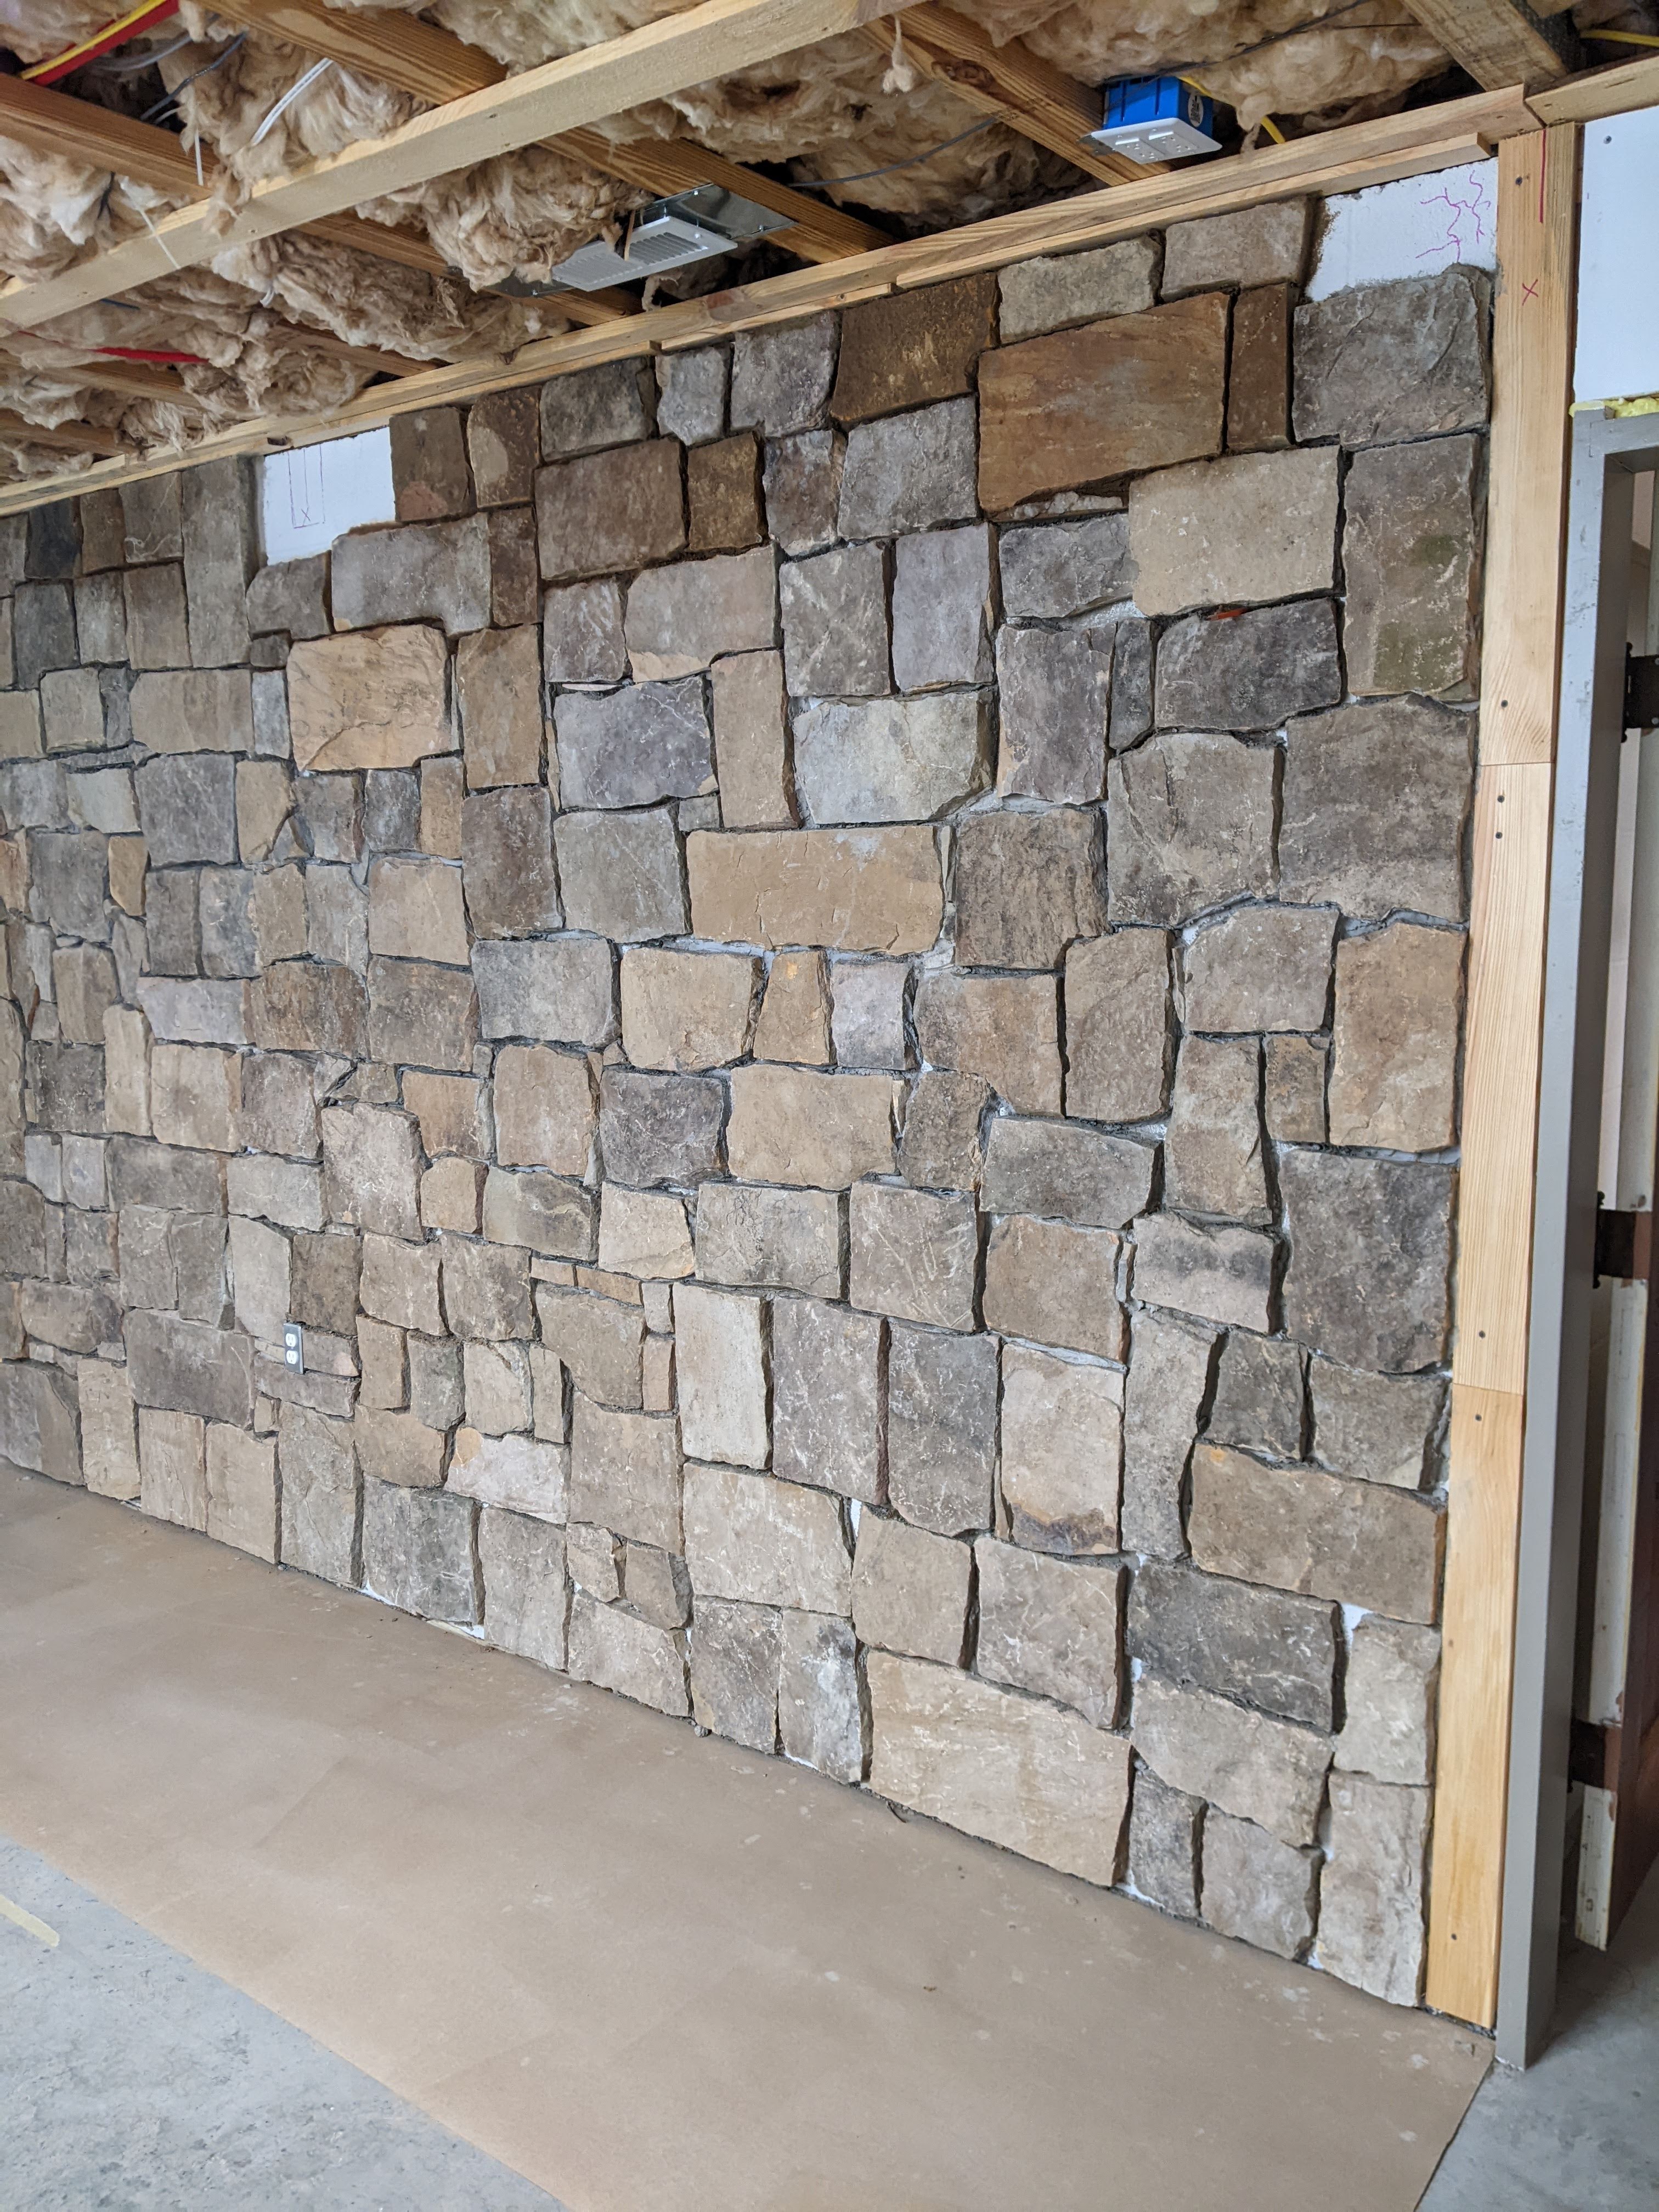
We finally got all the stone up on the wall, except for where the beams are going to be installed. We left room to maneuver the beams and also for the remaining stone so that it isn’t cut into tiny pieces.
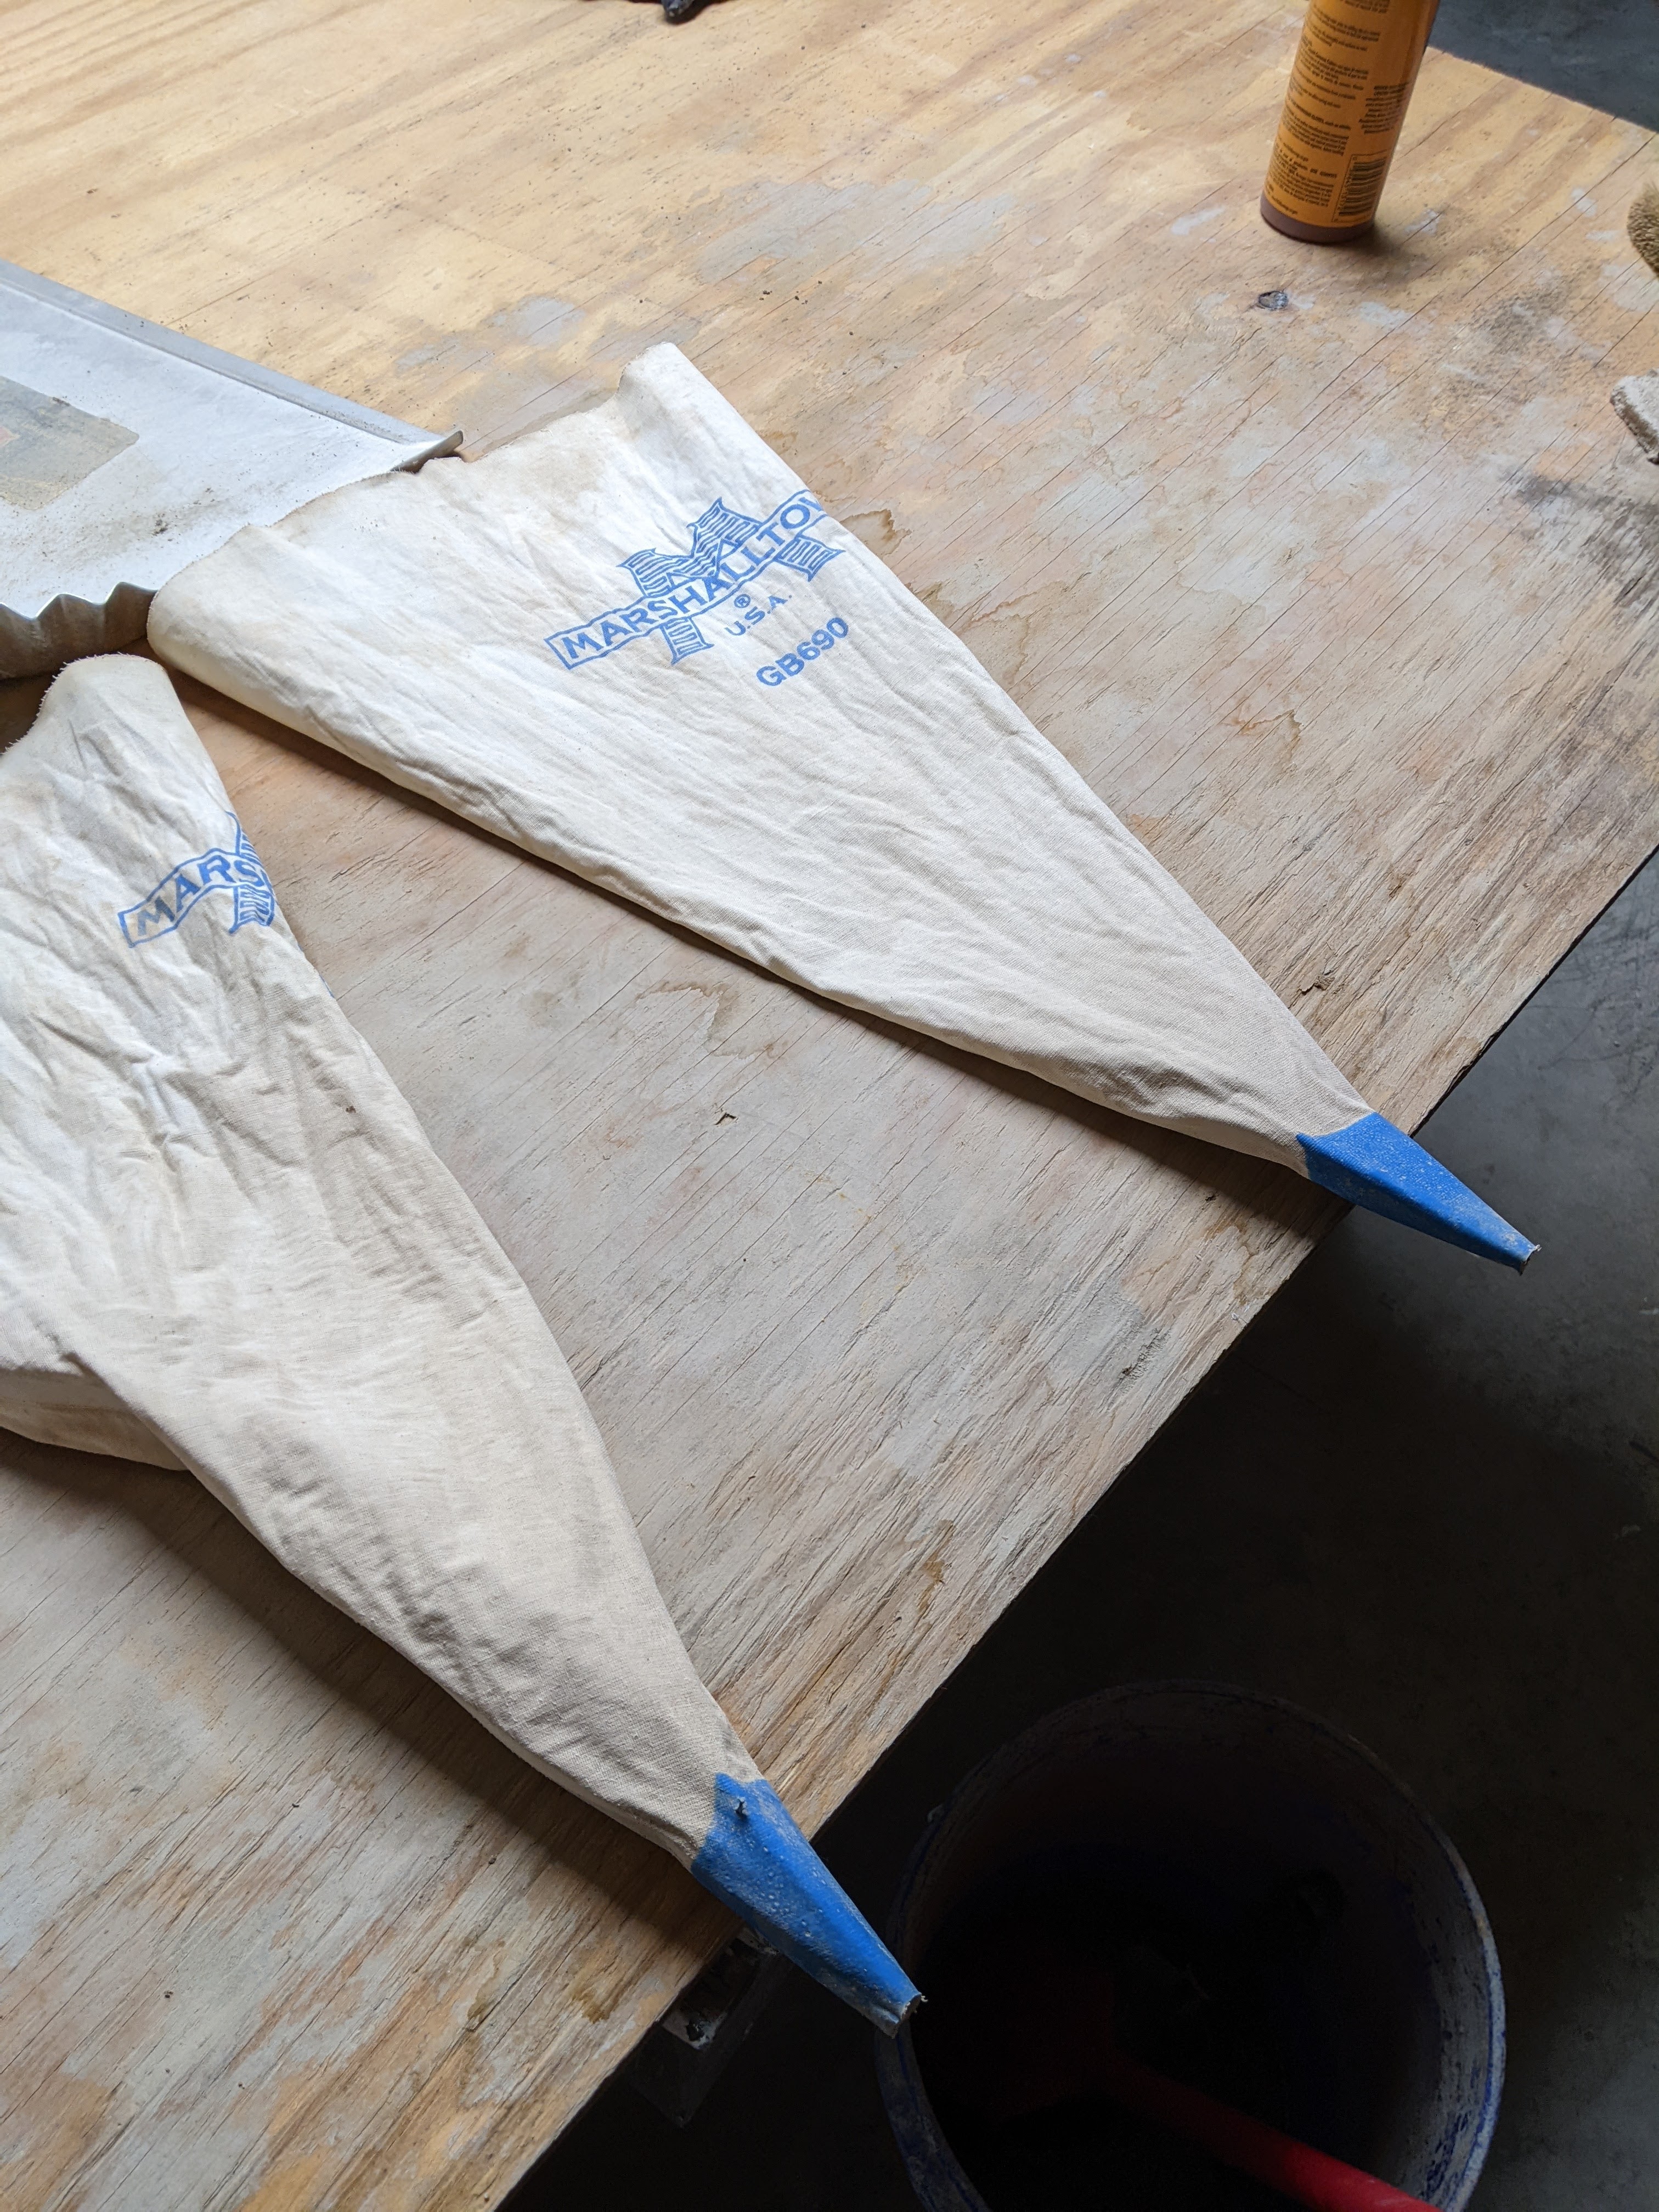
At this point, we started grouting. We used the same ratio of mortars, but found that the mortar had to be really thin to push it through the tip of the grouting bag. You need to mix the colorant into the water to get a consistent color throughout. AND, you need to stir up the water every time you get some because the colorant settles out. We used a garden trowel to scoop the mortar into the grout bags. It’s helpful to have two people for this operation–one to scoop, and one to step on the tip of the bag and hold the end of it open. While putting the stone up took WAY longer than anticipated, the grouting is going more quickly than anticipated. HOWEVER, grouting bags are heavy and your hands will be really sore and tired. I wouldn’t recommend doing it two days in a row.
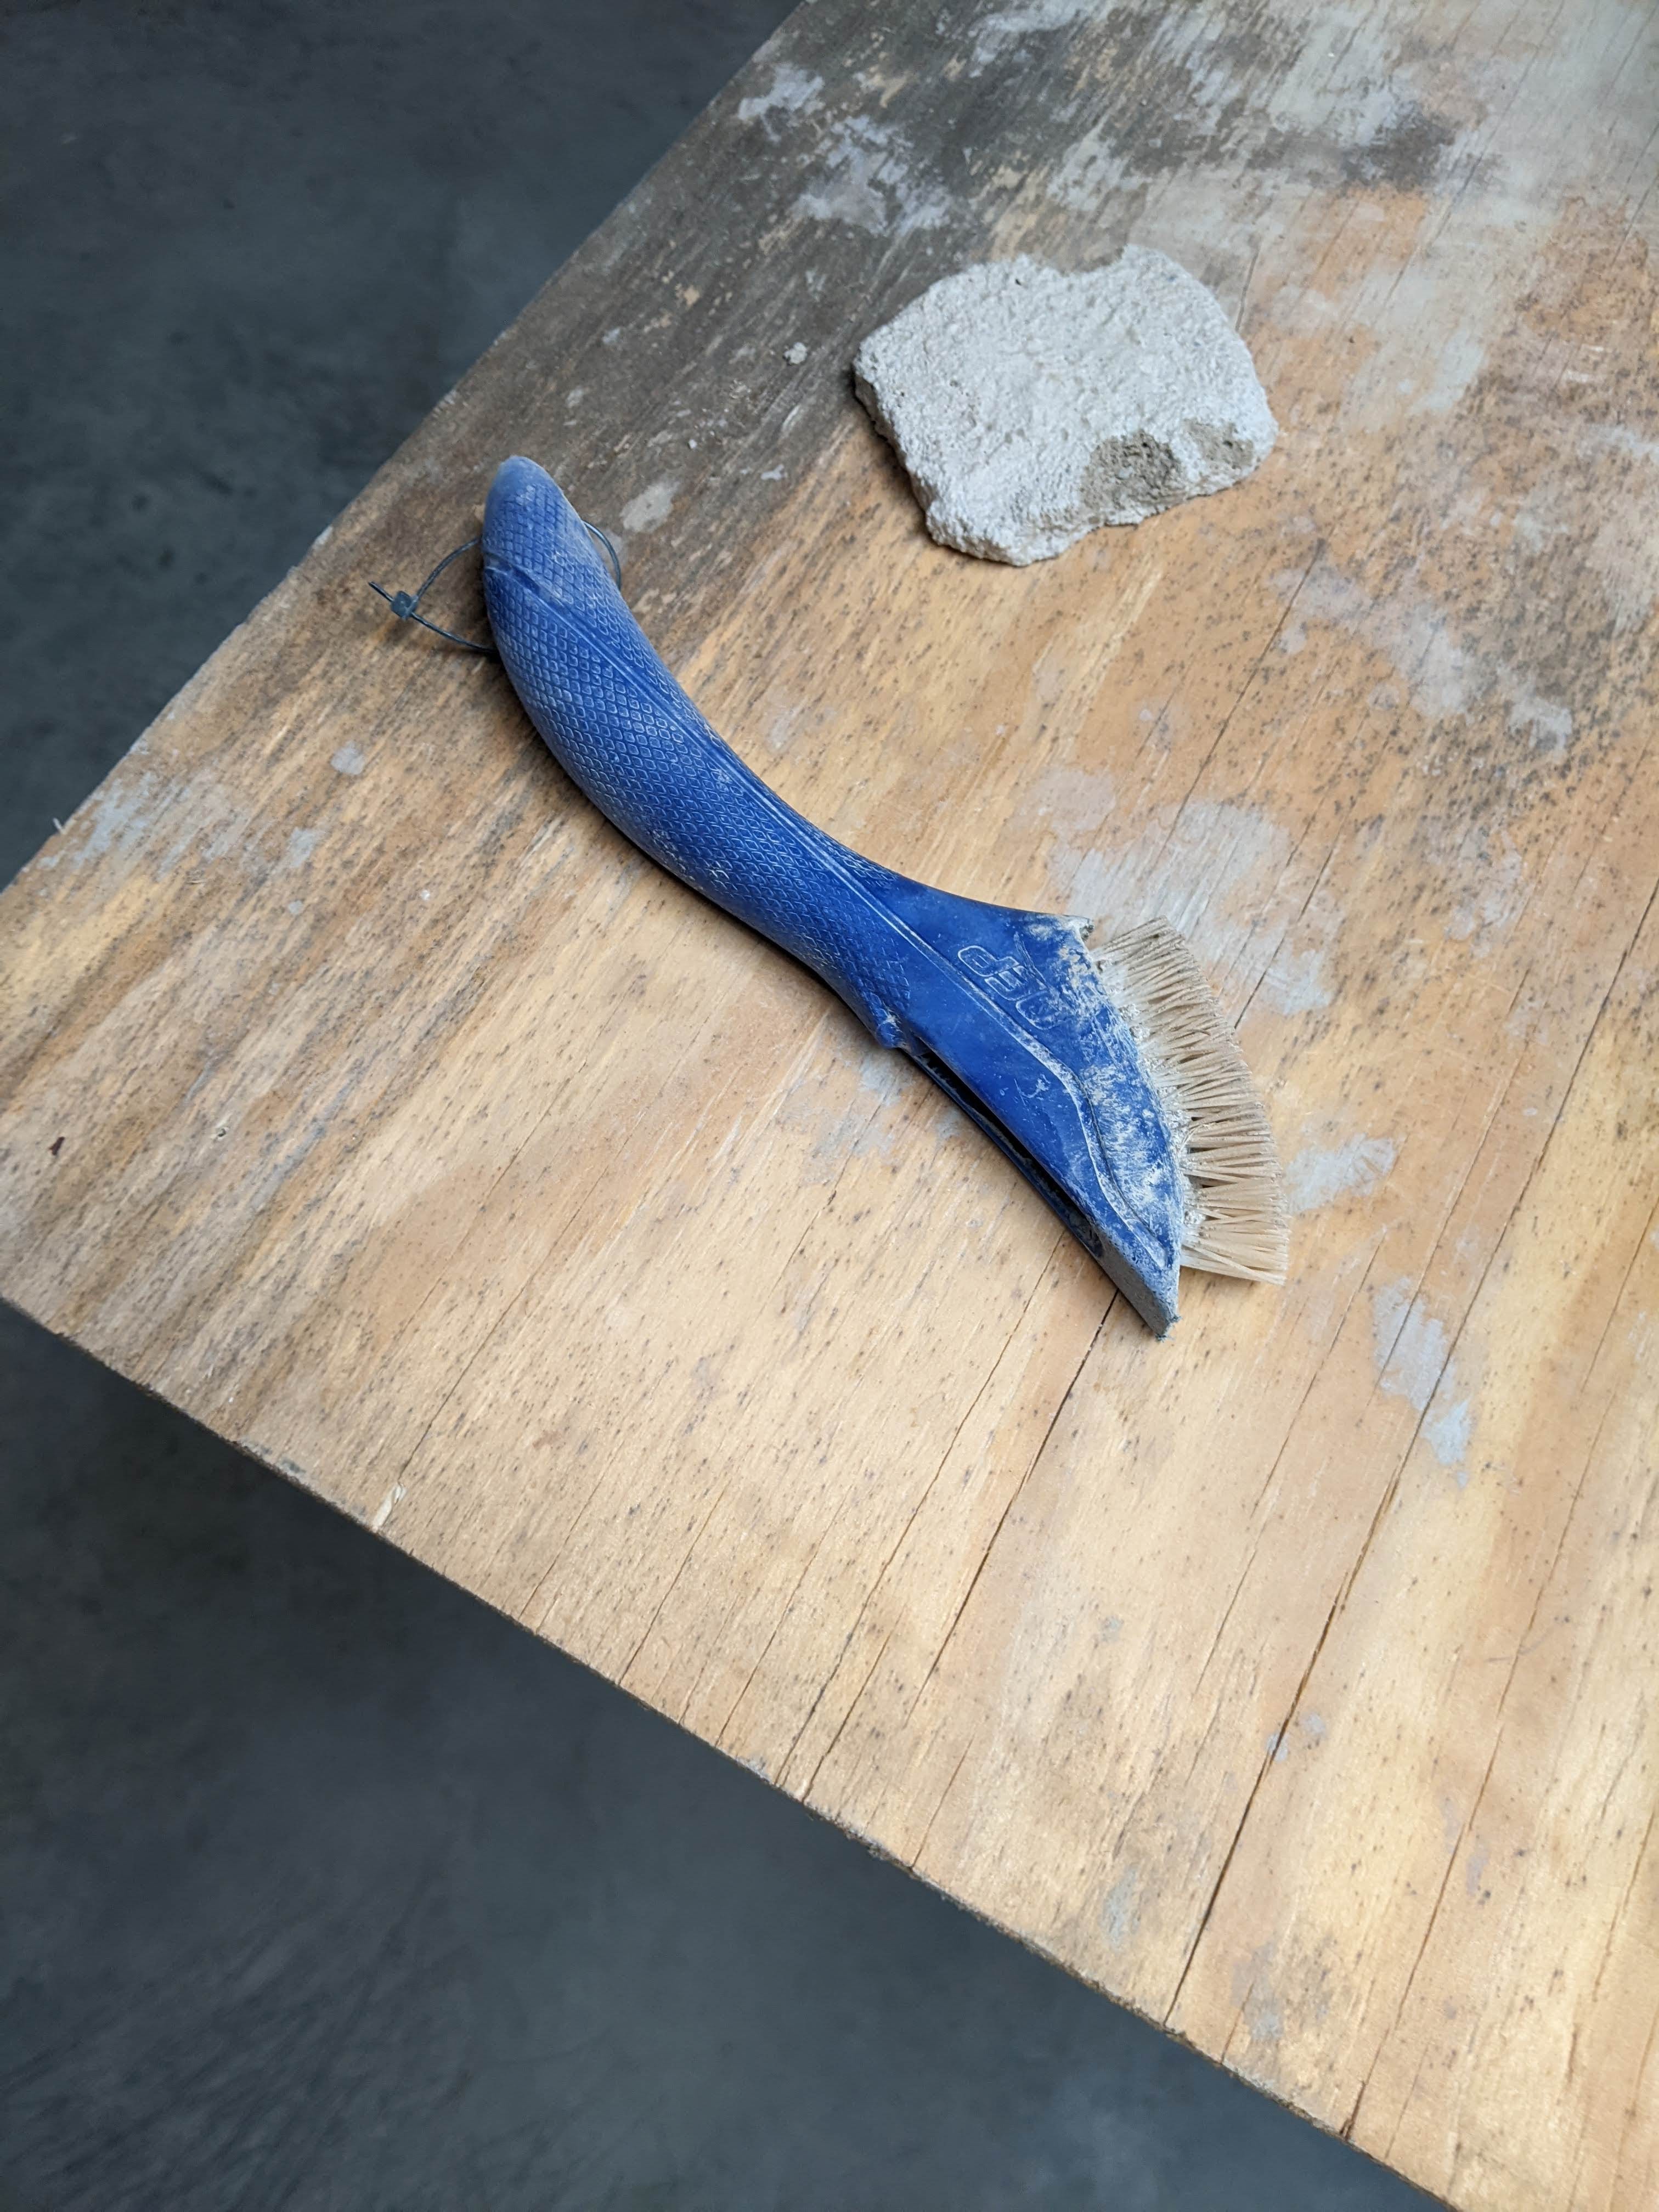
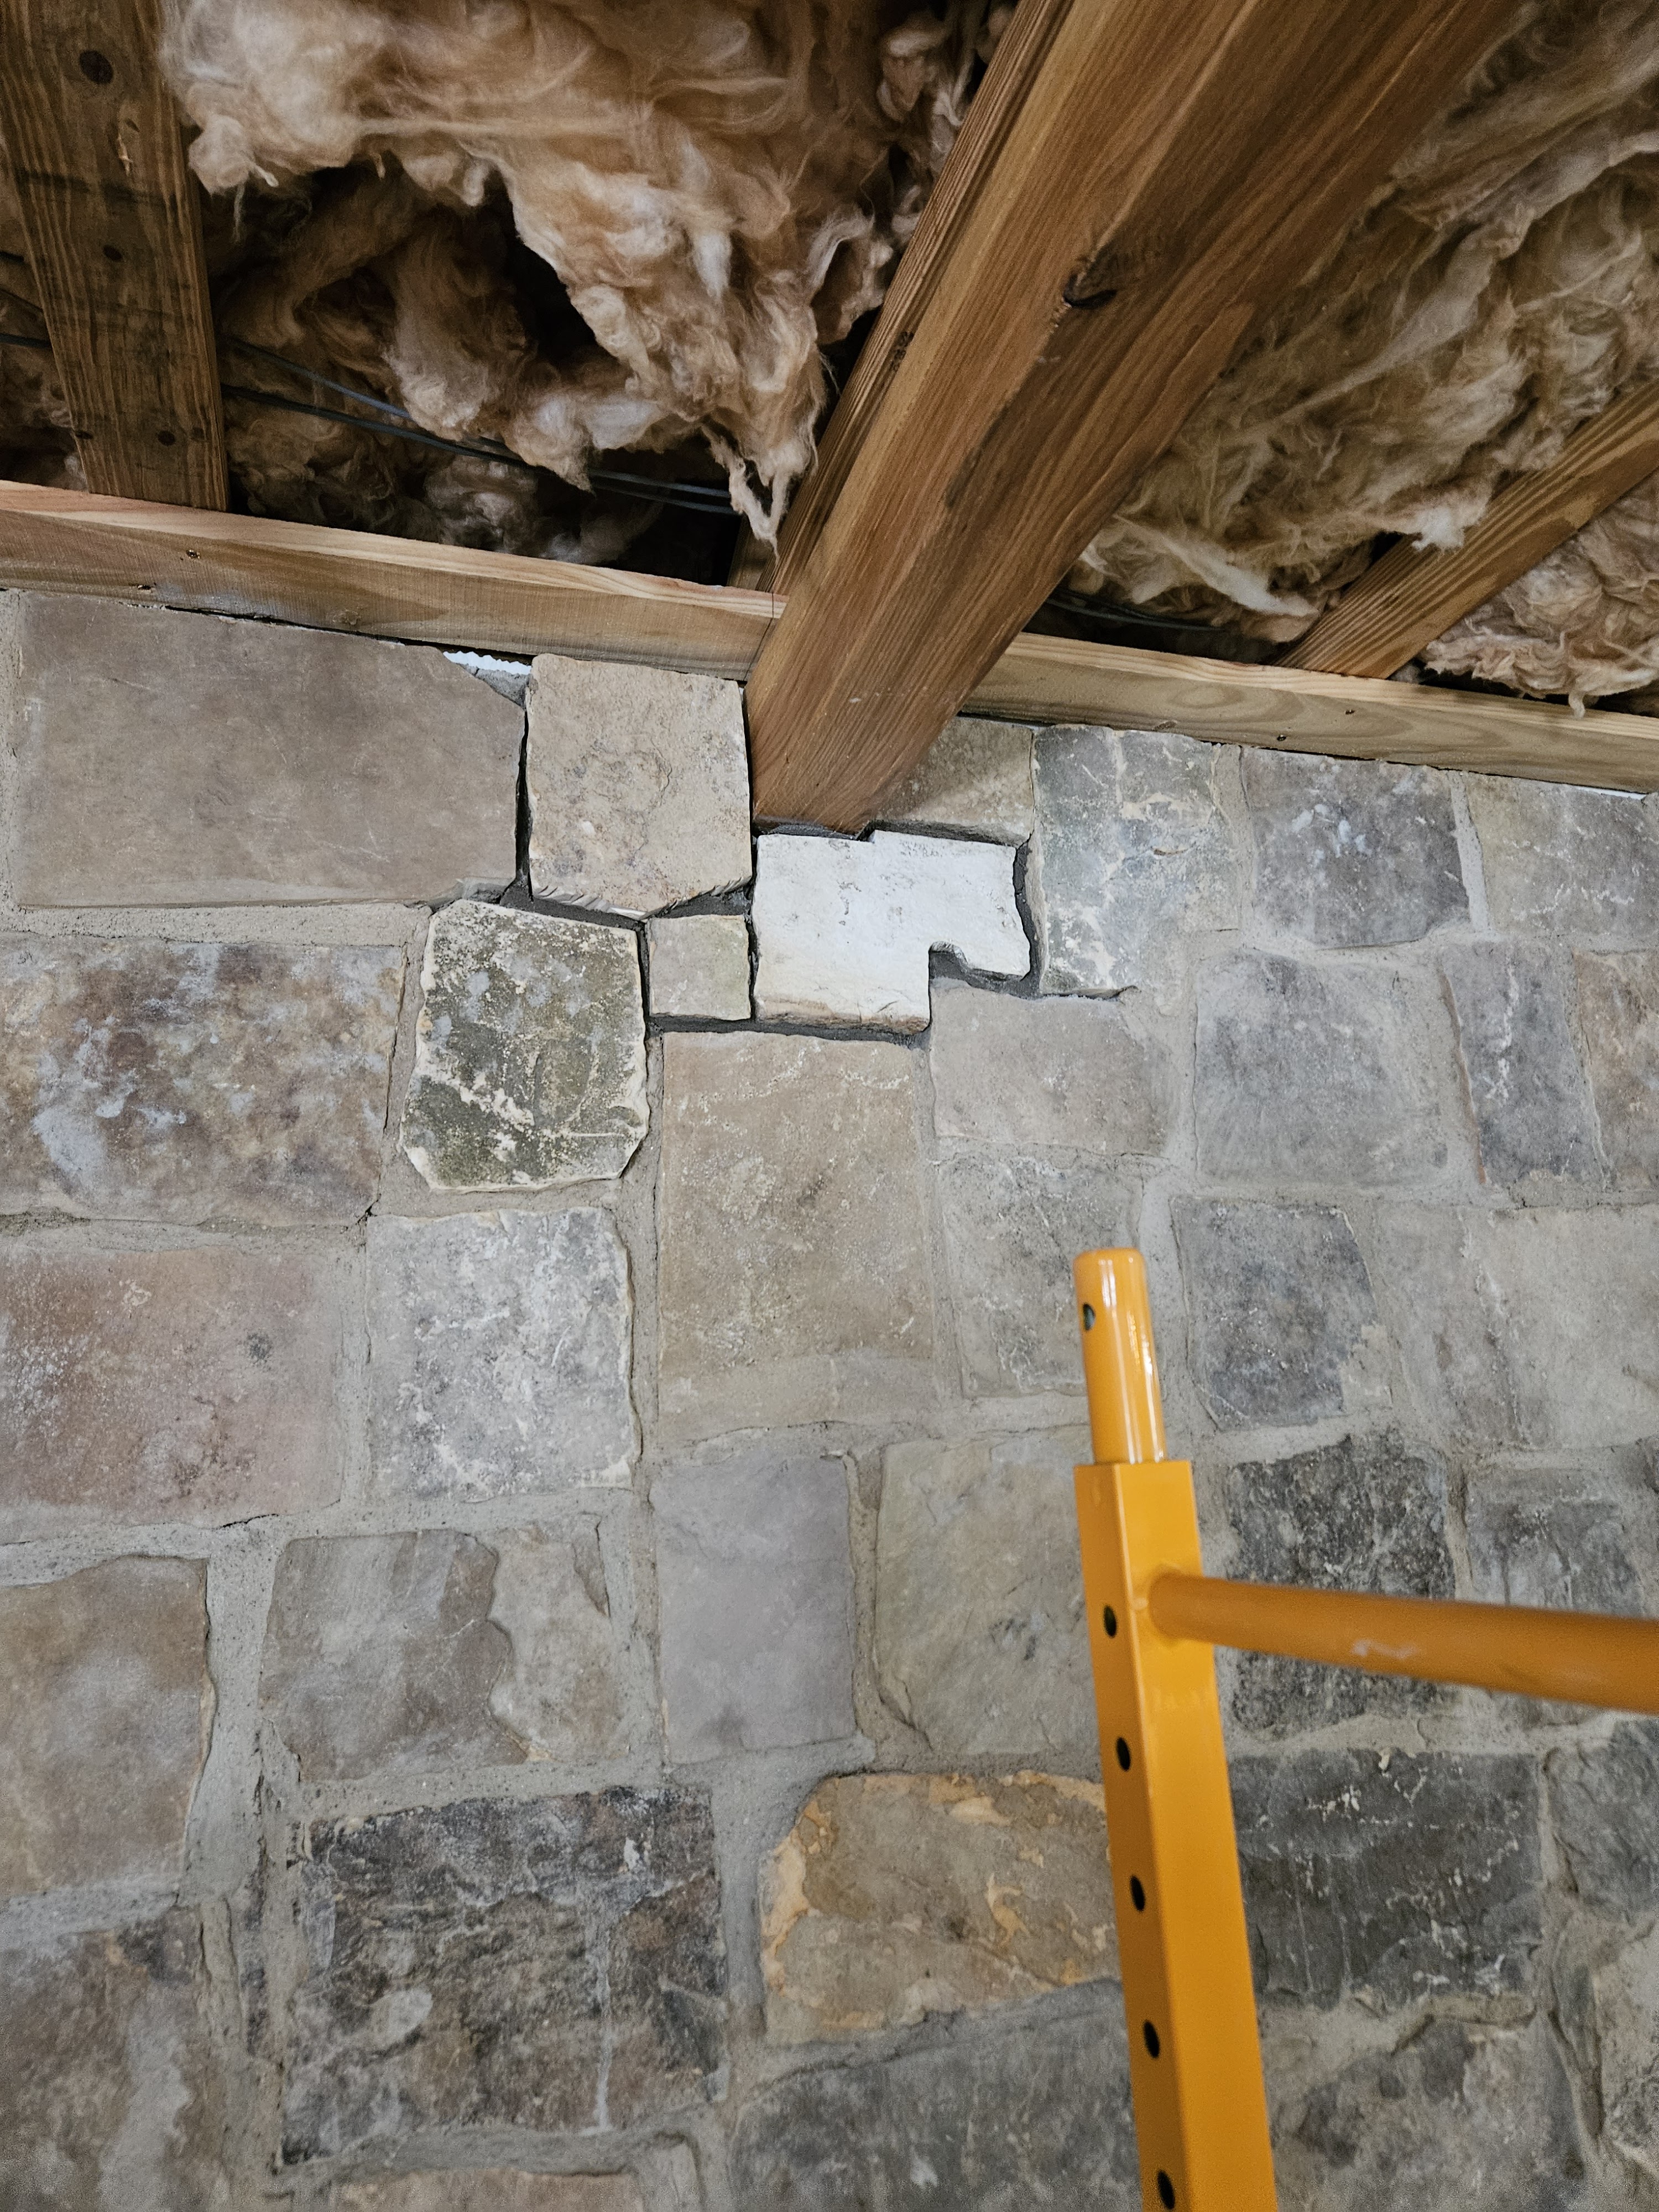
We are overgrouting the stone, which gives it a more old world look. When you fill the gaps between the stones, you basically overfill it beyond the surface of the stone. Once the grout begins to harden, you use a brush to remove the excess. What we saw on YouTube videos said to use a soft brush, but we found that a first pass with a small stiff brush, followed by a soft brush worked best. Once the excess was removed, my husband carefully washed the stones and wipe the grout lines. Search for Mason’s brush when you’re looking for these items.
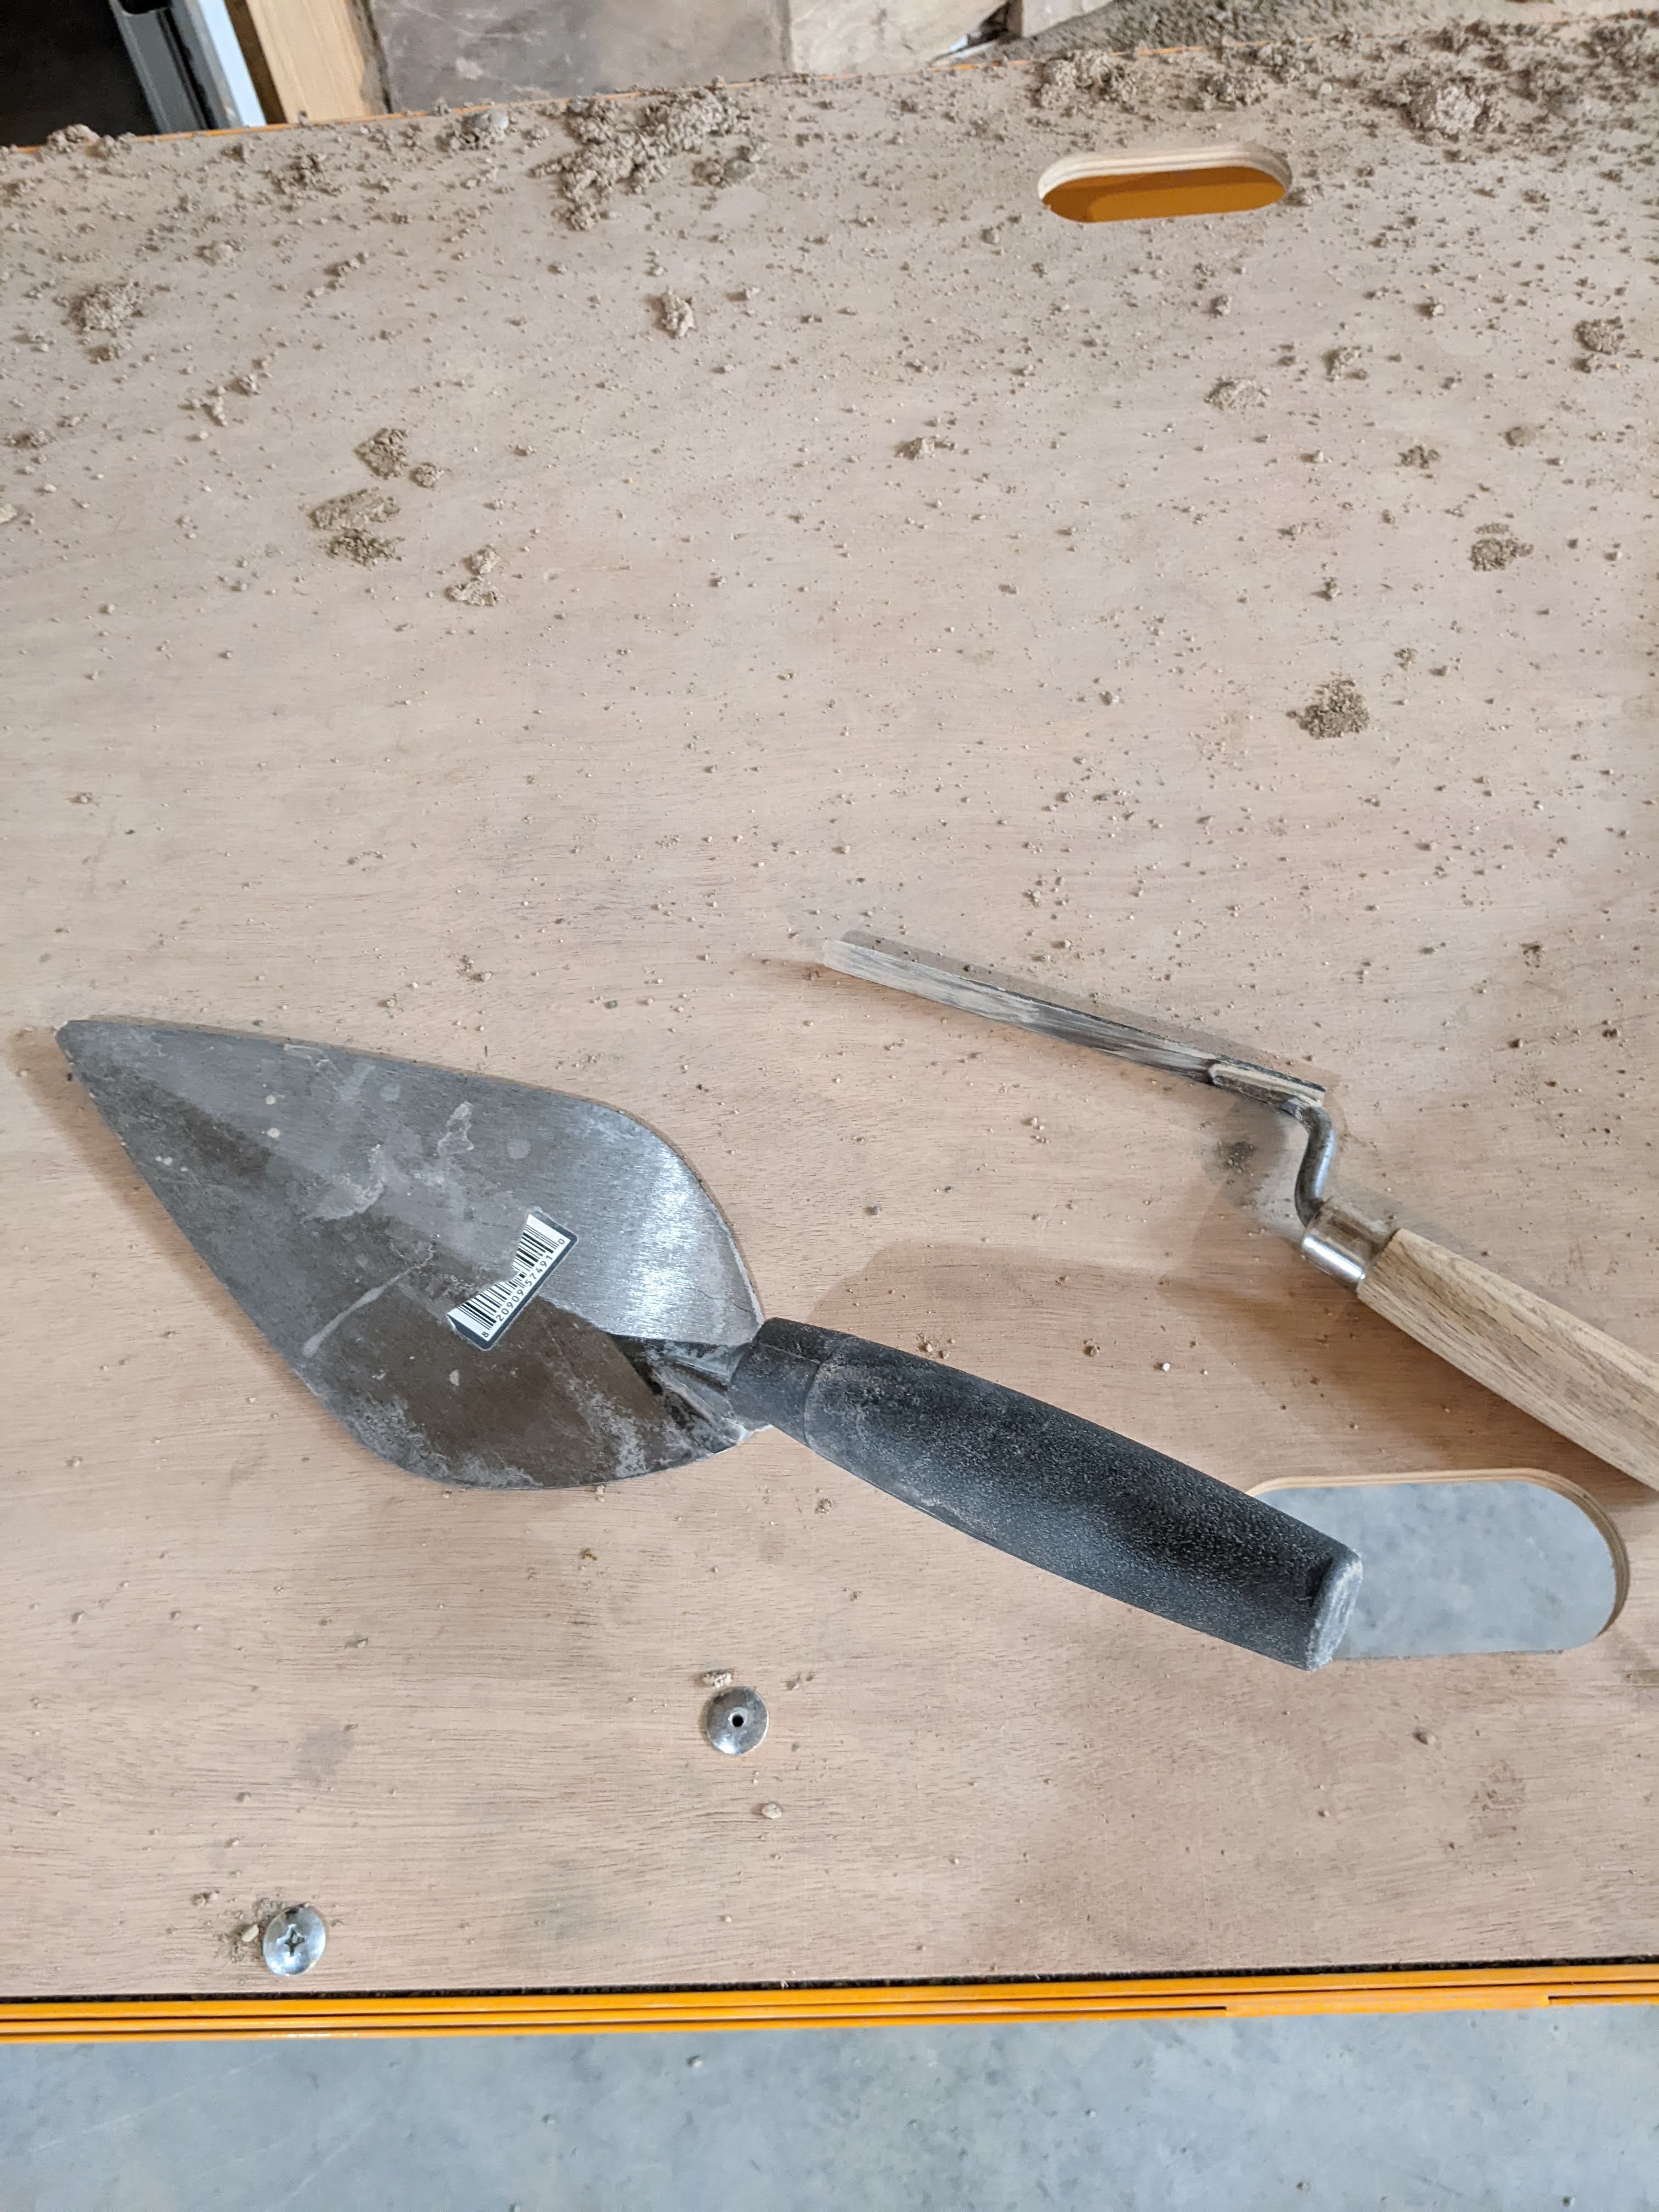
Speaking of tools, we learned a lot by trial and error. You will see videos where they are using a mason’s hammer and mason’s chisels to cut the stone to size/shape. We tried this and it just made a mess. We found that a rotary cutter with a diamond blade was the way to go. It’s super loud (get good hearing protection) and really dusty, but it gets the job done. You will also need a couple of trowels. We really like a small square trowel for putting mortar on the stone (looks like a pancake turner) and a long thin trowel for cleaning up joints when you’re installing the stone. We also used a long stiff brush to get mortar off the stone during installation.
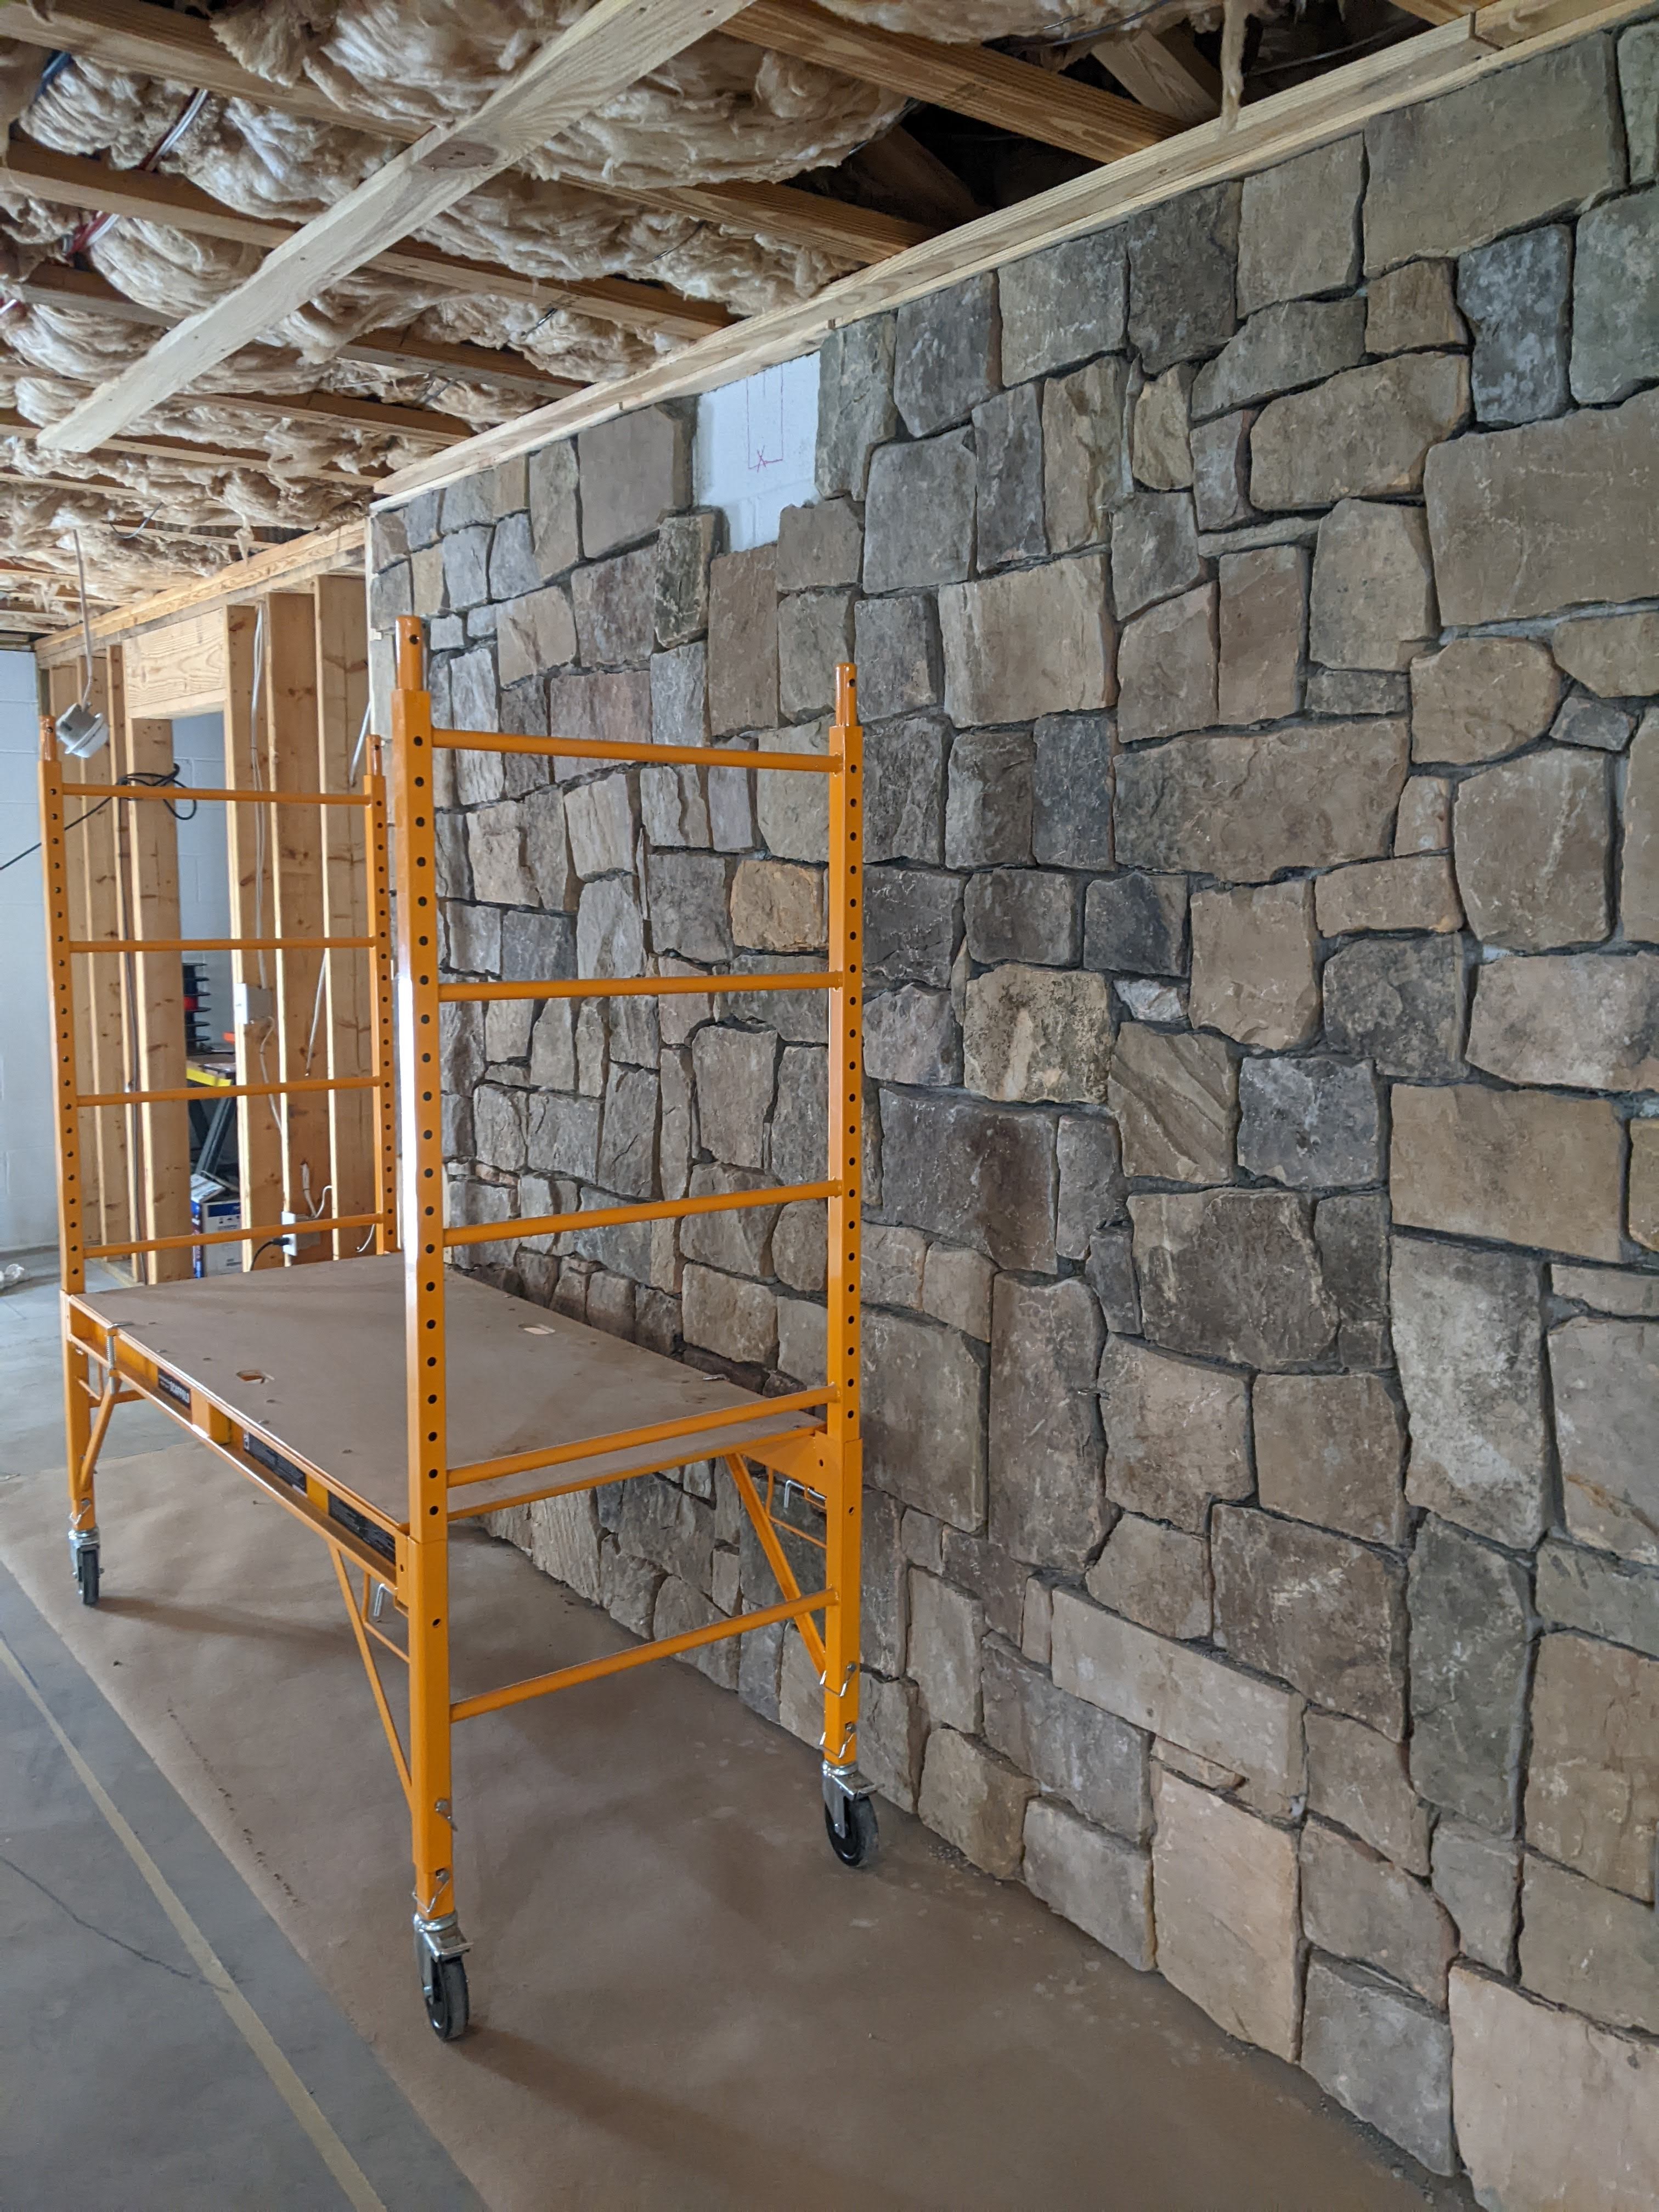
When we were installing stone above shoulder level, we found that a rolling painter’s scaffold was invaluable. We used my fitness step to climb up and down from it. My husband bought it at Harbor Freight.
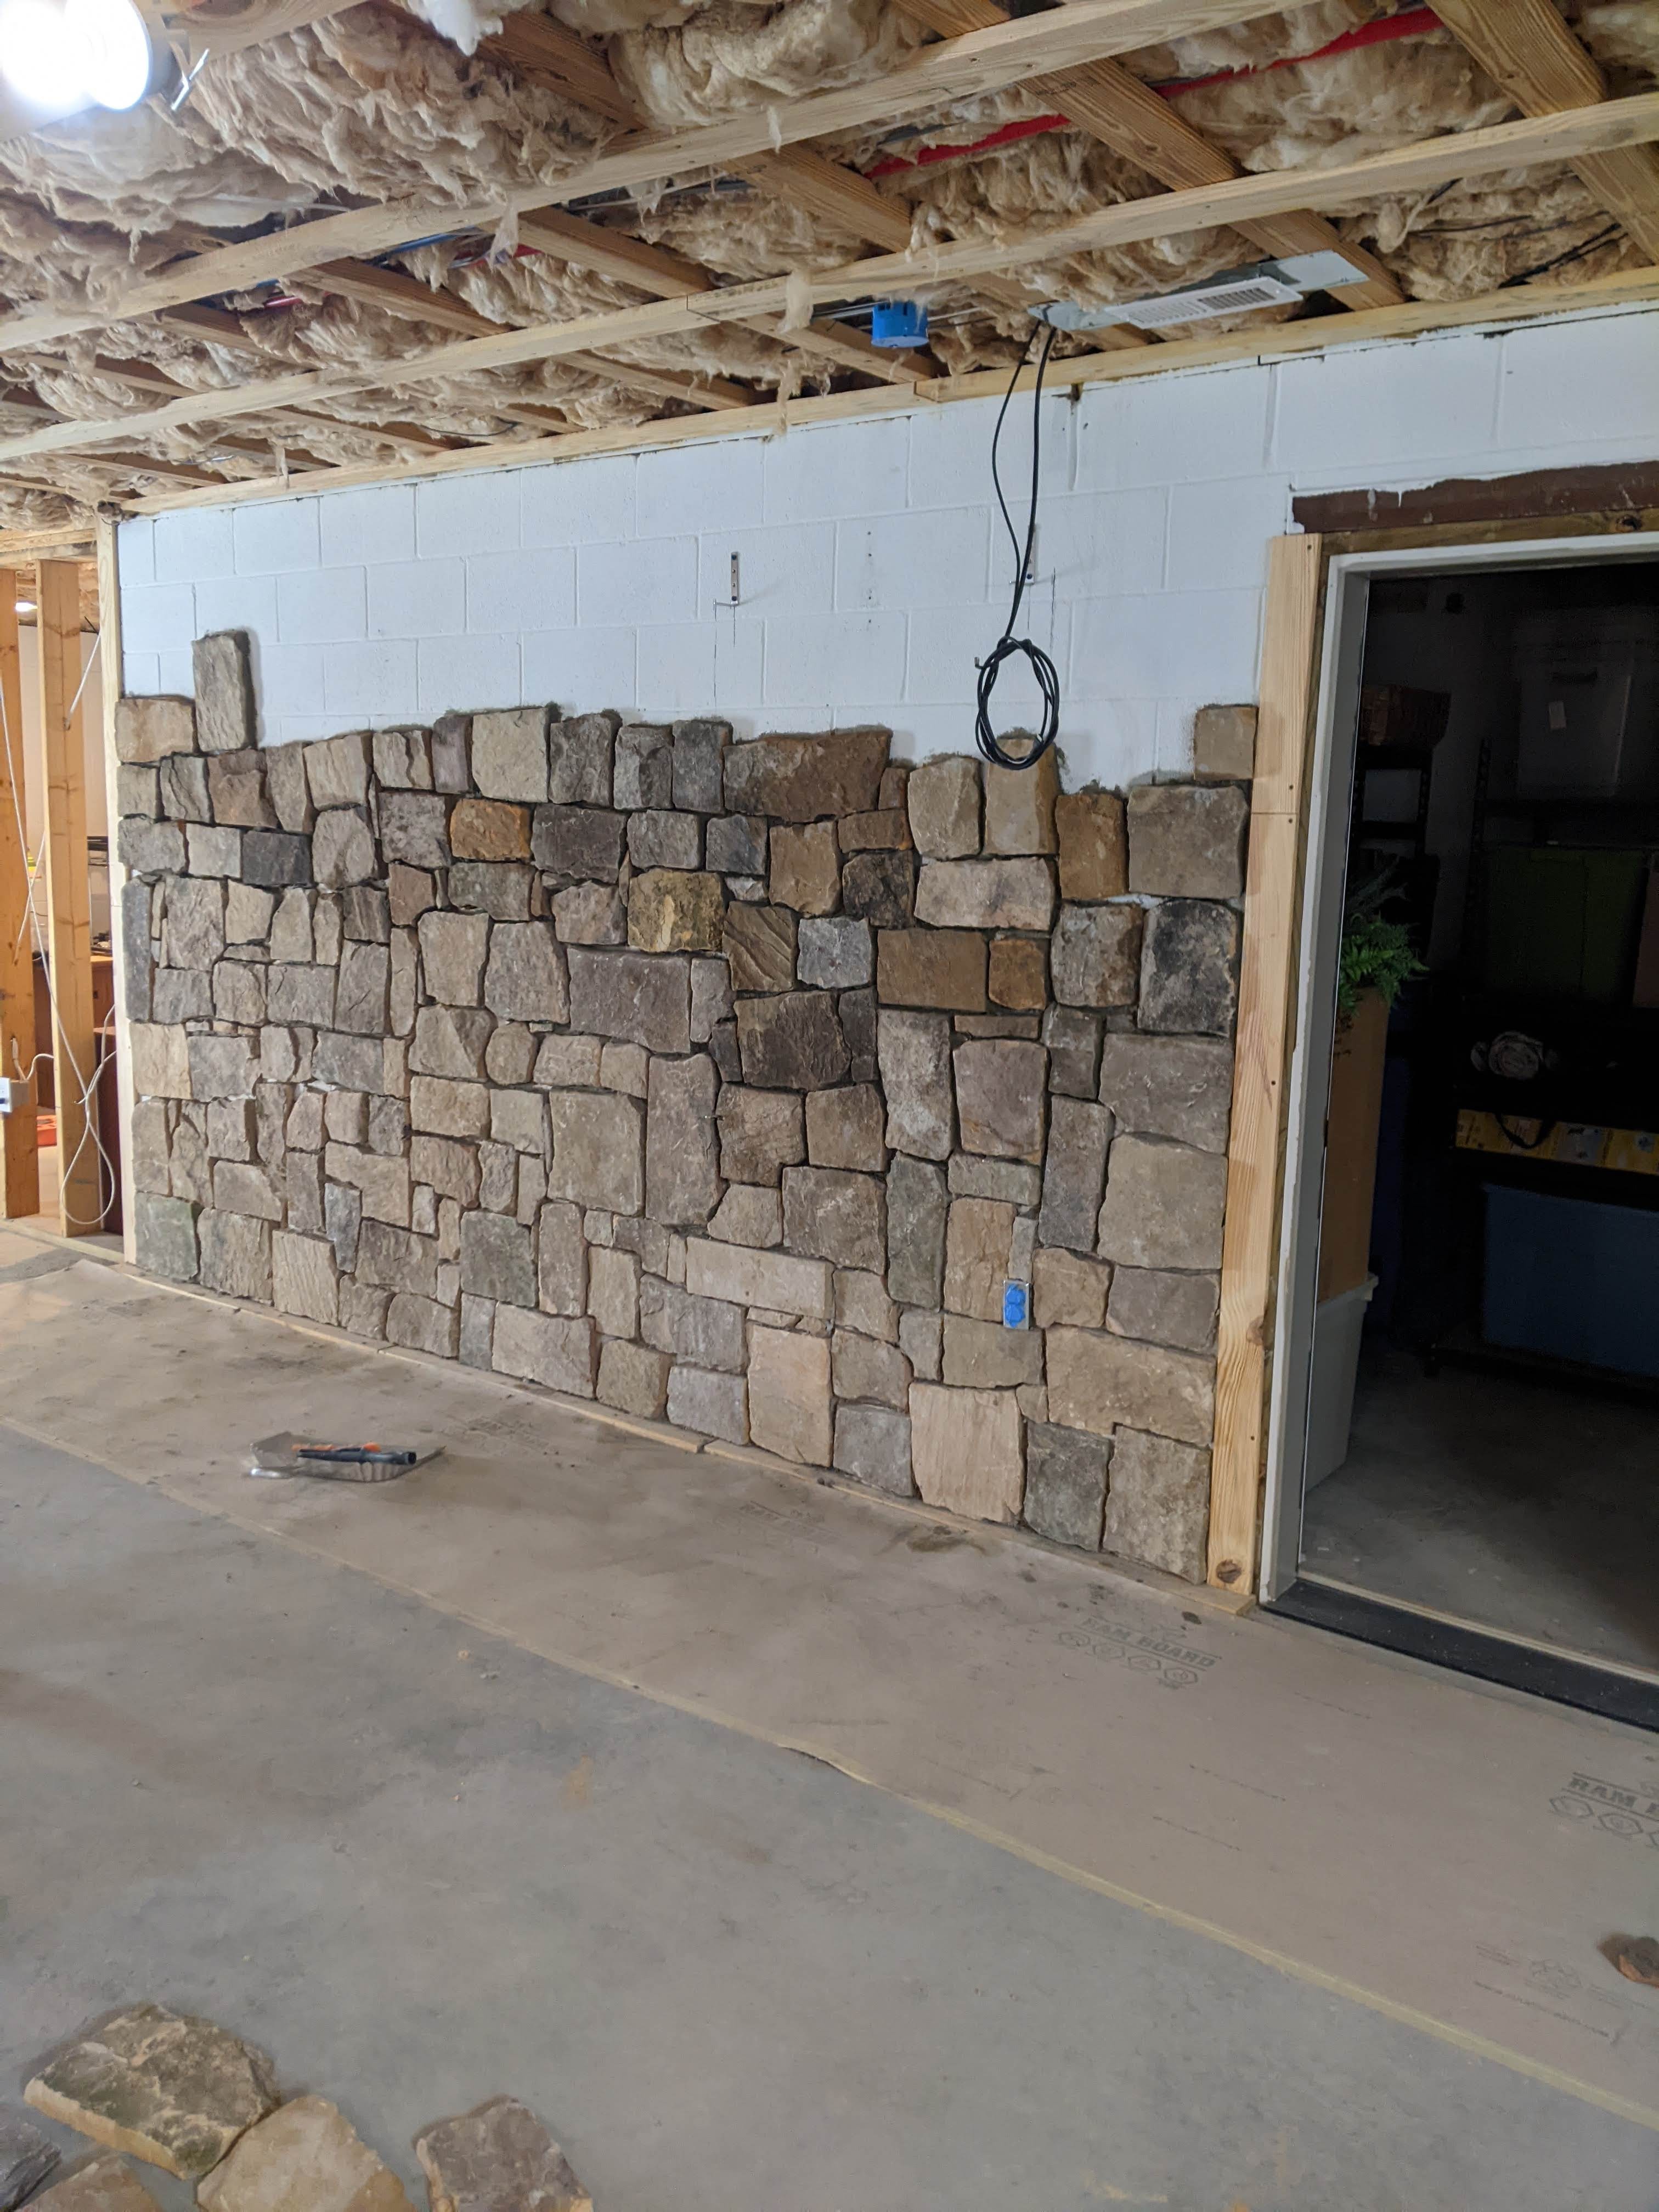
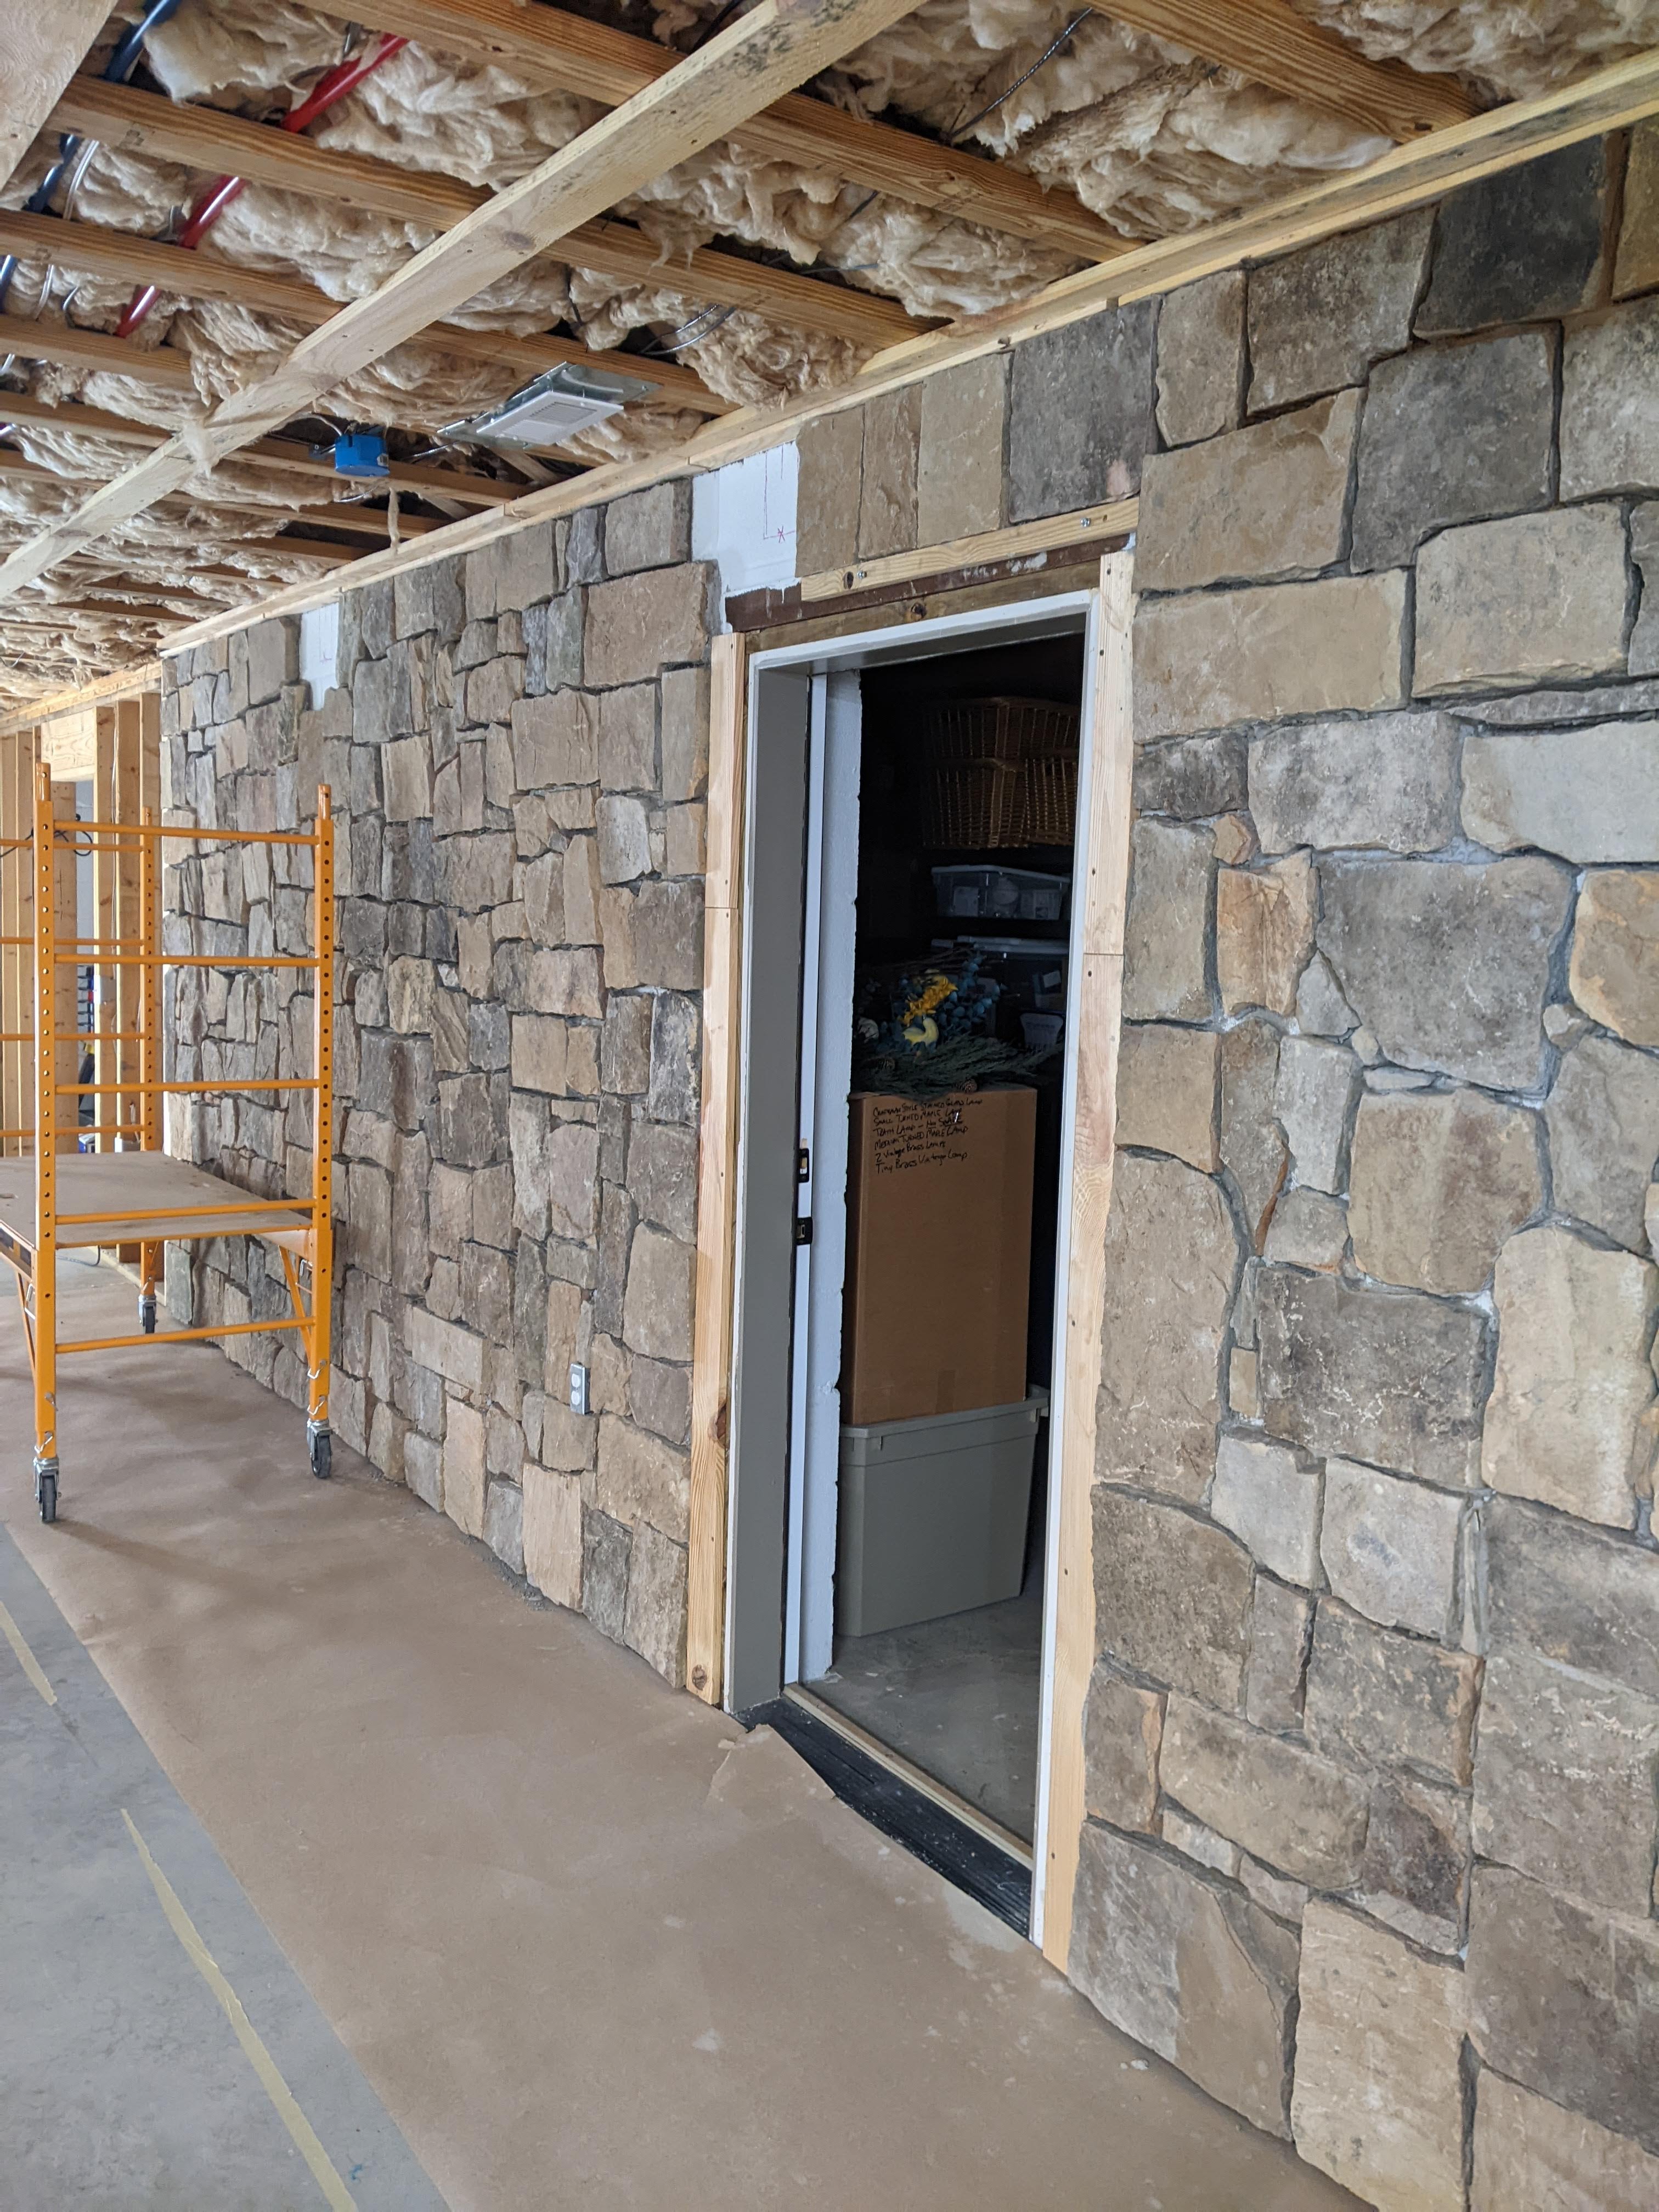
Here’s the grouting shortly after we put it up.
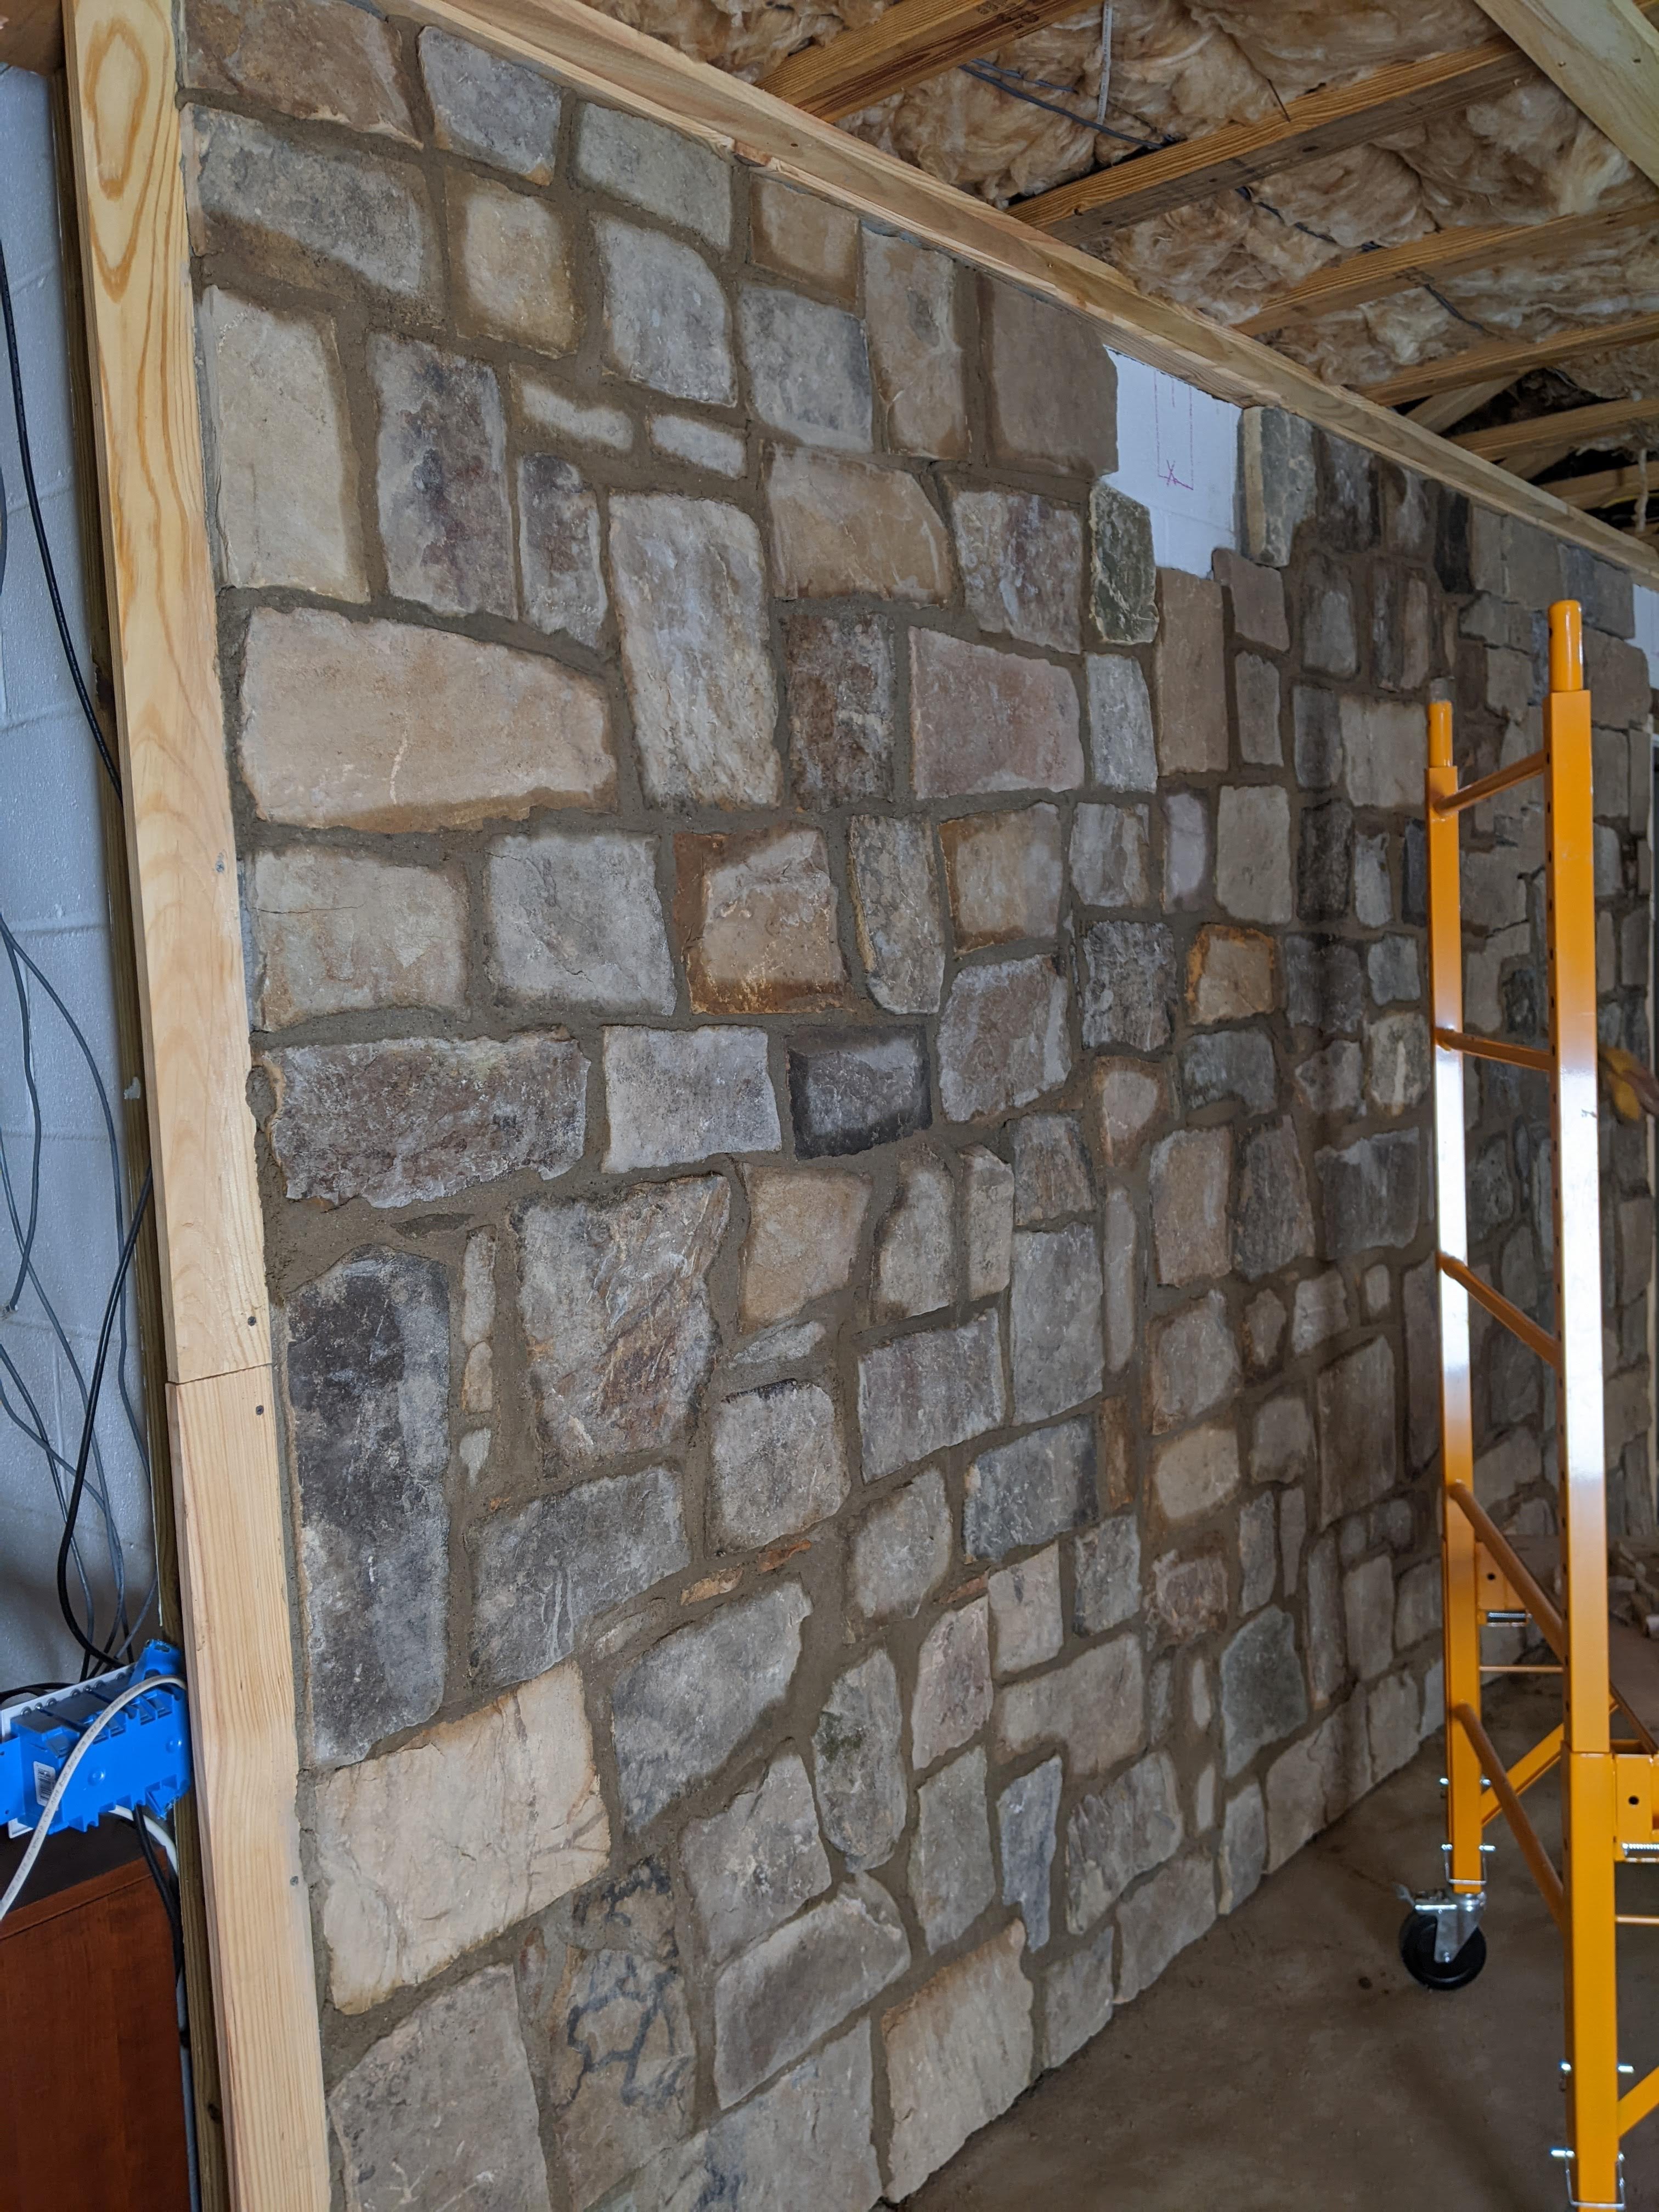
And here it is about 24 hours later.
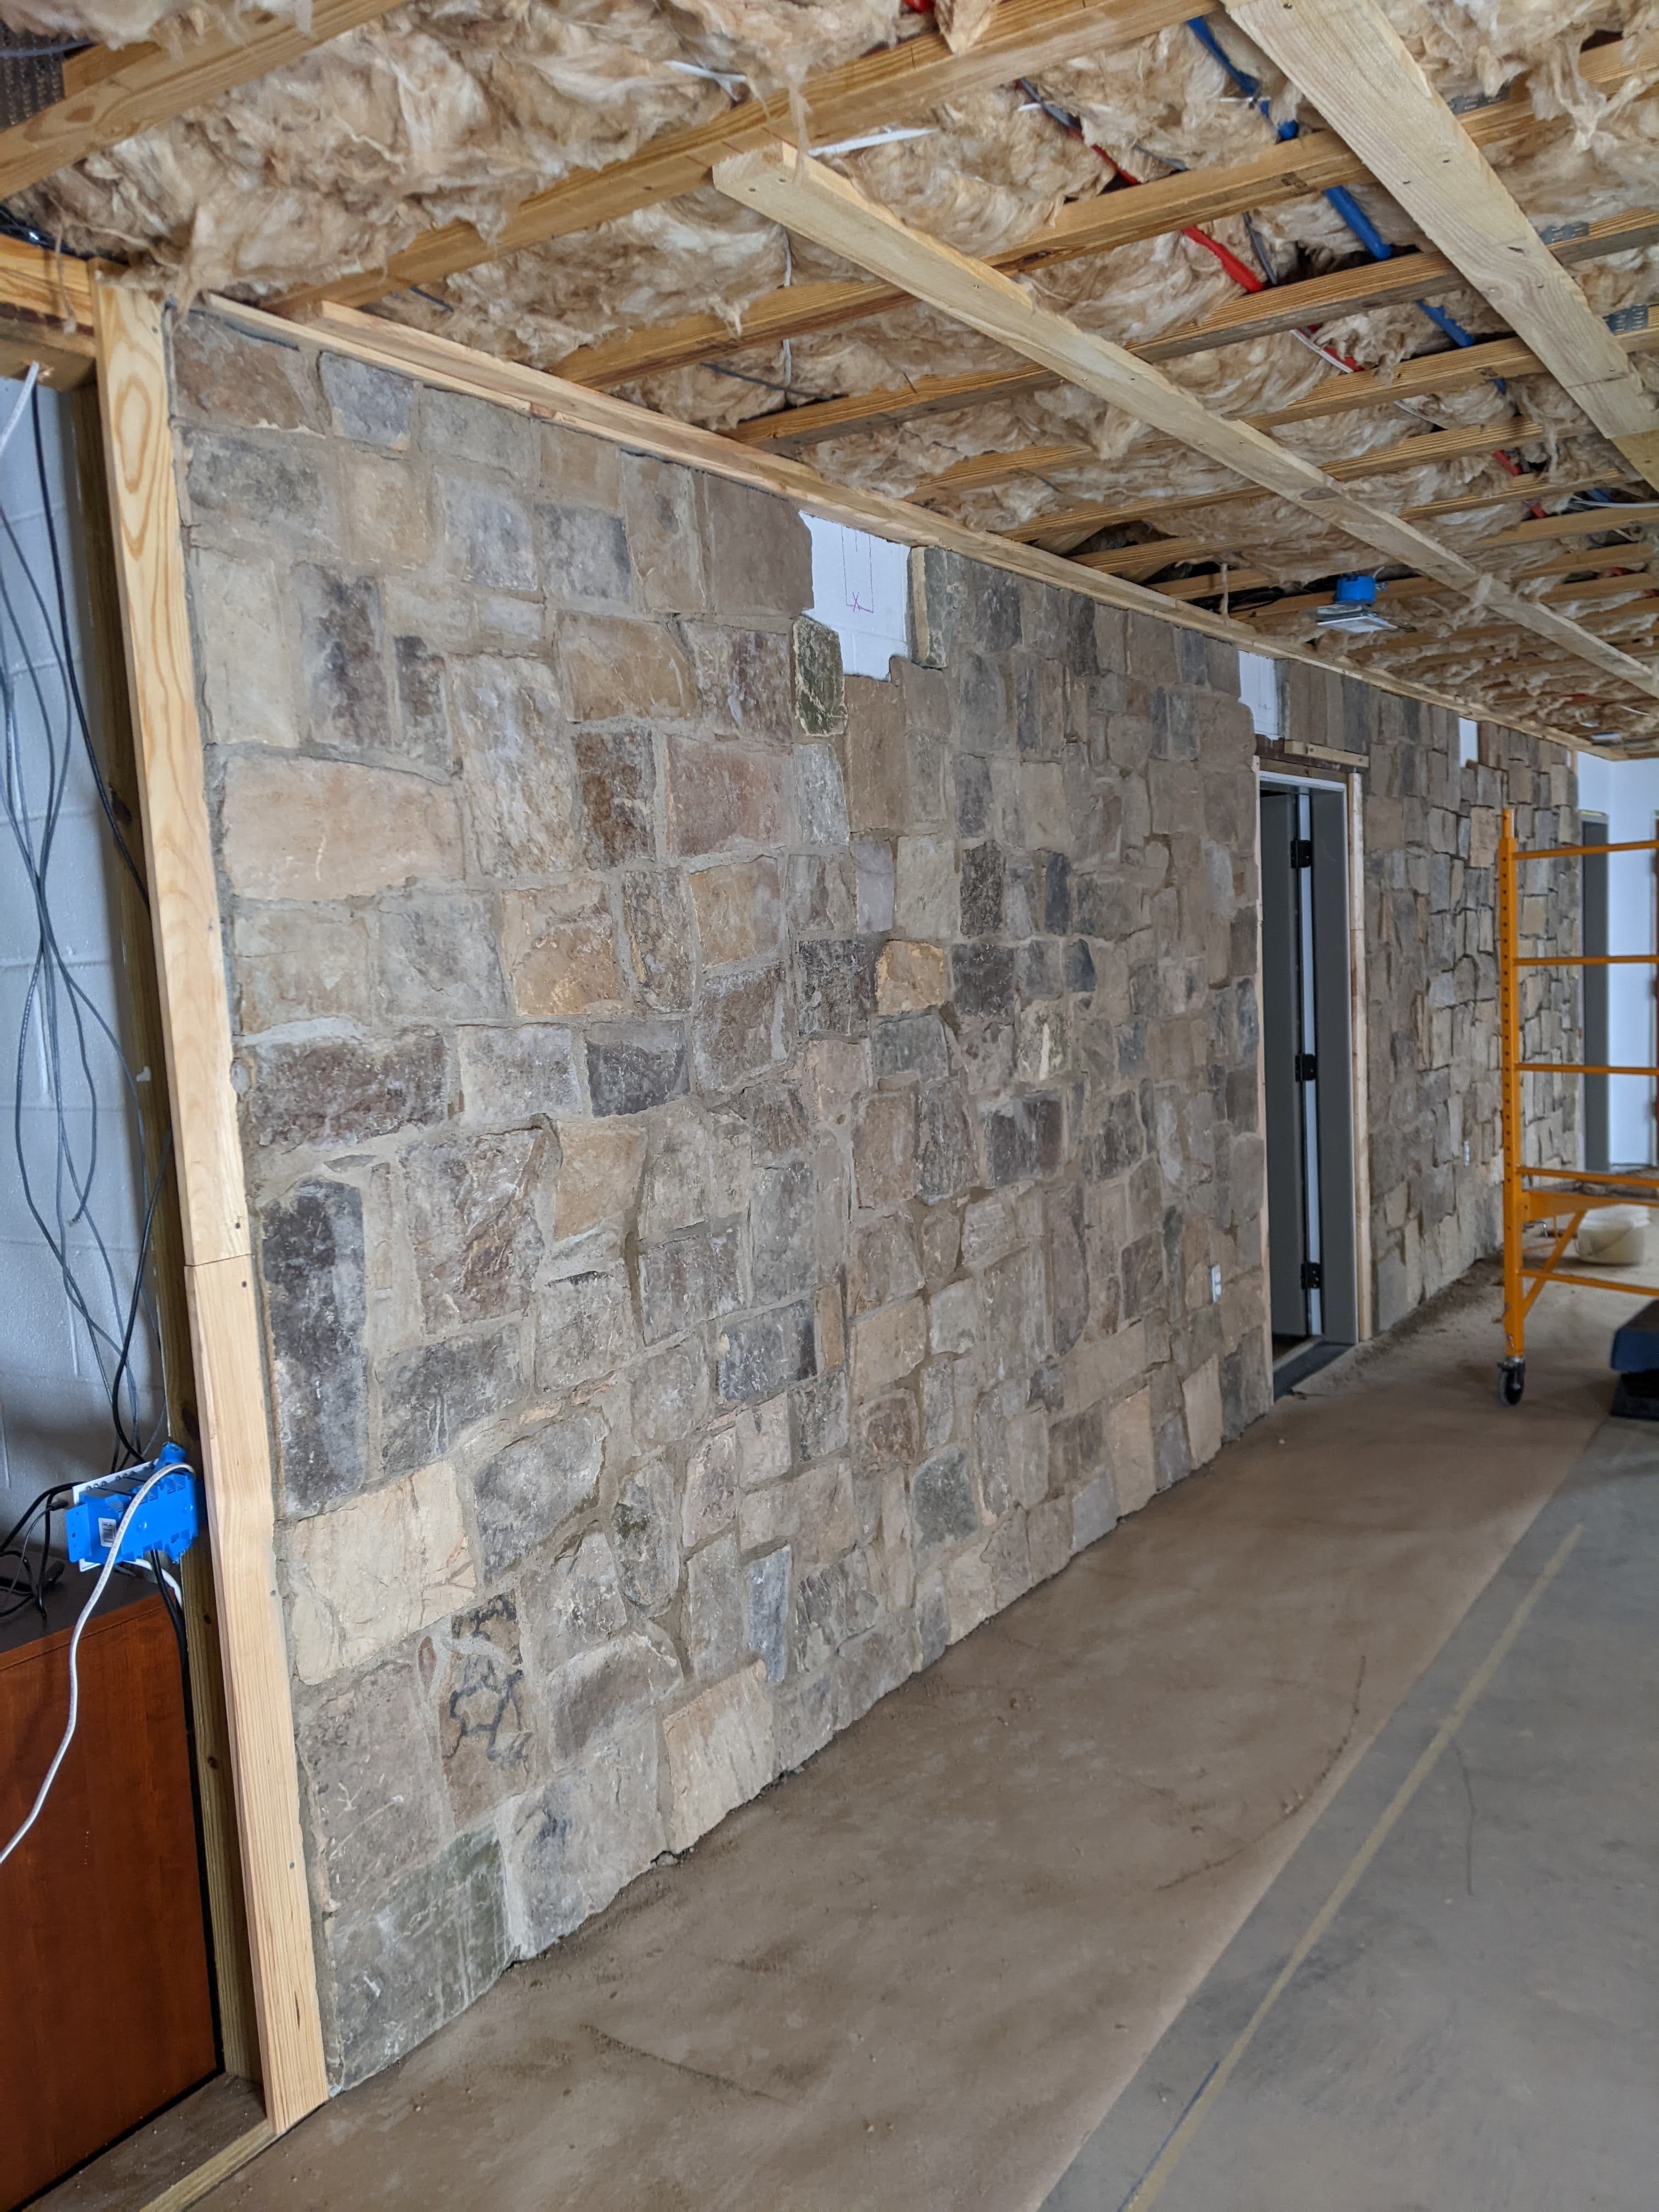
We have about 60% of the wall to the right of the door to do and we have some areas that need a little touch up, but we’re really happy with how it looks so far.
While this project was not difficult, it is physically taxing, especially because we are using real stone. And it is time consuming. To get to this point has probably taken us close to 120 man hours of work. This project has also been unbelievably messy and dusty, which isn’t so much of a problem for us because we’re working in an unfinished basement, but if you’re planning to reface a fireplace or something, you’ll want some way to contain the dust and really good floor protection.
Given what I have shared here, was it worth the work?
November 18, 2023:
If you’ve been following along, you know that we are going for and 1930’s English pub kind of vibe in the basement because of the space that we’re working with. One of the things that we decided to do was to add oak beams to the ceiling to add a nod to that look.
Earlier this summer, my husband worked with a friend who has a portable band saw mill to cut oak beams (they weren’t lumber grade) into roughly 4″ x 6″ beams–some needed to be about 13′ long and we had a couple that only needed to be 9′ long. However, a 4″ x 6″ x 13′ long, or even 9′ long, is really damn heavy. The logs had been laying in his barn for a little while, but they were still pretty green, so my husband carefully stacked and stickered (putting 1″ x 1″ boards (stickers) between the layers of beams) in the upstairs garage.
Well, that is the side of the garage that the jet skis are stored in over the off season and as we approached the end of the river season, my husband started working on the beams. First, he had to get the face that would be mounted to the joist flat so that it would mate up properly. He did the first couple with a long hand plane–and with oak that has a lot of knots and imperfections, that was SLOW going. He upgraded to a Bosch hand held planer and that sped things up by like 10 times. He did the planing, and I did some of the sanding, and over the course of a few weekends, we (he) got them all done. (But we did end up having the jet skis where I normally park for a while.)
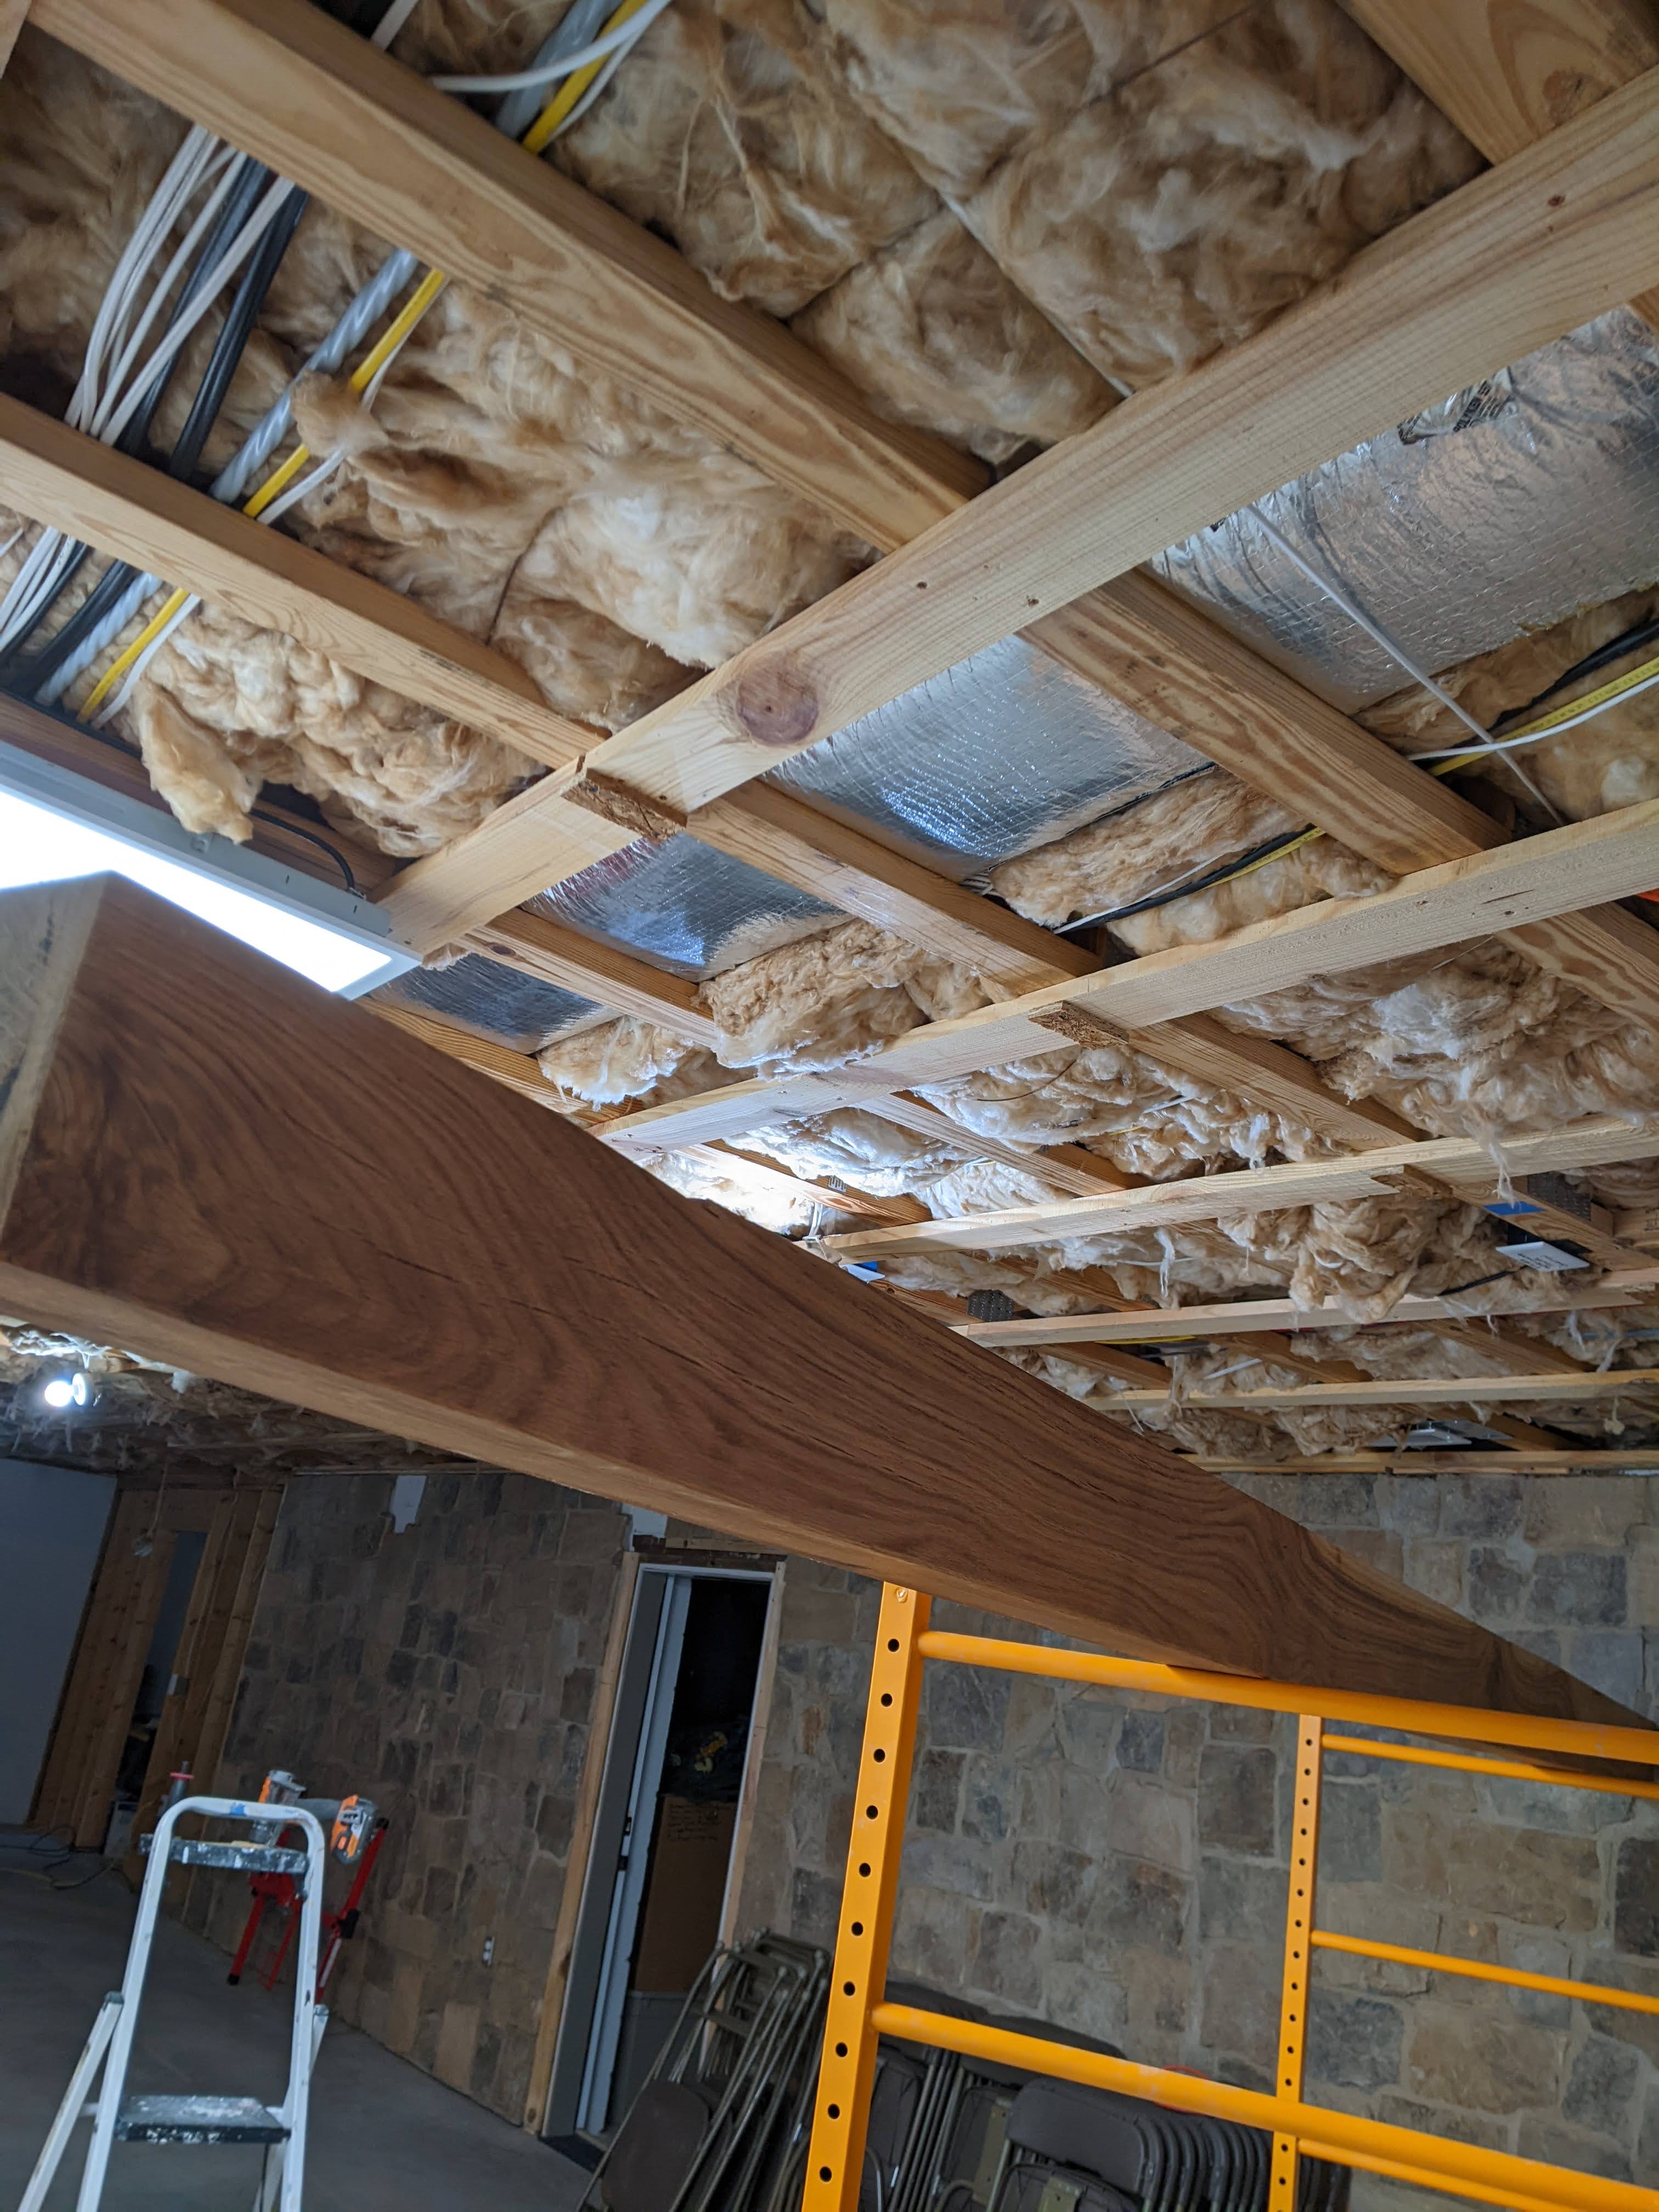
He put several coats of Tung Oil finish on them and then hoisted them into place. This was a tricky operation because they were so hard to handle and so heavy (safety was a big concern).
He had to cut the dry wall where it exists to fit the ends of the beams in.
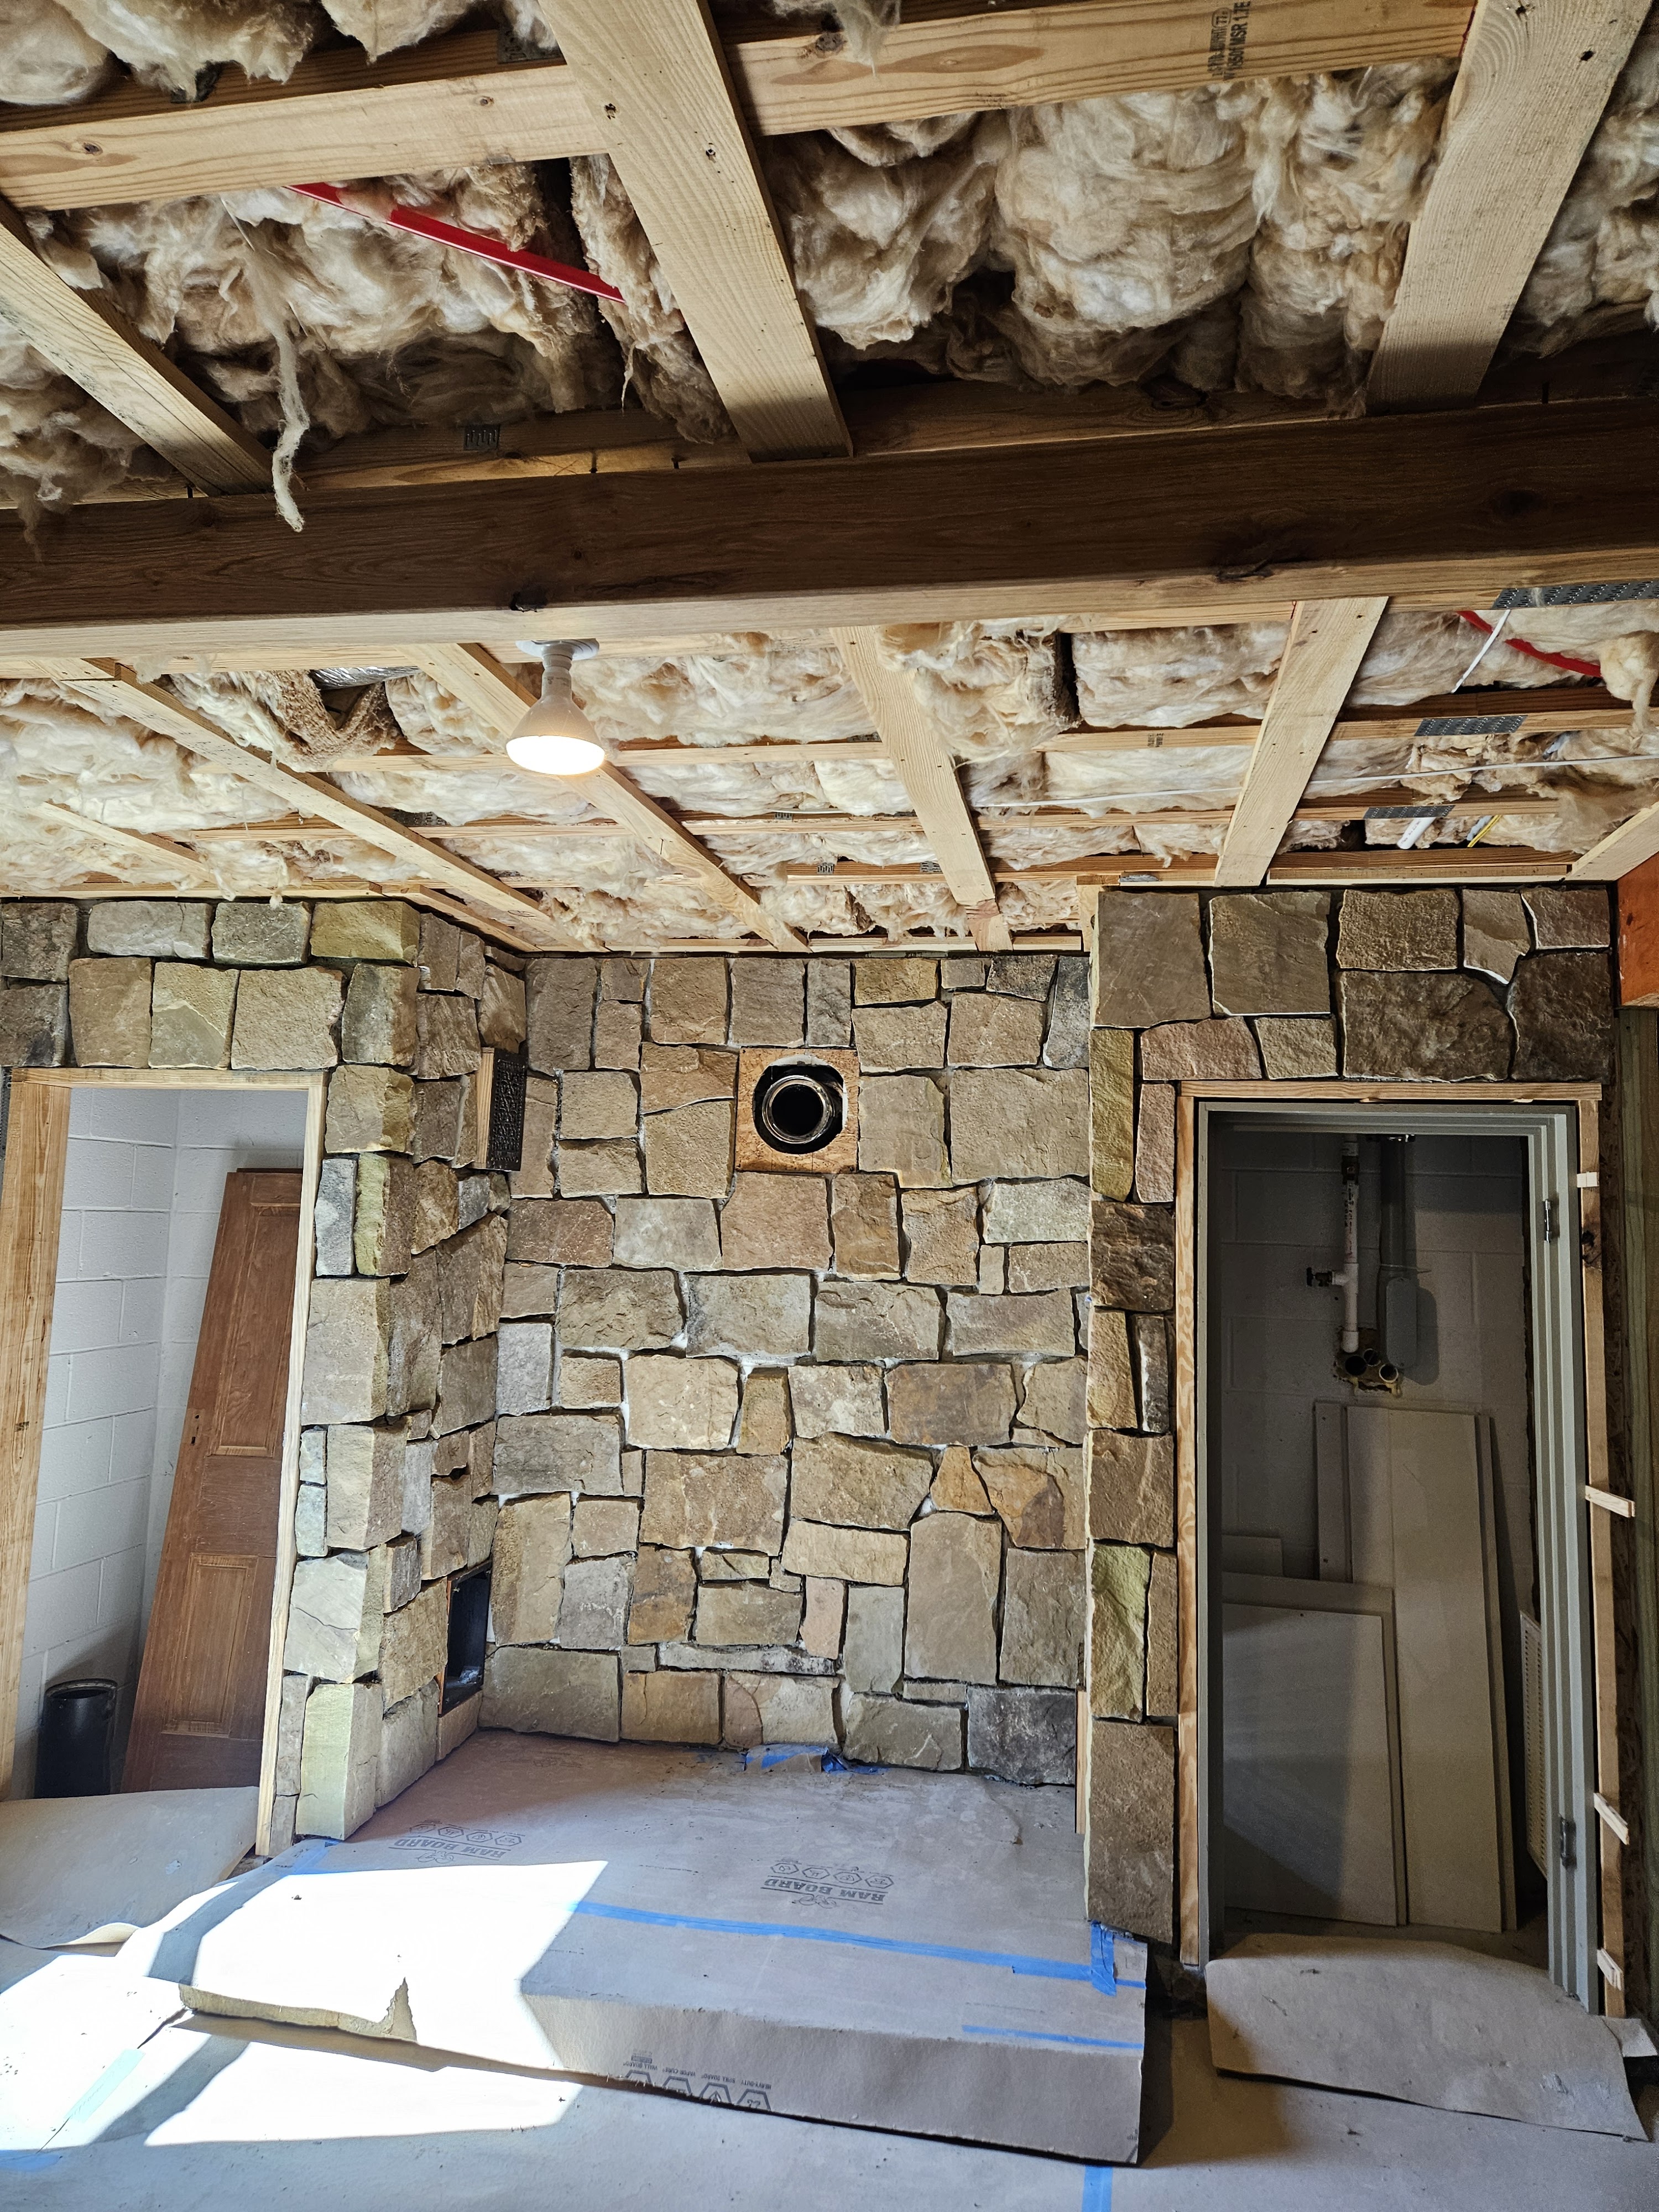
Now they are all in place and they look SO much better than I ever dreamed they would and it has helped us see what the finished basement will look and feel like. We couldn’t be happier with how they turned out–even with ALL the work.
I’m really proud of him. This was a HUGE job and he did some really beautiful work.
June 26, 2024:
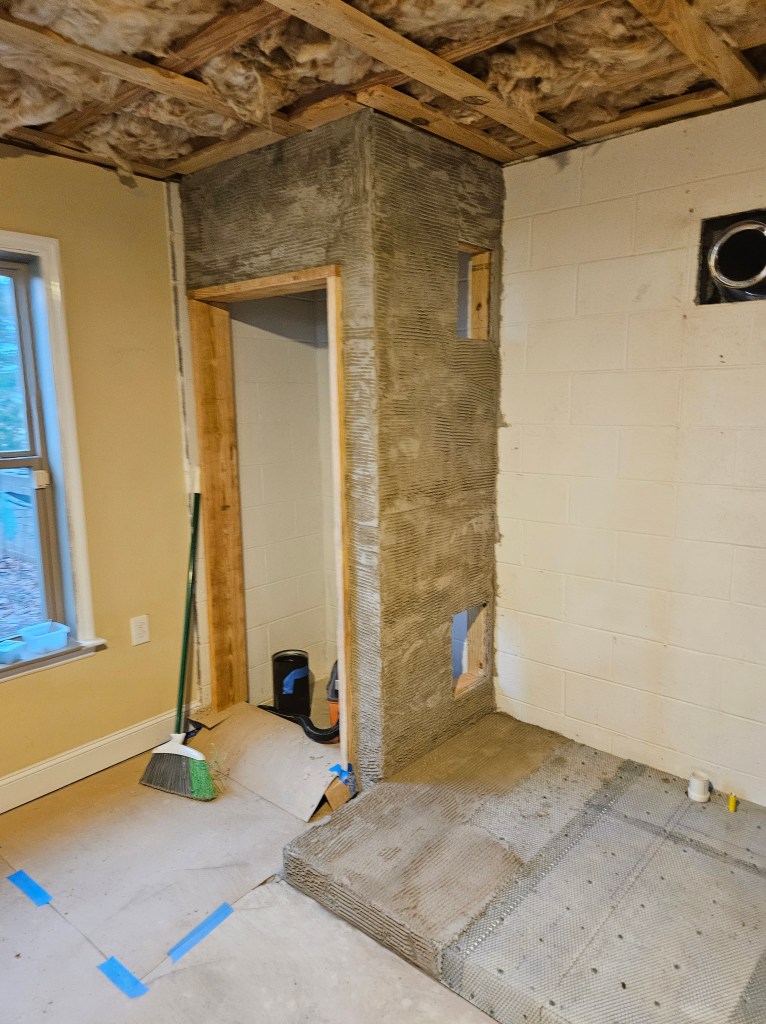
We kind of overdid it last summer with the stone veneer on the big cinder block wall and we’ve struggled to find the motivation to finish the stone work. However, my husband has gotten the closets clad in plywood and cement board and applied the metal lath and the mortar scratch coat. In addition to that, he built a platform. Here’s the progression:
Then my husband started applying the scratch coat.


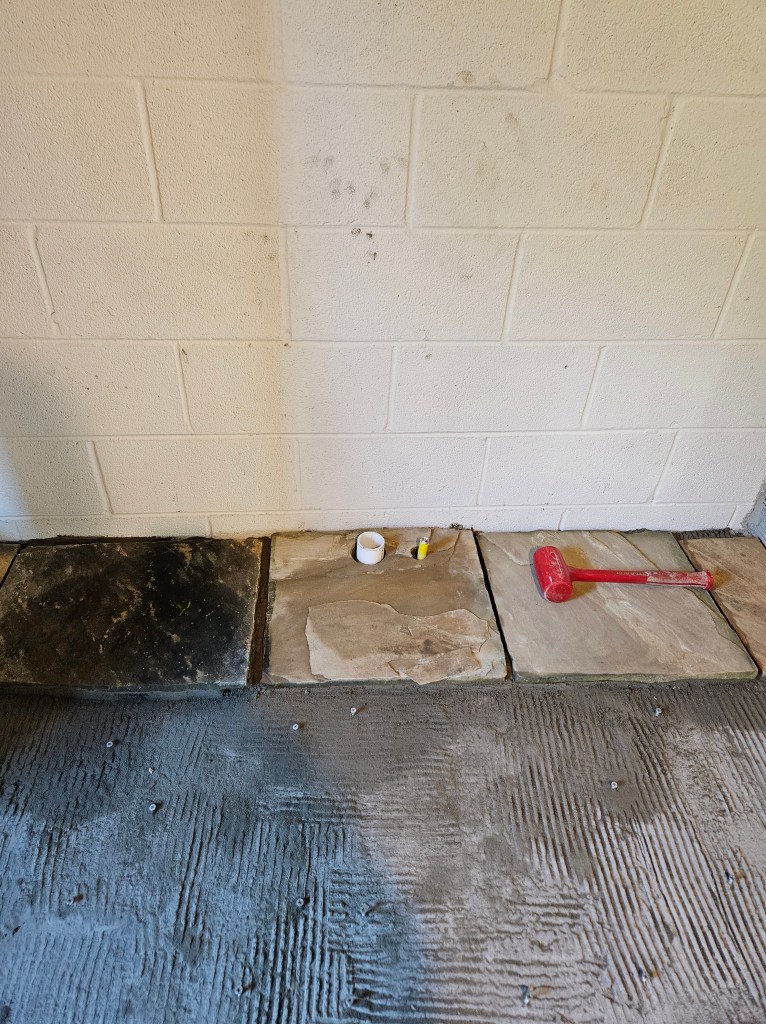
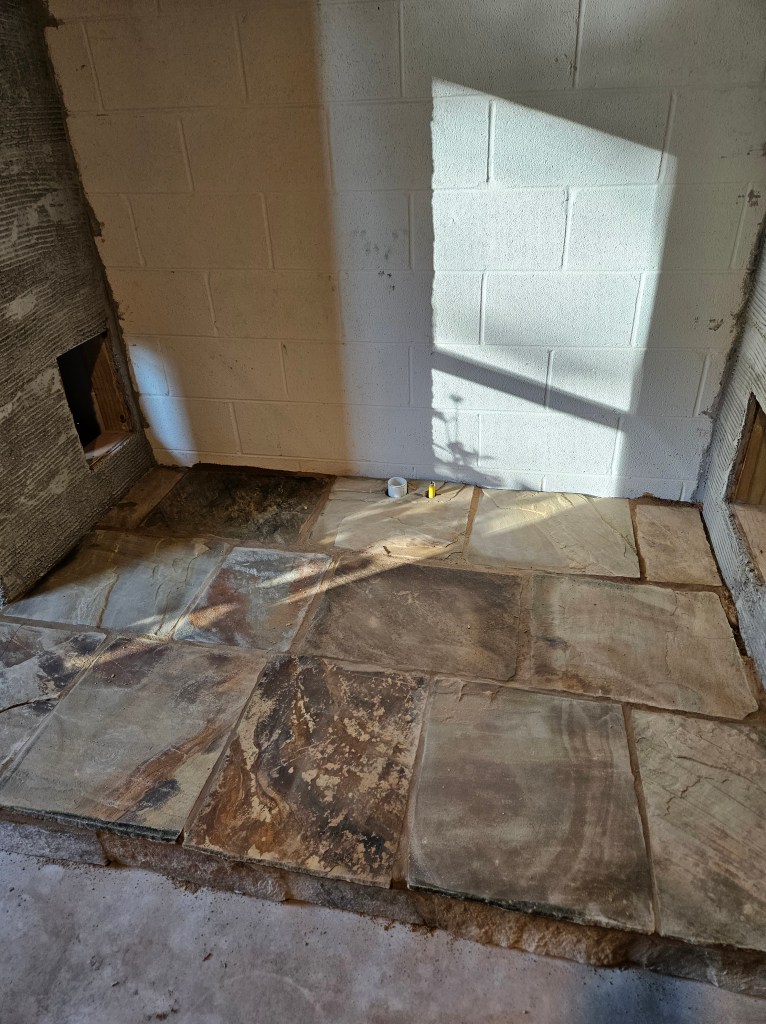
I found 14 pieces of thin flagstone at a stone yard in Cleveland, TN which was just enough to cover the floor of the platform (and it saved us from having to buy an entire pallet of stone) with one extra piece in case something went wrong. My husband had to cut everything to size and drill holes for the airline and the gas line. Then we had to come up with a way to get all the stones as level as possible so that the stove would sit flat.
We came up with driving 3 screws per stone into the platform and then using a laser level to determine whether or not the finished height of the stone was level and adjusting the screws as necessary.
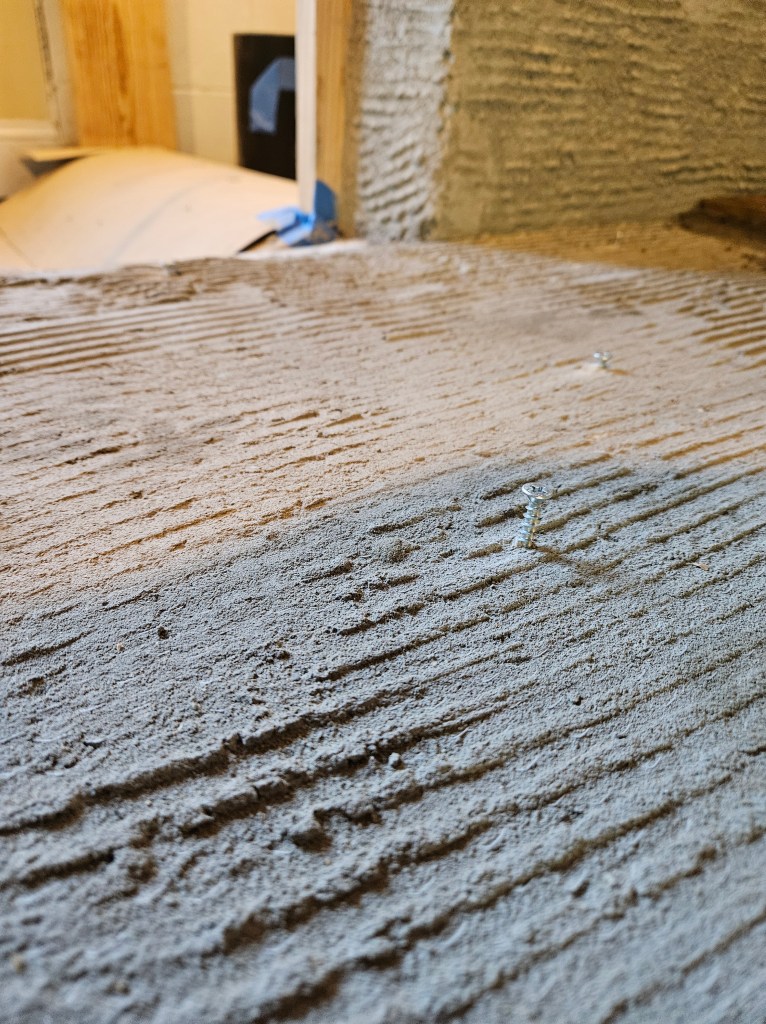
It worked surprisingly well. We got one row installed before we had to call it a night. The first row was frustrating because we didn’t have the mortar runny enough so my husband couldn’t press it out with the stones because it was like packed wet sand.
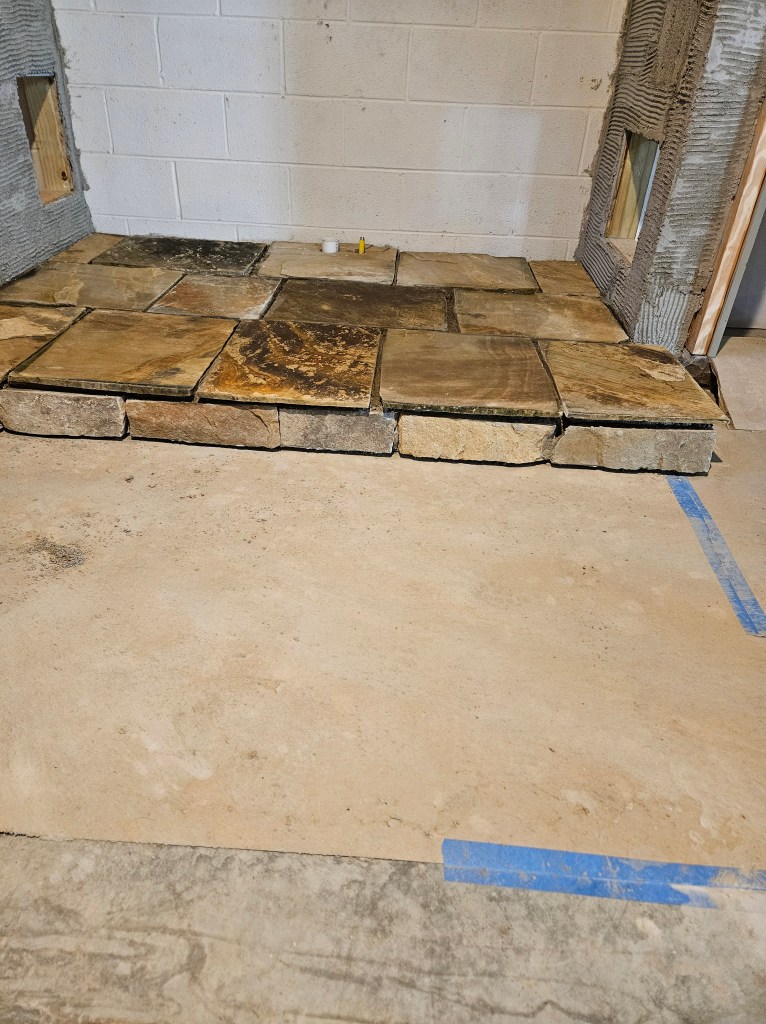
The next morning, we mixed the mortar to a really runny consistency and that worked so much better and we got the rest of the stone installed in about 1 1/2 hours. Here’s what it looked like after that step:
The next step was to grout the floor with colored mortar that is mixed to a really runny consistency and then we brushed the joints so that they’re even with the stones, just like we did with the walls. (It’s a good thing that I do this blog because otherwise we might not have remembered the ratio of colorant to water to get the grout the right color to match the wall–and we still have a few stones to put up over there around where the beams are.)
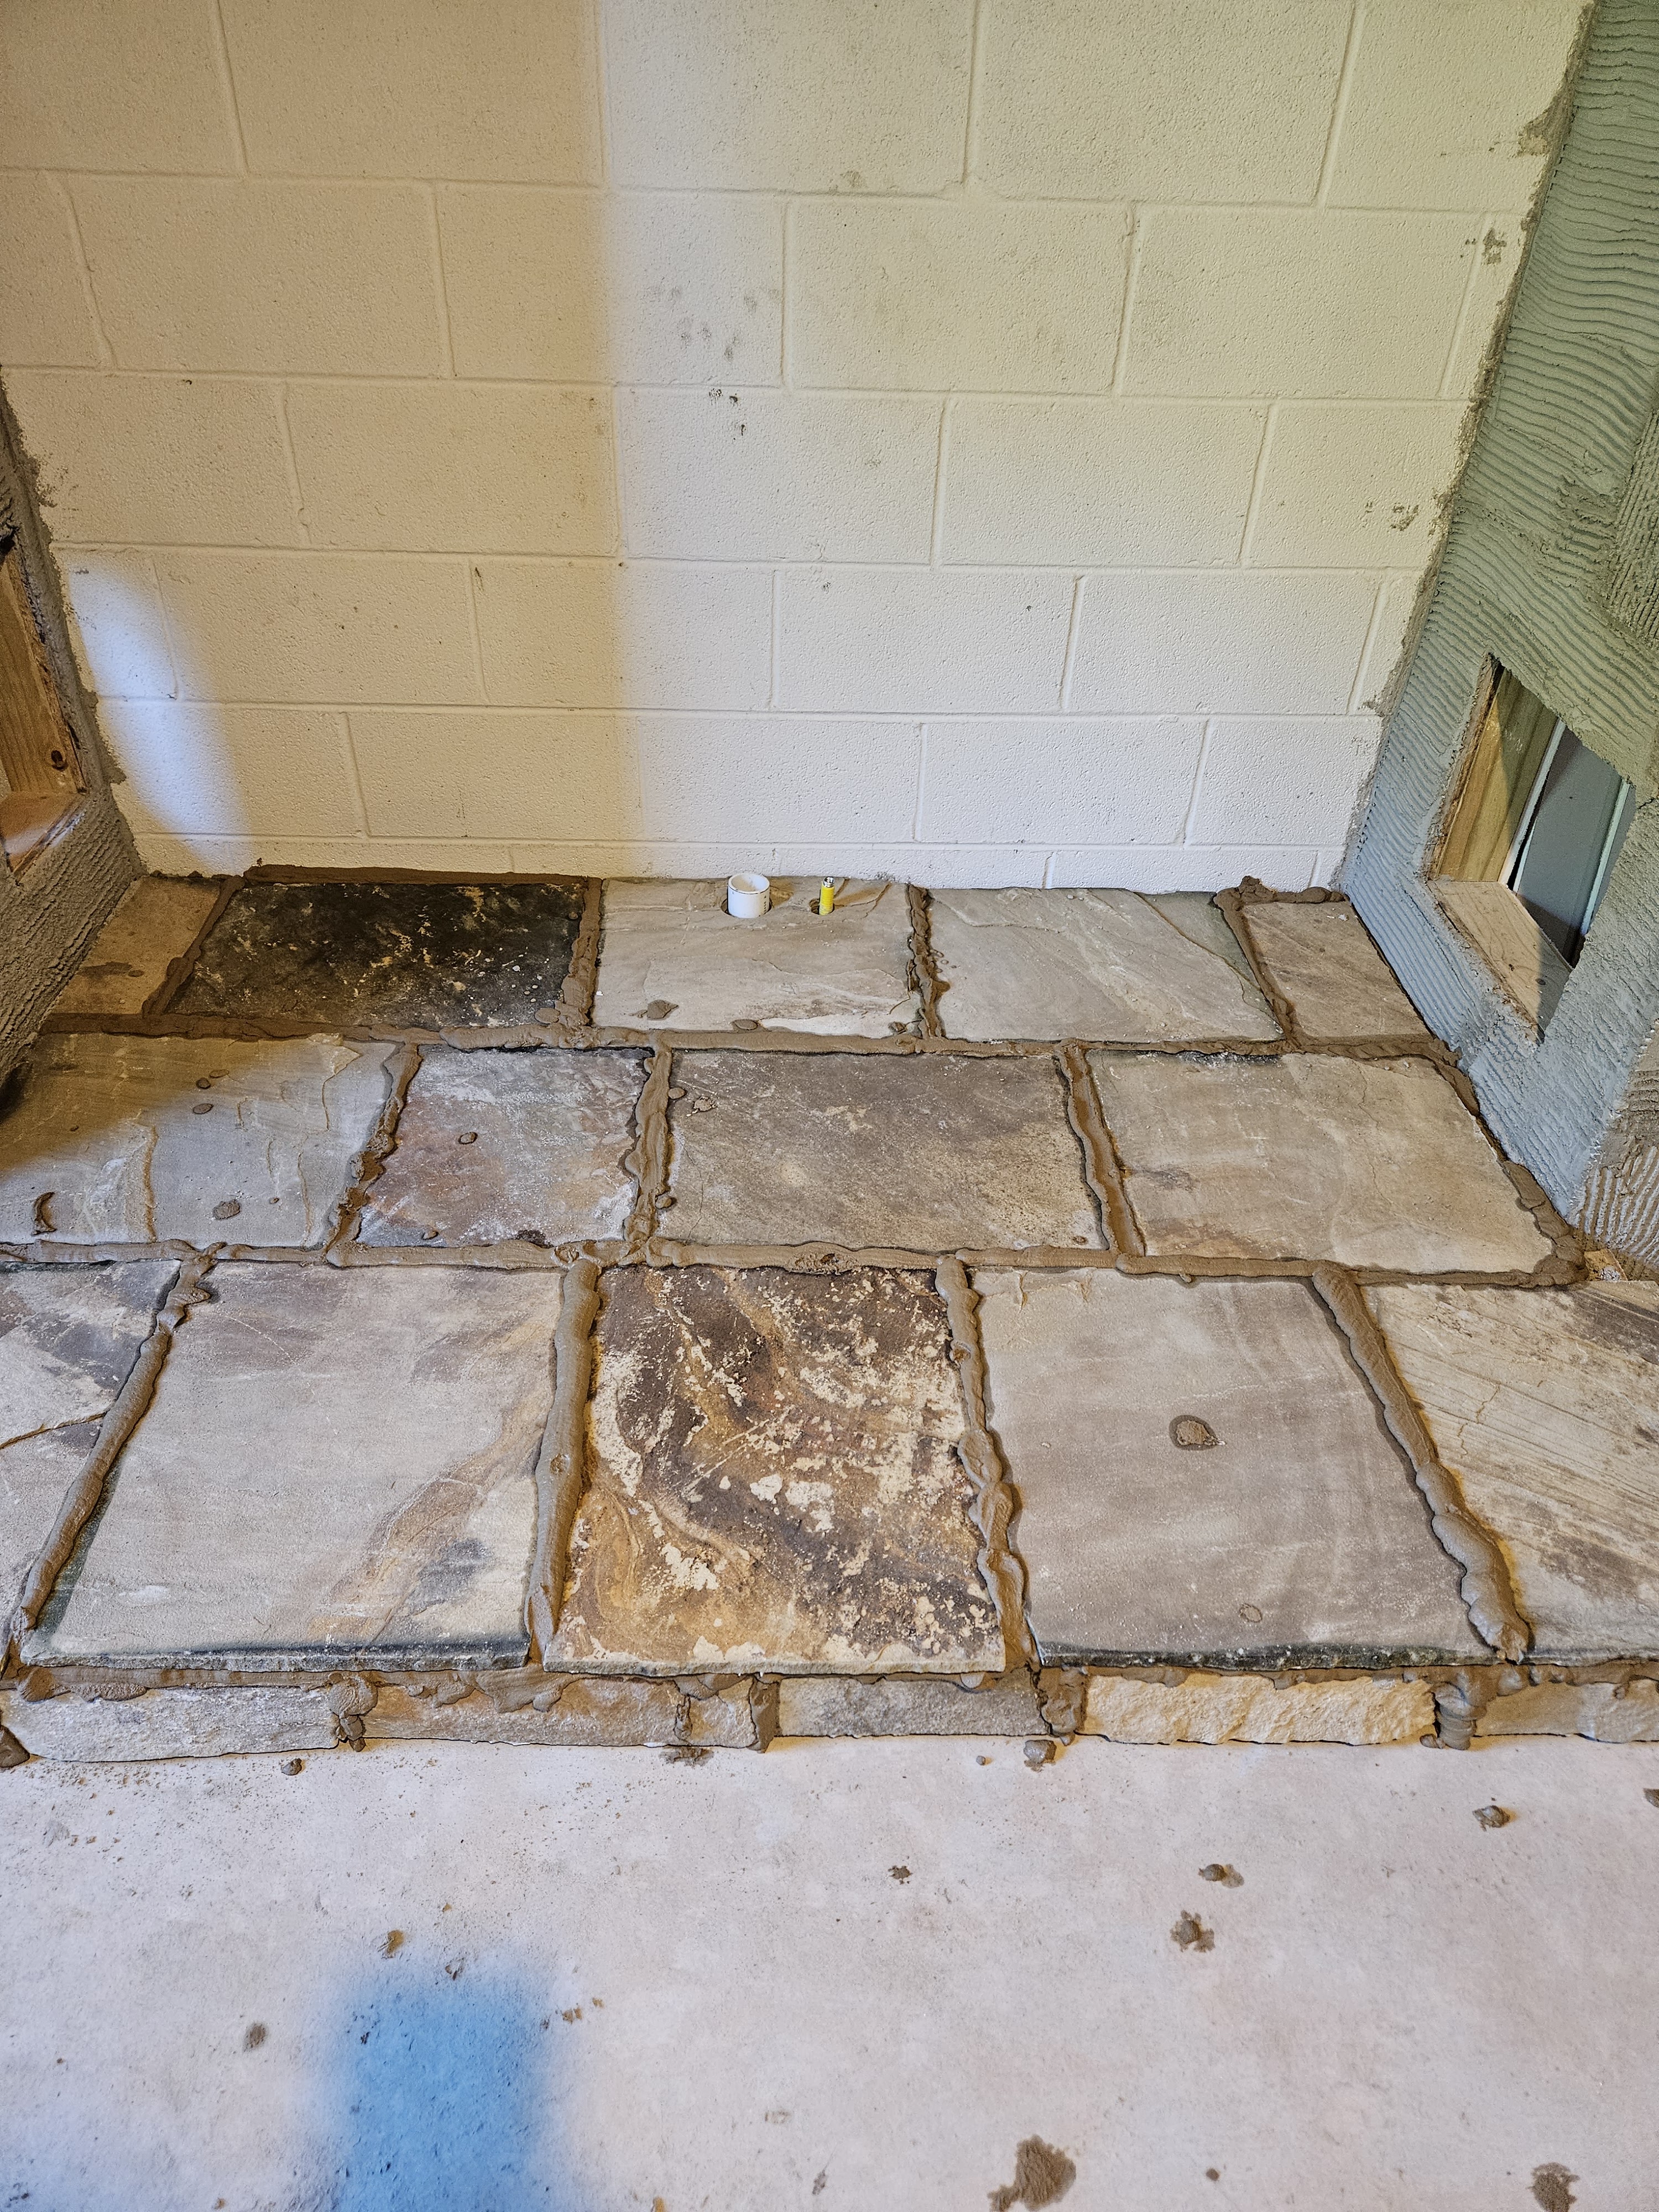
And then here it is after we removed the excess:
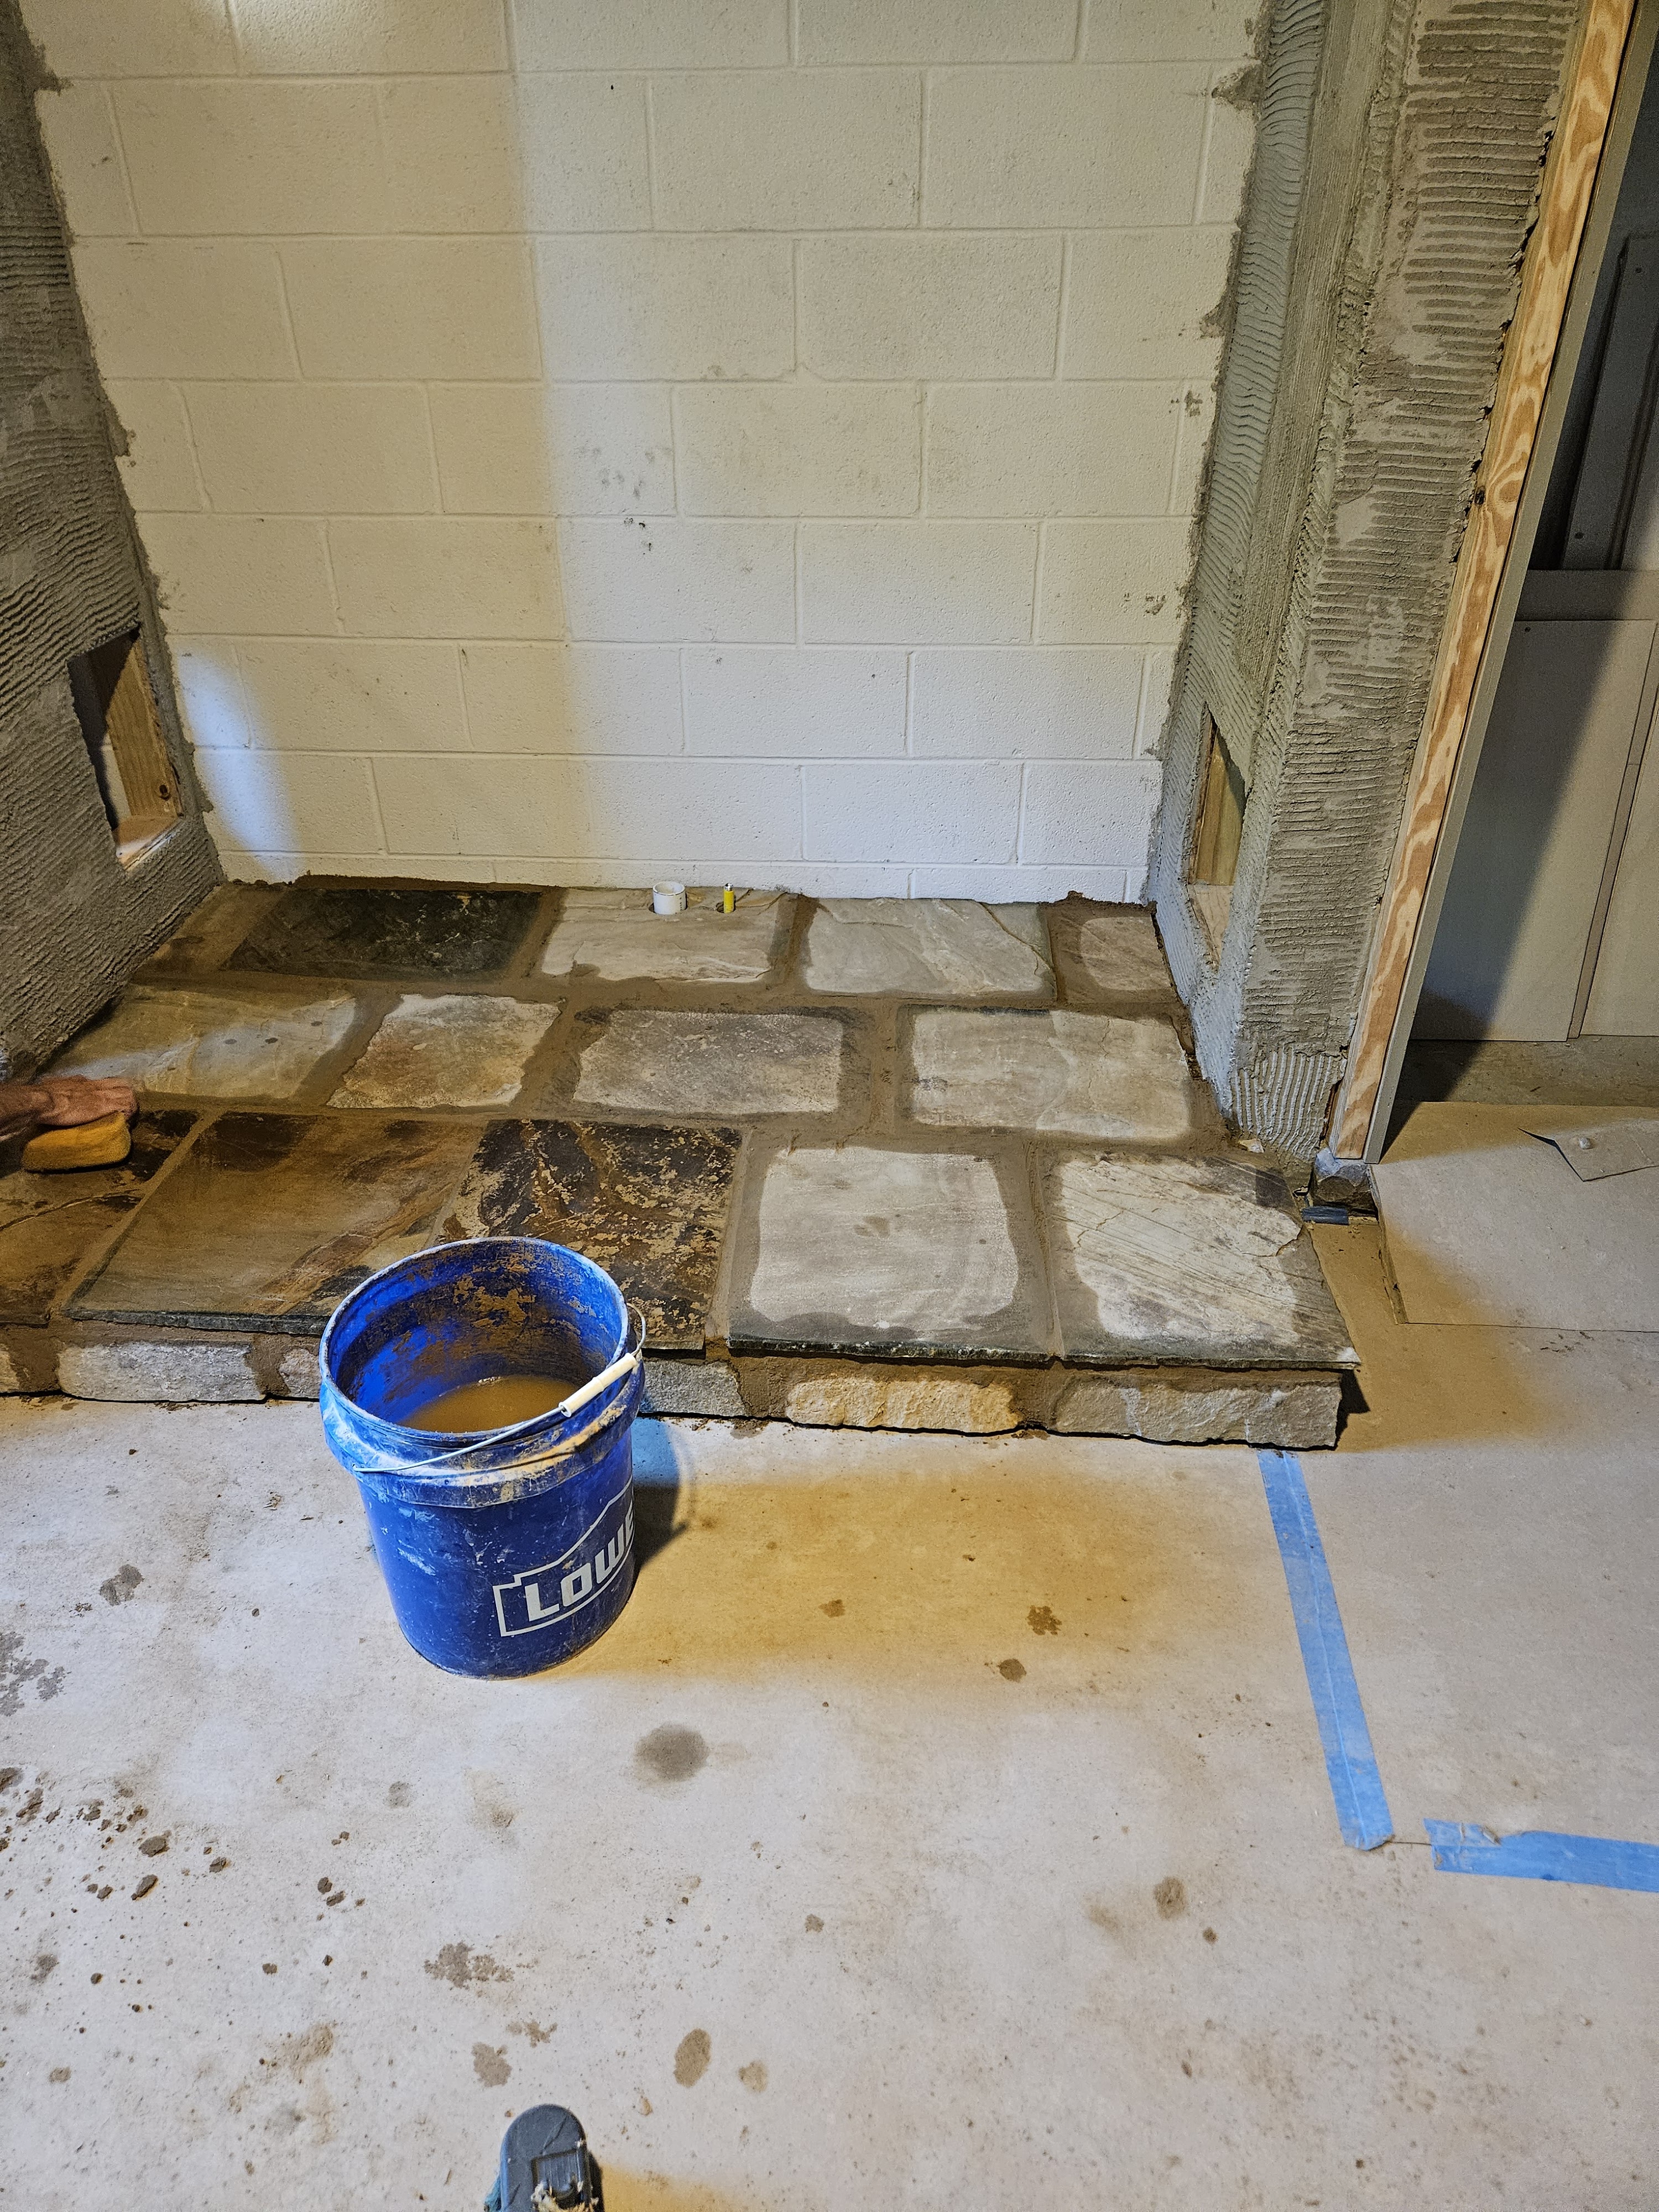
And here it is the next morning:

The grout wasn’t completely dry so the finished color will be a little lighter than it is in these pictures. We mixed up two gallons of the tinted water that we’ll use for the walls so that it all matches.
Our next steps are:
- Put up some boards where the flange for the wood stove pipe goes through the wall so that it will be inset into the stone instead of sitting on top of the stone–safer and definitely will look better.
- Figure out where the fireplace tools will go and put in some extra long screws and put straws over them so that we can put the holder up later and screw into the plywood.
- Then we’ll start putting stone on the closets. We’ll begin the process with the exterior corners that we bought pre cut from the stone yard. This will give the appearance that the wall is made up of full stones rather than a veneer.
- Once those are up, we’ll start with the rest of the stone veneer on the rest of the closets and back wall–we’ll need to put down ram board over the platform to keep it clean and free from random bits of mortar.
We hope to get a LOT done over the weekends that bookend the holiday. The floor went better/faster than expected so we have a little momentum going into the larger piece of this project.
Wish us luck!
July 11, 2024:
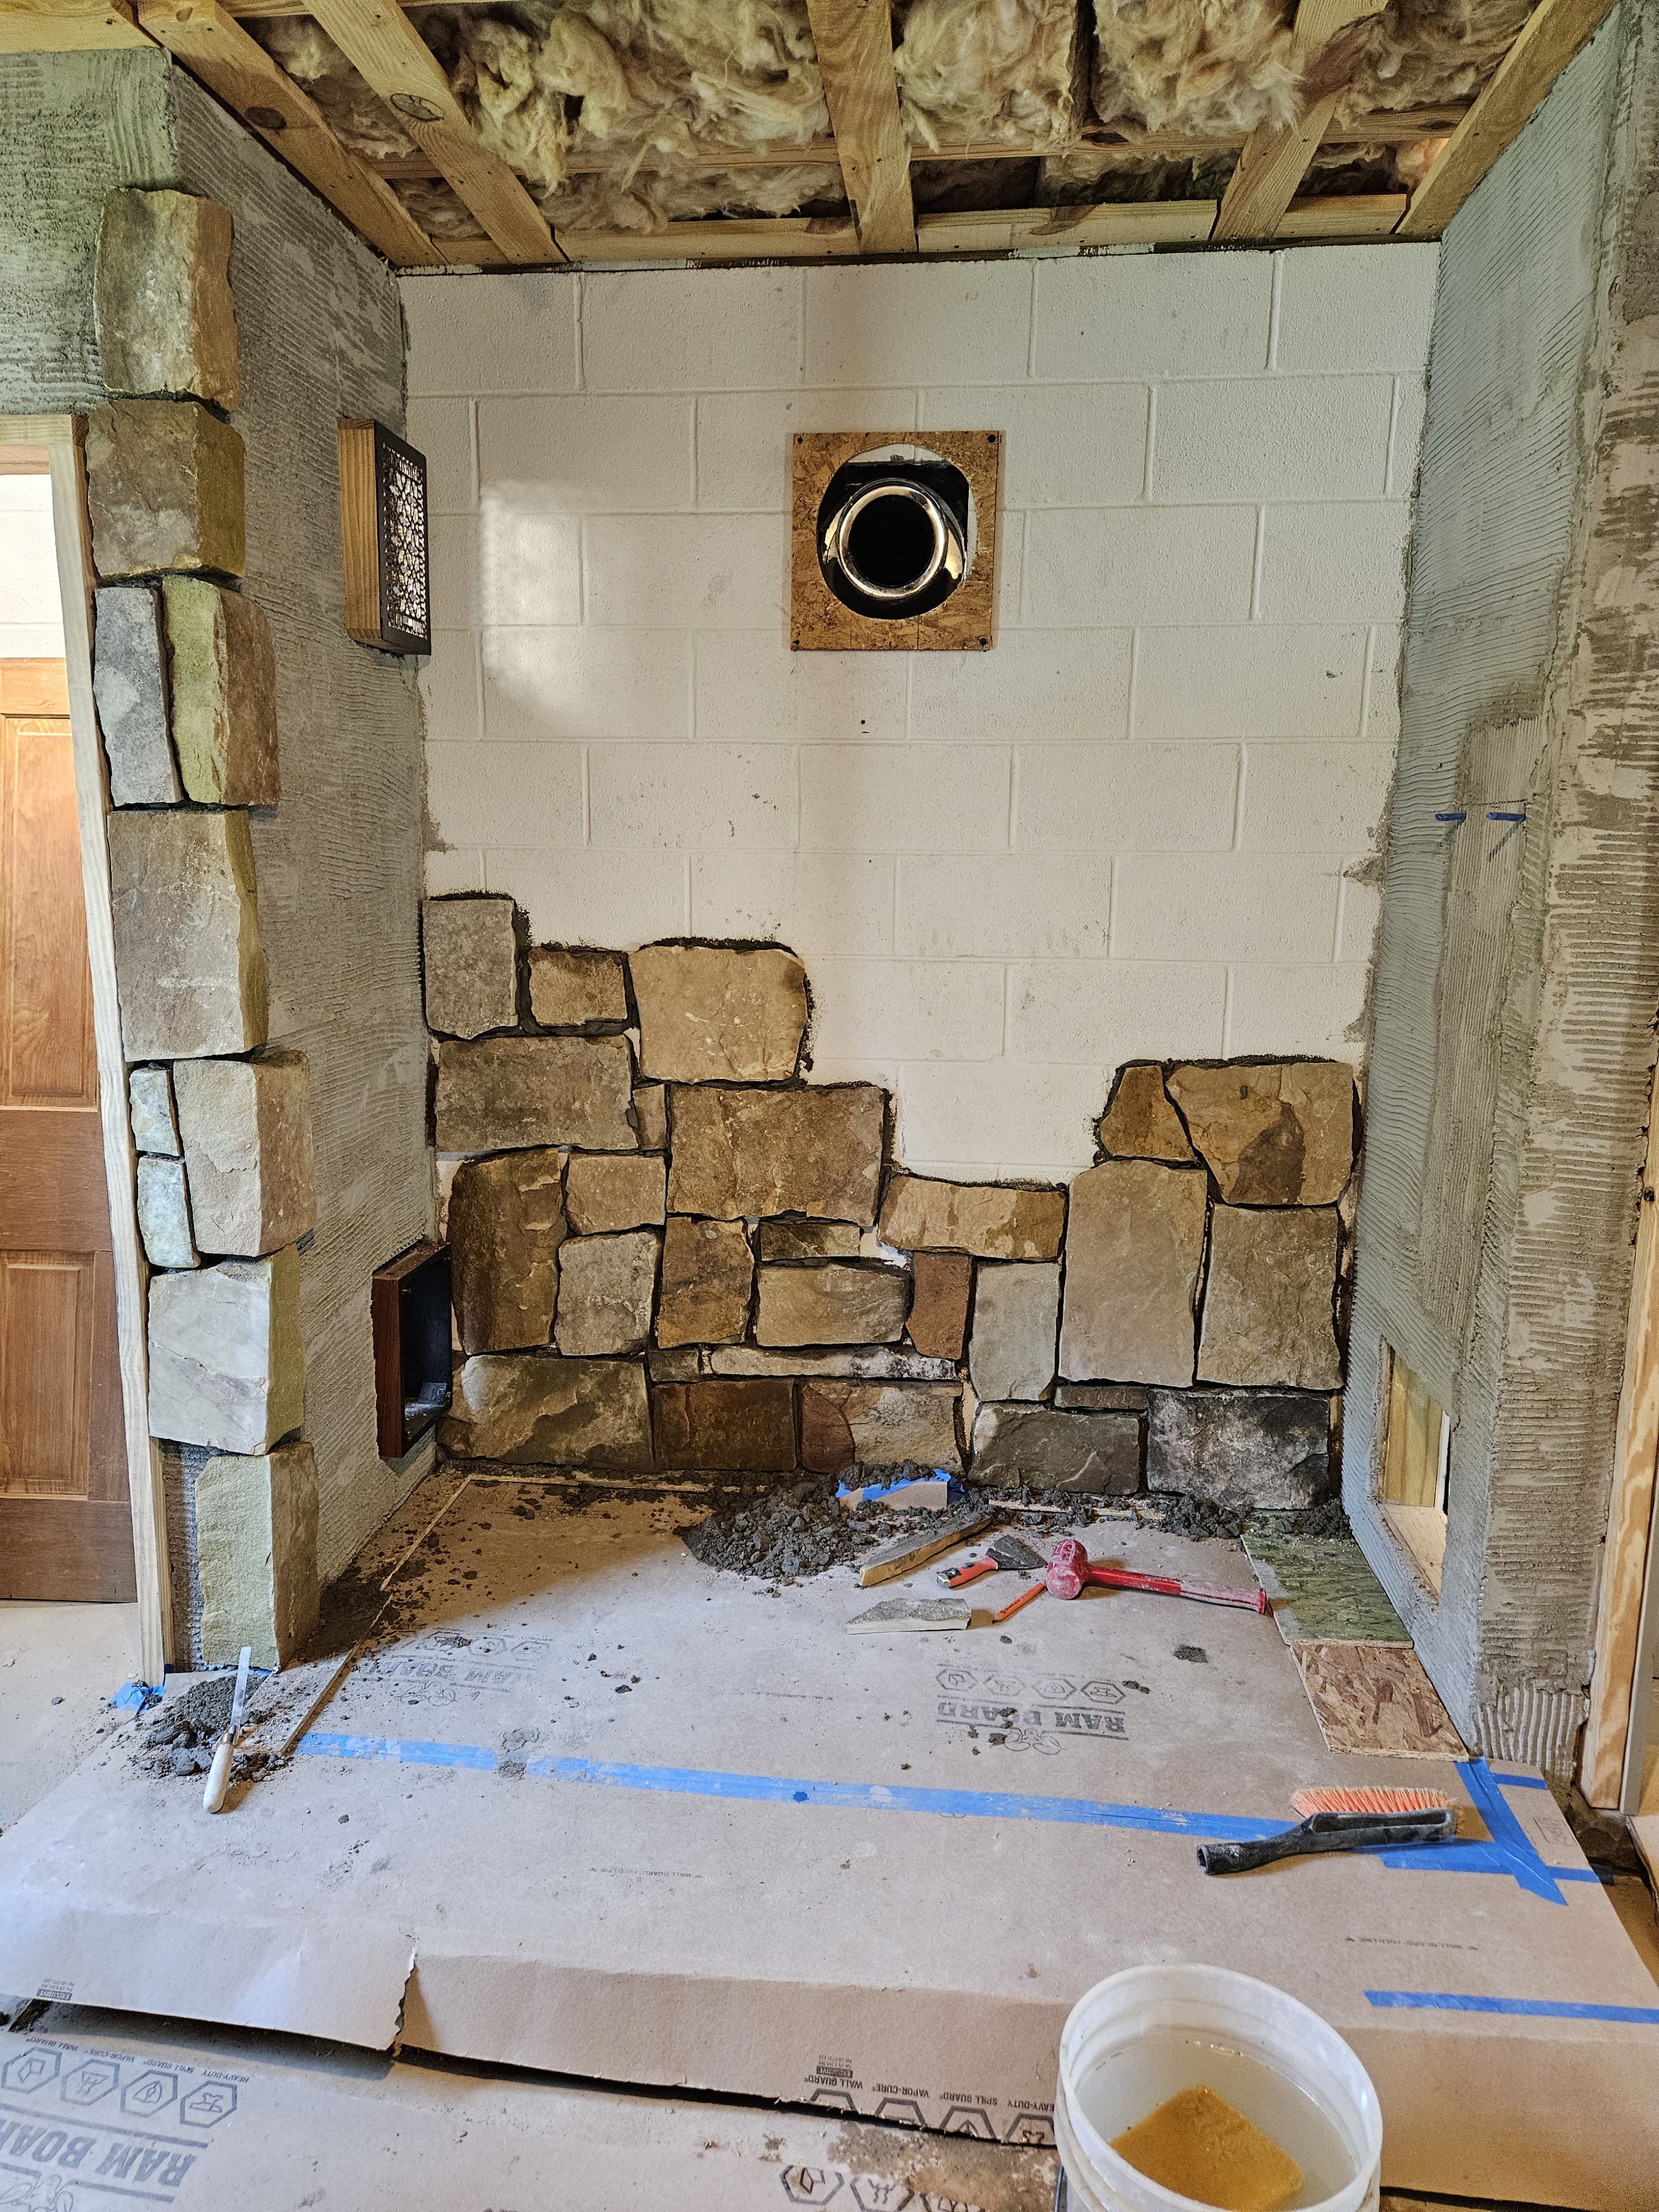
Oh my goodness. This was so much work! We got a little momentum going from finishing the platform under the stove, but then it was time for the walls of the closets and the wall behind the stove.
First things first, we put down Ram board to protect the floor of the platform from stray mortar.
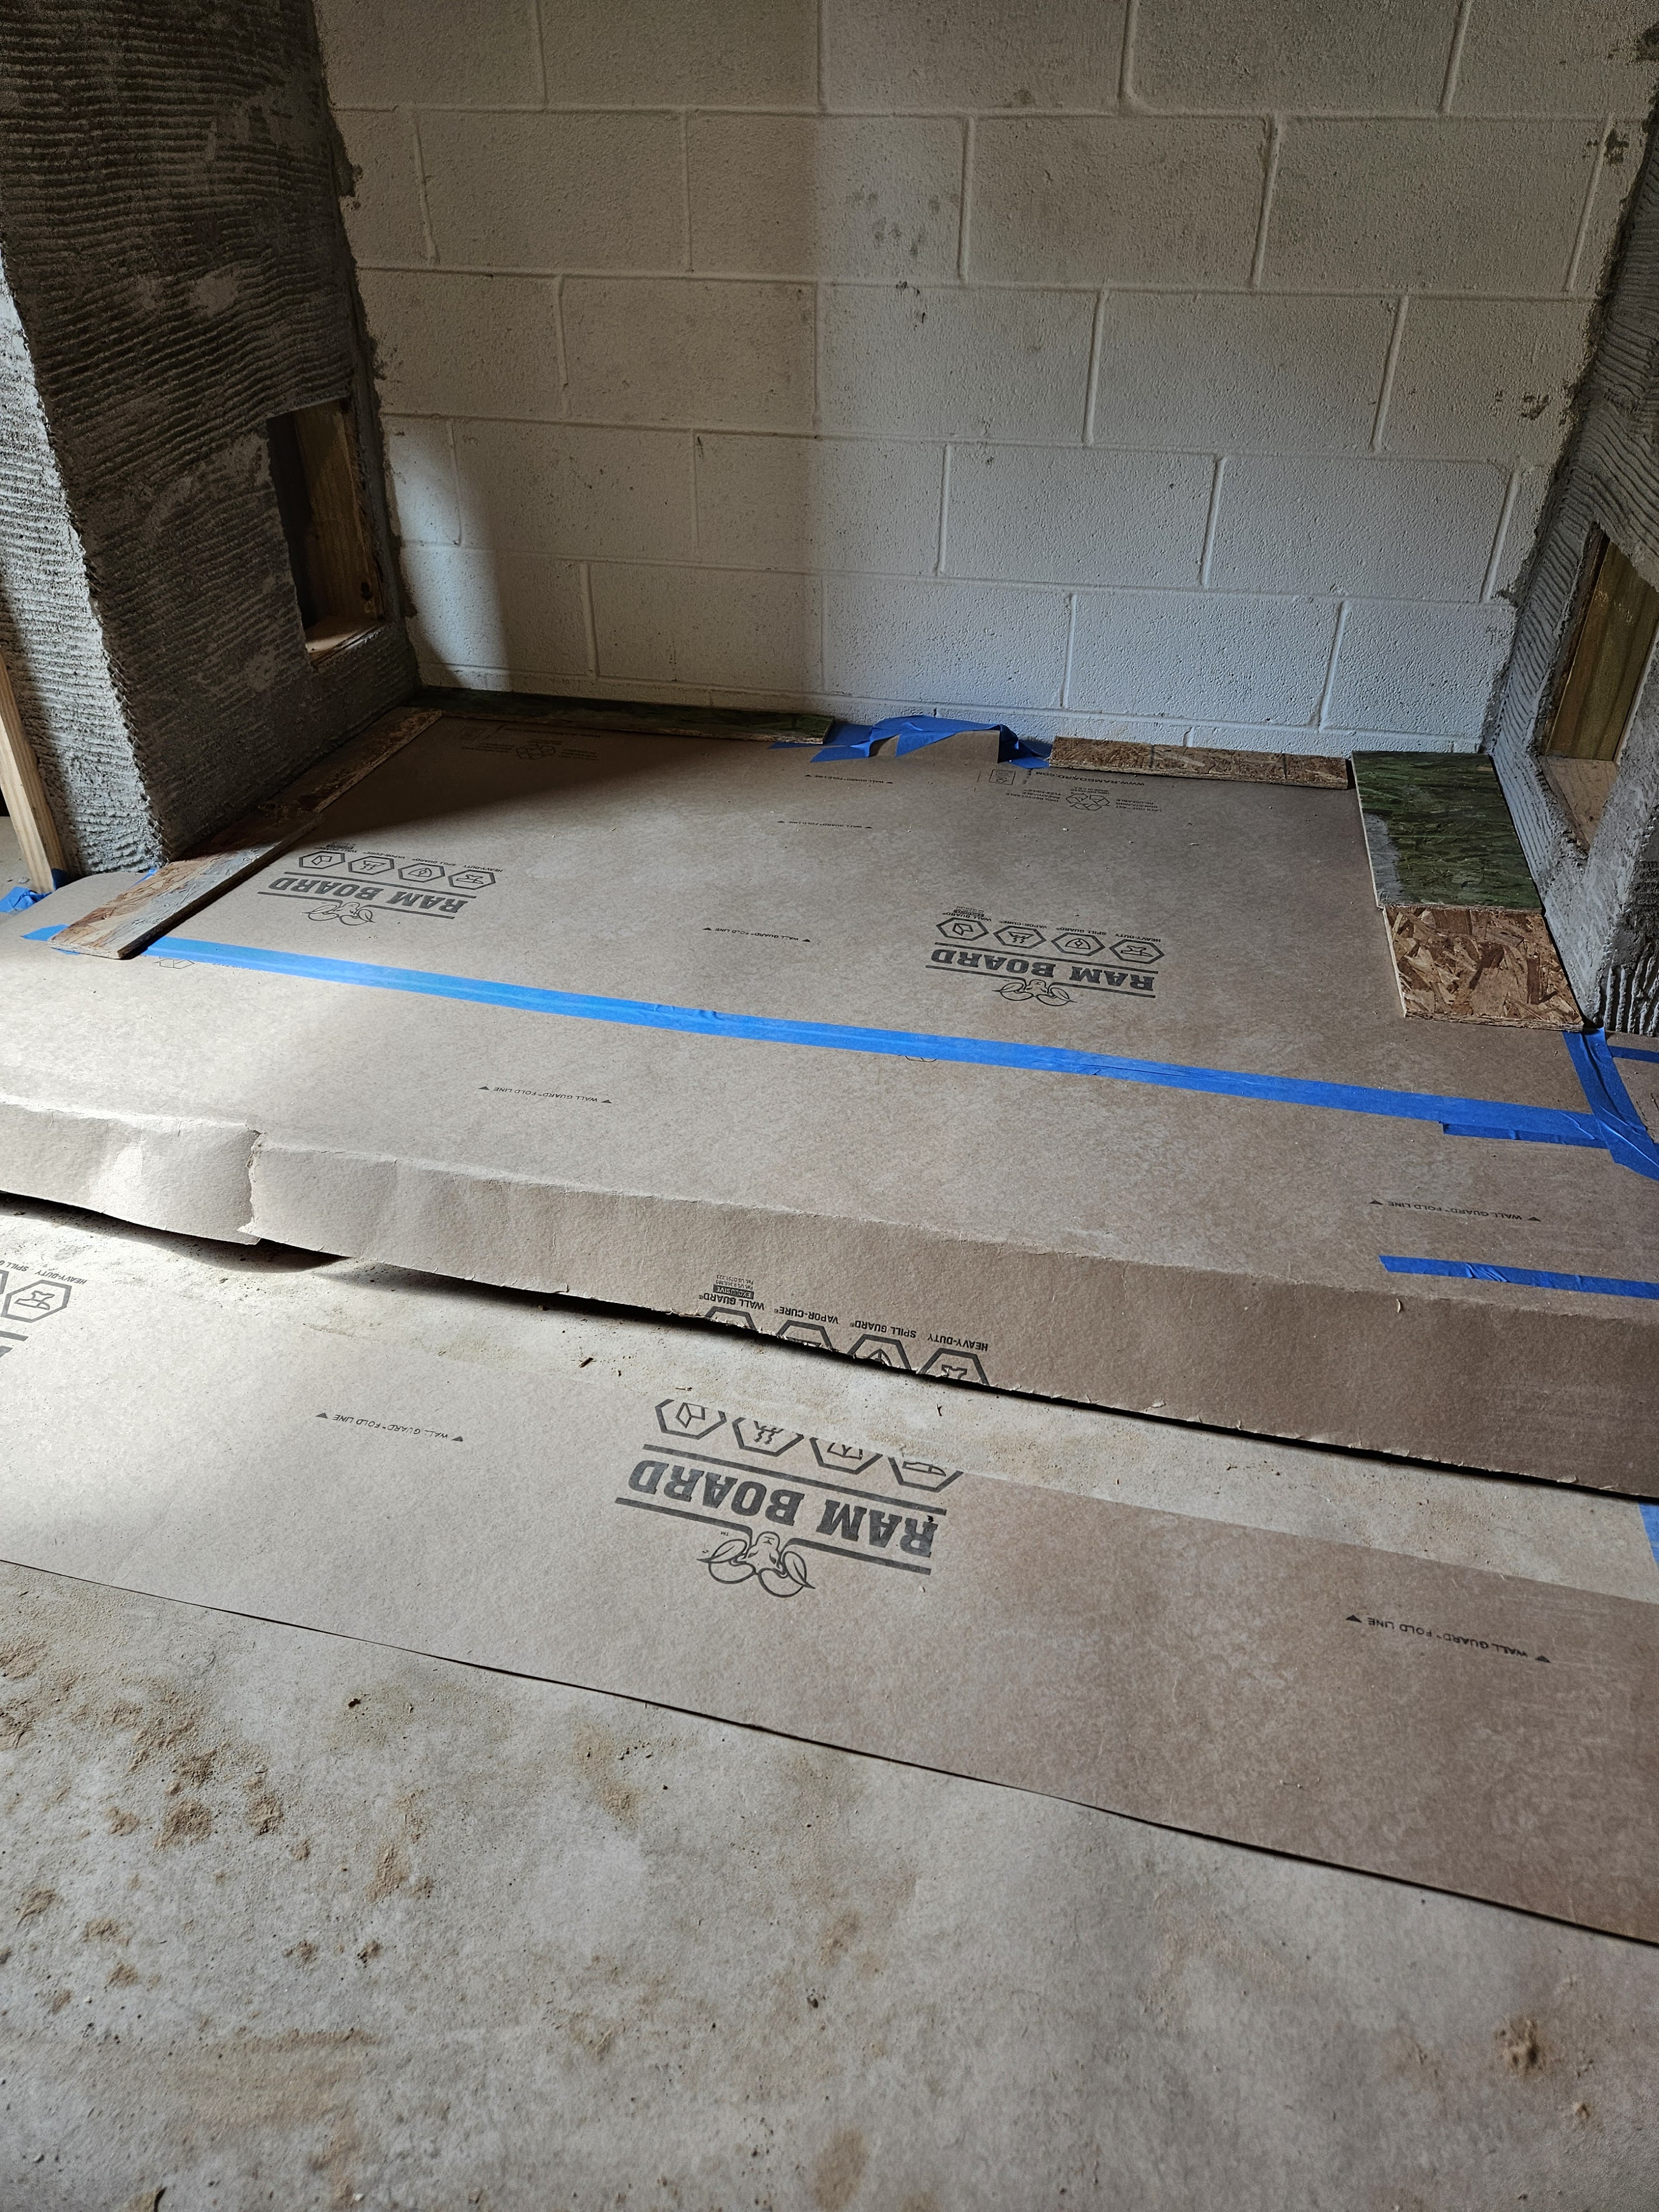
I had to be careful to cover the air pipe and the gas line.
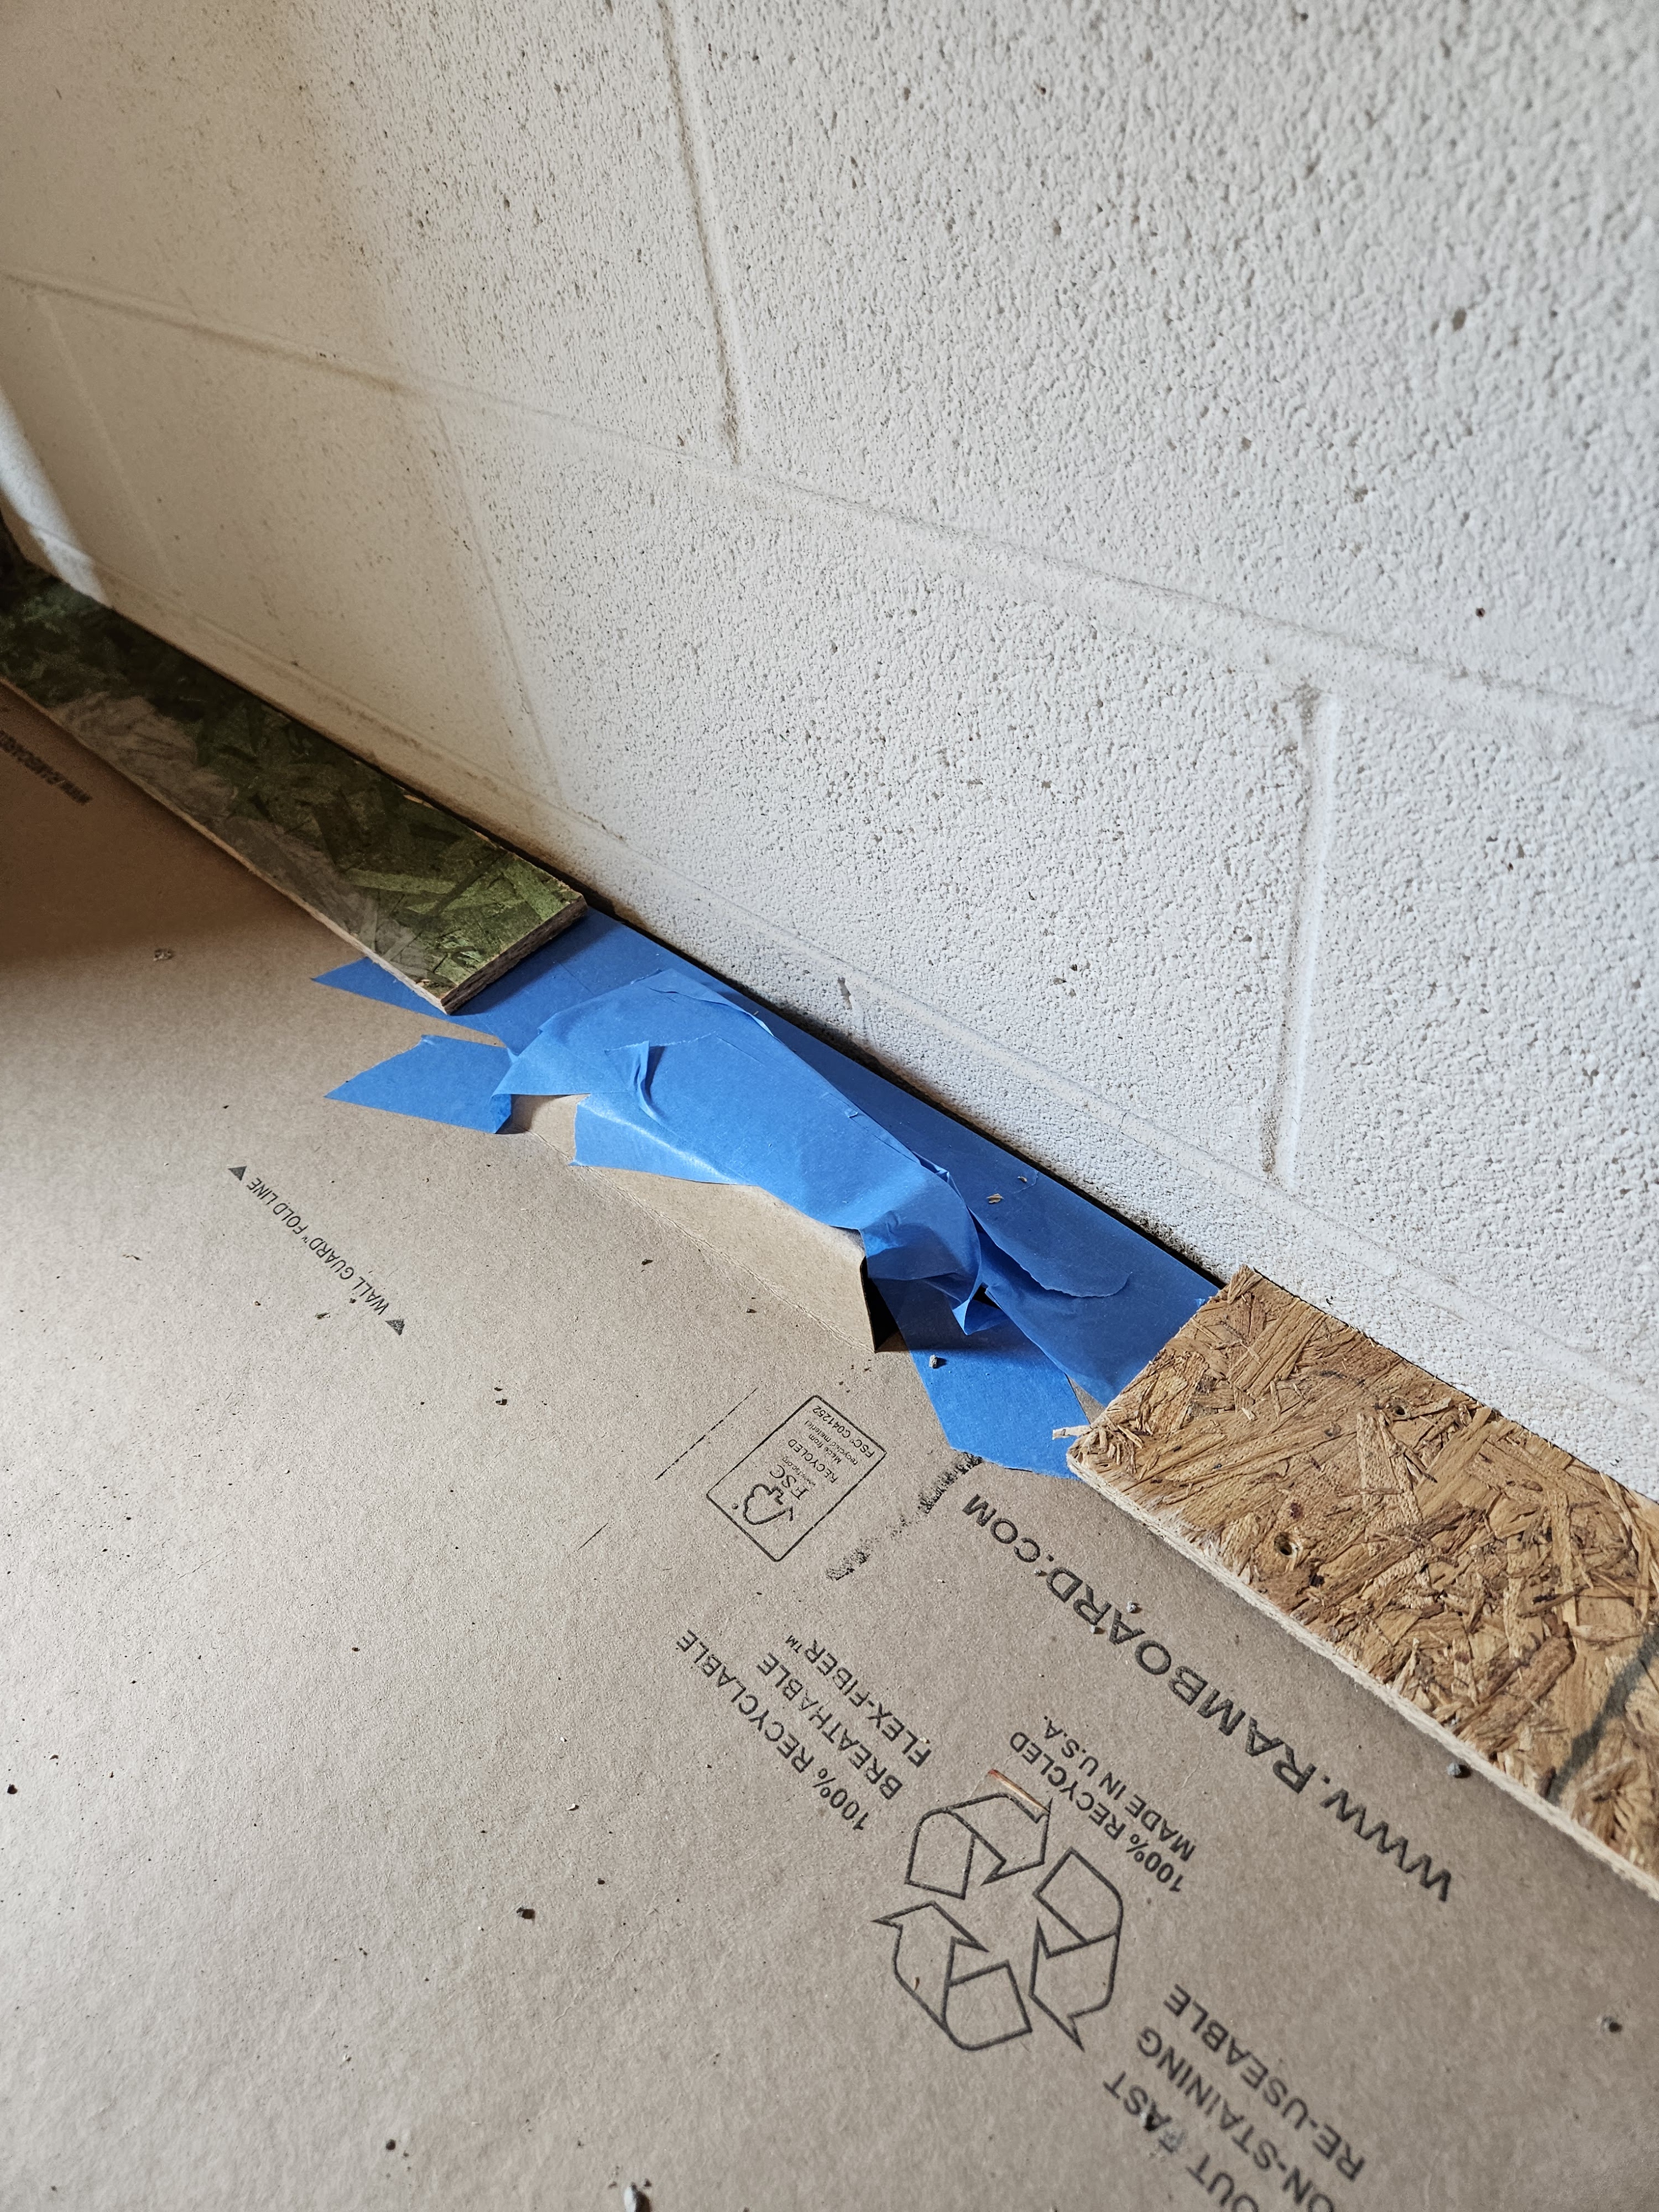
Then we installed screws for the fireplace tool holder. I wrapped the screws with painters tape and then put a large diameter straw over the top to keep the grout out.
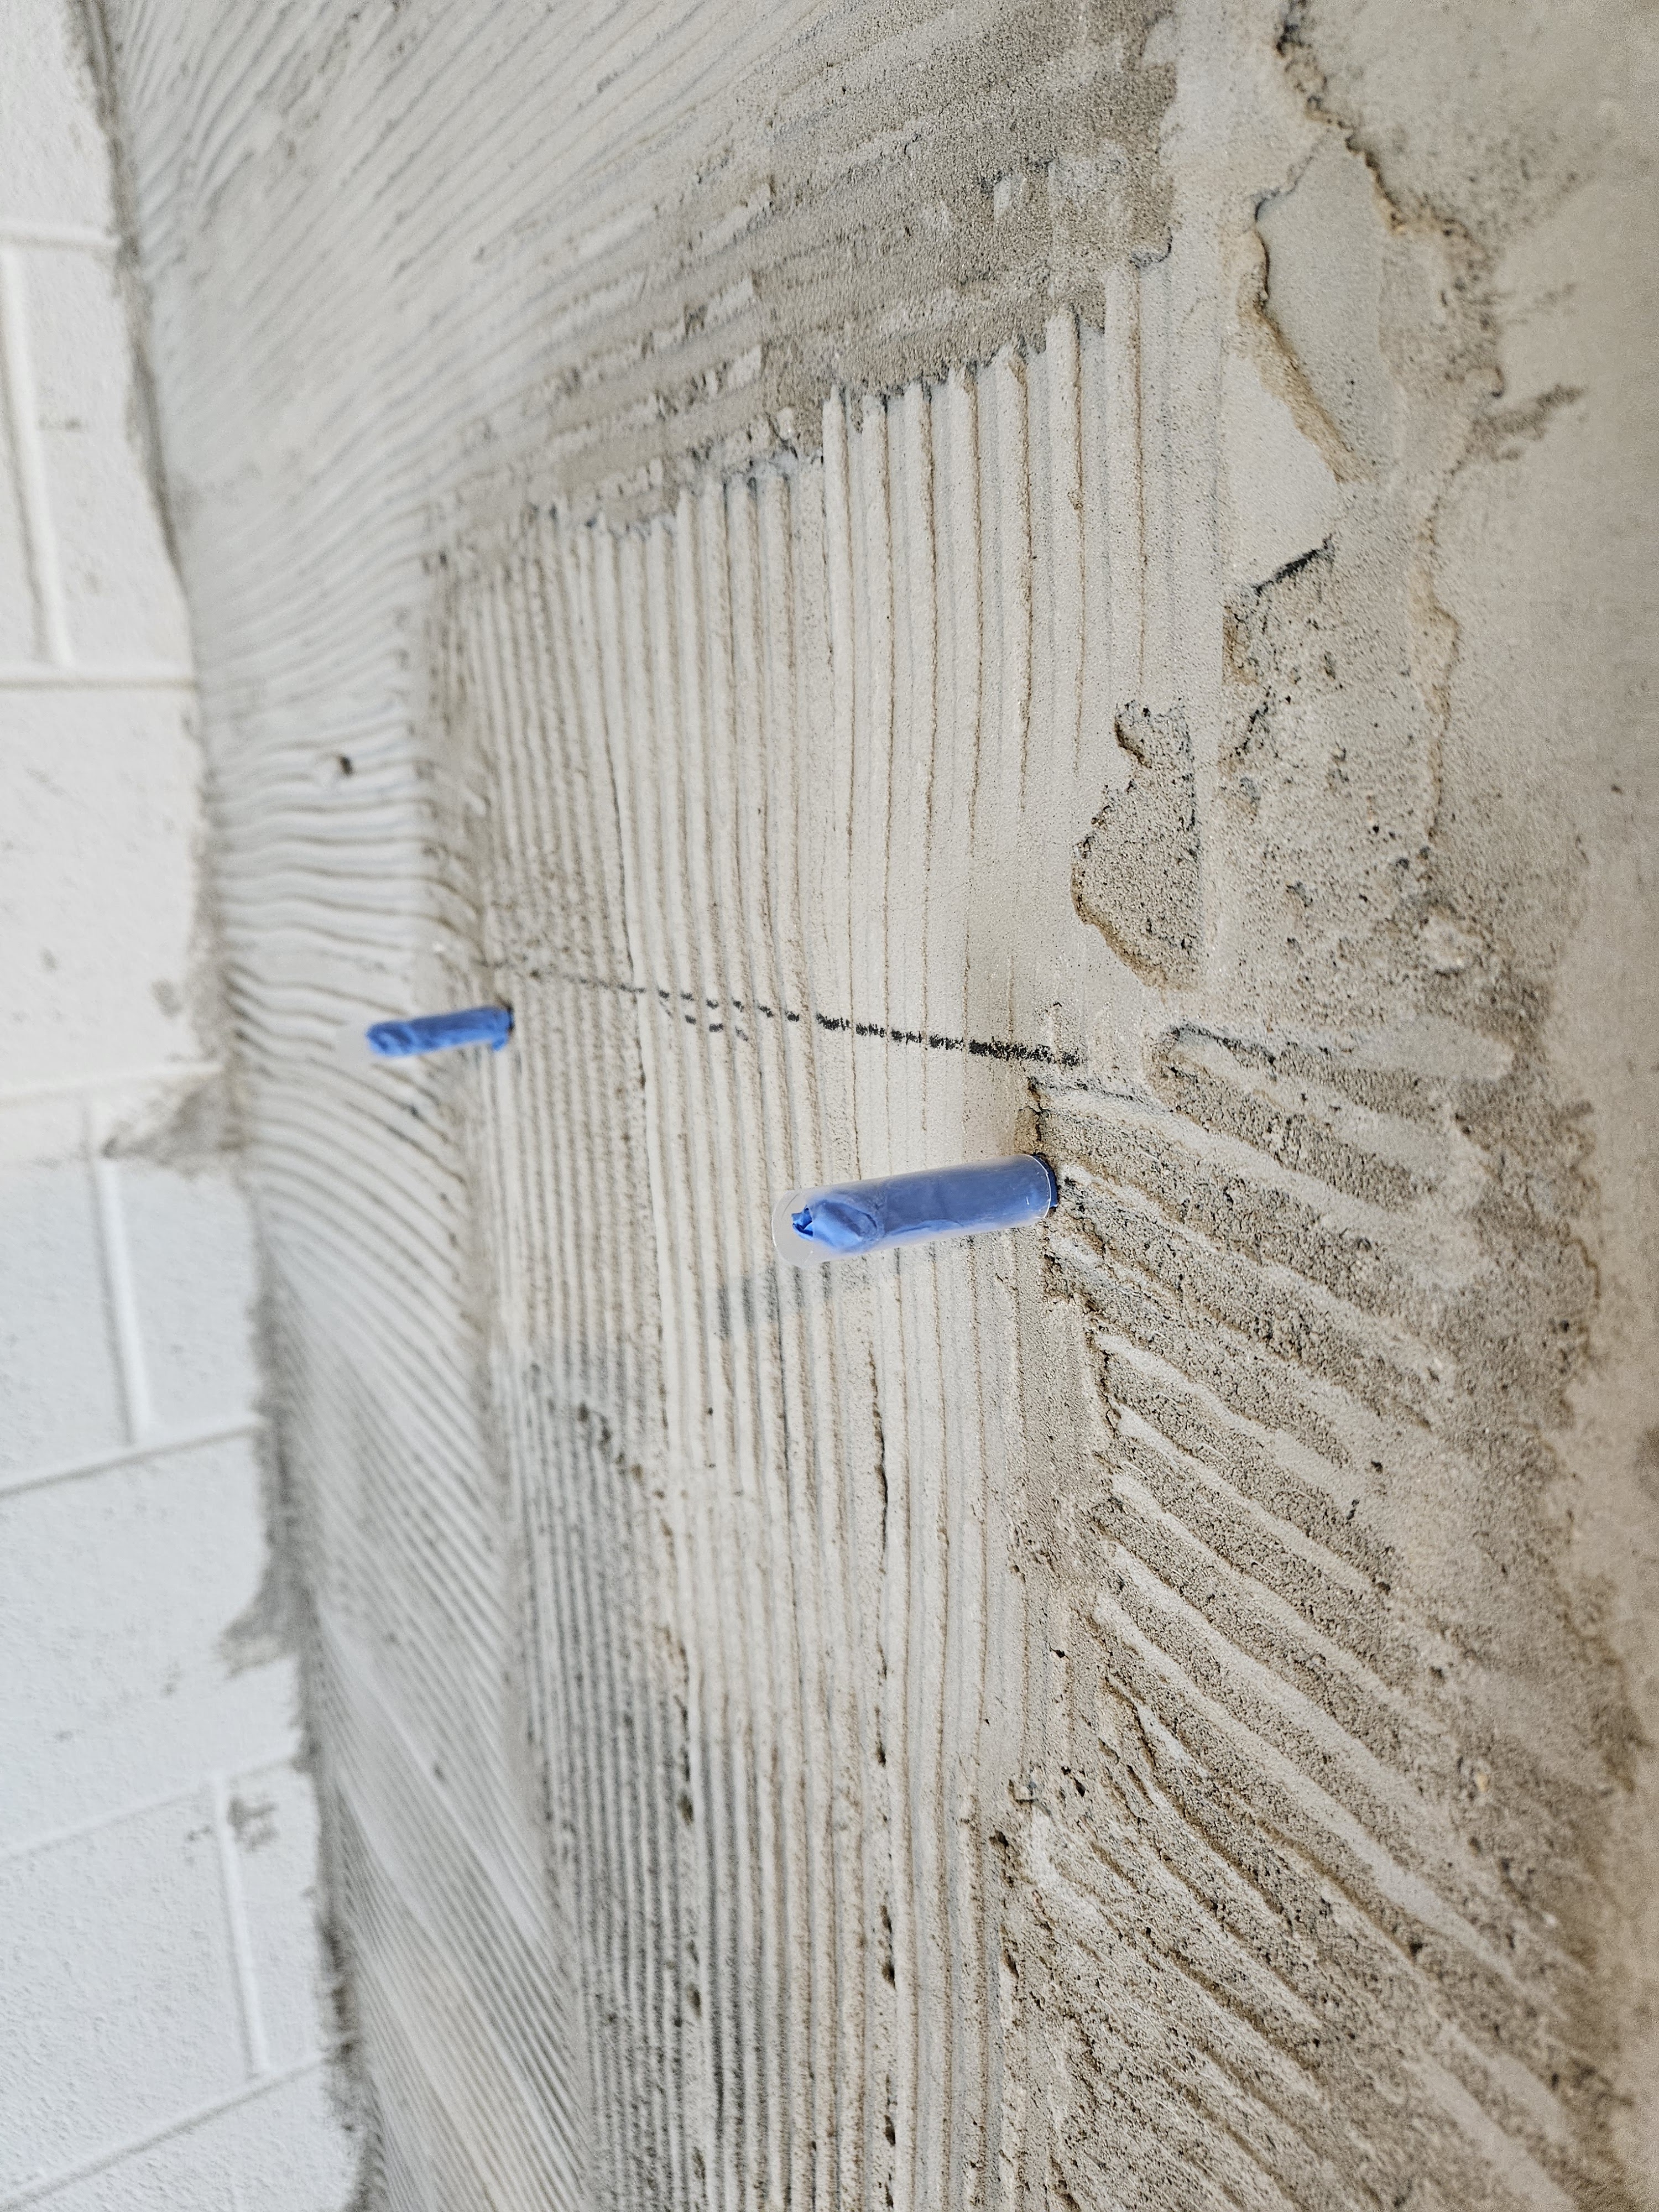
The last piece of prep work was to put up a piece of OSB so that we can recess the stove pipe flange into the stone when it’s complete. This was a little involved but not terrible.
Here are photos of our progress.
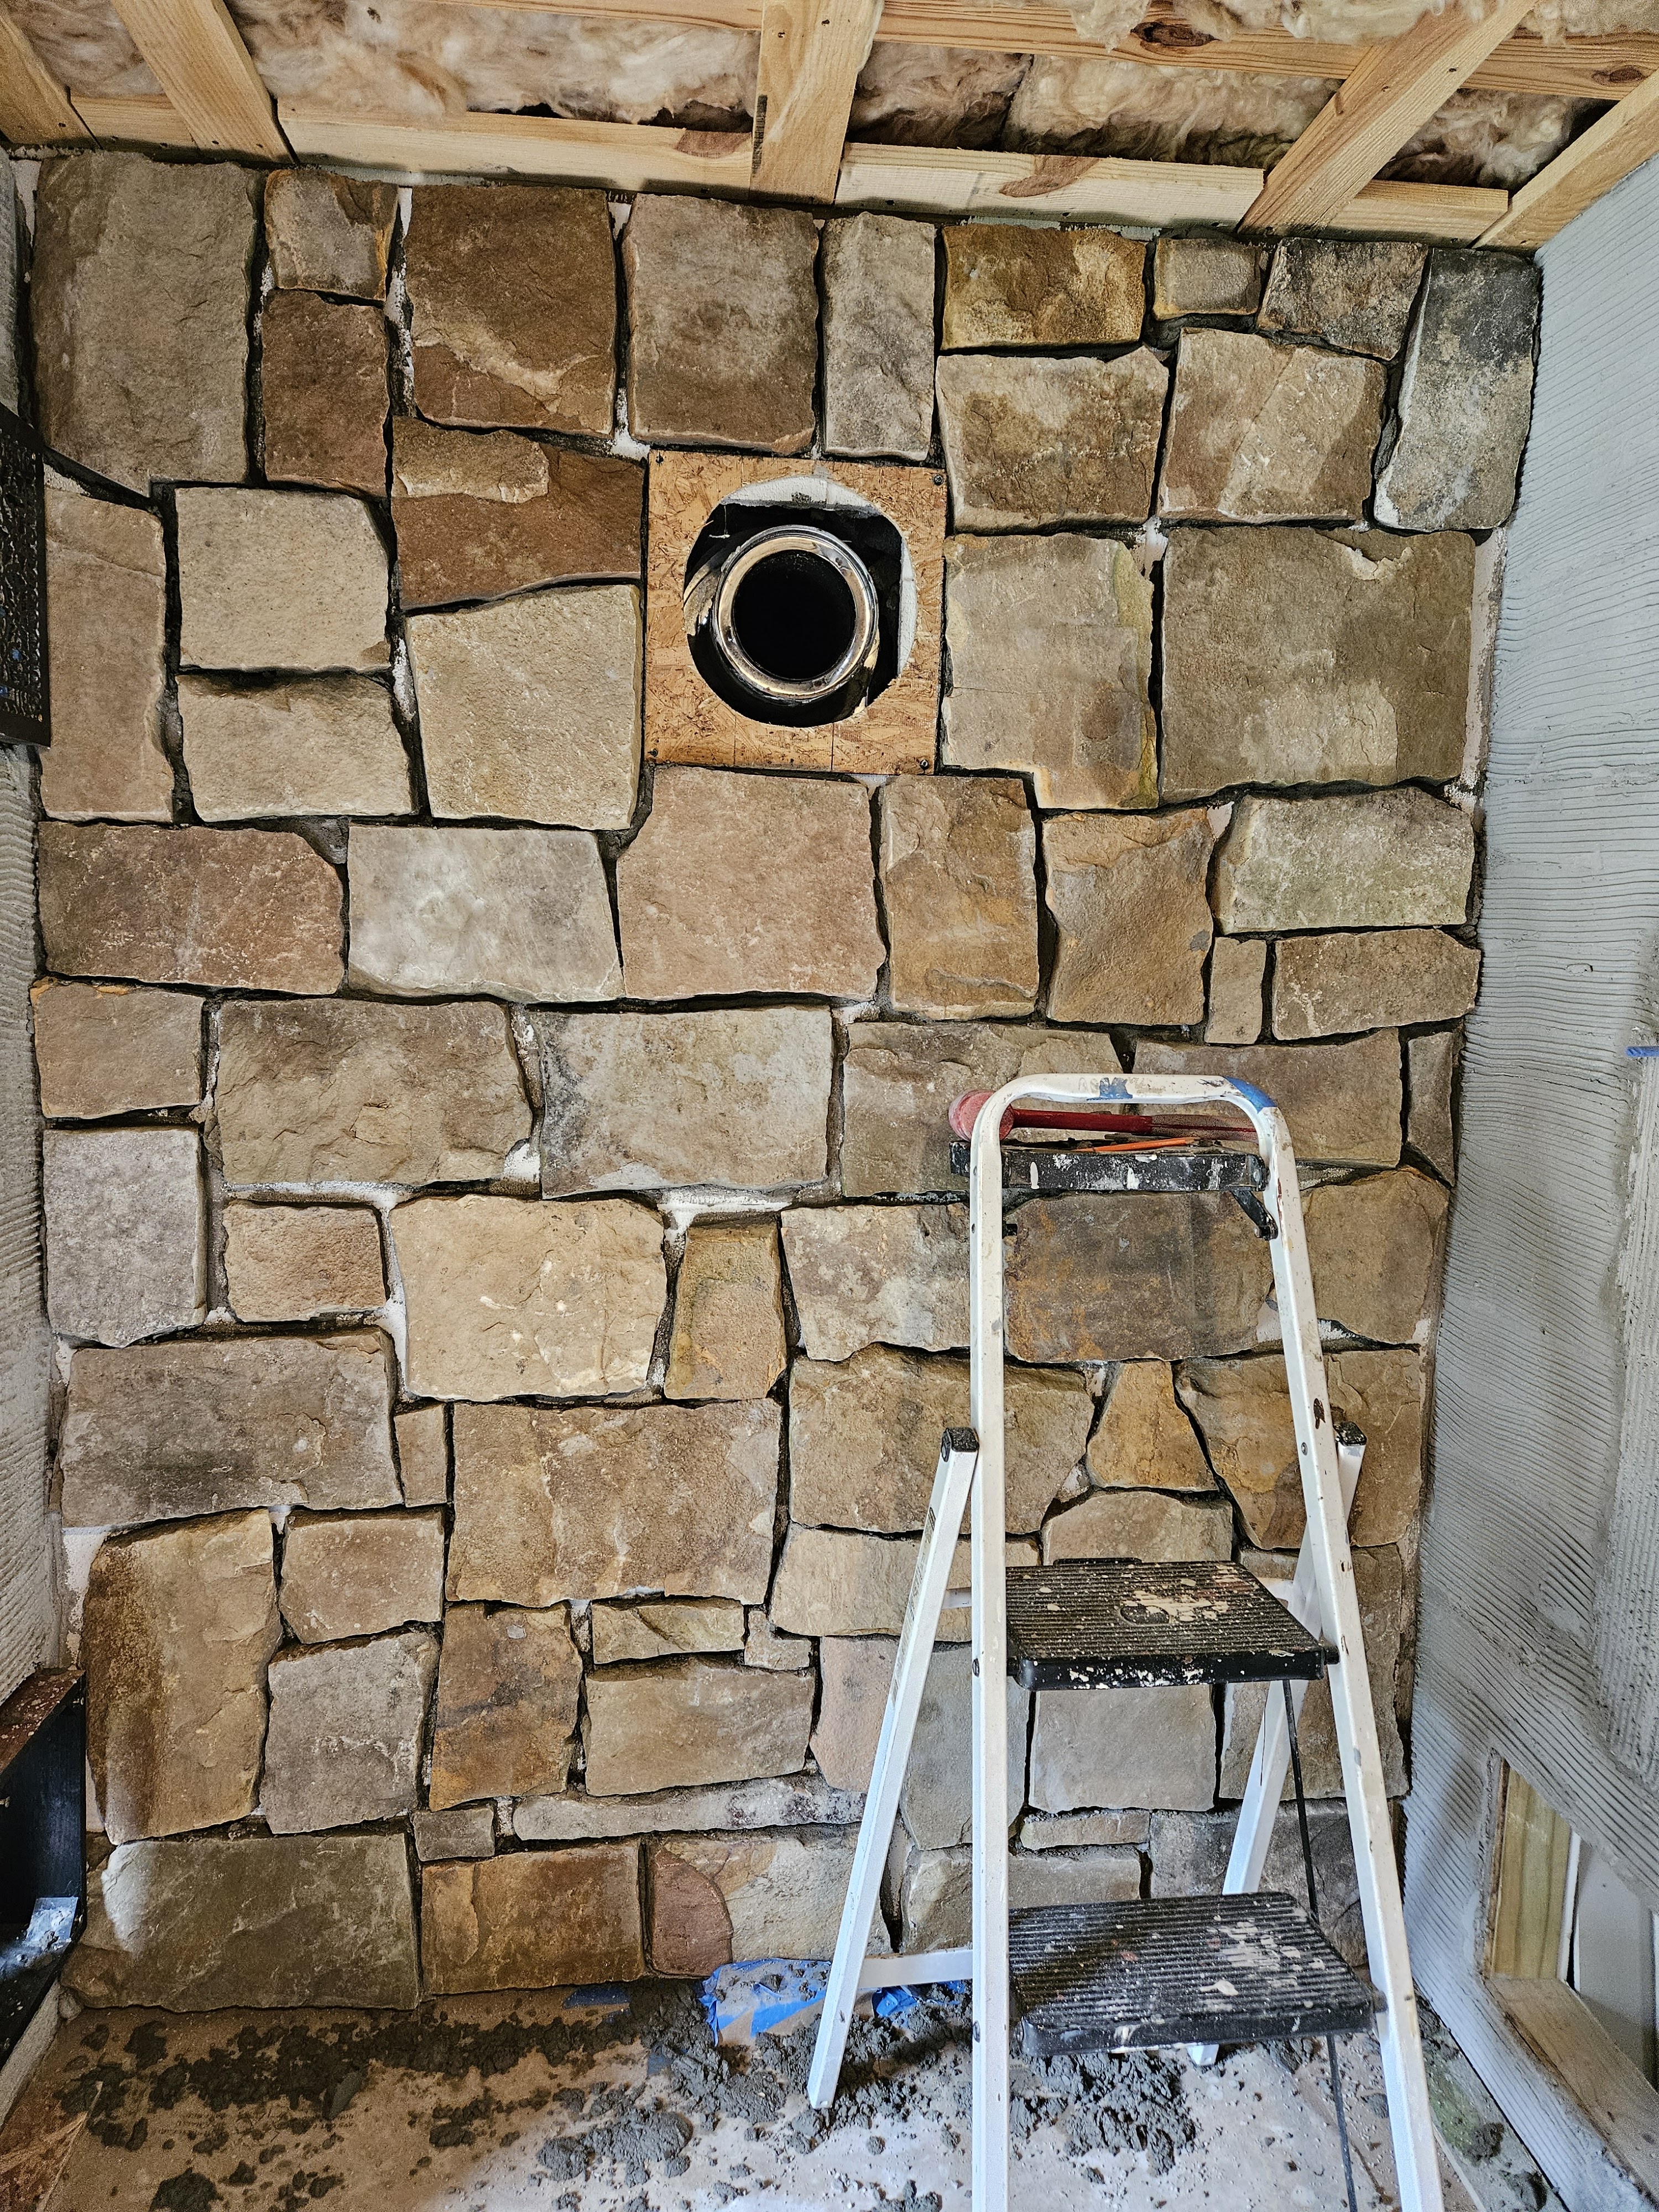
We also had to go back and put the rock around the beams that we installed last fall. That was so much work because of all the trimming to get them to fit.
Next it was time to grout everything. Our first batch was really runny and we made kind of a mess with it. We got about half of the stone around the wood stove platform done on the first day. But then we took a couple days off because we had a friend in town. I was super tired from all the hosting we did over the holiday weekend, so my husband did the last bits by himself. He really did a beautiful job. I’m so happy with how it’s turning out.
Here are the beams:


And here is the original drawing of what we envisioned around the stove:
And here is where we are now:
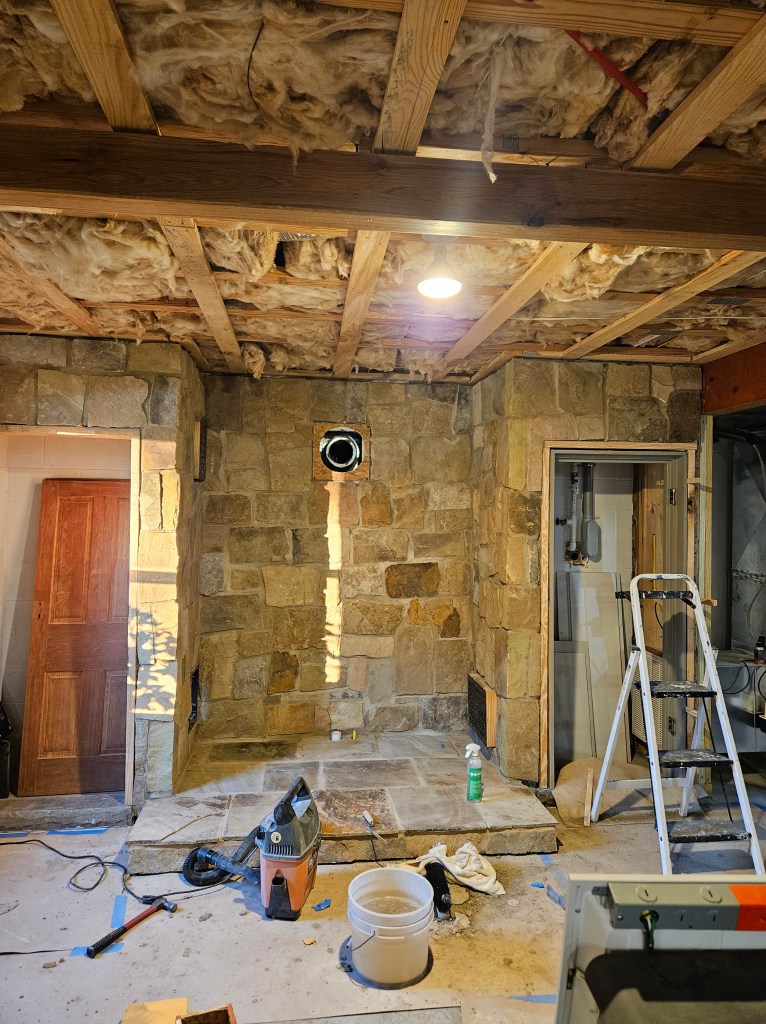
It’s just amazing how much difference the grout makes in the finished product. We will be working to get all the mess cleaned up and fixing a few areas. Then we need to get the air grates installed permanently, the tool holder put up, and the stove put in place. Then it’s on to finishing up the doors (sanding, finish, hardware and getting them installed permanently. I will post about those next steps, because it’s actually quite a lot of work, even though the results won’t be earth shattering or anything.
The next projects will be finishing up everything that we have started, so it will take a lot of time, but the results won’t be very dramatic. I’m concerned that if we don’t finish up these details as we go, we’ll get to the end and have a ZILLION details to finalize and that won’t be fun.
December 7, 2024:
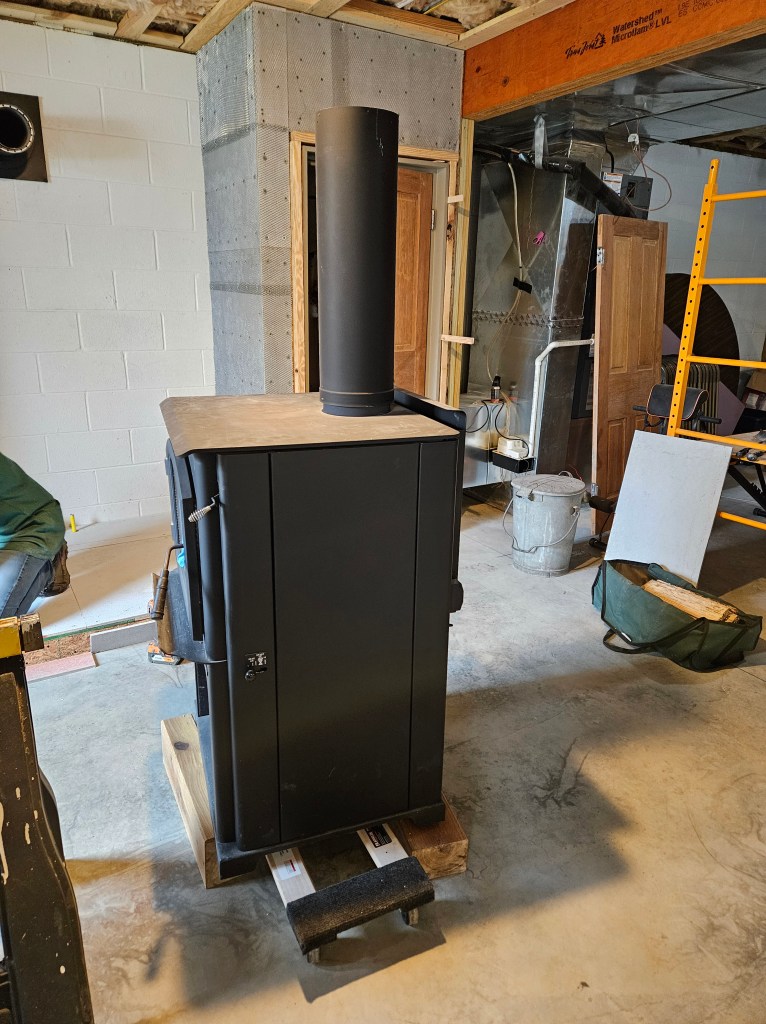
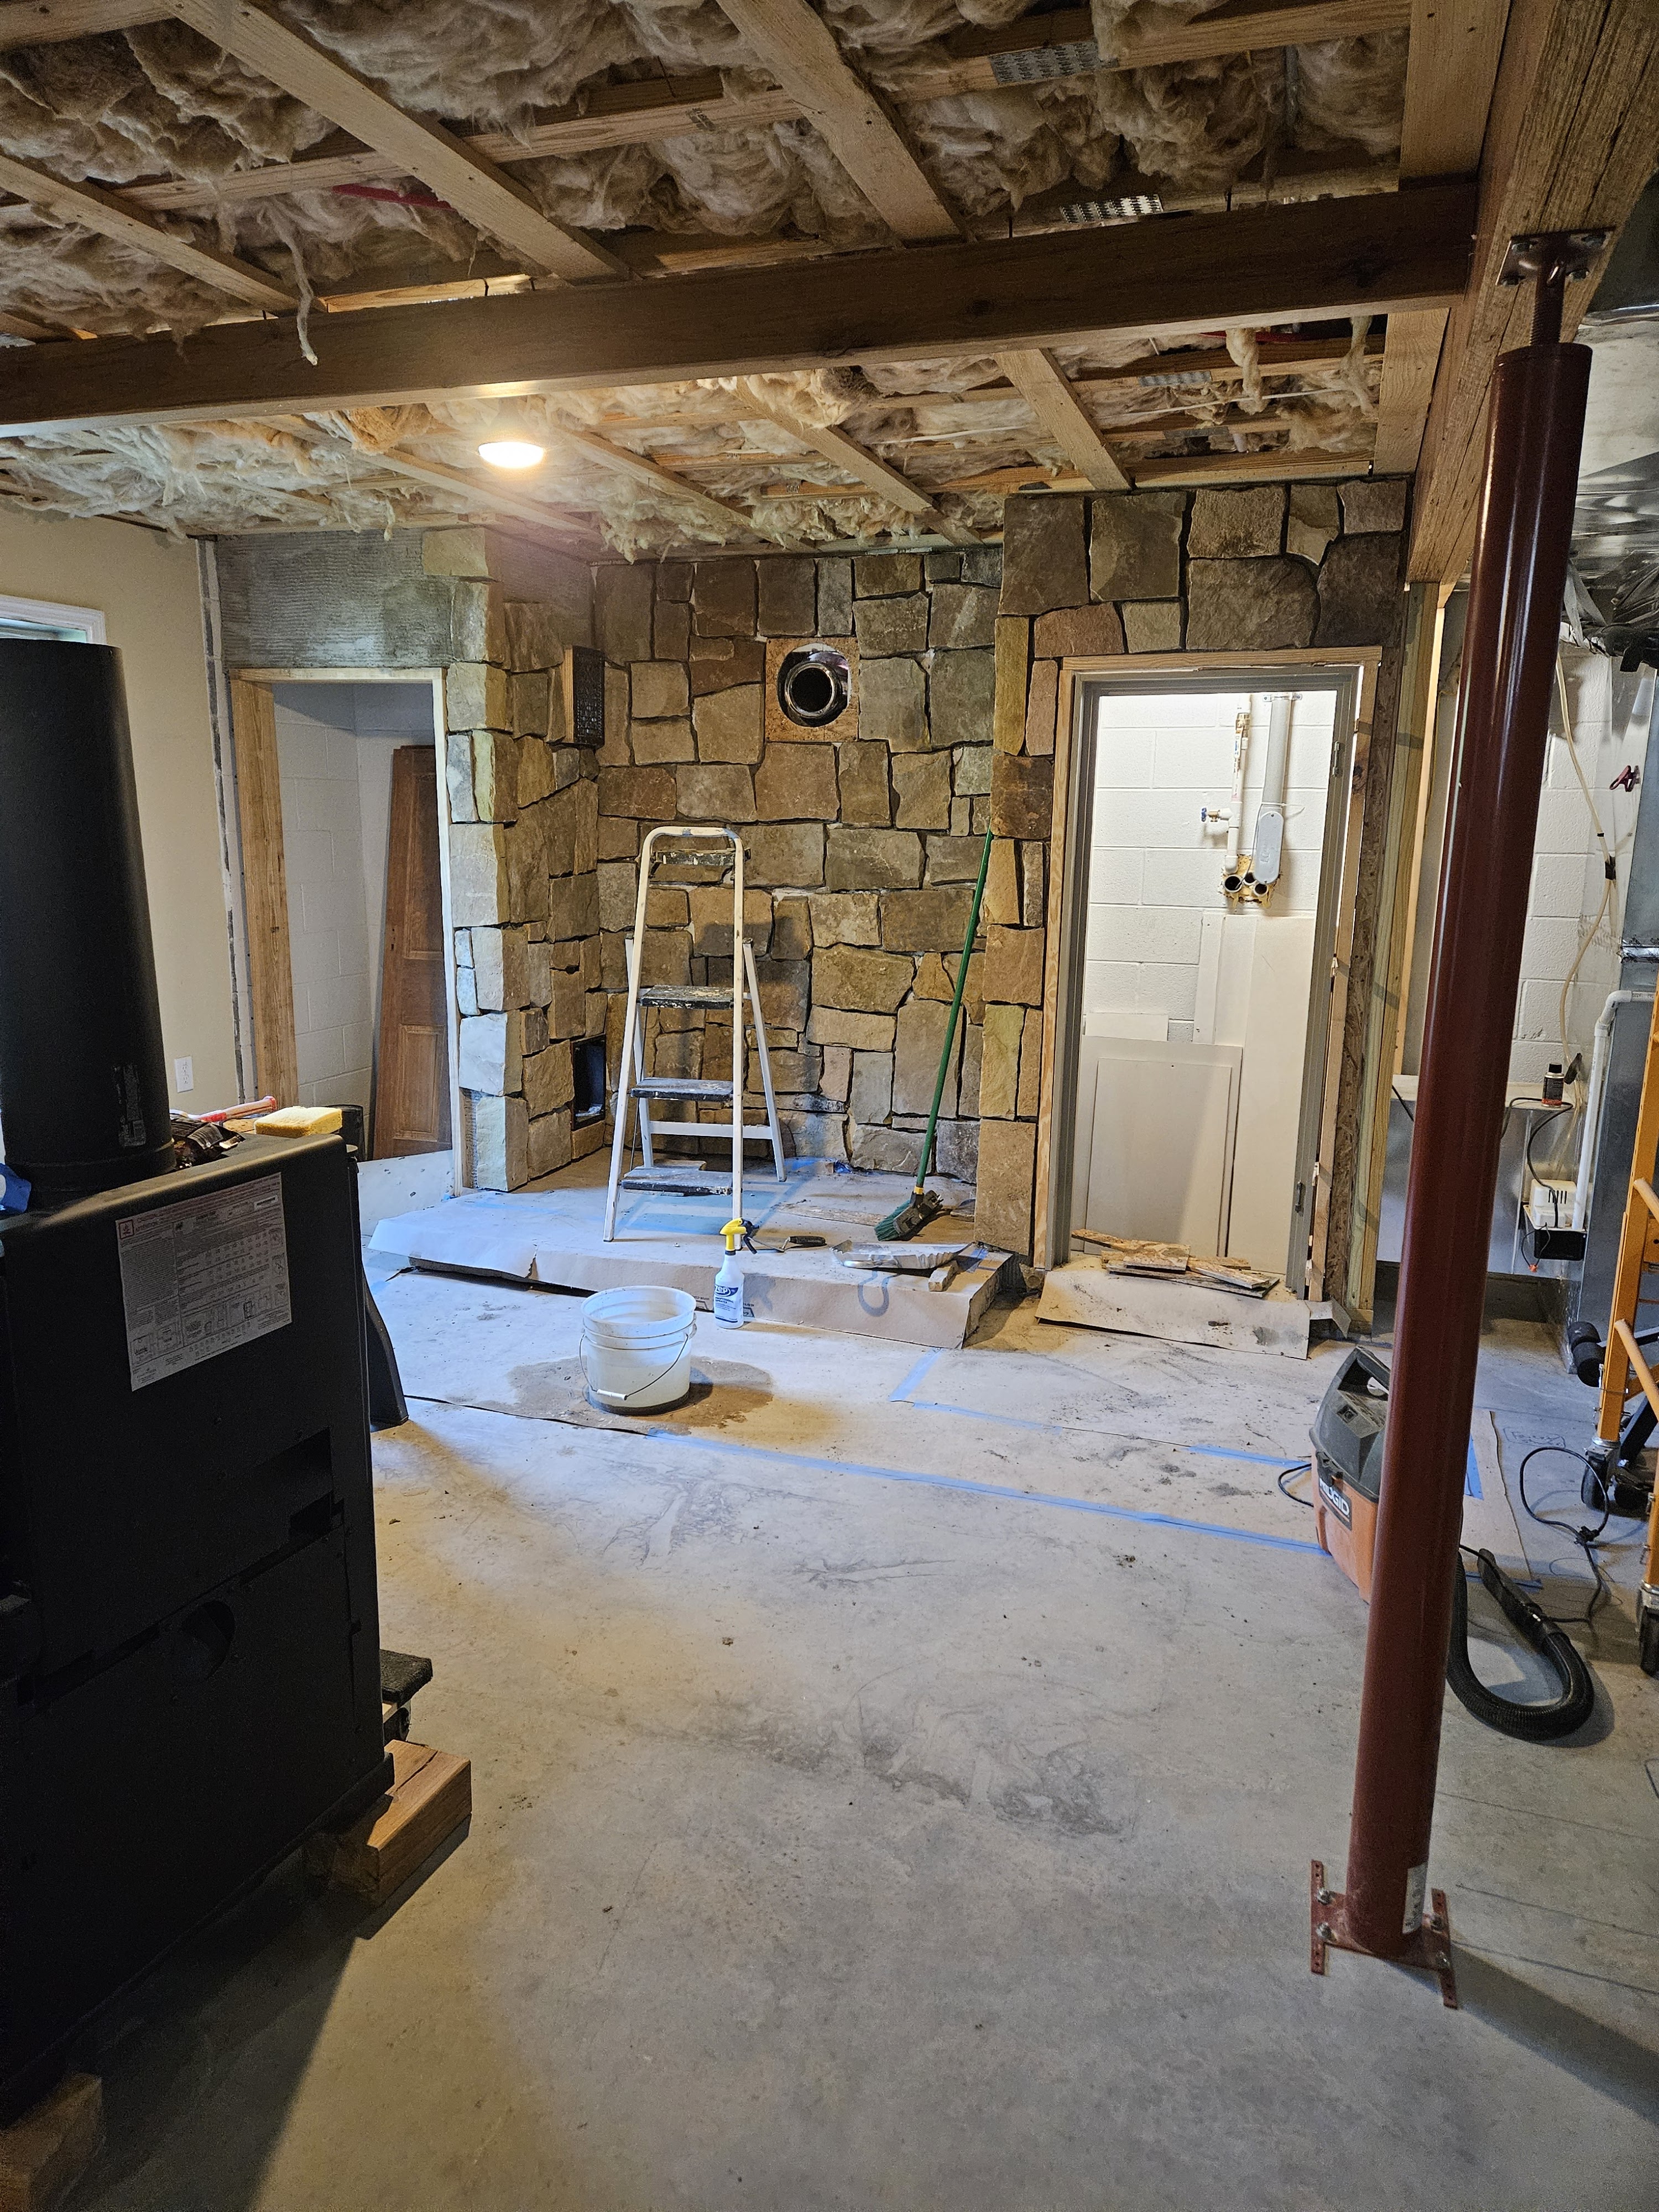
My husband finished the masonry work around the wood stove and was able to get the stove back in place with the help of our son. He really did a beautiful job.
We still have to sand and finish the doors and put the hardware on them. Then my husband is going to make some molding for them.
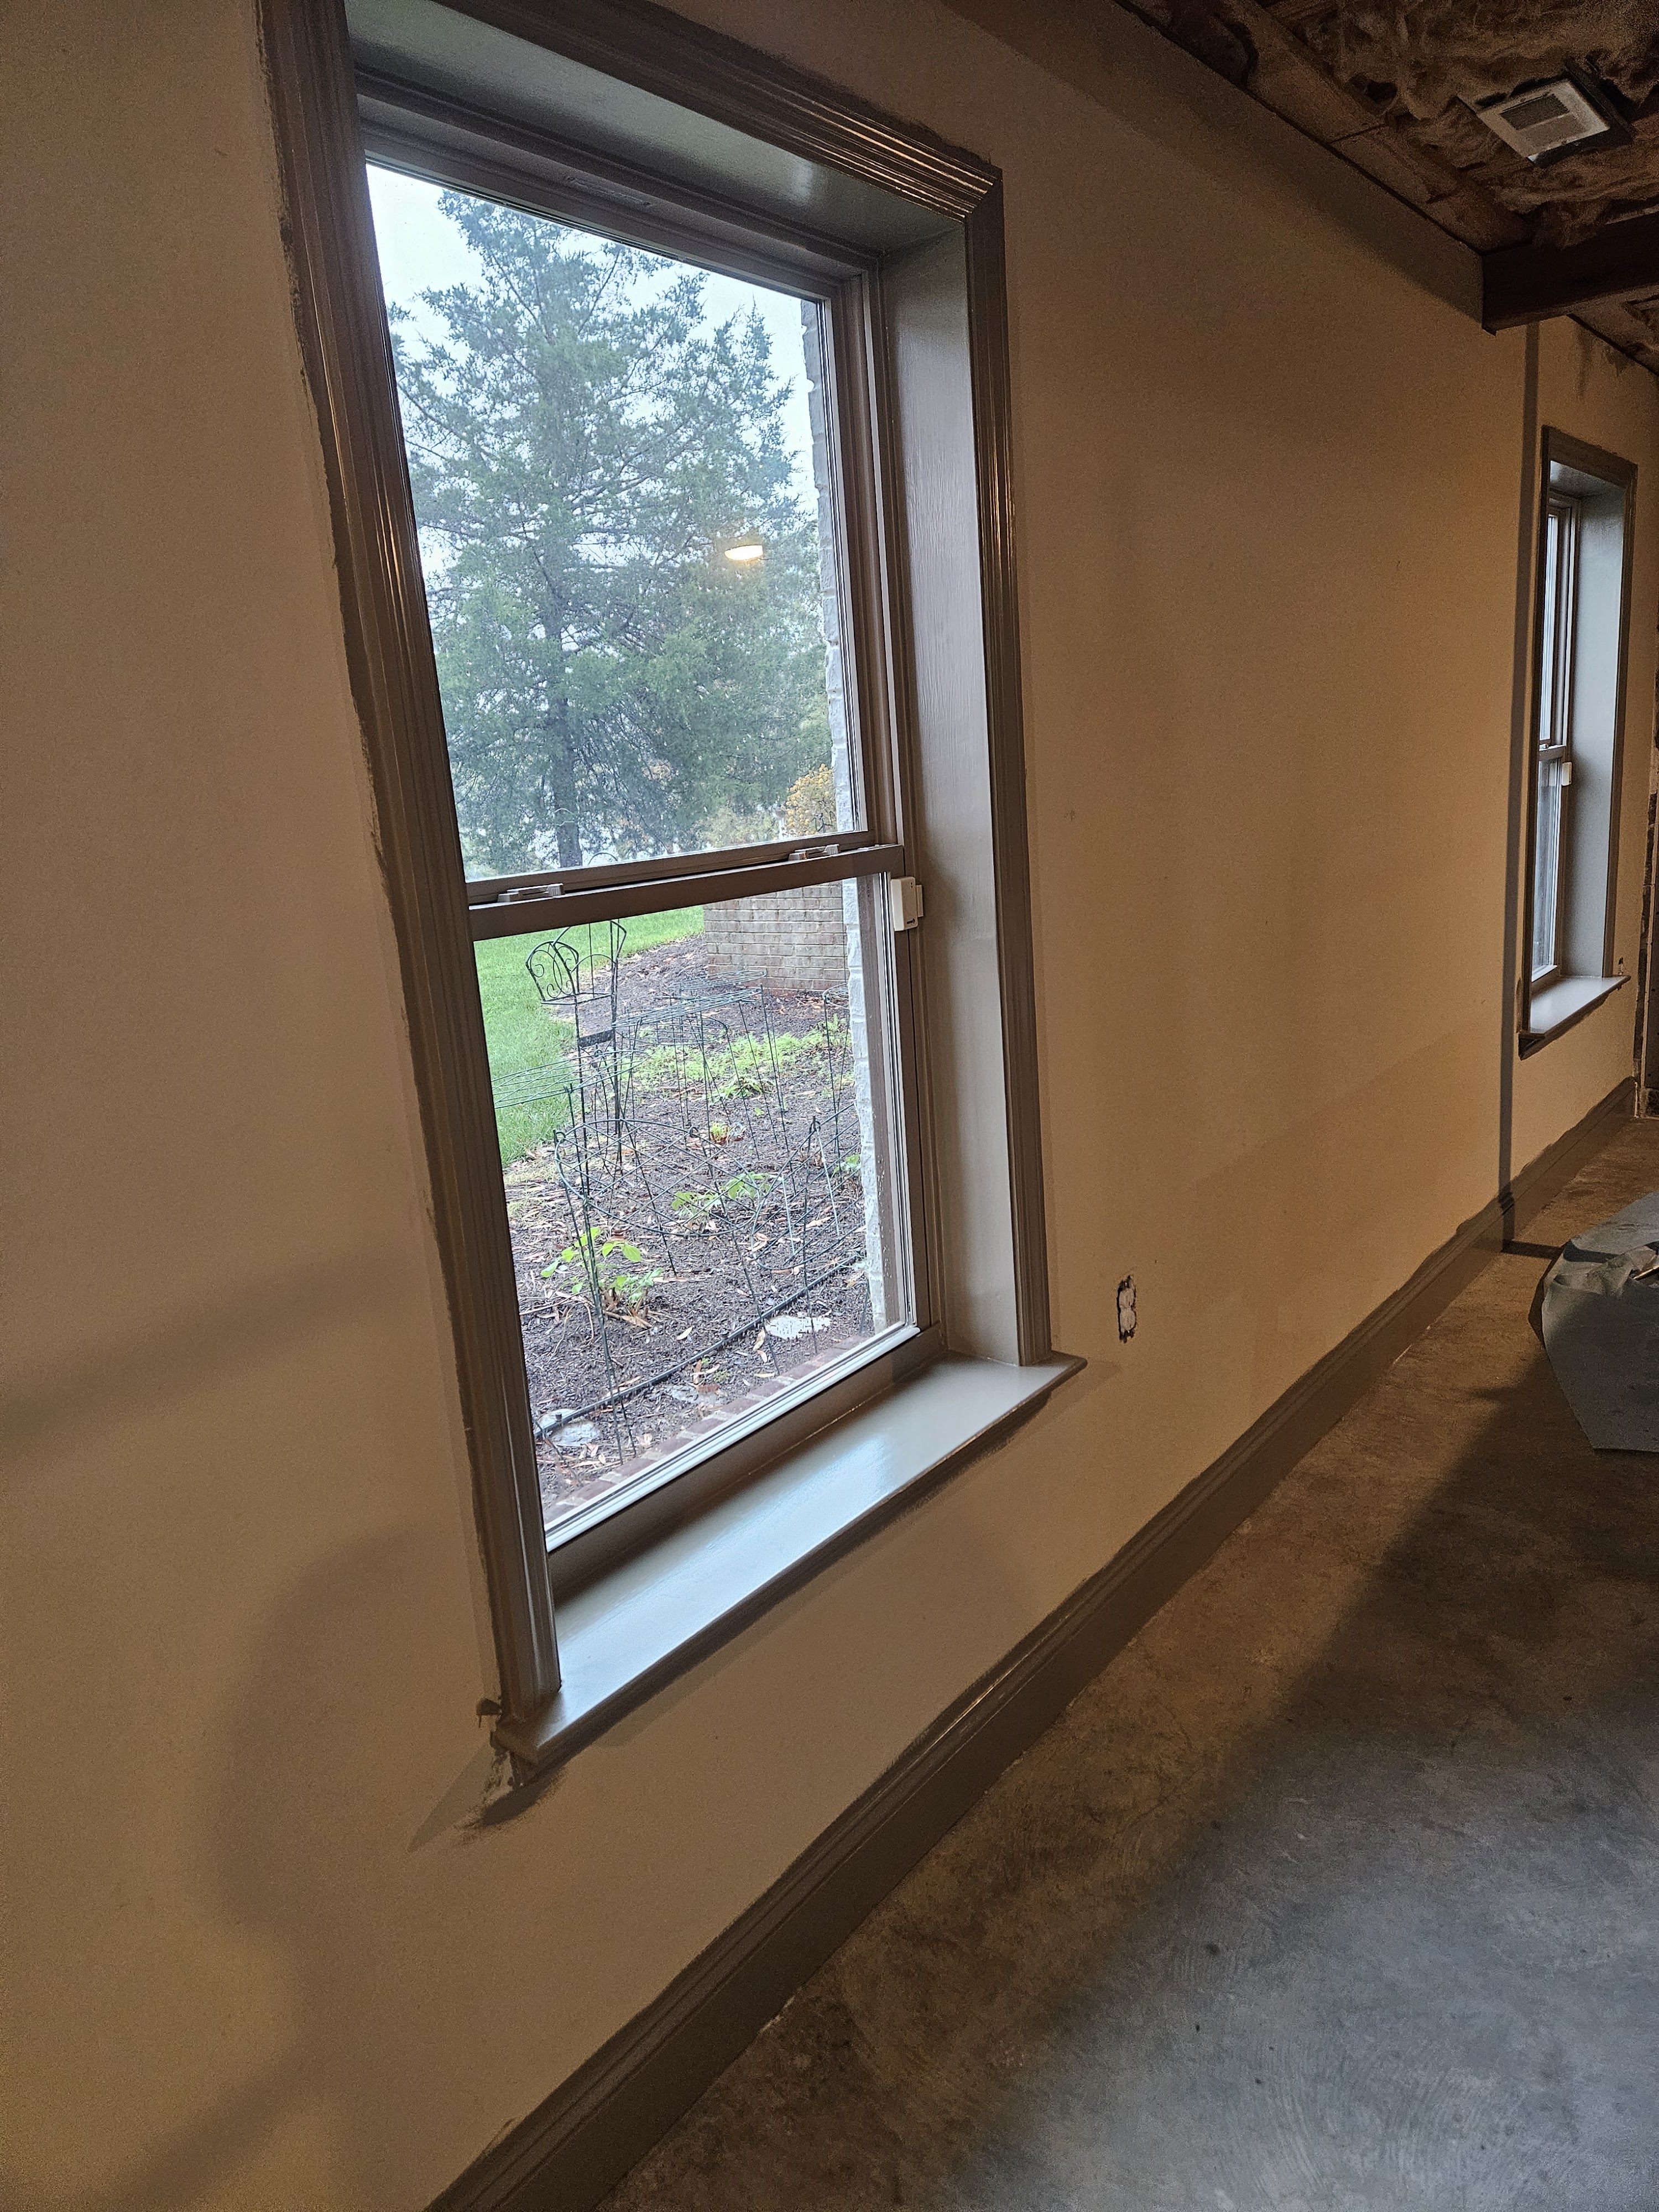
I would like to be able to use this space over the holiday, so we are working on getting it more finished looking. I bought more trim paint and we picked a wall color and I finished painting the window trim and the baseboard. Then I painted the wall. The colors look great with the stone work.
Eventually we are going to build a mini wall to enclose the drain pipe that they put in the middle of the floor and we’ll build a matching one further down the wall and the television and some cabinets will go between them.
Next up, we needed to deal with the faux brick wall at the other end of the room. Eventually, there will be a door to the outside just to the right of this wall (roughly where the air compressor is sitting).

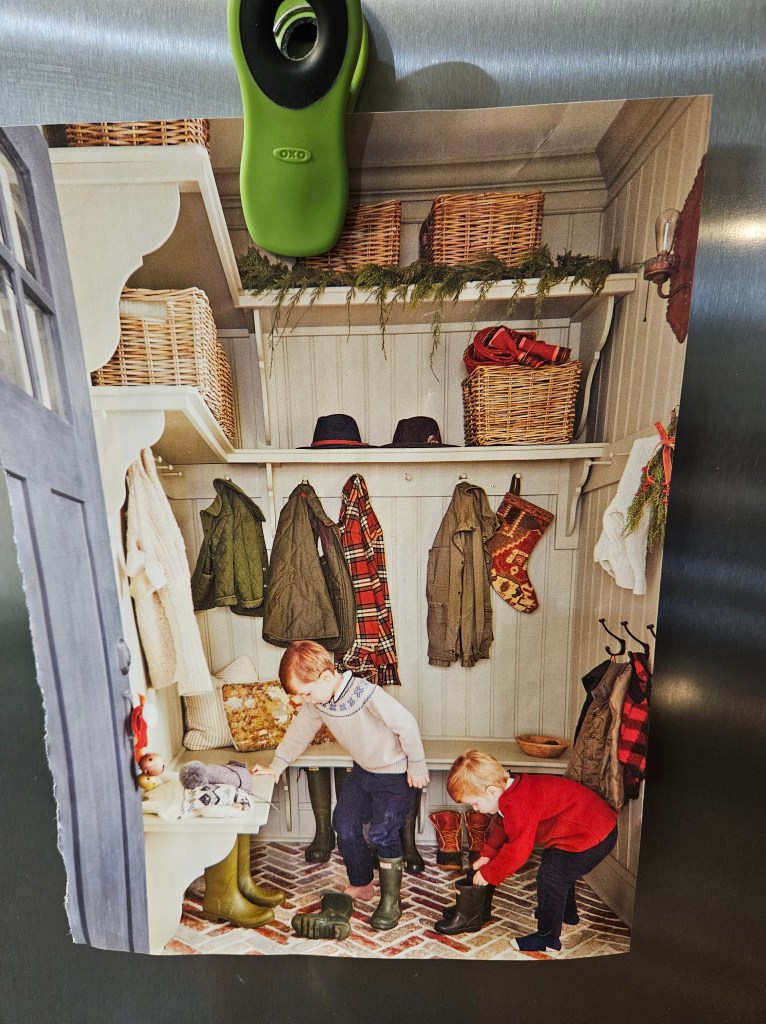
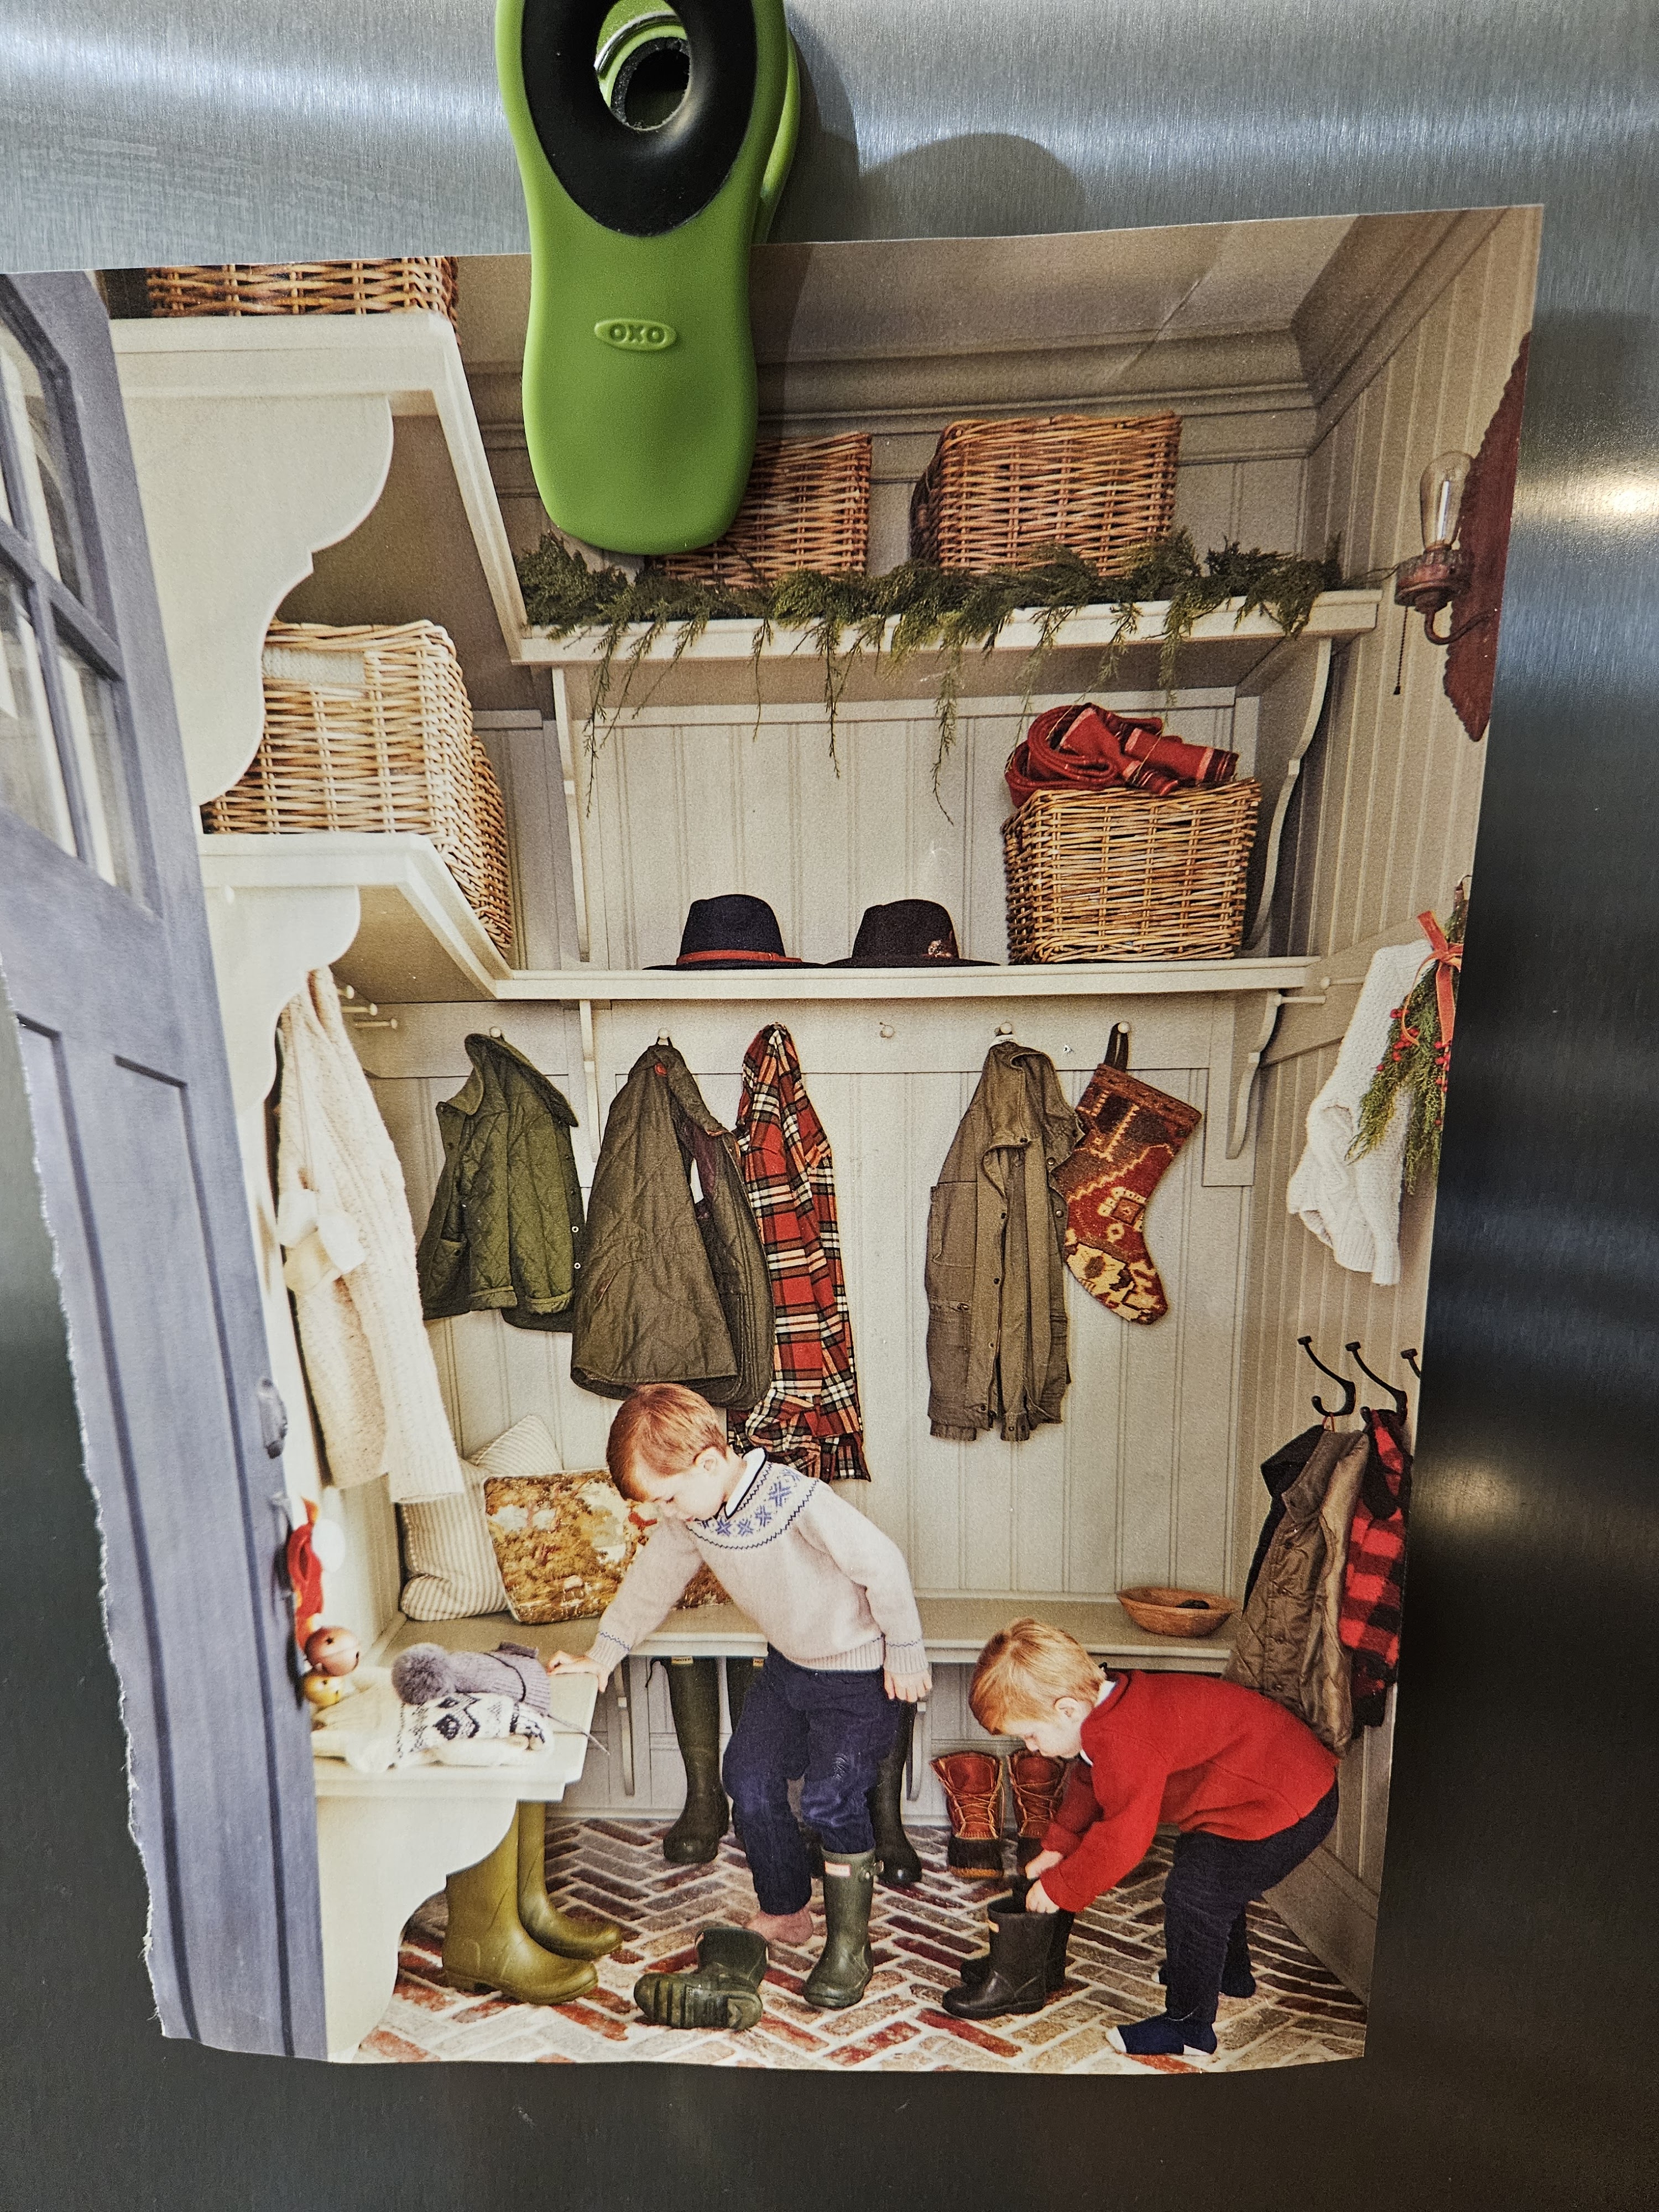
I saved the photo below as an inspiration for what I wanted to do on this wall.
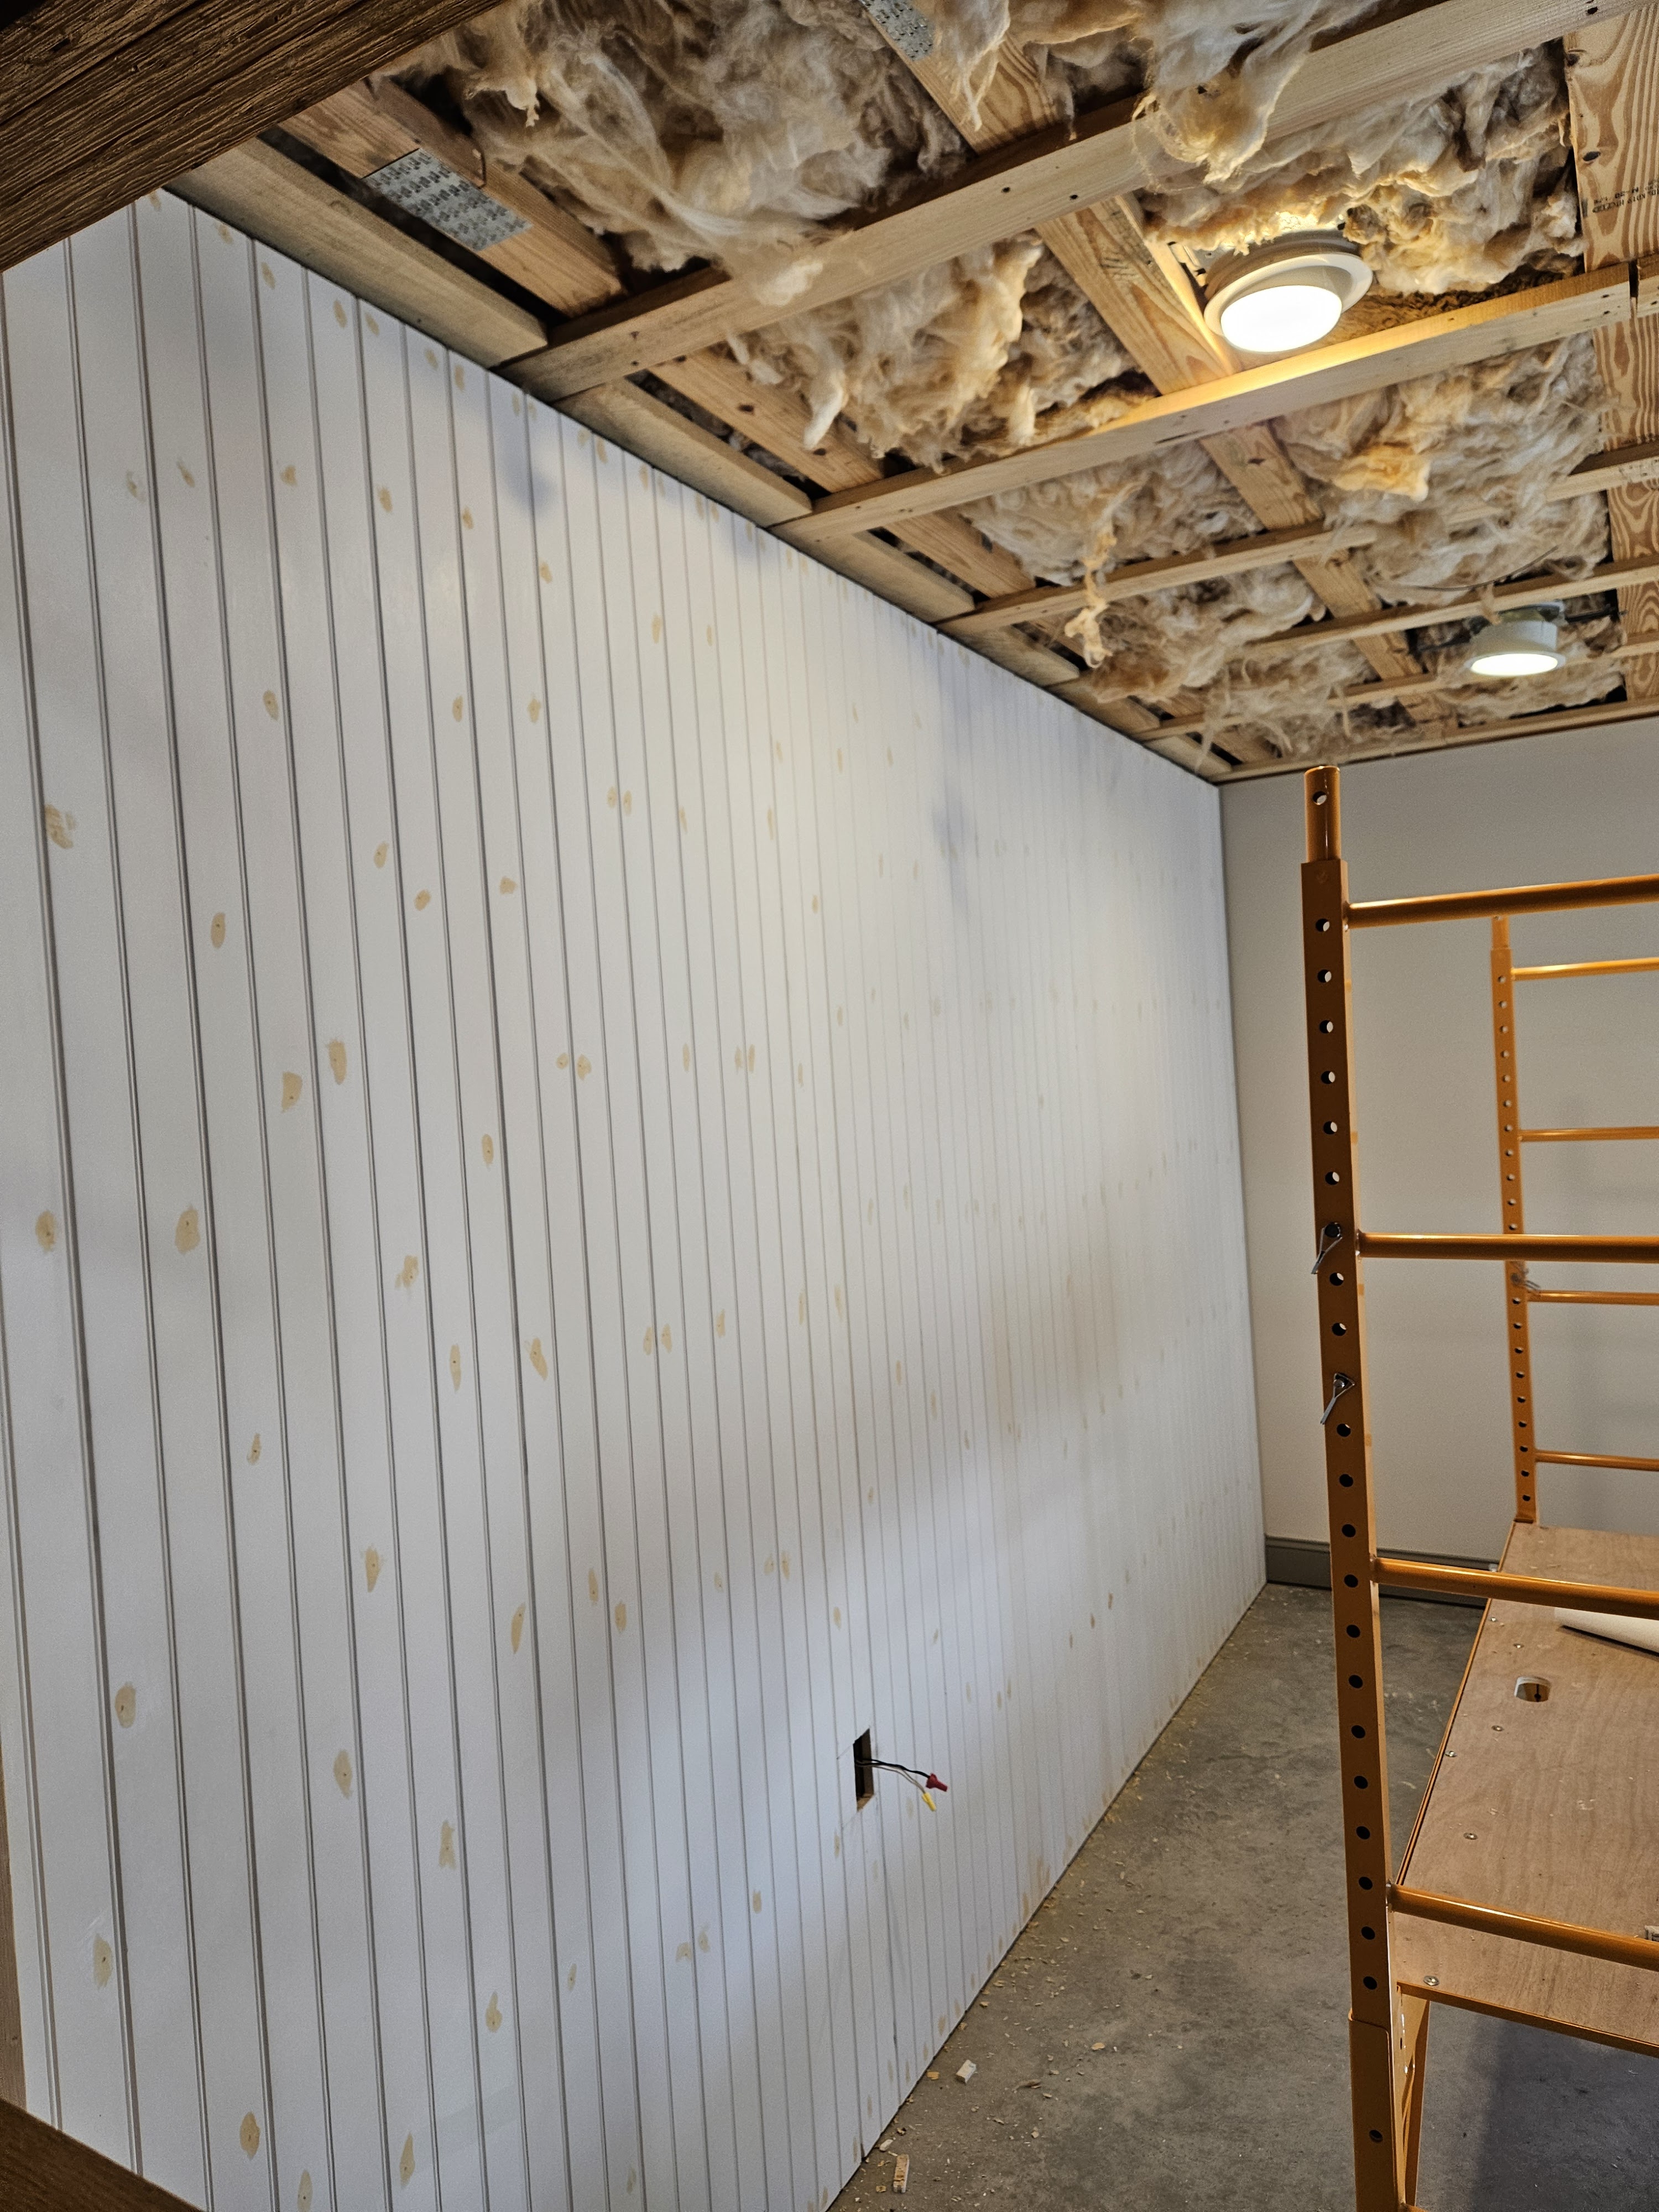
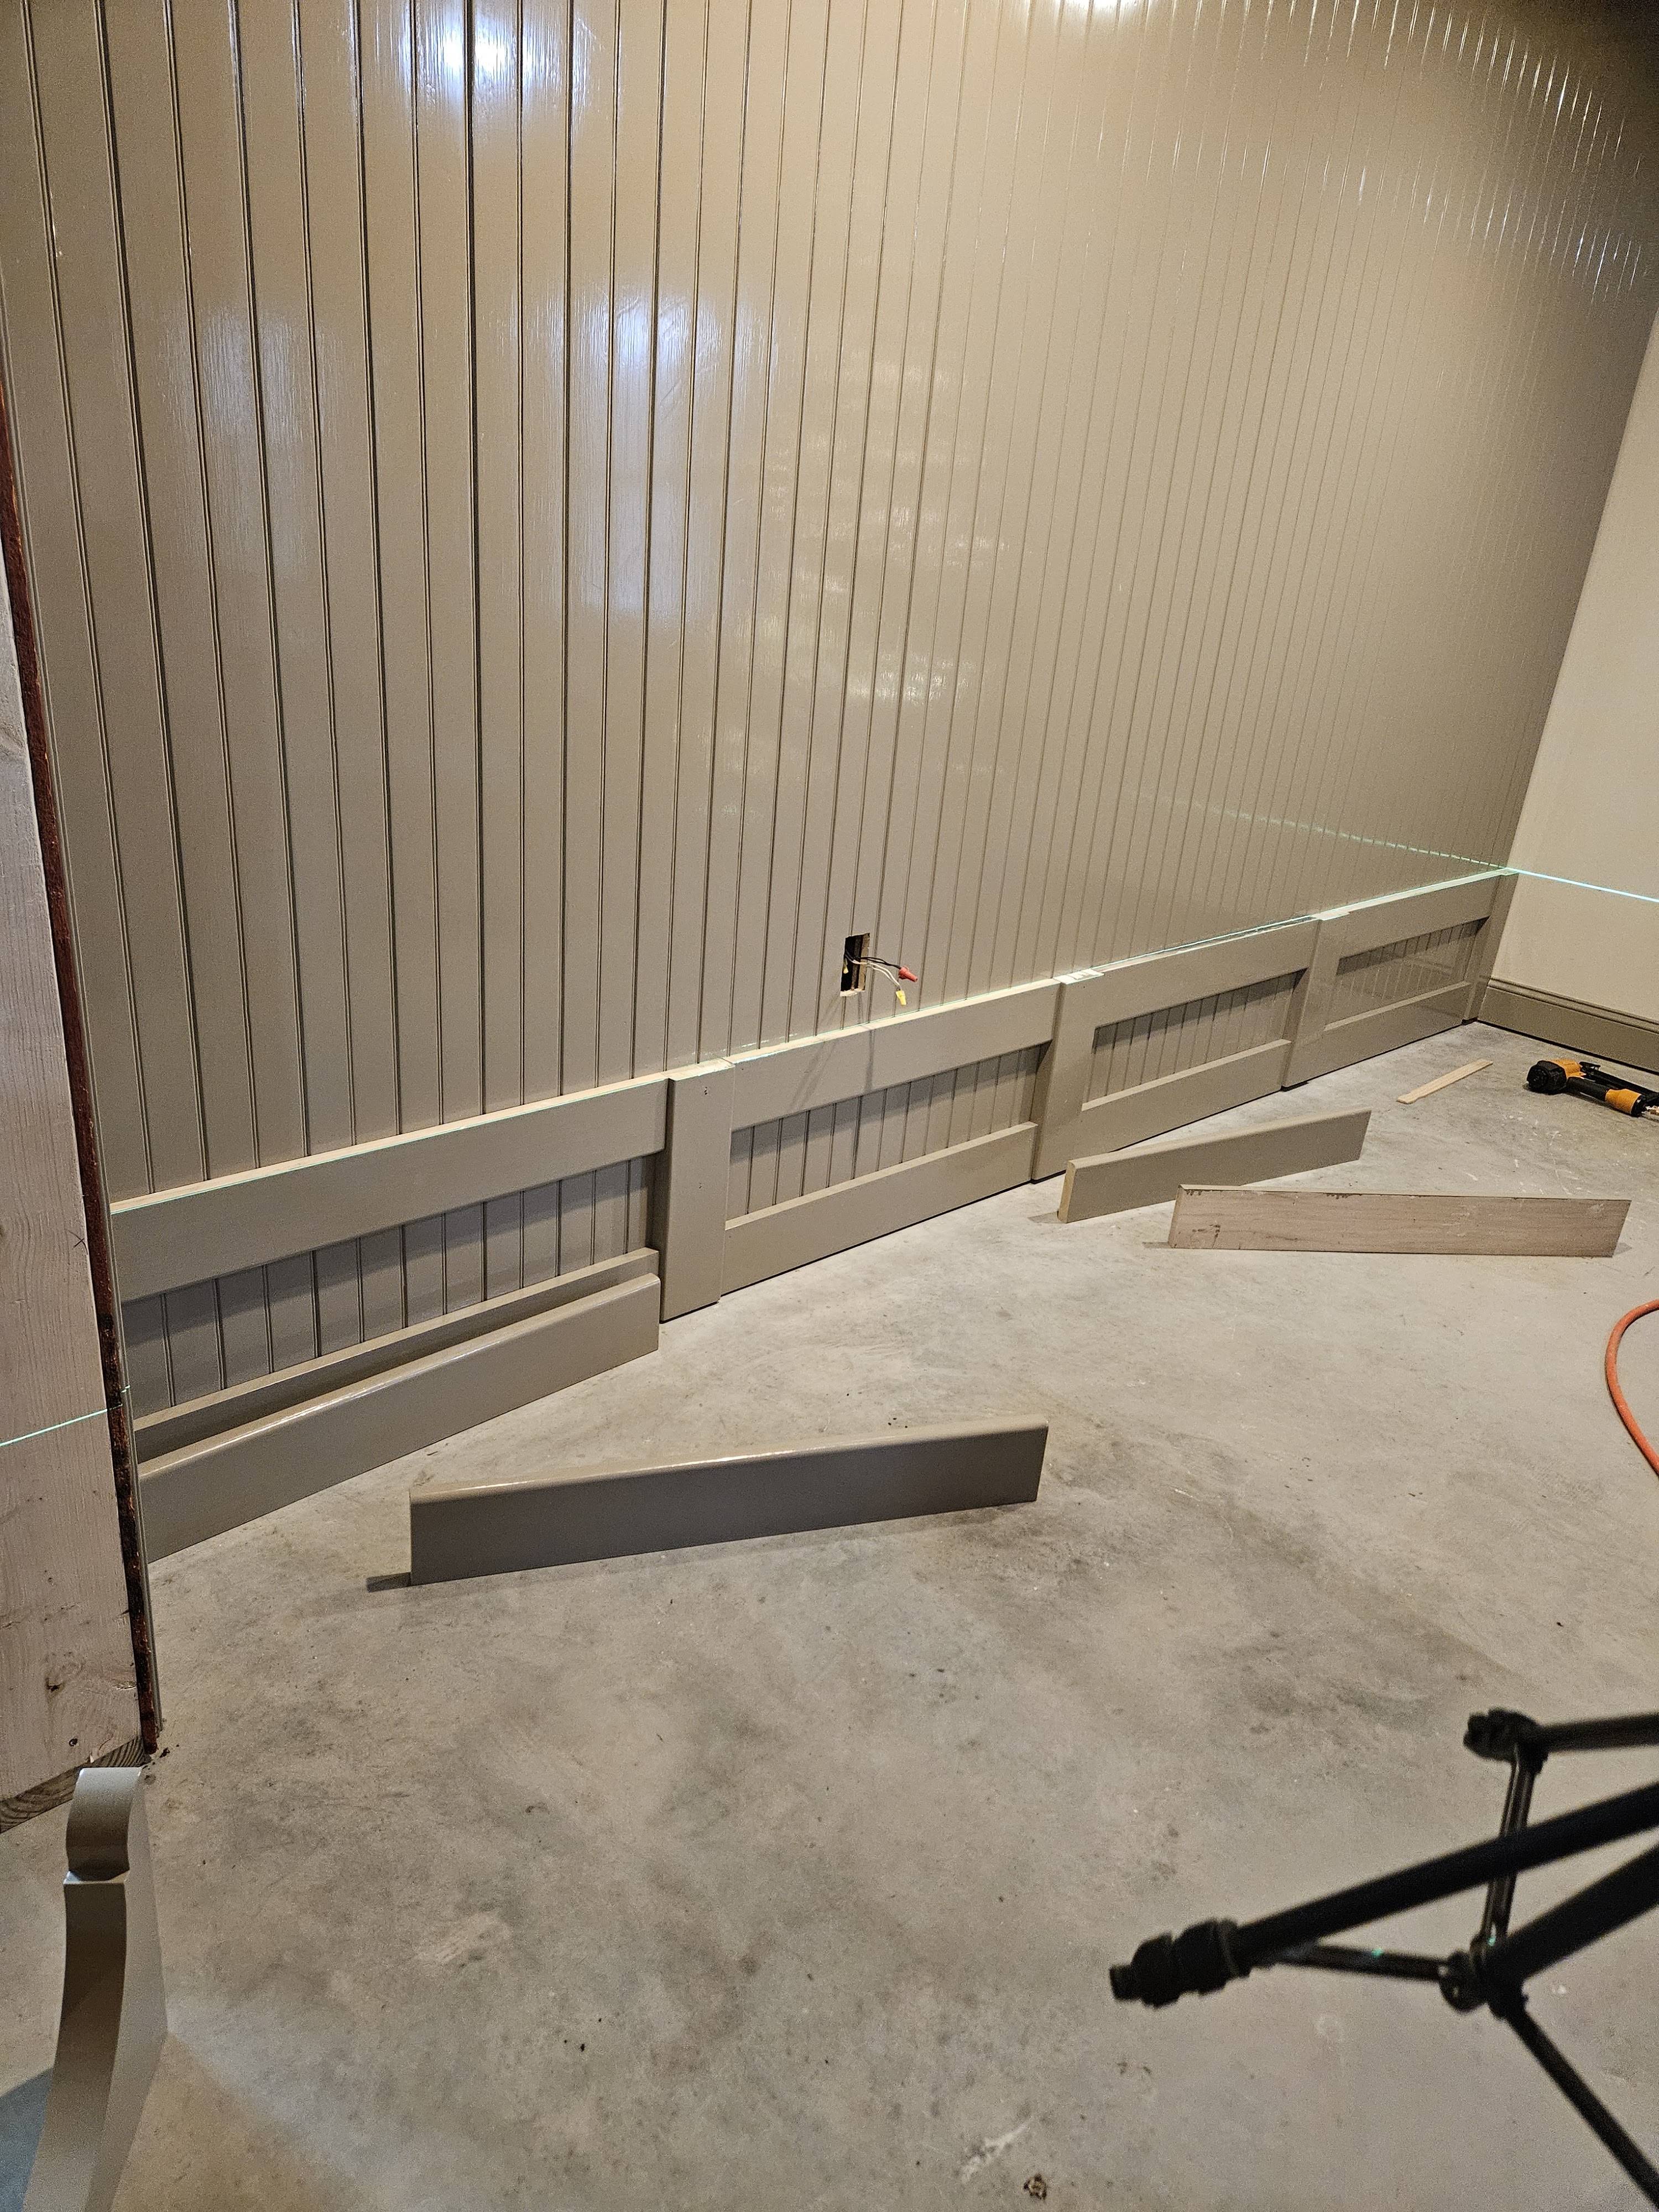
So, I found a beadboard plank product at Lowe’s and we bought enough to cover this entire wall.
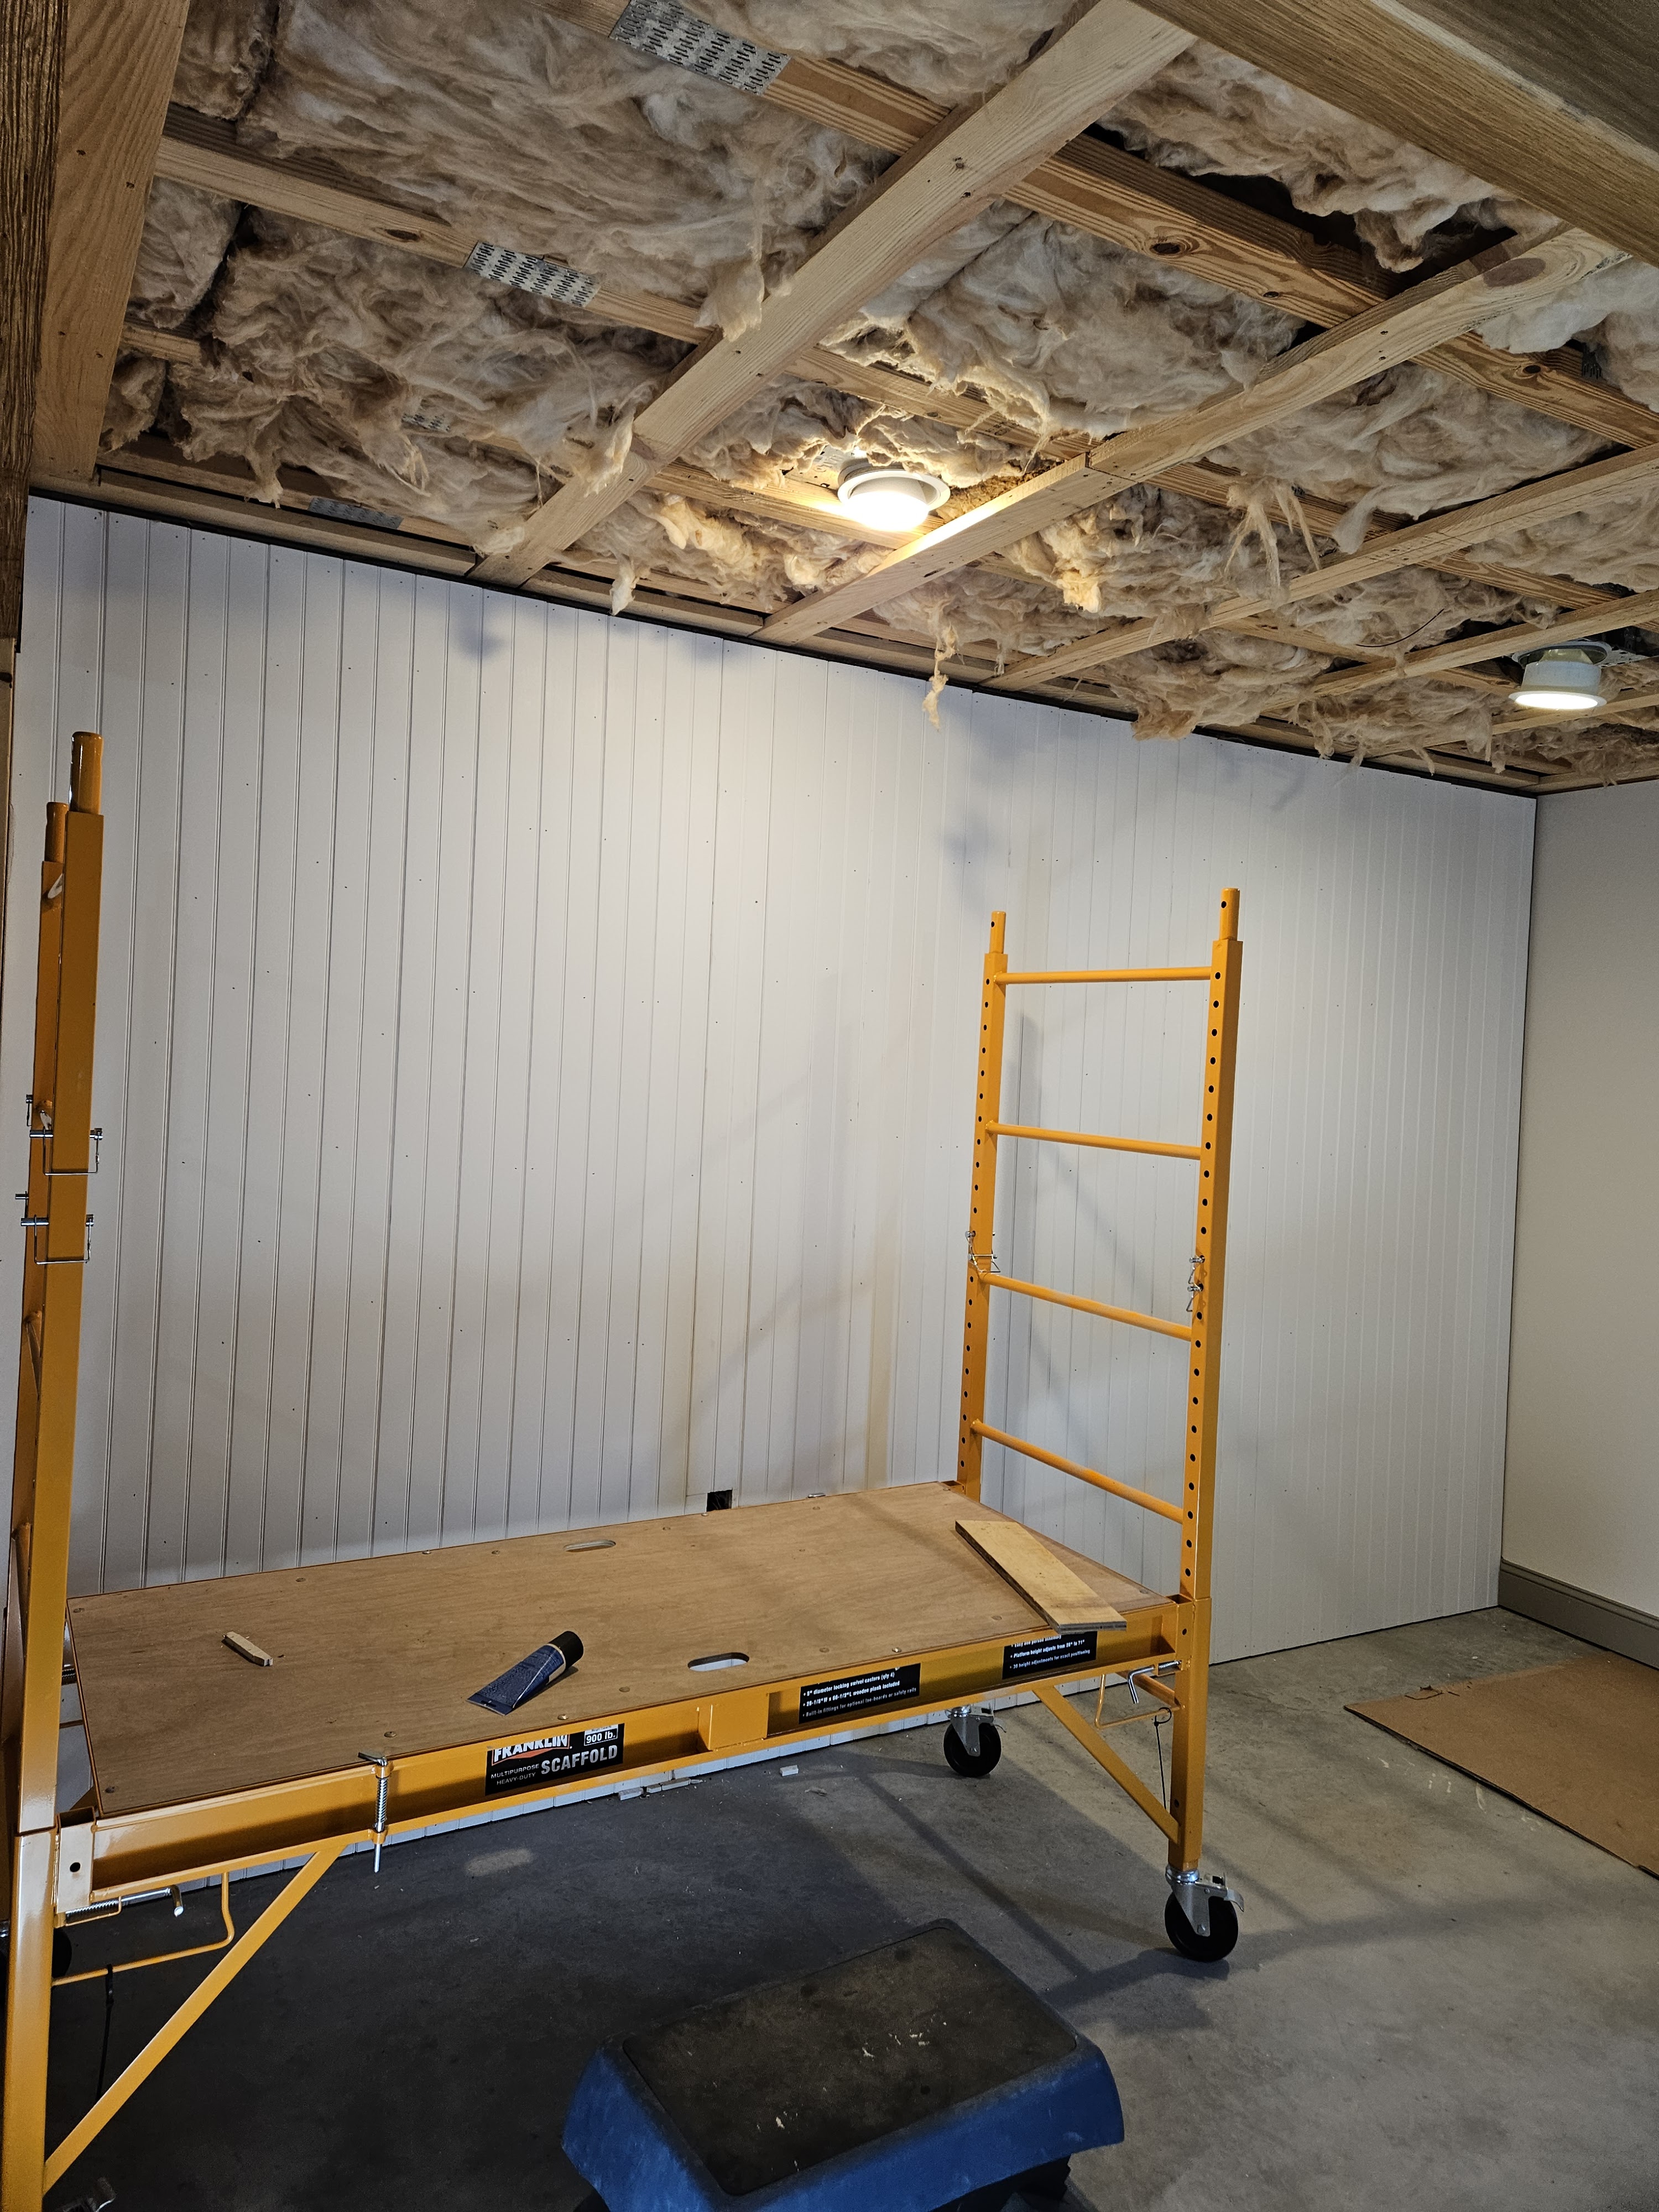
Then I put wood filler in all the holes. I put it in with my finger and then scraped off the excess with a wide putty knife after it dried for just a couple minutes. Having this rolling scaffold is an absolute game changer when working on a project like this.
Then, I came back and sanded the wood filler.
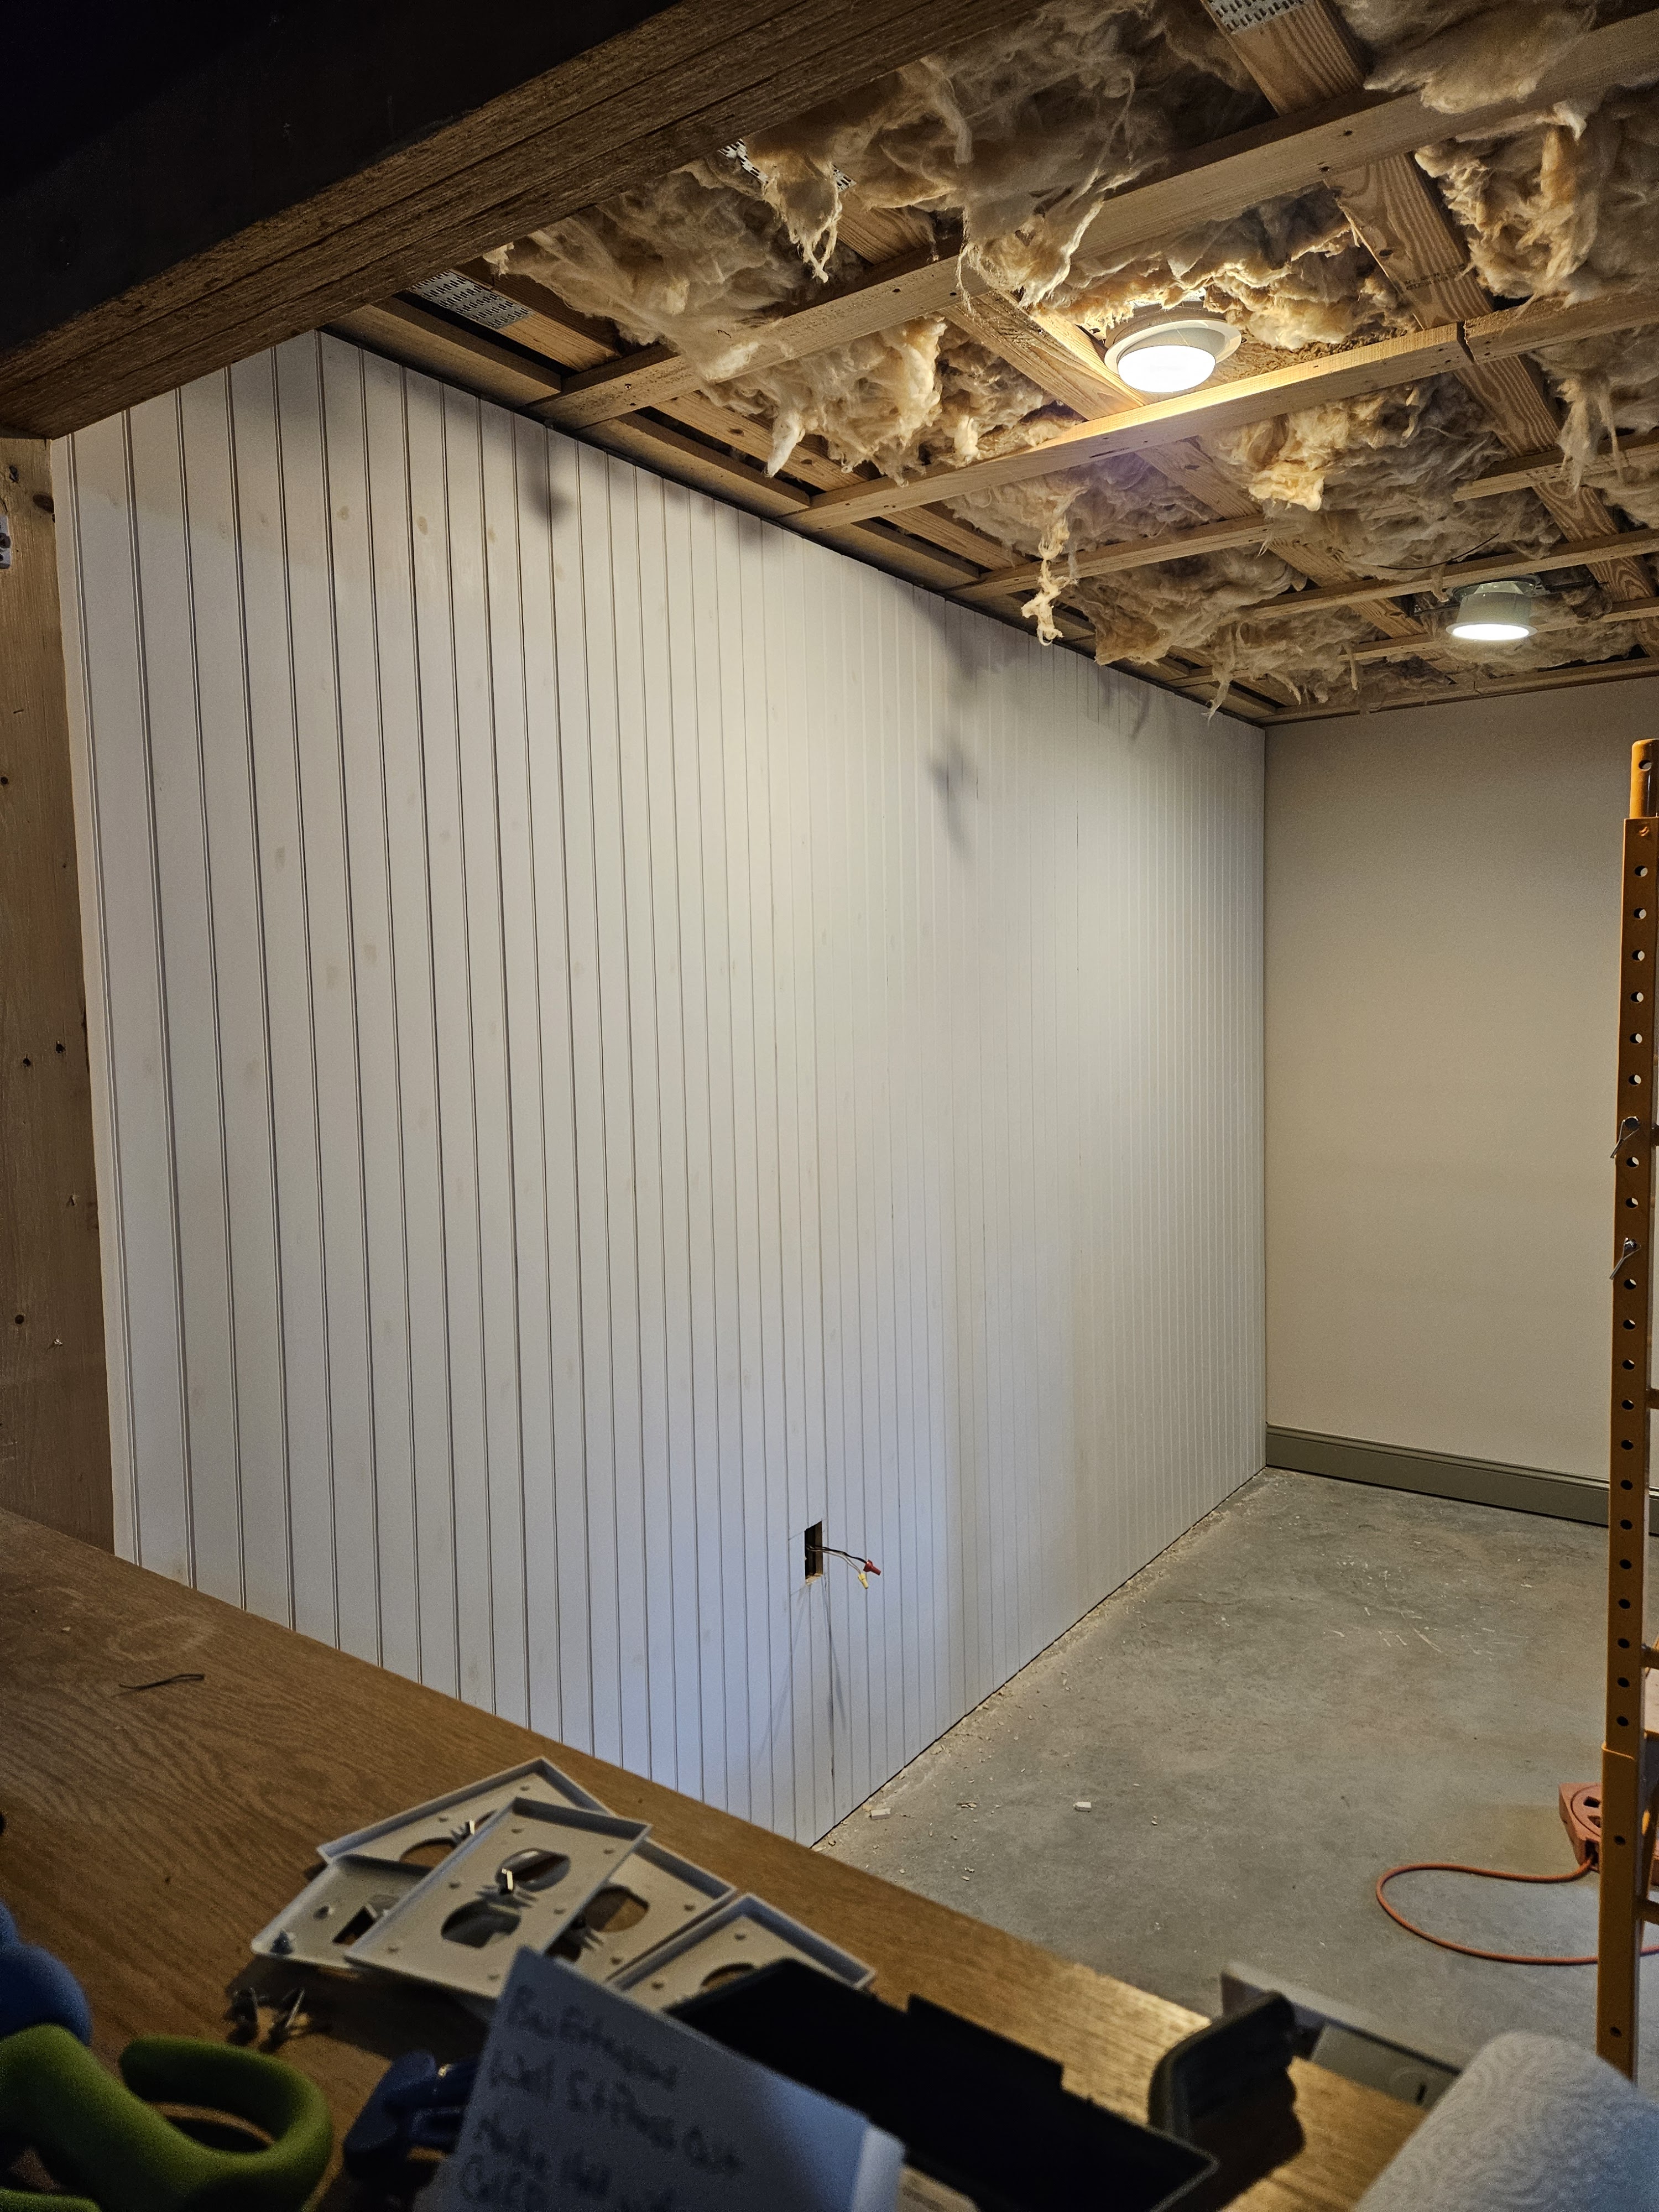
Then I vacuumed the dust off the floor and the wall and tack clothed the wall to get the final bit of dust.
This is a pre-primed product, so then it was time for the paint. A couple of things that I have learned about using oil paint on this project is to thin the paint and to strain the paint before using it. It helps make the paint go on so much more smoothly and no little bits of stuff are in it that you then have to try to pick off the wall.
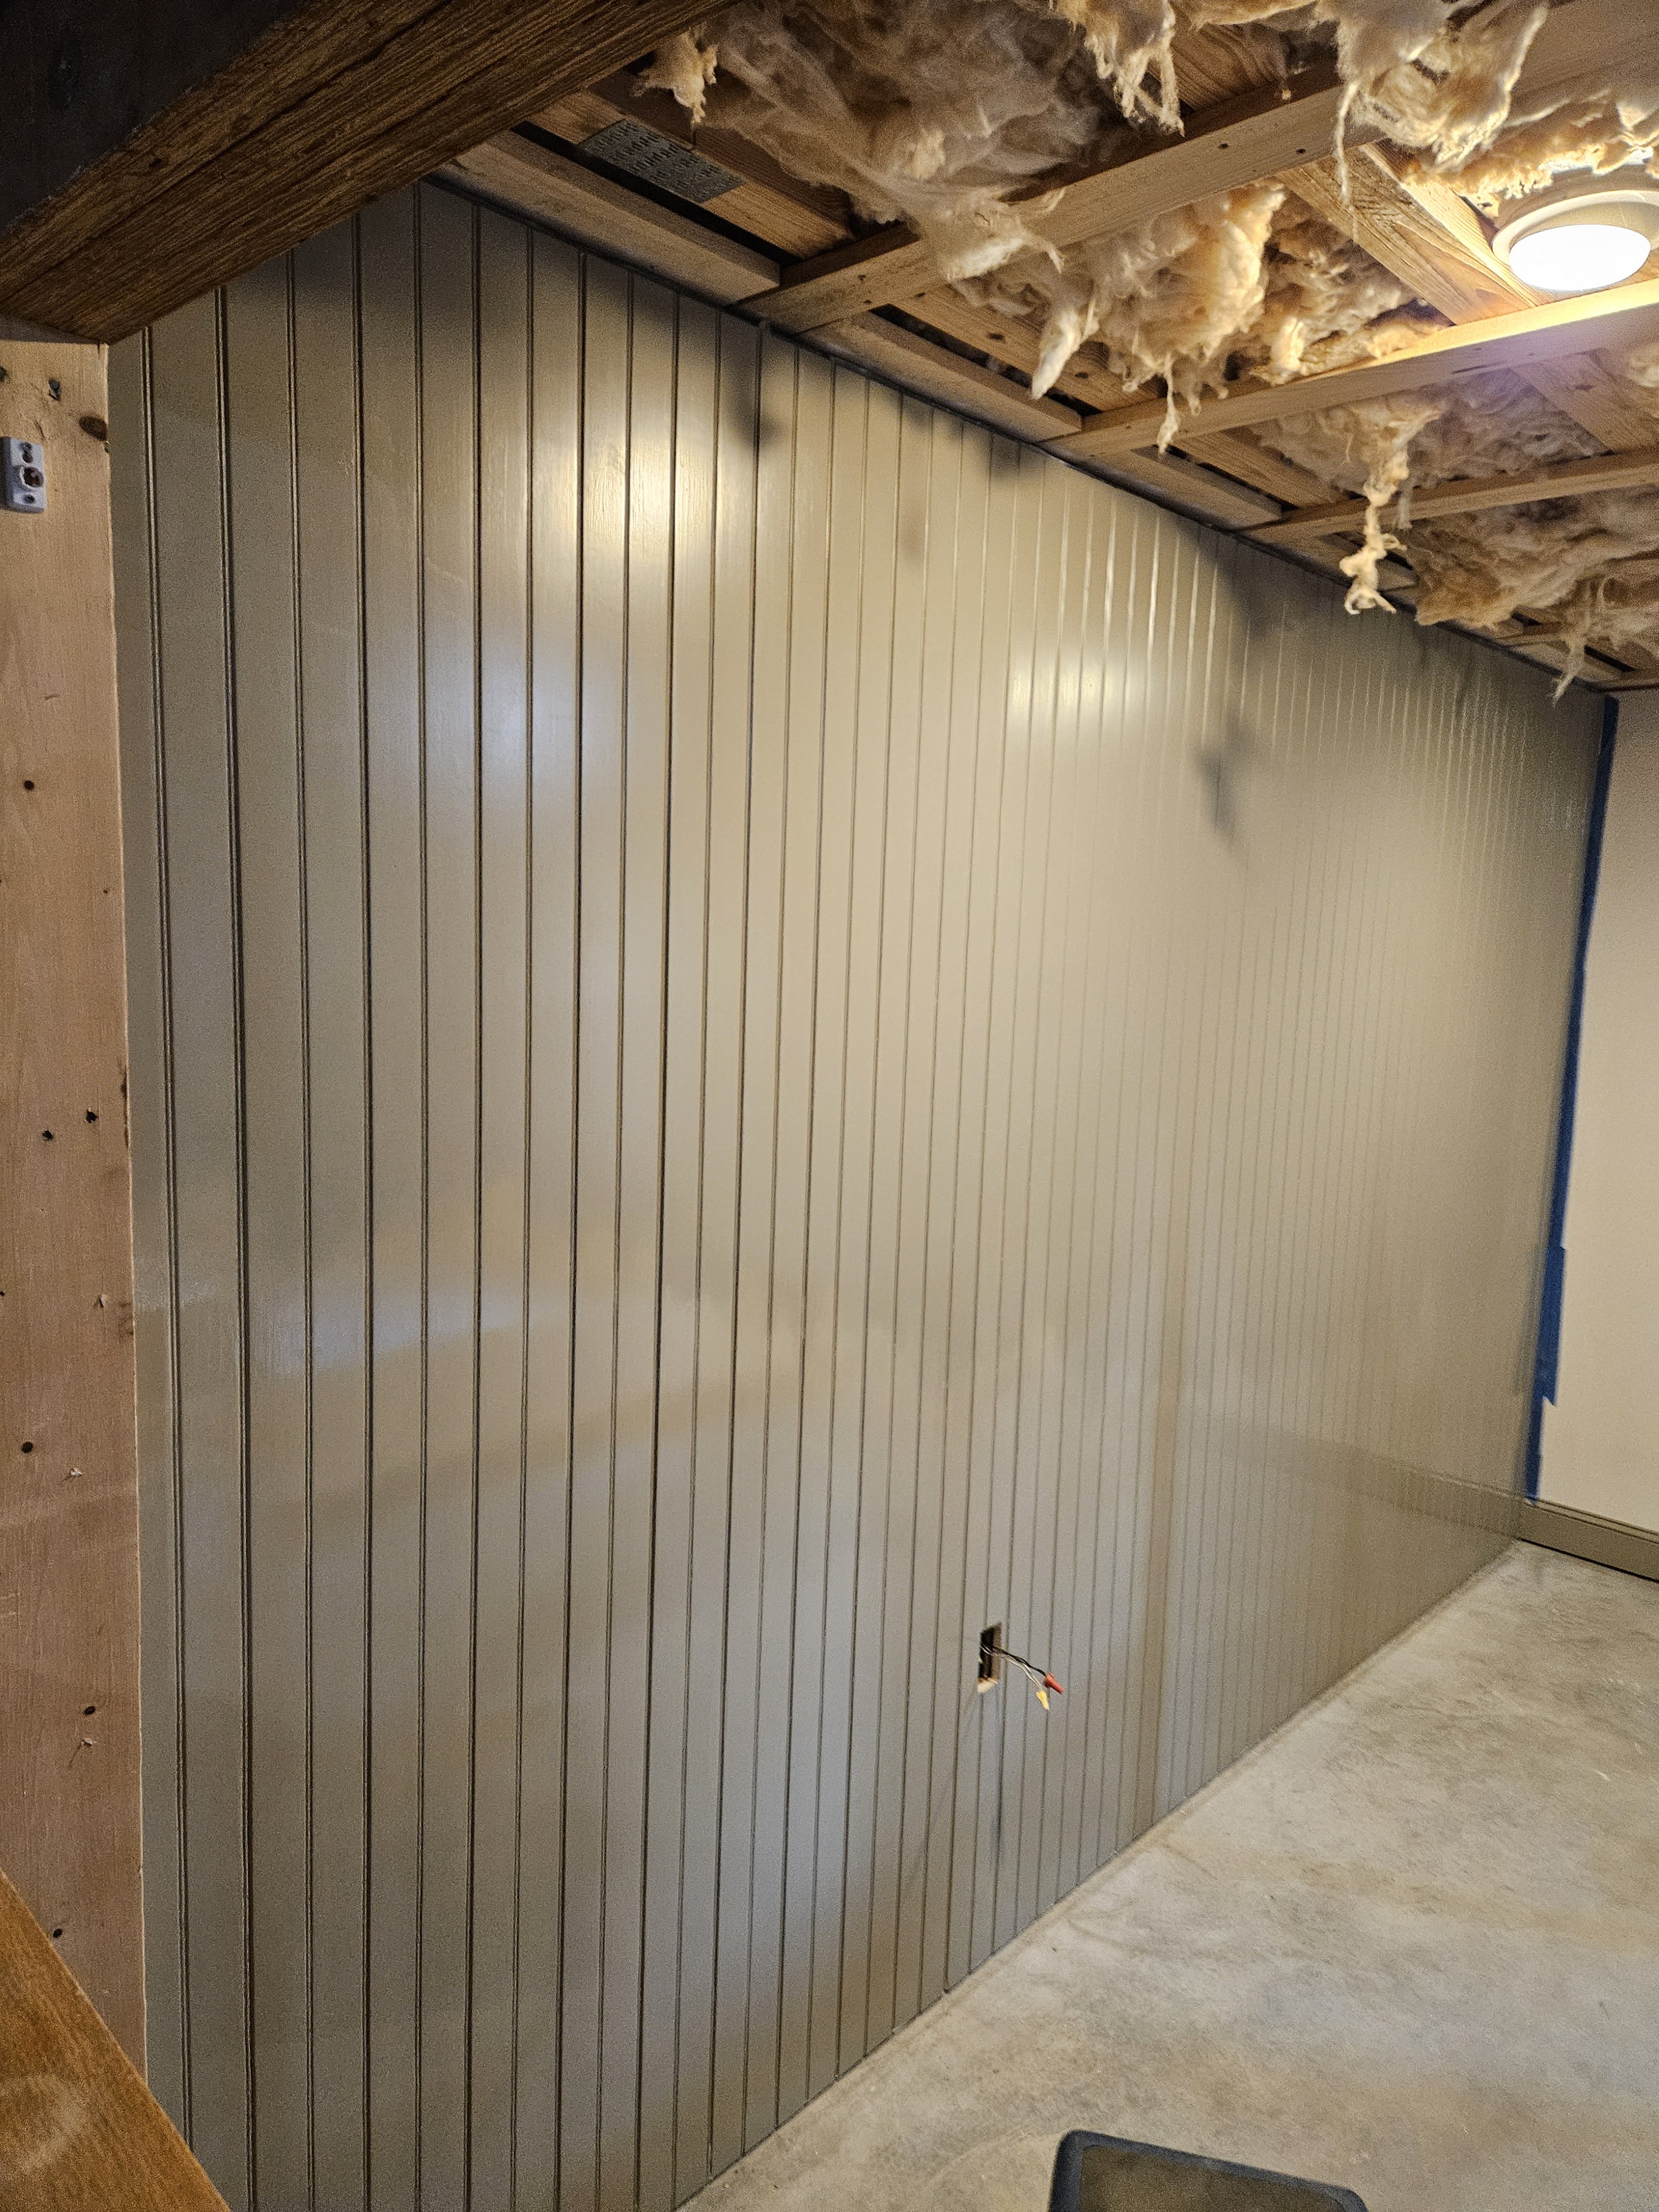
So there were gaps between some of the boards which were white and I needed to disguise because they were REALLY obvious. So I taped those places between the first and second coats of paint and sprayed the gaps with tan spray paint.
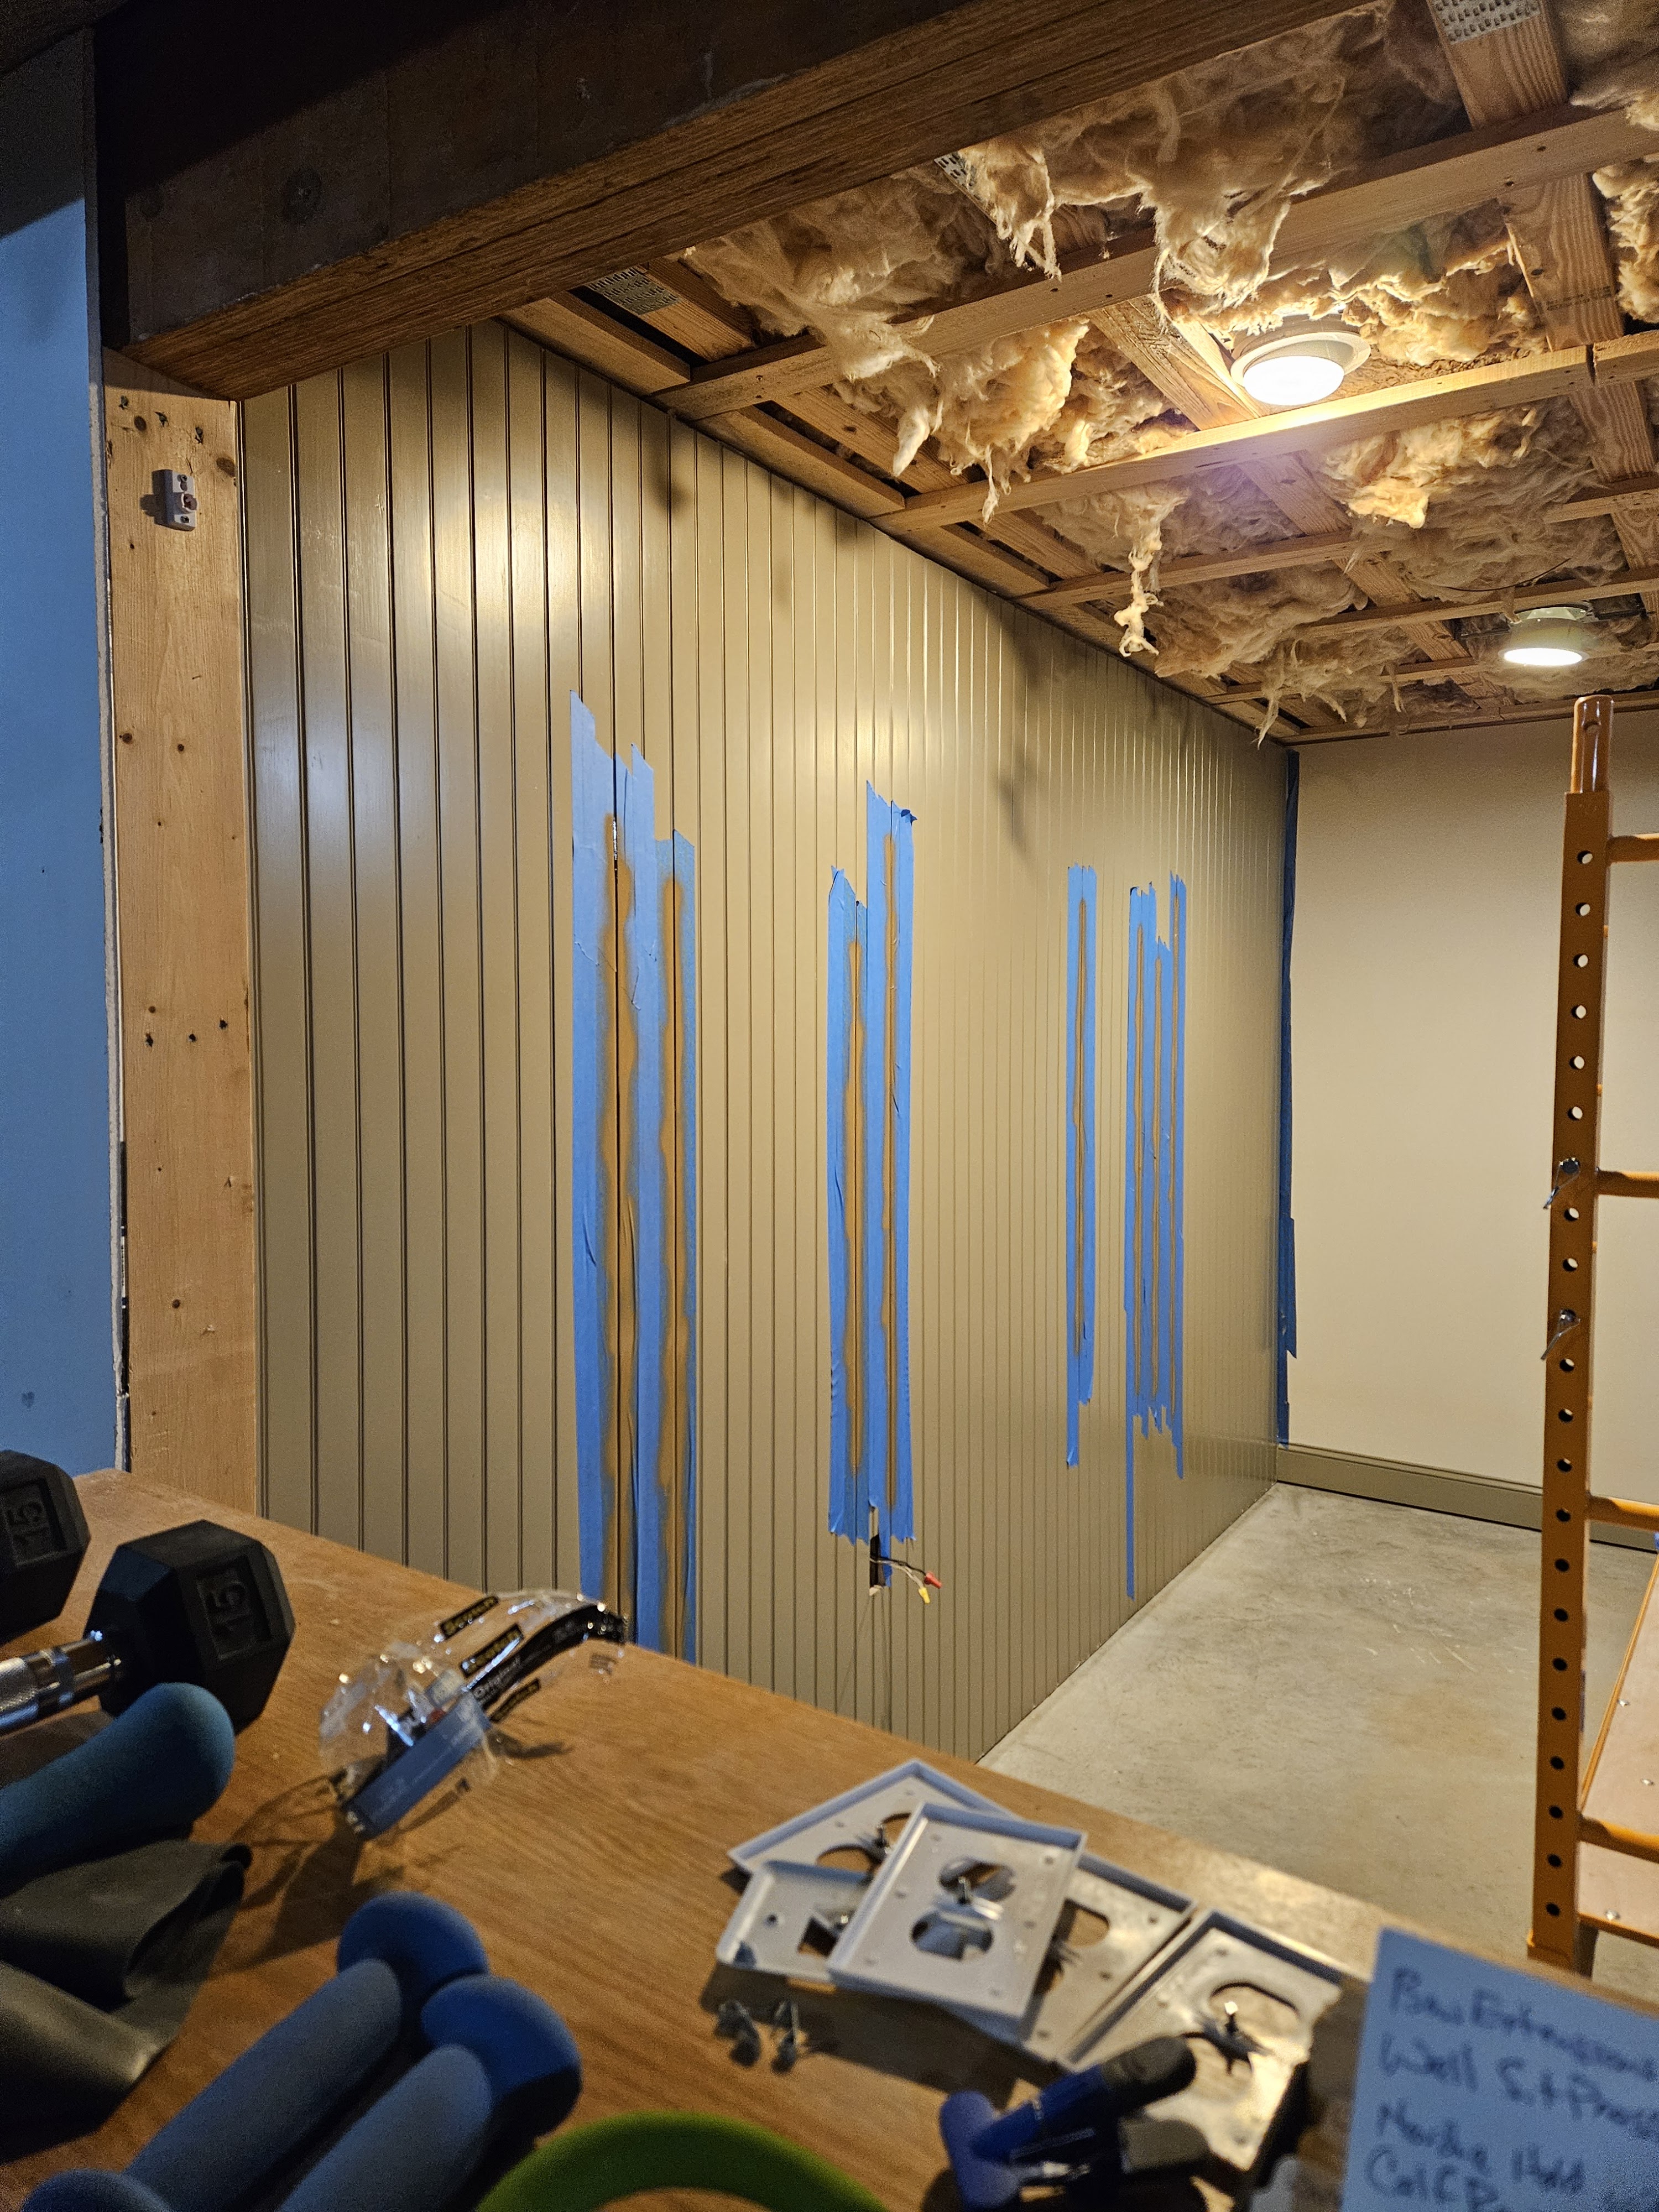
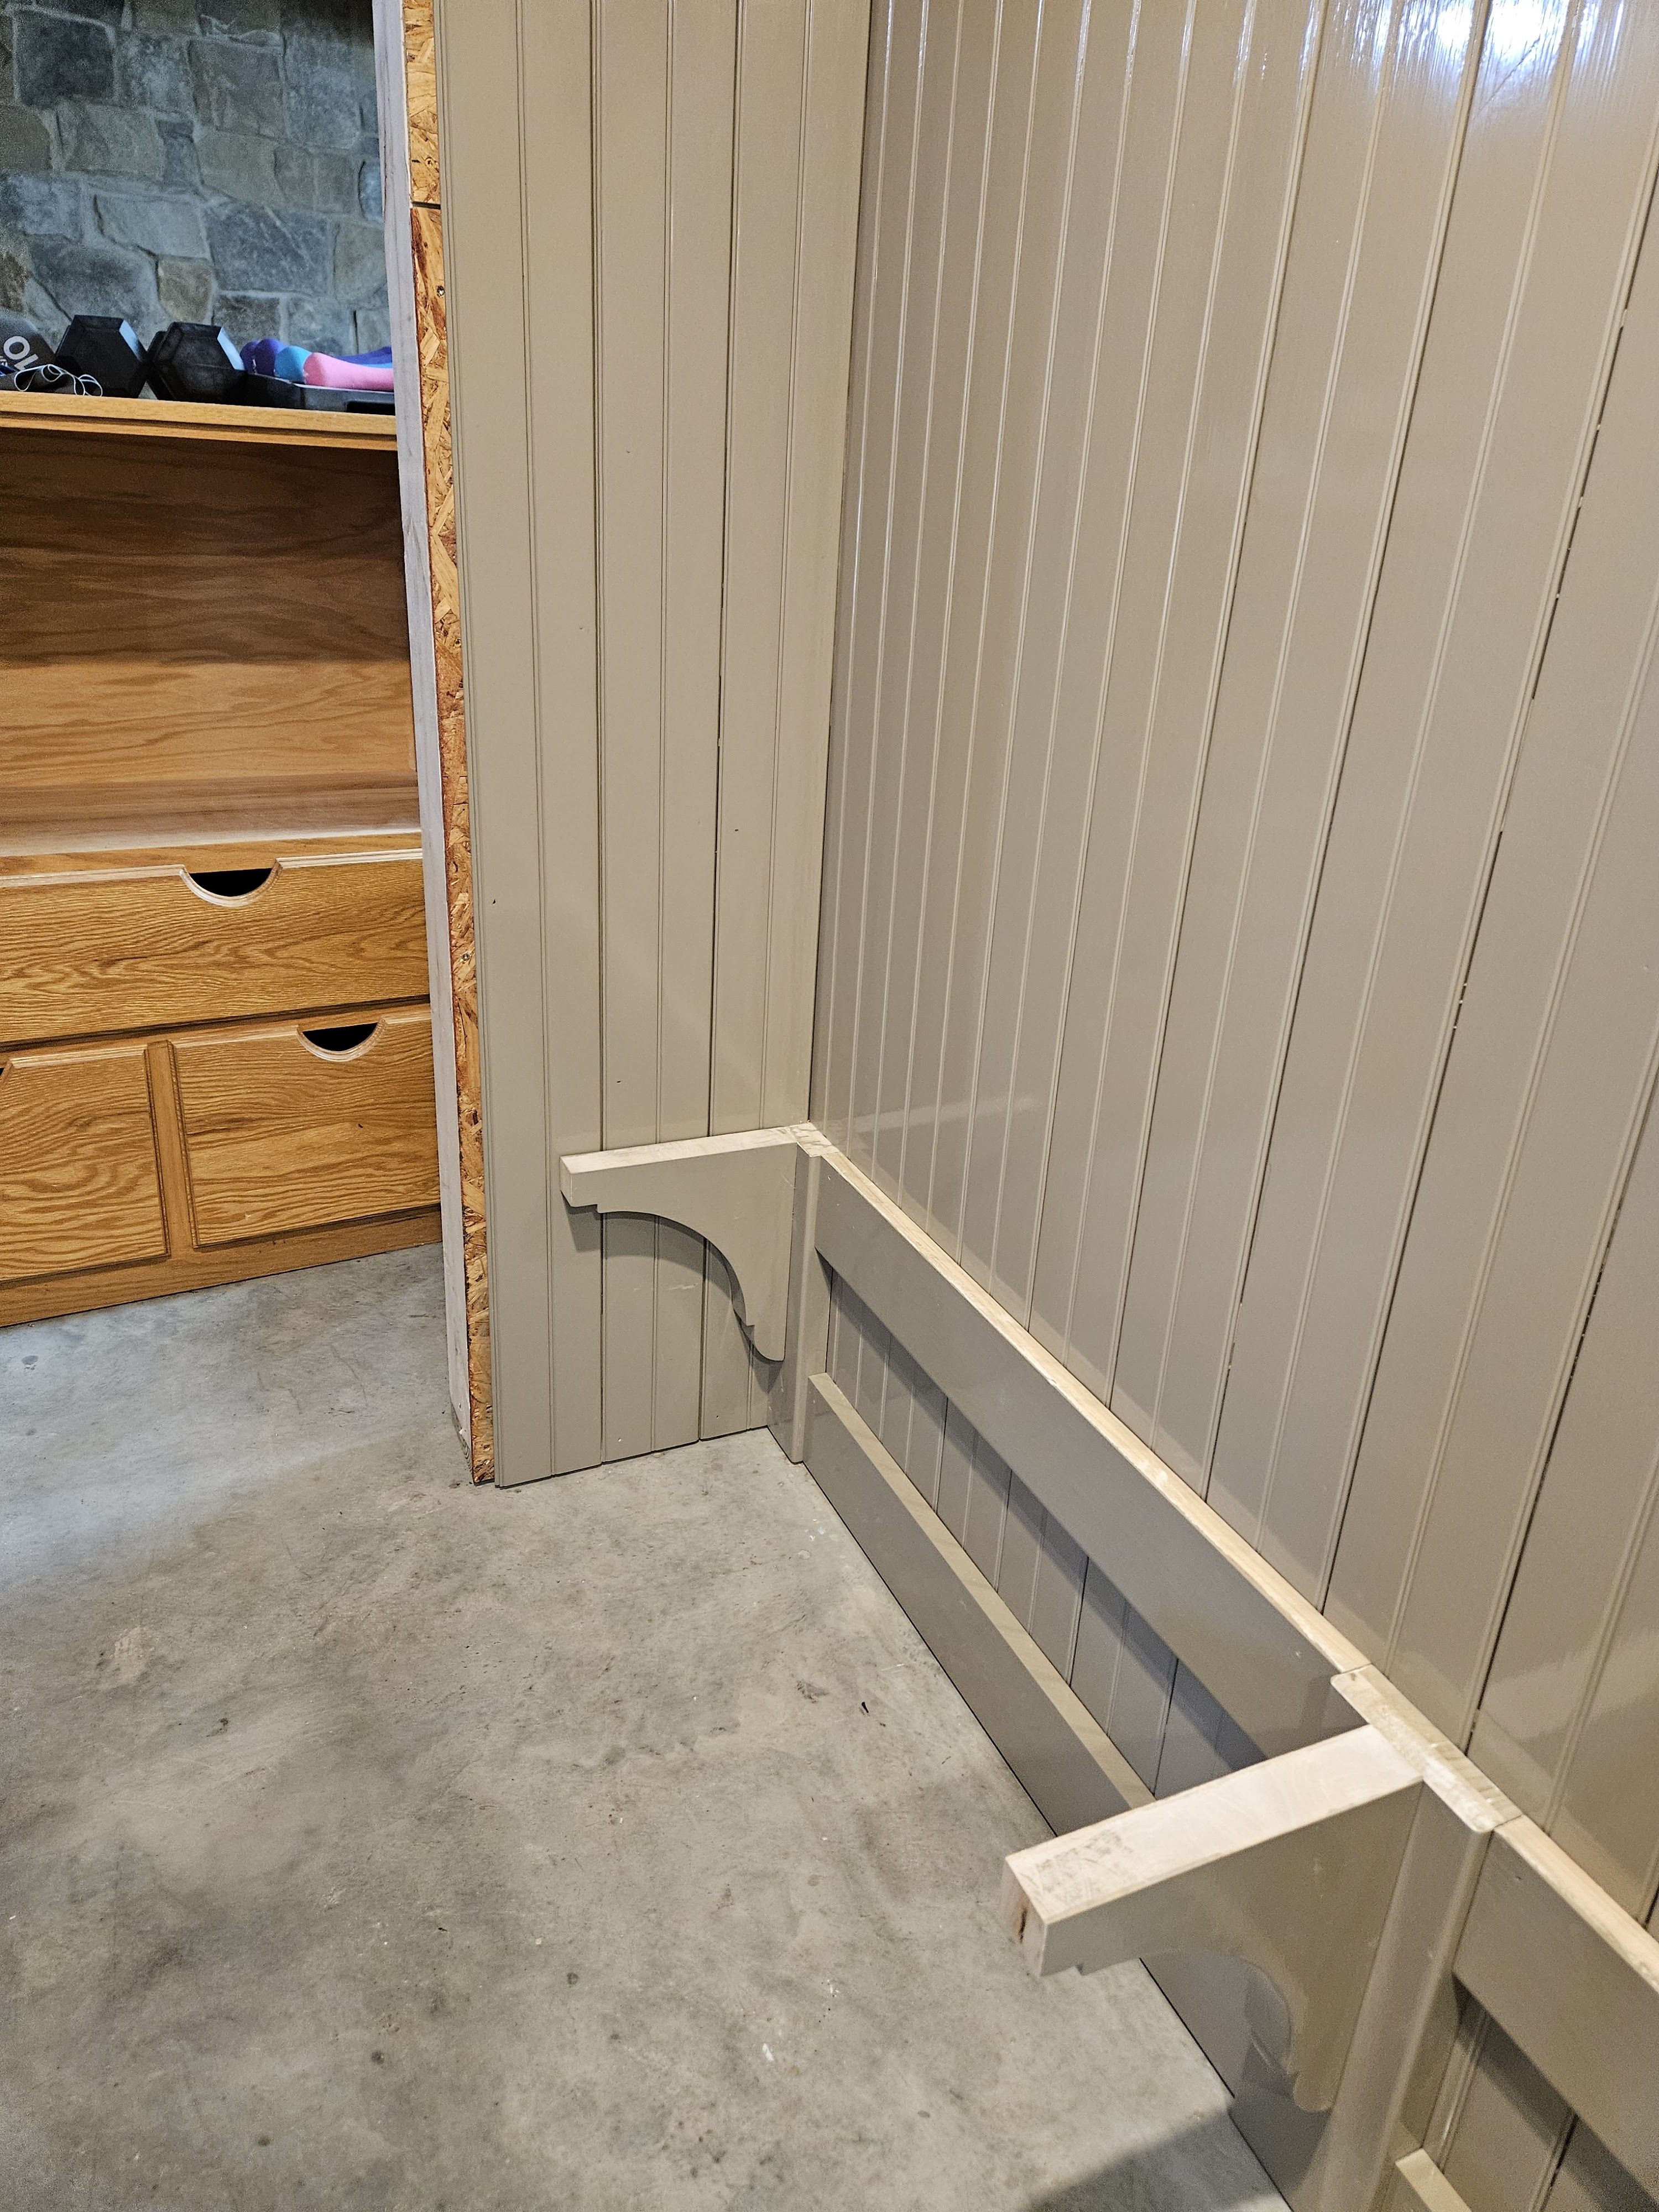
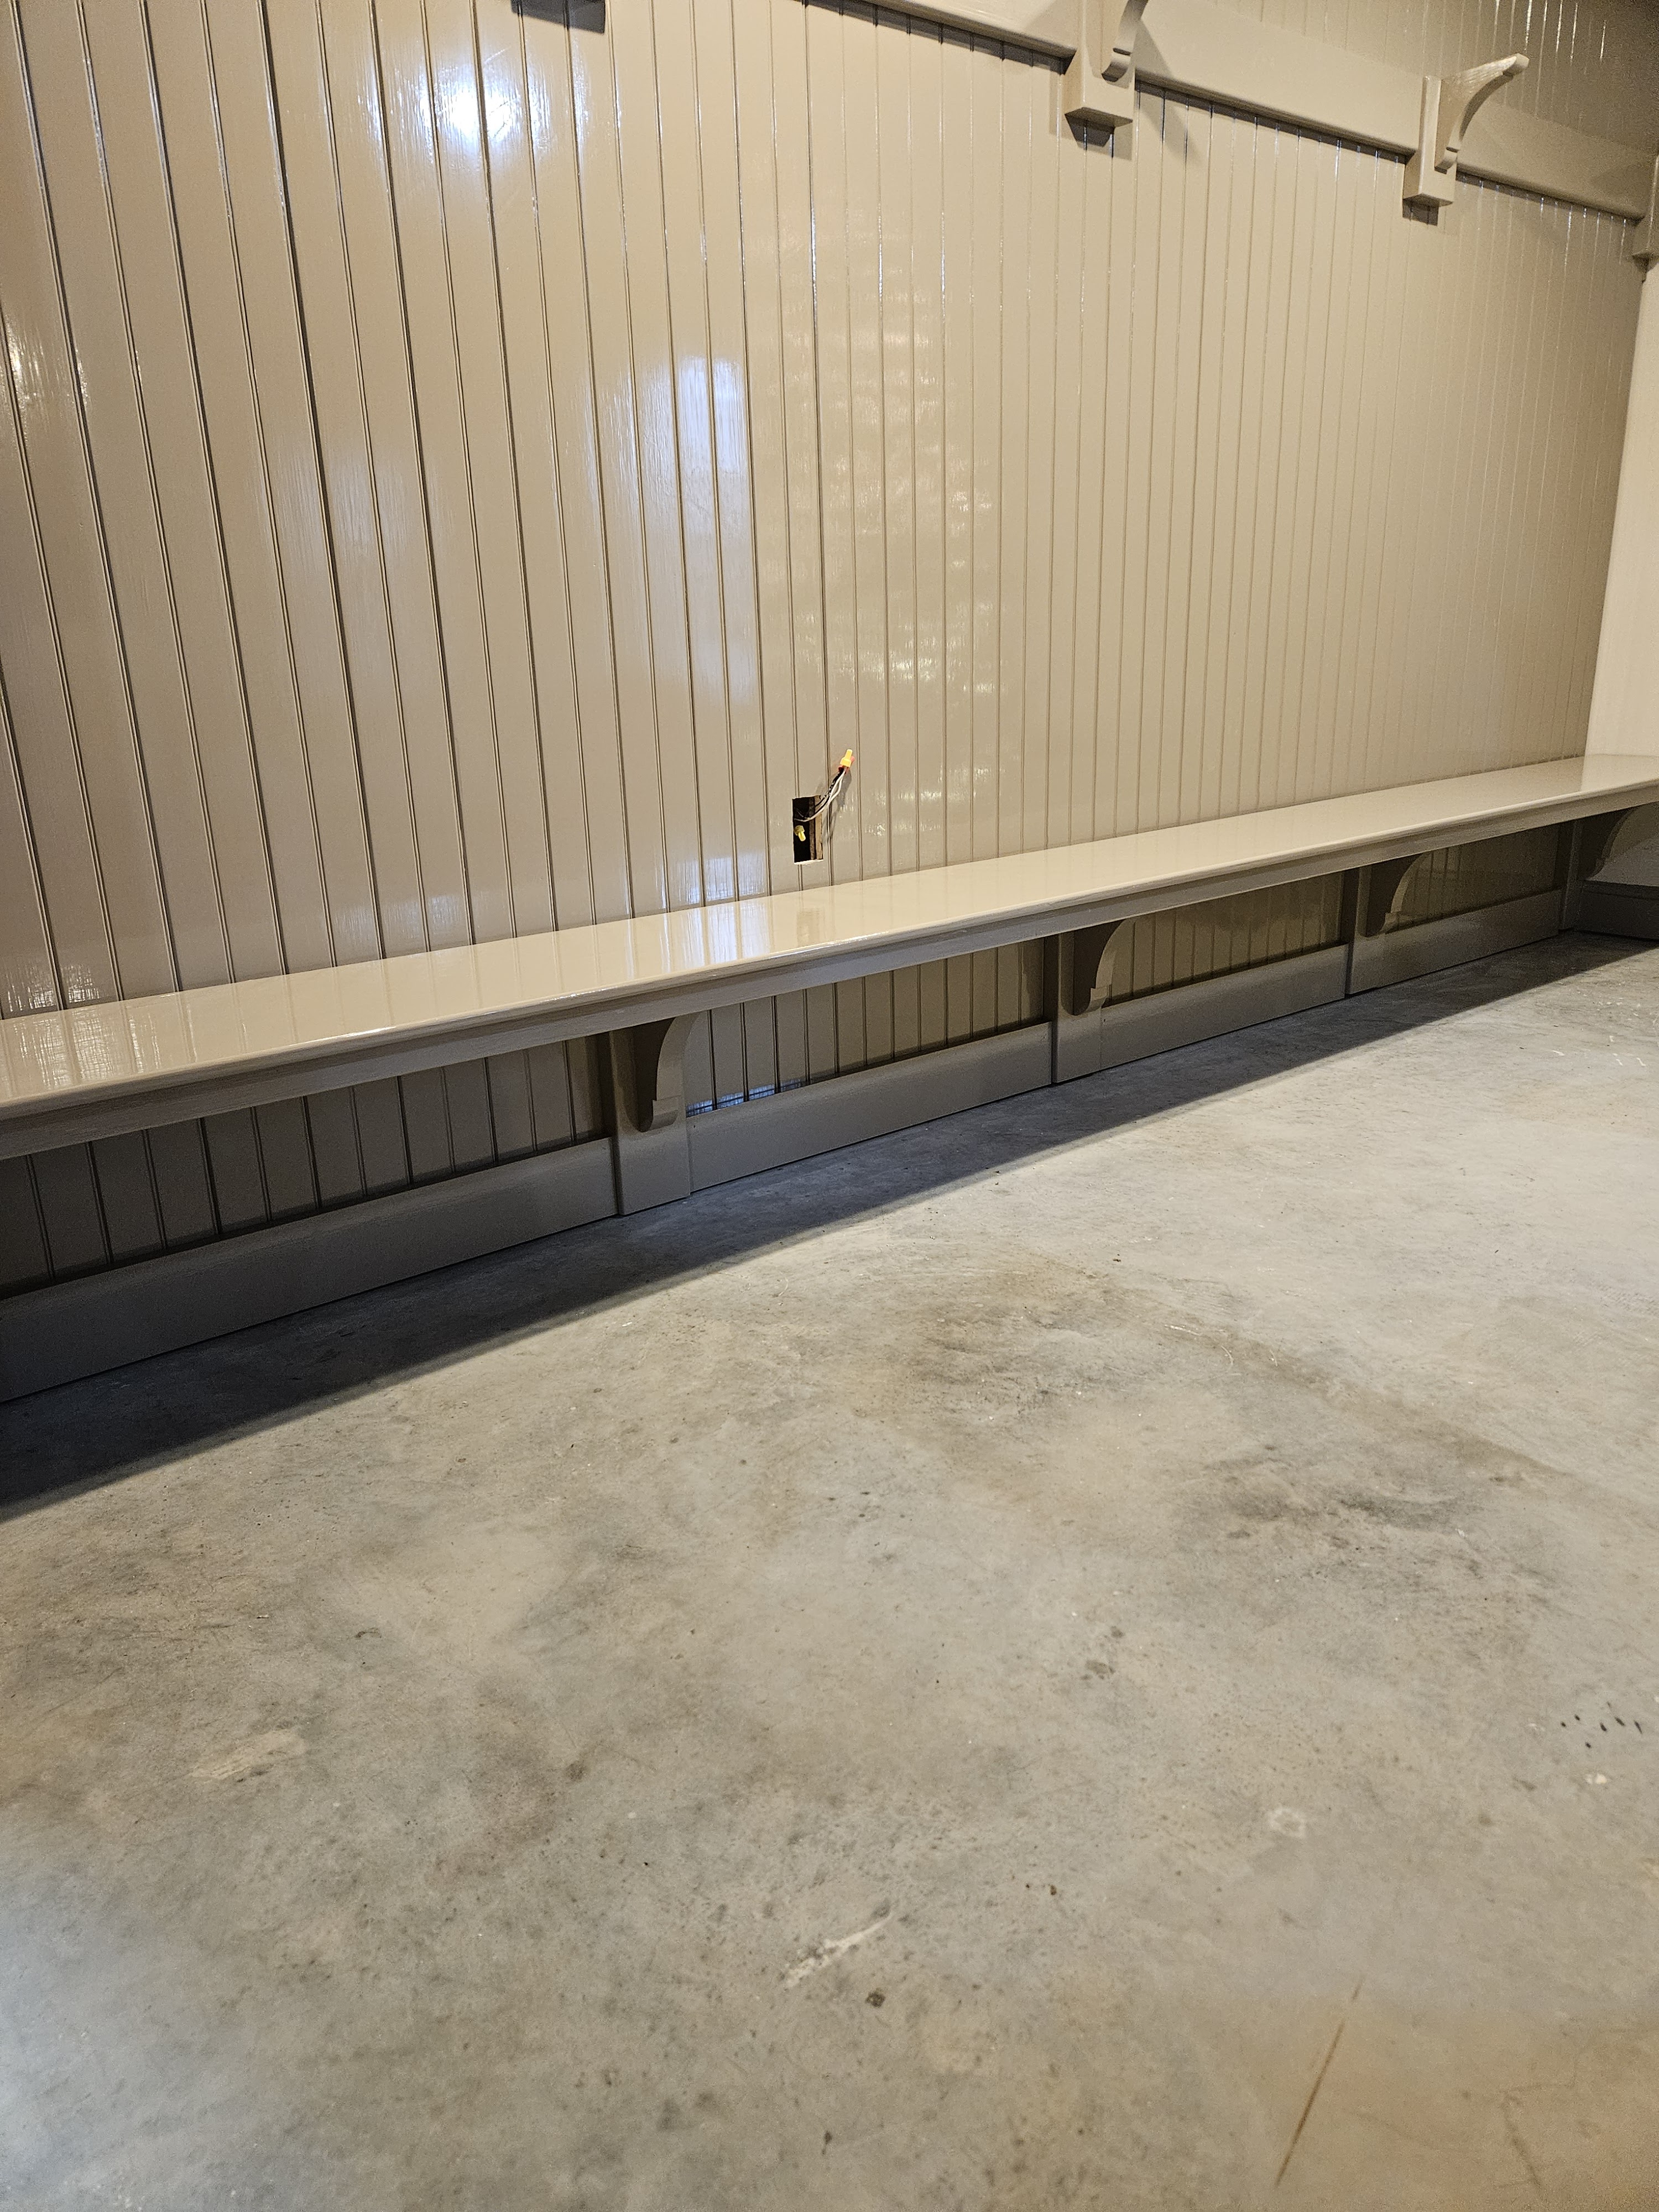
Then I did the second coat. In the meantime, my husband has been working on all the parts and pieces that we need for the shelves, pegs, brackets and bench. I bought the brackets from Architectural Depot because my husband has a list of things to do that is a mile long and he just wasn’t going to have time to make them. He was a little annoyed at first but ultimately agreed that this was the right decision. The brackets came sanded, but I primed them with spray Kilz primer.
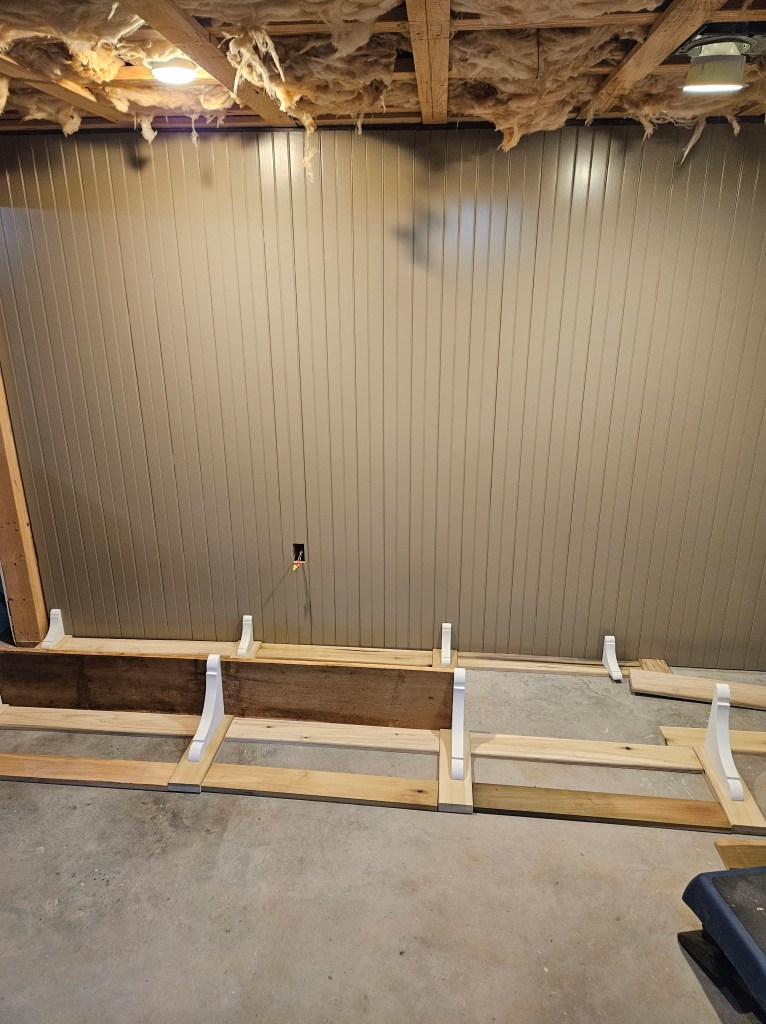
Before we can install all of this, my husband and I need to extend the little wall on the left so that it is a little longer than the bench. We’ll cover this with beadboard planks and paint it.
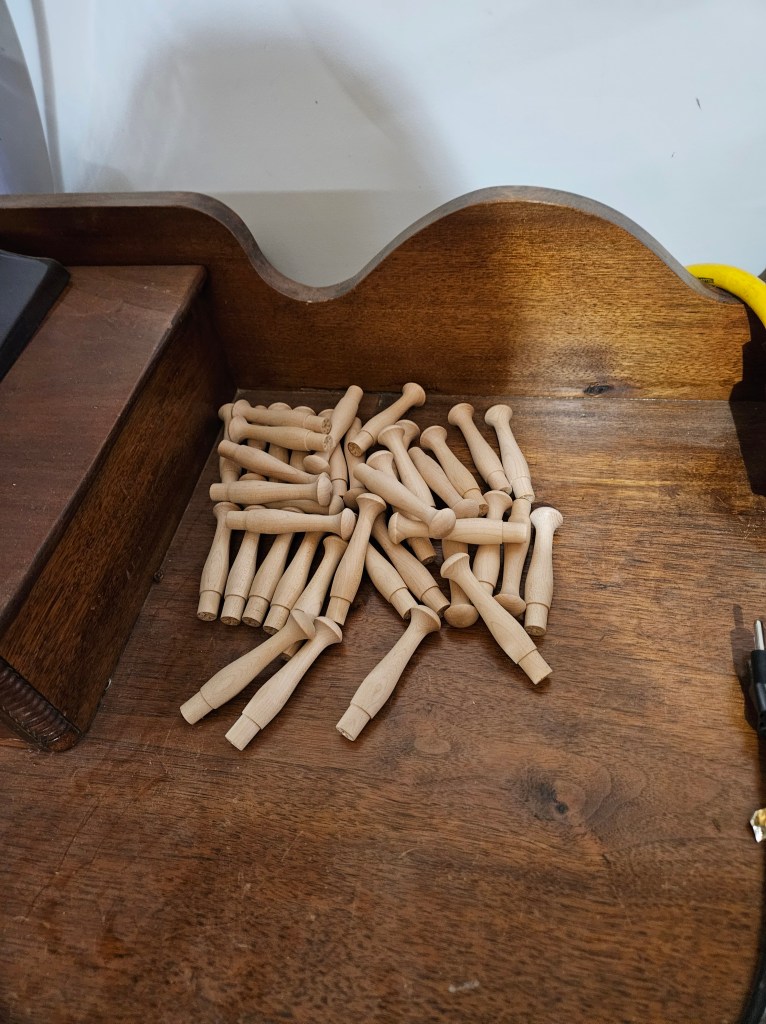
At our old house, we built a place to hang coats, etc. just inside the garage door and I think that pegs must come in bags of 50 because we still have 39 left to use. These are made of maple, and already sanded. I will prime them and use a scrap piece of wood to drill holes in so that I can stand them up to paint them, and not mess up the final board that we’re using. We haven’t decided how many pegs we’re going to use, but it’s a pretty good bet that we’ll still have pegs after this project too.
So, I have a lot to do, so I am going to get to it.
December 20, 2024:
We have been working on what I have been calling “the mudroom wall”. I posted some photos a few weeks ago of the beadboard wall and all the parts and pieces that my husband made and the brackets that I purchased.
Here’s where I left it:

And here’s a reminder of the inspiration photo that’s been hanging on my fridge for years.
While I was out of town for a week helping my niece with her new baby, my husband made the shelf board and the bench board–so there have been a bunch of parts and pieces all over the basement. I primed all the parts and pieces with 2 coats of a stain blocking sandable oil based primer and 2 coats of the top coat. I ran out of the paint that I was working with and bought a fresh can and the level of gloss didn’t match, so I ended up repainting the beadboard wall and the brackets.
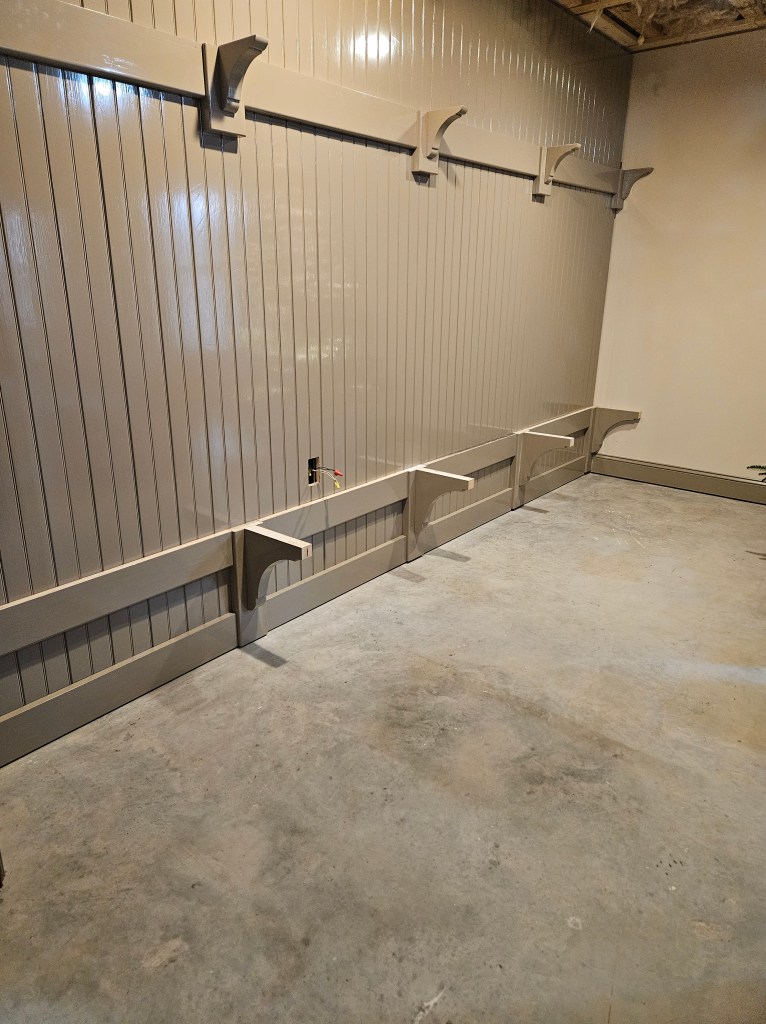
Yesterday, we started by putting up the pieces for the bench and the baseboard. We used a laser level to get everything lined up because the floor isn’t very flat/level.
We repeated the process for the parts and pieces for the shelf.
We added the brackets. My husband had to cut the ends off of the brackets for the bench so that they would fit behind the support board on the bench.
We repeated the process with the brackets for the shelf.
And we also set the bench board on the brackets for painting.
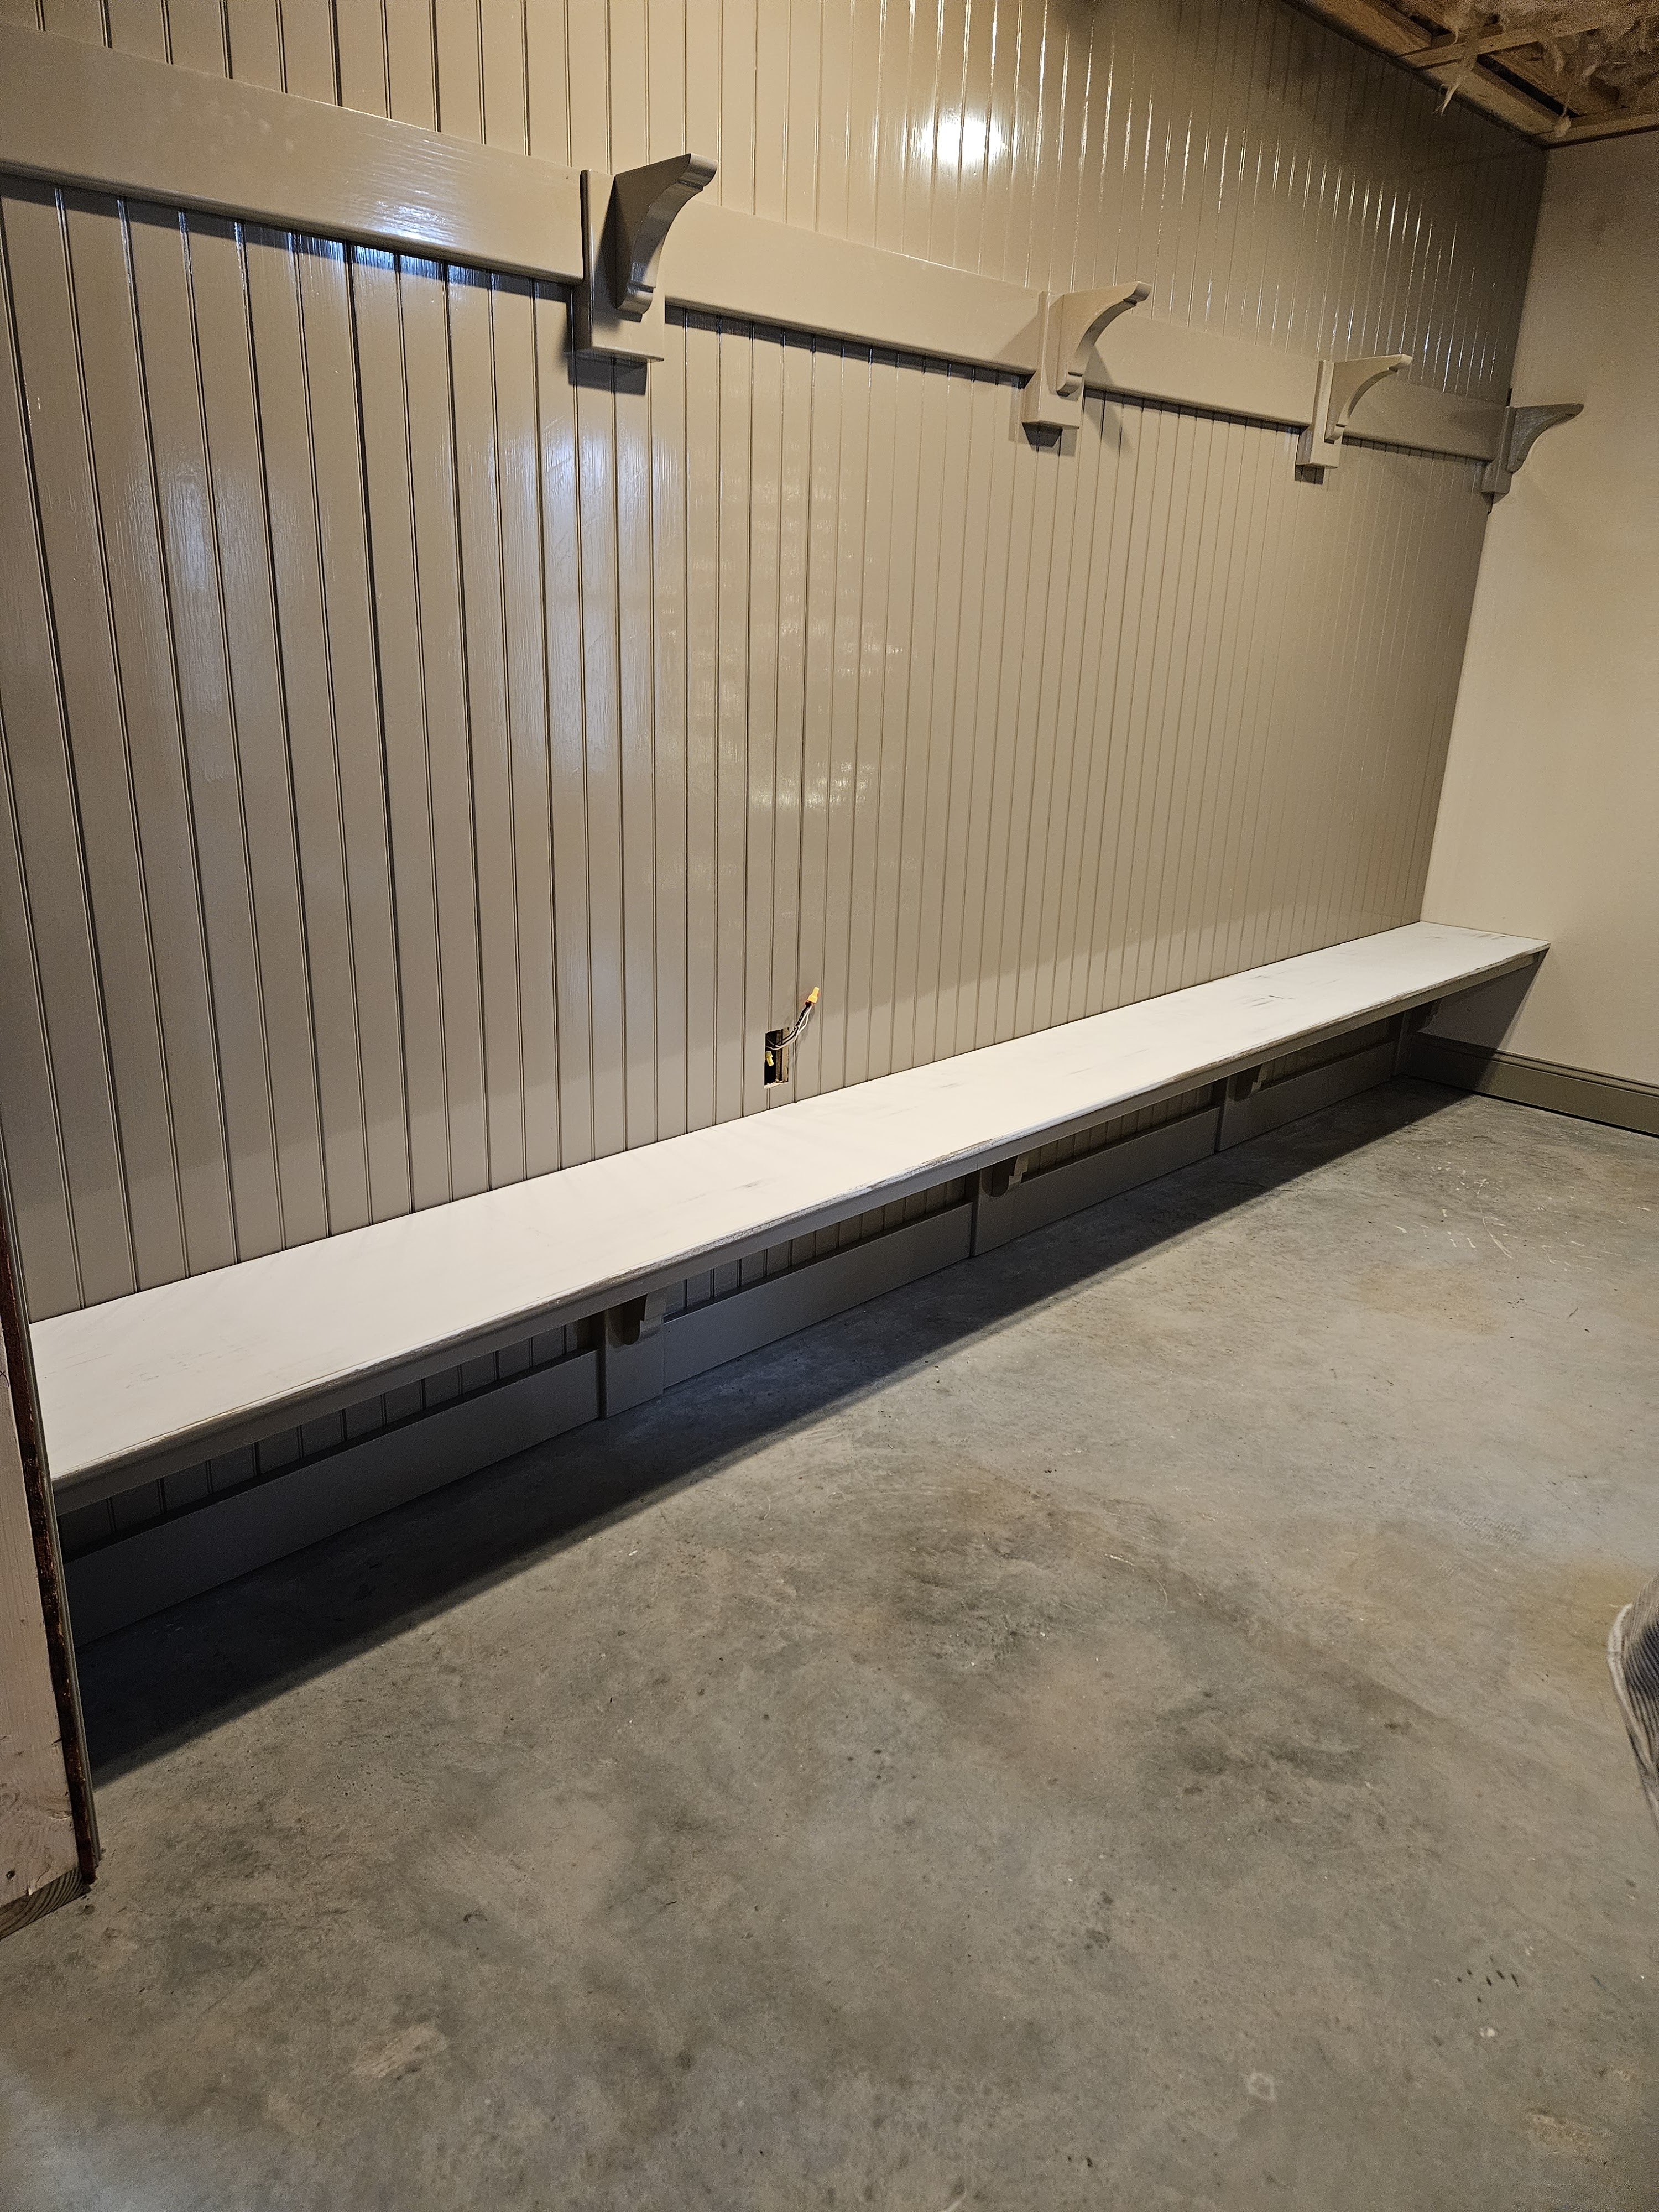
I painted the board and left it to dry.
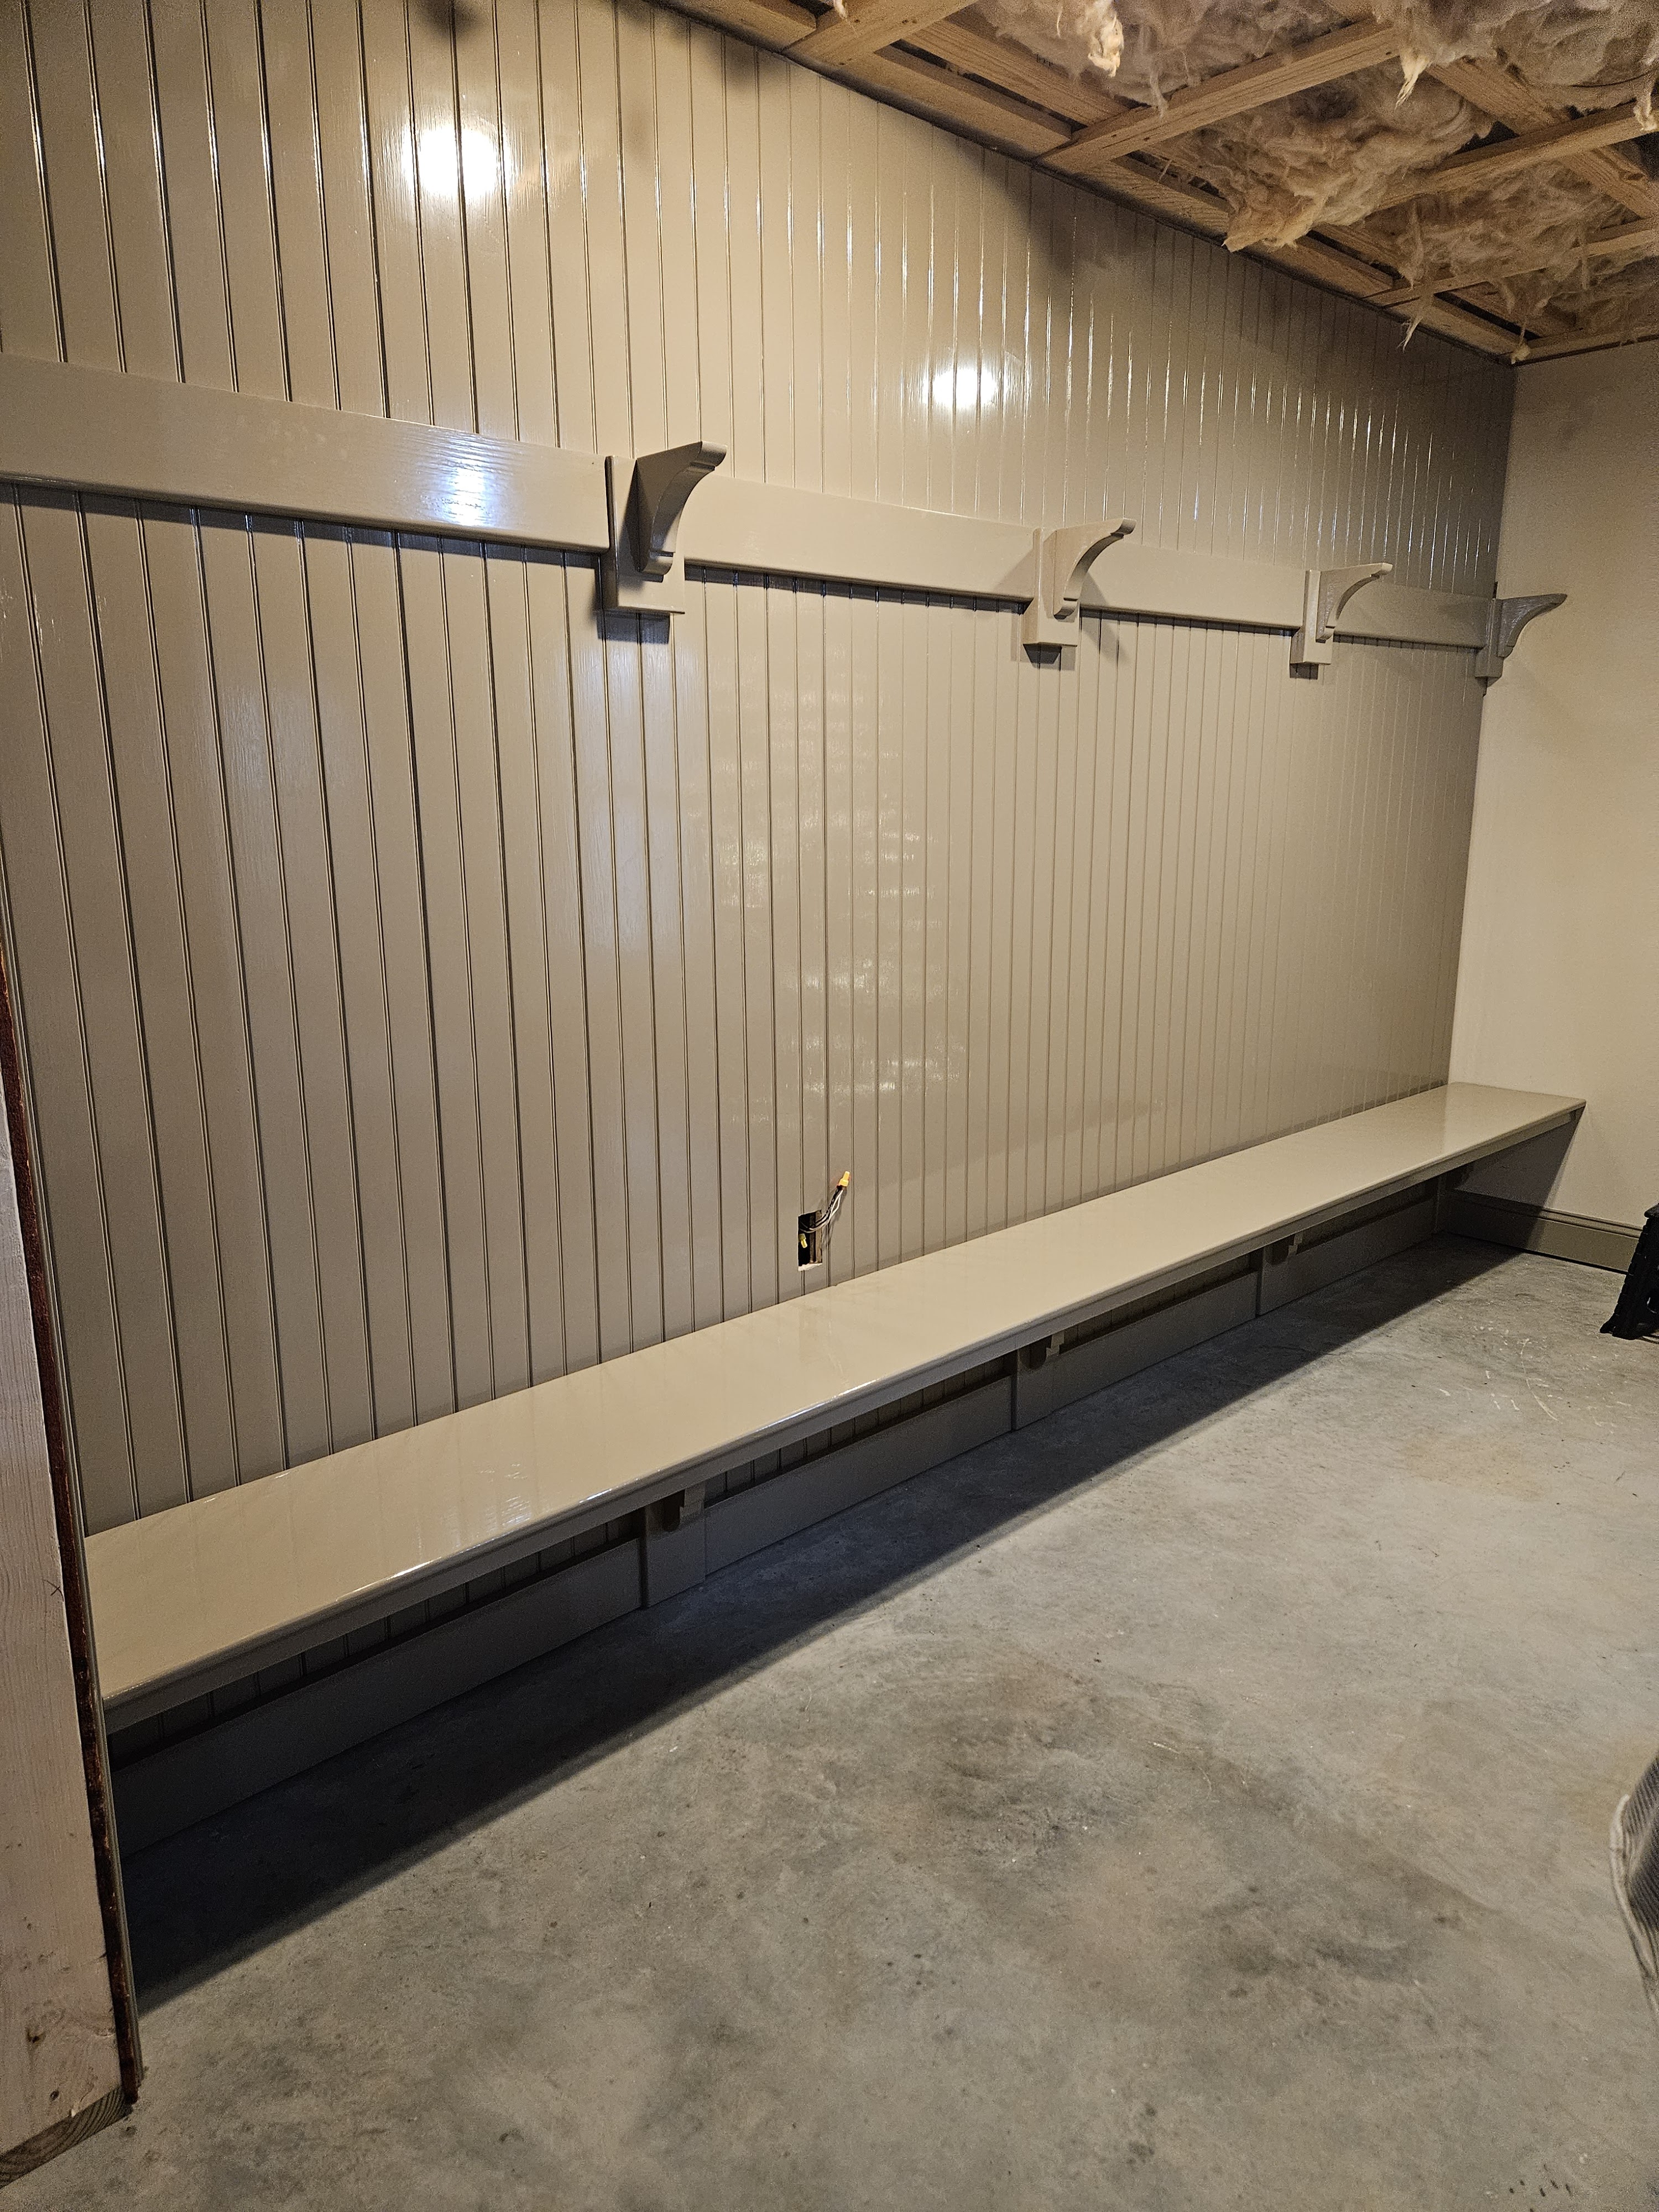
This photo shows the detail better on the bench.
The shelf board is getting painted too, but off to the side on sawhorses.
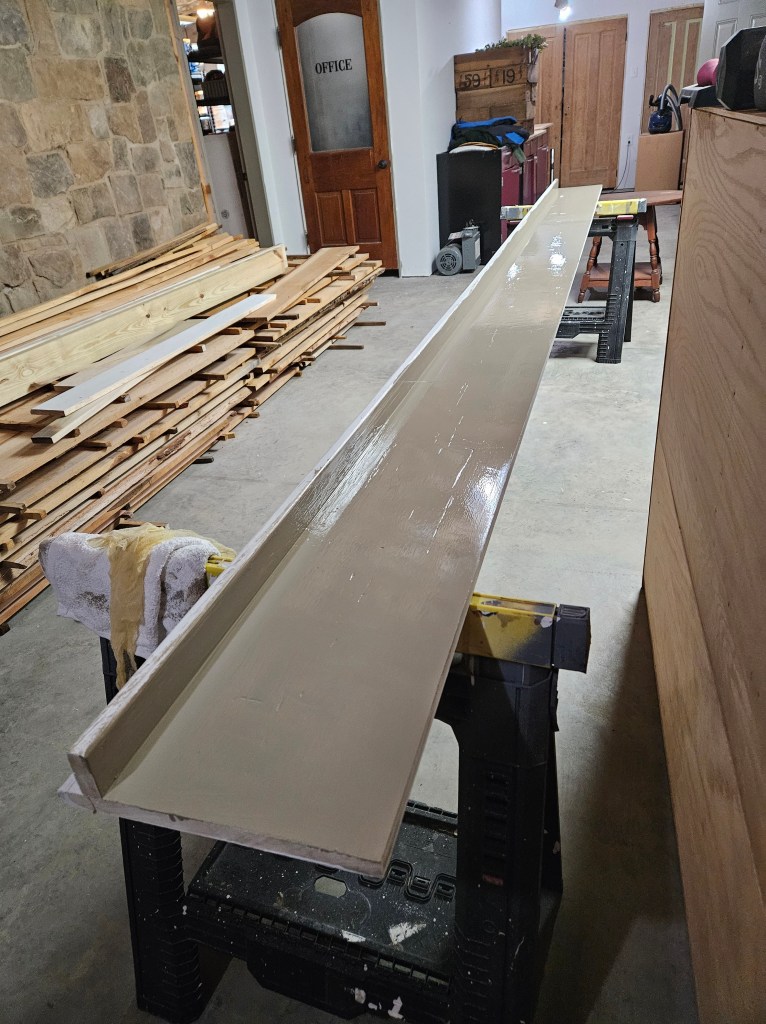
I need to flip the shelf board over and paint the top. I will paint the front edge of the shelf, the underside of the shelf at the very front and the front of the support board when we put the shelf in place to avoid having weird drips that would be difficult to fix.
I was going to do painted wooden pegs for the coat rack, but the thought of priming, sanding, and painting 20 pegs was more than I could think about, so I bought oiled bronze finish brass coat hooks. They should arrive today. That is the color of some of the door knobs, and the dark color will echo what is going on at the other end of the room with the stove and the fireplace tools, and the metal grates.
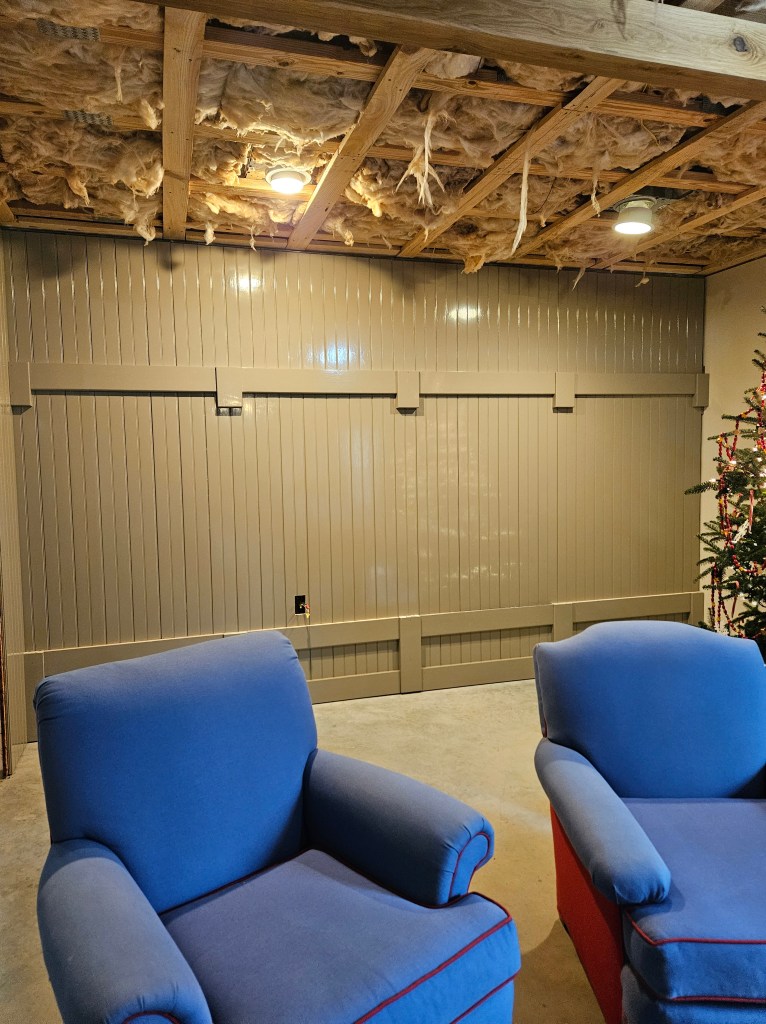
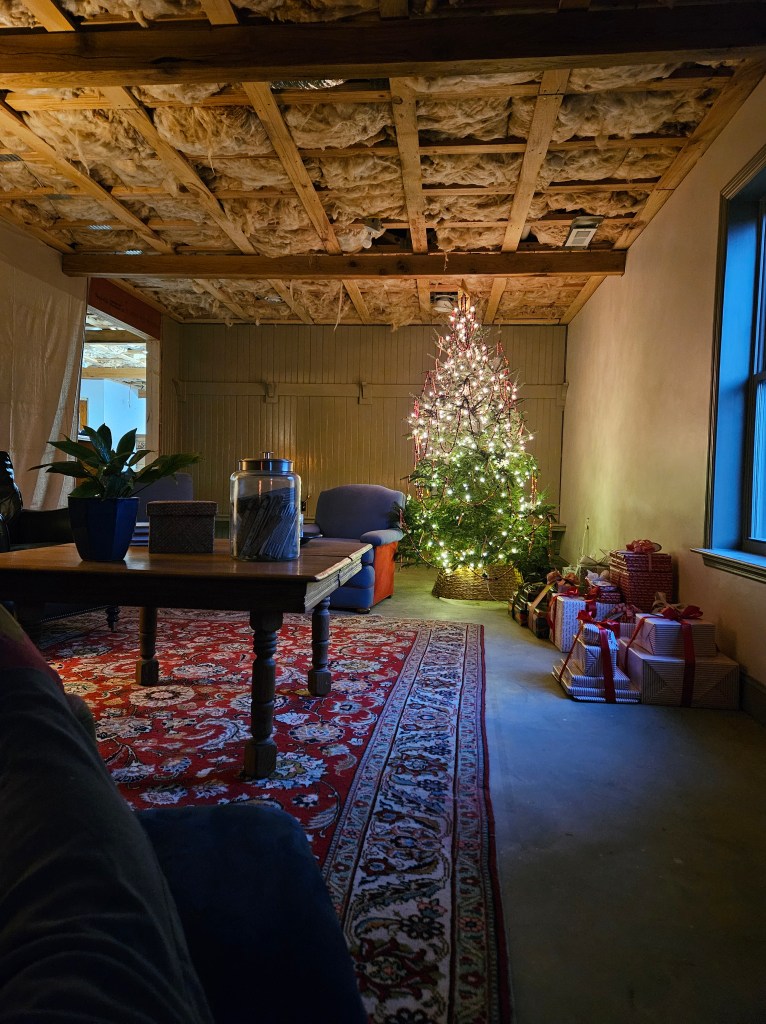
We also set the room up so that we could use it during the holidays. I finally got the rug that I bought for the space cleaned and I bought a rug pad for it. Then we had to VACUUM everything–even though it was covered with sheets, it was all really dusty from all the construction. We put up a couple of drop cloths so that we could really envision how the room would be once the wall is up. I had hoped (unrealistically) that we might get the ceiling up, but my husband has projects going on at work, so that didn’t happen. I am hopeful that he will get the new outlets installed before the holidays–they are almond which will look better with the wall color.
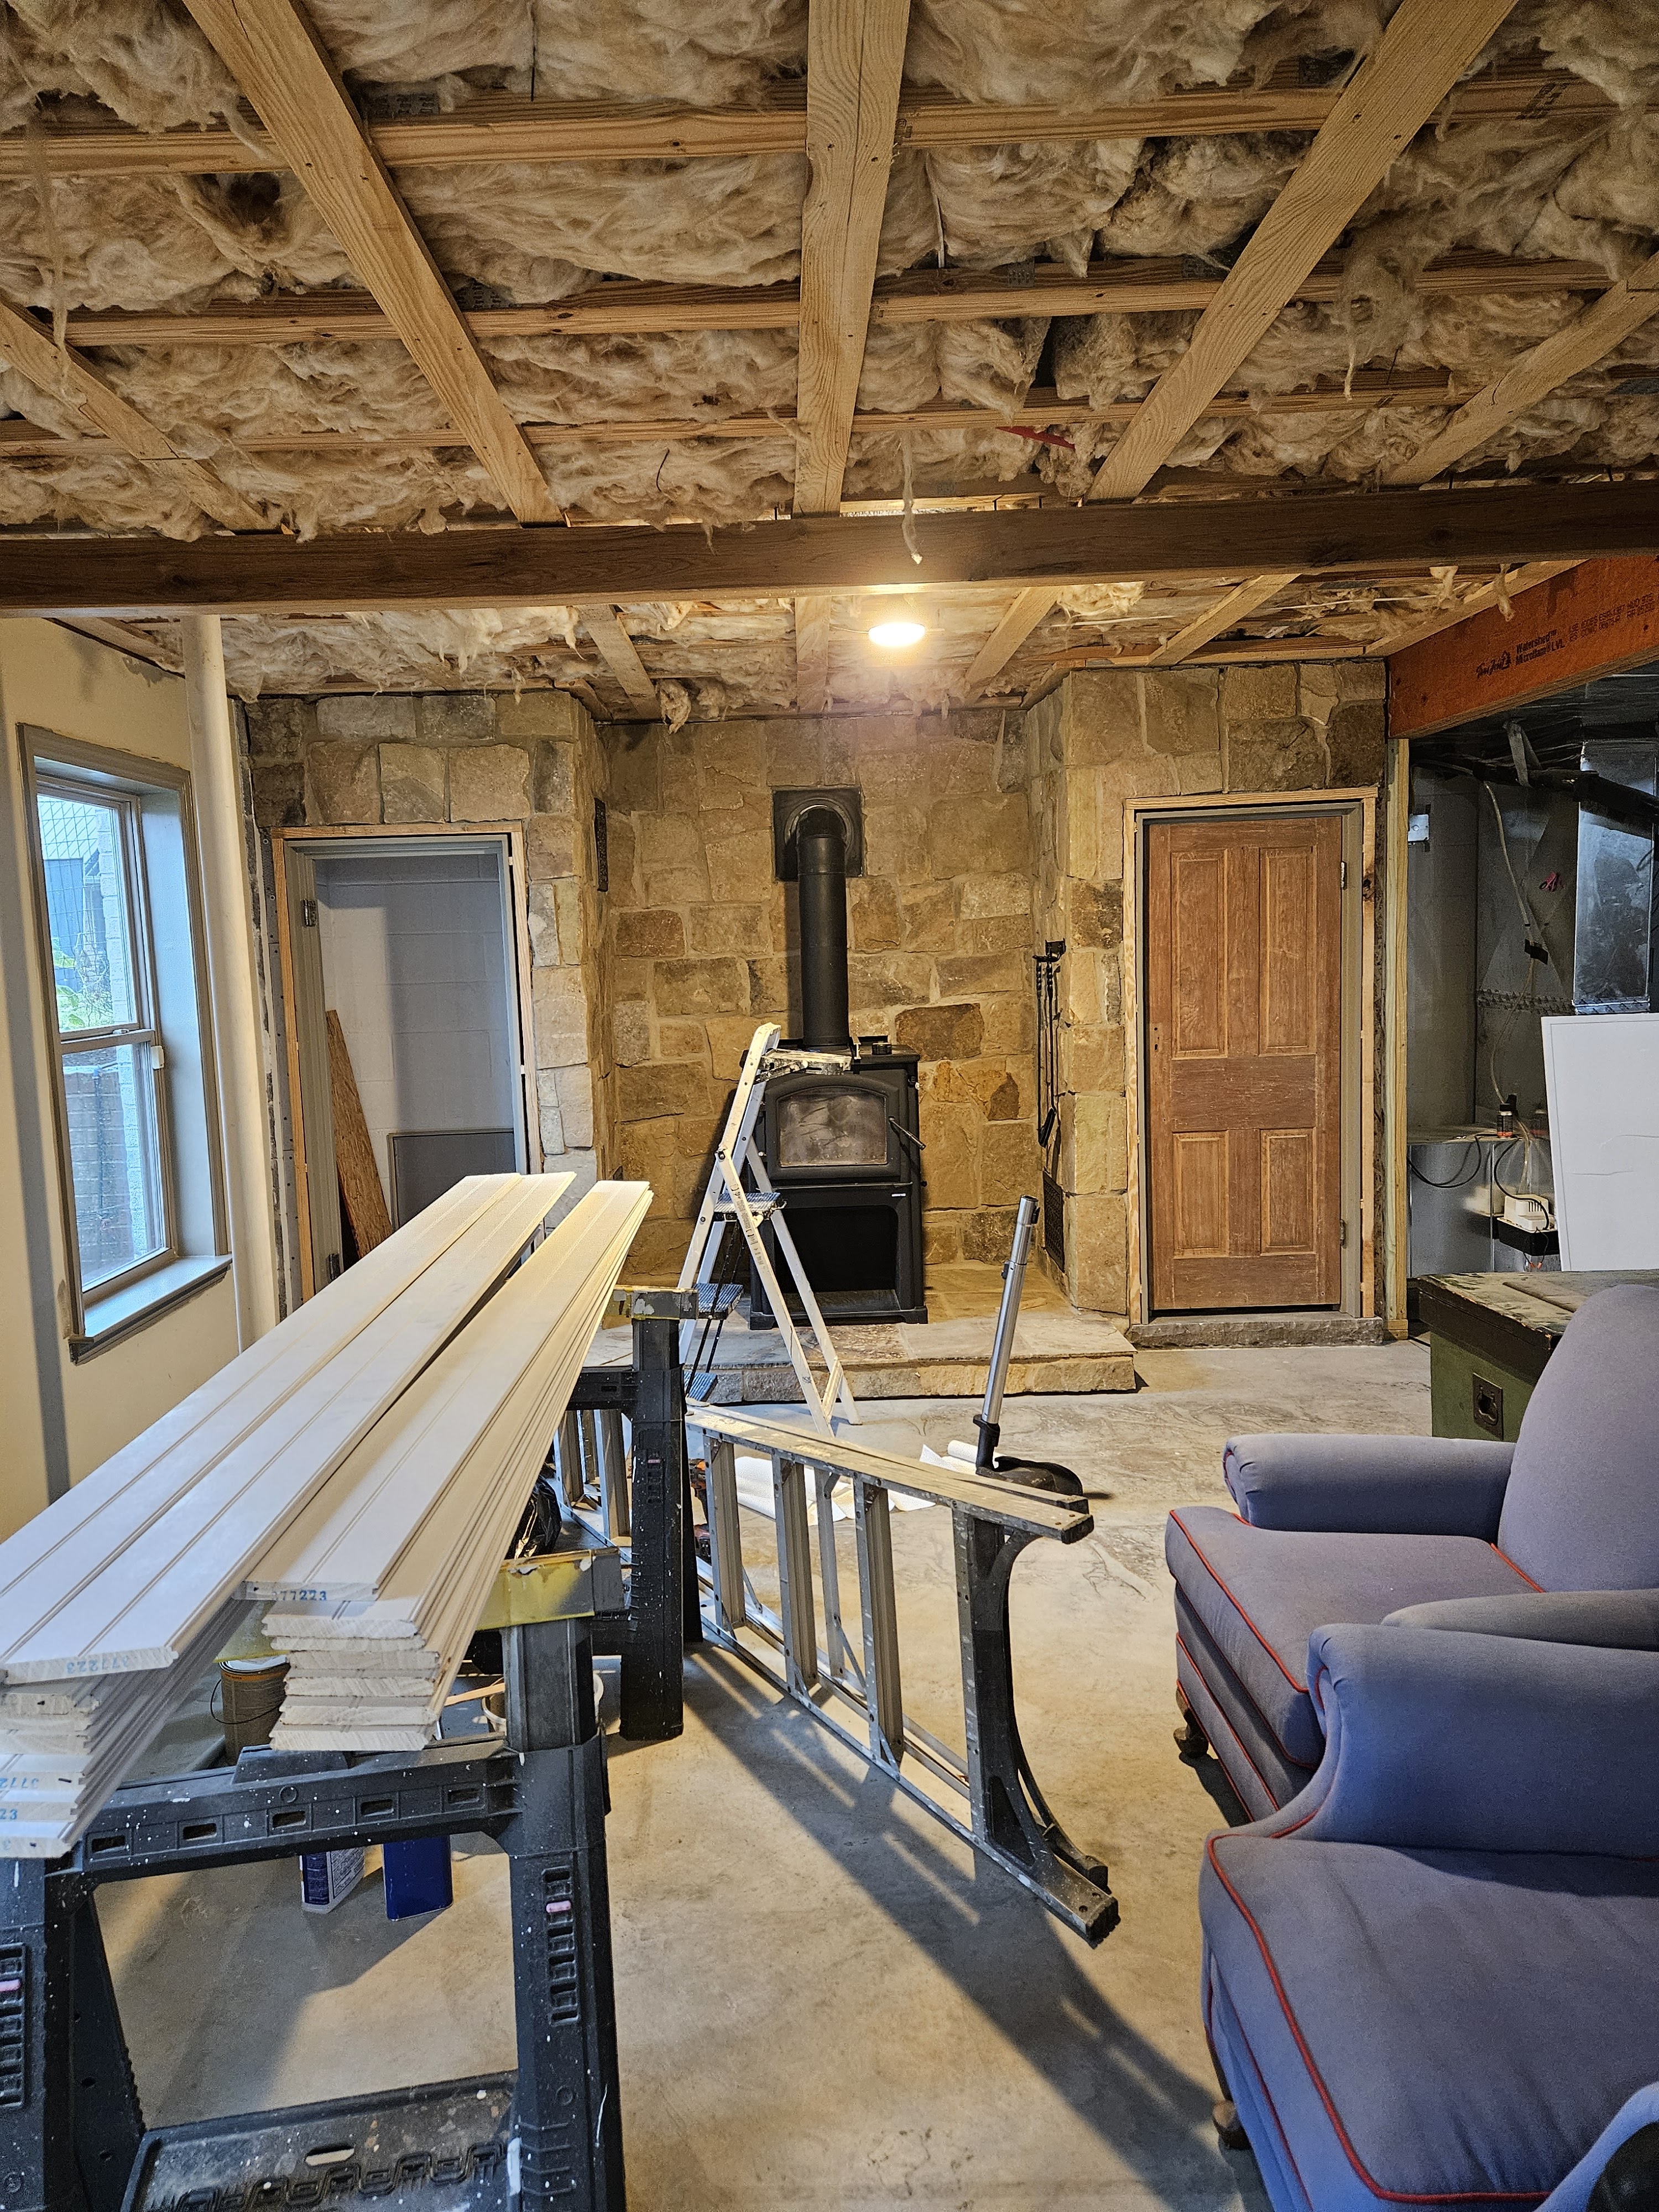
It is really obvious that we need a longer and narrower and shorter coffee table than we currently have and that the sofa we buy shouldn’t be nearly as deep as these leather chairs we have. But, we love how this room is turning out. It’s really cozy.
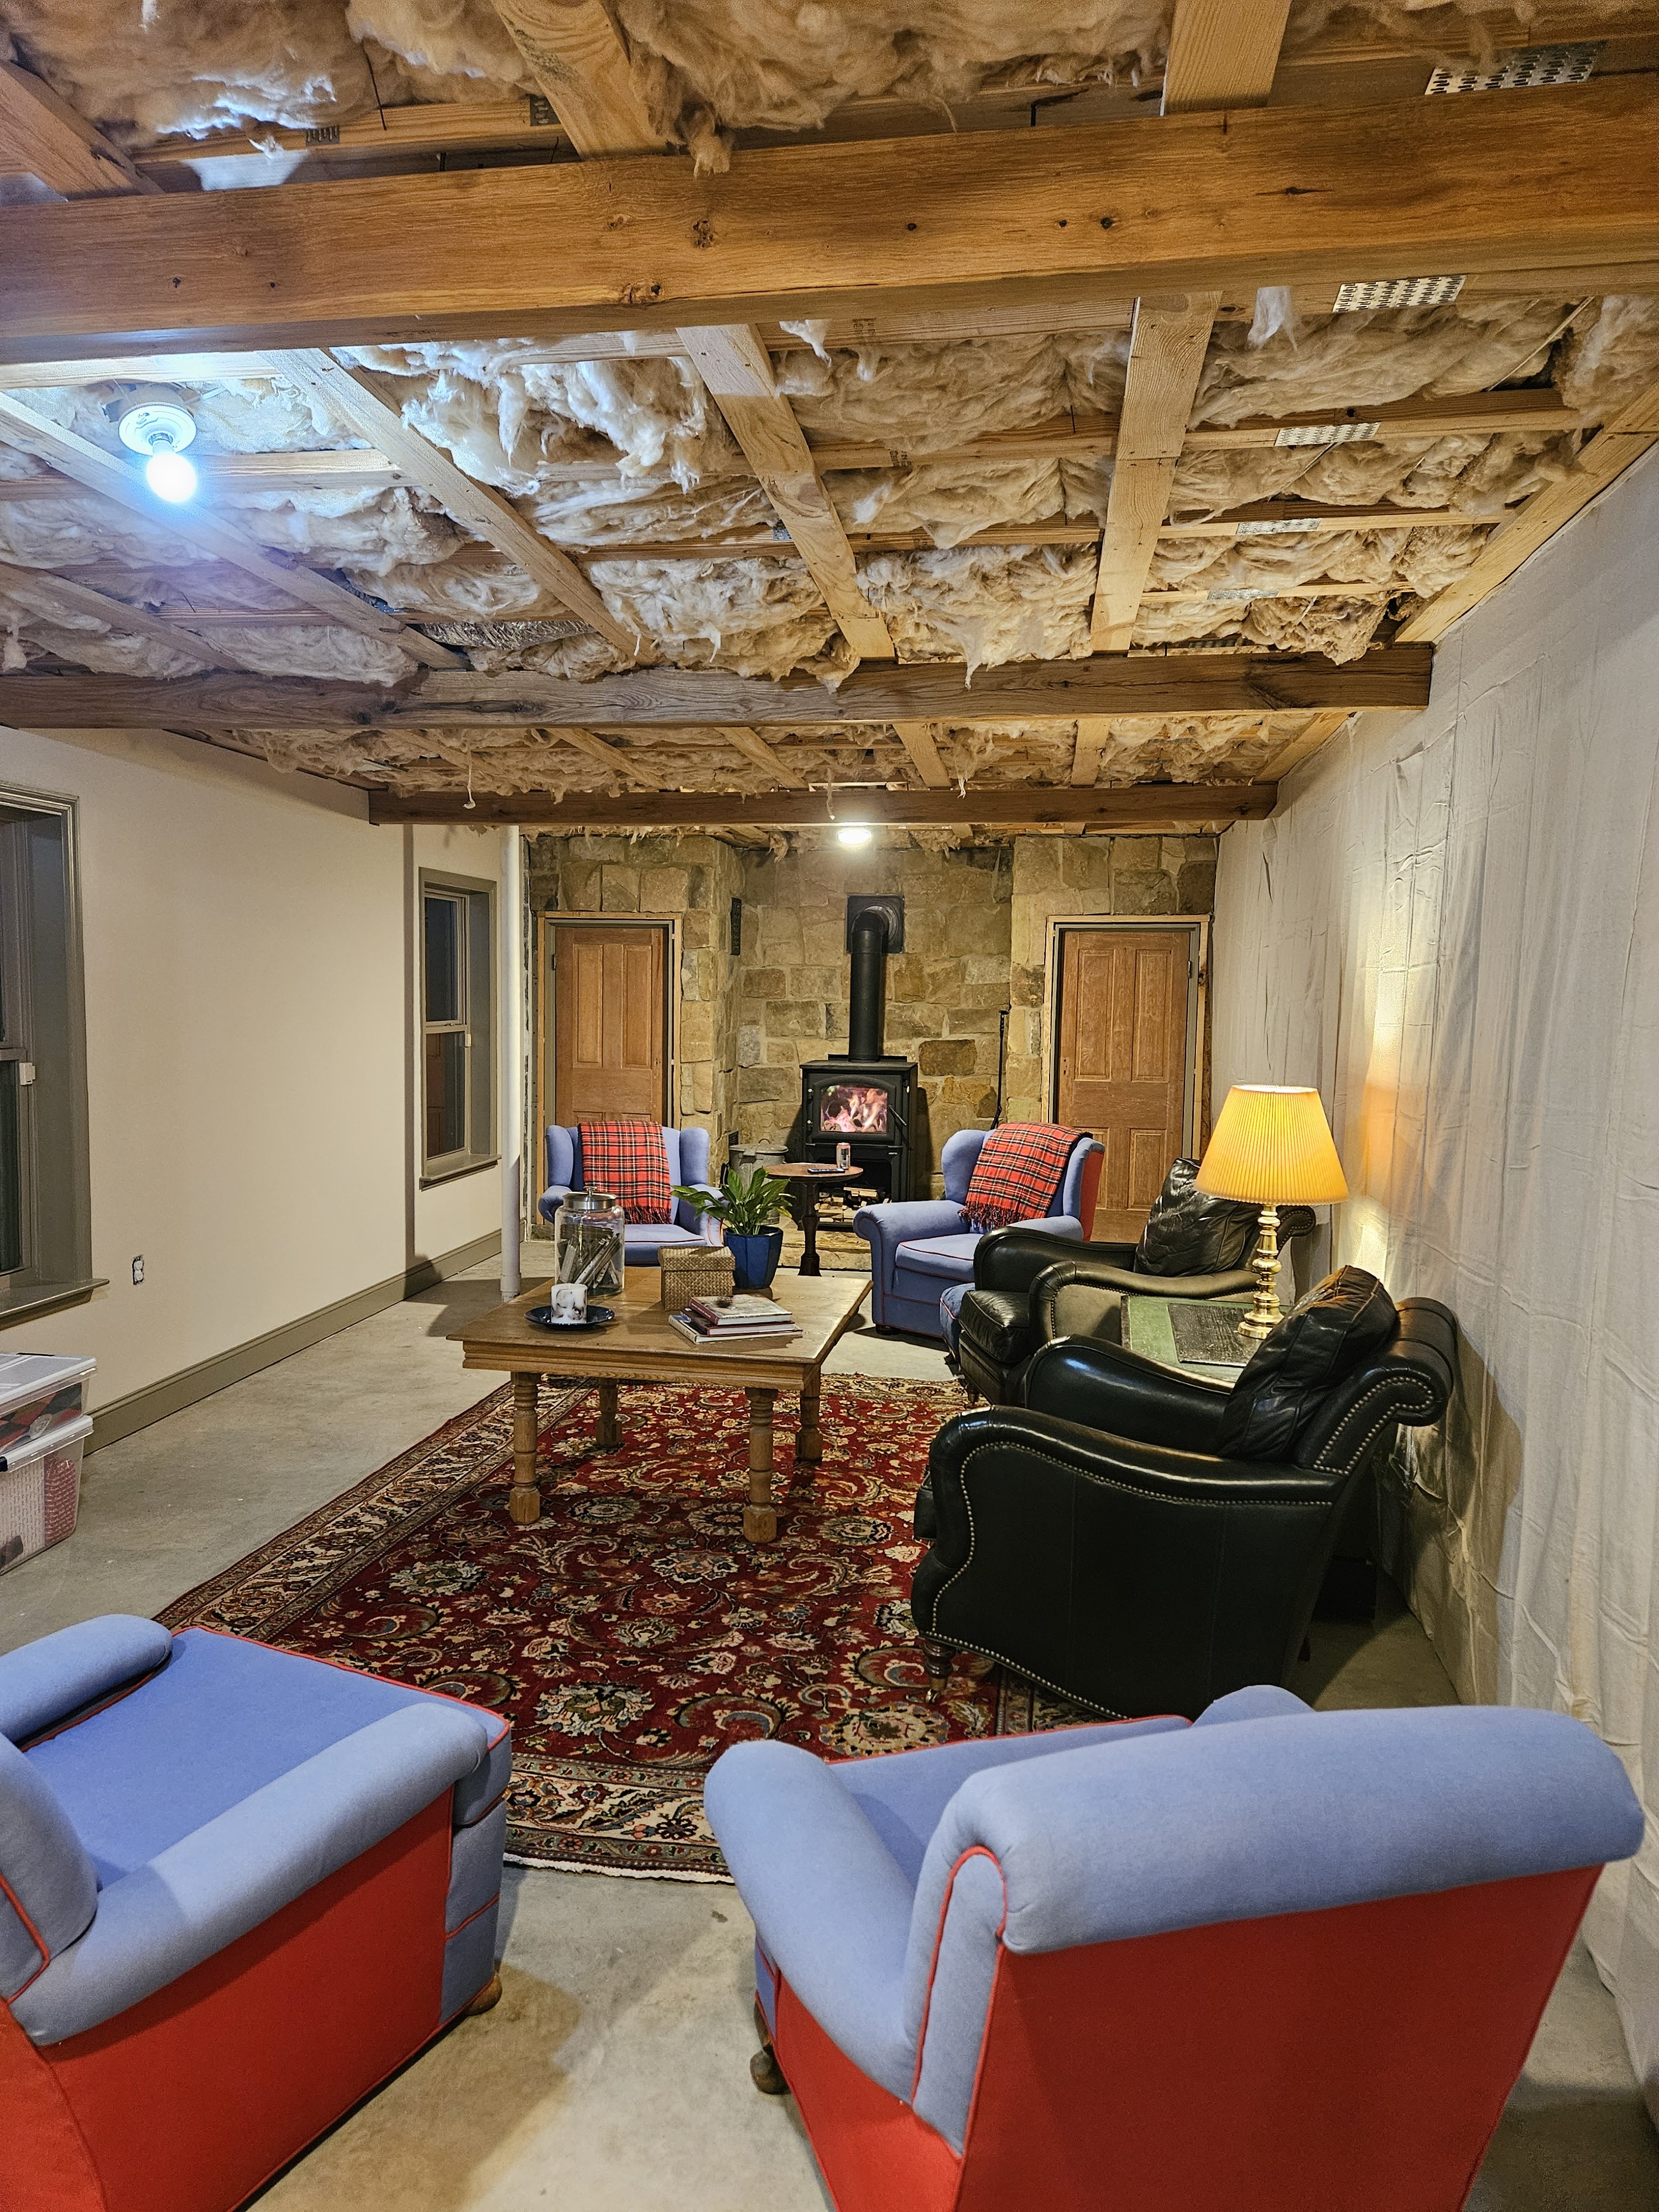
And, while I was out of town, my sweet (but very Grinchy) husband went out and bought a Christmas tree for the basement, put it up, and put lights on it. I have decorated it really simply with candy canes, paper snowflakes, garland, and a felt star, but I think it’s really cute–and putting everything away will be a snap.
And, I finally finished my Christmas wrapping.
And, if all of that wasn’t enough, we hired a painter (my friends will know how truly rare this is) to paint the stairwell. We had them paint walls and ceiling all the same color. I was able to convince my husband to hire it out because it would have taken us days and we would have used some really sketch scaffolding.
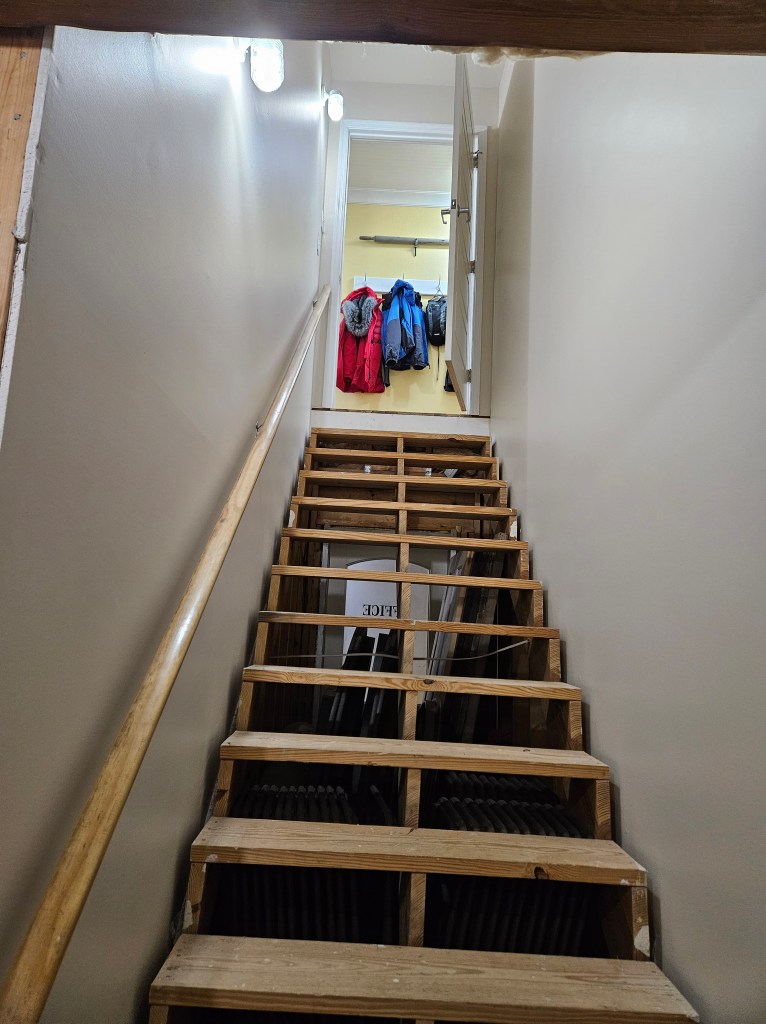
We bought some neat antique light fixtures for the stairwell up in Michigan while my husband was in a conference up there last year. There are 3 of them, so we’ll have to add another box on the wall and we’ll add a light switch at the bottom of the stairs. We are going to put quarter sawn white oak treads and risers (you can see them in the giant stack of wood in the photo of the shelf board above) to the stairs and we’ll add painted trim boards to either side. We’ll replace the wooden handrail with a custom made metal one.
Still SO MUCH to do.
January 3, 2025:
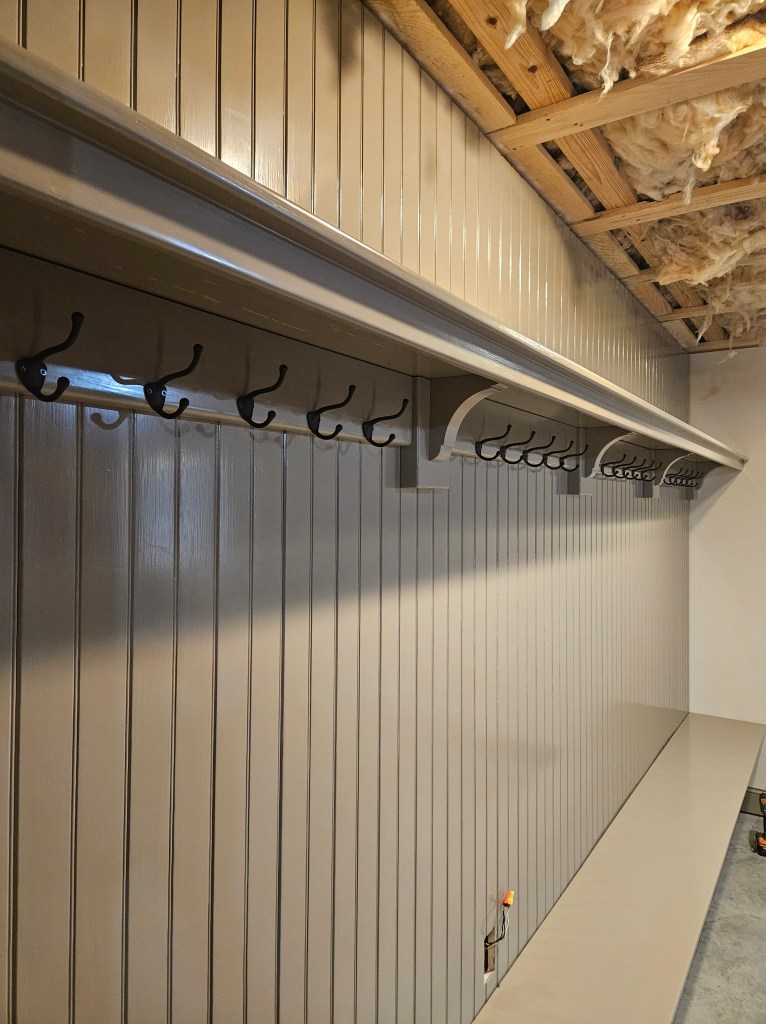
We took a break from working on the basement during the holidays, but we are back on getting the mudroom wall finished up.
I bought 20 oiled bronze finish brass coat hooks from Van Dyke’s. They aren’t very tall which is good because there isn’t much room in that direction. There are 5 hooks between each pair of brackets, so in order to figure out the placement, I started by finding the center point–17″. (I used wide painters tape to make all the markings.) I divided 17 by 3 to determine the general placement of the two hooks on either side of the center points–which came out to approximately 5 5/8″. I measured out from the center point to ensure that things looked even to the eye. It’s not exact, but you can’t see it–you’d have to measure it to see that it’s not perfect.

My husband made a little fixture to make all the little screw holes for the coat hooks. He drilled all the holes and then installed the coat hooks. Then we took a break for dinner–homemade tamales and Mexican rice. The board that the coat hooks are mounted to is only held in place by the finish nails we used to install it, which isn’t strong enough to support any weight on the coat hooks. So, my husband took each coat hook down and hid a finish screw behind them to ensure that it was sturdy enough to support the weight of coats and bags.
The next step is to secure the shelf to the brackets and the bench to the brackets. For the shelf board, we are going to screw through the shelf into the brackets because no one will see the screws. For the bench, we are going to mount L brackets to the trim board under the bench and then to the bench so that my husband doesn’t have to try to drive a screw through the bracket from underneath at a really awkward angle. We thought about going through the bench into the brackets, but that would require patching, sanding, and painting the screw holes on the top of the bench. Holding the bench in place isn’t going to need much because gravity is doing most of the work for us, so the L bracket solution is the lowest risk option–and you won’t see them unless you get down on the floor.
In other news, we are finalizing our flooring choices. For most of the space, we’re using a Marmoleum Dark Bistre in 12 x 12 squares (we think). I have ordered a box of them to see how we feel with real tiles since the sample is only a 3 x 3 inch square. We’re using a hexagonal mosaic for the bathroom with medium green, dark green, yellow and white with a border of black and white and green. And we’re going to use Fireclay ceramic tiles in Sunflower (yellow), Clover (medium green) and Sandstone (tan–very close to the trim color) in an interesting pattern in the kitchenette/bar. I’m thinking about doing a more interesting border to delineate the space, but we’ll see how expensive that is.
Our next steps are:
- Noting all the electrical elements that need to be added to the living room side of the basement and hire an electrician to install them.
- Once all the electrical is finished, we can install the ceiling and the can lights. This will make a HUGE difference in the room. We’re using Hardie Bead Board painted Damask Silk like the walls for the ceiling.
- Finish sand the closet doors and spray them with lacquer. We’re using a light tough on all of this because I love how the doors look at this stage and I don’t want them to lose their patina.
- Put the hardware on the doors. I got rim lock hardware–mounted on the face of the door. We are concerned that the knob assembly doesn’t have enough adjustment for how thin the doors are (about an inch). I think that I am going to order rim locks meant for screen doors in a bronze color, because we’ll need the rim locks that we already have for some of the other doors that we have to install.
- My husband helped saw a BUNCH of poplar into blanks for mouldings. So, he also ordered a shaper and cutters to make all the baseboard, and window/door casings. It’s supposed to arrive next week. So, we’ll have to make the door casings for the closets and then a little trim piece to hide the block wall on the left edge of the left door by the stove. Then sand, prime, and paint them and then install them. There are a few molding pieces that we need to make for the mudroom wall that we’ll do at the same time. We won’t worry about baseboard or window casings for now since there are some. We’ll replace it when we crank up to make those for the rest of the basement.
Once all of that is finished, we’ll be at a stopping point in the living room and we’ll move on the stairs (new lights, custom iron railing, quartersawn white oak risers and treads, and painted trim along the stairs and new door casing.
Then on to my husband’s office and a storage room. Those will take longer because they are whole rooms that are currently unfinished.
January 9, 2025:
We are expected to get a lot of snow (for here) tomorrow, and we’ve had enough notice that we could actually think about, plan, and purchase everything for the project.
We are going to build the shelves that we had planned all along at the bottom of the stairs–to fill this area.
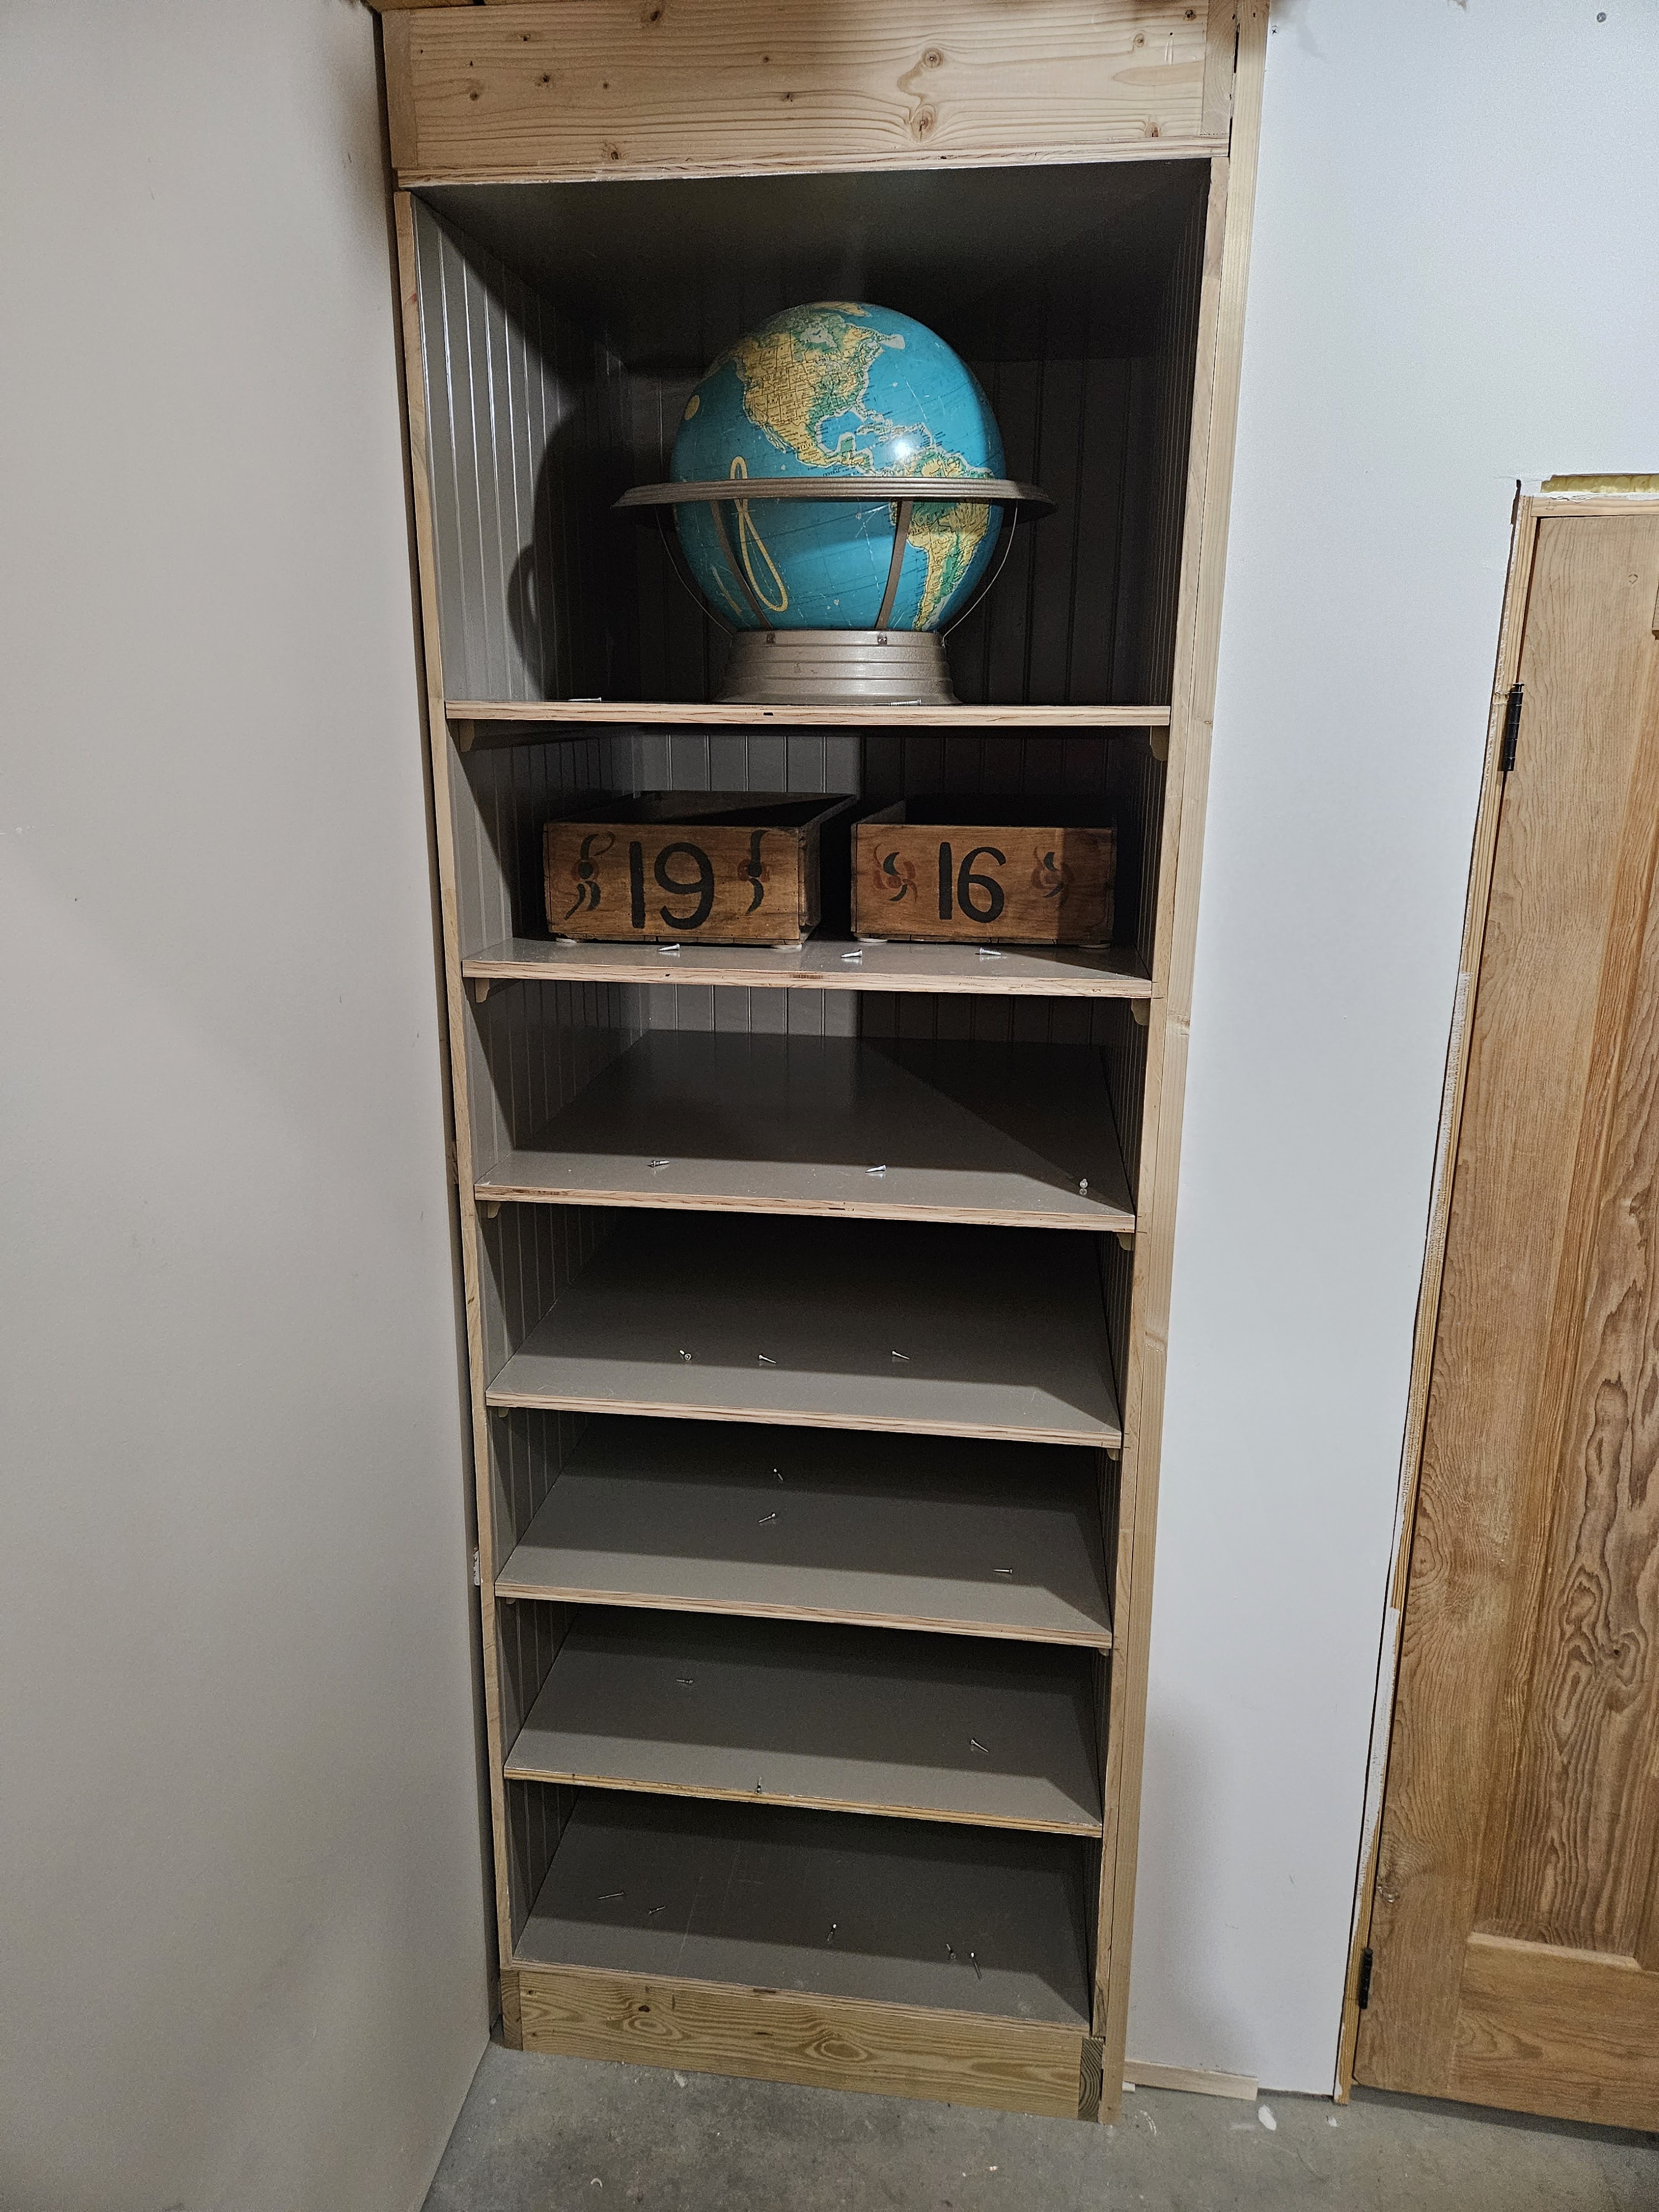
Years ago, I found some old wooden boxes that were used as “lockers” for a local lake that used to be the swimming pool for the local area. I love old boxes and while I bought these to sell when I had an antiques booth, I didn’t sell them, and I love them so much that we’re going to make a proper place for them.
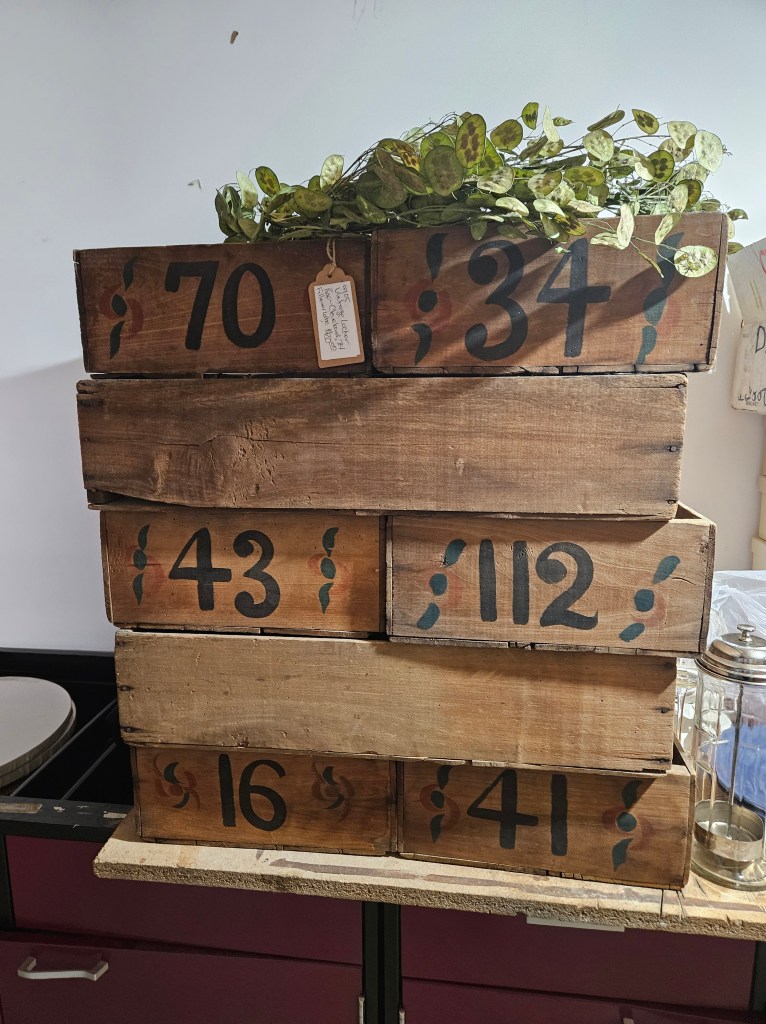
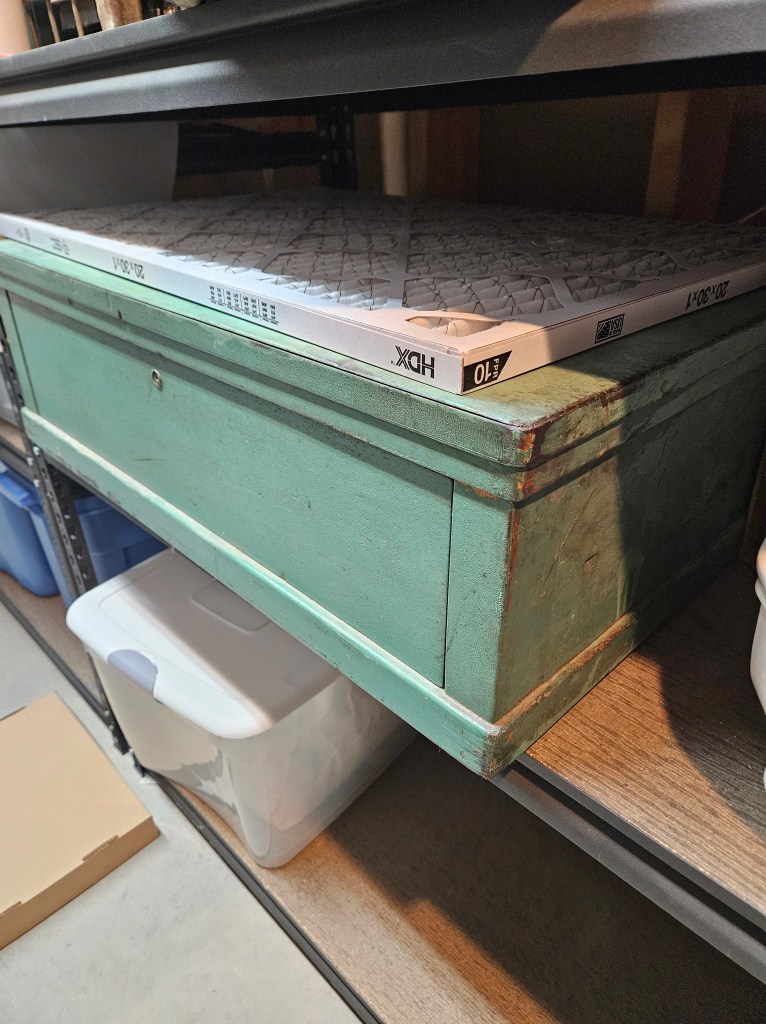
We also have the bottom part of an old (really old) NCR cash register that we used to use for my husband’s keys, wallet, phone, etc at our old house–it saved many hours of searching for those items. We are going to put it on the bottom shelf.
Then, I found an absolutely FABULOUS old globe that came from a school. That’s going to go on the top shelf.

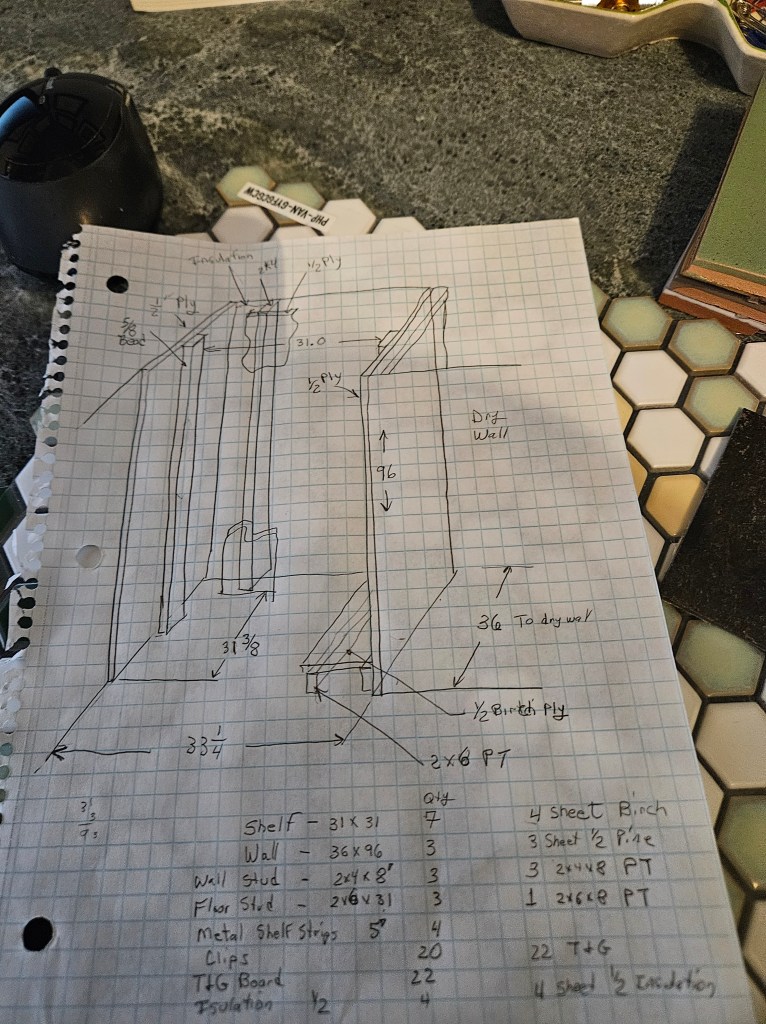
Here’s a sketch of what we’re going to build (and also a peek at our flooring selections):
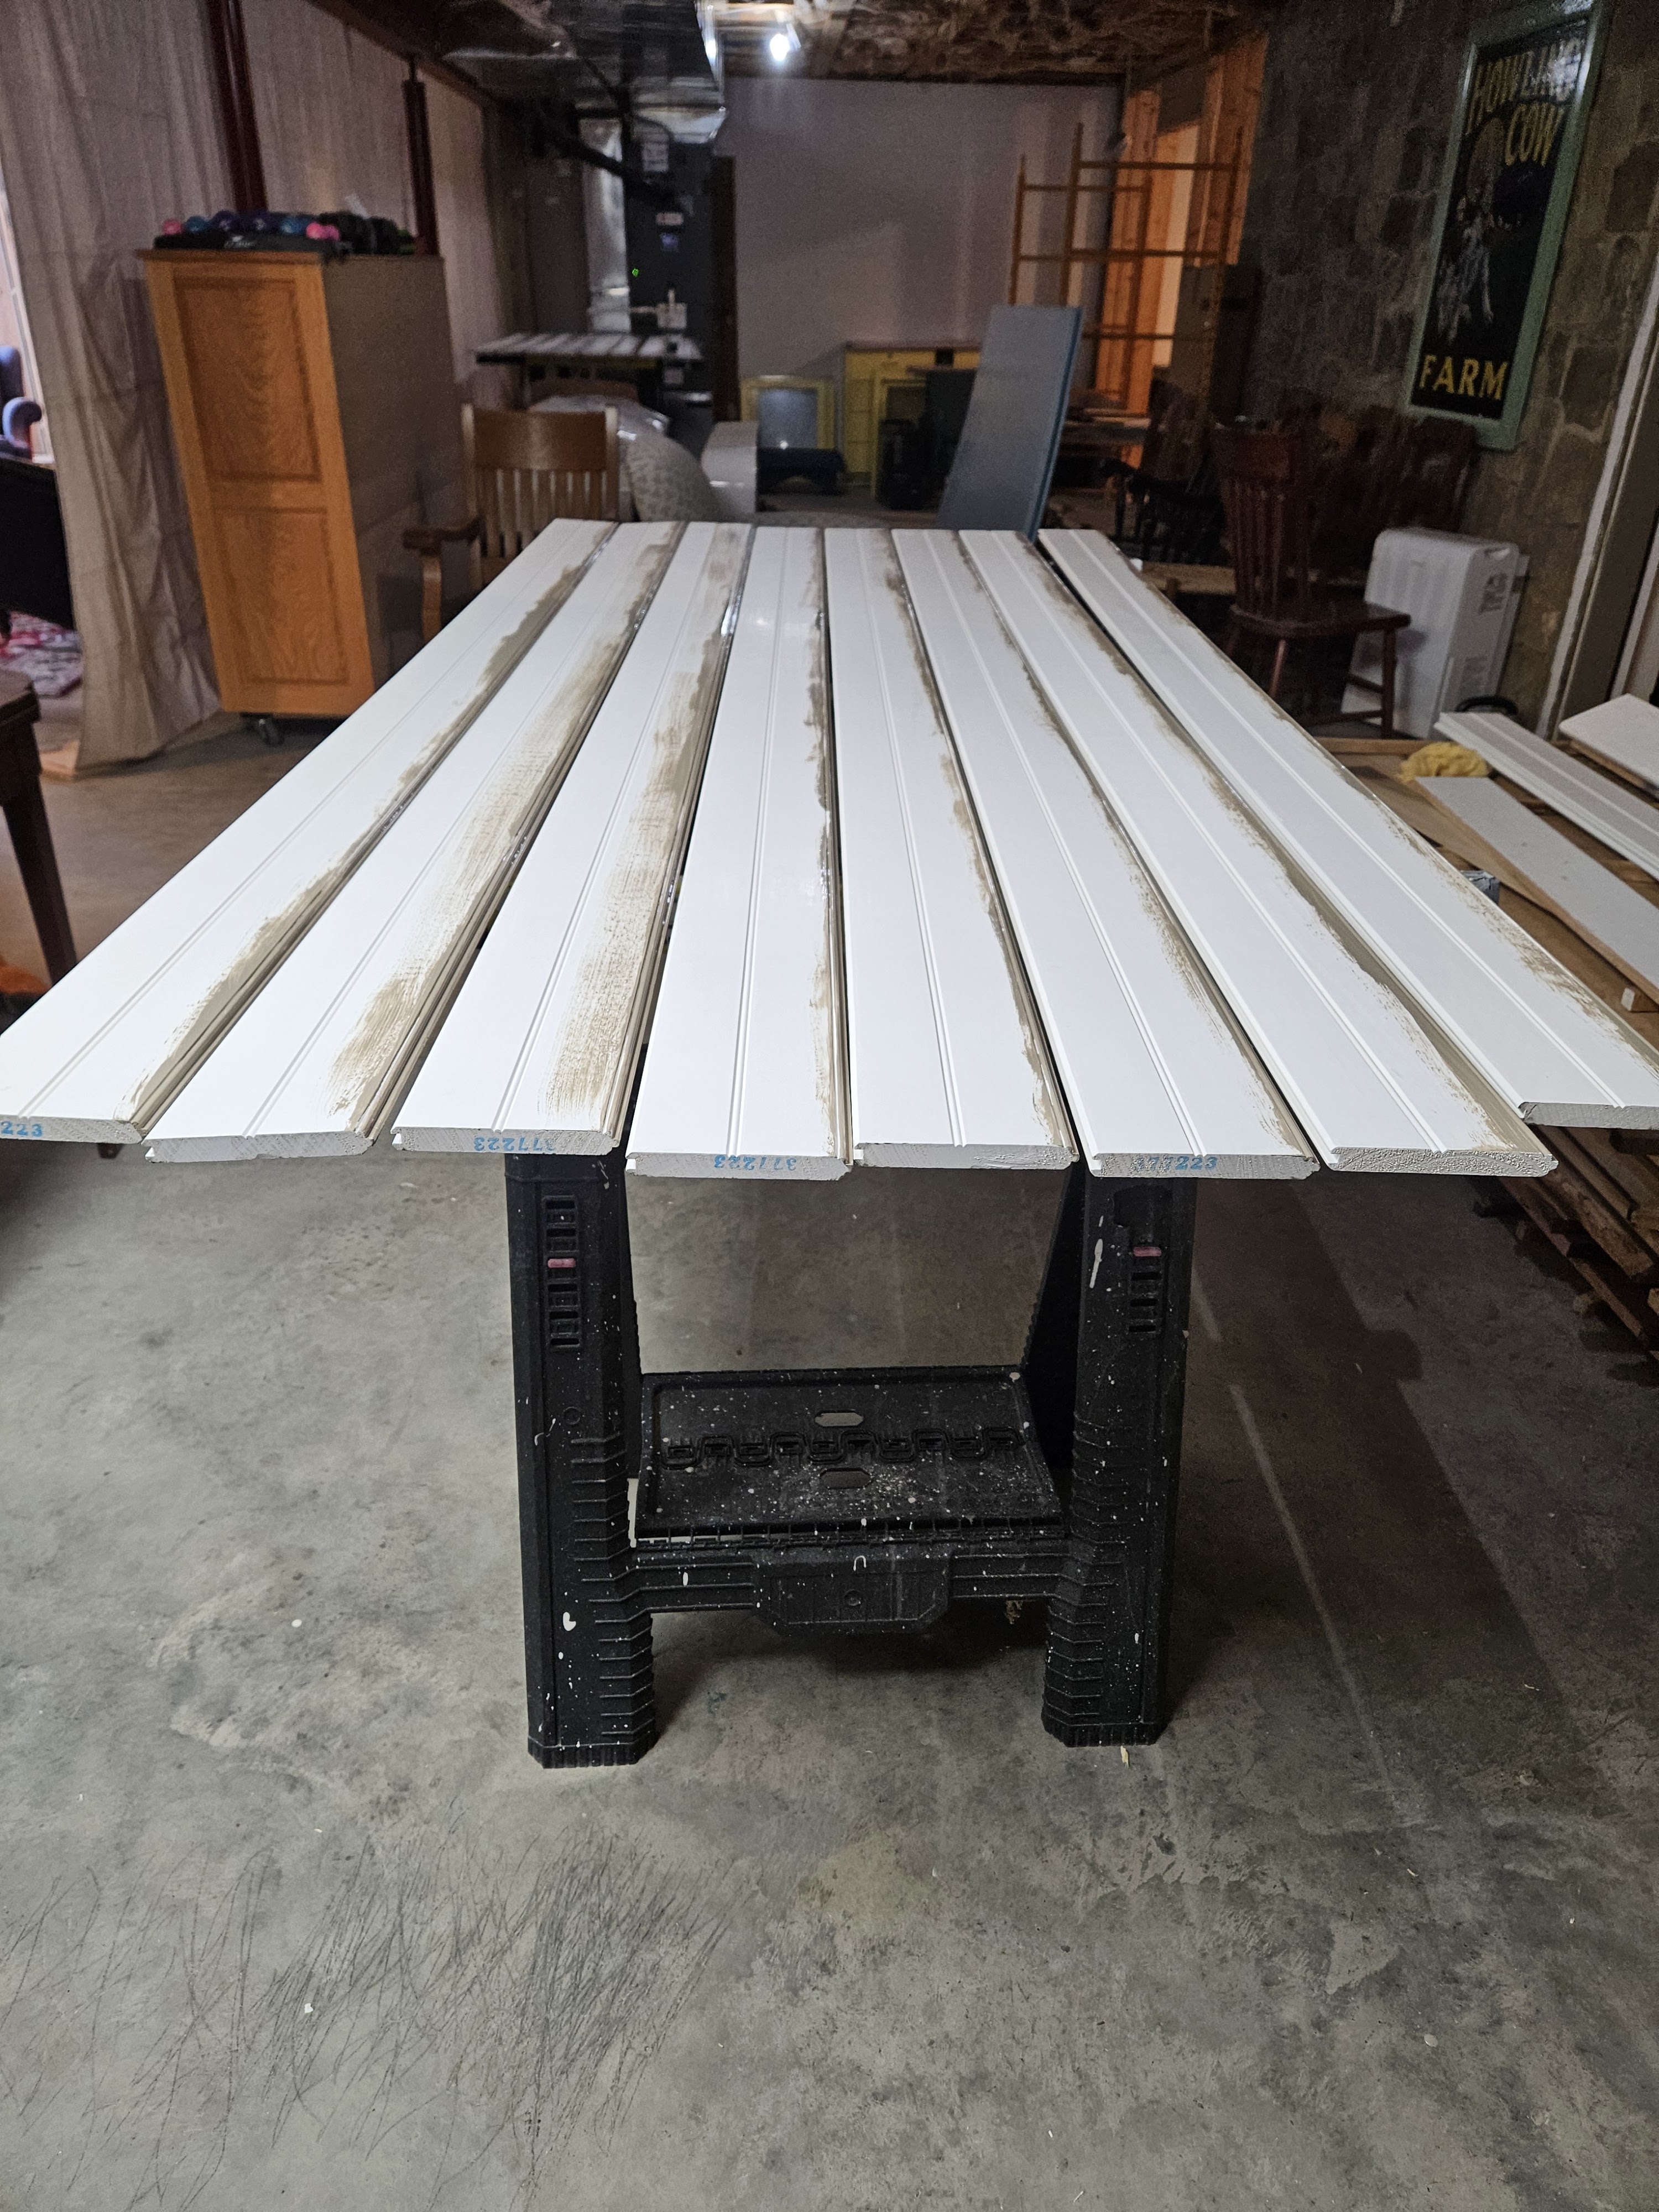
I ordered most of the items from a local building supply and they delivered it about 90 minutes after I ordered it–amazing! We’re going to use the same tongue and groove beadboard material that we used on the mudroom wall, so I had to go to pick that up yesterday afternoon, because my husband was expecting a really long day (and he was right). I was able to get all 18 pieces in my 4Runner.
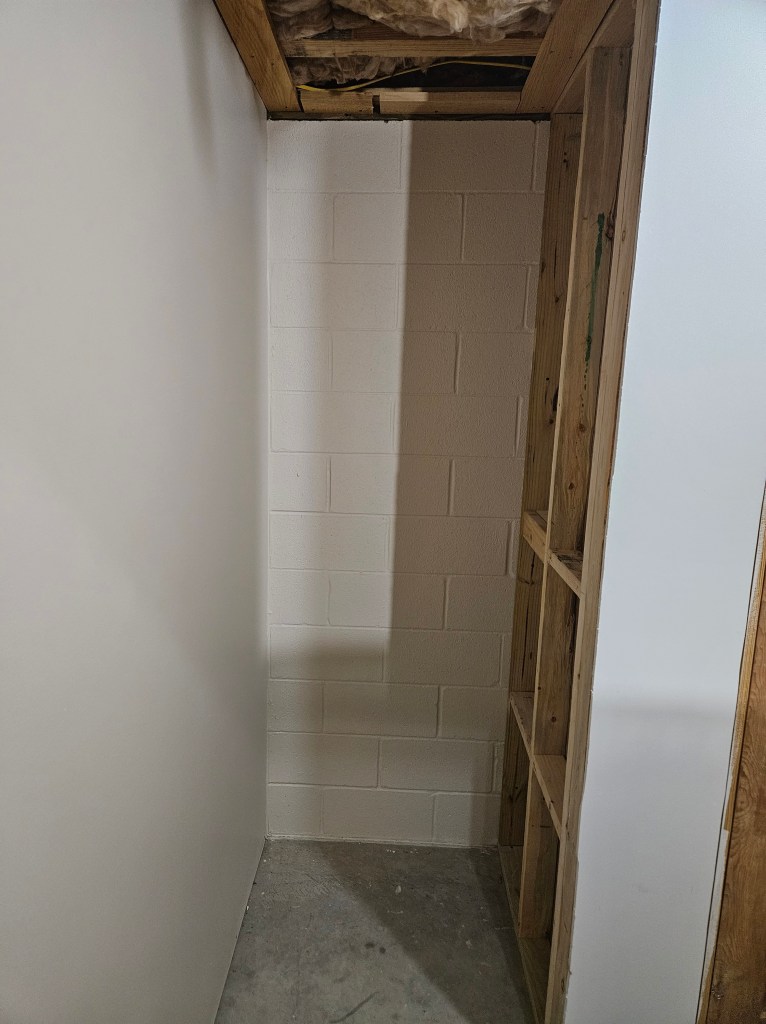
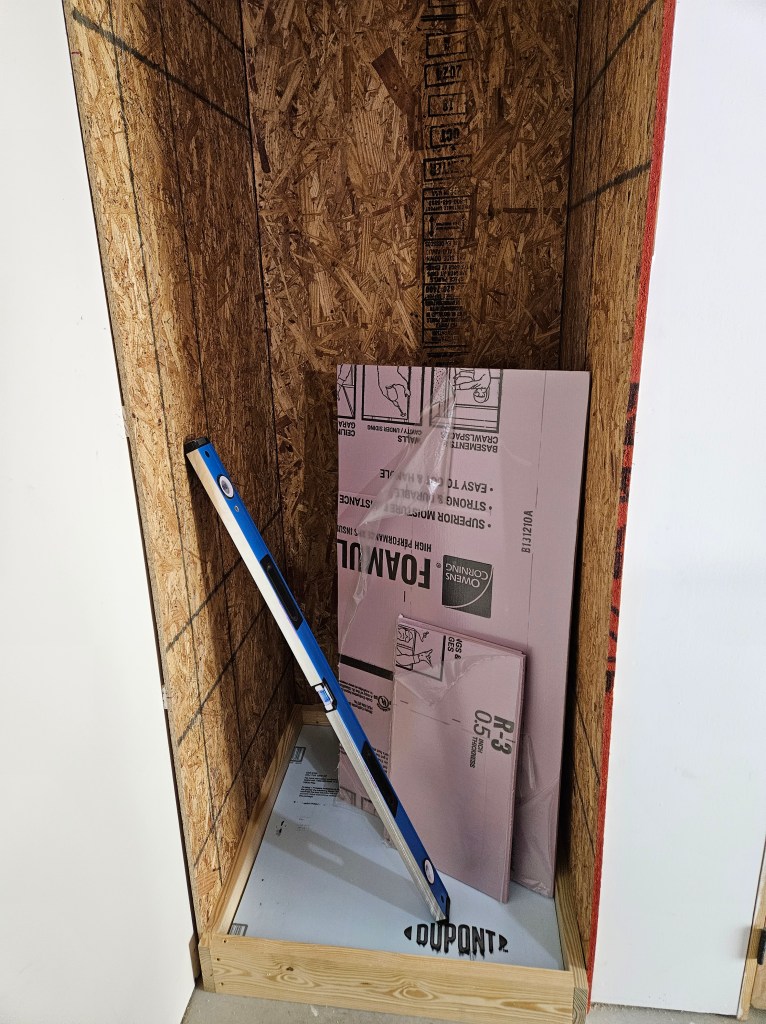
The basic plan is to put 1/2″ plywood on the left and right walls. Then we will fur out the back wall with some pressure treated 2″ x 4″ x 8′ boards. This is an exterior block wall, so we will fill the gaps between the studs with foam board, just for a little insulation. For the floor, we will frame it with pressure treated 2″ x 6″ board so that it’s tall enough for a 5″ baseboard that we’ll add later. The ceiling of the unit will be framed out with 2″ x 4″ boards to hold the piece of 3/4″ birch plywood that we’ll use to cover all the framing.
Once that much is done, I will paint the tongues of all the beadboard so that I don’t have the problem of the white peaking through like I did on the mudroom wall. Once those are dry, we’ll trim them to length and install them in the unit. I will paint them once they are installed to keep paint from pooling in the grooves.
After that is all painted, we will install the “floor” and the “ceiling” and paint those. Off to the side, we will be building the shelves and the face frames to give it a finished look. We will also have to add some trim pieces here and there to cover gaps. And of course, all of that will have to be sanded, primed, sanded, and painted before it’s installed.
I’ve been waiting to do this project for a long time, and it’s one that I think that we can finish in a 3 day weekend. I’ll report back next week.
Wish us luck!
January 19, 2025:
We started this project during the weekend that we got snow and were stuck at the house. I think I jinxed us when I said I thought we could accomplish it over a long weekend. No such luck. I’ve had a few people ask how the project is going, so here is the update.
I painted the tongues of the beadboard planks.
And…..we didn’t make much more progress than that during our snow days. Here’s why: We are building the unit using the existing walls as the sides. Unfortunately for us, the walls are not plumb or parallel to one another, so my husband had to add additional framing in both side walls so that he could add shims to correct the plumbness of the walls and then he installed OSB on top of that.
He put in pressure treated 2 x 4s on the back wall and filled the areas between them with foam board since this is an exterior wall, and then installed OSB on top.
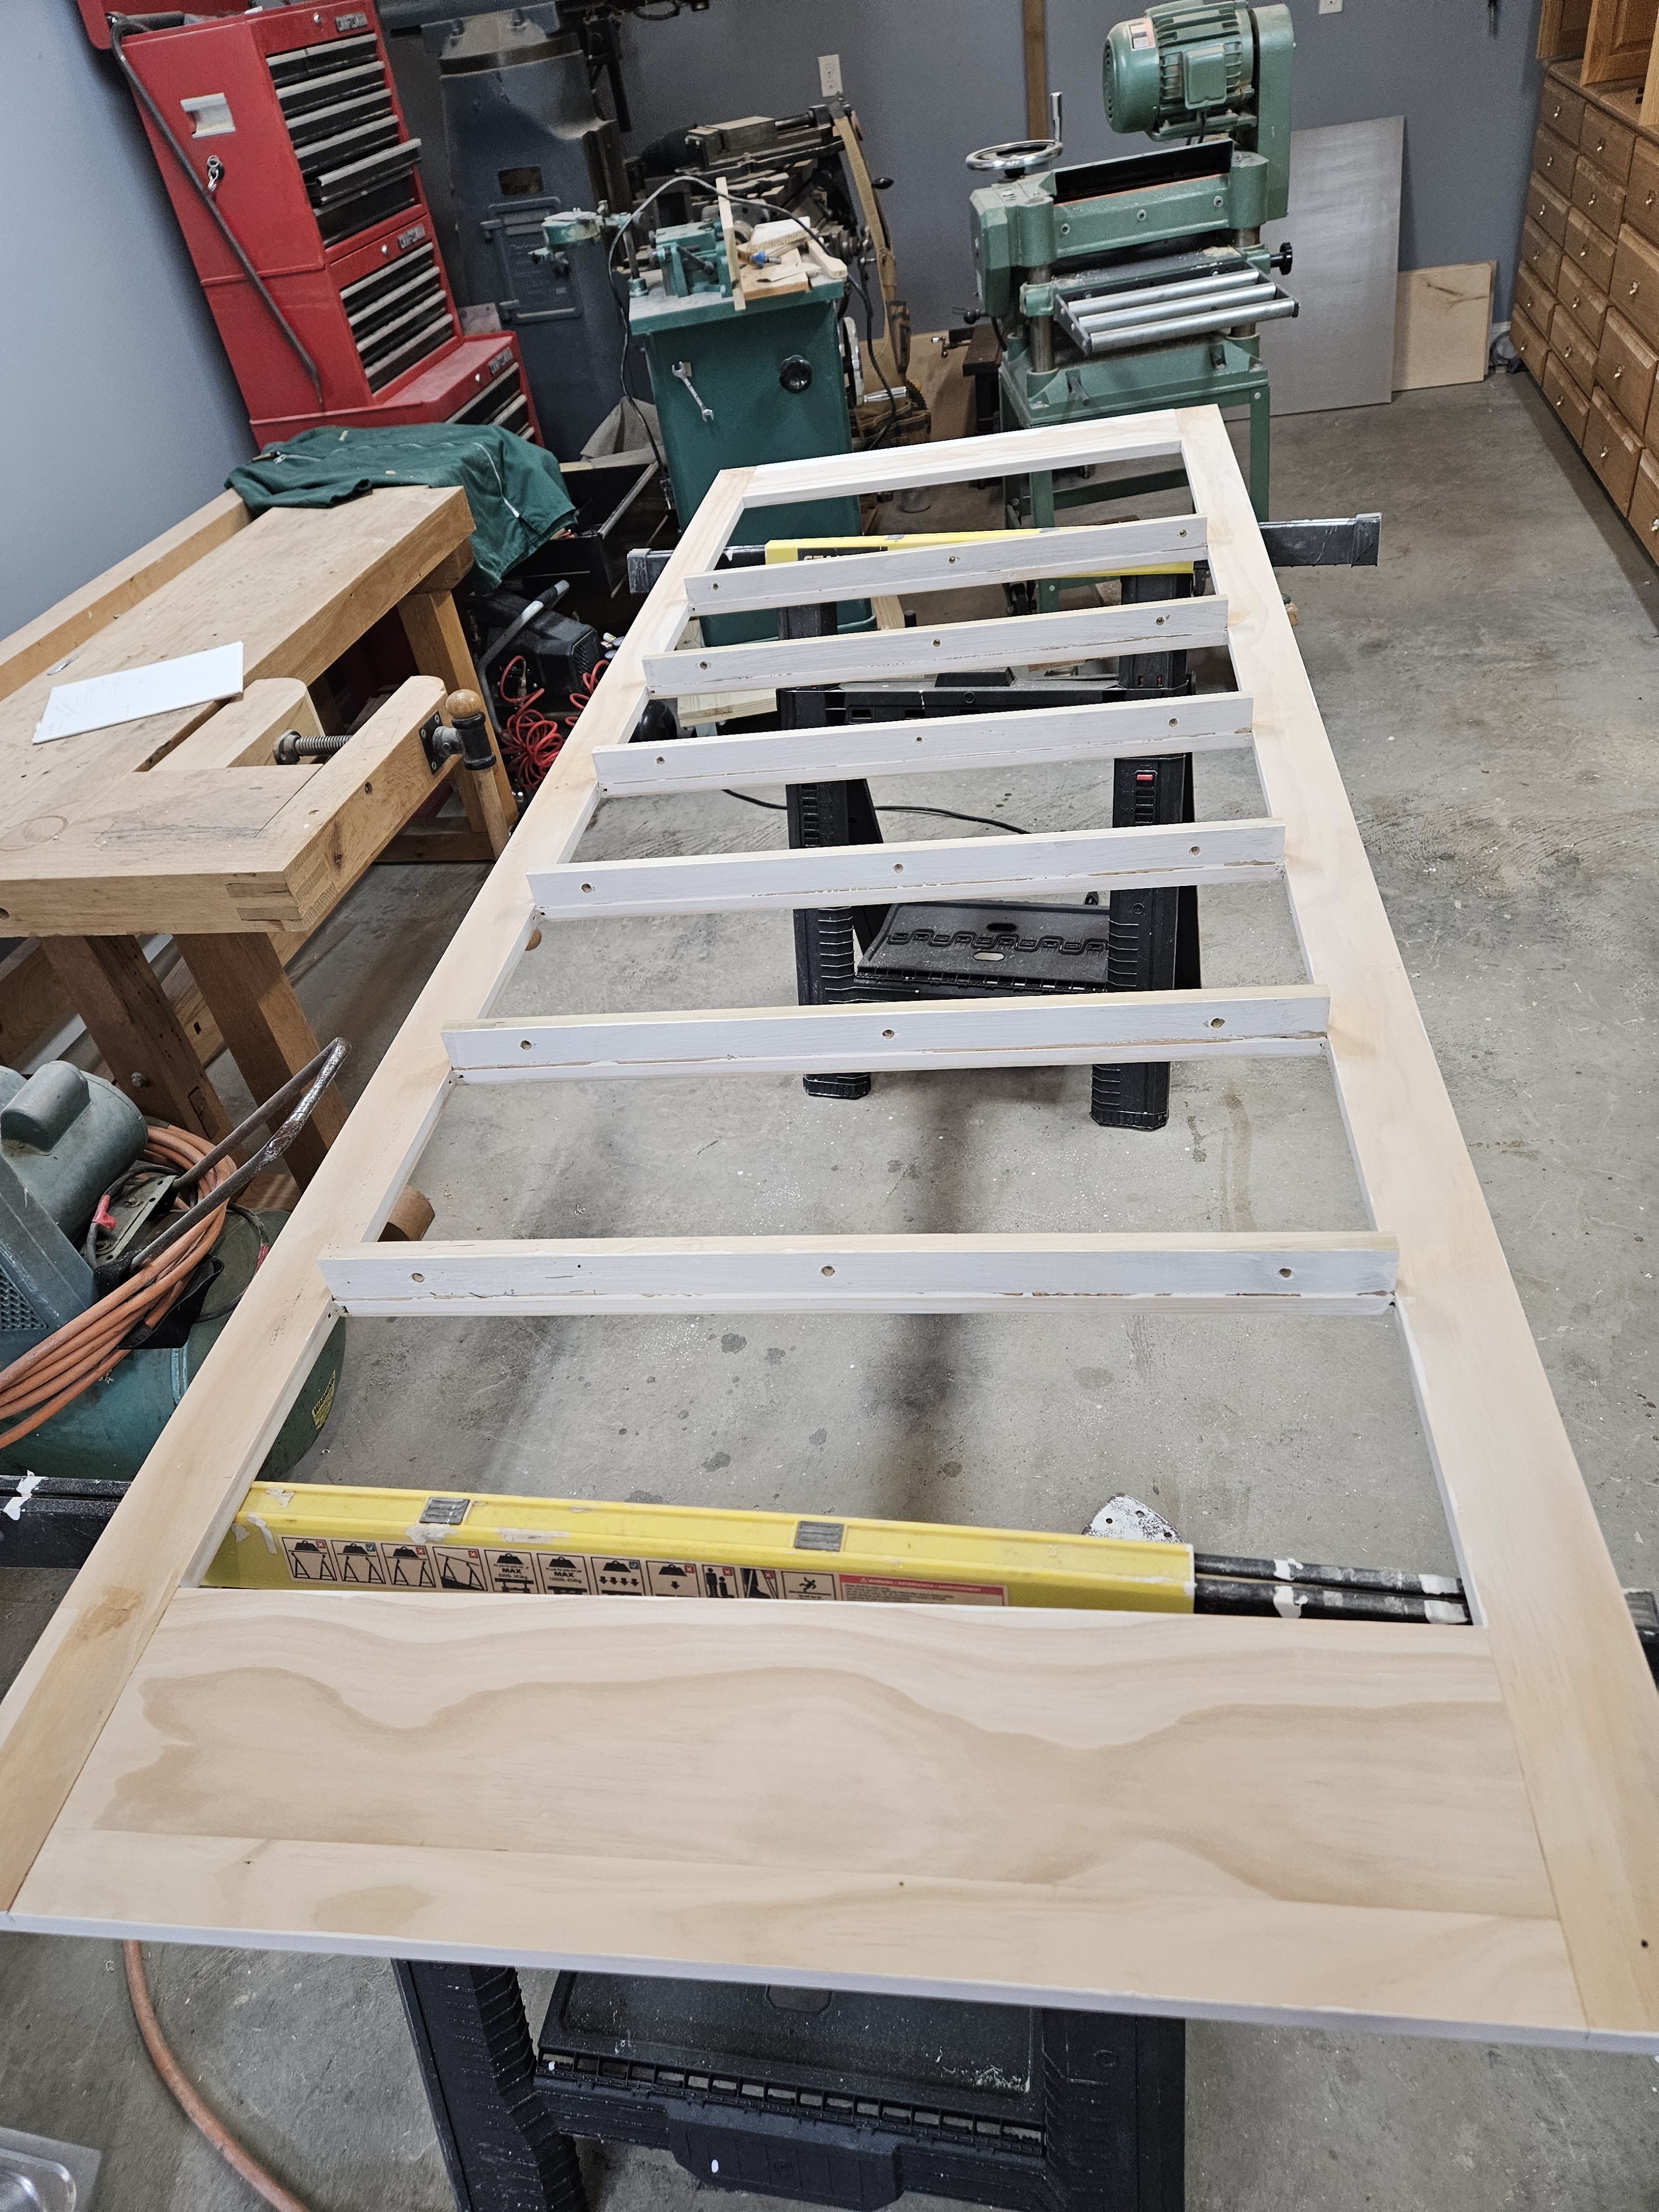
Then he started working on the ceiling and floor of the unit. He framed the floor of the unit with pressure treated 2 x 6 boards that he had planed and jointed to ensure that everything was square.
Then he built the structure to support the plywood for the ceiling.
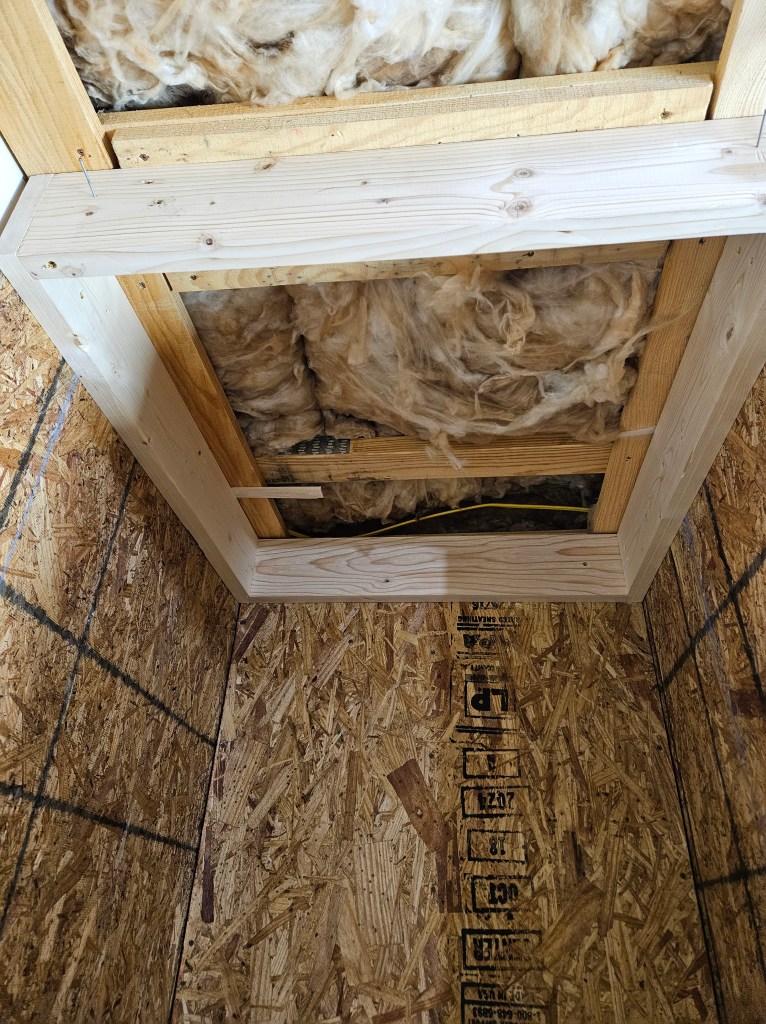
He filled in the area in the floor with foam board insulation.
He also cut all the boards for the face frame, but that just looks like a stack of lumber.
He is taking 3 days off this week (because he desperately needs some time off) and we’re going to work on this. The next steps are to put up the beadboard planks–cut them to length; nail them up; fill the nail holes with wood putty; sand them; paint them. The we will cut the plywood to size for the ceiling, floor, and all the shelves. We’re going to need to get one more sheet of plywood–we miscalculated.) Once we get the plywood cut to size, we’ll sand; prime; sand; and paint it before we install it.
In retrospect, we should have built this as though it were a free standing unit and put it place. It has really been kind of a pain.
I hope to have more progress to report soon.
January 25, 2025:
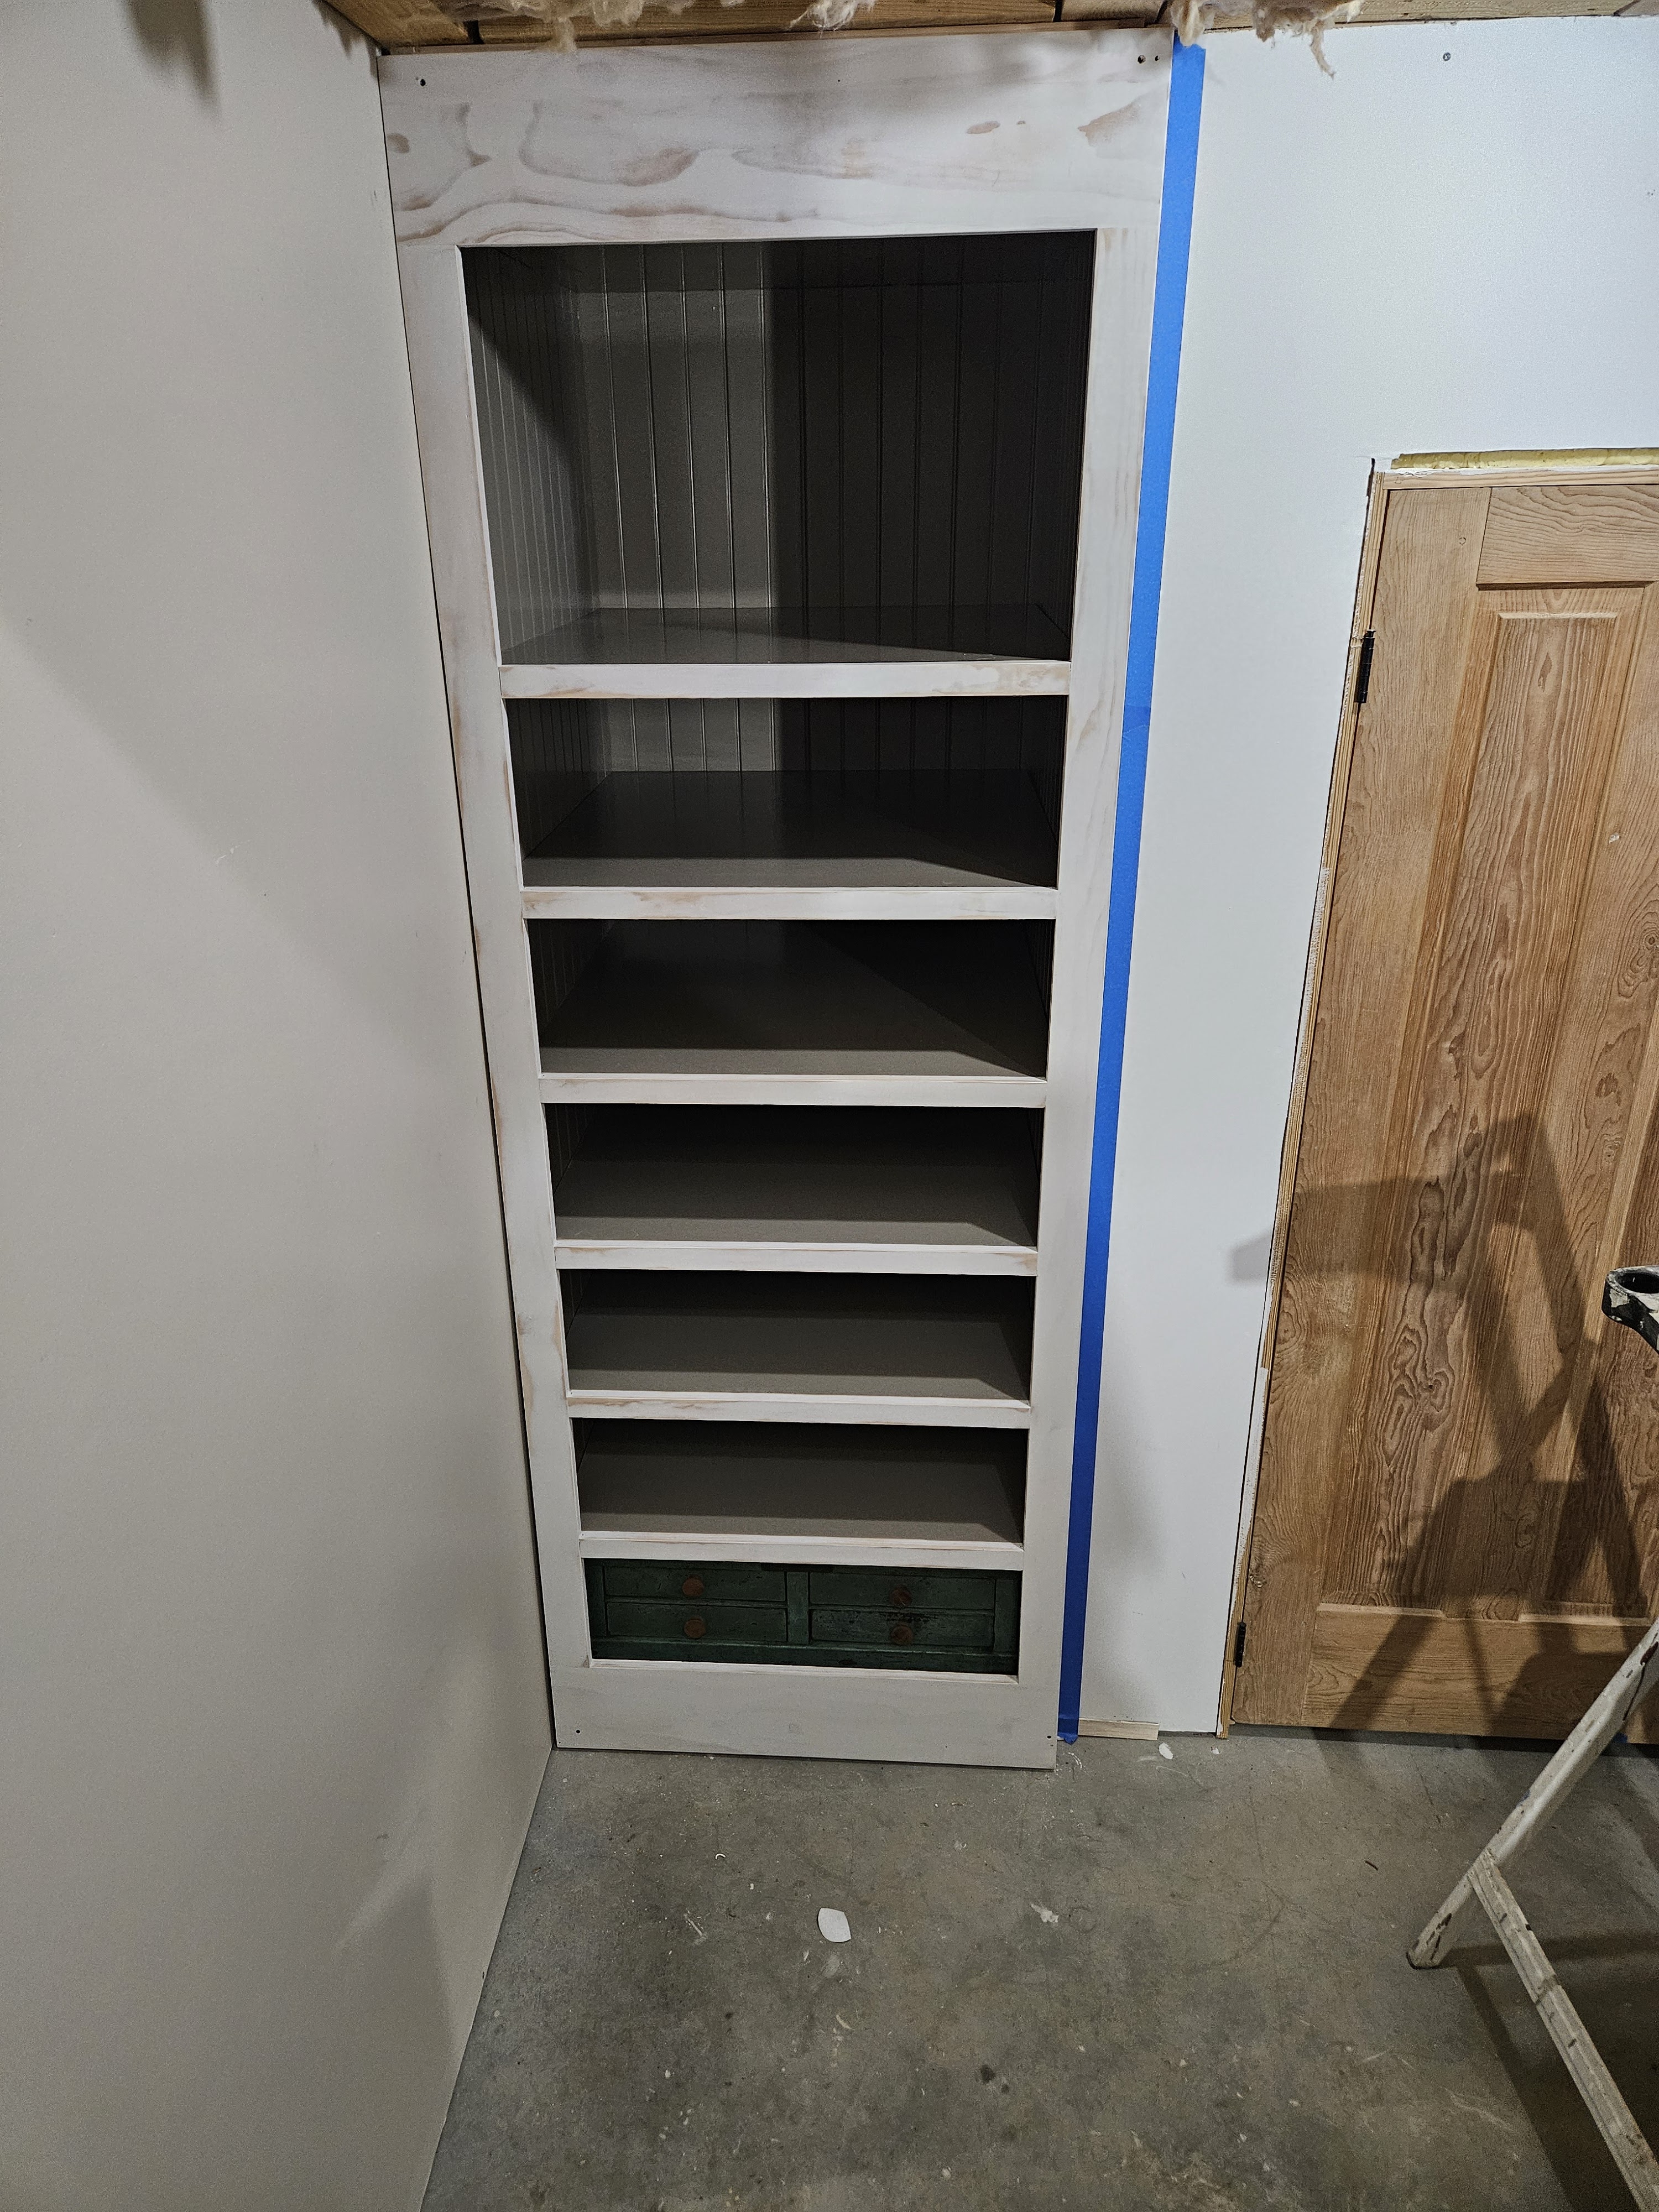
So this project is moving WAY more slowly than I ever expected, but here we are. We have made more progress than it’s going to appear in the following photos.
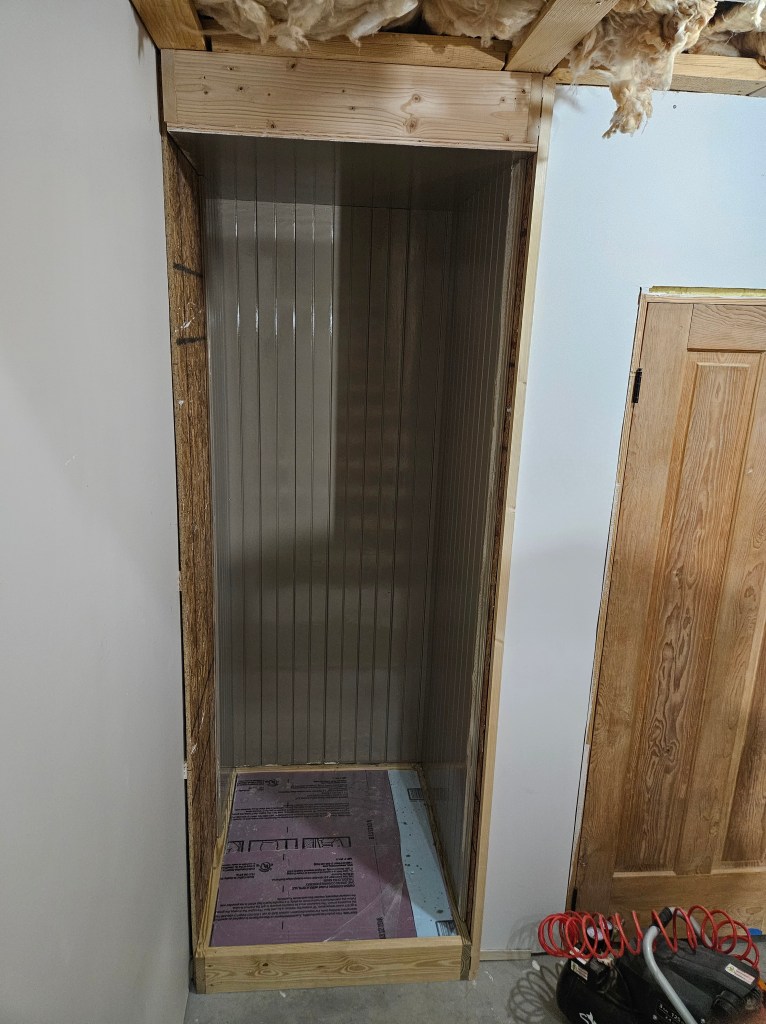
So, what you can’t see from these photos is that the left and right walls are plumb and parallel (and that took a LOT of time.) The bottom of the shelf is level and REALLY well insulated. The ceiling of the unit is also level. Because we made the unit a little deeper than we originally planned, we ran out of planks for the side walls, which is why they aren’t fully complete. BUT, everything that is installed has been painted with the top coat, and there are few tiny places that I will have to touch up, but not much–and after ONLY one coat. Love that so much!

These are the remaining beadboard planks for the walls. I have painted the tongues of them so that we won’t have the white showing once they are installed. It is incredibly difficult to paint those once they are installed.
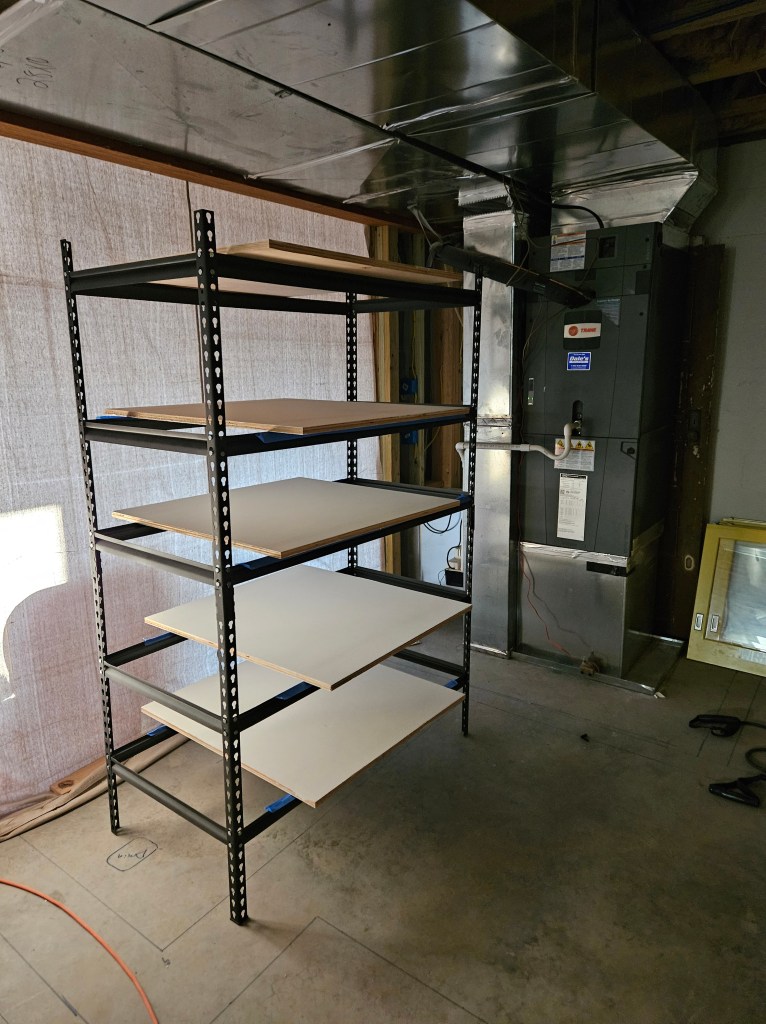
We put together this shelving unit that we had taken down because we didn’t need it anymore so that we could use it as a drying rack for the shelf boards. These boards have 2 coats of primer on both sides. It’s supposed to be warmer the middle of this coming week, so I will take them outside and sand them. The dust from sanding these is akin to the dust you get from sanding drywall and it gets EVERYWHERE which is why I am waiting to sand them until it’s warm enough to do it outside.
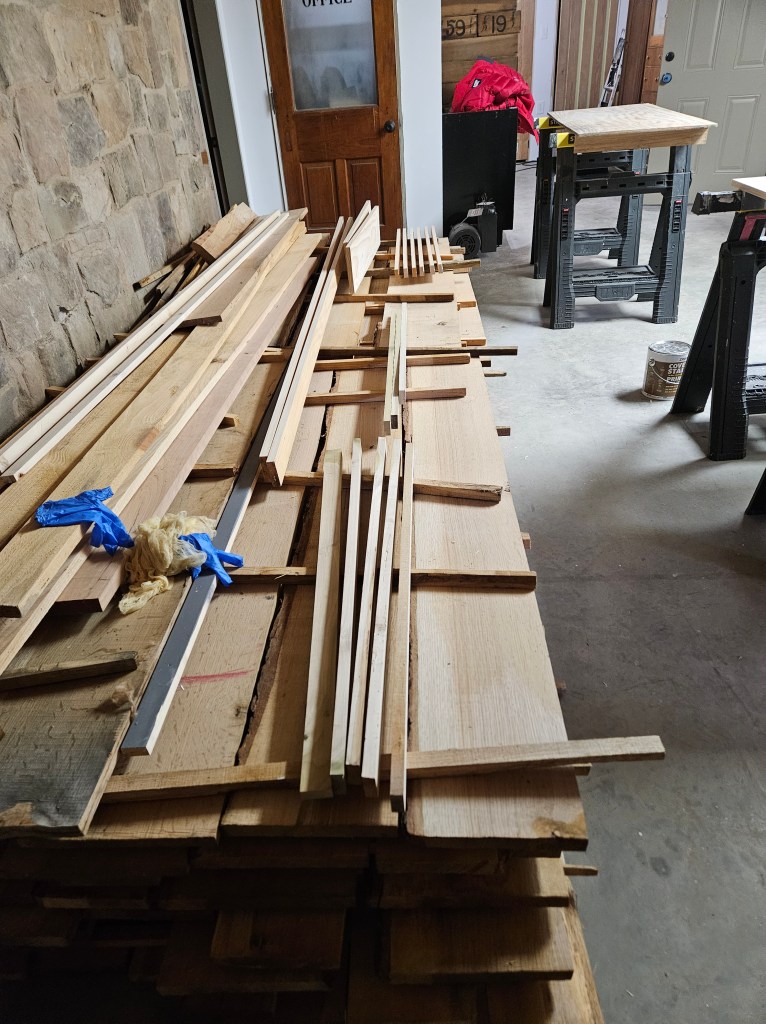
My husband has prepped all the pieces for the face frame of the shelving unit and here they are. (Most of them are here, but there are others under the beadboard planks too.) They don’t look like much, but he has everything sketched up and the face frame will be pretty quick to assemble. Once it is assembled, I will prime it with 2 coats and sand it. I won’t put the top coat on until it’s installed.
So, what’s slowing us down? Well, the top coat paint dries really hard, but it takes about 3 weeks for it to fully cure and not feel tacky. We learned that from the mudroom wall which was super shiny and also tacky until about a week after the holidays (about 3 weeks from when the last coat of paint was applied). With that in mind, we are hesitant to work with any pieces that haven’t been drying for at least a week, because they are really pretty sticky for at least that long. Fortunately, the basement is really warm because we have had a fire going in the wood stove for weeks because it’s been so incredibly cold here. So the basement is nice and warm, and the air down there is DRY–both factors aid in paint drying.
Next steps are for me to finish priming all the shelves–doing two coats (one coat brushing in one direction and the next coat in the other direction)–and then sanding everything smooth with 150 grit sandpaper. Then I will vacuum and tack cloth the shelves and put the top coat on one side of the boards and let them dry for a week. (I really wish I could sand them today, but it is just too cold to be out there doing that.)
While we are waiting for the shelf boards to dry, my husband is going to make molding that will be the brackets for the shelf boards to sit on. We’ll install the rest of the beadboard planks and get them painted. After a few days, we’ll install the brackets and get those painted. Then we’ll assemble the face frame and fill the nail holes, prime it, and sand it. Once the walls and brackets and the shelf boards are dry, we’ll trim the shelf boards to the final width (currently they are wider than necessary). I will paint the back half of the top of them, and then we will put them in place. As we put the shelves in place, I will paint the front halves of them. Then we’ll have to wait several days again and we’ll install the face frame, fill the nail holes, and paint it.
Then the hardest part of all will be waiting 3 more weeks to put all the stuff on the shelves–just to be sure that everything is really good and dry. This will get that much more stuff put away and out of the storage room–which is a good thing because that’s where my husband’s office and a much smaller storage room are going to be.
Eventually, there will be crown molding across the top, and baseboard across the bottom, but we won’t do that until we’re installing it in the whole room.
Honestly, it makes me a little tired thinking about it, but we have to keep making progress if we want it to be finished by the holidays this year.
May 21, 2025:
Sorry that I have been away so long. It’s been so busy around here since the middle of April when we spent 8 LONG days helping our oldest with his new (1932) house–pulling out carpet, cleaning, painting, putting down hardwood, putting up drywall, and refinishing floors. Shortly after that, we went to help our youngest son move from one apartment to another in the same city. All of that came just after two weeks of extensive outdoor work here at the house and just before we drove to Rye, NY to pick up cabinets for the basement. Between all of that, I was struggling just to keep the house running, and us fed–and staying on top of the yard work has been a CHALLENGE with all the rain that we’ve gotten.
But believe it or not, in the midst of all of it, we were able to finish the Snow Day project from months ago, where we were building in a set of shelves to house all the weird junk I have found over the years. My husband is a saint, really.
Here’s where I left you:
The shelves were up and painted, but lacked the face frame to finish it off.
My husband put the face frame together and sanded it.
Then I primed it and sanded it well all over and my husband installed it.
We had to put the green cabinet you see (actually the base from an old NCR cash register) on the shelf before we added the face frame because the opening is too small for it to fit through.
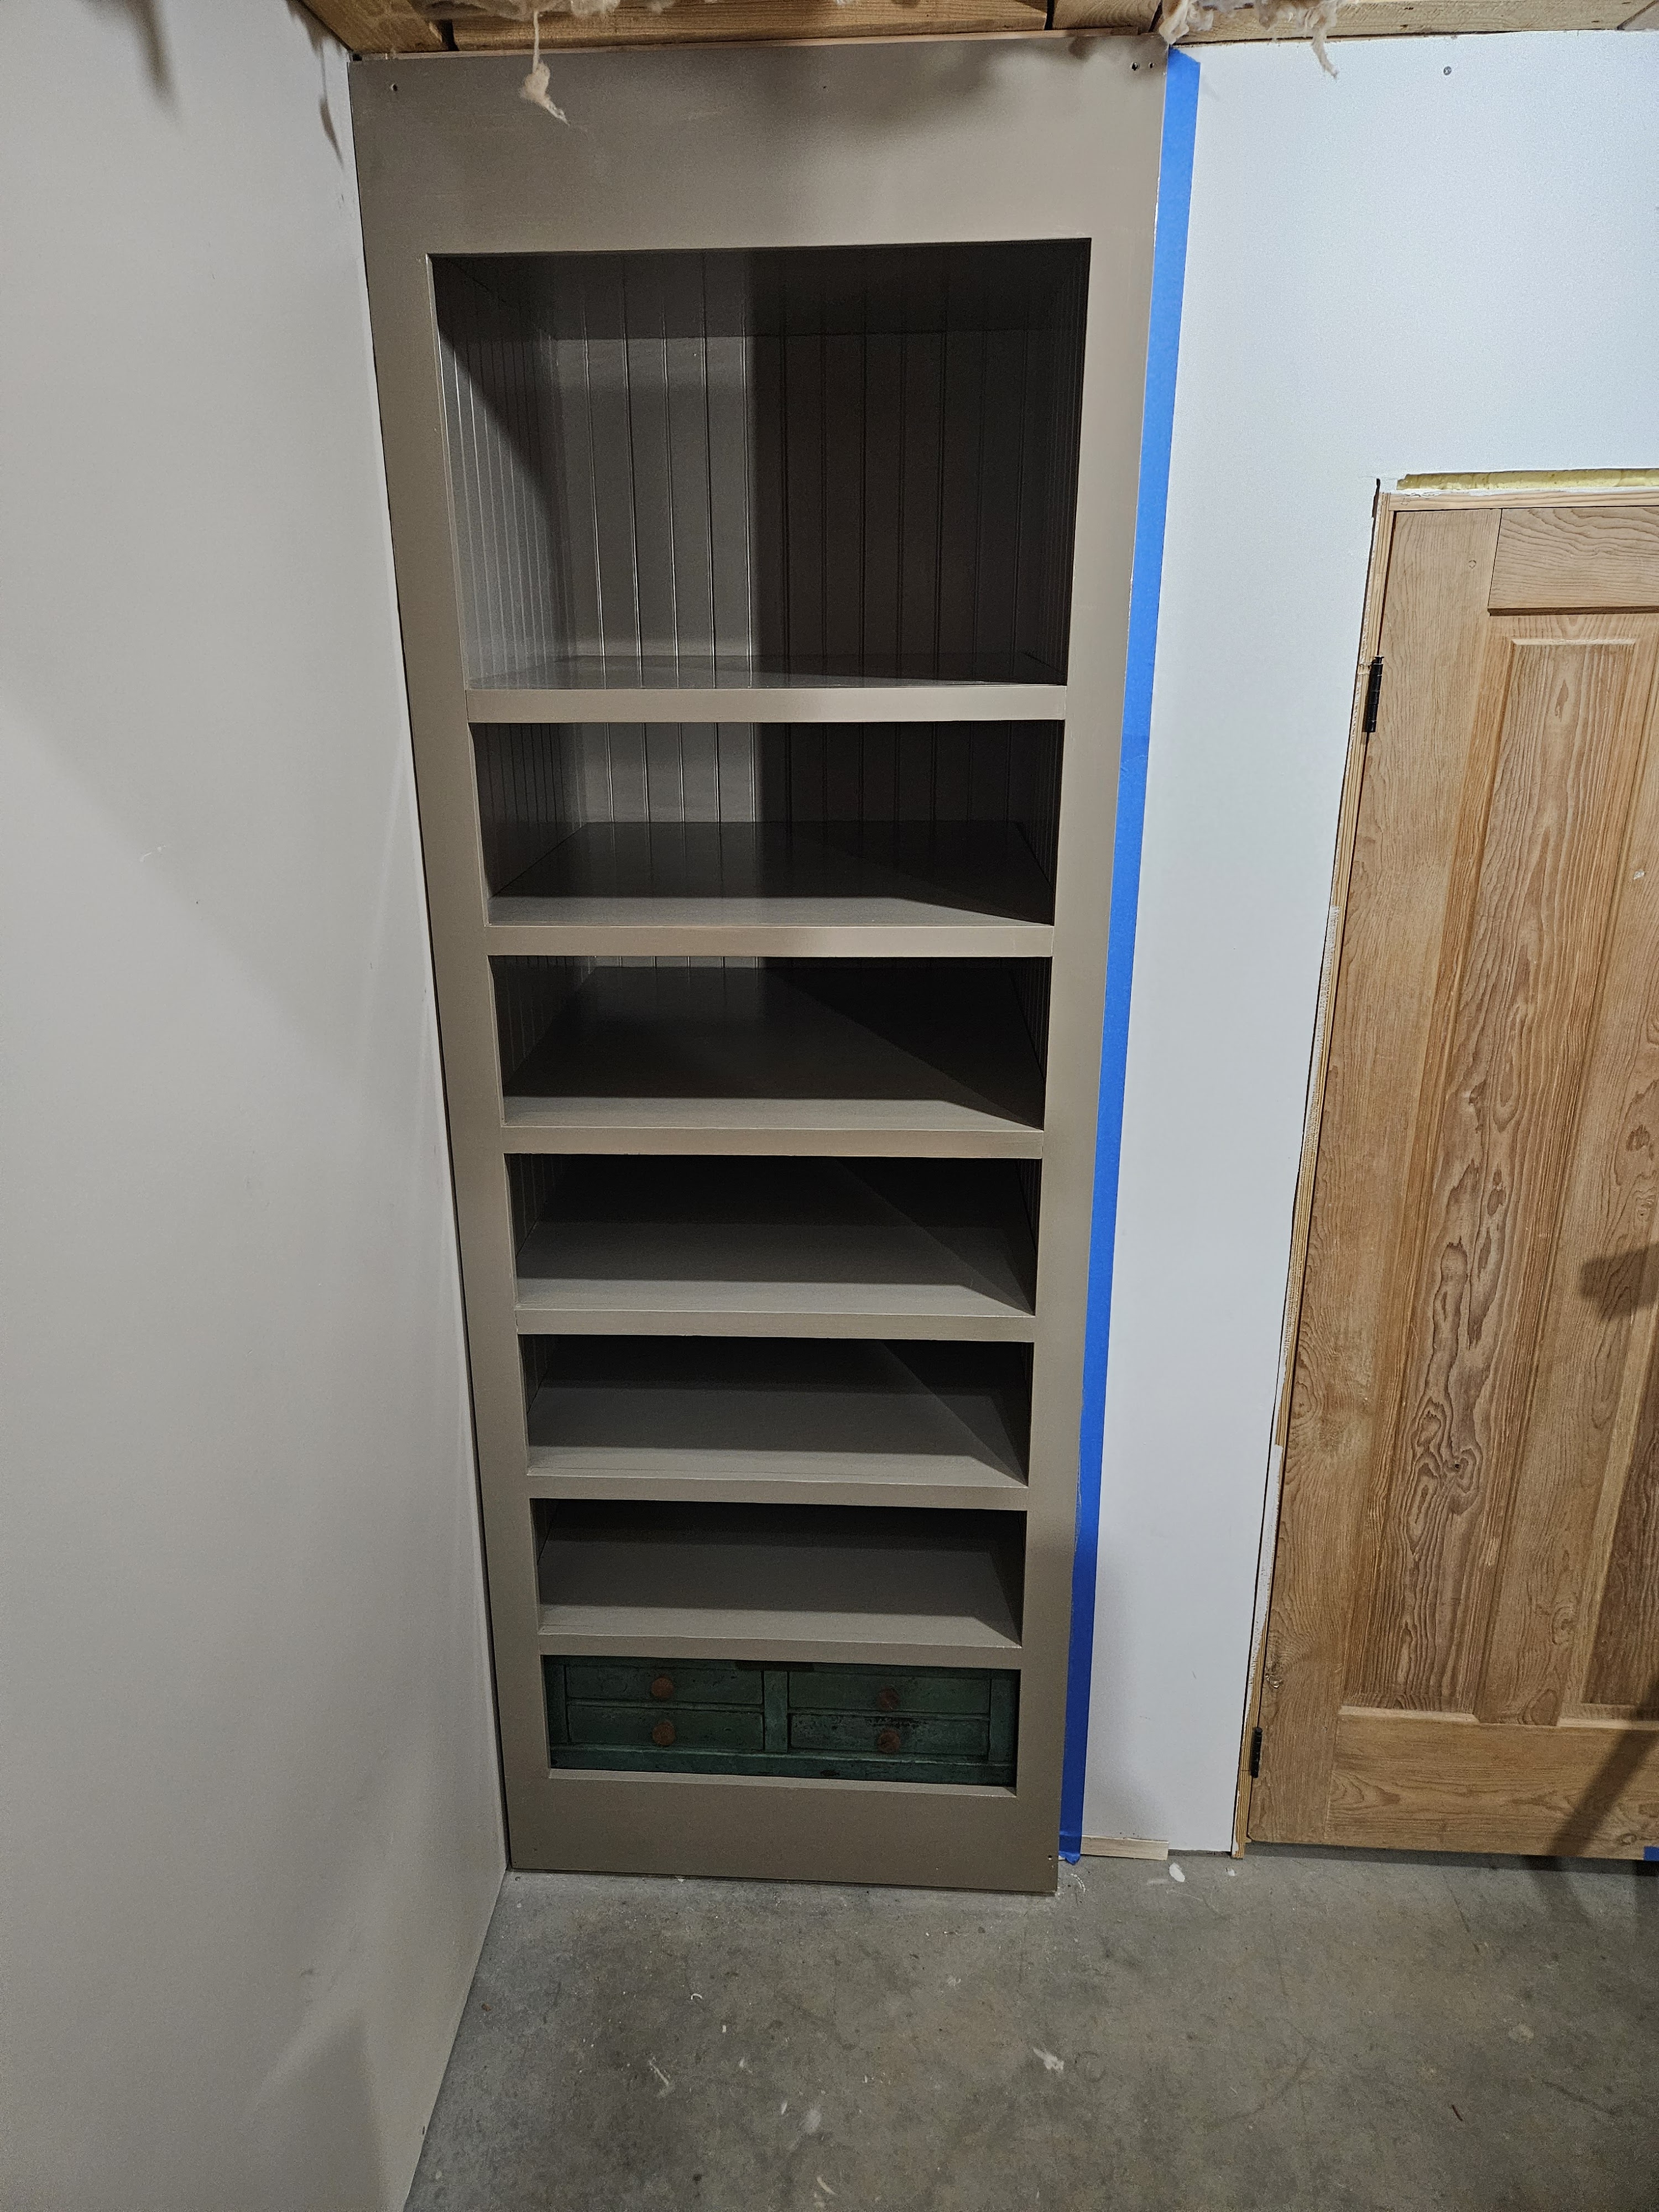
It’s all painted–2 coats. This paint dries really hard, but it takes FOREVER to dry, so we’ll have to be patient and wait a few weeks to be sure that it’s really good and dry before we put anything on the shelves.
Here are a couple more views:

Eventually, we will add crown molding to this entire wall, and baseboard throughout to finish it off. My husband may add some additional moldings to the case itself. We’ll see.
May 24, 2025:
We bought the sink and cabinet and the bath tub for the basement from Hudson Valley Houseparts–which is a salvage company that goes to houses that are going to be torn down and pulls out all the great architectural salvage that they can. I received an email from them about a kitchen and a butlers pantry that they were pulling out of a 1916 Colonial in Rye, NY. The run of cabinets is 10′–lowers and uppers and then there was a modern run of lowers with a granite counter, a couple of old uppers, and a sink and faucet. They are just exactly what I was looking for.
I forwarded the email to my husband and he asked when we were going to go–which SHOCKED me, because I really thought he would tell me no. So we made a deal on the cabinets and a dishwasher (which ultimately didn’t work out because it was a lot older than I thought). We started out on 5/9 and drove as far as Bristol, VA and spent the night there with the plan to drive to Charlottesville, VA the next day to see Monticello. The next morning, we drove to Monticello and saw that and then drove to Montpelier (Madison’s home) and saw that. Then we were on the road again and spent the night in Fairfax, VA. The next day, we drove to Malvern, PA hoping that we would be able to tour the Escherick studio, barn, and home (he was a famous woodworker), but no luck, so we ended up touring Sugartown. Then, it was back in the car and we drove to Tuckahoe, NY. Traffic was terrible on Mother’s Day, so it took forever. Good news is that we went to a fabulous Indian restaurant in Eastchester called Marigold–Delicious! The next morning we drove to the house and started loading up.
The cabinets were MUCH older than we expected and were built on site, so they don’t have backs–my guess is that they are from the 30’s based on the original color, and some quirks that they have. So the guys helped us load 2 pieces that are 10′ long each, plus a 10′ piece of granite. The glass doors for the upper cabinets and the sink went in the back of the car. It took about 2 1/2 hours to load and secure everything in the trailer. Then we got back in the car and drove to Roanoke, VA and the rest of the way the following day. We spent about 30 hours in the car altogether. We’re not going ANYWHERE for a long, long time.
The plans for the cabinets is to use the lowers along the back wall of the bar–we’ll put the sink in the section with the two small drawers. We’ll use one of the upper cabinets too. We’ll use the 2 modern cabinets under the bar along with a built in oven and a small beverage fridge. The upper cabinets with the glass doors (with true mullions, not just a grid) will become a built in bookcase on the stairwell wall. My husband wants to use the granite counter for his office. We’ll have to have it re-cut and installed, but it will be gorgeous with the quarter sawn and rift sawn oak he is going to use in there.

Here are the 10′ runs of cabinets in the home.
Here is the upper cabinet that we’ll use on the bar wall of the bar–I love the little brackets underneath.
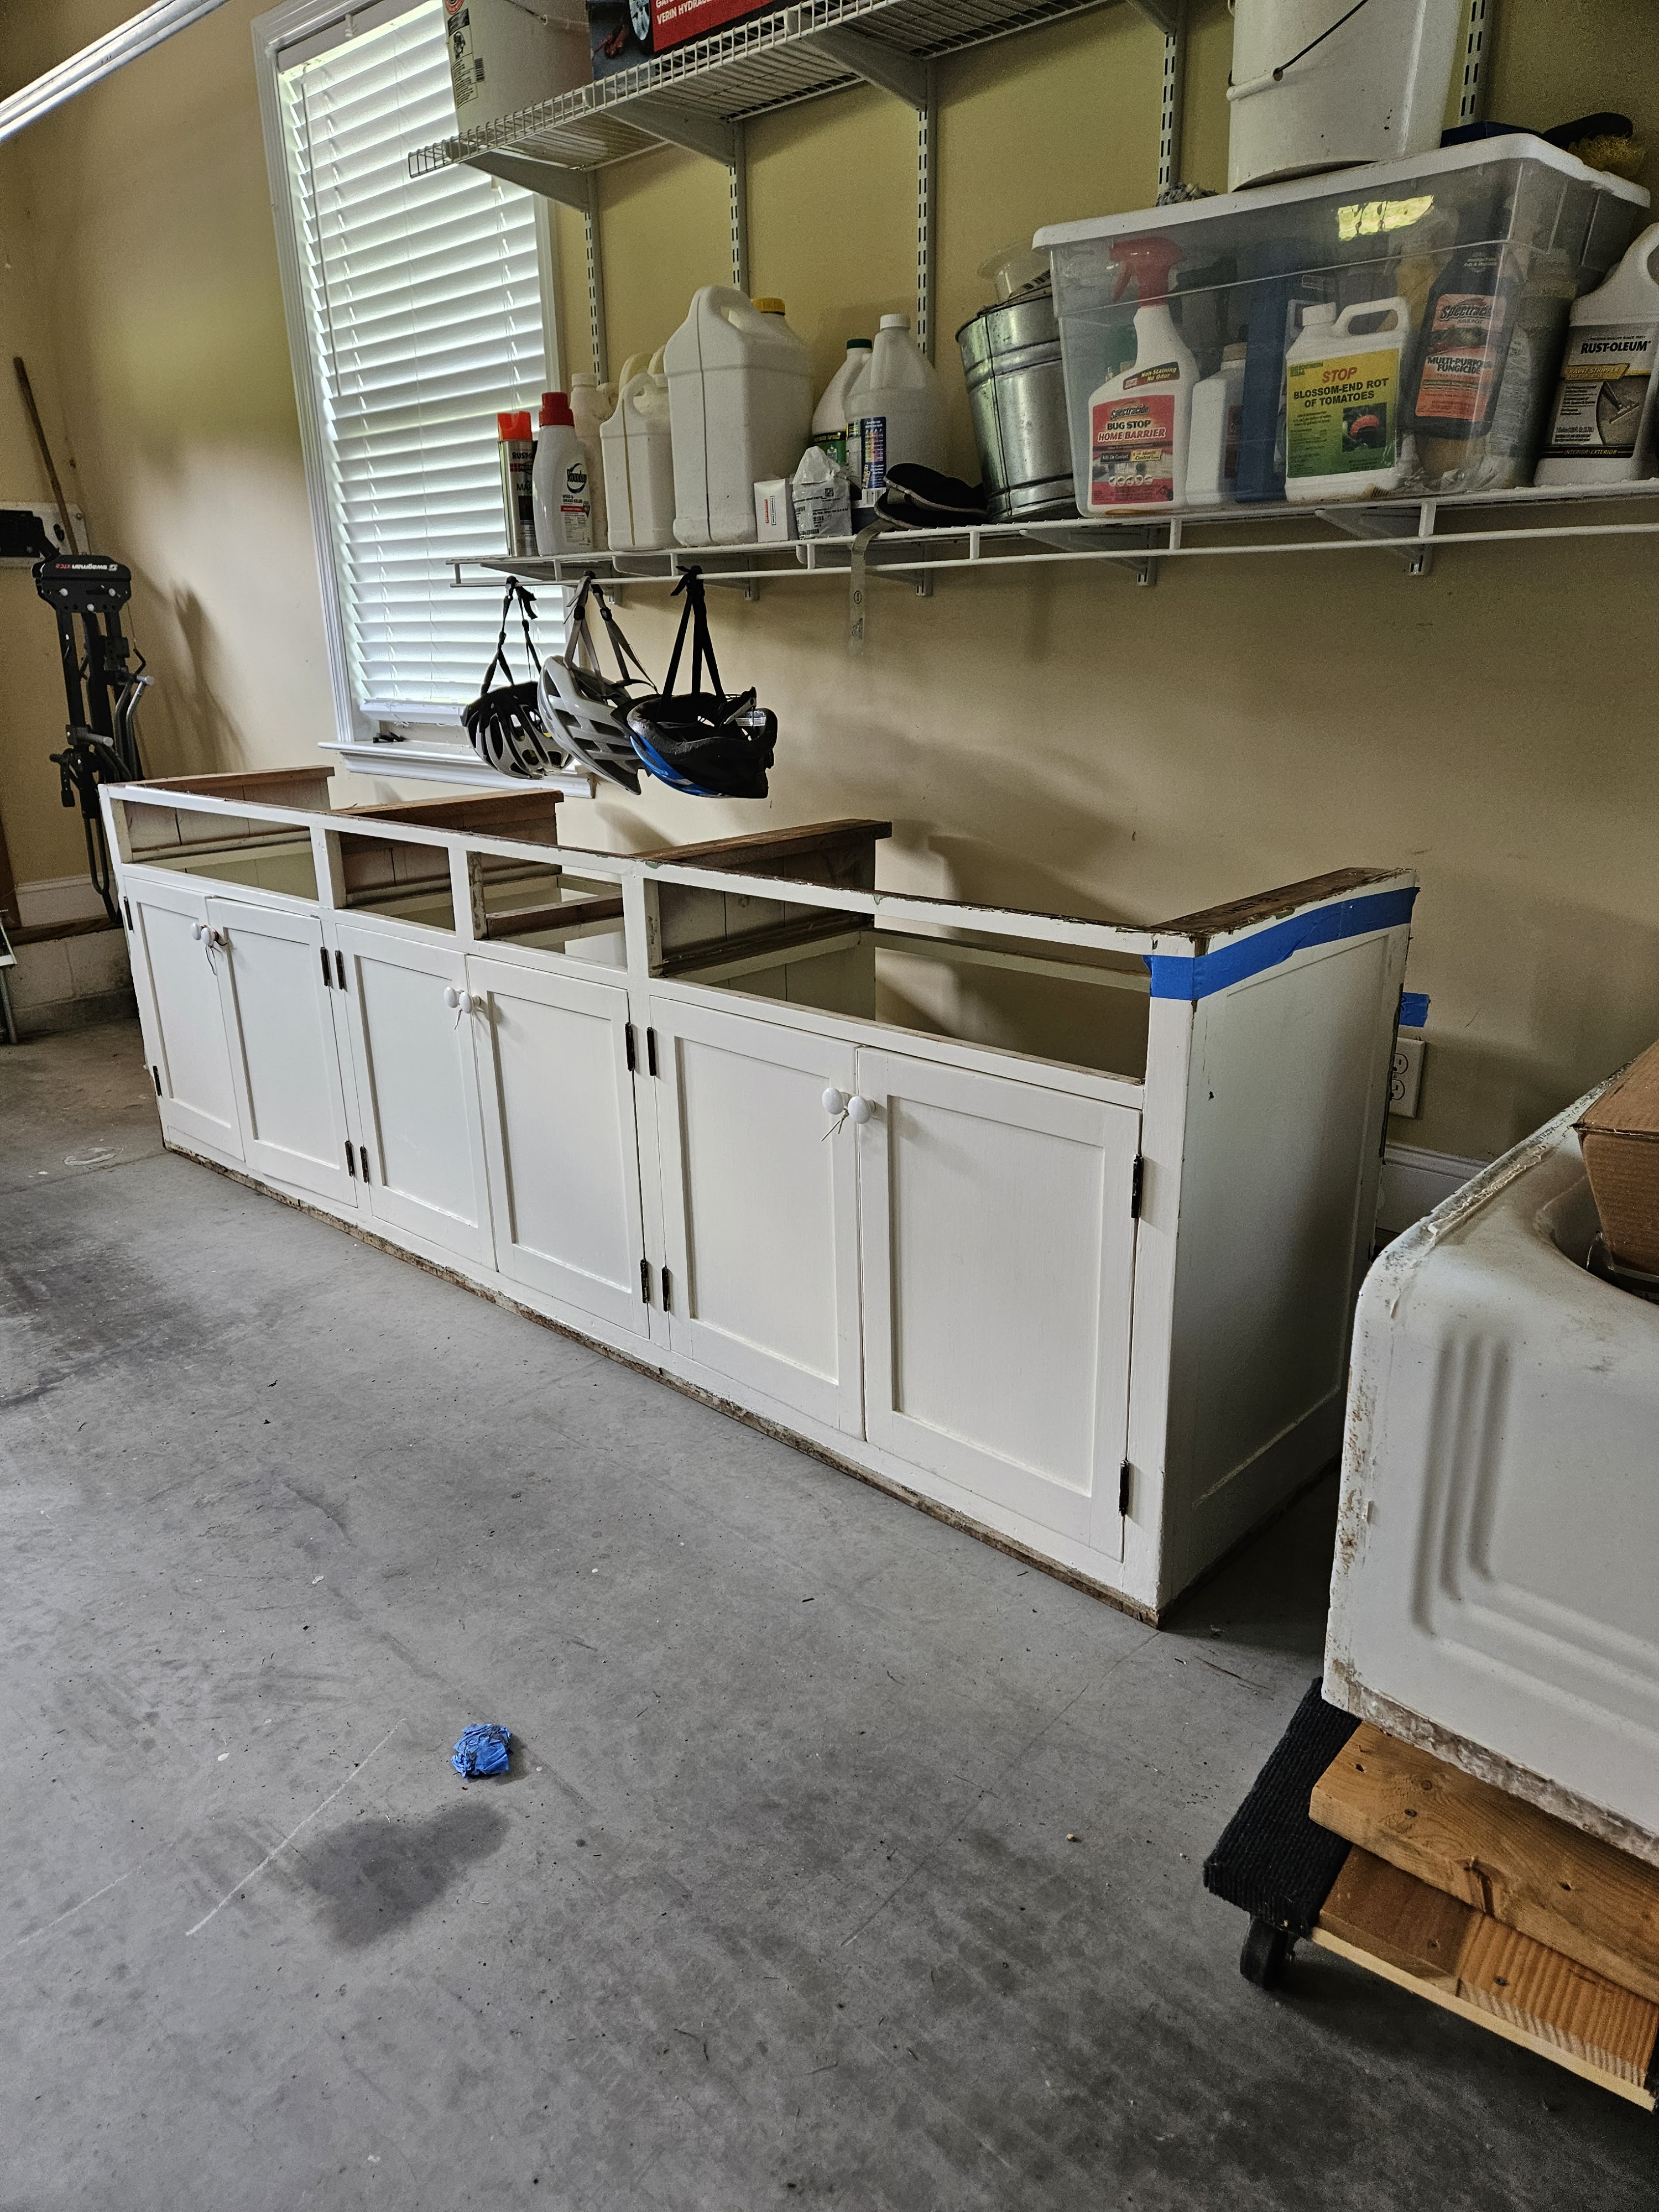
Here they are sitting in our garage:
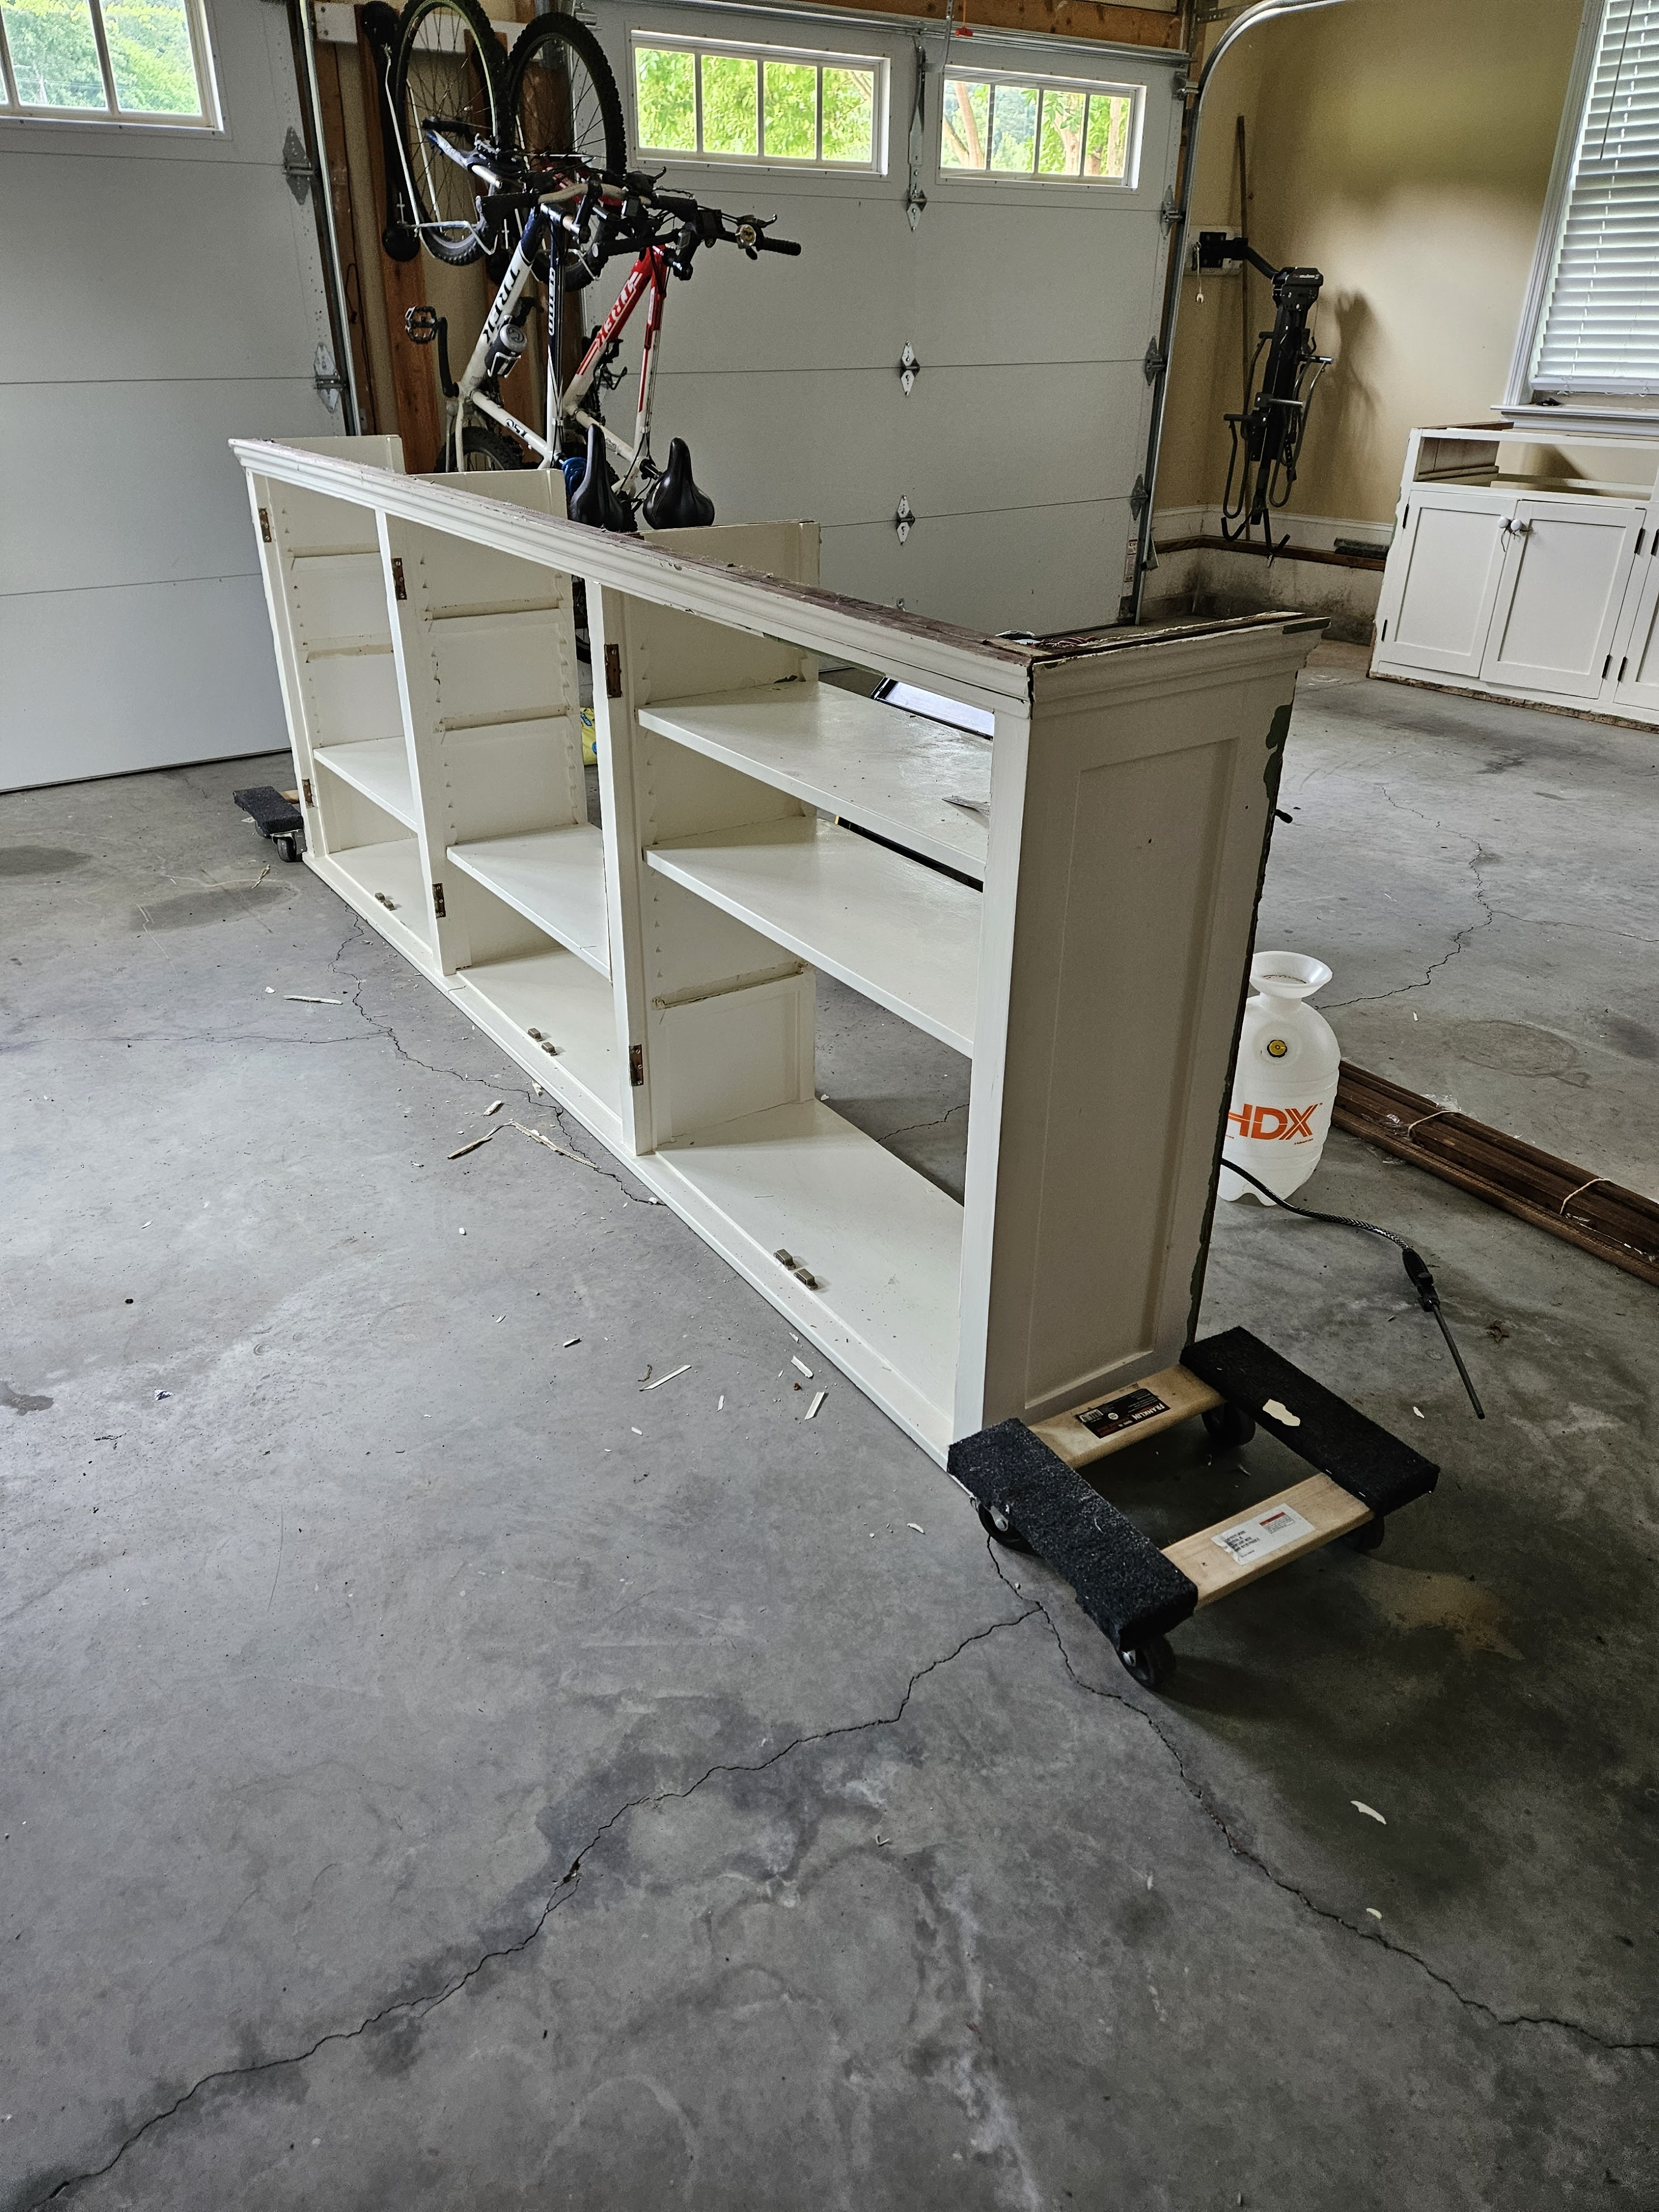
The shelf adjustment in the uppers is so cool.
We are going to chemically strip these as much as we need to in order to get a smooth surface to start from. The funniest part, is that we’re going to paint the bar cabinets a green that is really similar to the original color of the cabinets.
Anyway, I will update along the way. I really can’t wait to work on the bookcase. It will be spectacular and exactly what I wanted for the space.
May 29, 2025:
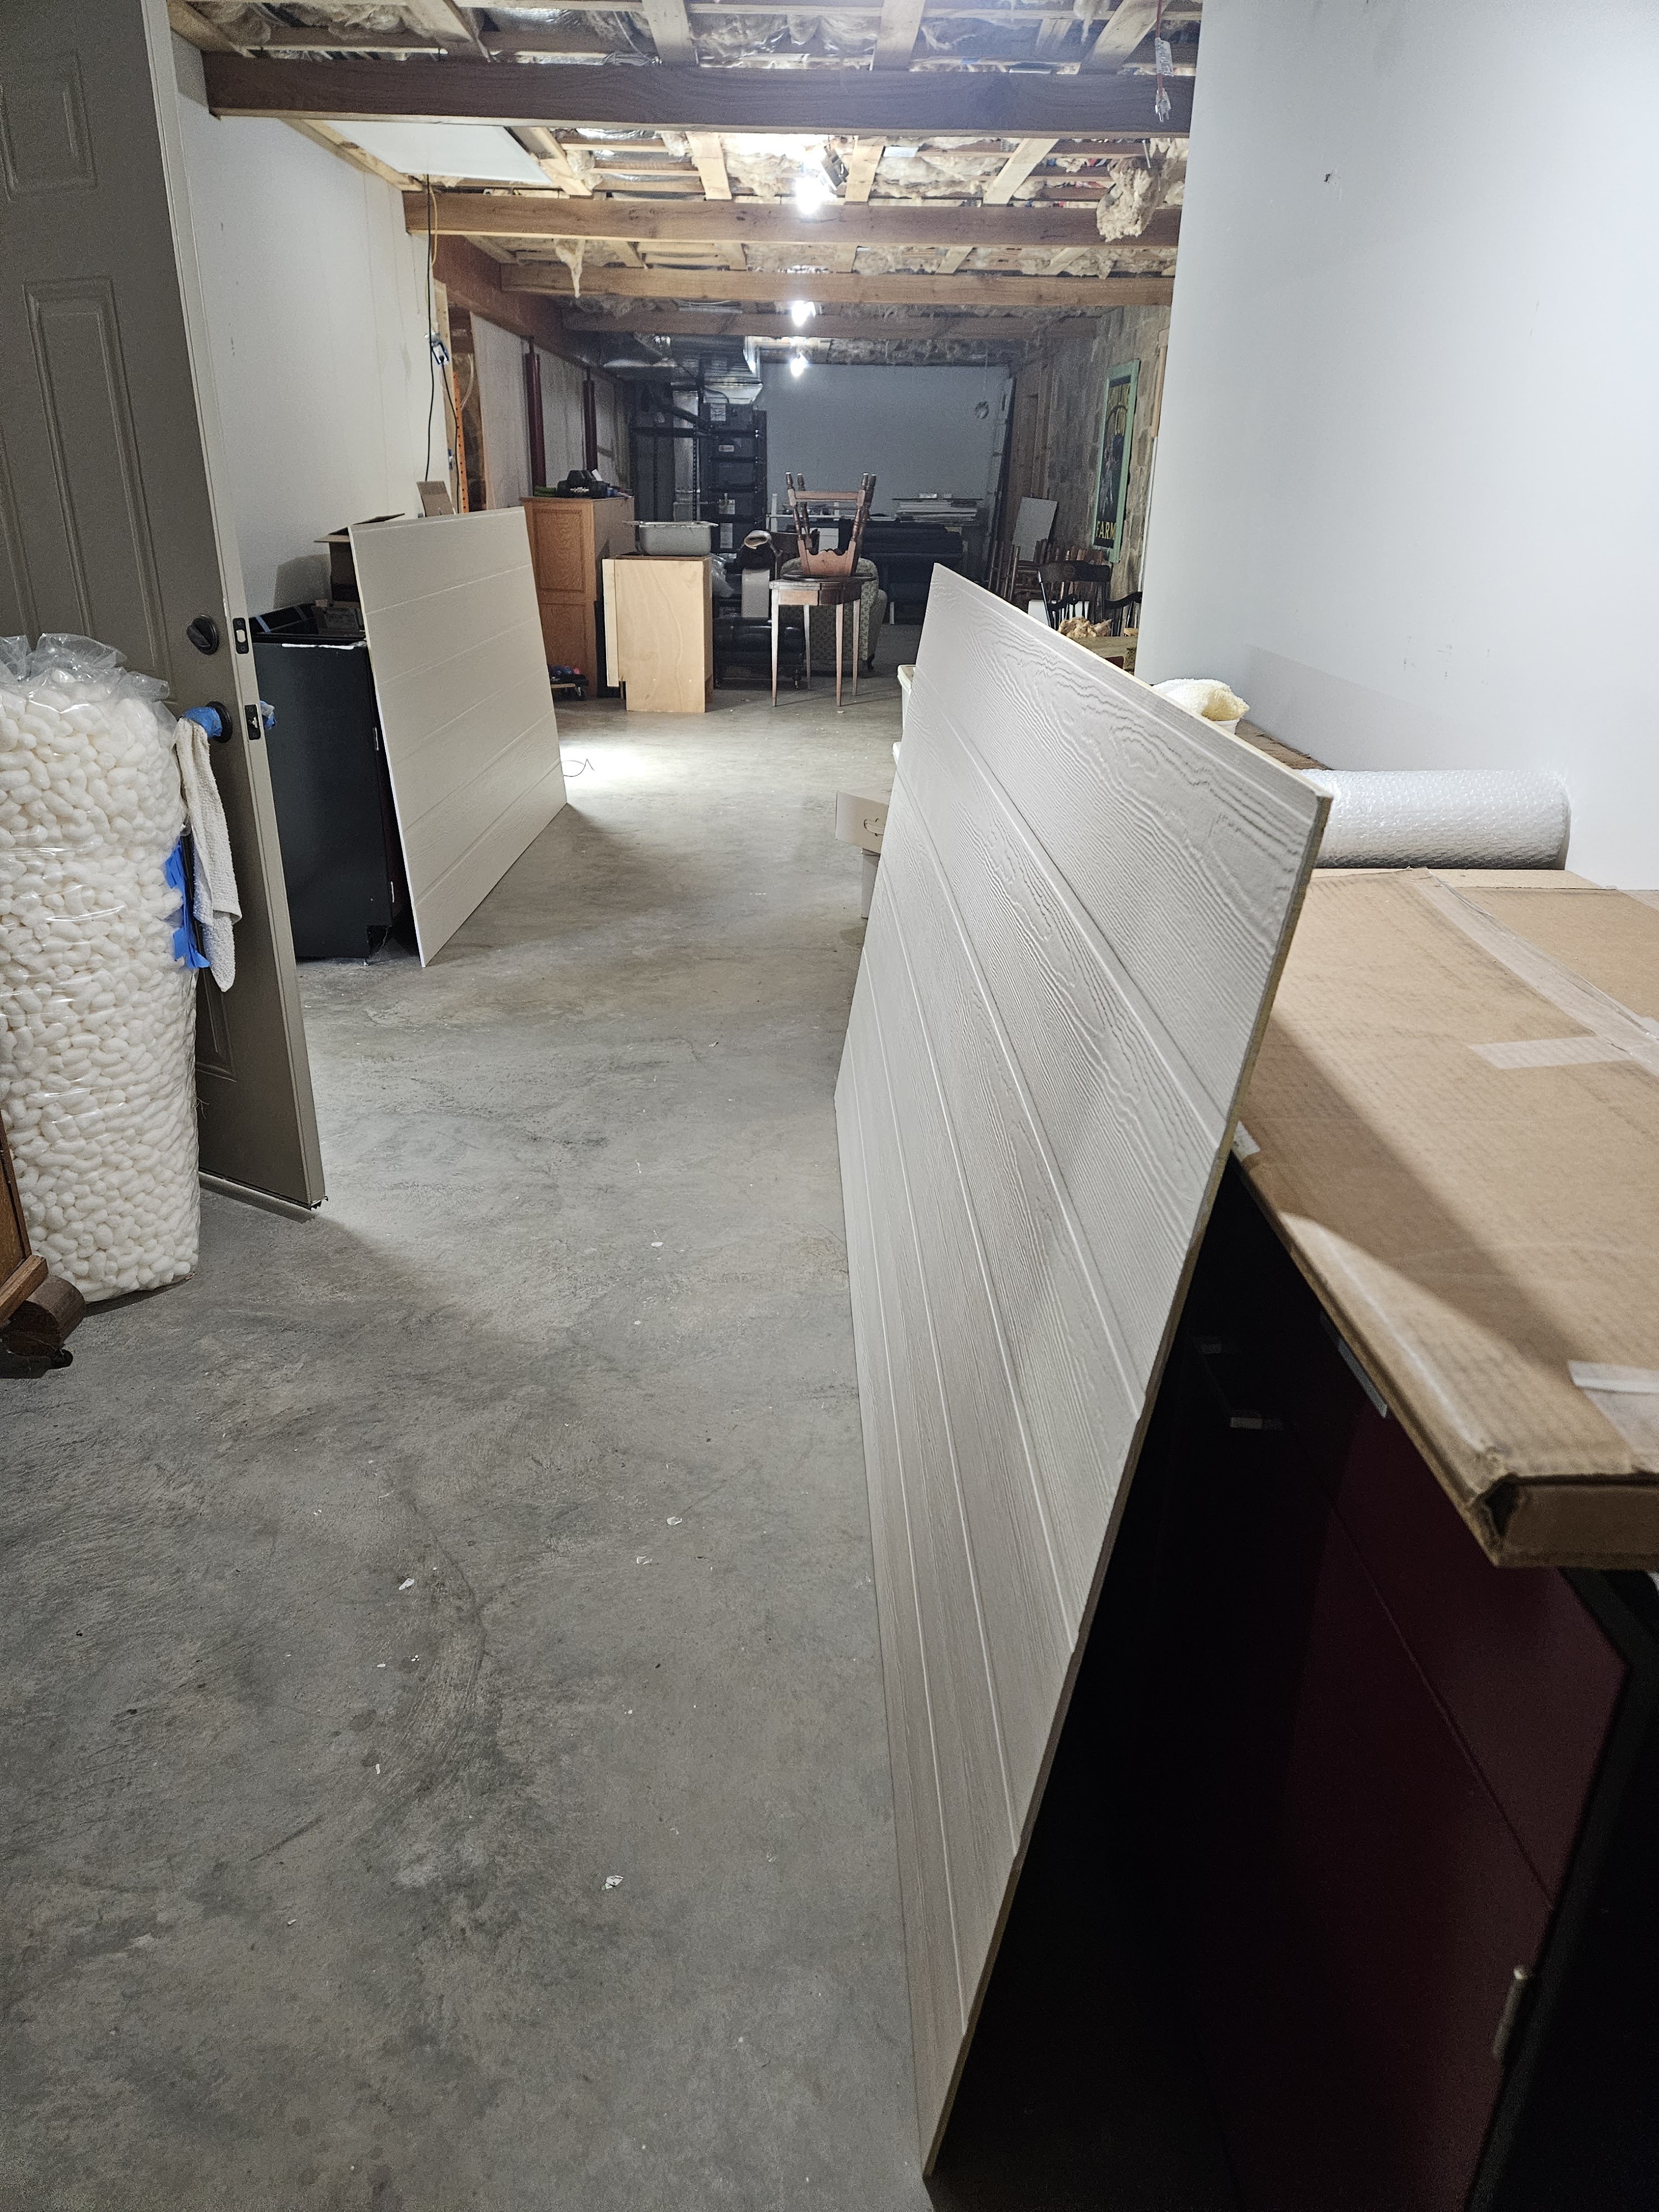
We were SO optimistic when my husband took a couple of weeks off in March that we’d get the ceiling up in the basement during that time, but I only got some of the Hardie board painted (the wrong color as it turns out).
This past weekend was Memorial Day weekend and the weather was cool, rainy, and breezy, so absolutely no fun to be outside. We took it as a sign that we should work inside. (I finally got caught up on housecleaning last week after being WAY behind, so we could work on a project instead of chores.) We had all the material to do the ceiling, so we started on it on Saturday. I repainted the sheets that were the wrong color the correct color (Damask Silk). And we had to bring everything inside when it looked like it might start raining again. We had it stacked all over. We had to keep them separate because the paint hadn’t cured, and we didn’t want to mess up the paint by having them stick together.
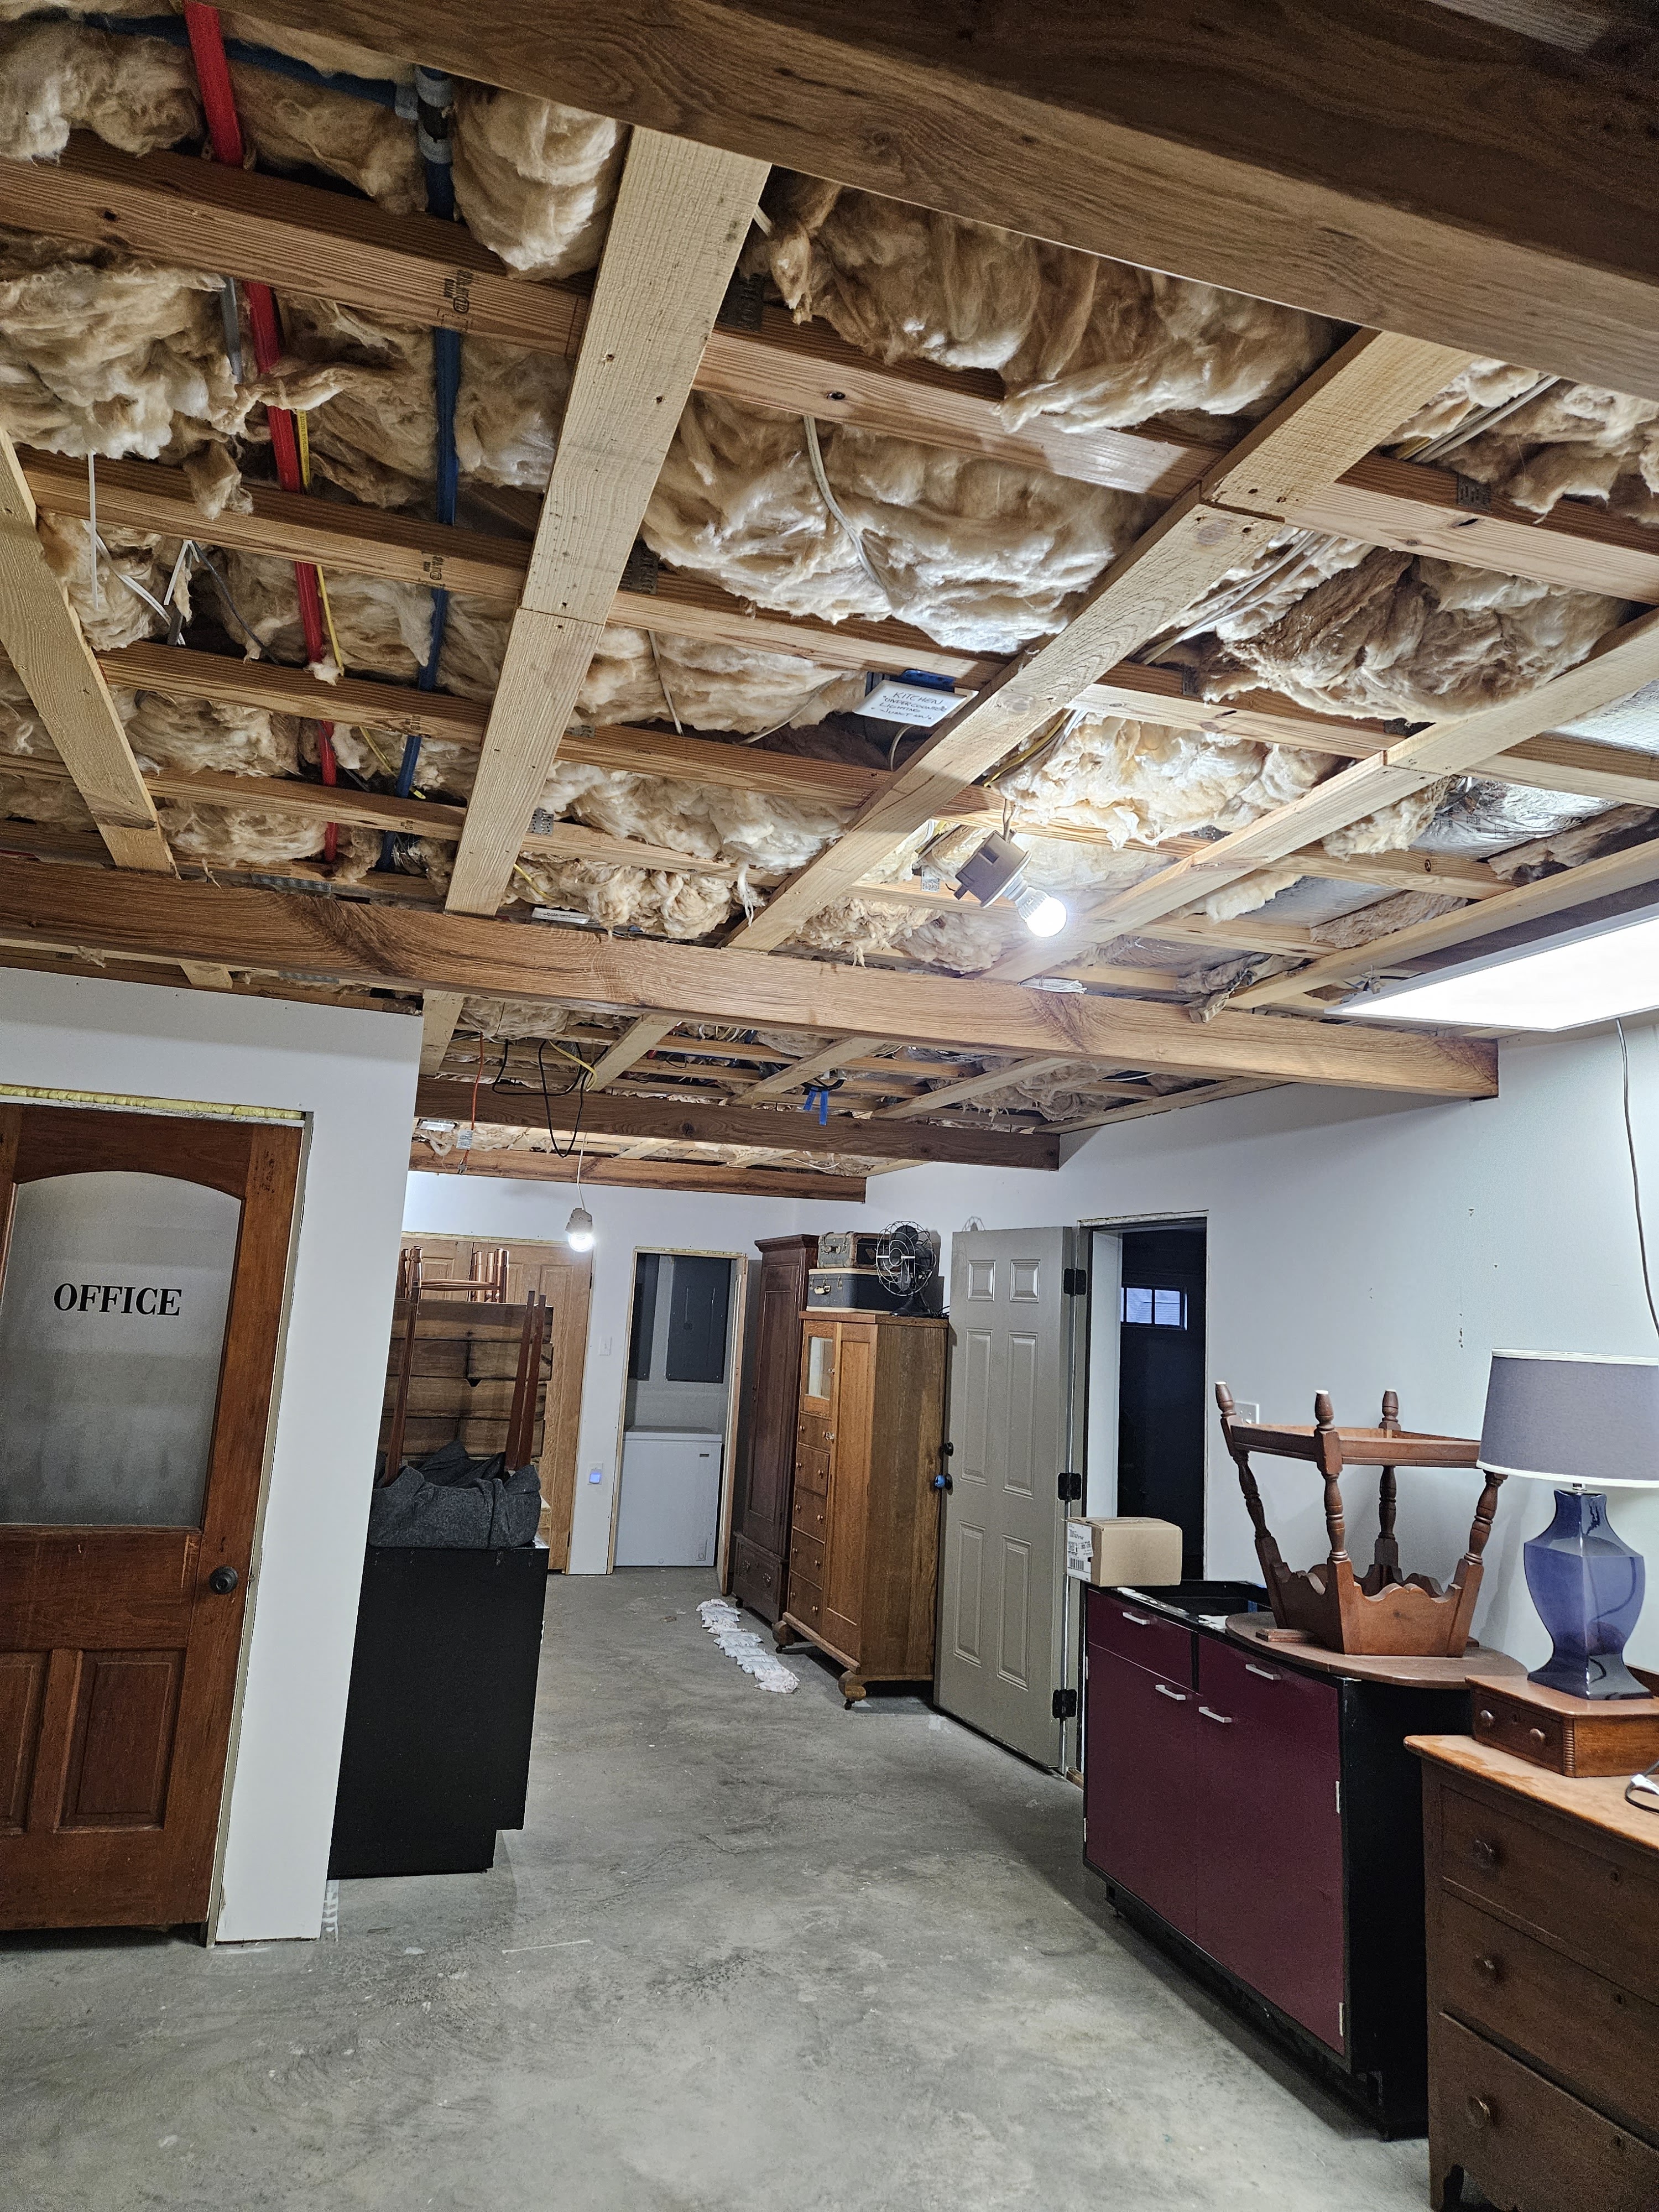
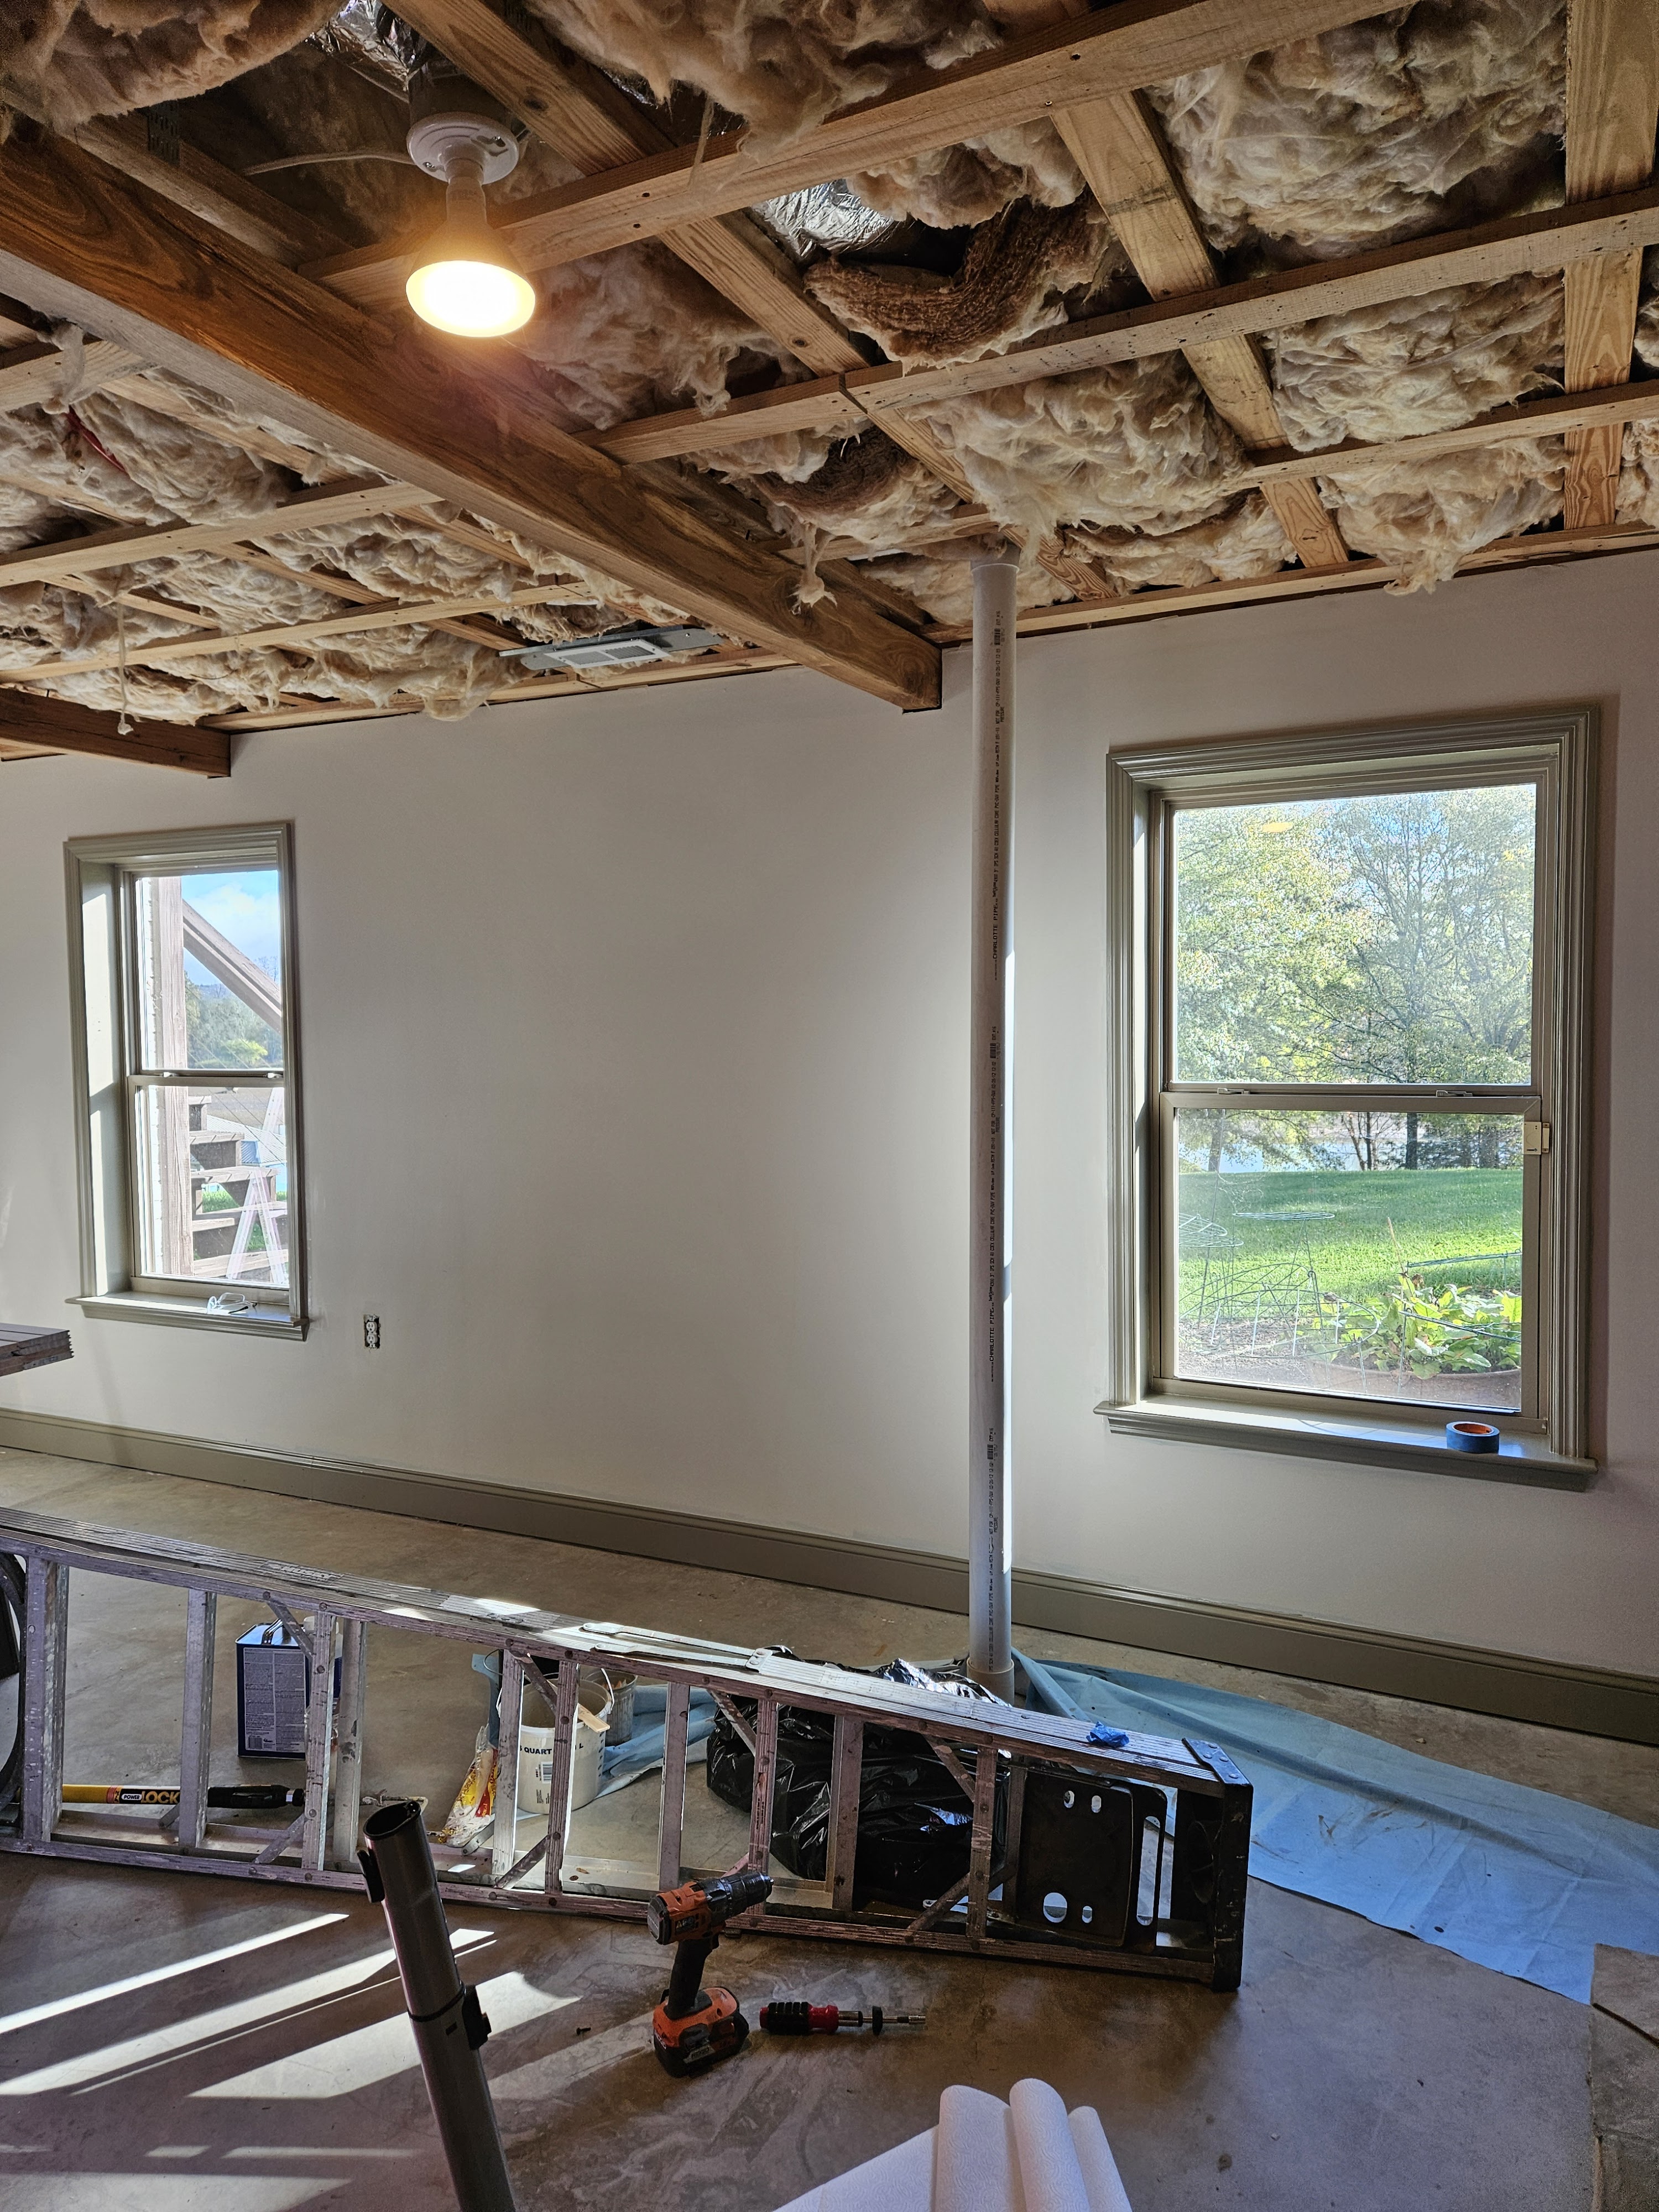
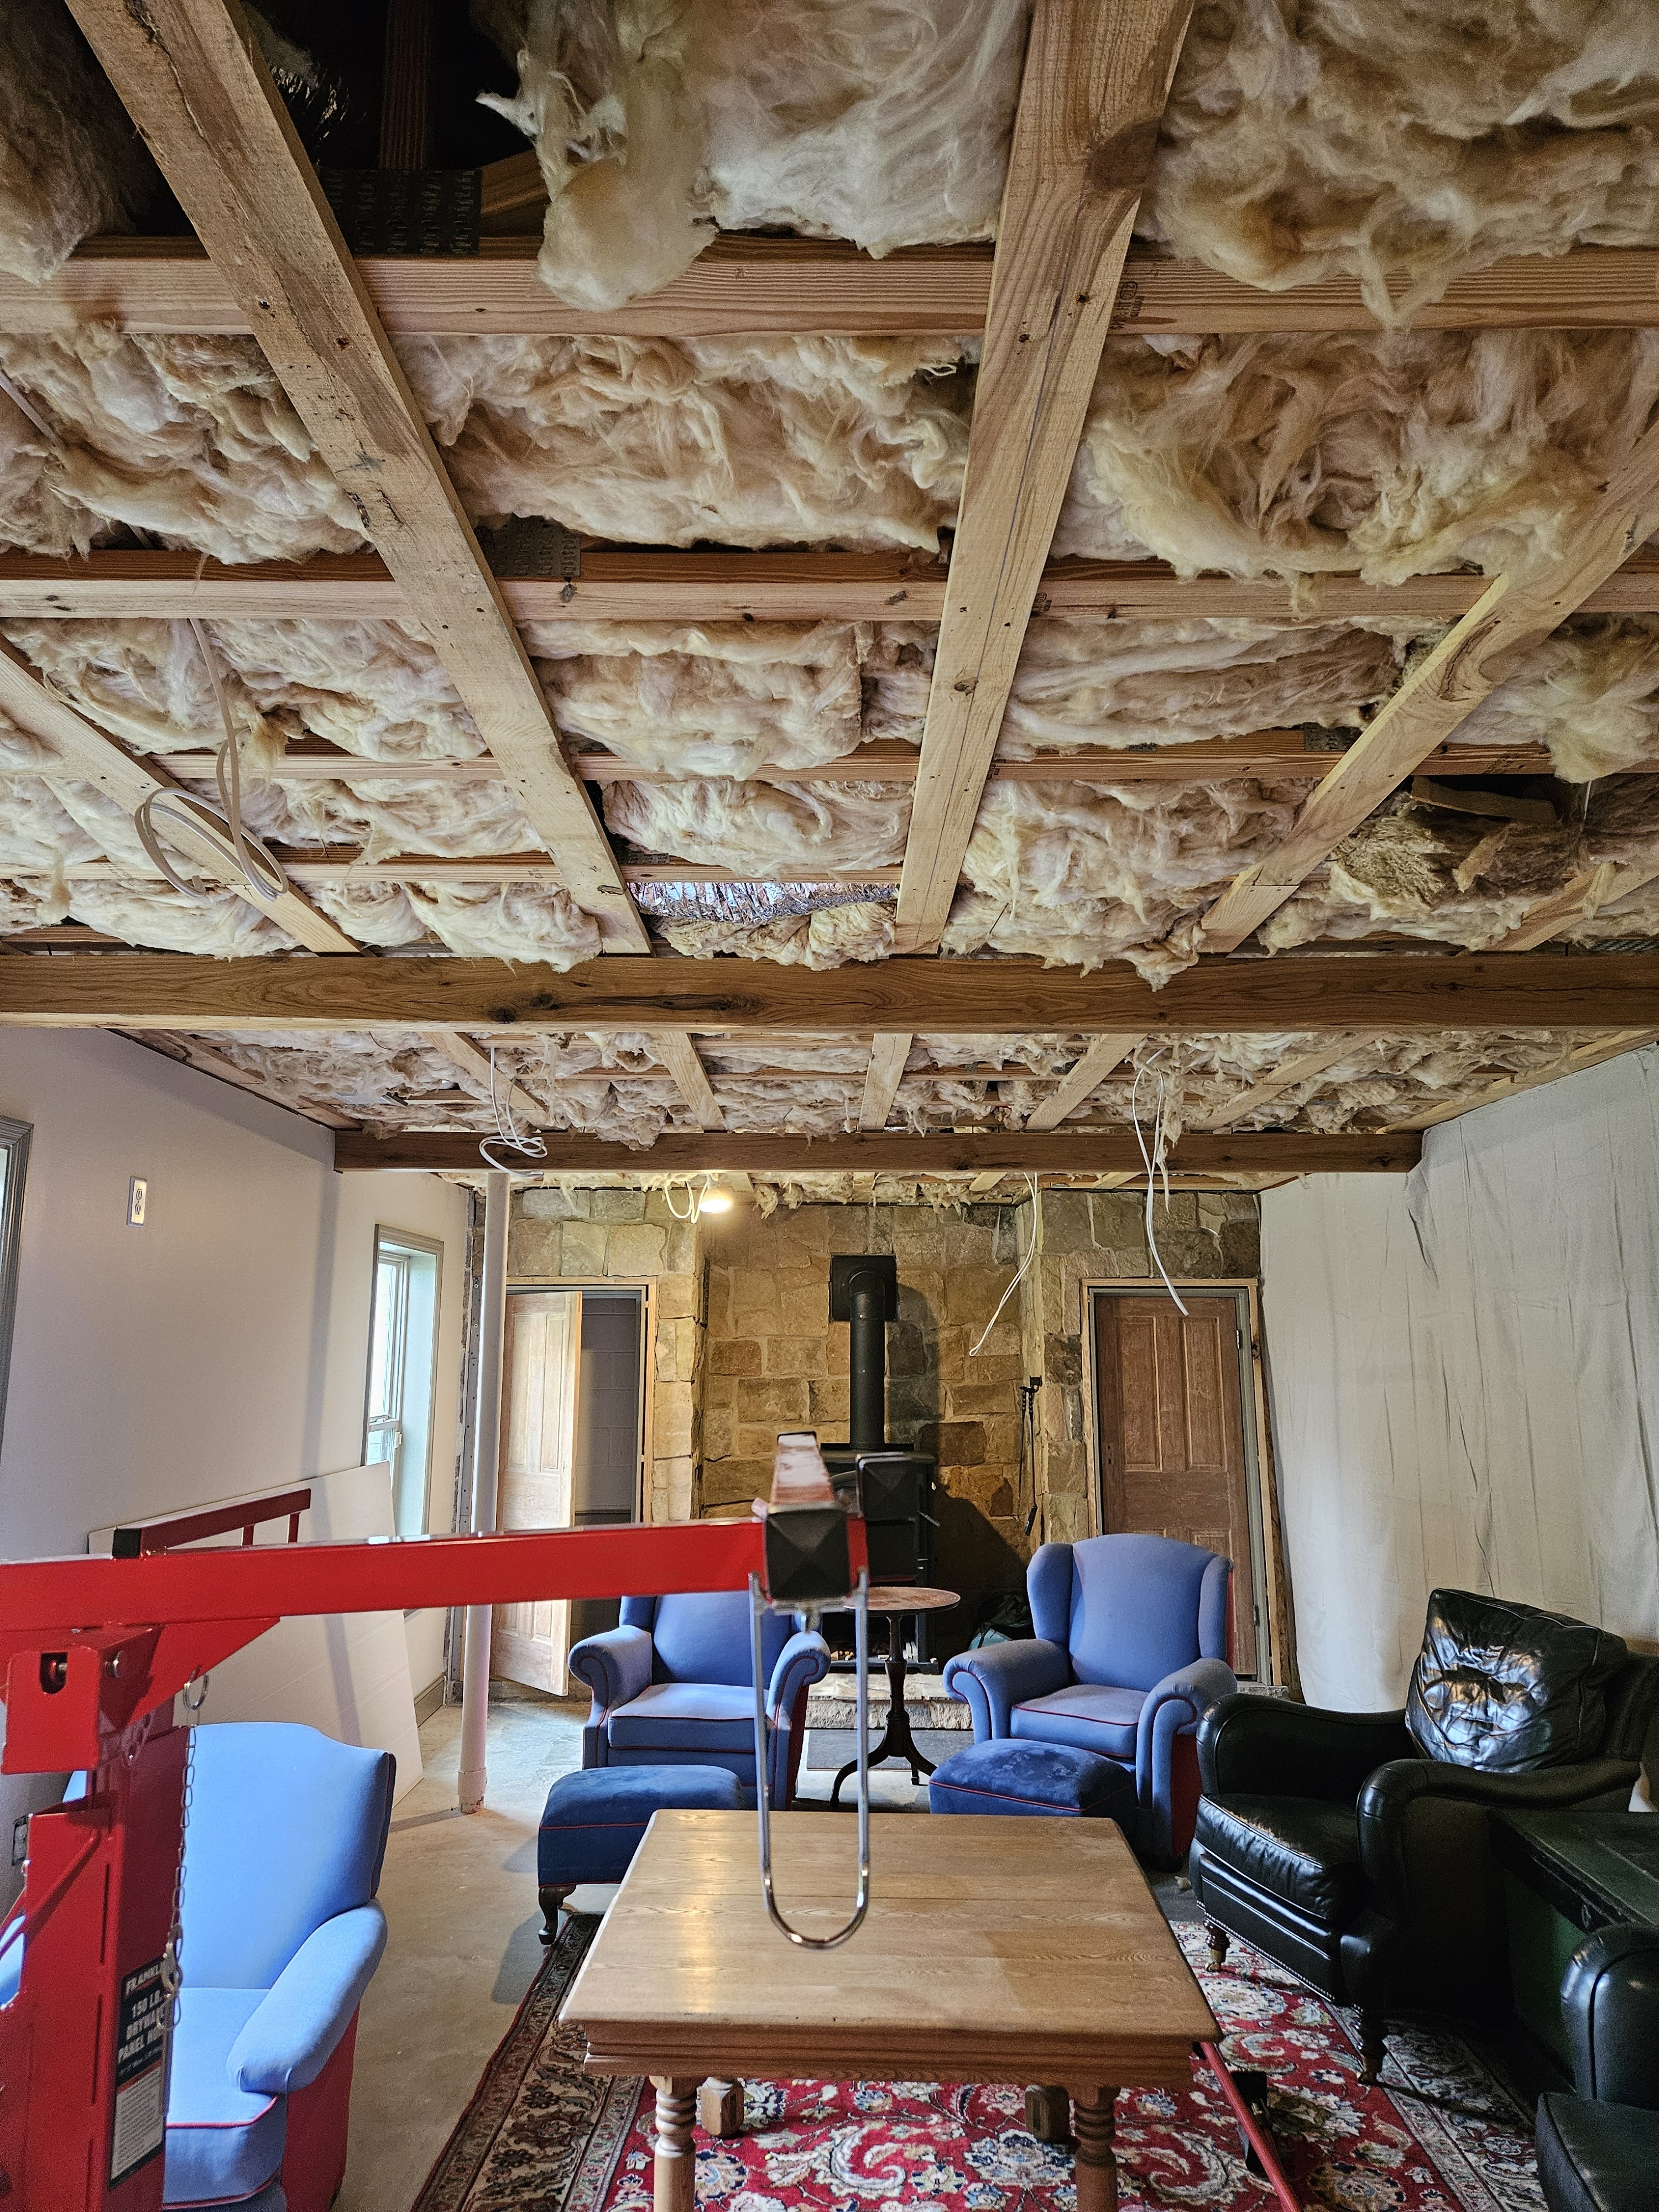
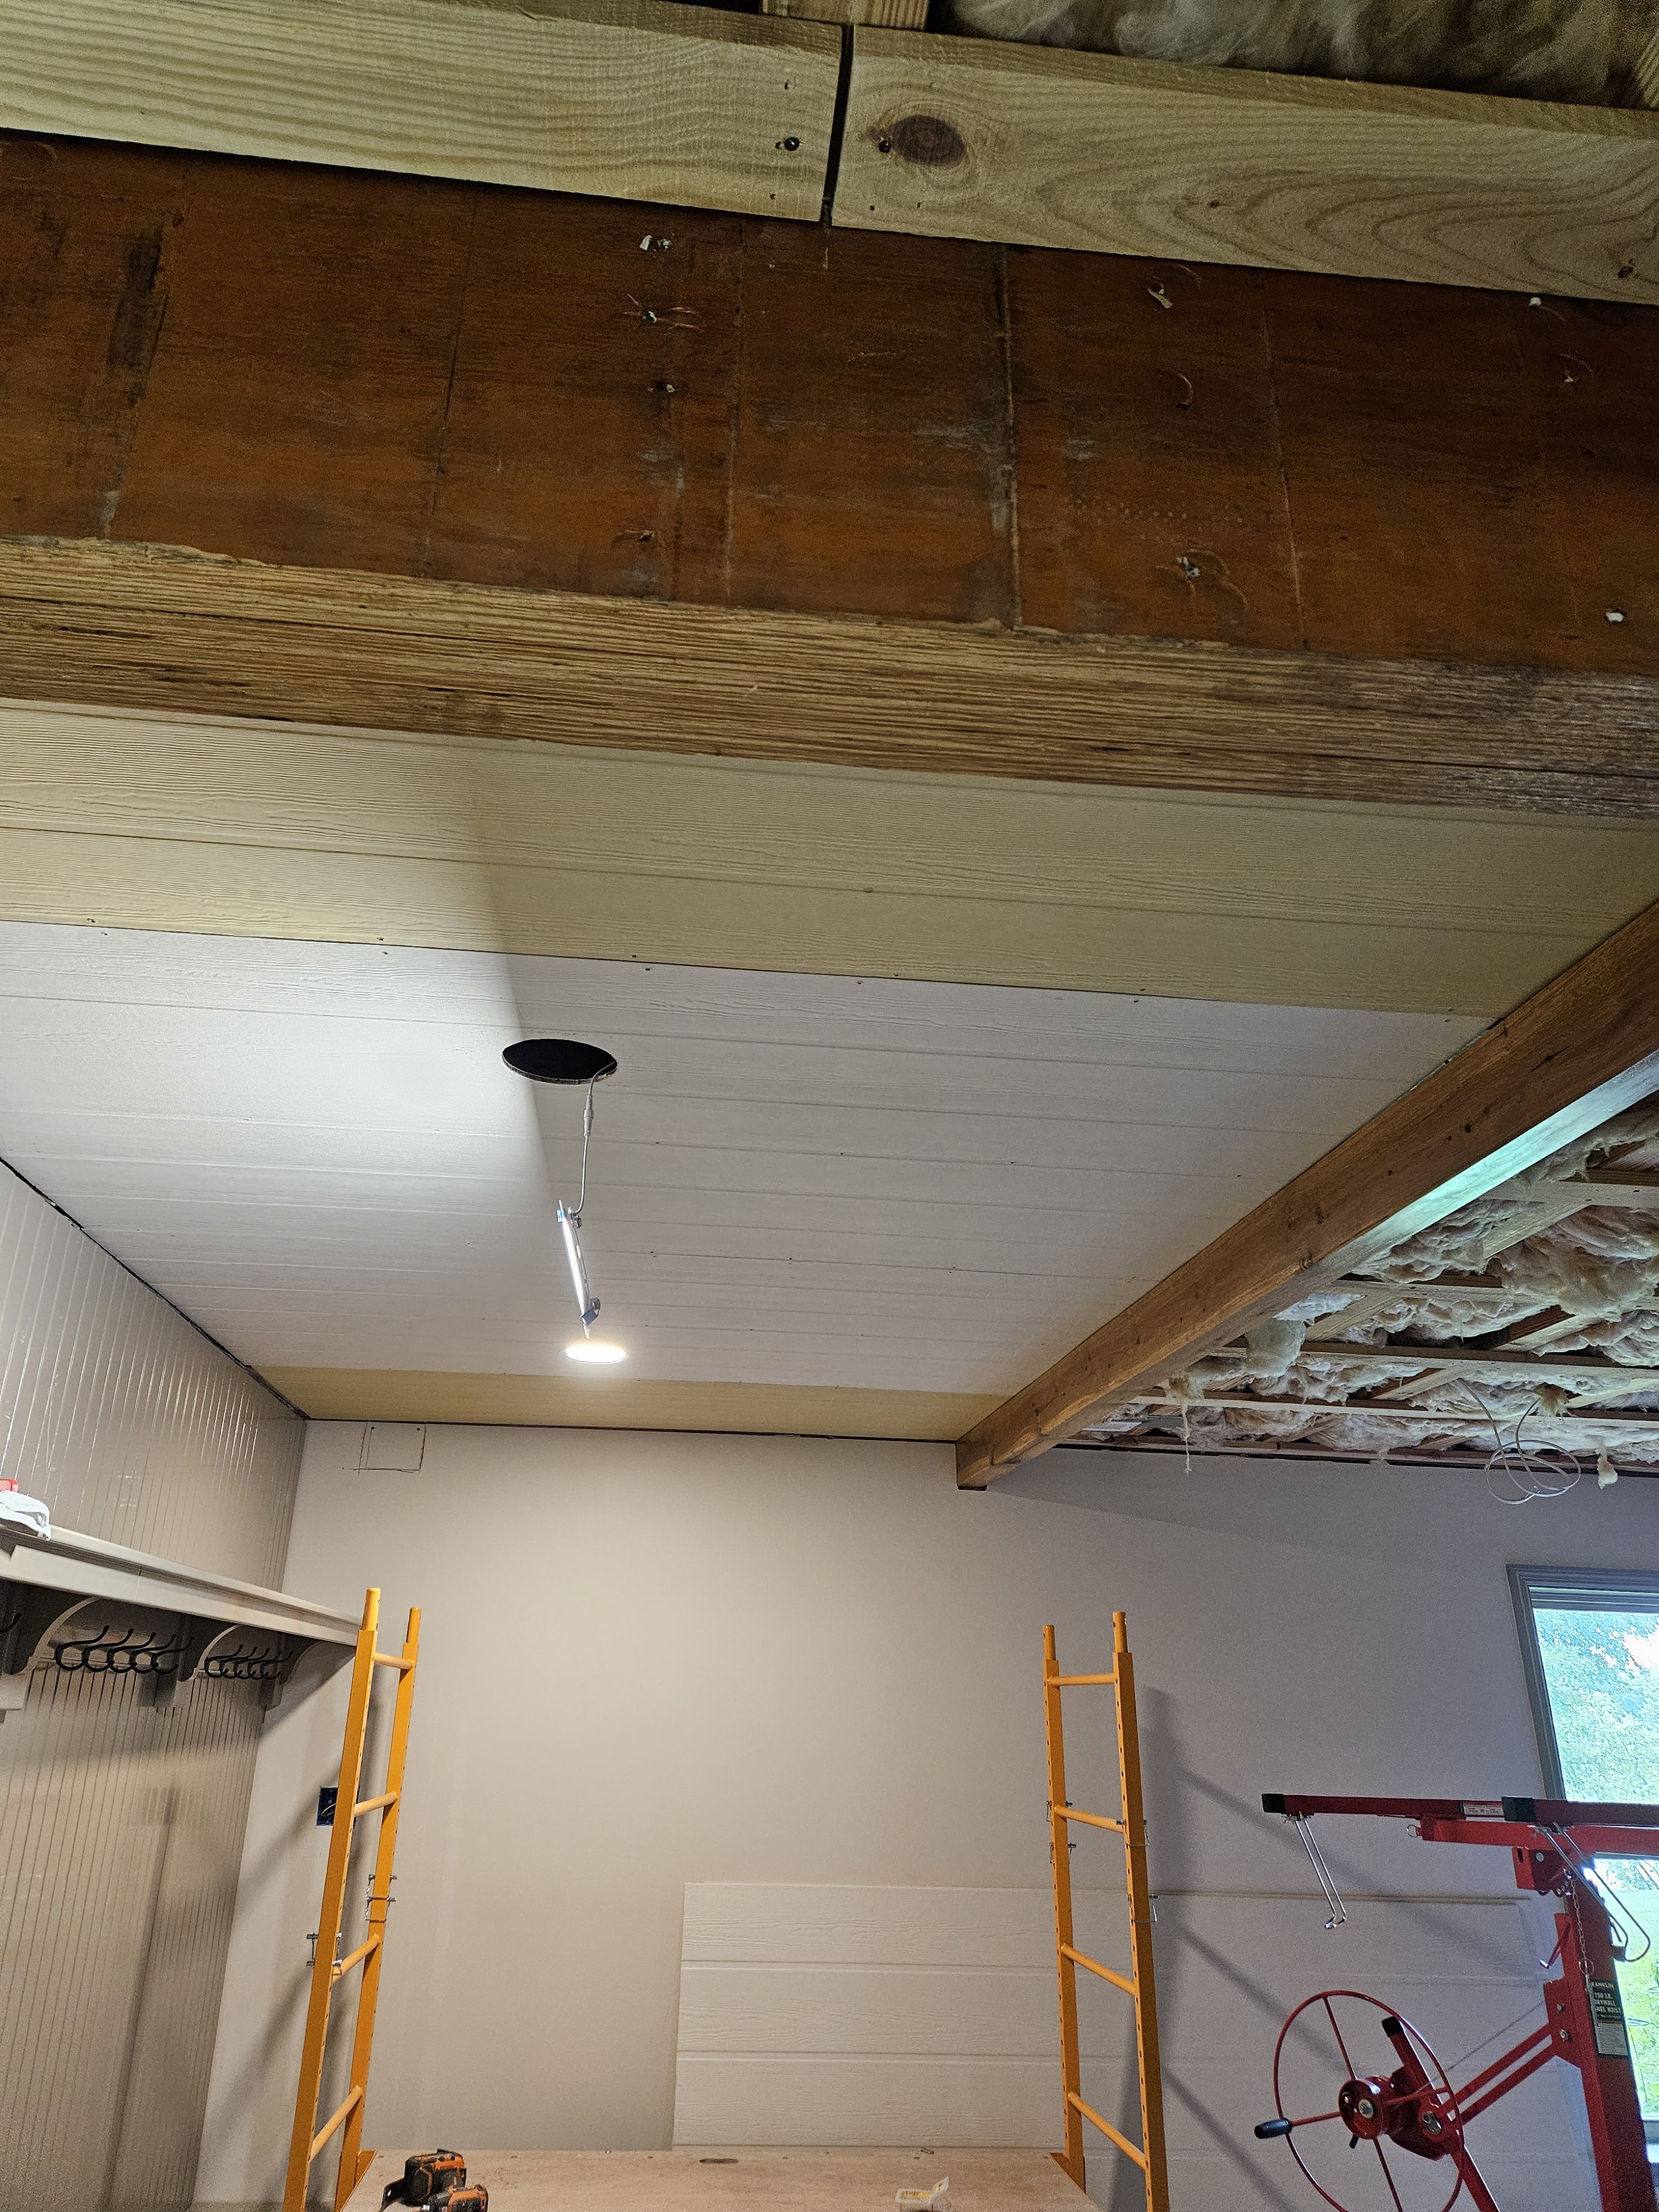
This is what the ceiling looked like before we started. You can see the wiring we hired out in March so that we could install all the can lights (they are the super thin LED versions as you’ll see later.)
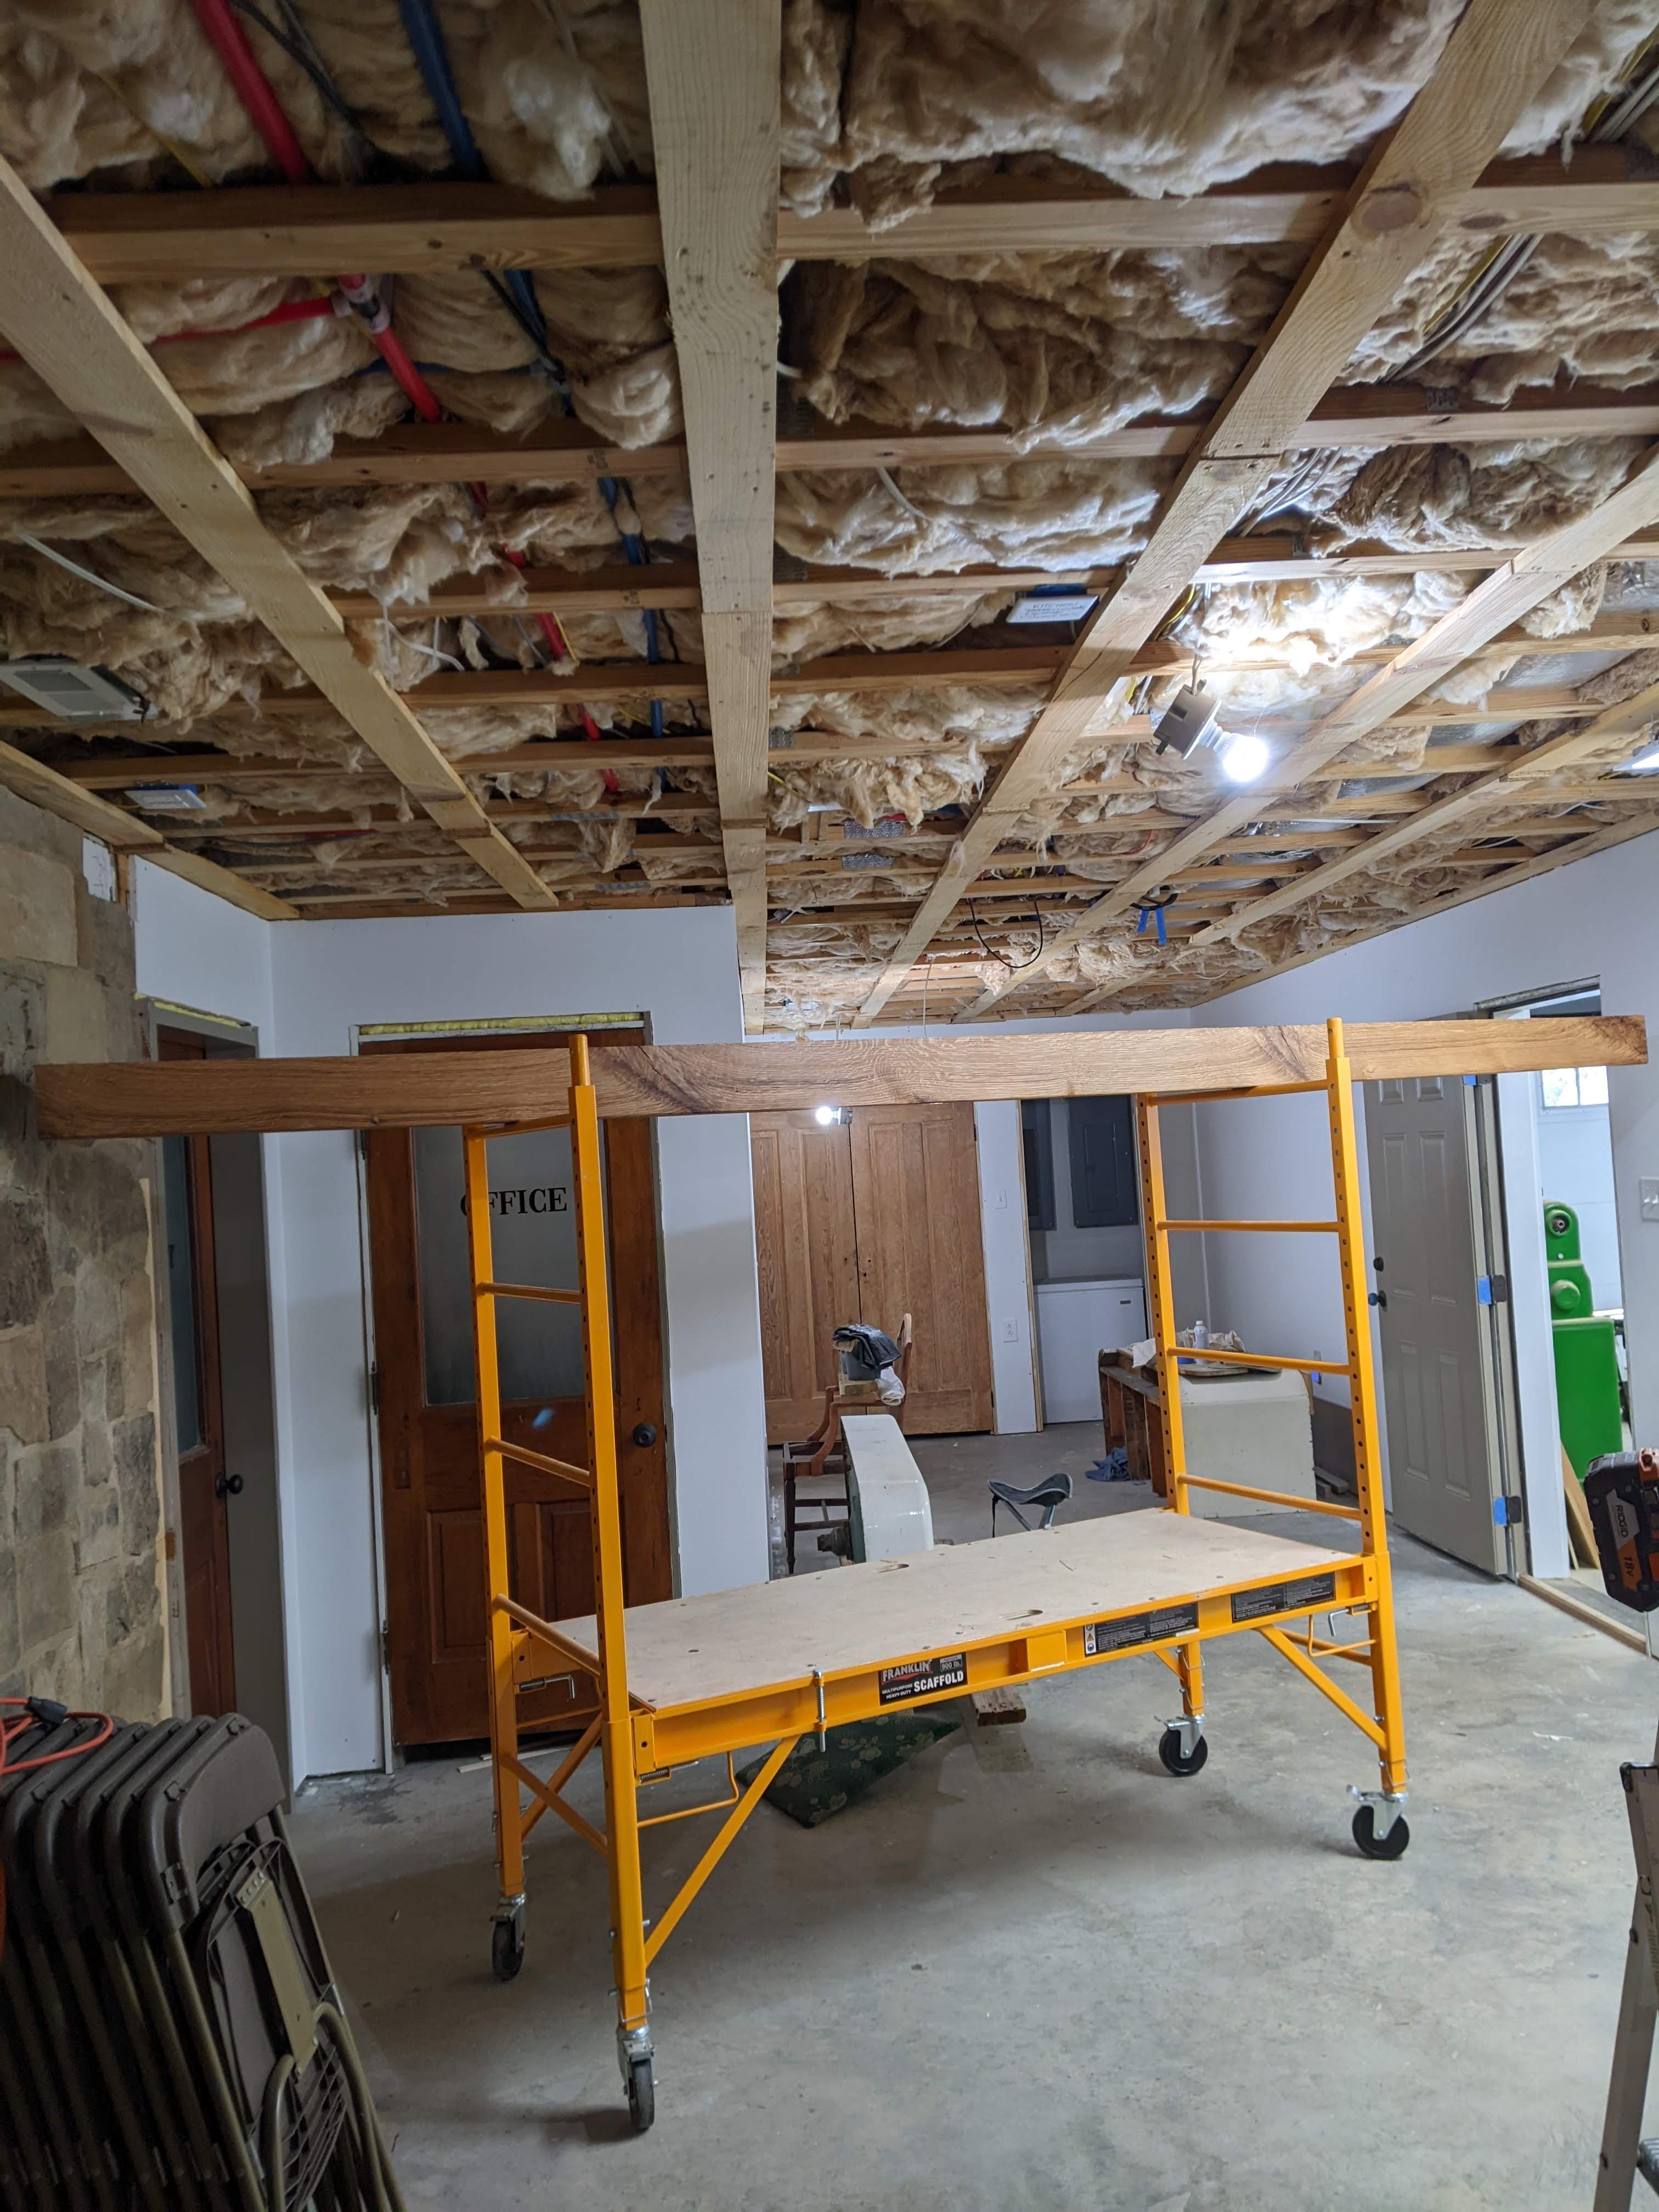
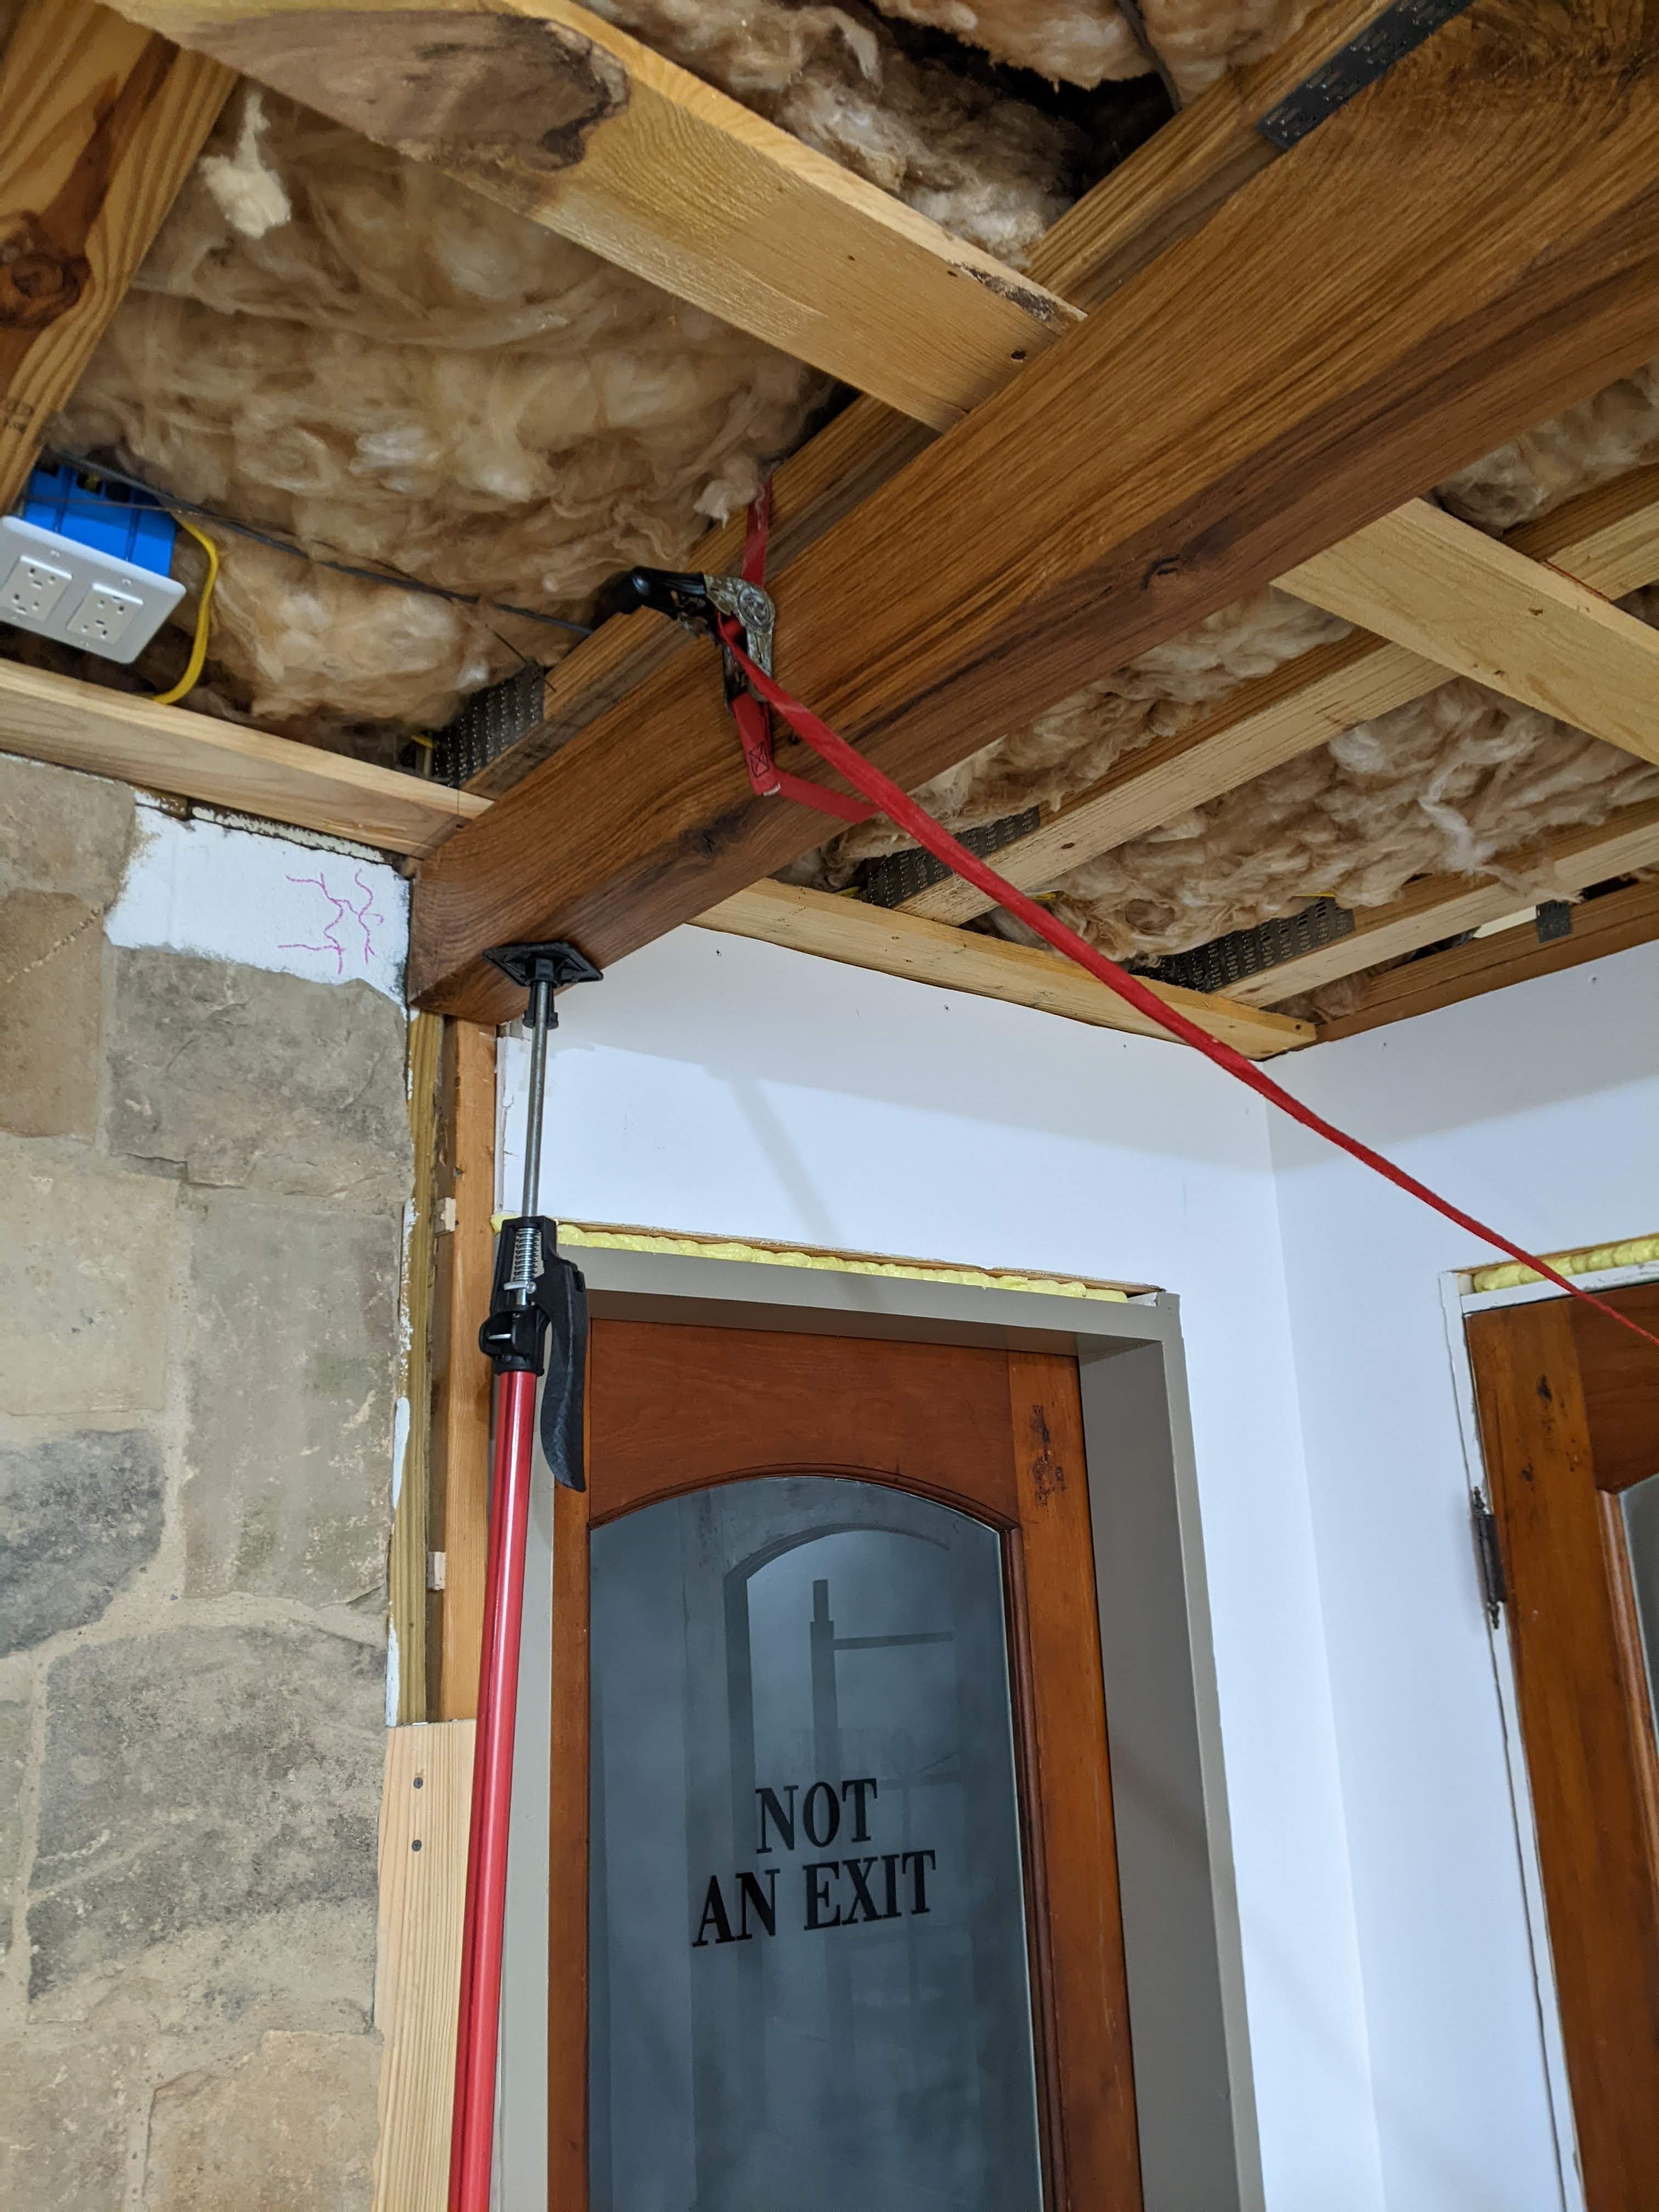
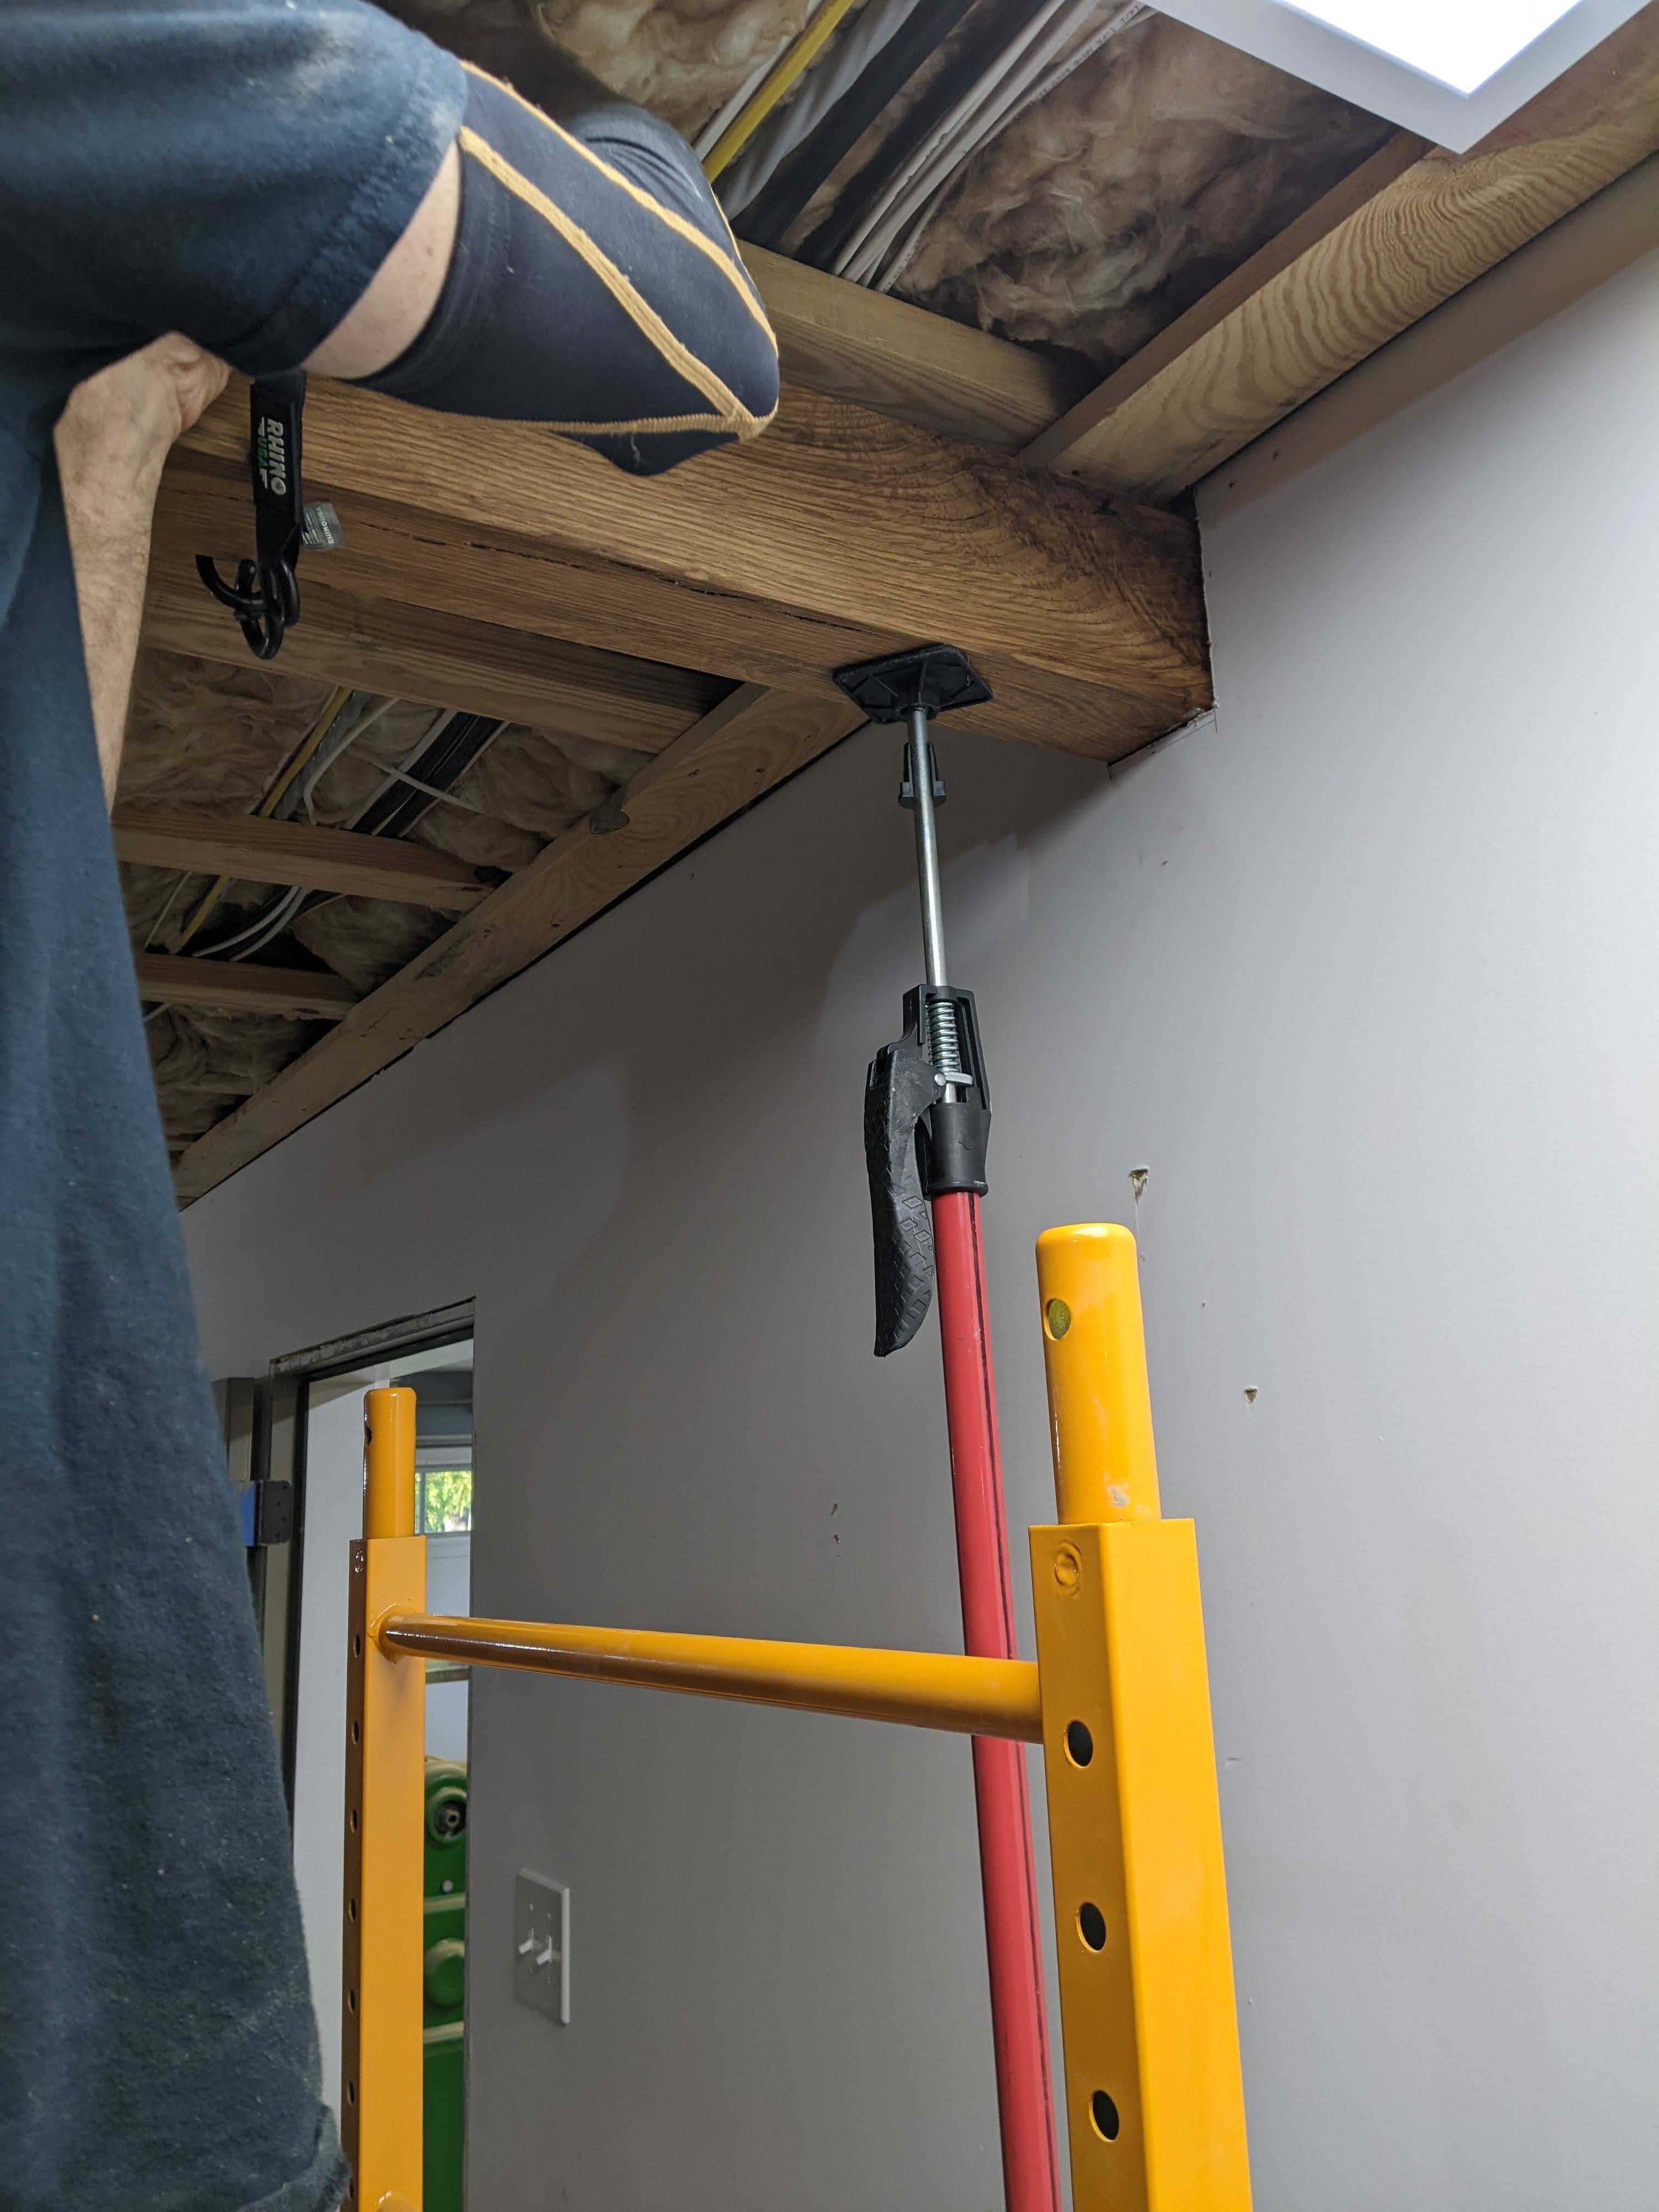
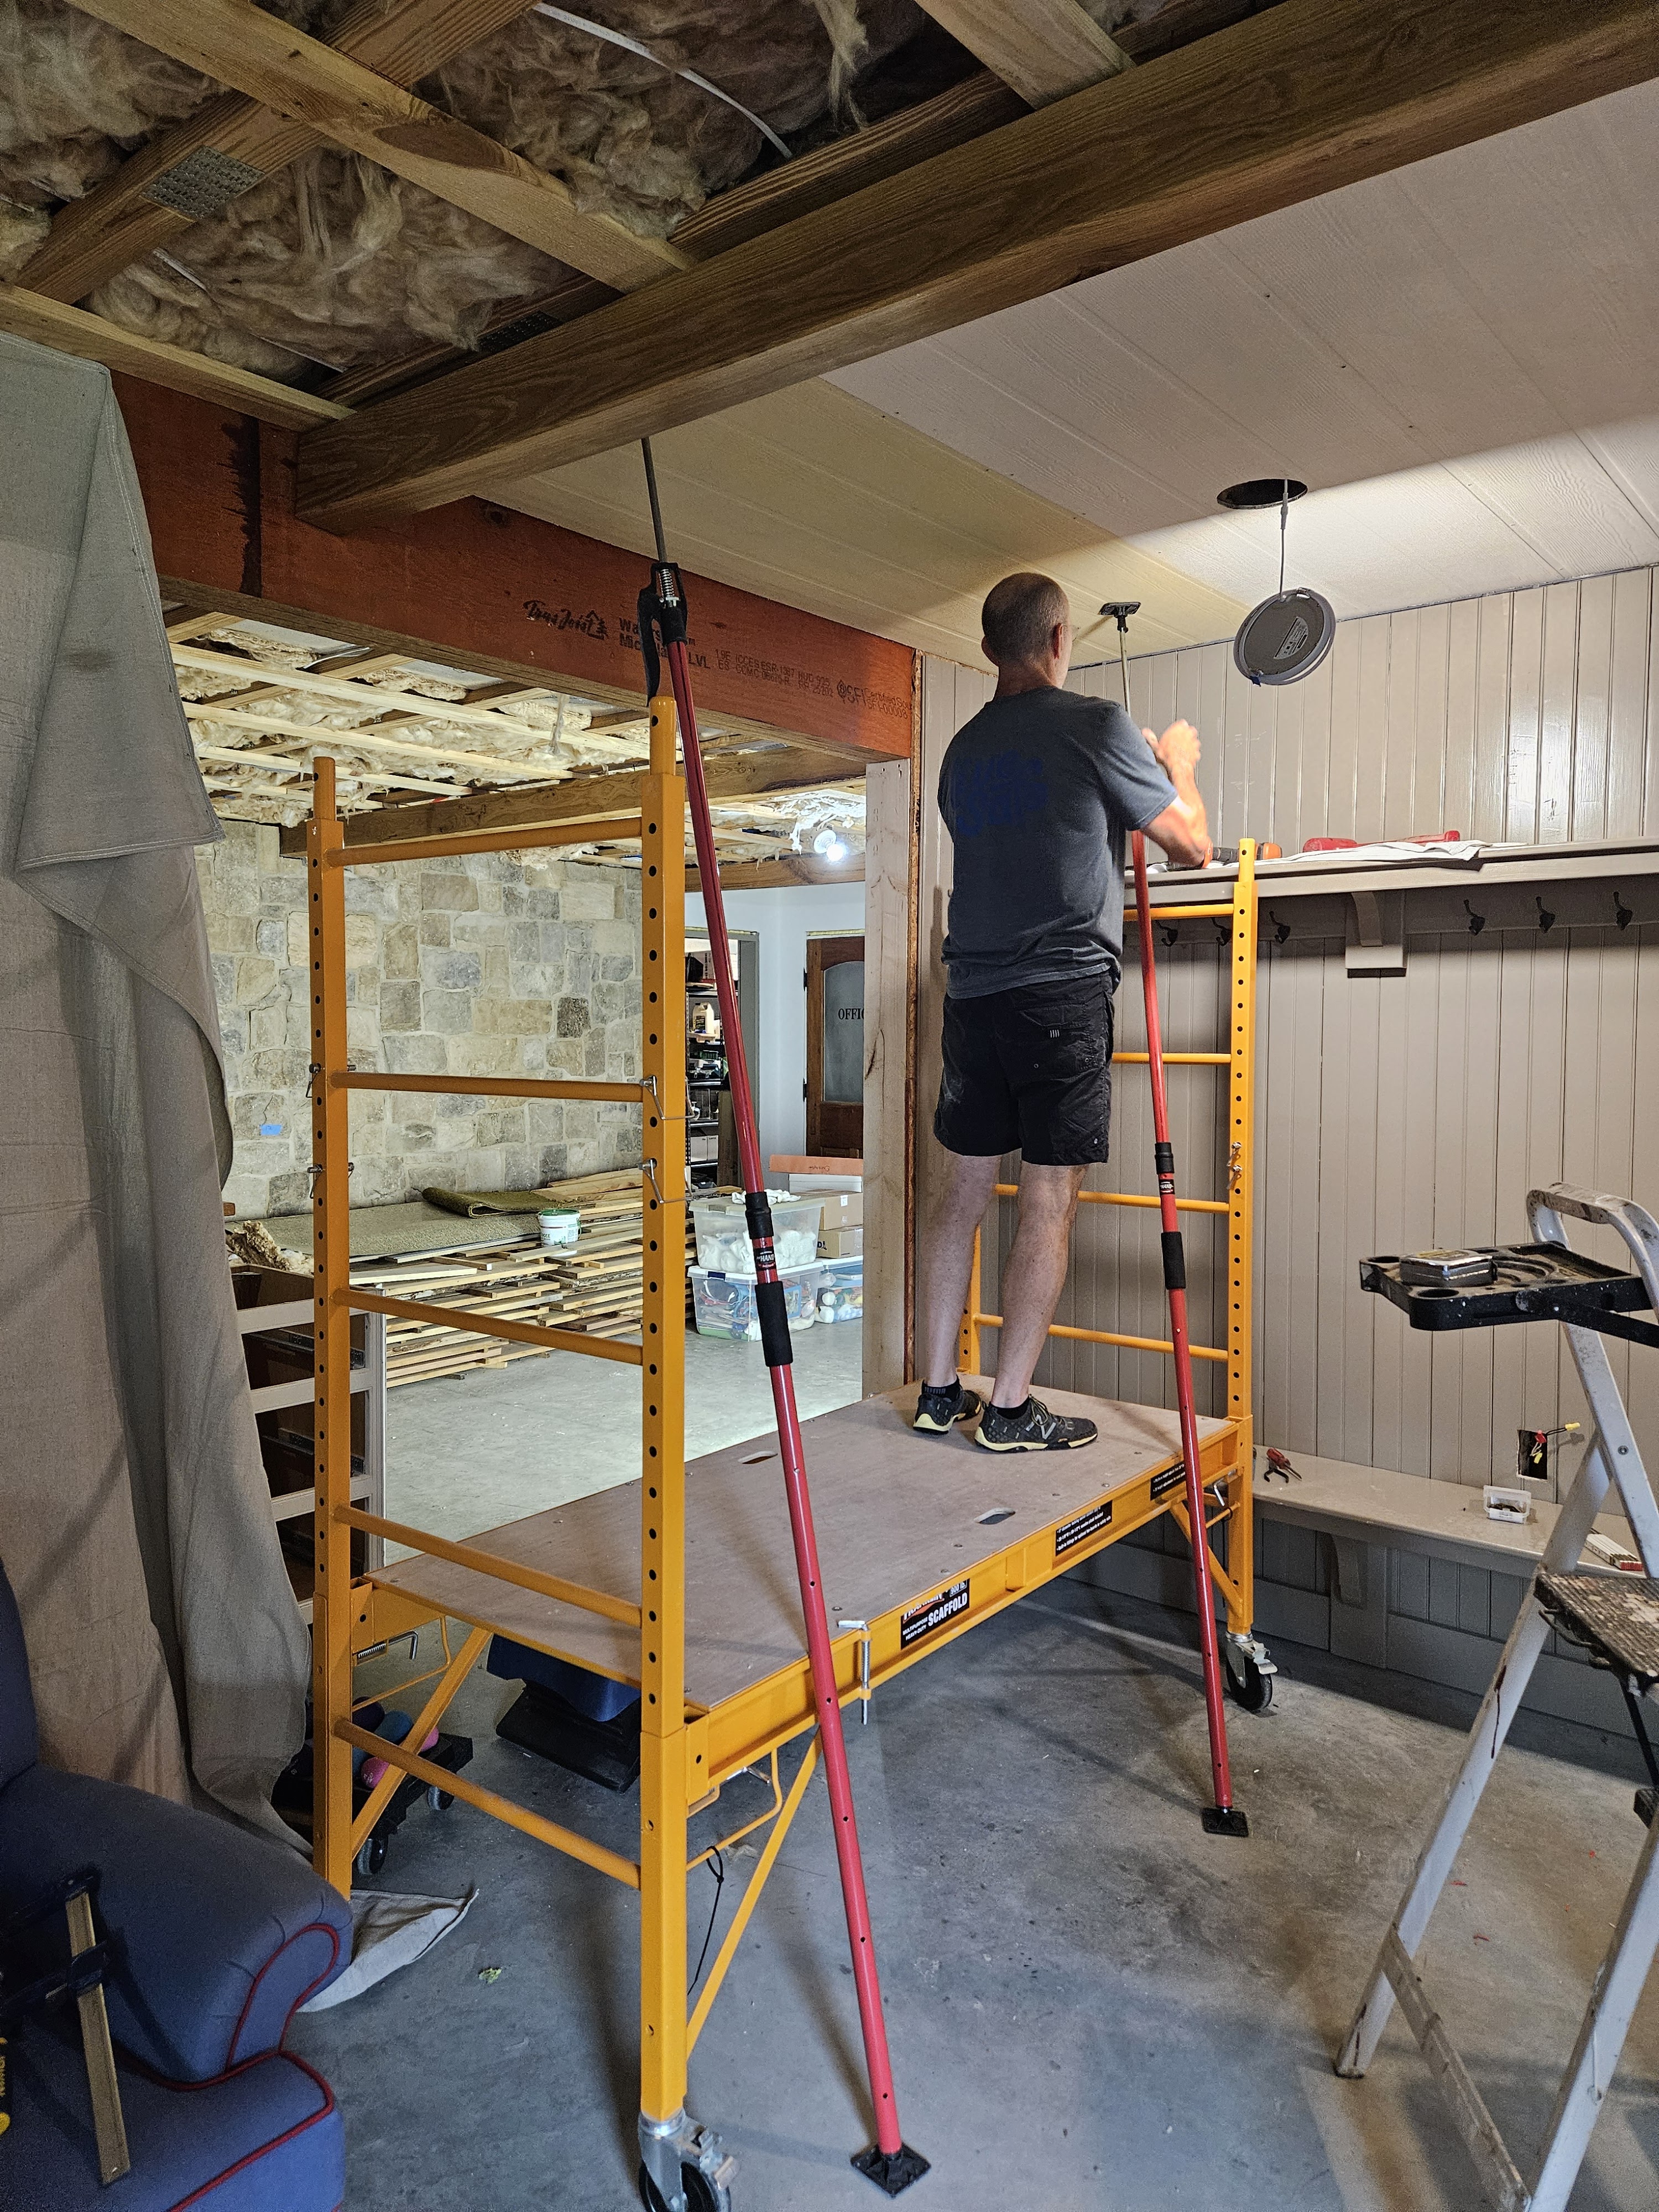
My husband bought a panel lifter to maneuver the sheets in place, and hold them in place while he fastened them to the ceiling. It’s a little janky, but it is a HUGE help because these sheets weigh a TON. I highly recommend one of these if you’re putting up drywall, or any sheet goods on the ceiling.
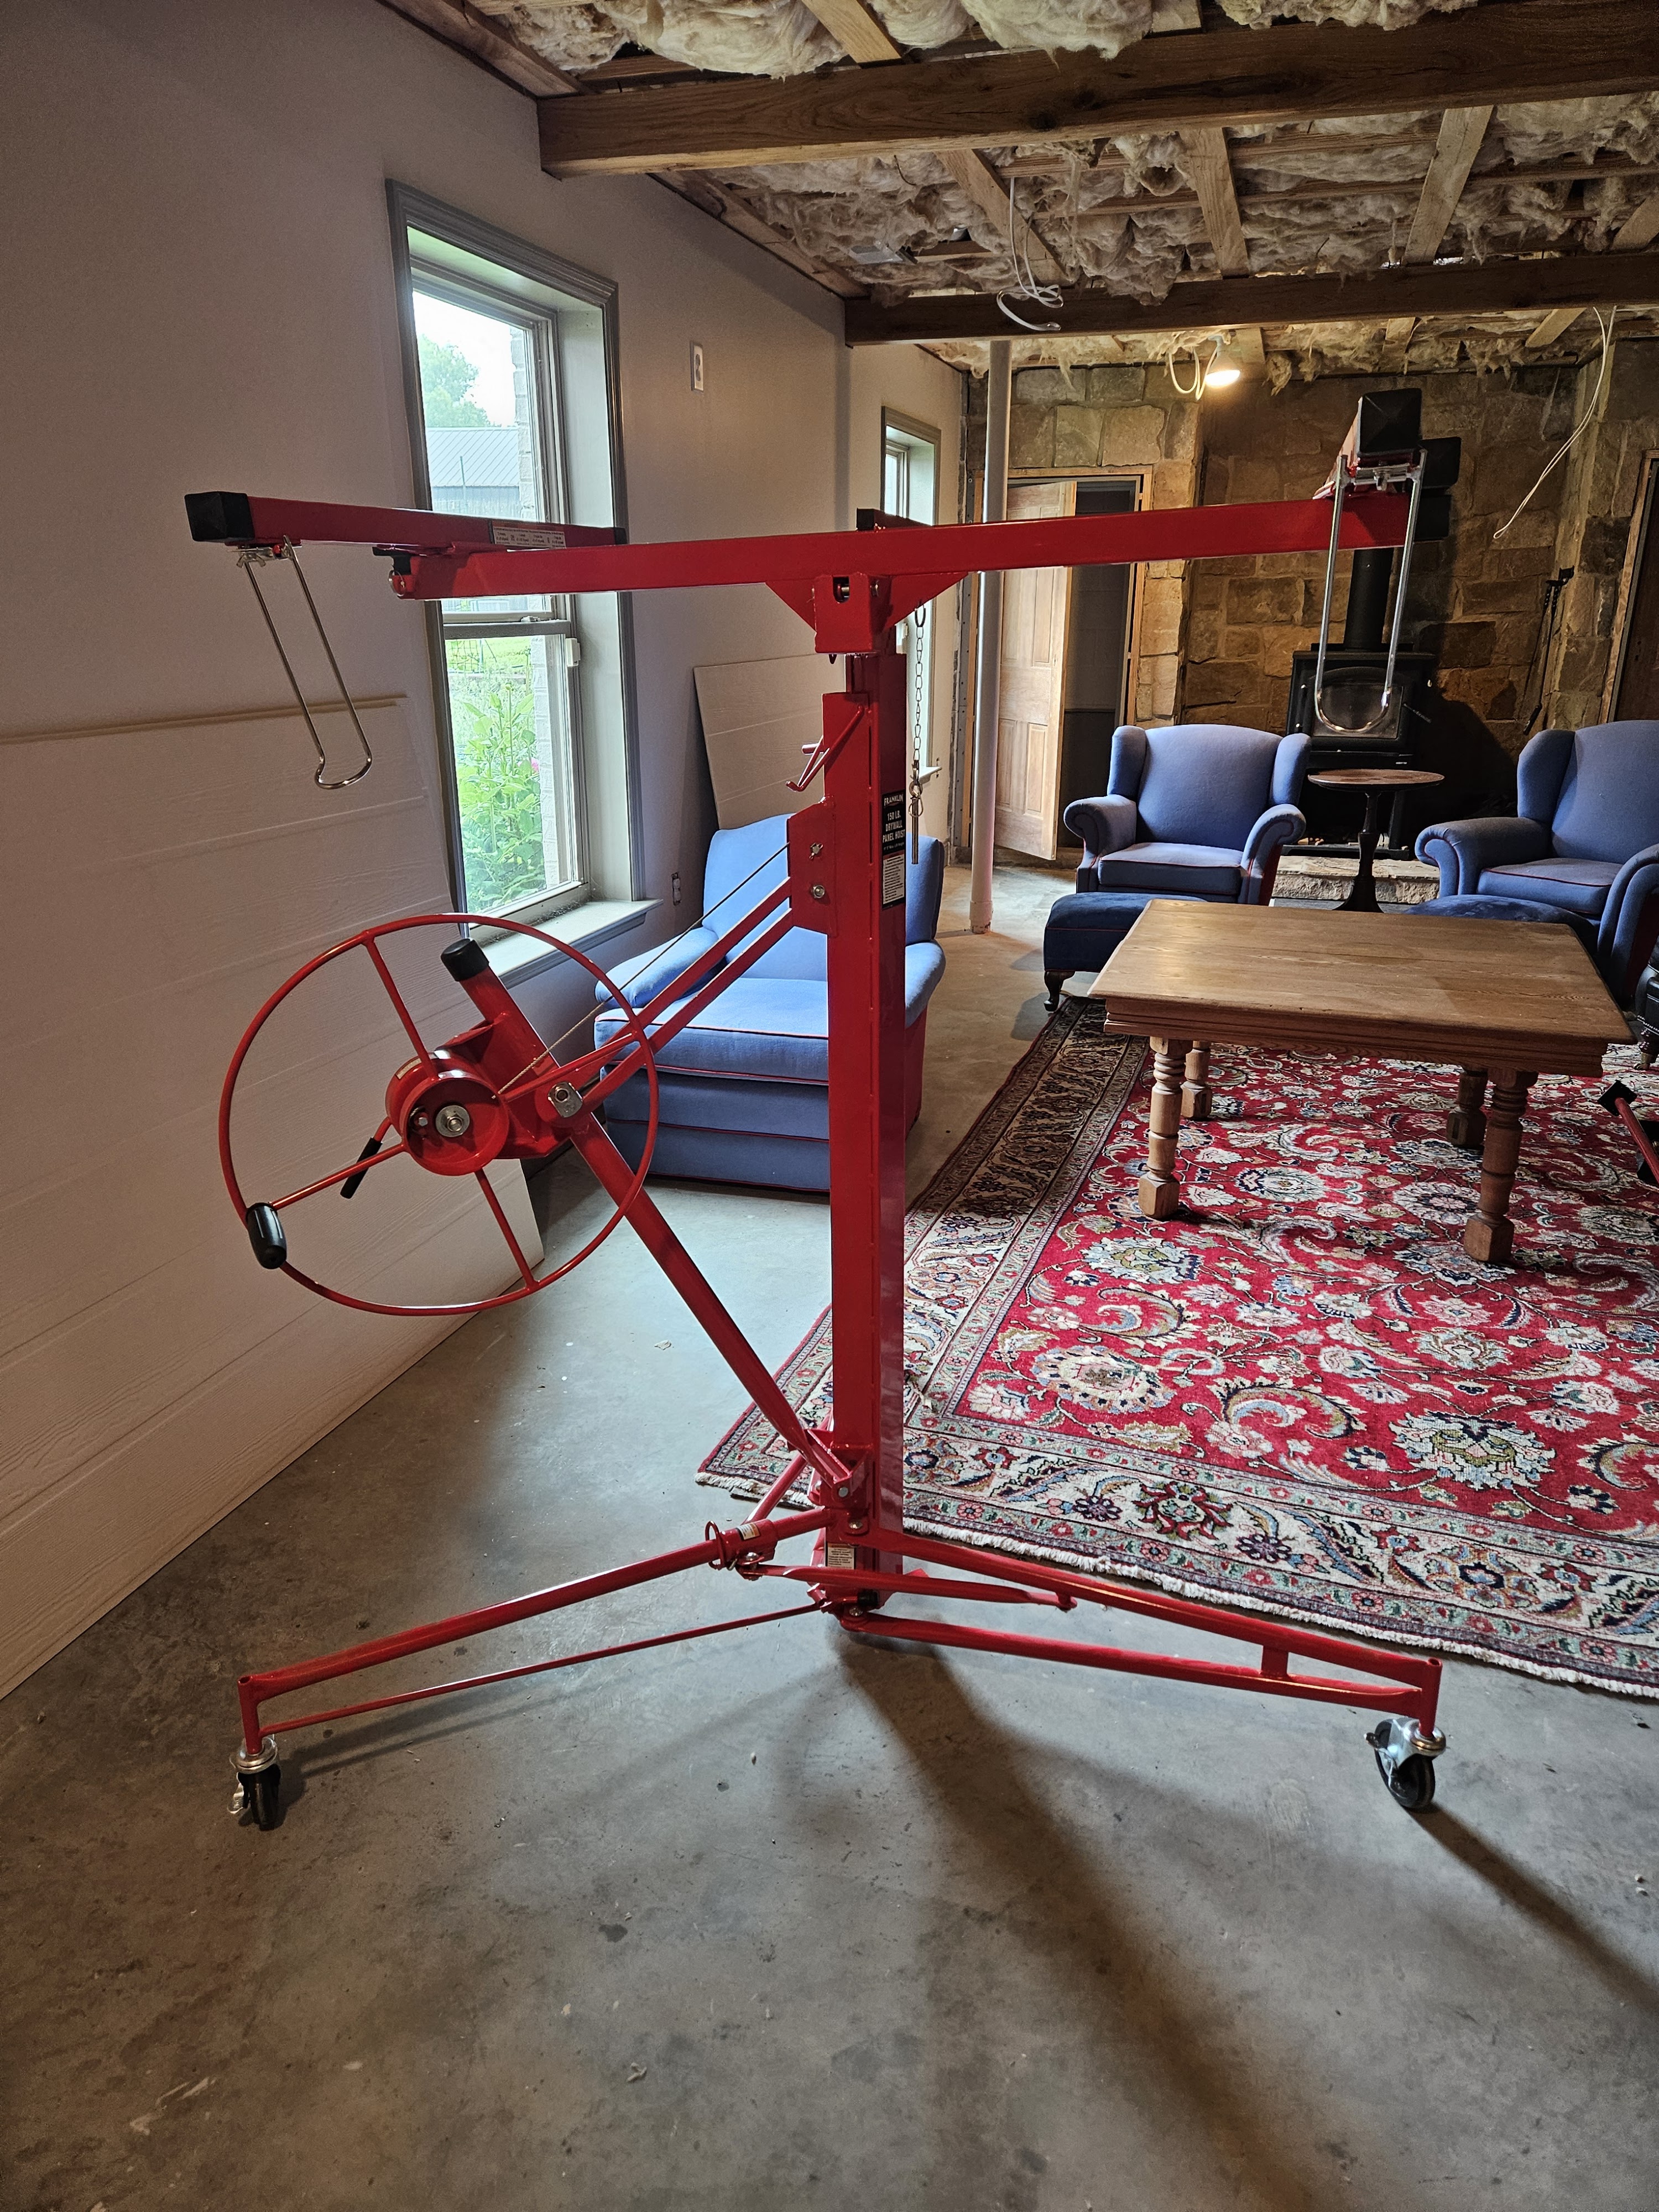
Part of the challenge is that we are tucking the short ends between the tops of the beams and the floor joists, and this stuff doesn’t really bend much. When we started on the first section, my husband was standing on a step ladder, while I manned the panel lifter and the adjustable poles that held things in place while they were being maneuvered and secured. Then we got smart and pulled out the rolling scaffold, which, again, I highly recommend if you’re doing a bunch of renovation work–painting a ceiling, putting up moldings, working on the ceiling, etc.
In retrospect, we shouldn’t have done the mudroom wall prior to putting up the ceiling, because it did end up getting kind of scraped up in the process. I will sand lightly and repaint. I will give the shelf a second coat of paint too while I am at it since it only has a single coat which isn’t really enough.
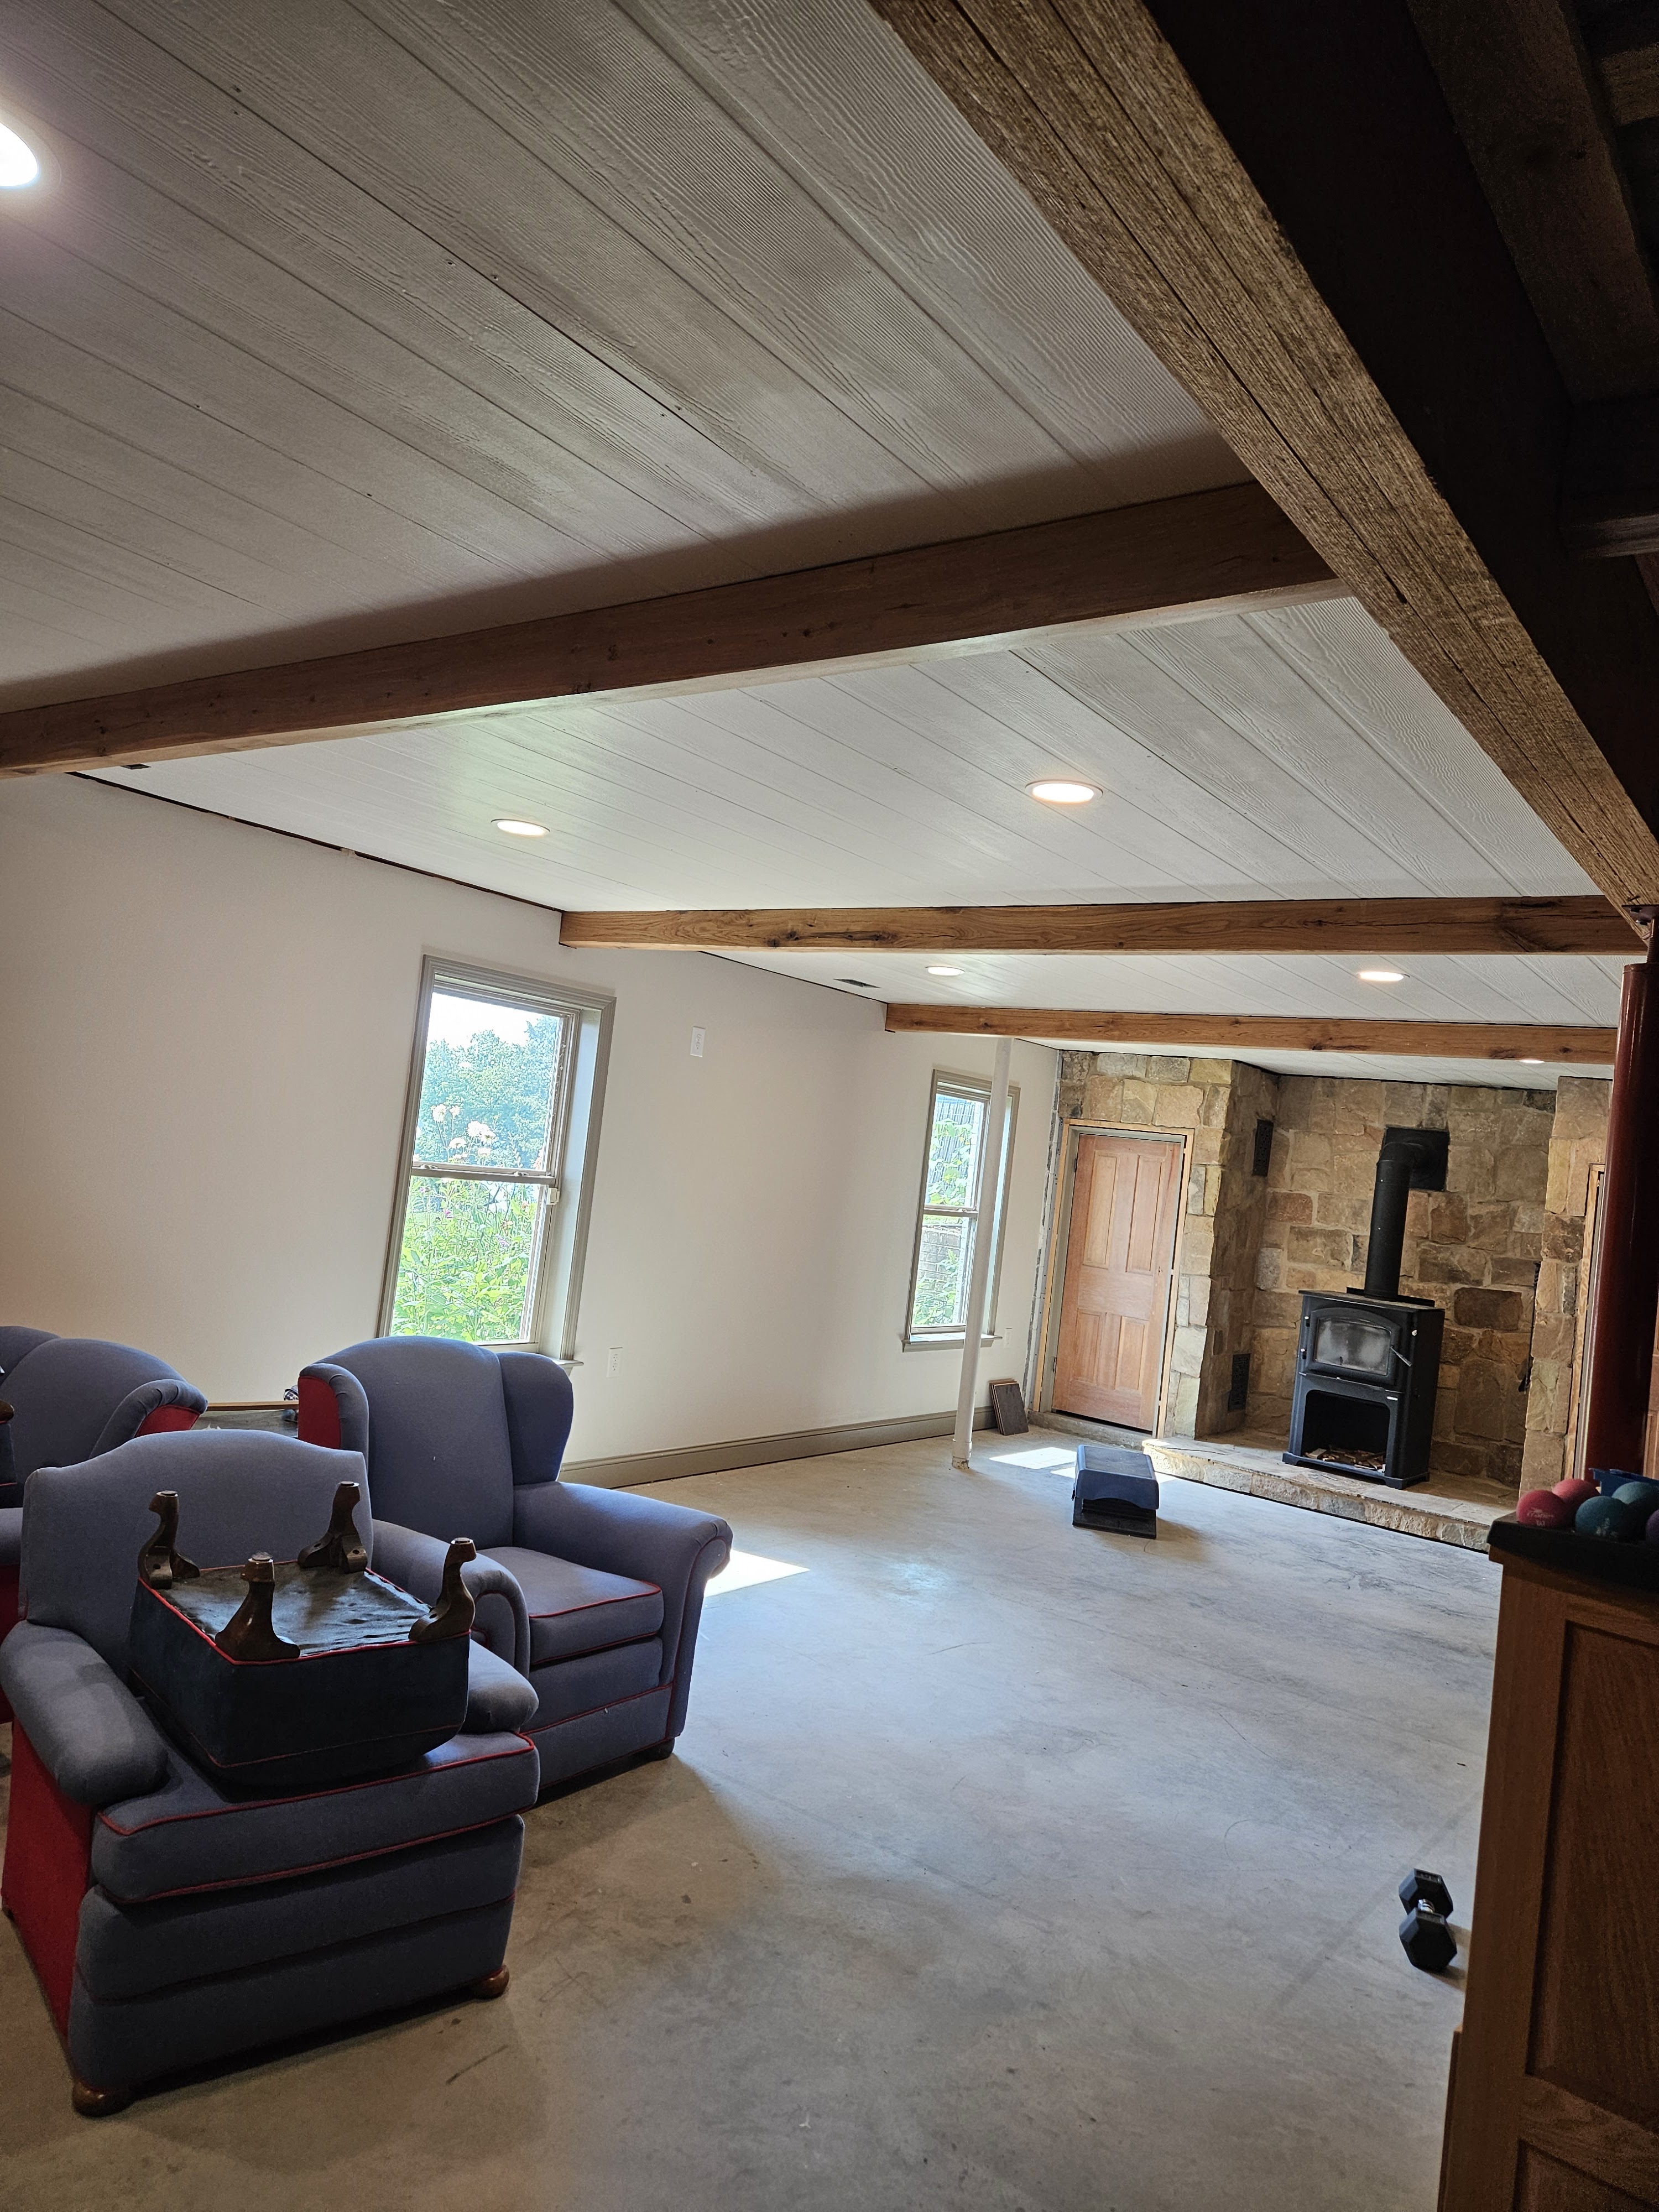
At the end of the day on Sunday, we only had a couple of panels up and we added the other two in the first section before lunch time on Monday. By the way, my husband was also doing the final wiring on the LED can lights during the process, which slowed us down at first, but he has gotten significantly faster. In the photo below, you can see the bracing (in the foreground by the LAM beam) that my husband added to the undersides of the floor joists that we are using the secure the ceiling panels to.
We got two more panels installed on Monday afternoon, along with wiring the lights.
Having a light colored ceiling that is somewhat reflective REALLY brightens the space–it’s obvious in this photo because the lights are off and it was a dreary day.
Here are things that we have learned so far:
–Rolling scaffold, Panel lifter, and adjustable poles are absolute necessities for doing this project.
–Pre-painting the panels isn’t really a time saver because I have had to do a bunch of touch-up so far and I am going to have to repaint some of the panels because the sheen difference is GLARING.
–You MUST have carbide or diamond tipped cutting tools for cement board–it absolutely destroys everything else. Milwaukee makes a carbide hole saw for installing can lights, but it’s special order only, so we are making due with a jig saw.
–We are putting up crown molding, so we really don’t need to have things fit tightly. Opening up the tolerances has really improved our speed, because it isn’t so much of a battle to get things in place.
–We hoped that we would not have to caulk the joints between panels, but we will. I won’t do any more painting until we have the first half of the room caulked, and the screw holes cleaned up.
Overall, we’re happy with how it’s looking, but, wow, this is a BIG job. I am definitely feeling the work, and my age.
I’ll post more when the entire ceiling is up.
July 10, 2025:
We used Hardie Board Plank sheets for our ceiling because they are waterproof, mold proof, and fire proof. While all of those are really good things, those attributes make the sheets EXTREMELY heavy. This project took so much longer than I would have ever guessed it would.
Here is a link on our progress:
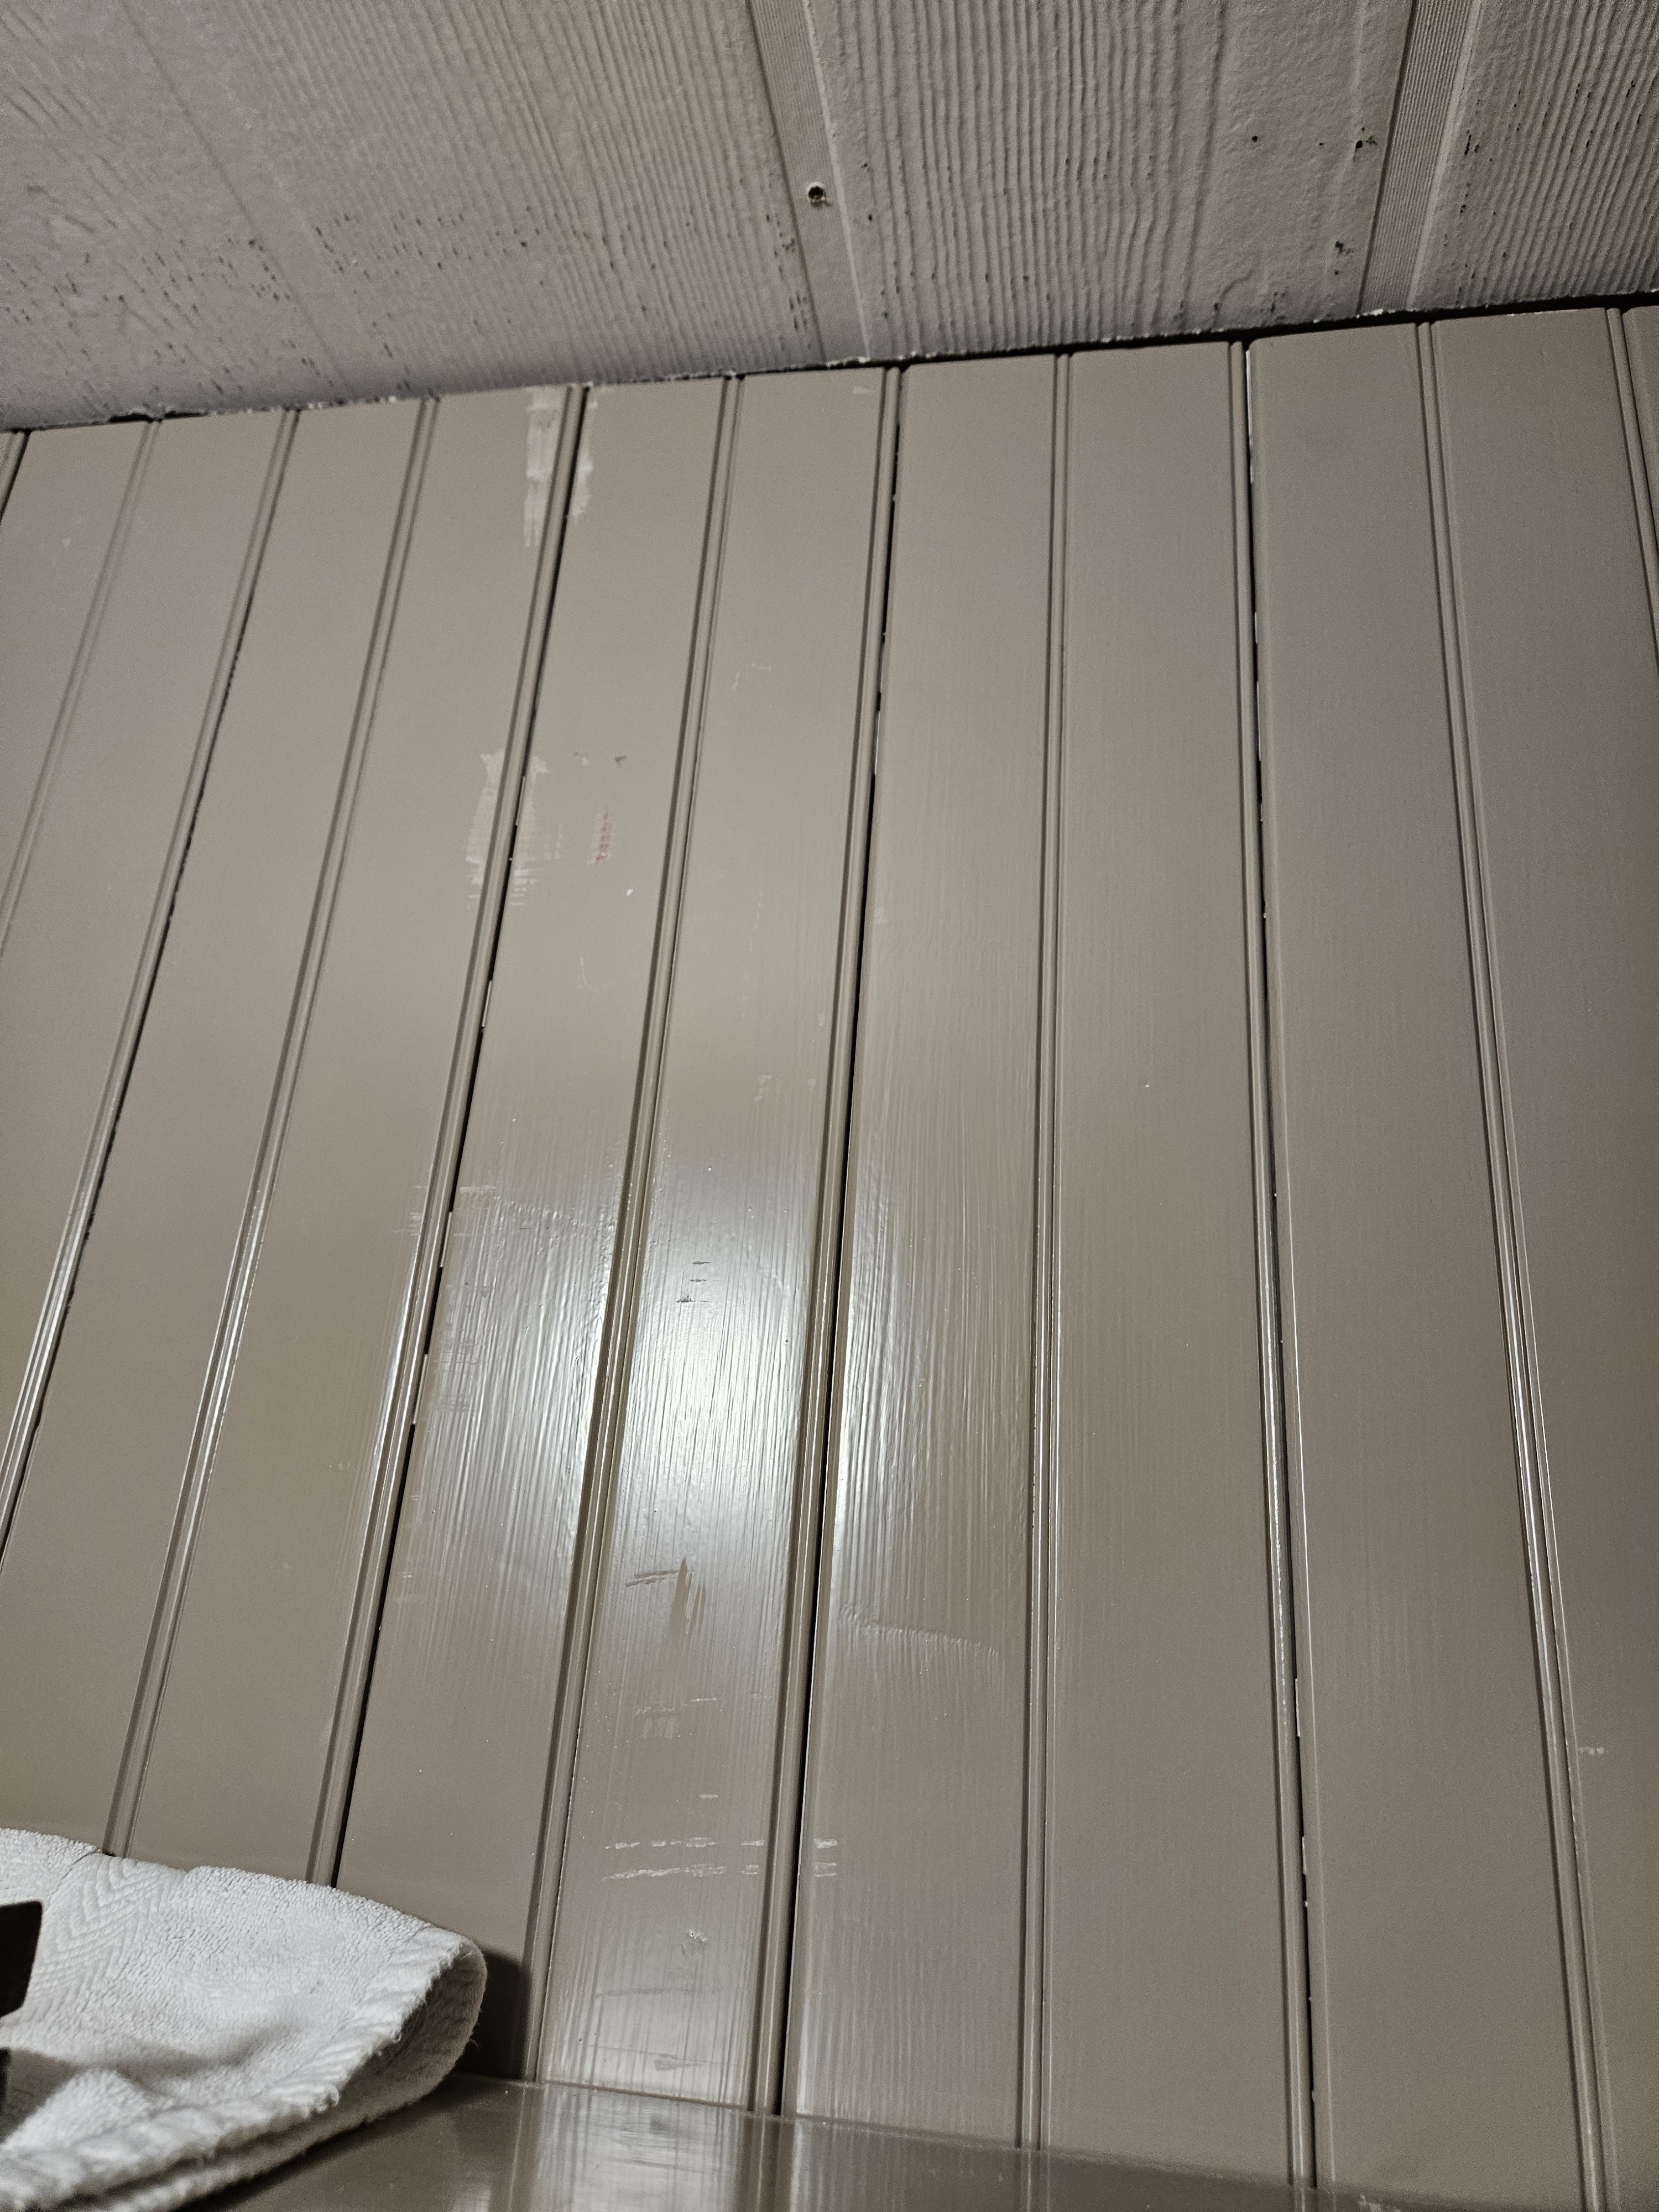
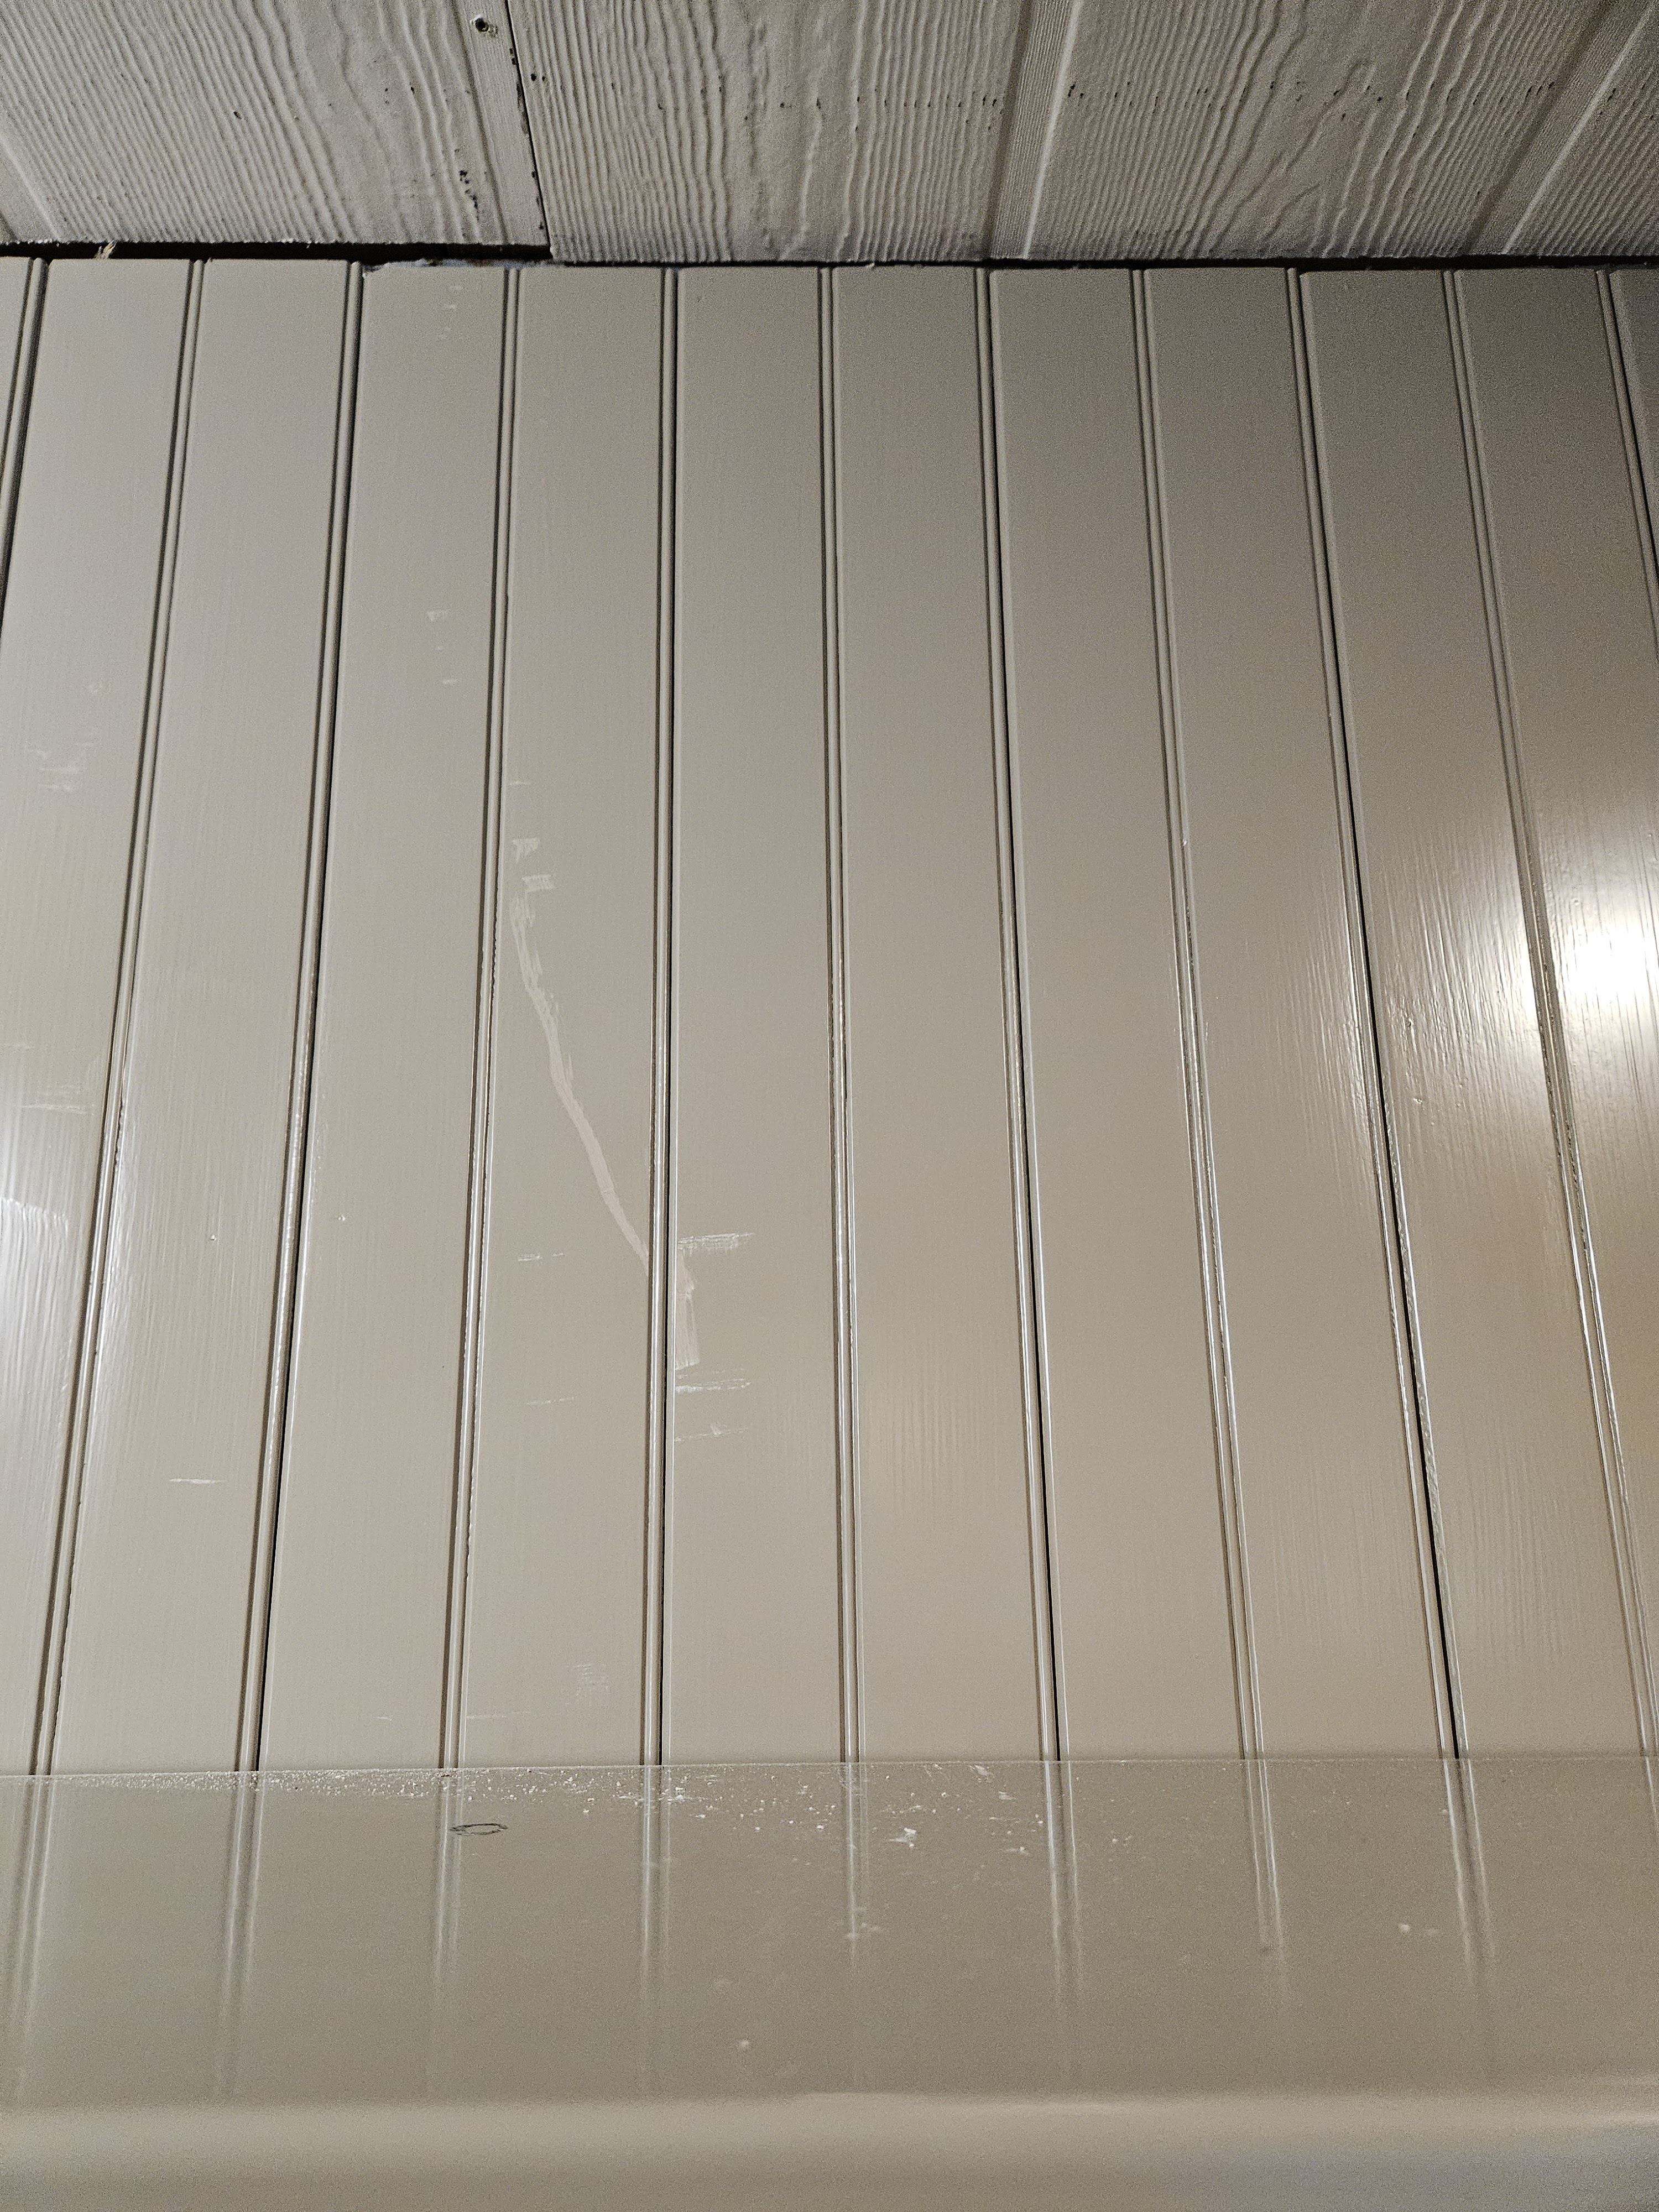
So, after this post we finished putting up the rest of the sheets. I sanded the screw holes smooth (where it lifts up a little bit of the material when you drive the screw), and I caulked all the seams with latex painters caulk. I painted all the sheets with their final coat of PPG Damask Silk in egg shell. It is the same color as the walls.
Here’s the end result:
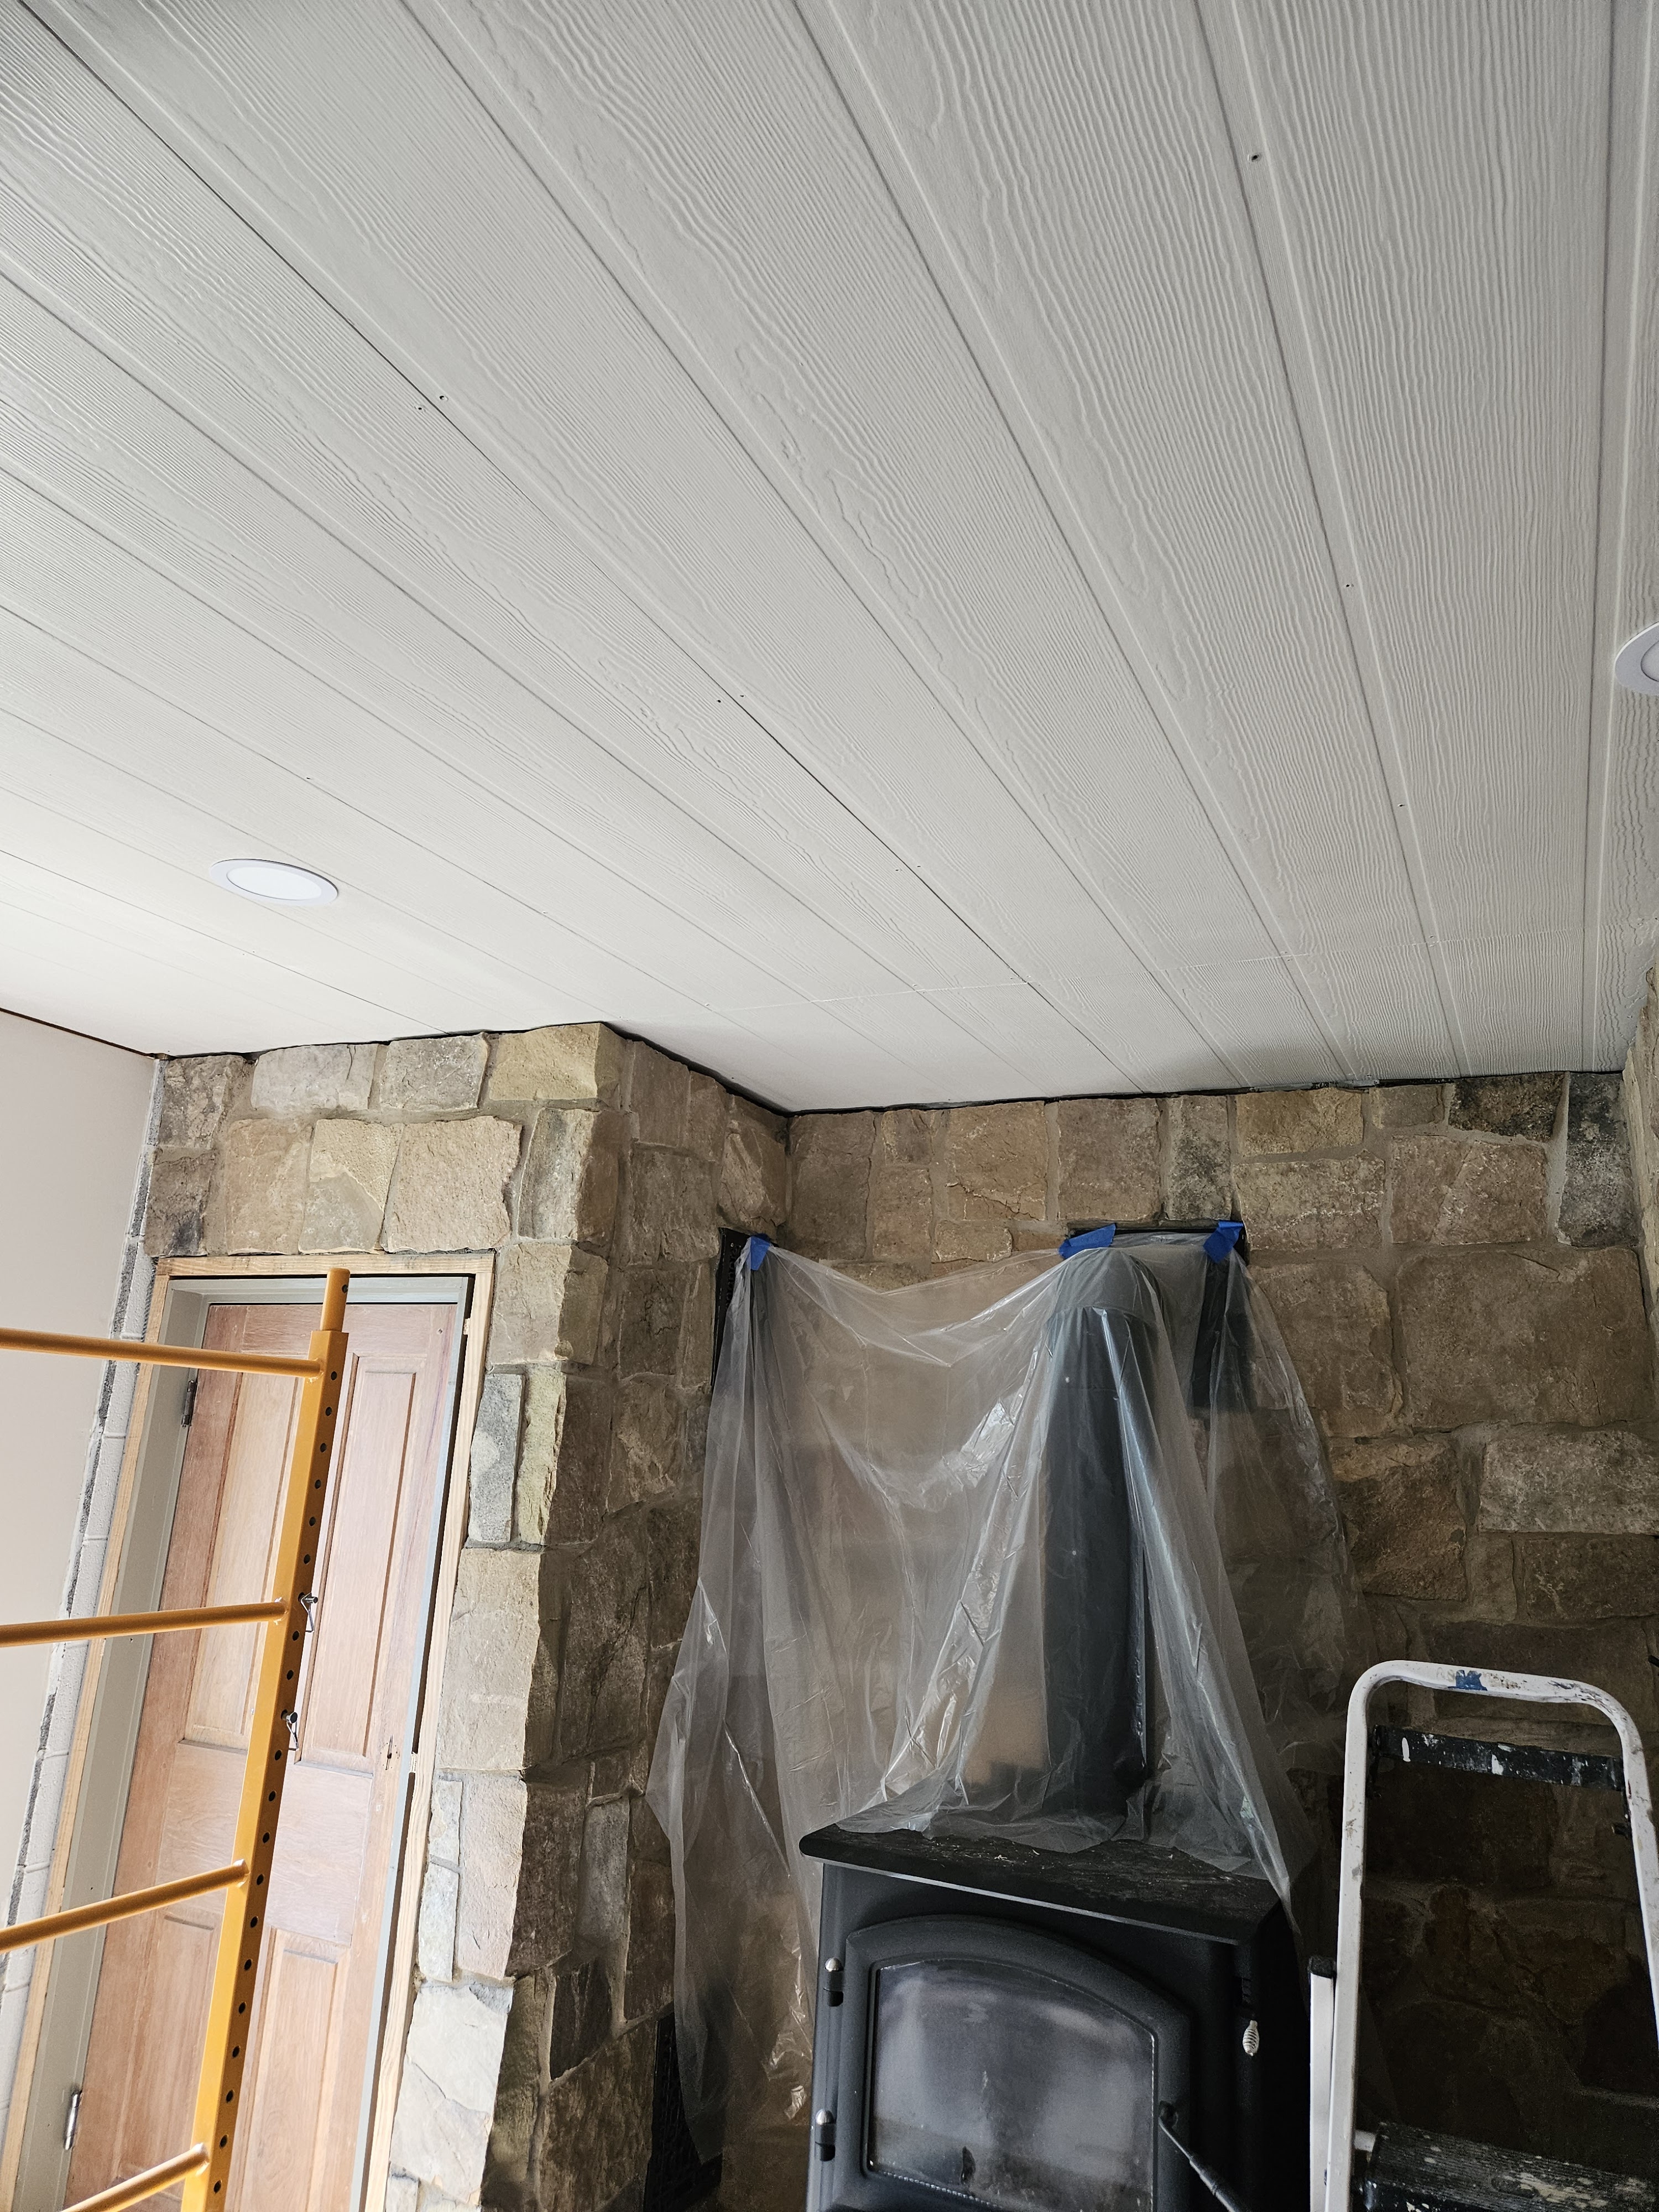

Once we are sure that we don’t need to take any panels down, we will caulk all the screw holes and paint the ceiling again. We need to have some parts of the basement starting to look finished to give us the motivation to keep going. Just getting this far has been so much work. (Especially since, we didn’t know what we were doing and have had to learn along the way.)
July 15, 2025:
My husband and I drove to Rye, NY over Mother’s Day weekend to pick up a bunch of cabinets that we’re going to use in the basement.
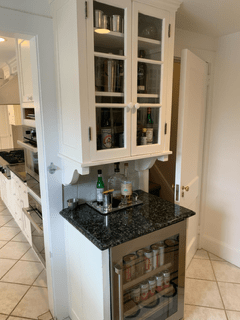
Here they are when they were installed in that house:

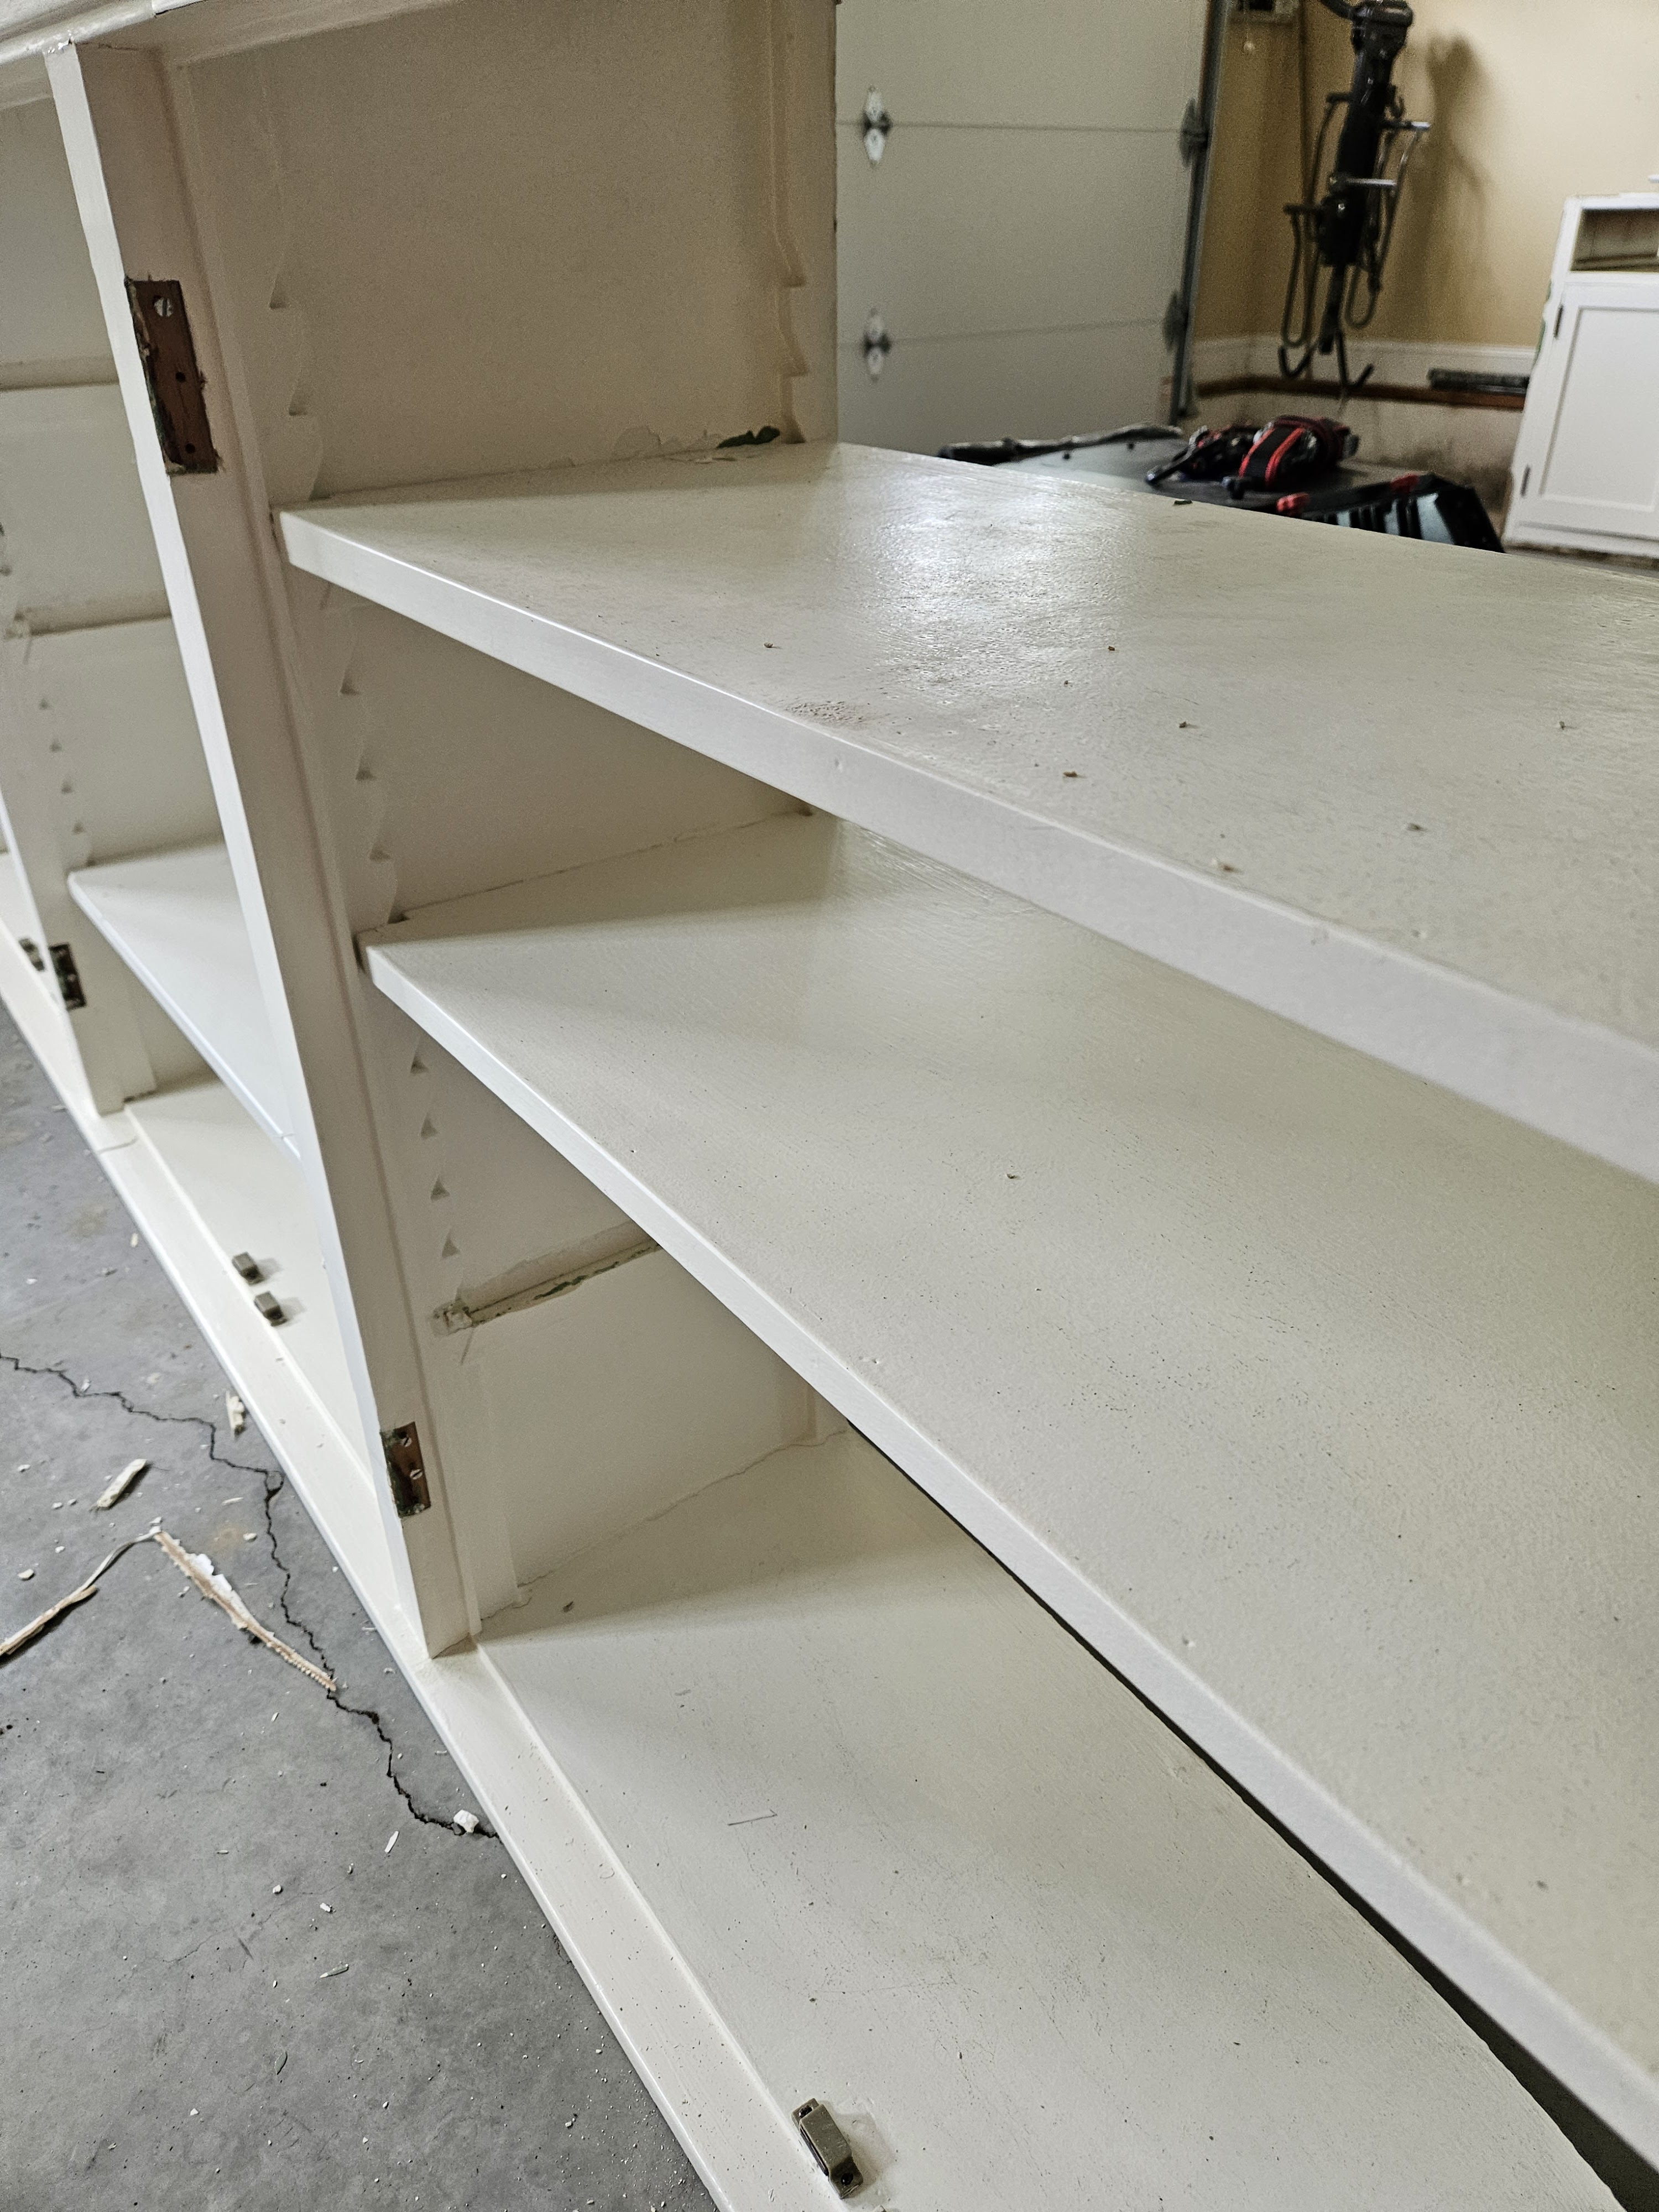
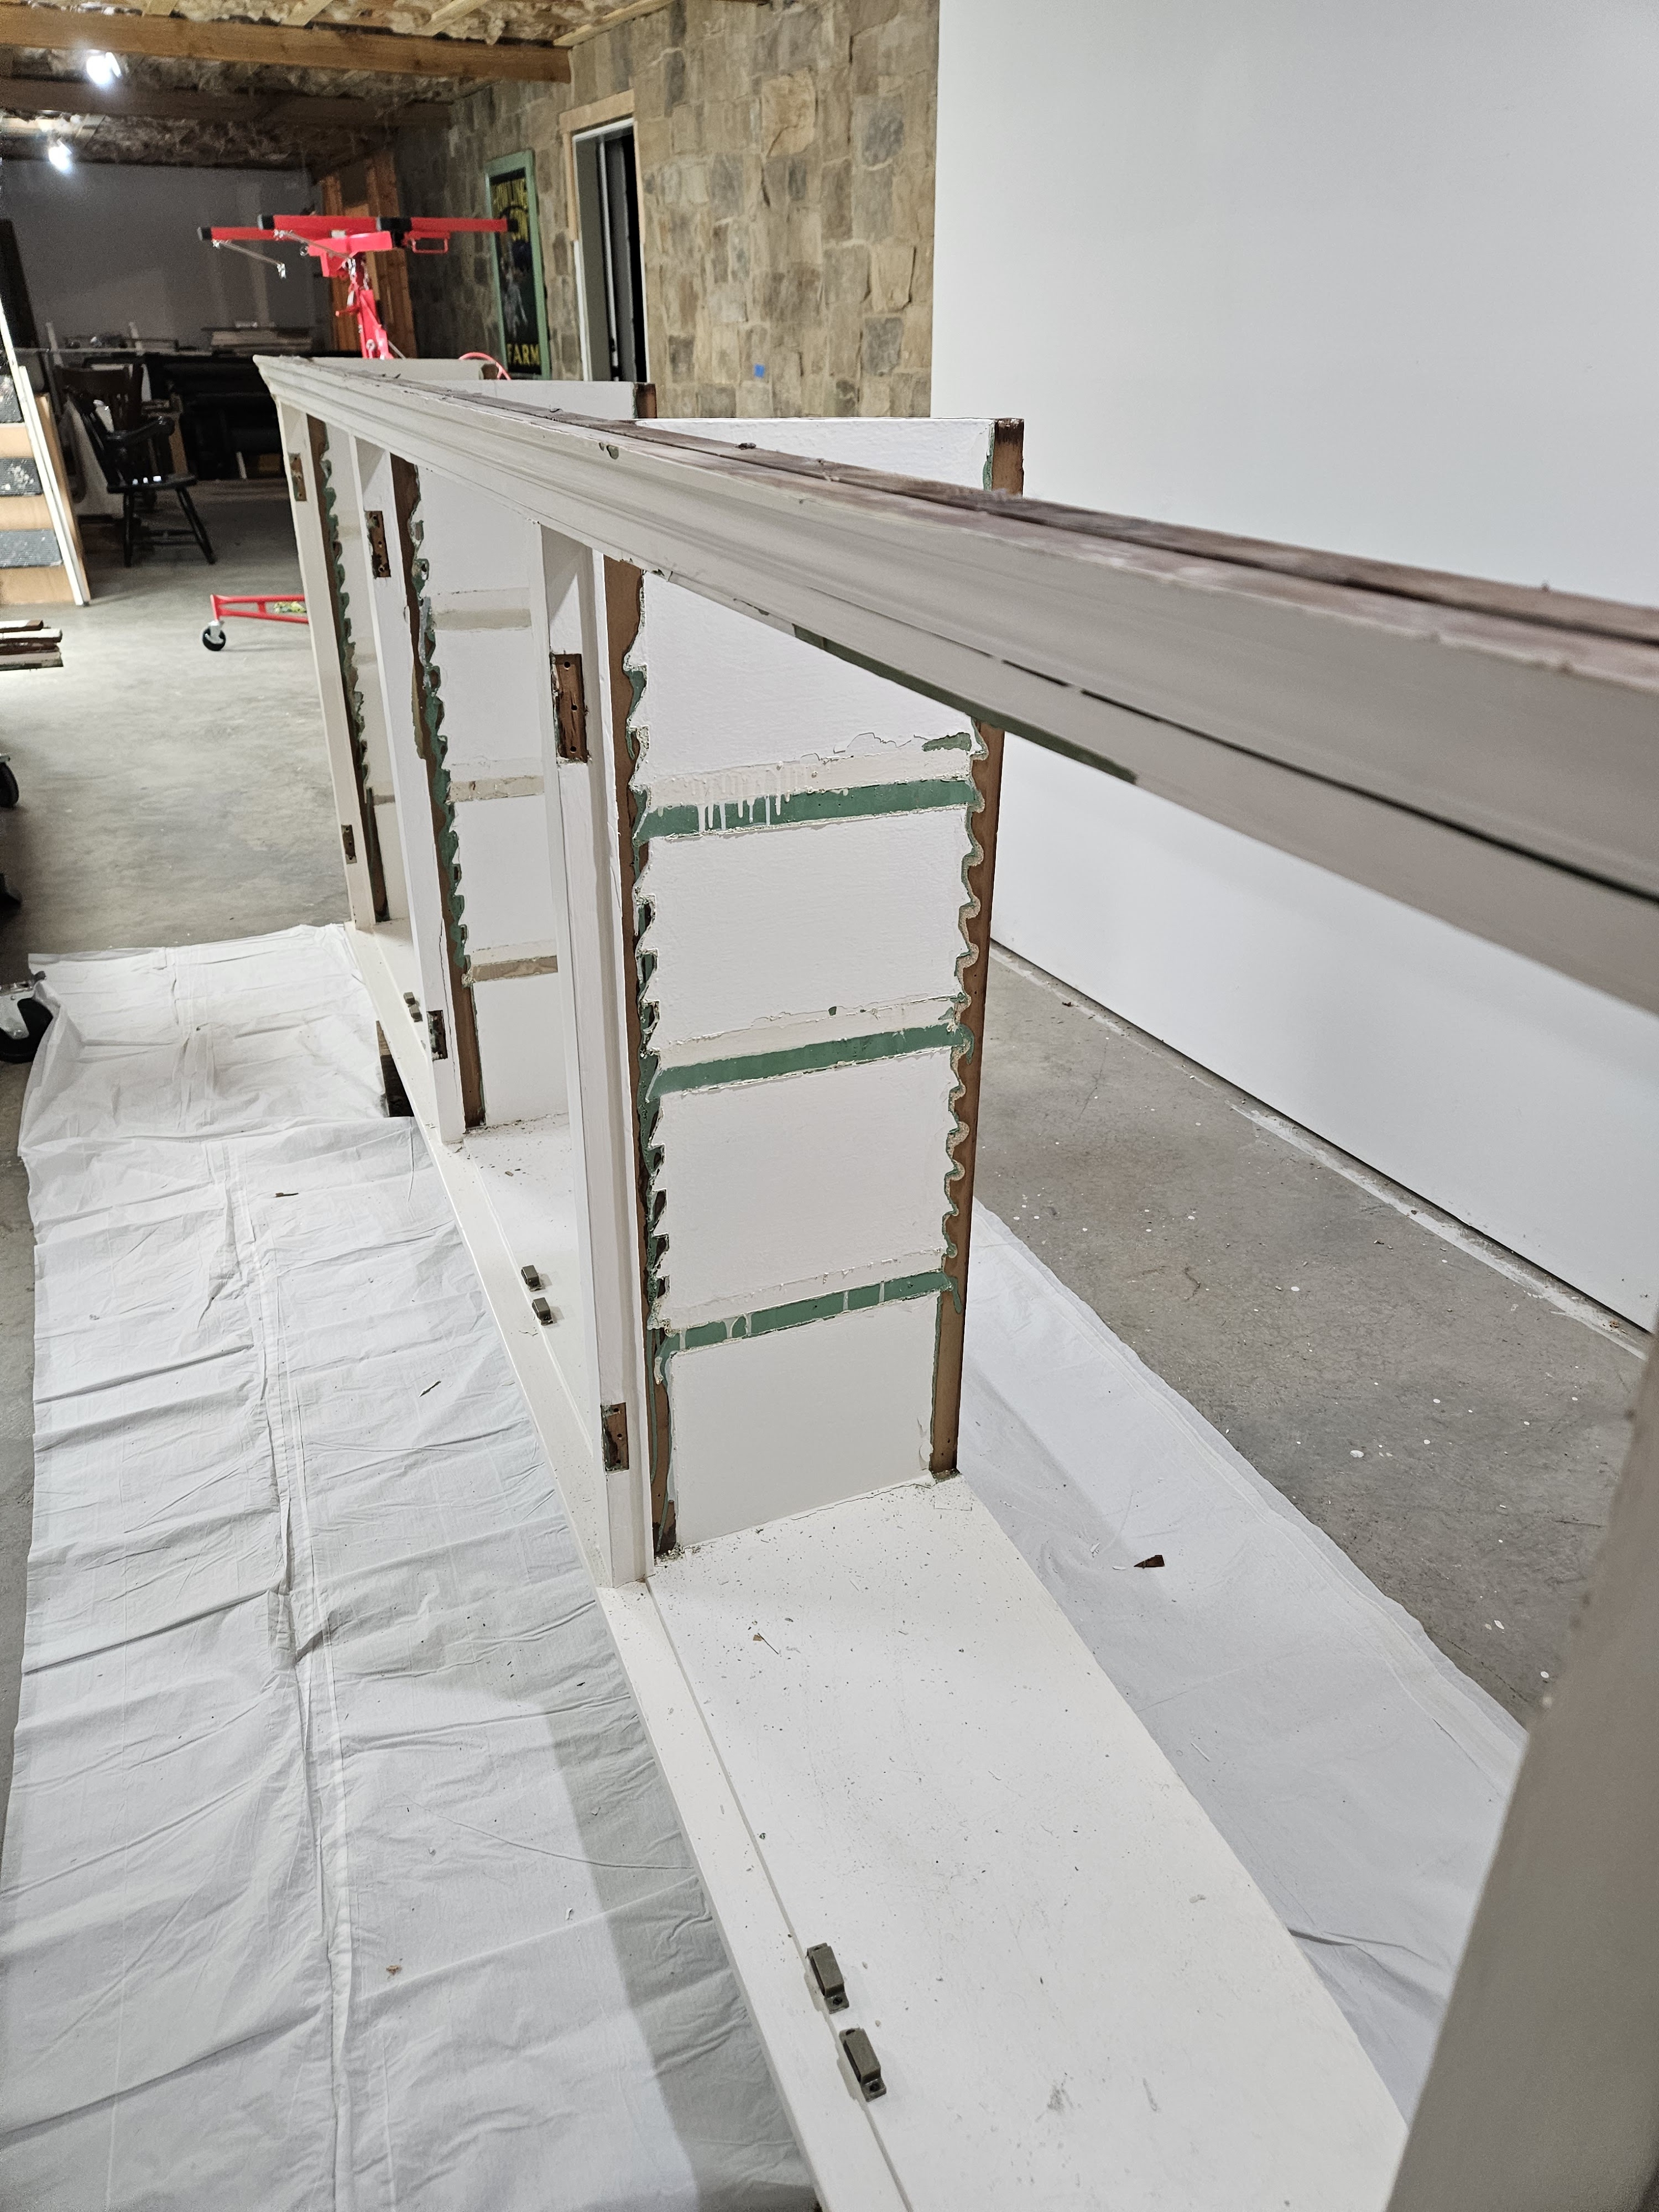
They are about 40″ tall, and we’re going to make a base for them to sit on. They were built on-site, so they don’t have a top, so we’ll have to add that to them as well. Anyway, I started stripping them over the holiday weekend because it was so stinking hot here that we didn’t want to be outside (except that my husband had a horrible outside project that I ended up helping him with–putting a 4″ PVC pipe under the sidewalk out into the yard to drain the downspout we added).
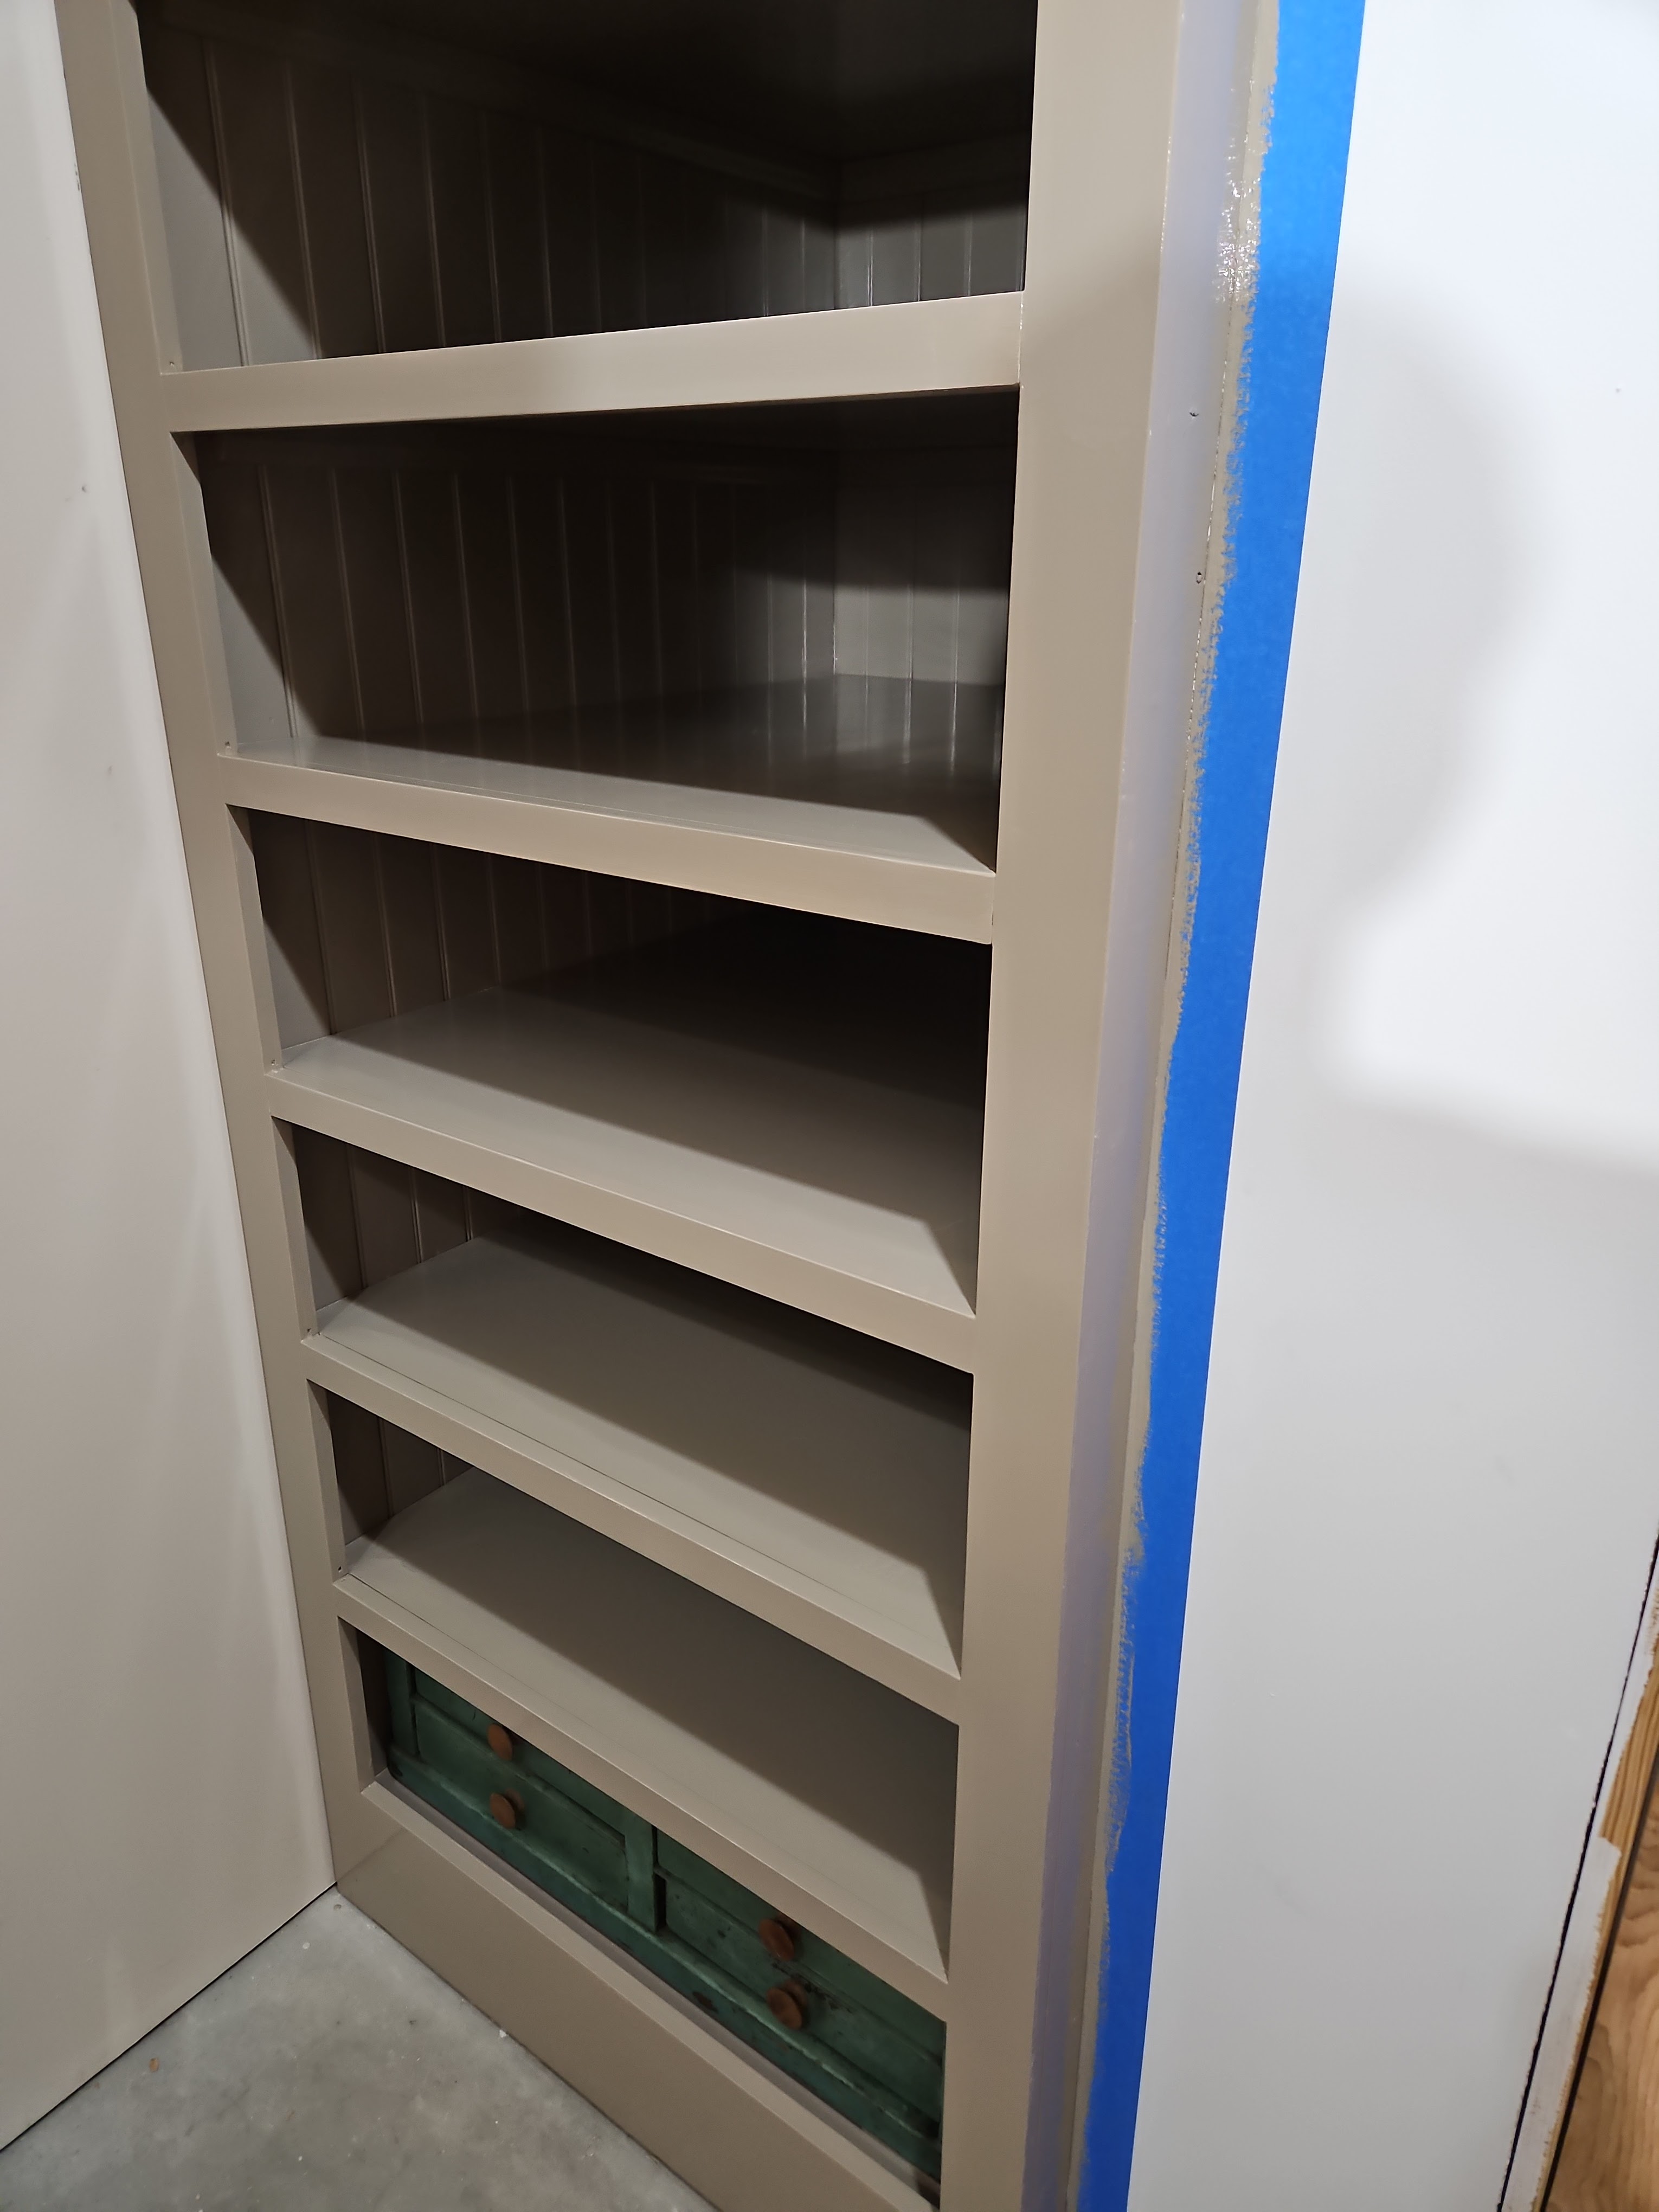
First, I had to take out all the shelves, and the brackets:
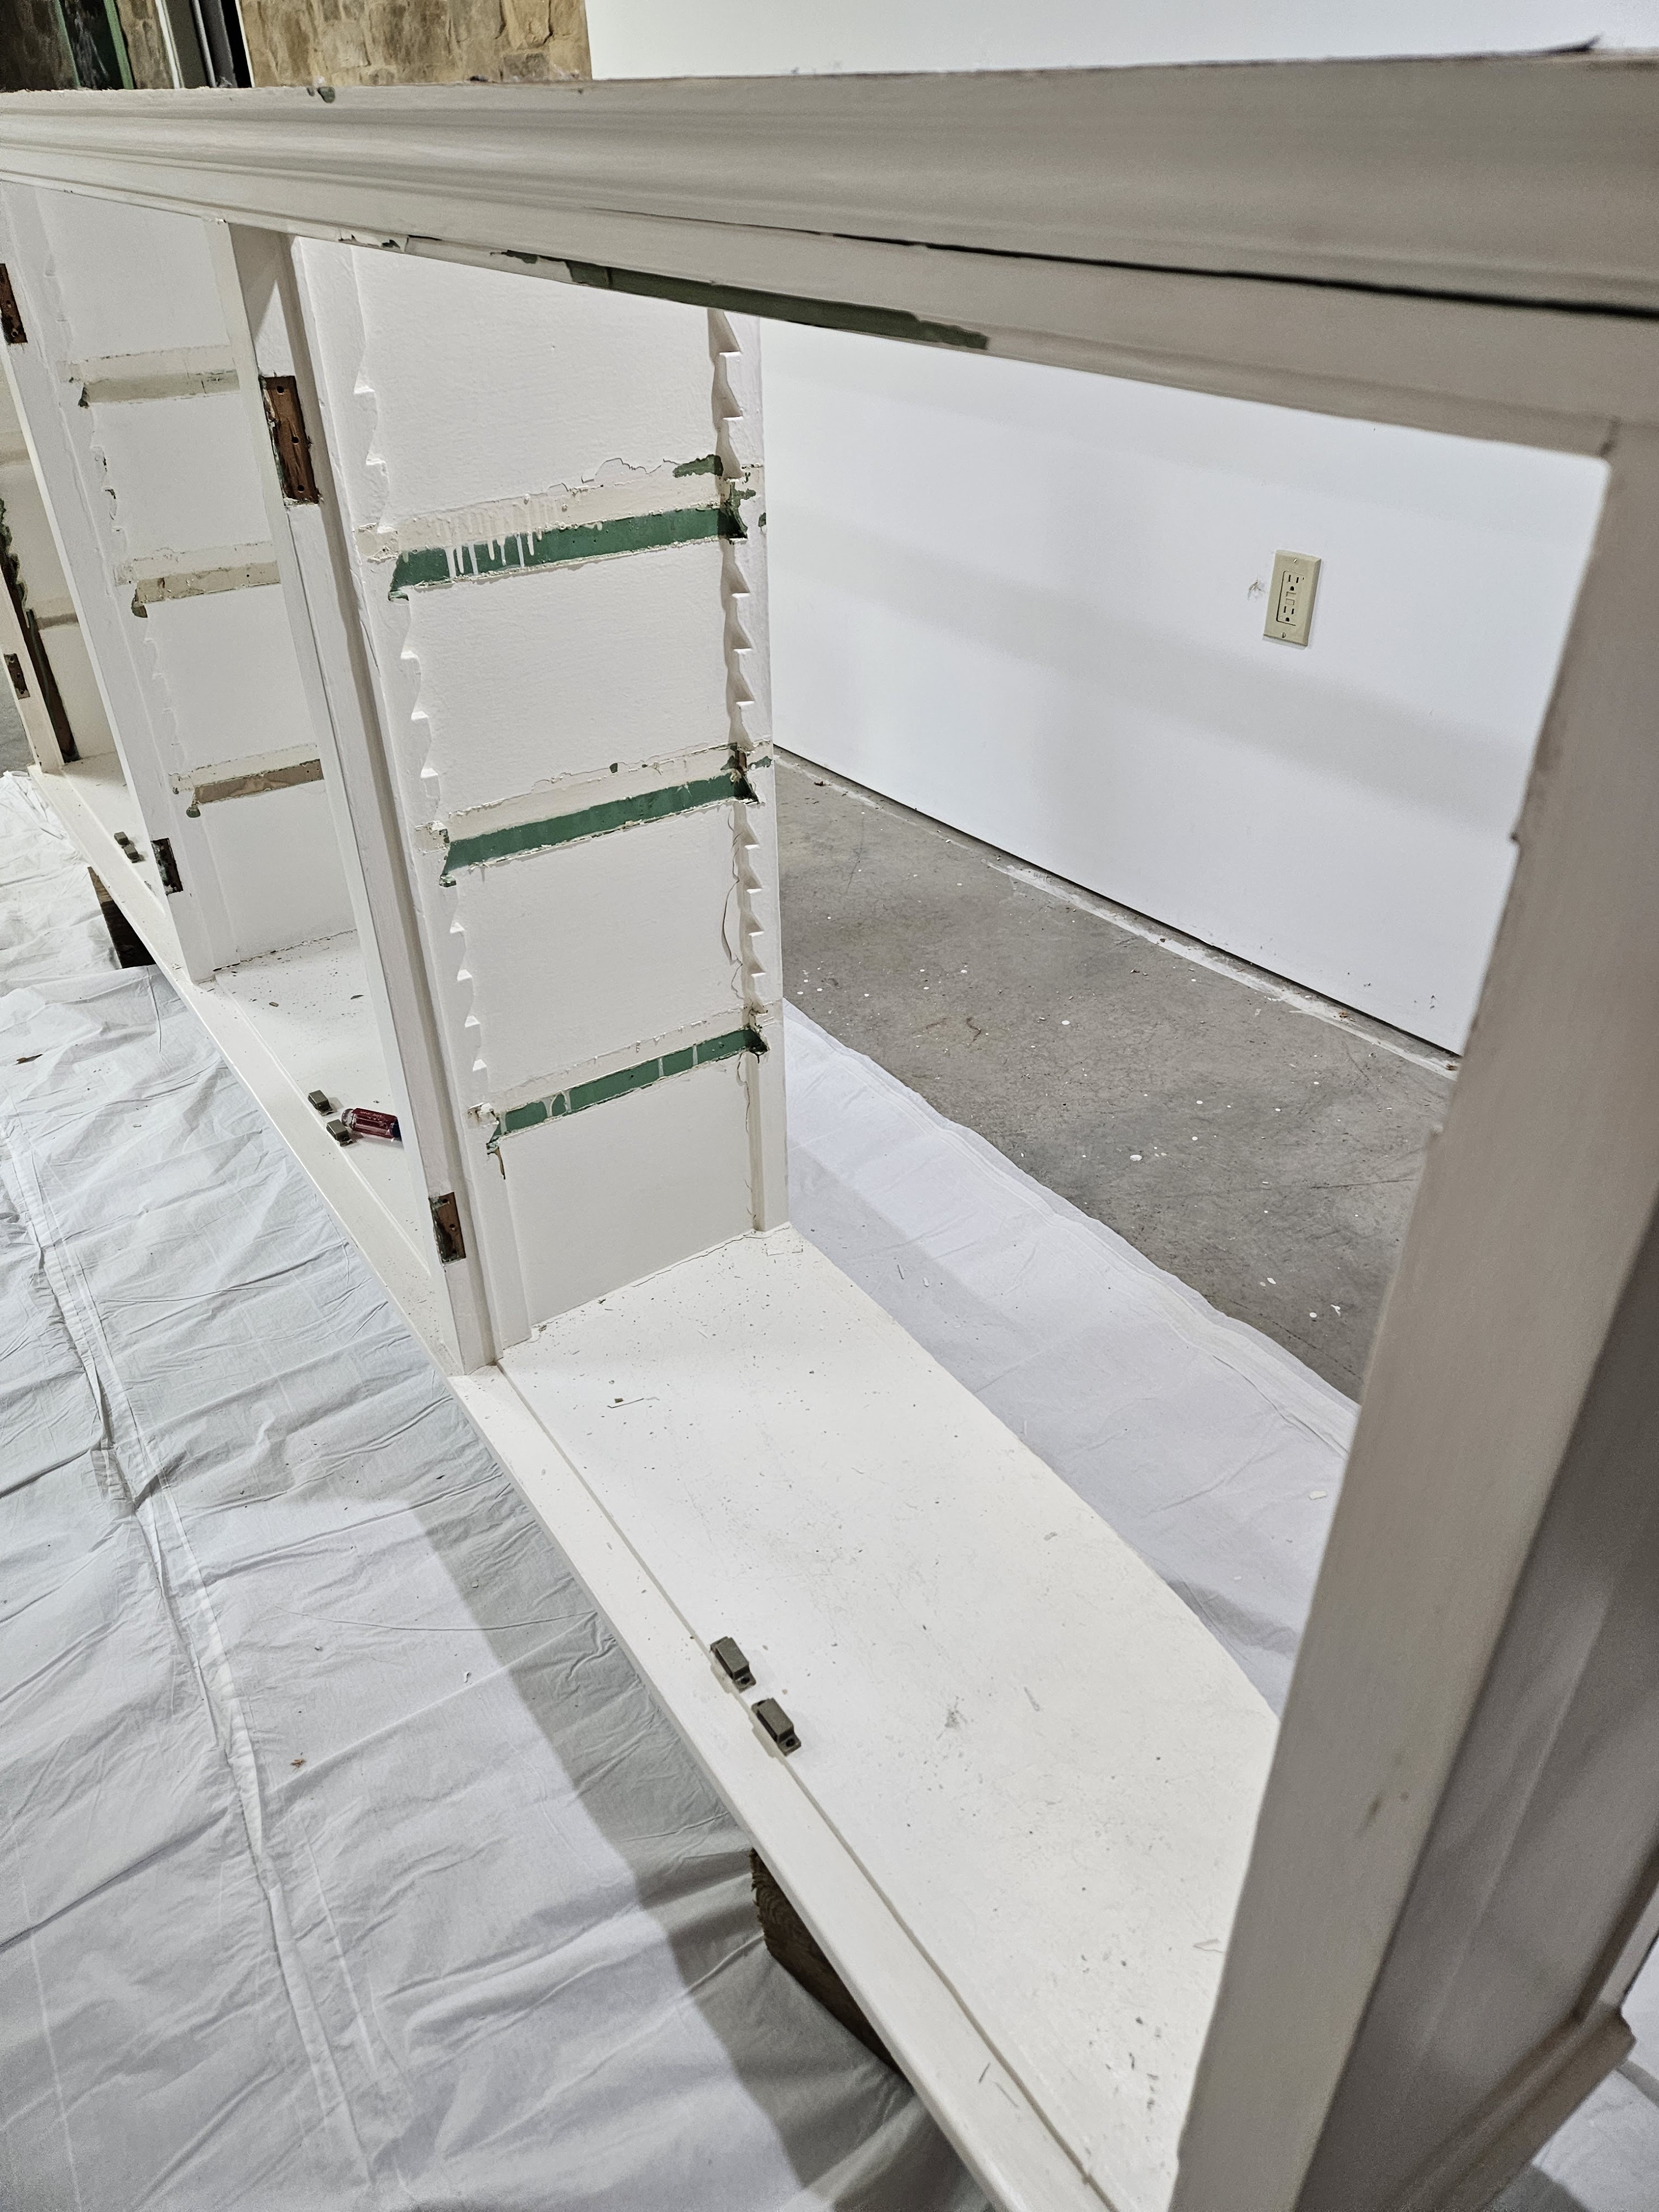
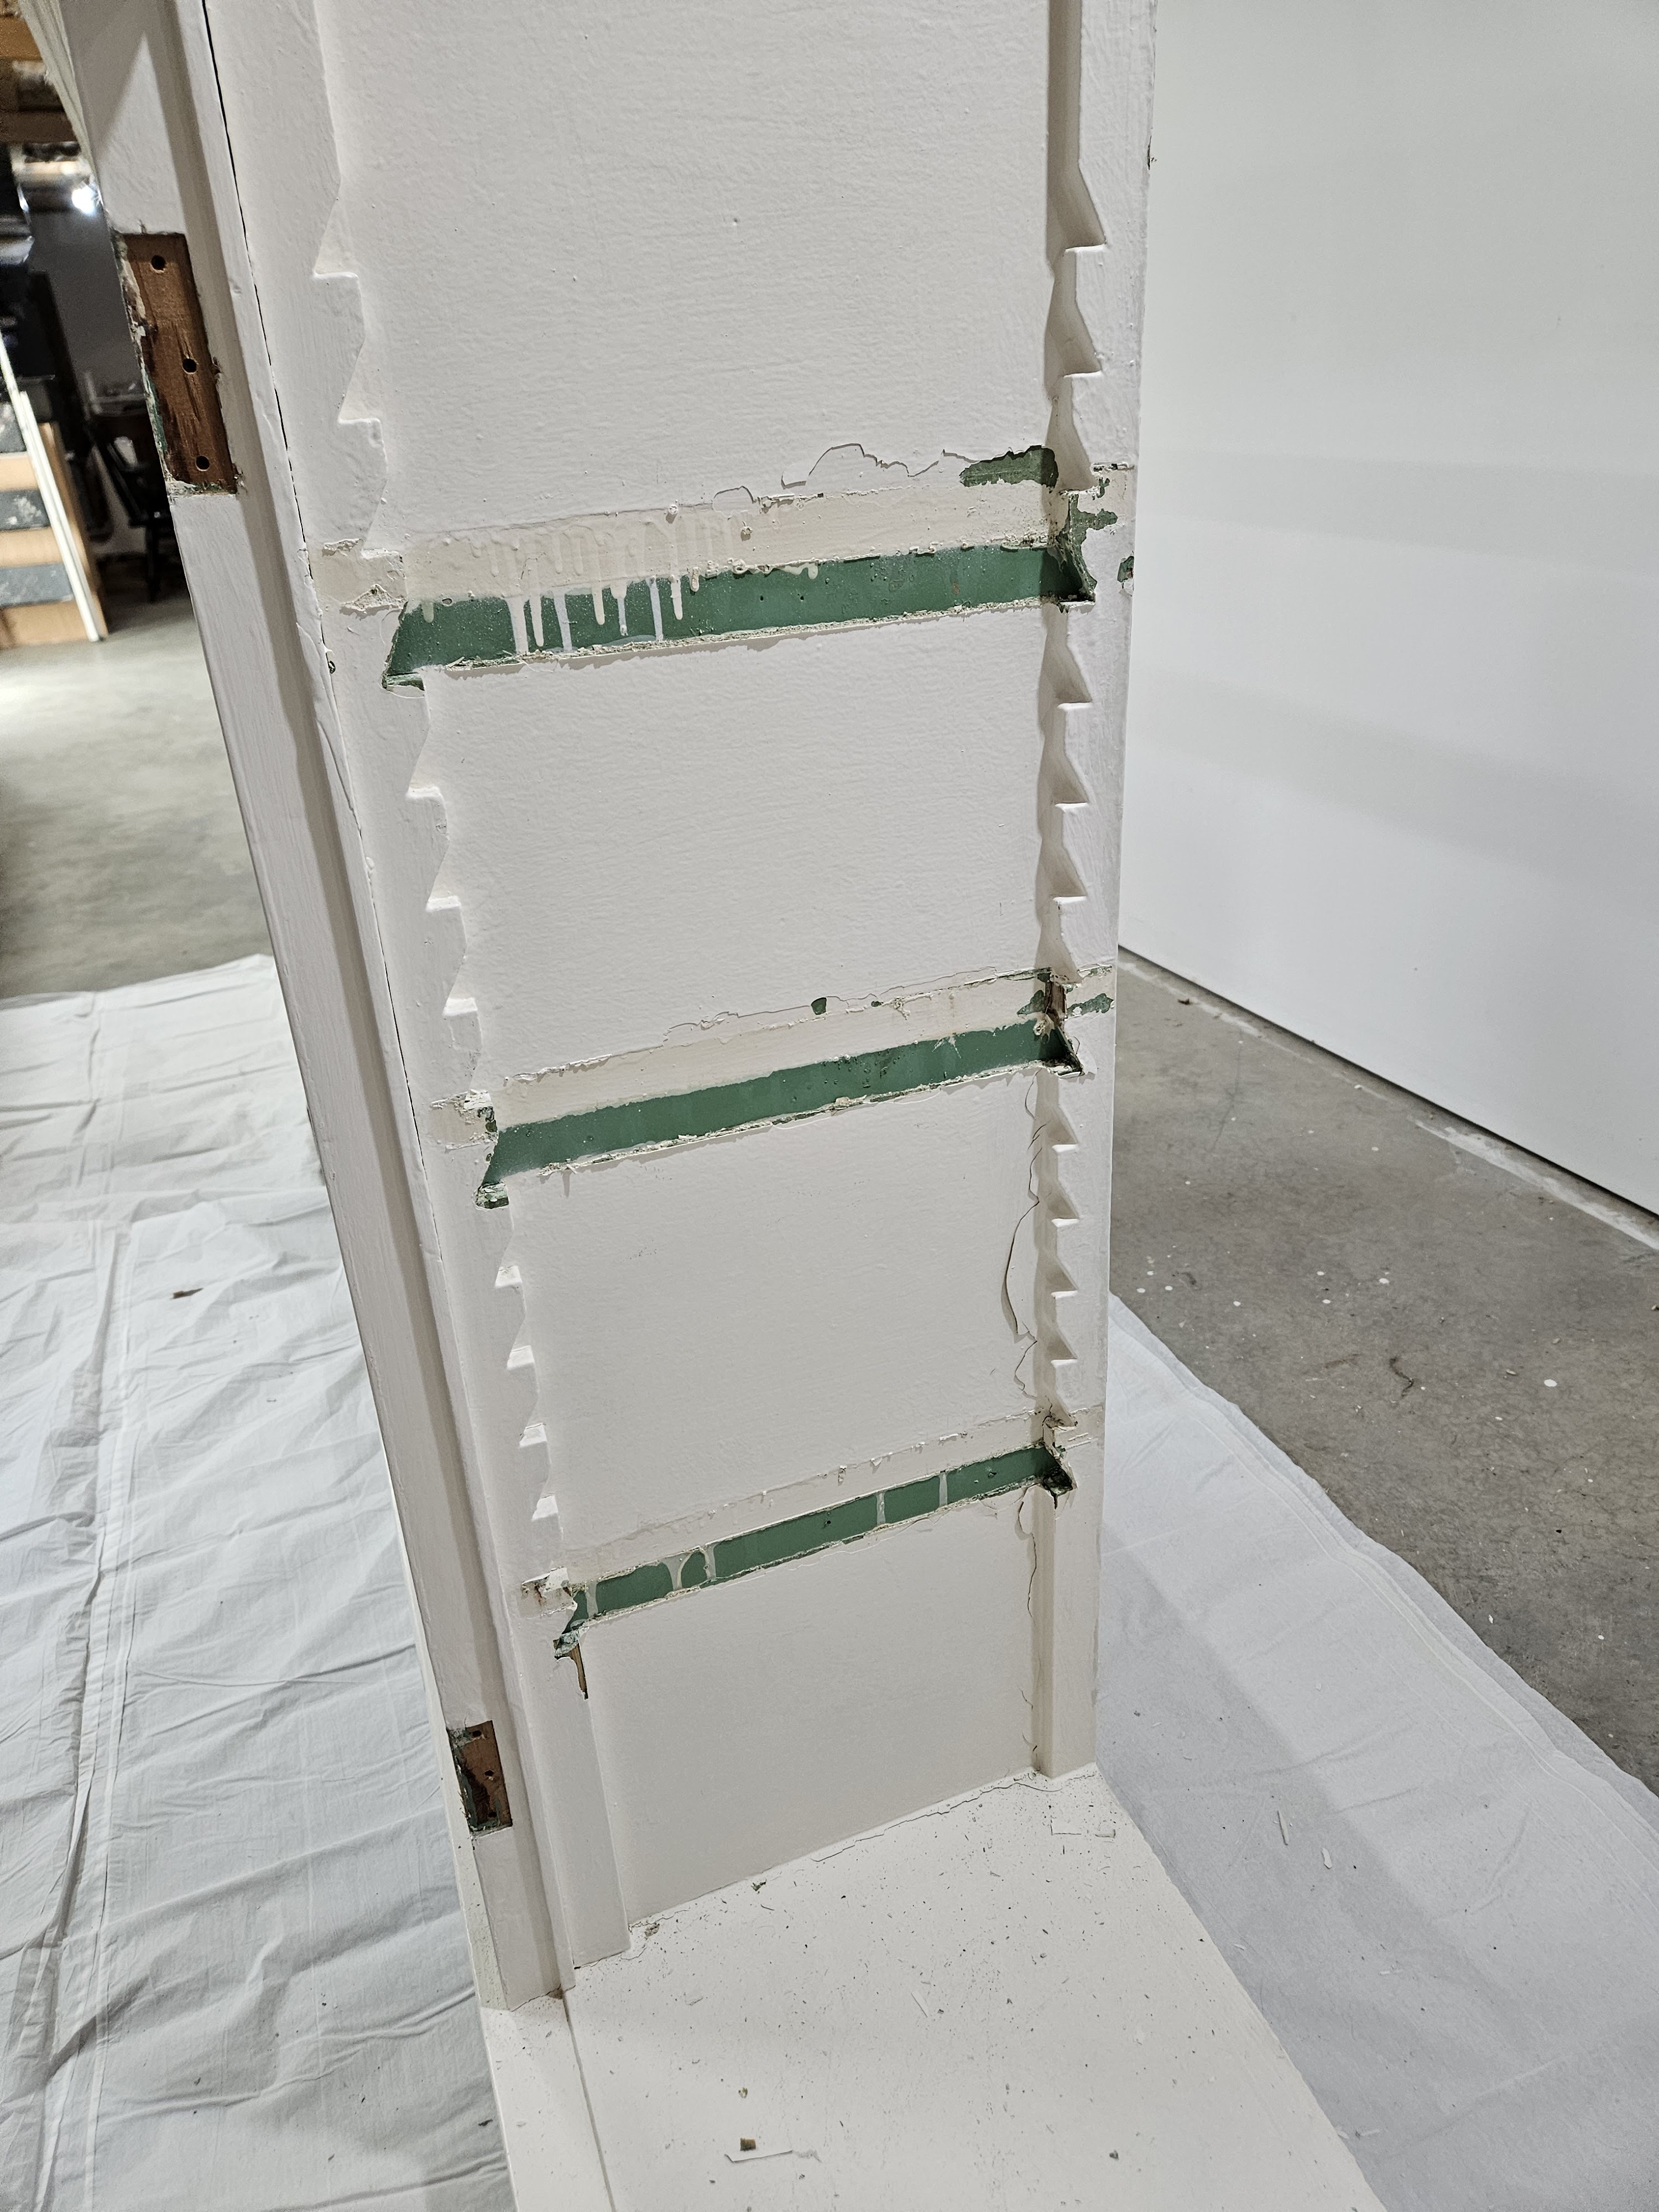
I also removed the little magnet cabinet stops on the bottom. I coated everything with Citrustrip and put plastic over it to keep the stripper from drying out before it could work its magic.
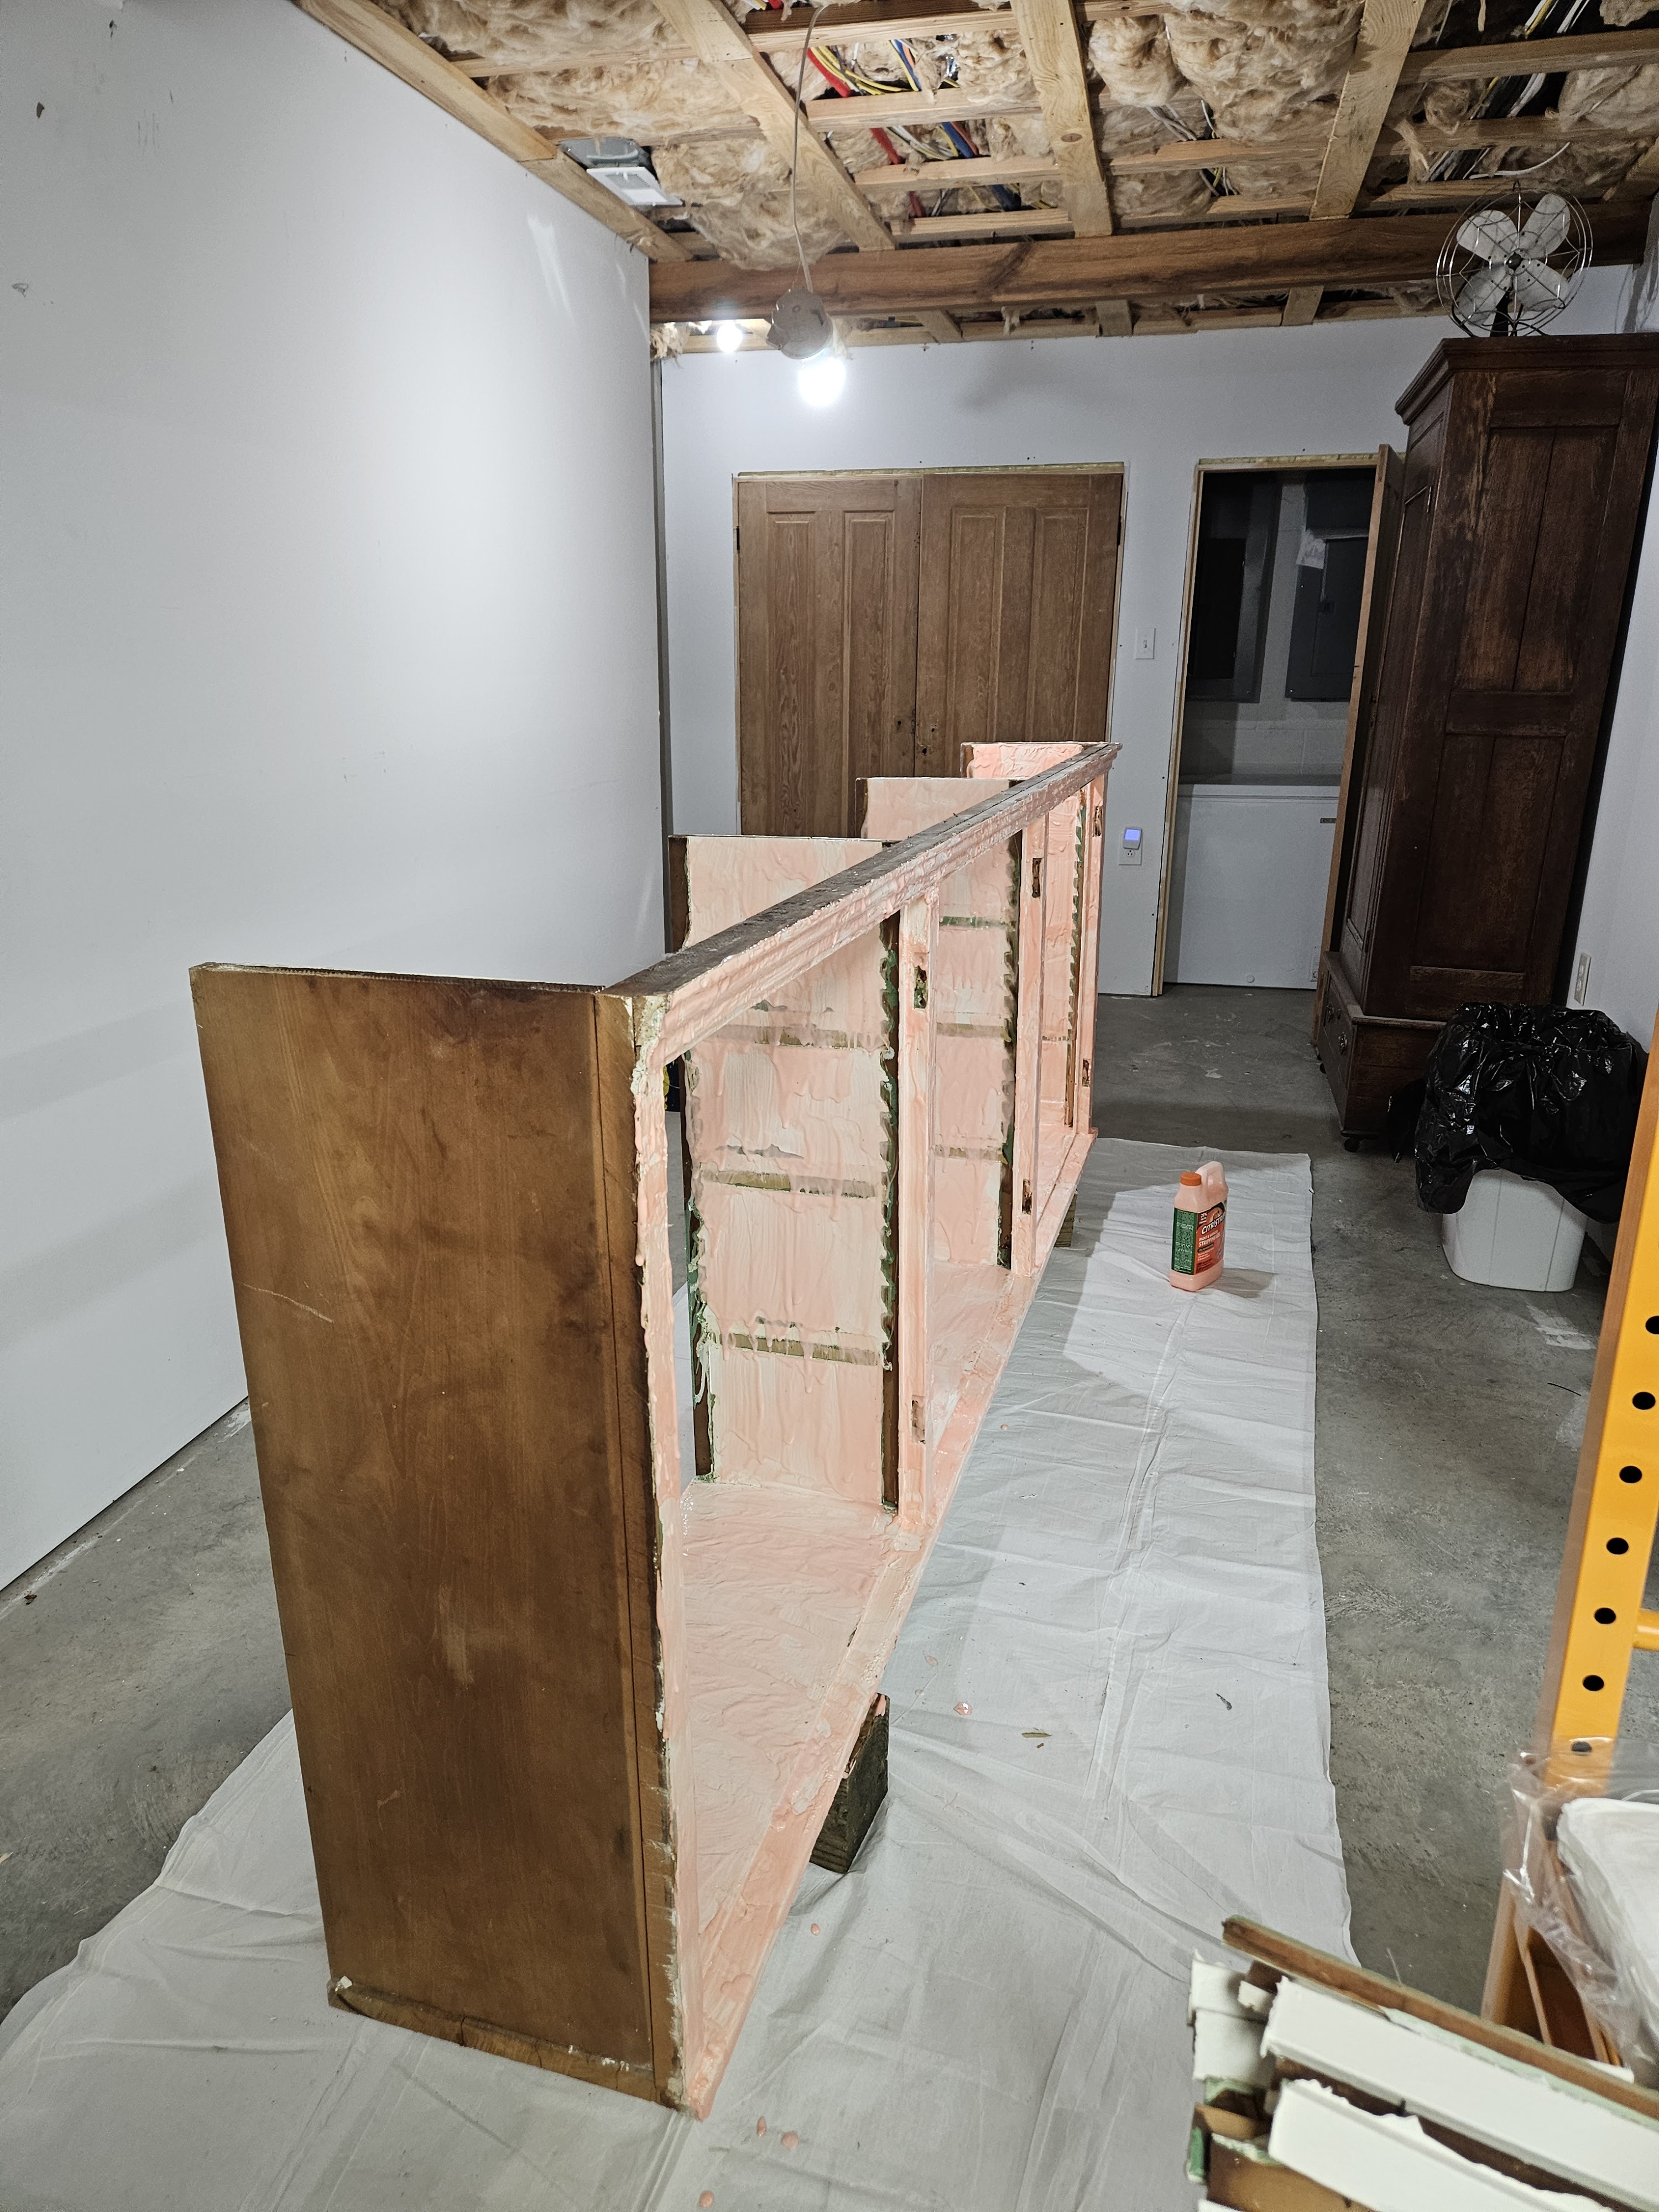
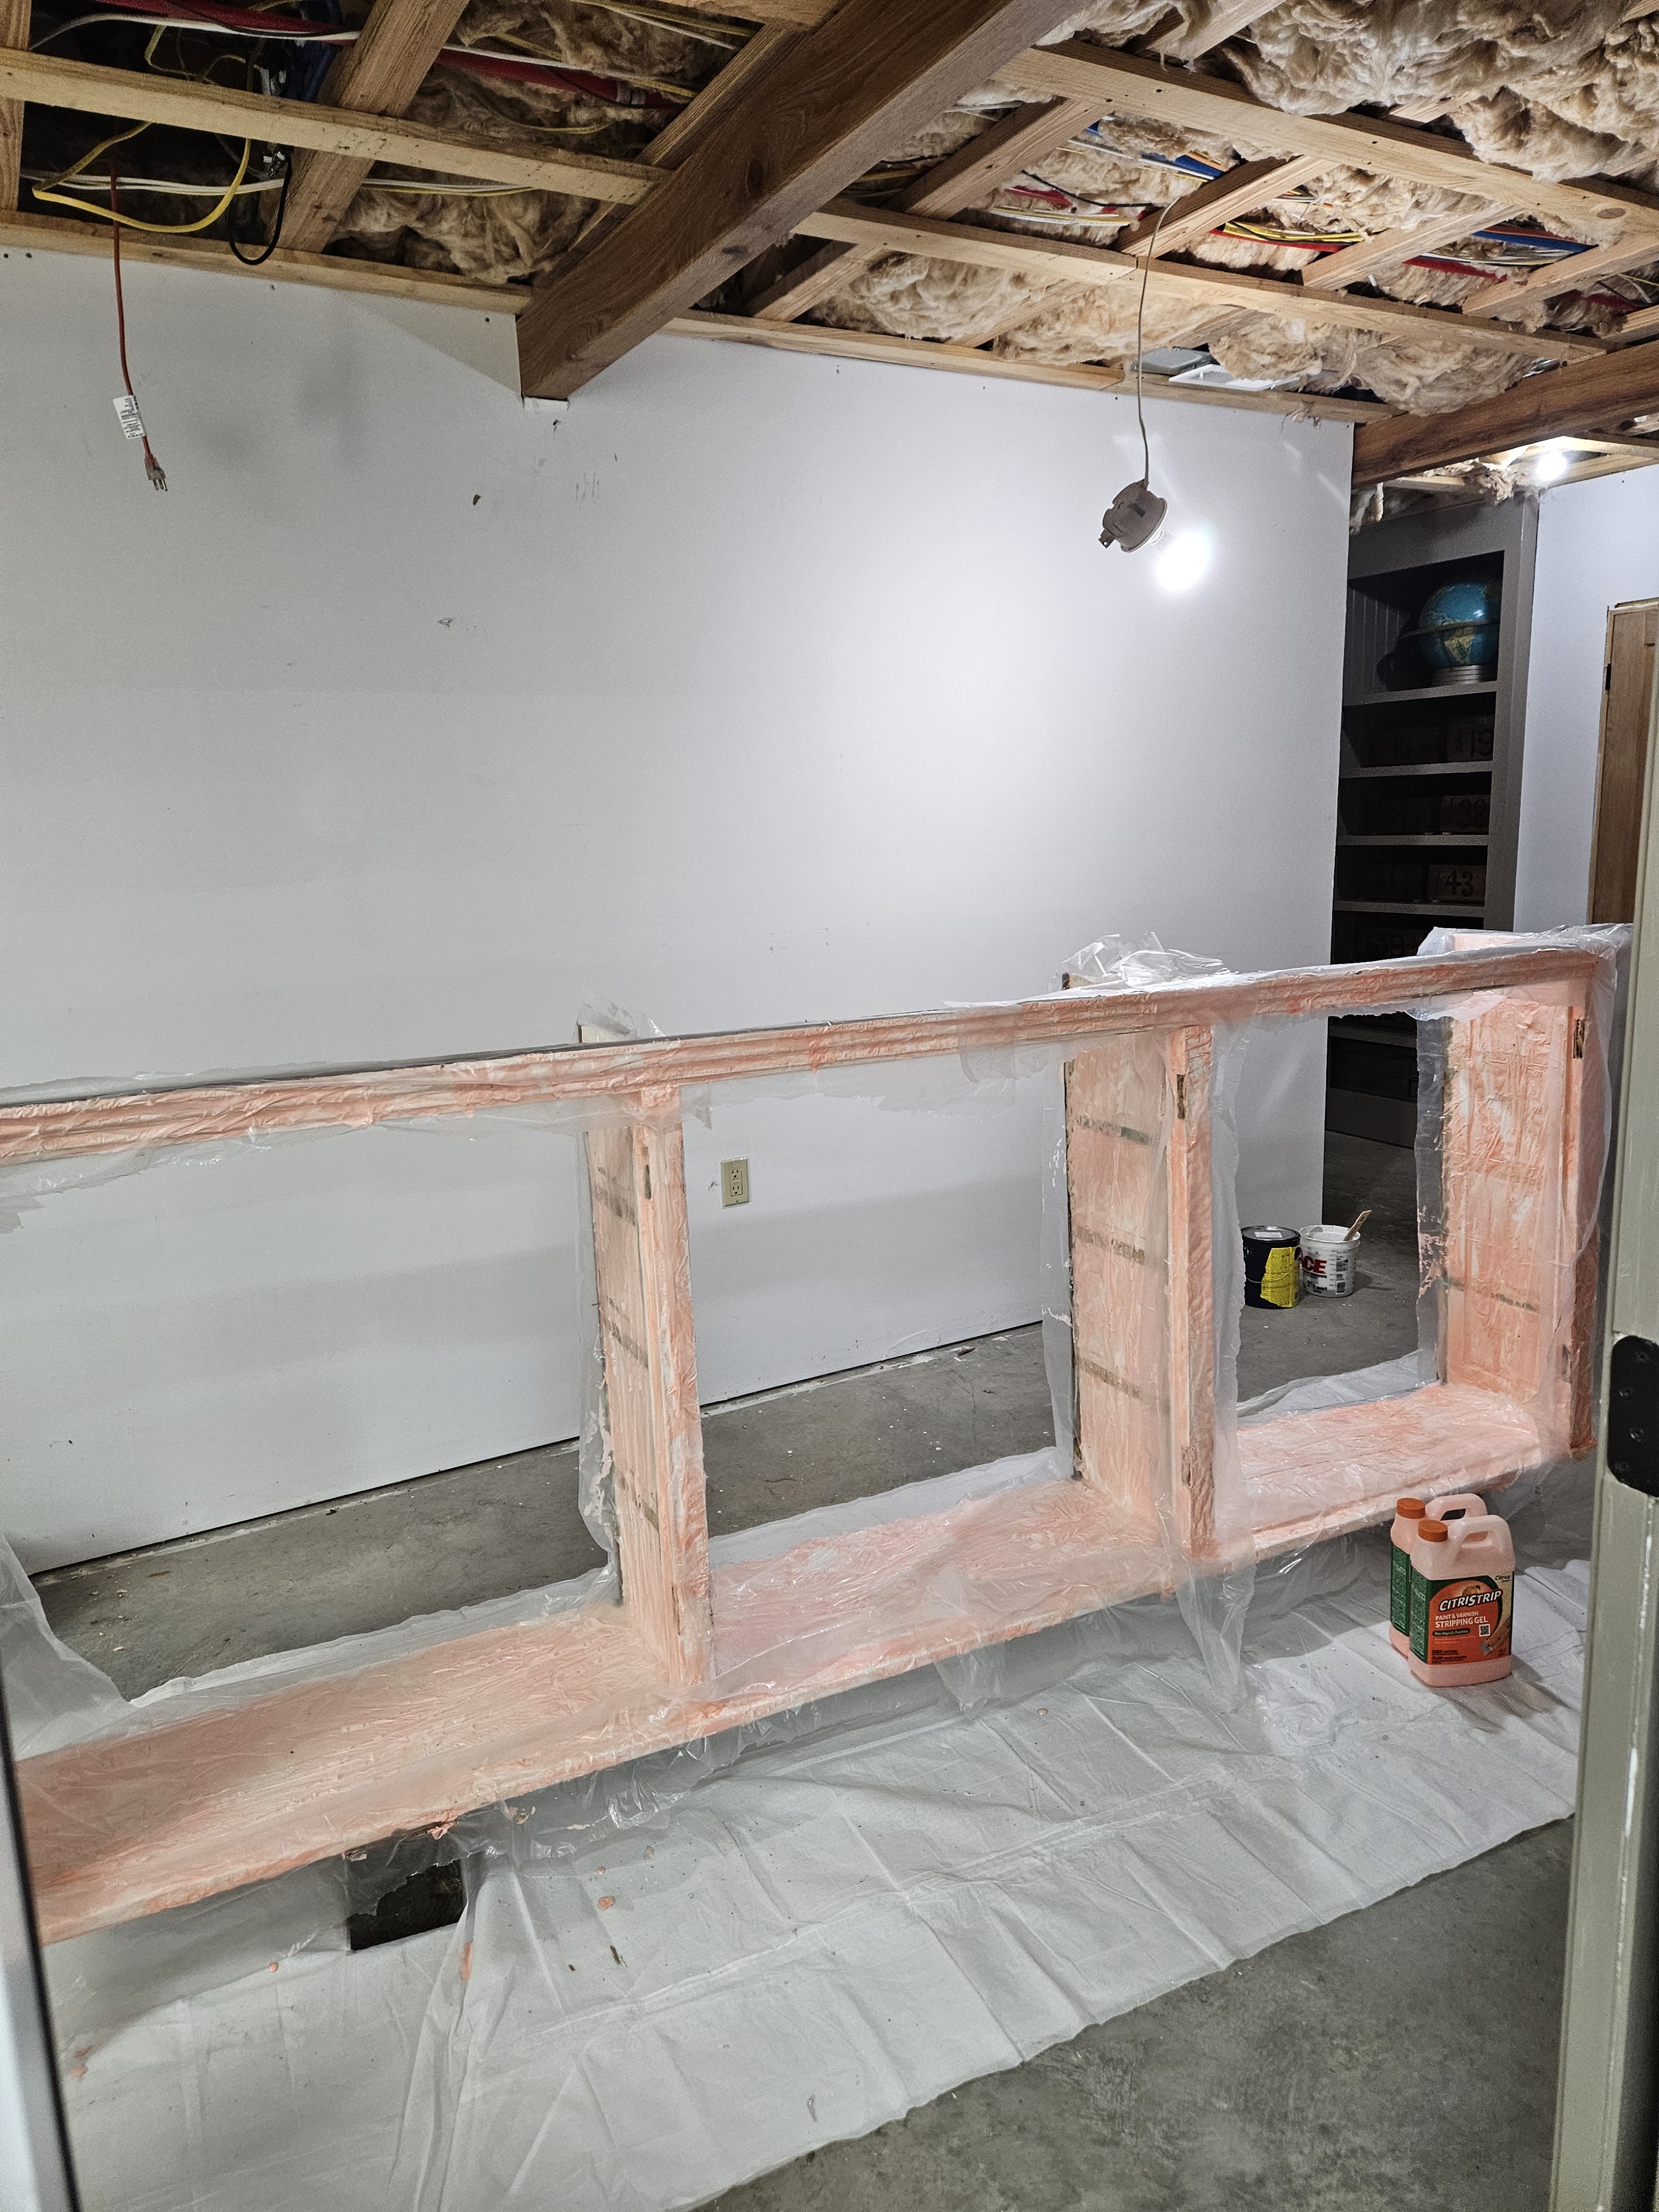
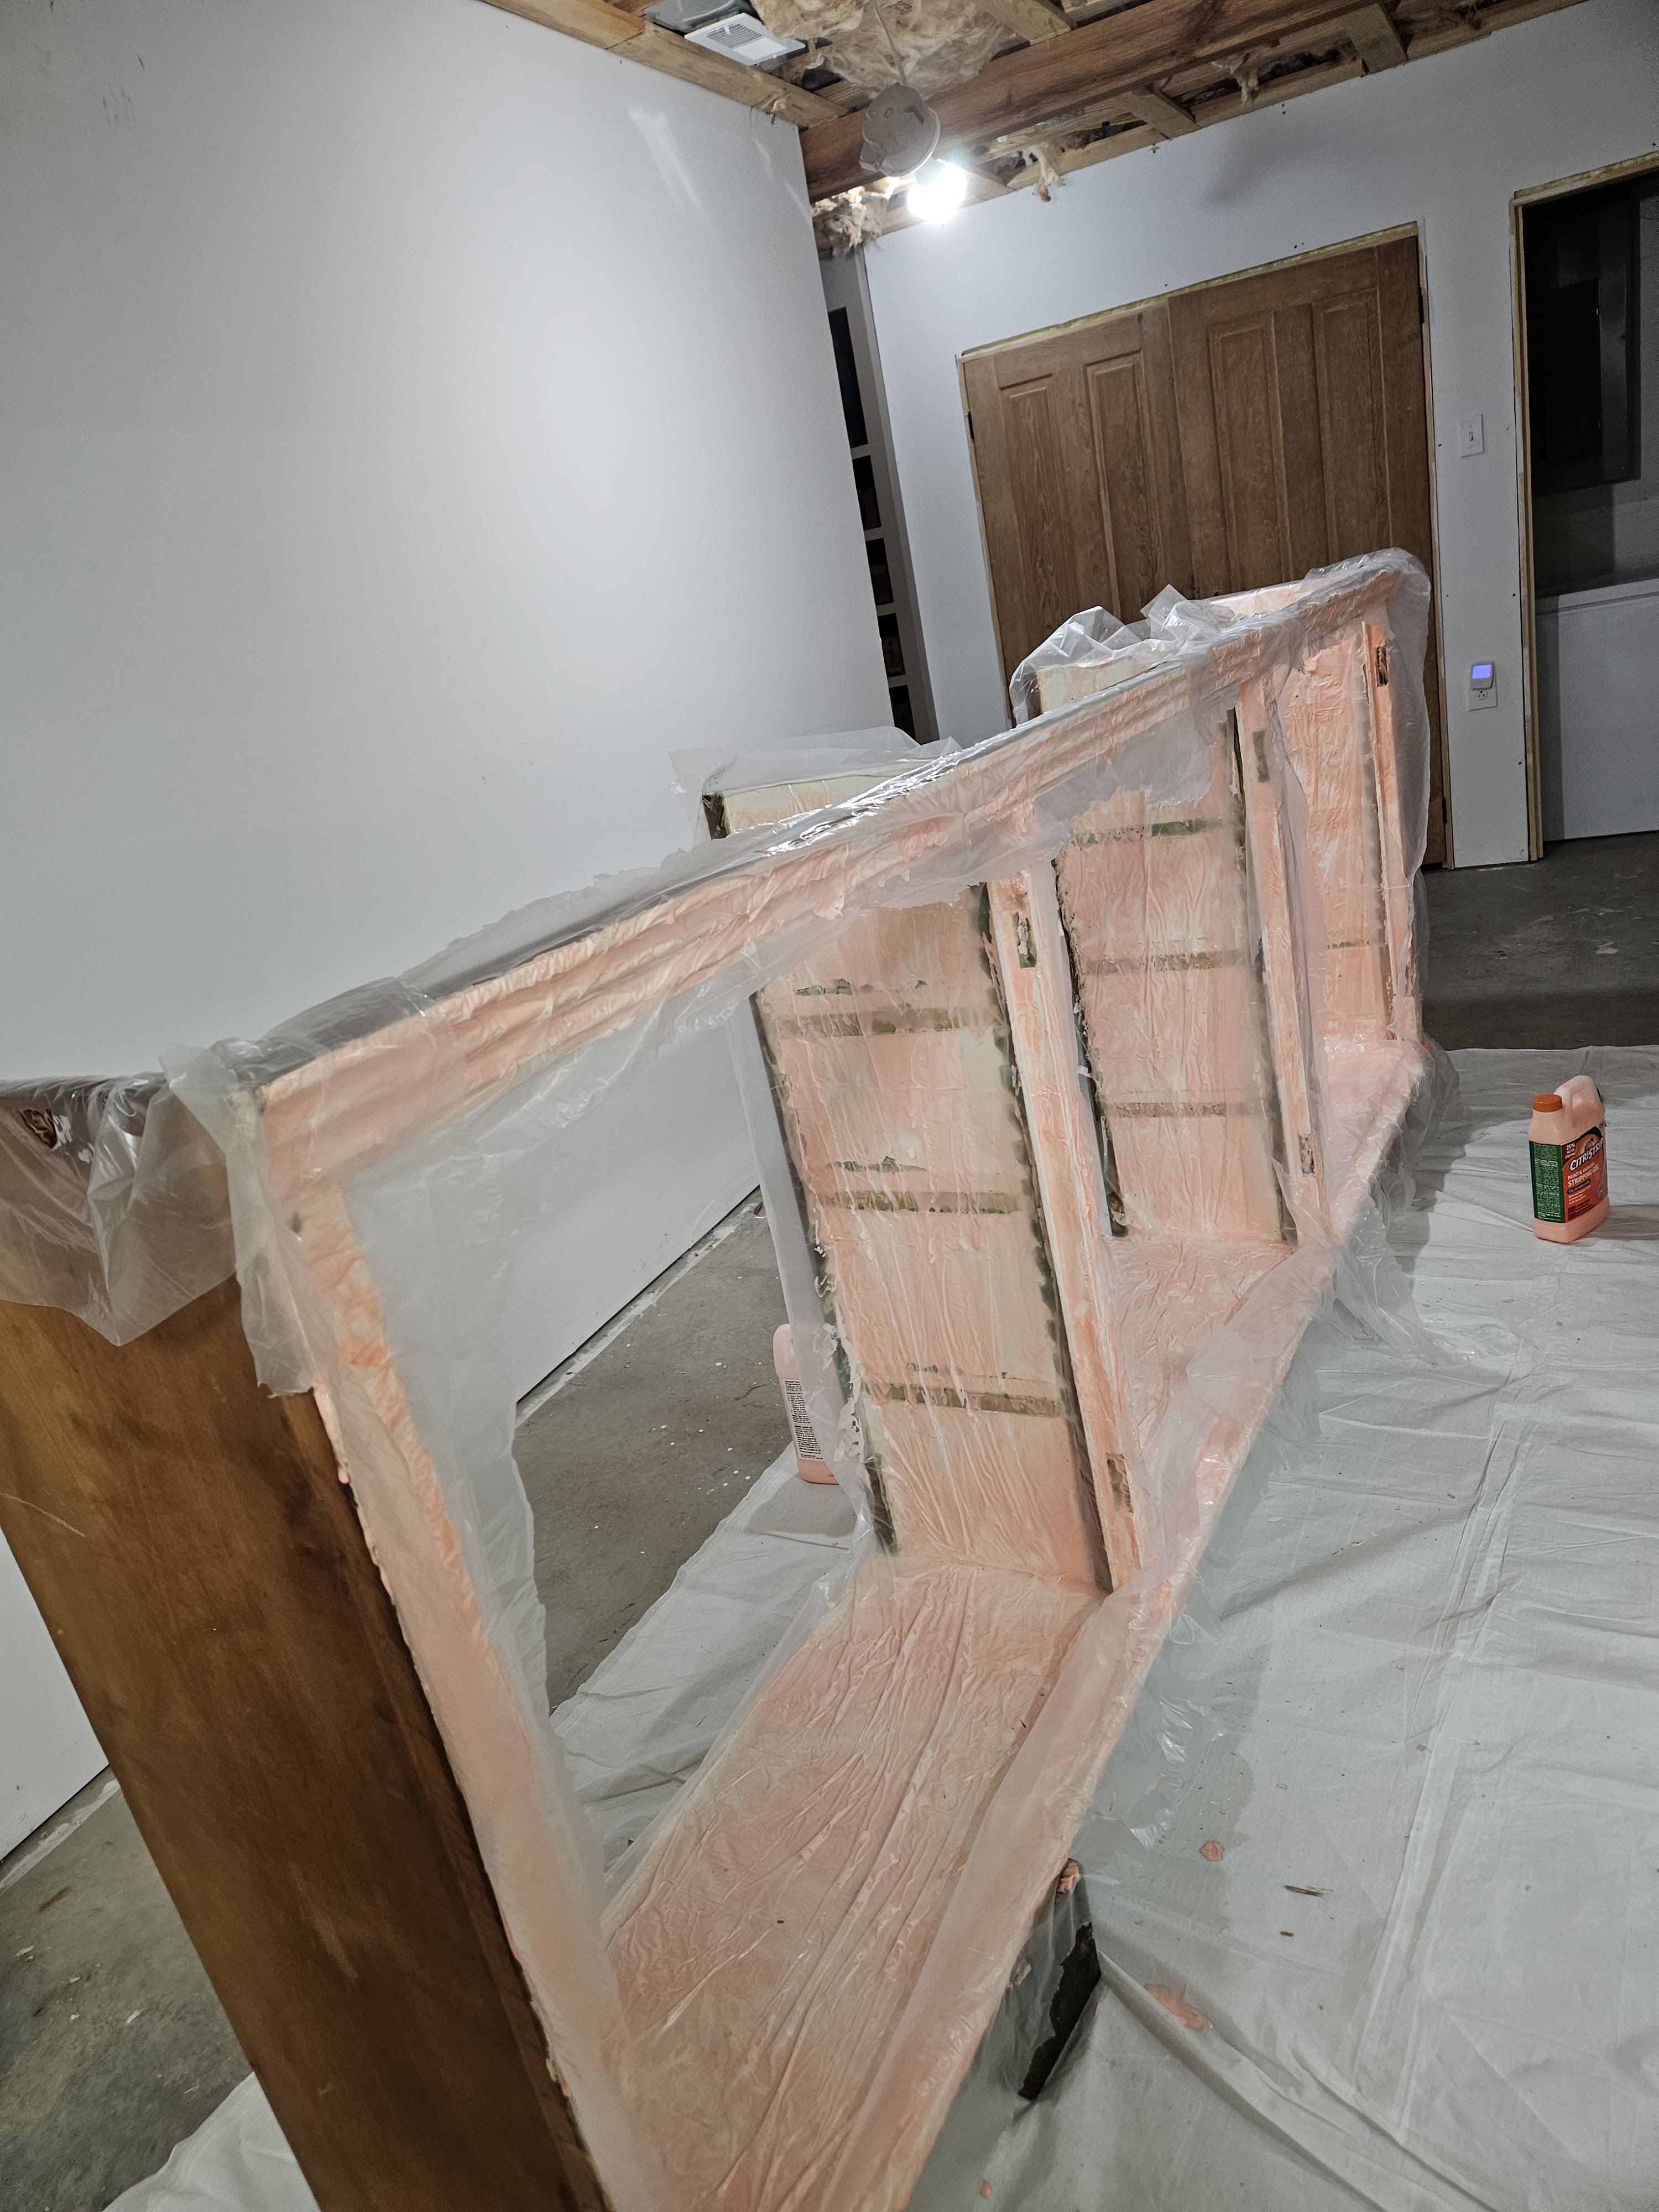
The next day, I pulled the plastic and scraped a BUNCH of paint off.
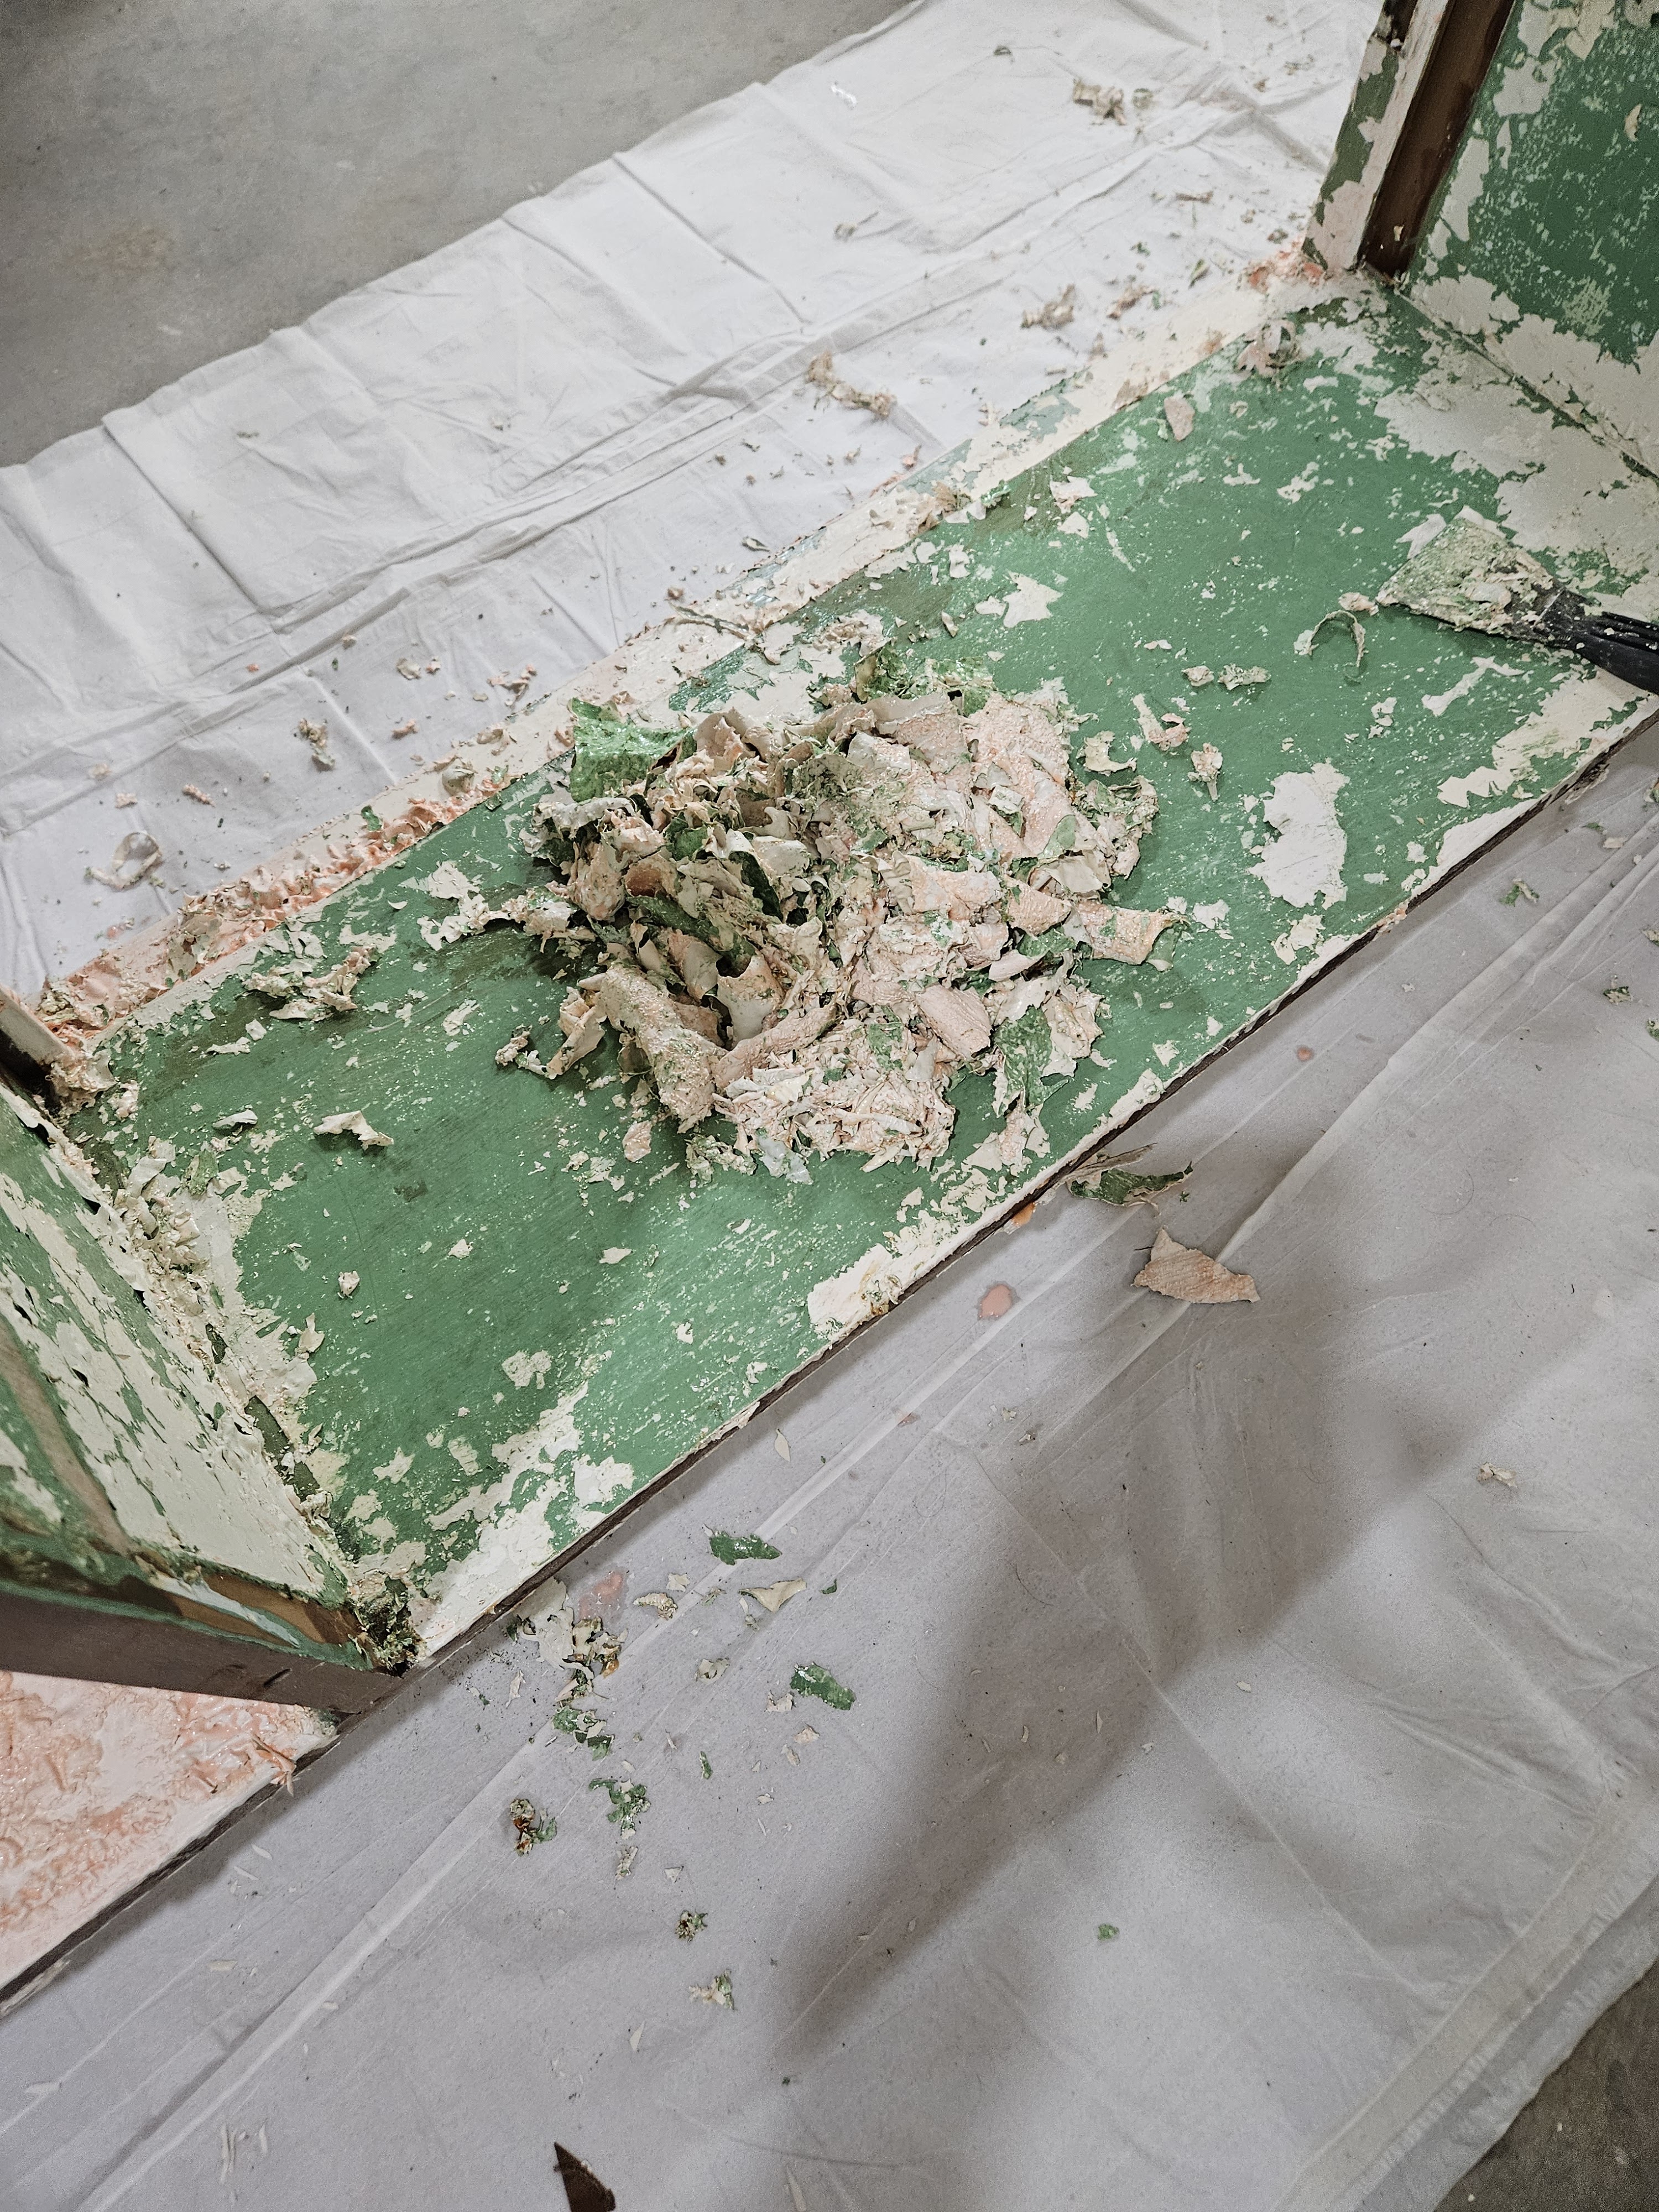
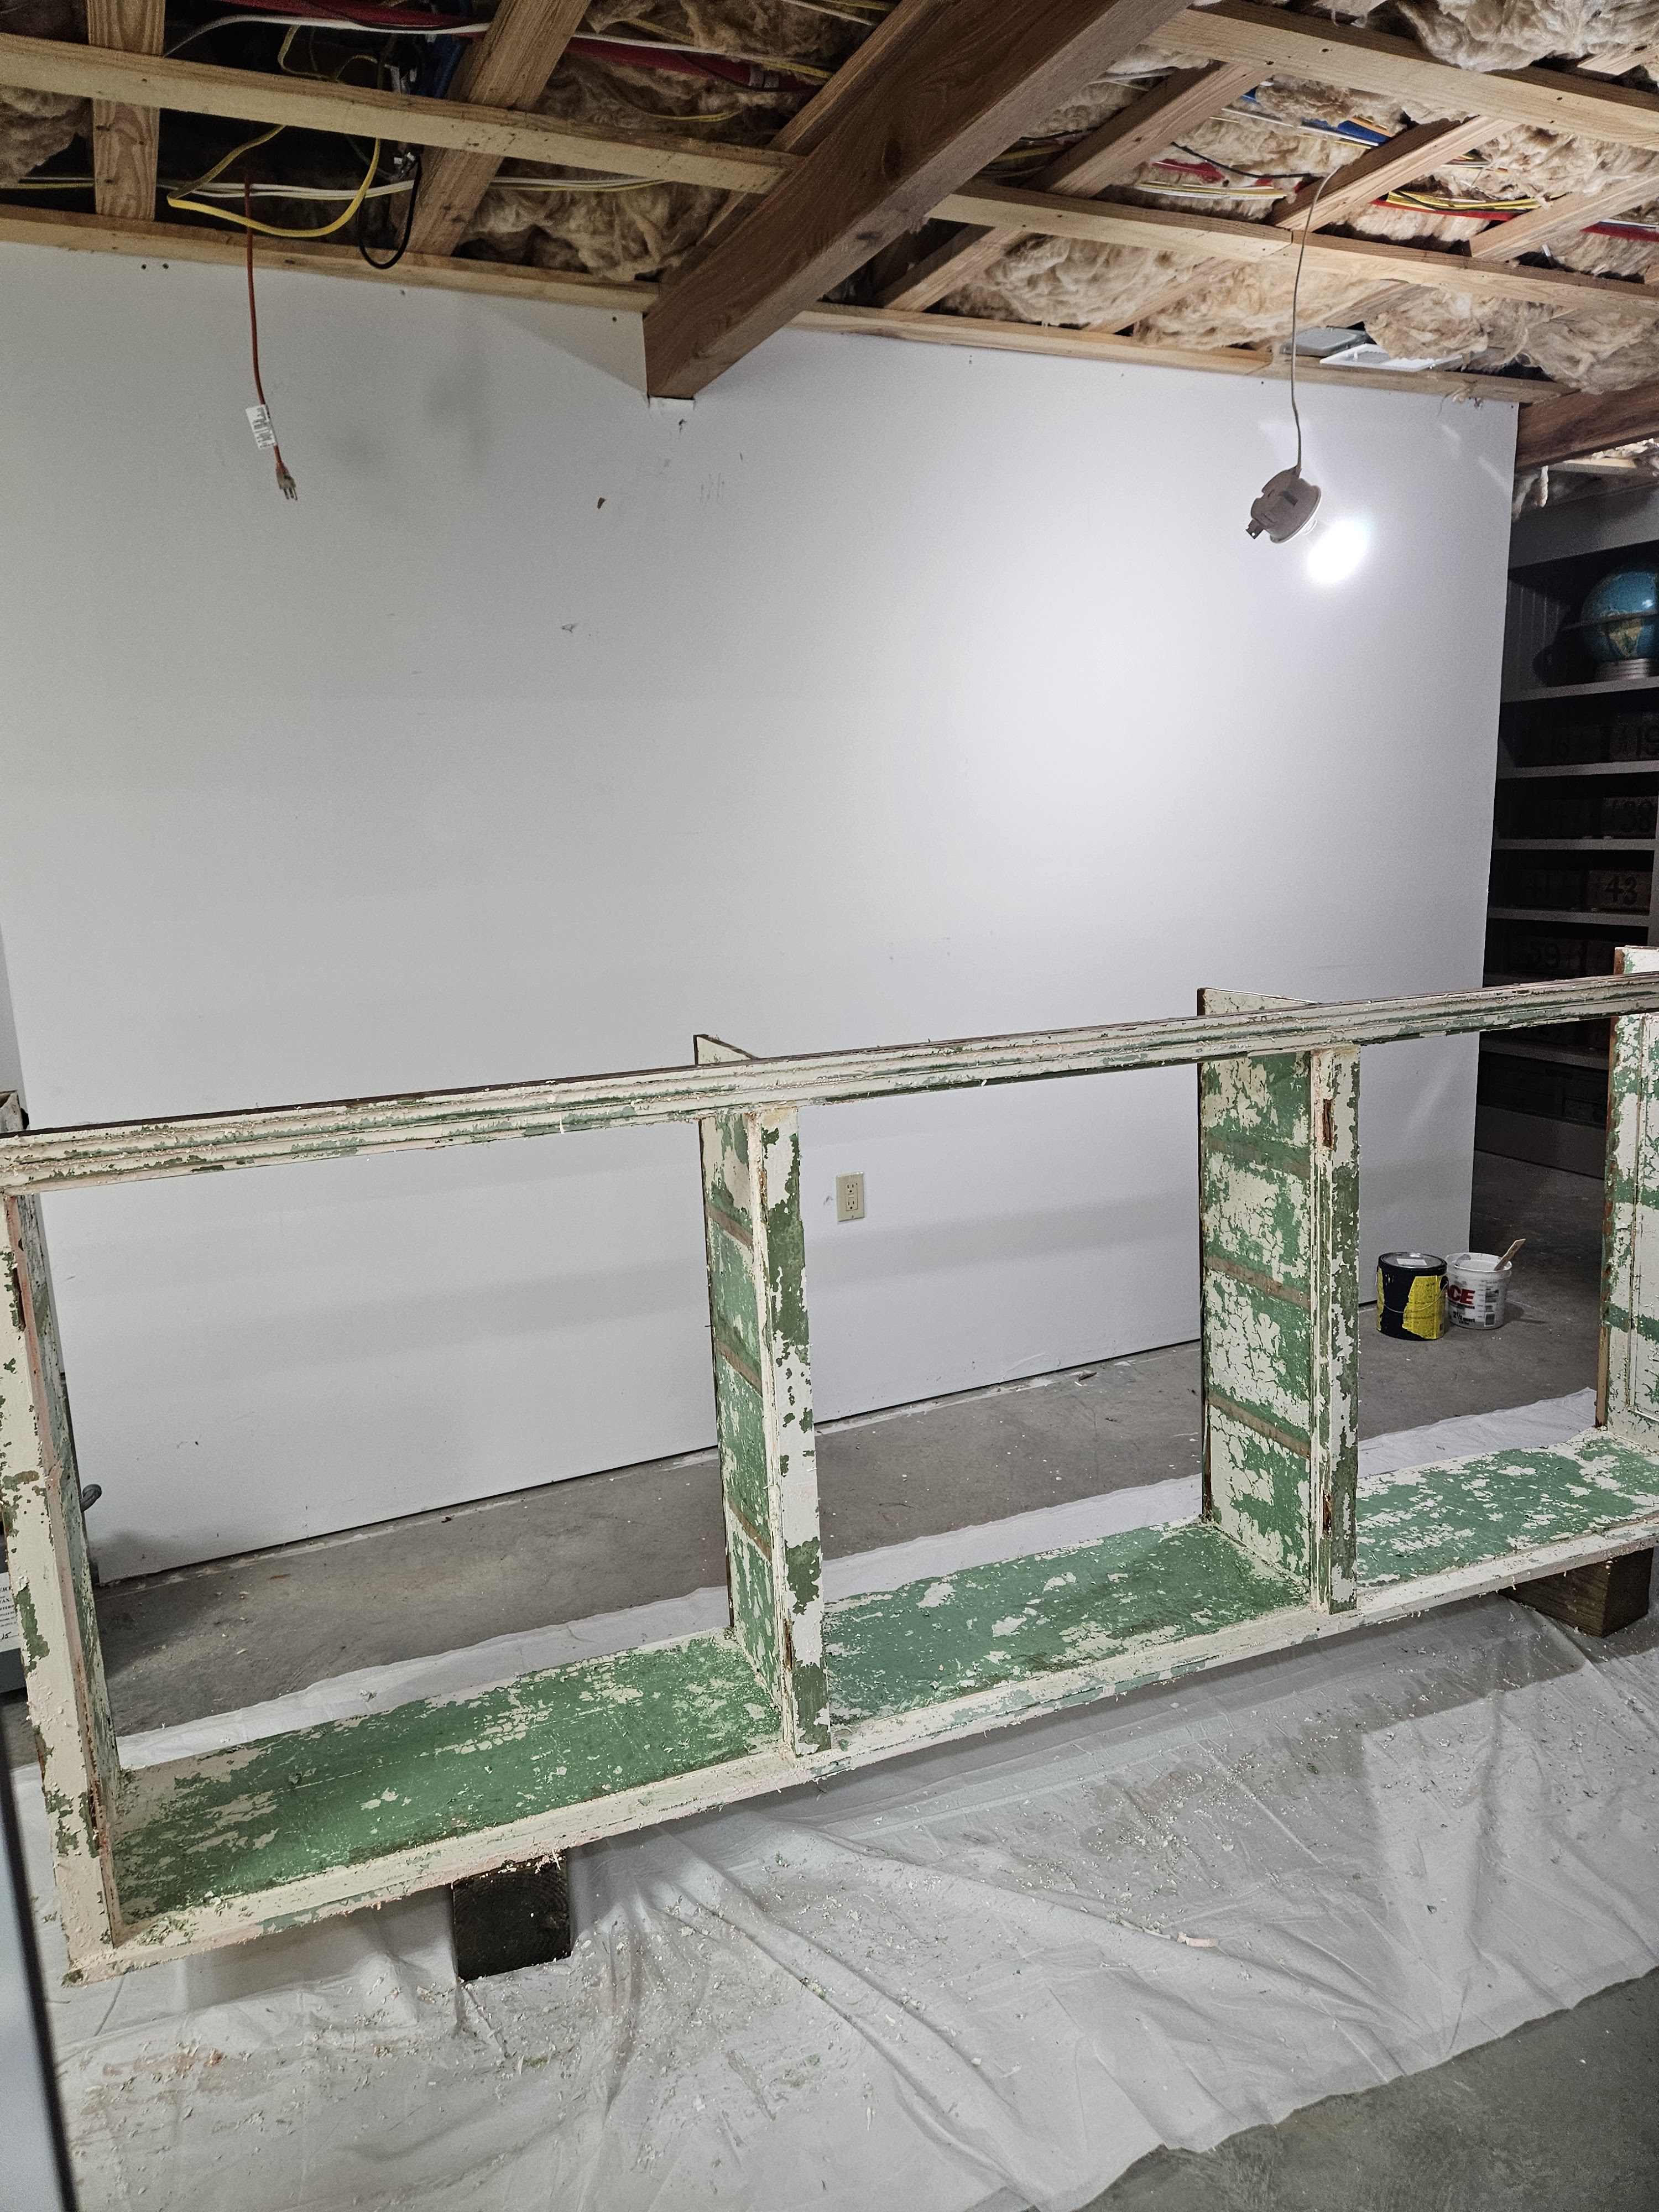
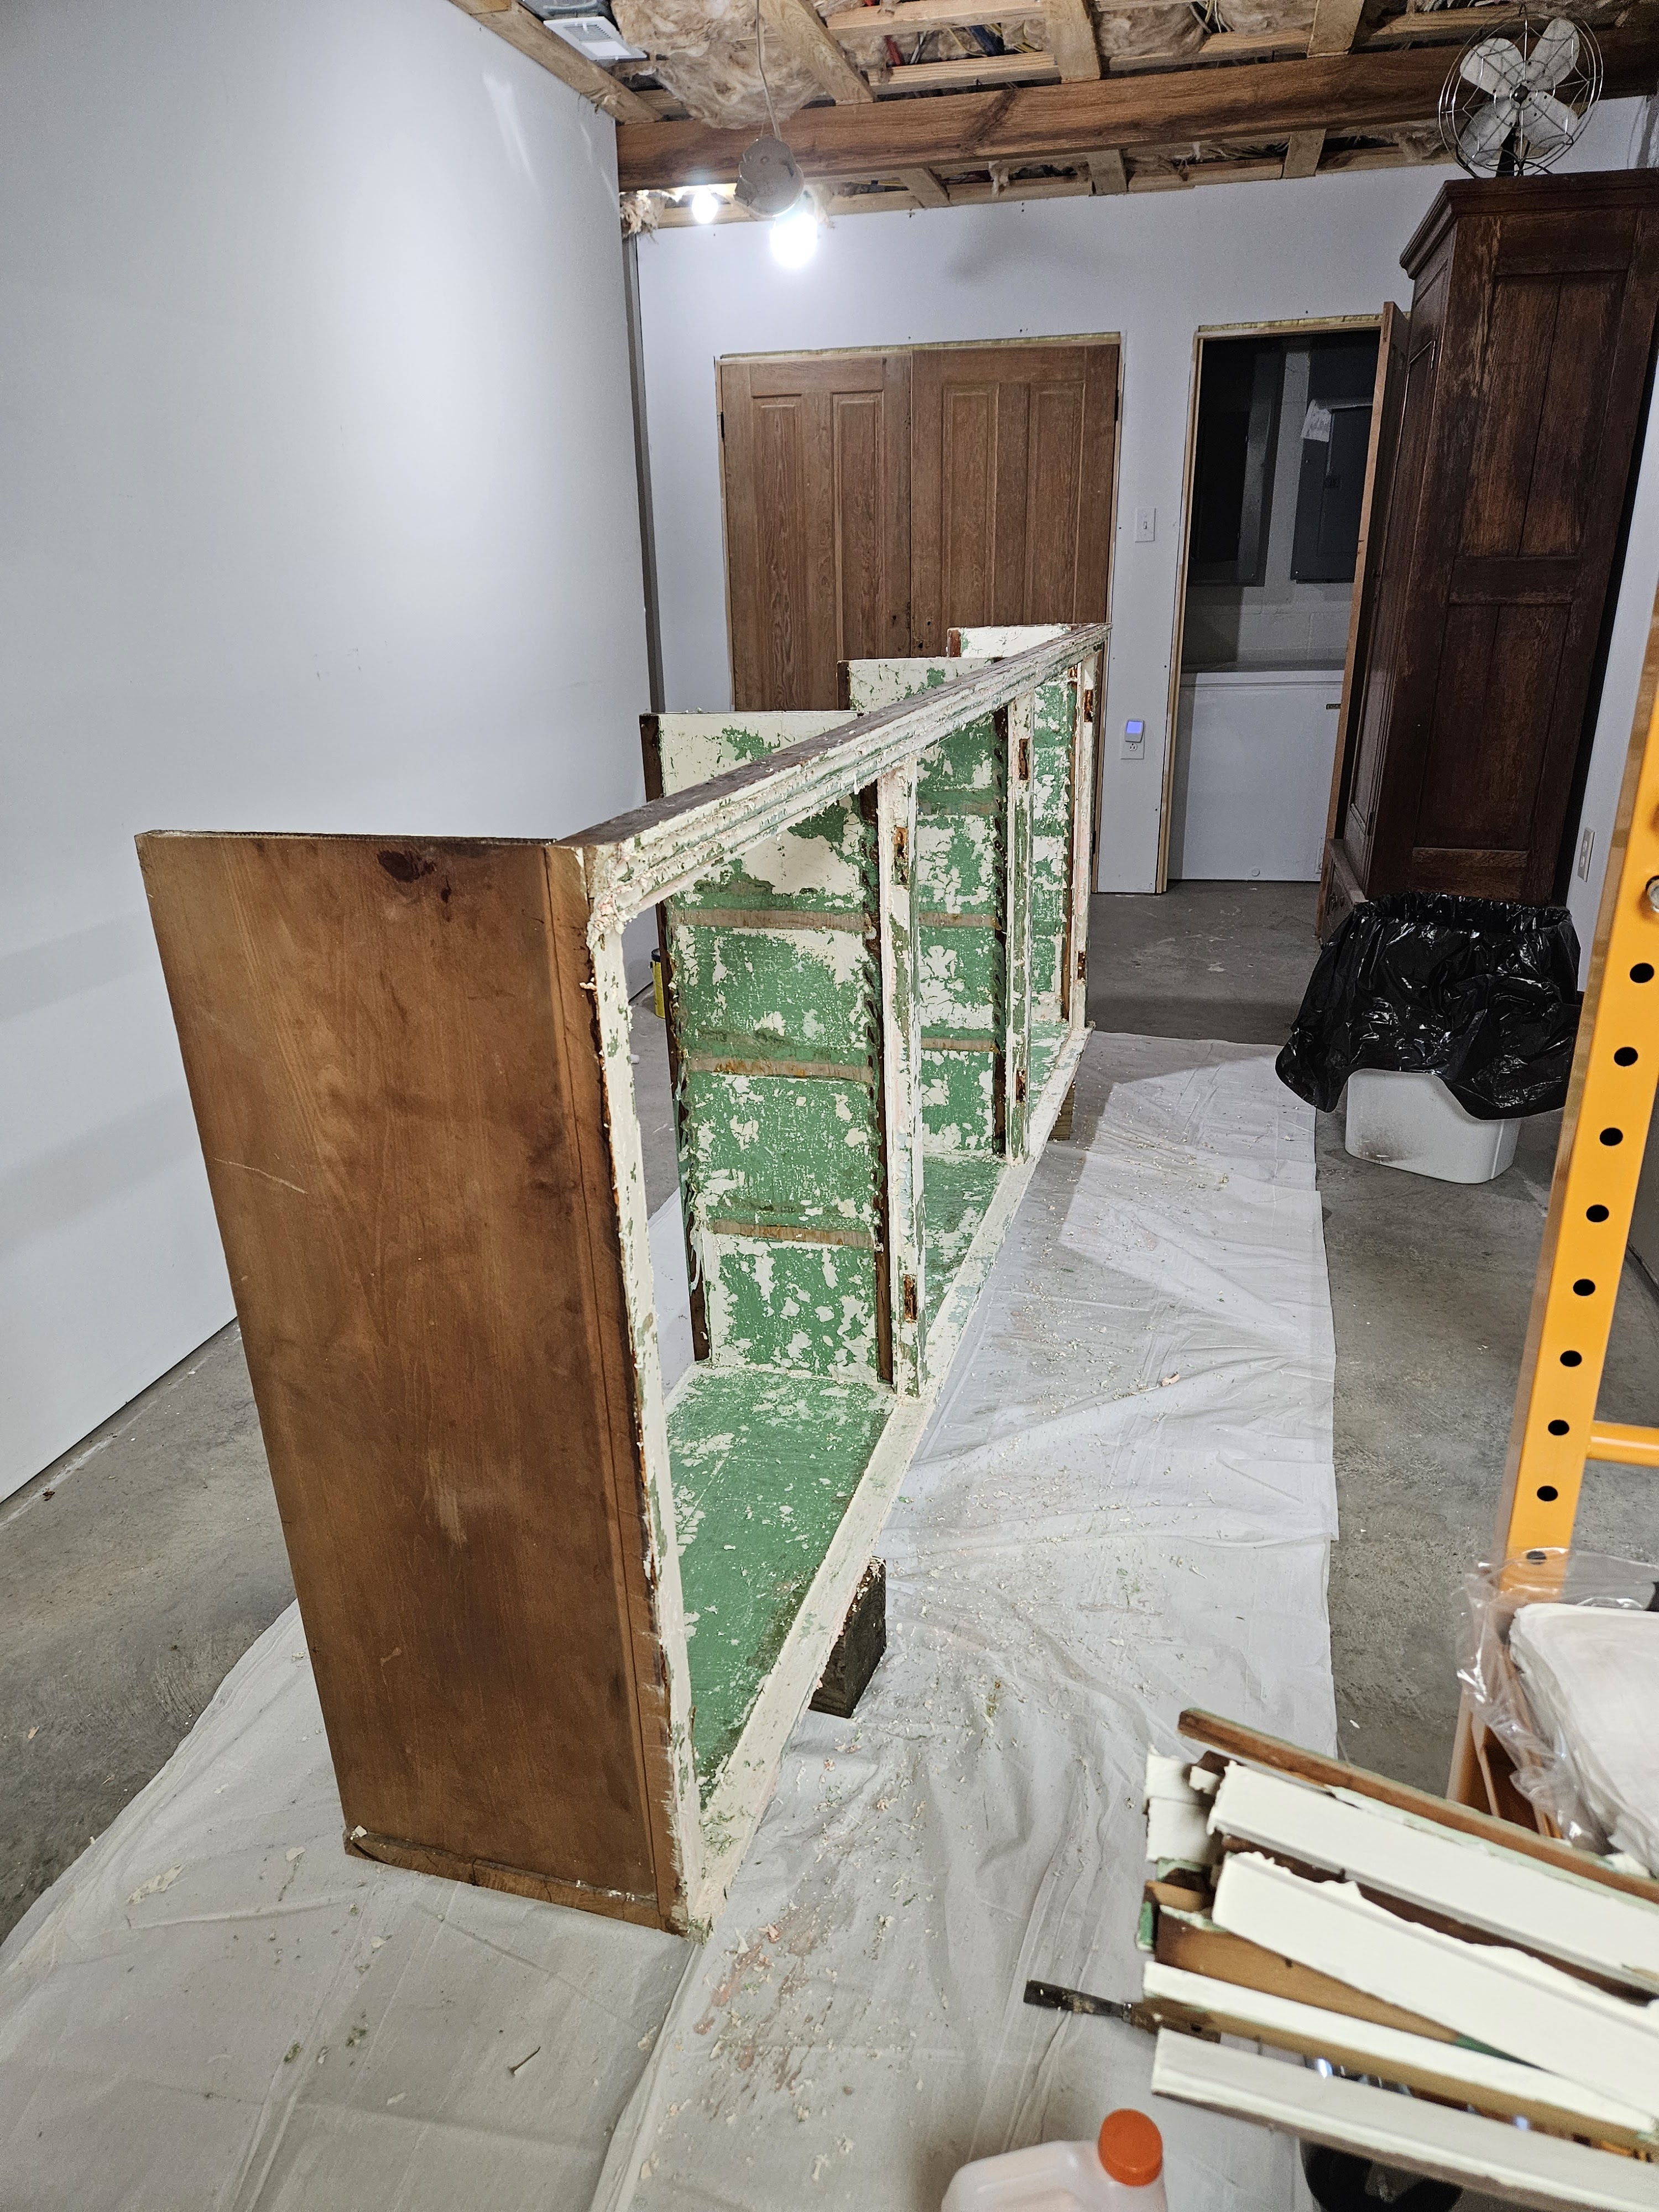
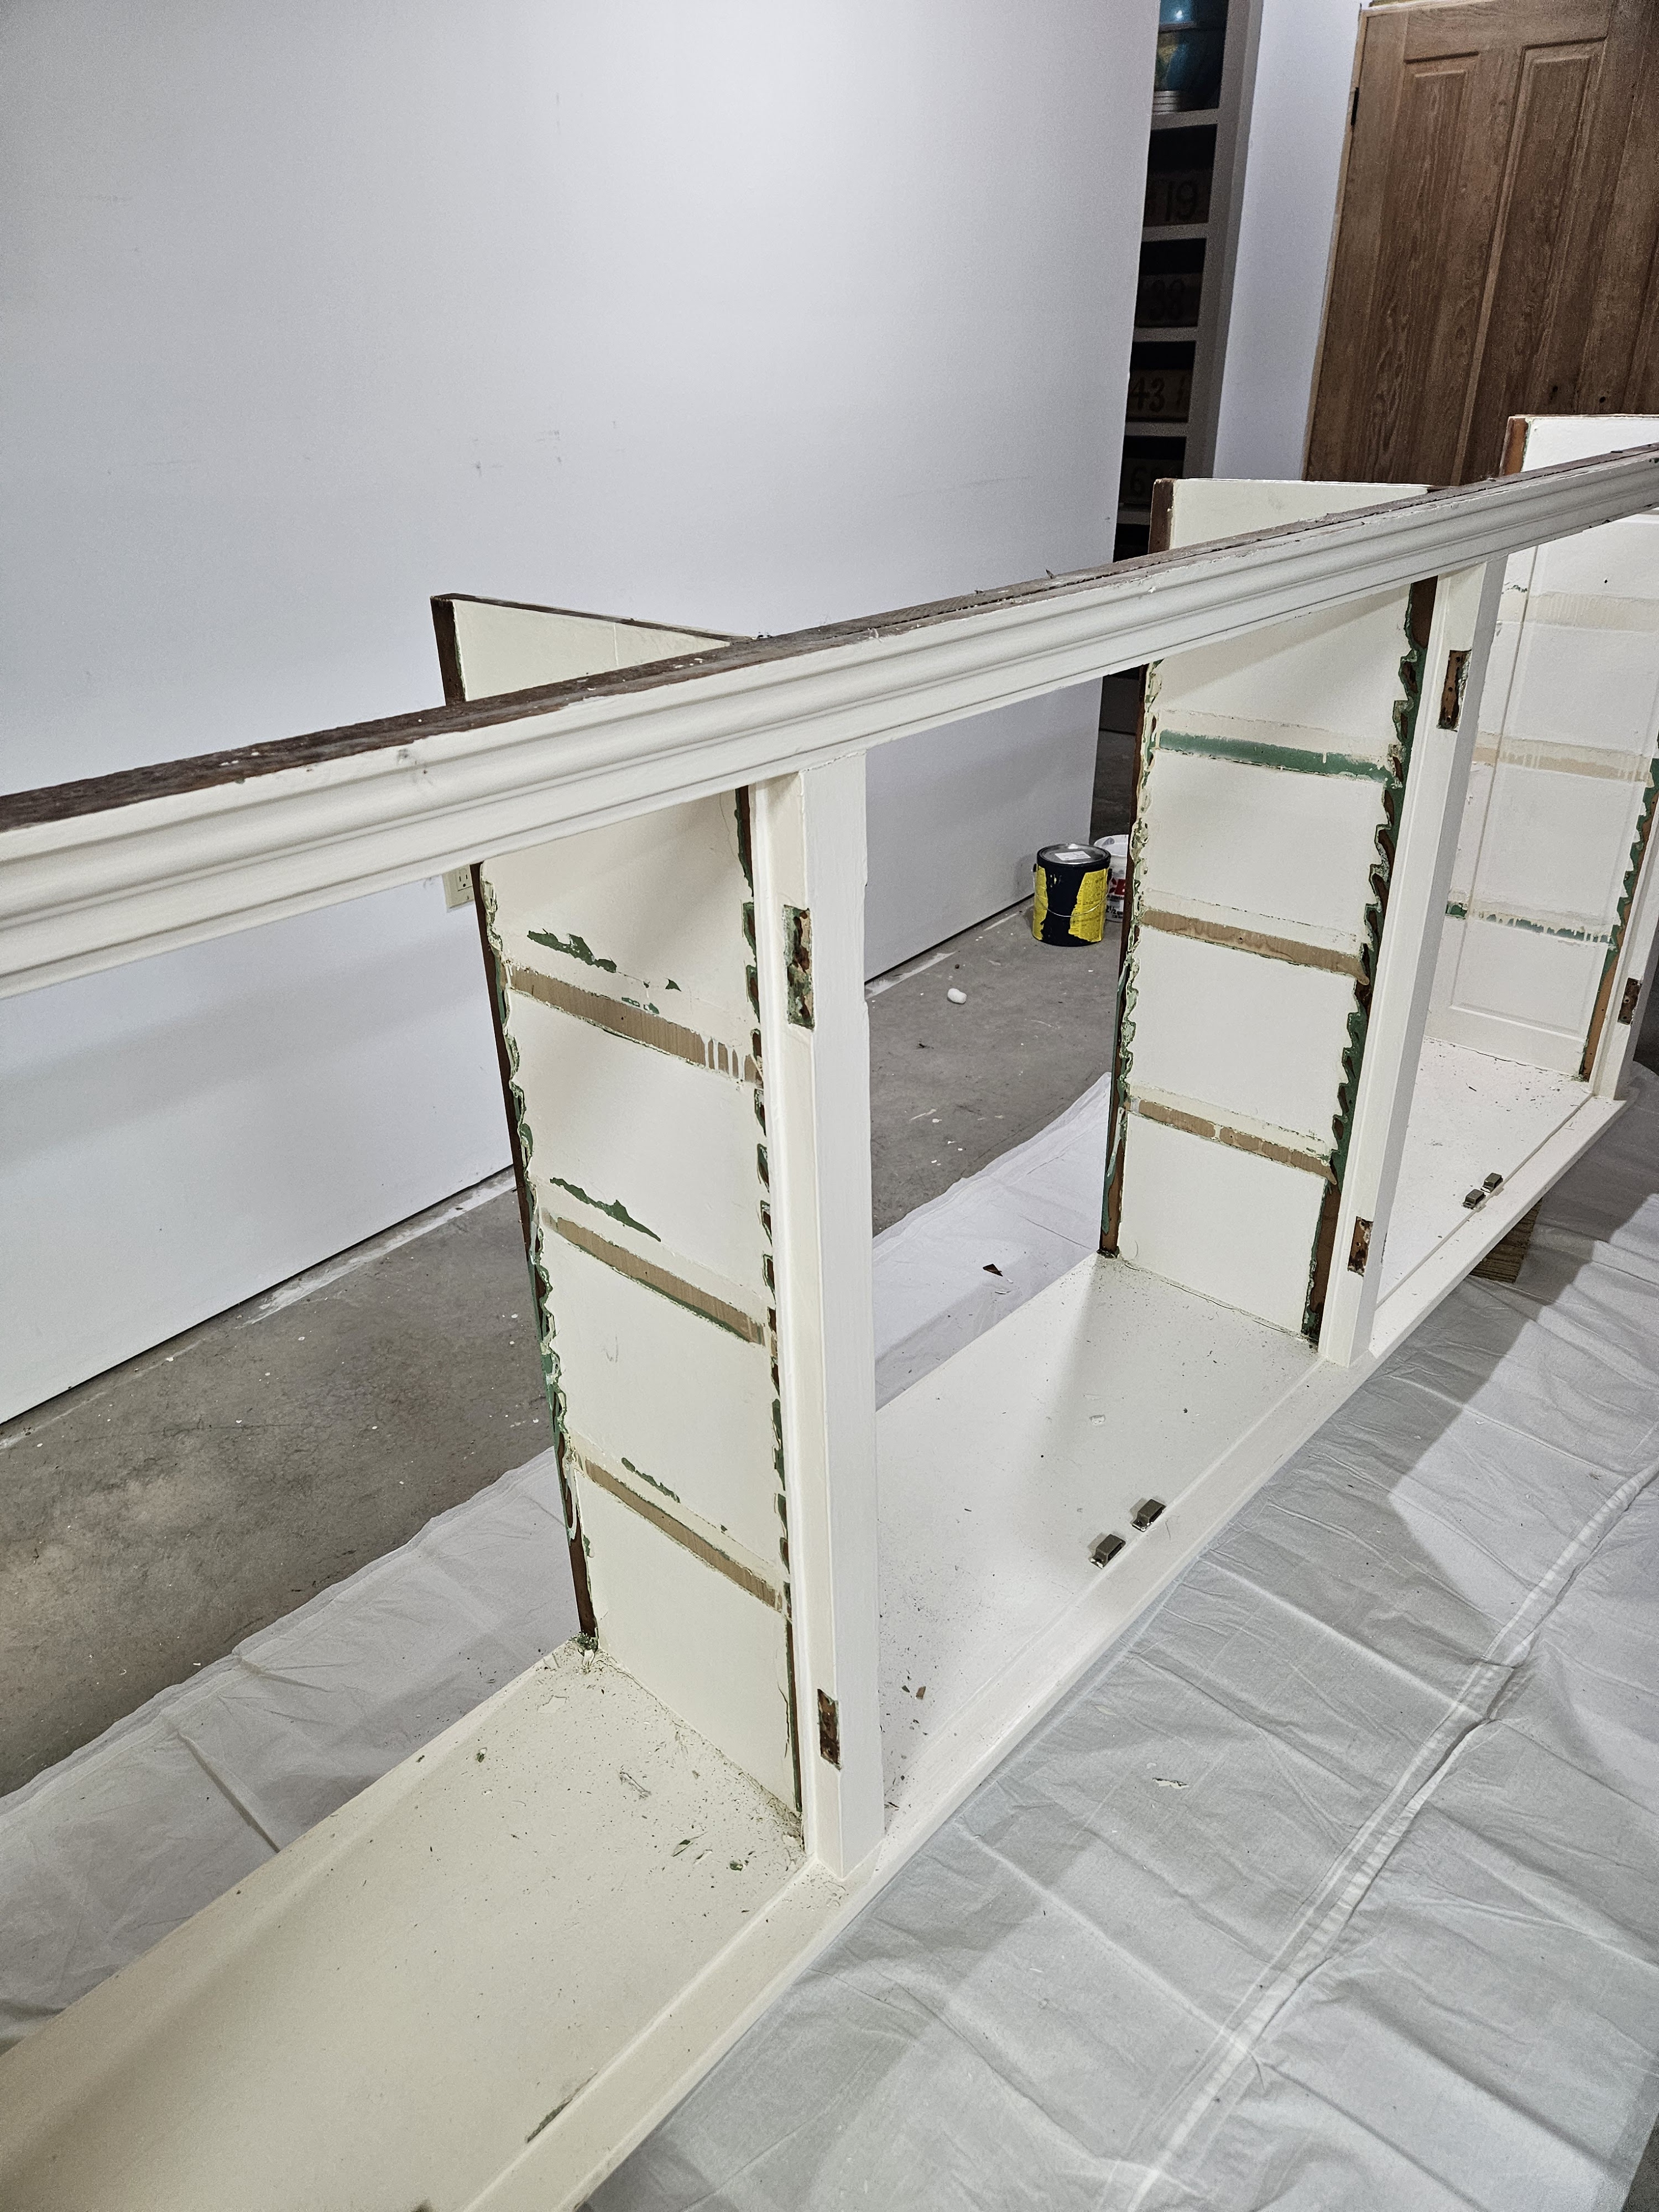
I repeated the process 2 more times, and this is what it looks like after I finished.
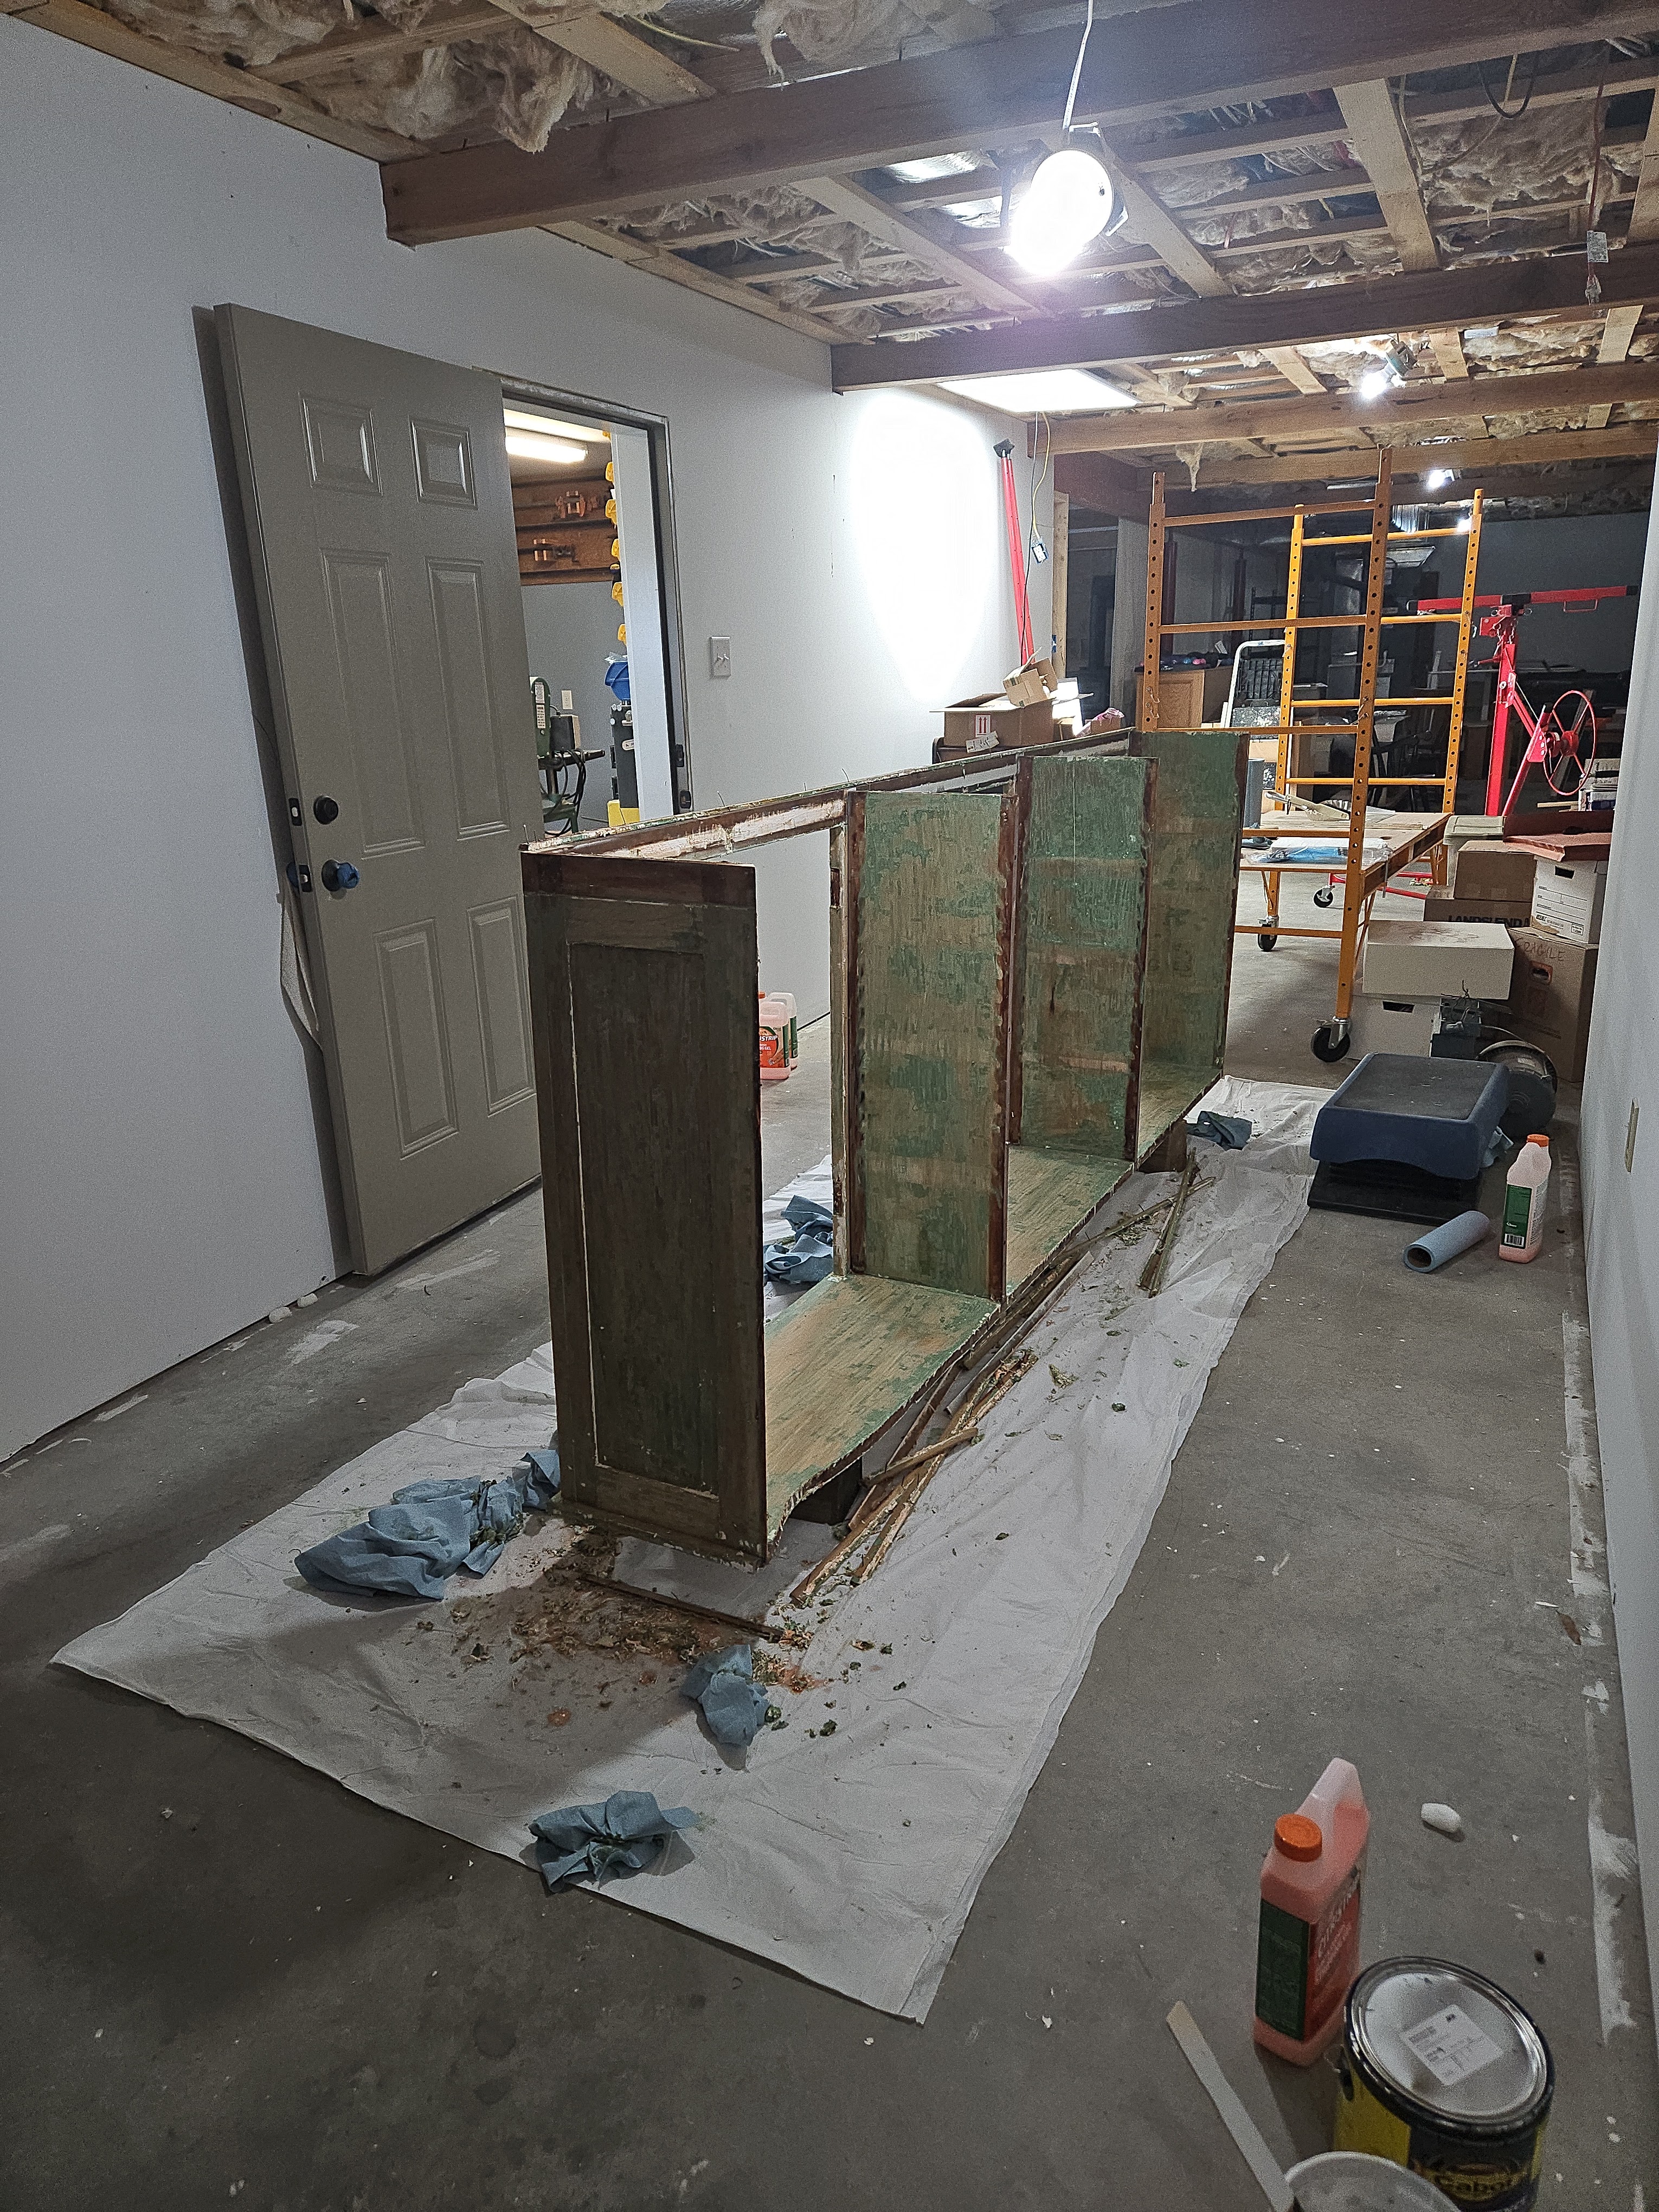

On the last pass, I used my little woodworking scraper instead of a putty knife. I also removed the molding at the top (we’re going to have to make new molding), and some door stops on the insides of the cabinets that were making it hard to work on. I am down to the very bottom layer of paint at this point. It was only ever painted green or white, but it went through several iterations of the colors. While this was quite a bit of work, it wasn’t nearly as bad as I expected. (It’s been a long time since I have stripped paint off anything, and putting the plastic over it is a game changer.)
We’re going to use the lower cabinets (pictured above) in the bar area, and they are going to be green–probably similar to the very first color these were ever painted. We’re waiting on a tile sample to make the final color selection–we’ve decided to use the same tile in the bar/kitchenette, and in the bathroom, and the cabinets and molding will be the same green in both rooms.
So the next step is to move the cabinet off of the drop cloth, and roll the drop cloth up because it’s such a mess. I’m going to do another light coat of stripper and put plastic over it, and let it sit for about 24 hours. Then I’ll scrape it again. At that point, all the paint should be gone, and I’ll be able to wash off any remaining stripper, sand it, and put some wood filler in the cracks, etc. and sand it to 100 grit, which is fine enough for a painted finish. Then I will prime it well and sand it smooth.
Then, it’ll be time to build the frame and get it attached to the wall. I think that we’re going to need to add cabinet grade 1/2″ plywood behind the shelf so that we have something solid to mount everything to. We’ll also have to build new molding for the top of the bookshelf, and build a top for it. We’ll wrap the frame at the bottom with baseboard. We’re going to paint this bookshelf the same color as the trim in the rest of the basement–Brushwood from the ICI/Dulux paint book.
I need to unwrap the doors and see what we’re going to need to do with them. I would like to lightly sand them, mask them, and spray them. We’ll see.
I took the shelves and brackets to Chattanooga to be professionally stripped, because they are solid boards with no glue joints, and they can do them all at once, and I really don’t have the space to do 9 shelves that are about 40″ wide.
A lot more to come!
July 17, 2025:
After we finished the ceiling, I thought it was silly to have all the furniture and rugs piled up with all our various cabinets, sinks, quarter sawn oak, etc., so I went ahead and cleaned the “den” well and moved everything back in.
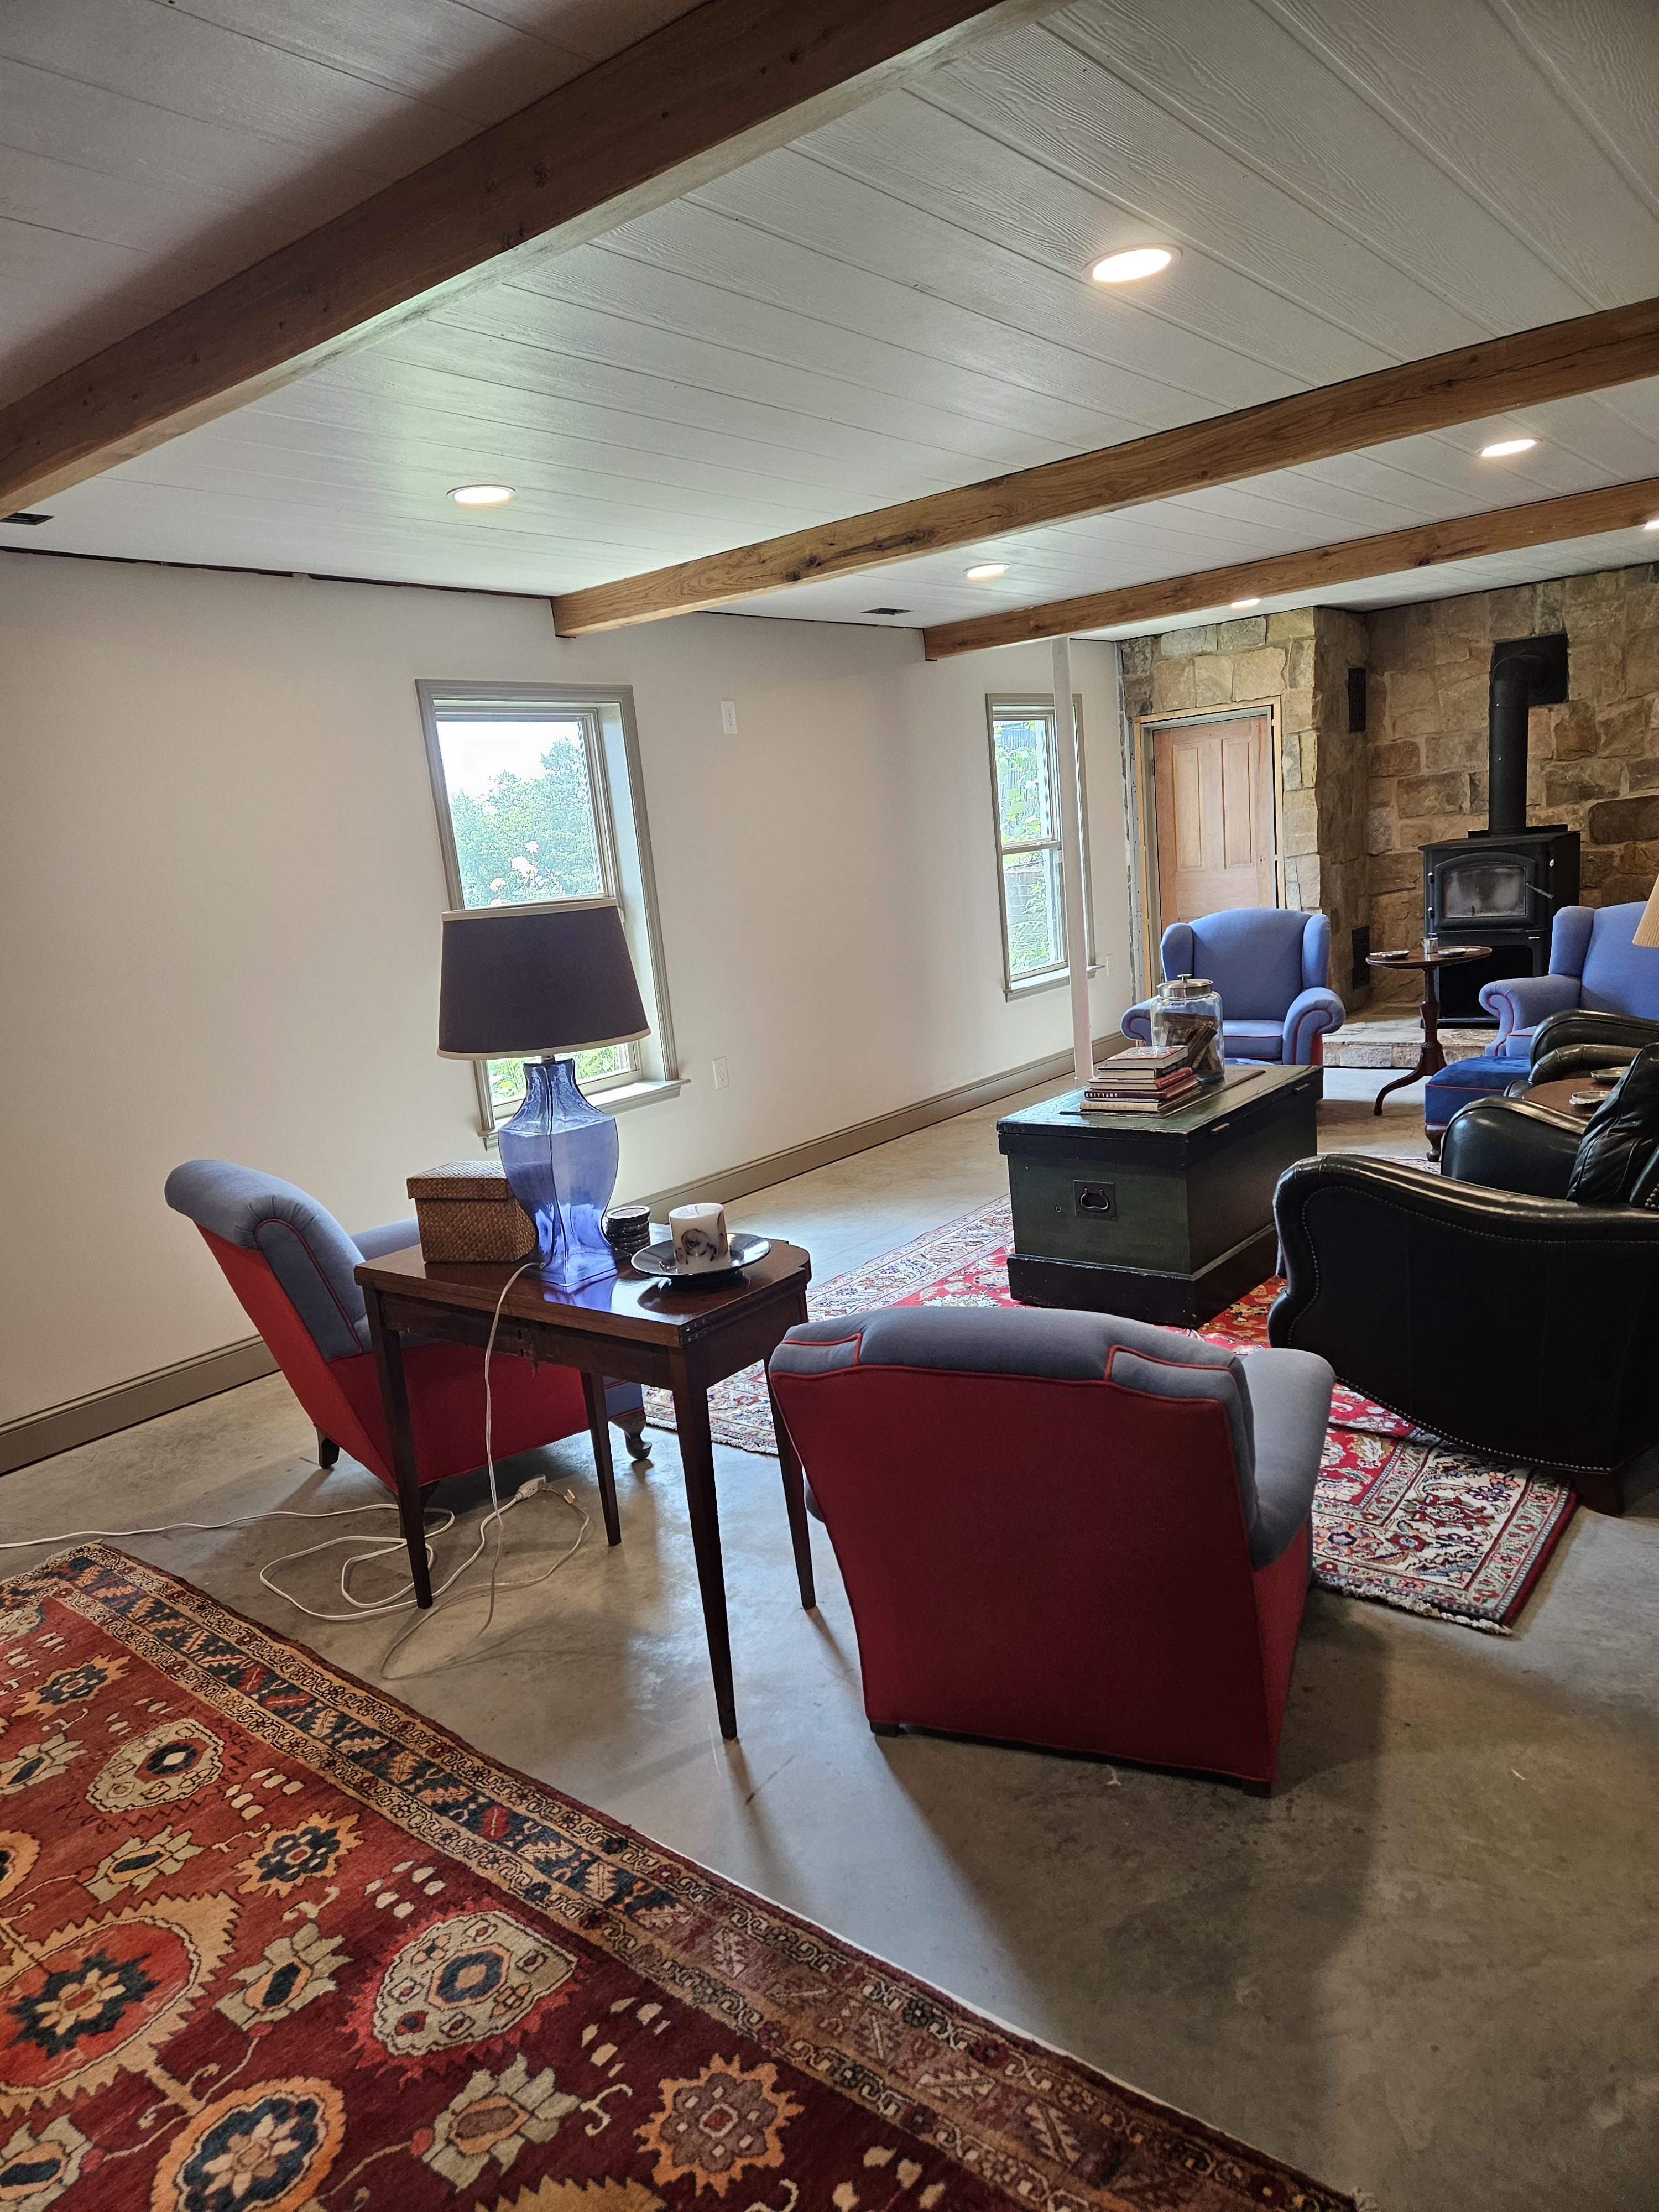
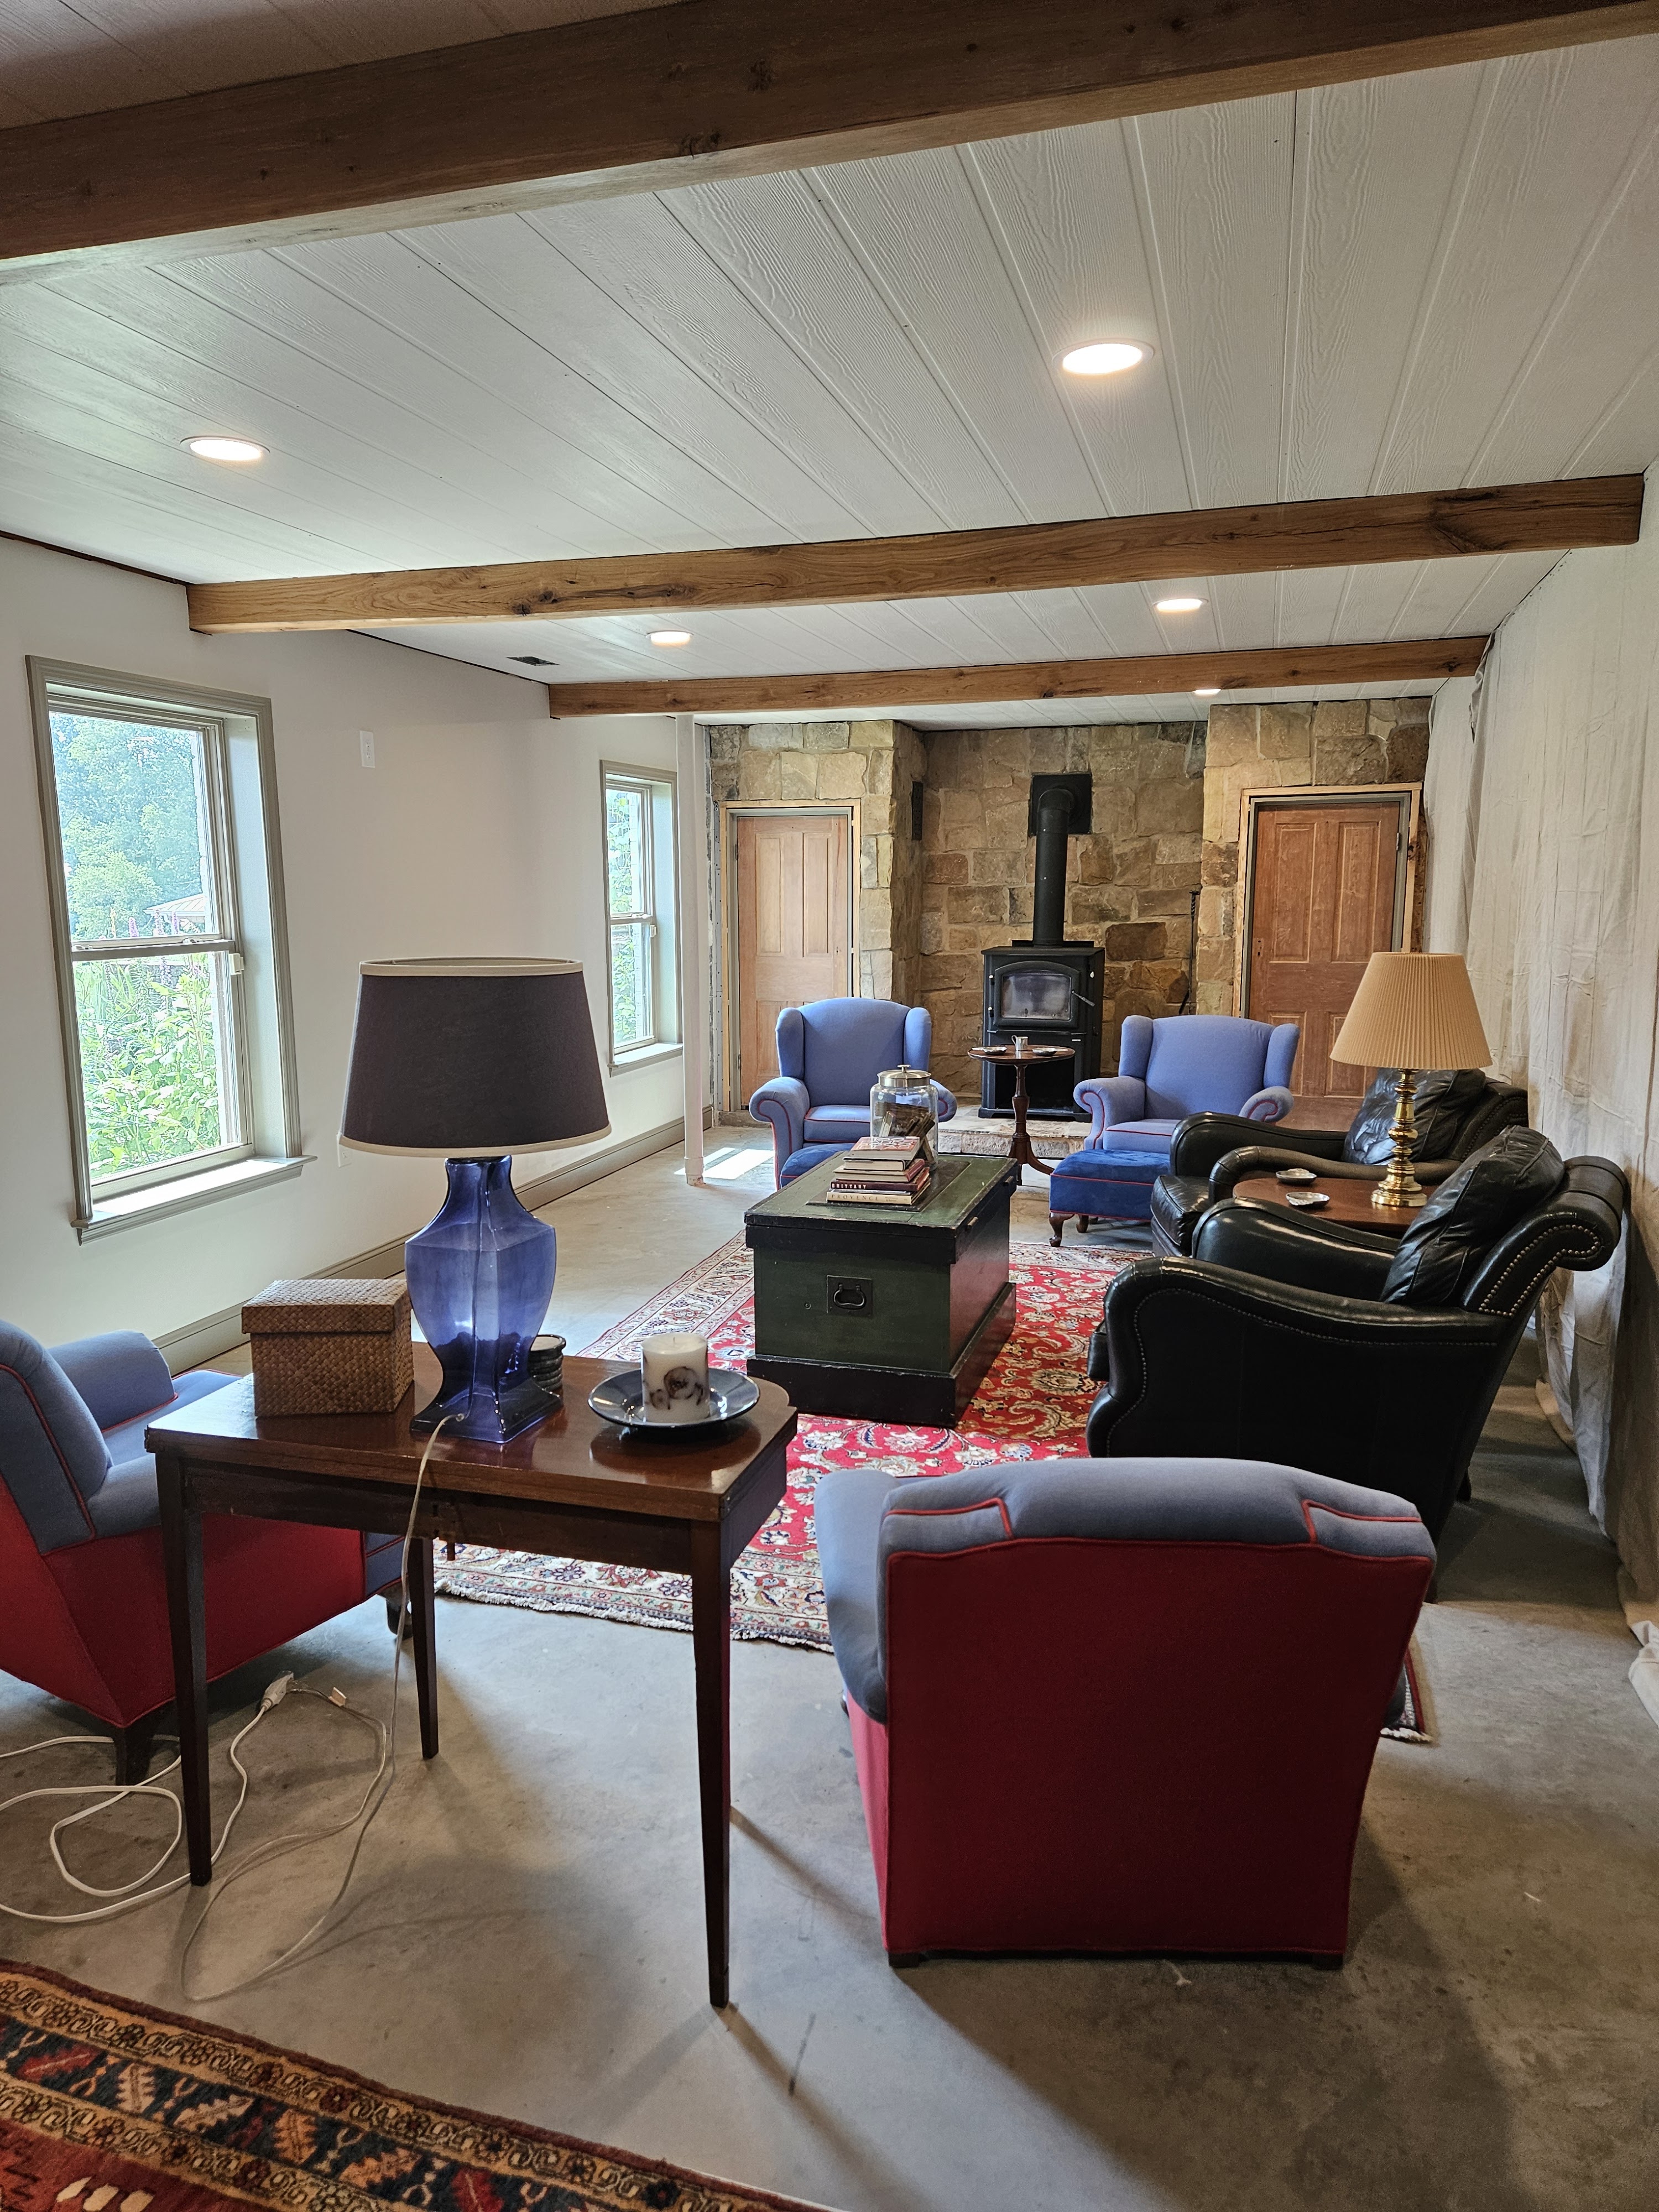
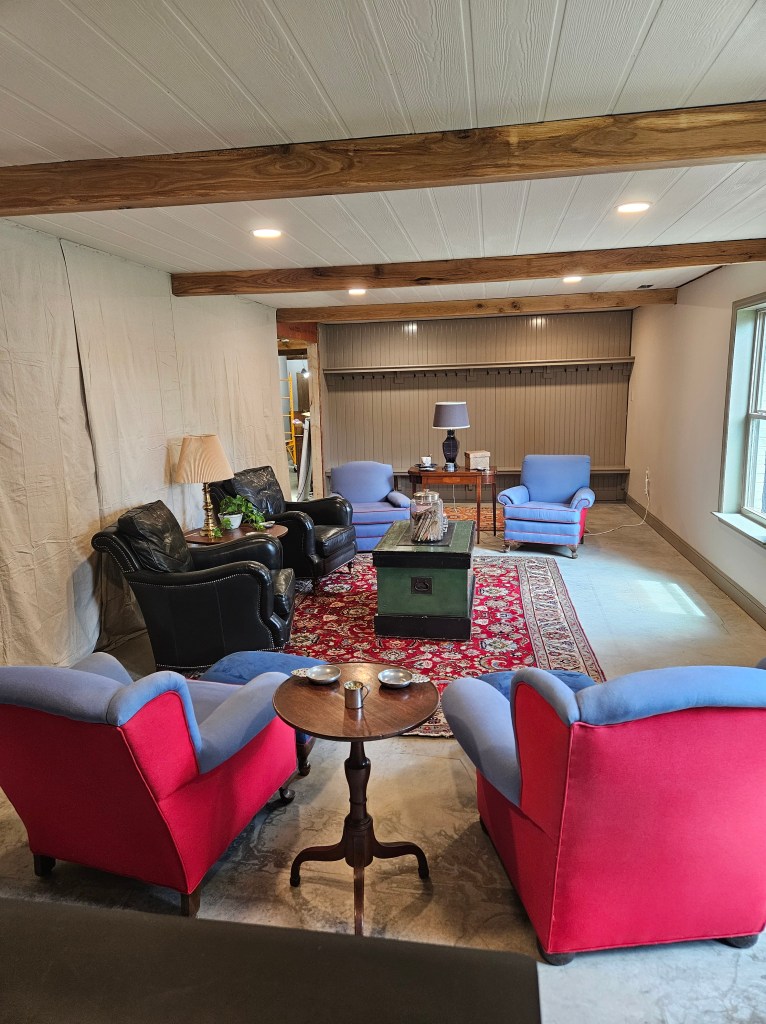
I put the dropcloths back up because it helps with the illusion.
We still have quite a bit to do in here, but seeing this much progress keeps us going.
Now you’re all caught up!

Wow! Has it been that long?
LikeLiked by 1 person