
We have taken a pretty long break from the basement after tackling the ceiling in the “den” portion of the basement. (I stripped the bookshelf, but we haven’t worked on anything big since the ceiling.)
My husband’s office in the basement is super depressing and while he could work from home on some days, he doesn’t, because his work space is so unmotivating here. If you’ve been following along, you also have seen that we have a GIANT pile of quarter sawn oak in the basement that is going to become paneling for his office, and stair treads and risers for the stairs to the basement. This pile of lumber is taking up a HUGE amount of space and we really need to get it out of the way.
It’s a little difficult to show, but we have three narrow rooms in the basement that run along the front of the house, one of the rooms is under the front porch, and then there are rooms on either side of that. They are about 7 1/2′ deep and we have used them for storage, primarily, but also for my husband’s office. We are going to move his office (which will become the bathroom) from the SW corner of the basement, to the NW corner.
Currently, the room that we’re going to use for his office is approximately 25′ long, so we are adding a door at the bottom of the stairs and we’re splitting the room into 2 rooms–one for his office and the other will be a storage room (holiday decor, infrequently used cooking/entertaining items, coolers, canvas chairs, wreaths, Christmas trees, etc.)
We emptied out this room so that we could start working on it, and it was really full. Now, the rest of the basement is a complete disaster. He really wanted to go ahead and start on his office, but I suggested that we should do the storage room first, so we could put all the stuff away. Having all the stuff out in the rest of the basement is making it very difficult to get in and out. At first, he didn’t like that idea (at all), because he really wants the office finished. However, after he thought about it for a few days and lived with the basement being an absolute mess, he relented.
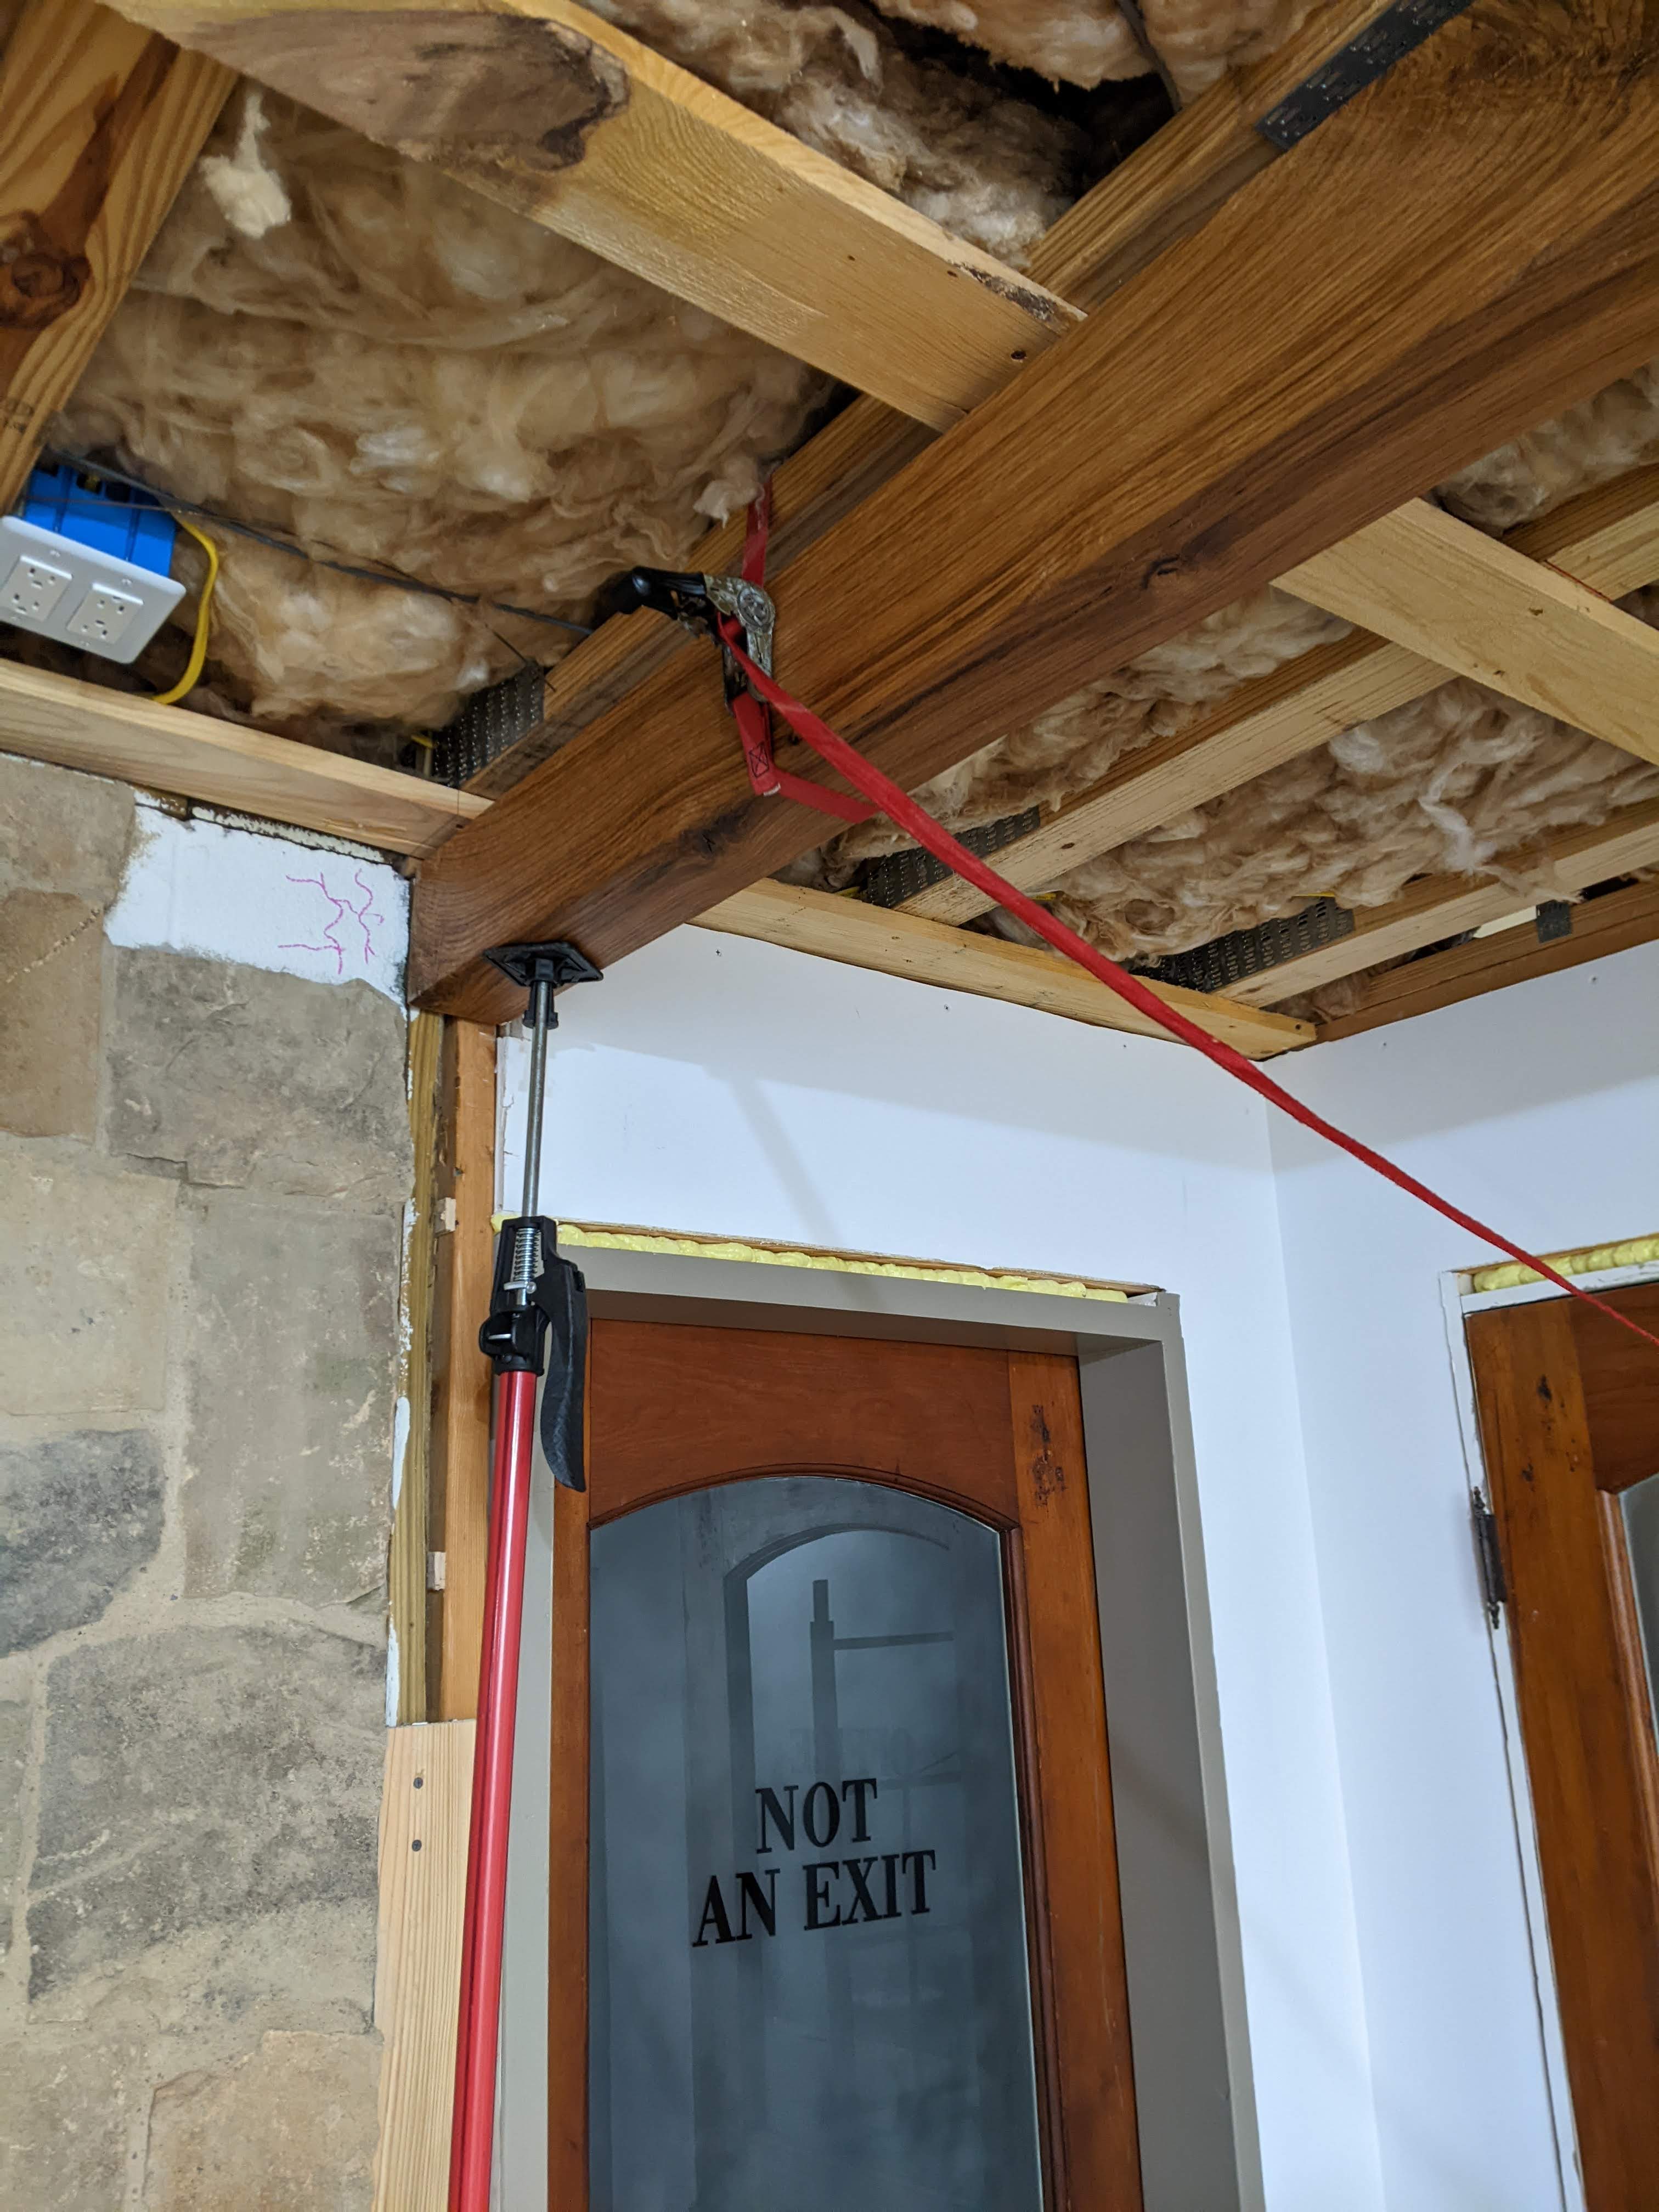
The first step to building out the storage room was to open a rough opening at the bottom of the stairs. We selected the door that we plan to use–and we still have several antique ones that we bought in Toledo. (If you missed the door saga, you can read about it here: https://cathyathomeontheriver.com/2022/08/15/the-ancient-basement/ ) It’s about 32″ wide, so we made the rough opening 34″ wide to allow space for the door frame, etc. My husband is going to have to flip the hinges so that the door will open the proper way–it will swing out (against the built in shelves pictured below), like most closet doors.
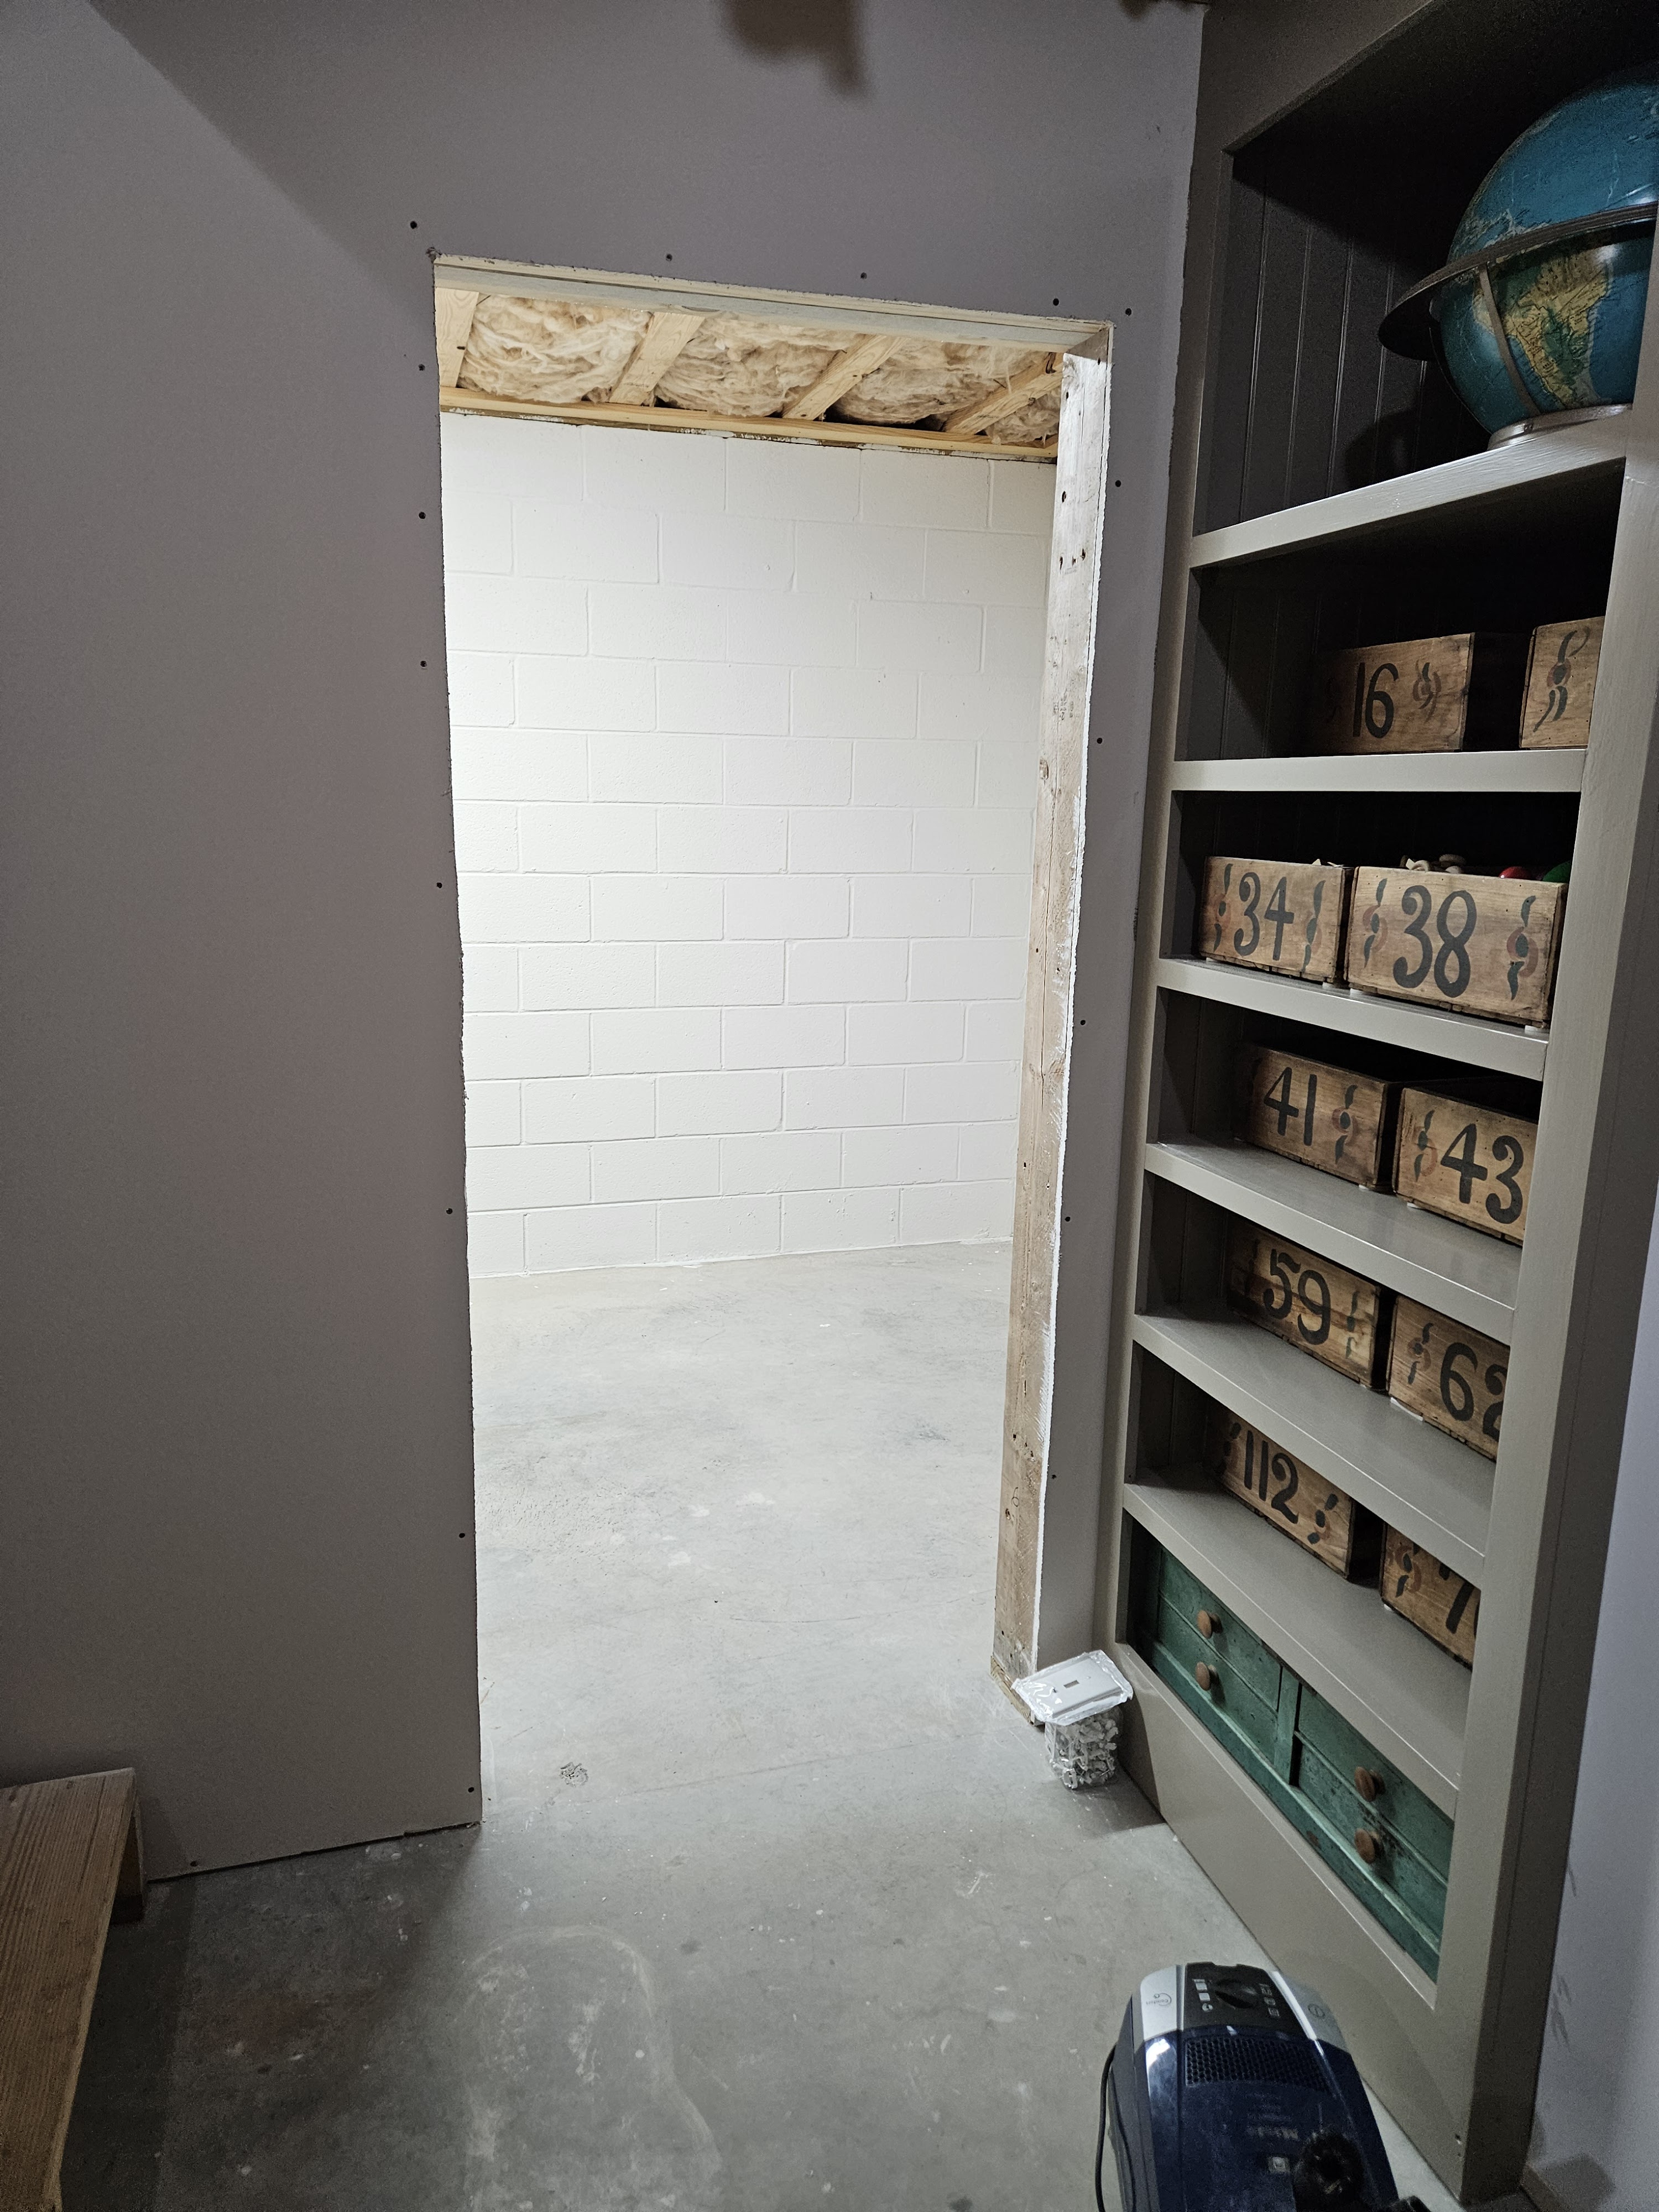
Here it is from inside the storage room:
After we opened the door, we needed to added a tiny bit of electrical work. Fortunately for us, there was an outlet at this end of the room that was the only device on the circuit. We tapped into the outlet so that we could add another outlet on the other side of the door and separate the light at this end from the light in what will become my husband’s office, by adding a switch and power to the light. All of this was really pretty easy and straightforward, and fortunately, we had everything that we needed to do it–so no trip to the store. We have everything roughed in, but not everything is finished up because we have to mount the boxes after the plywood is up.
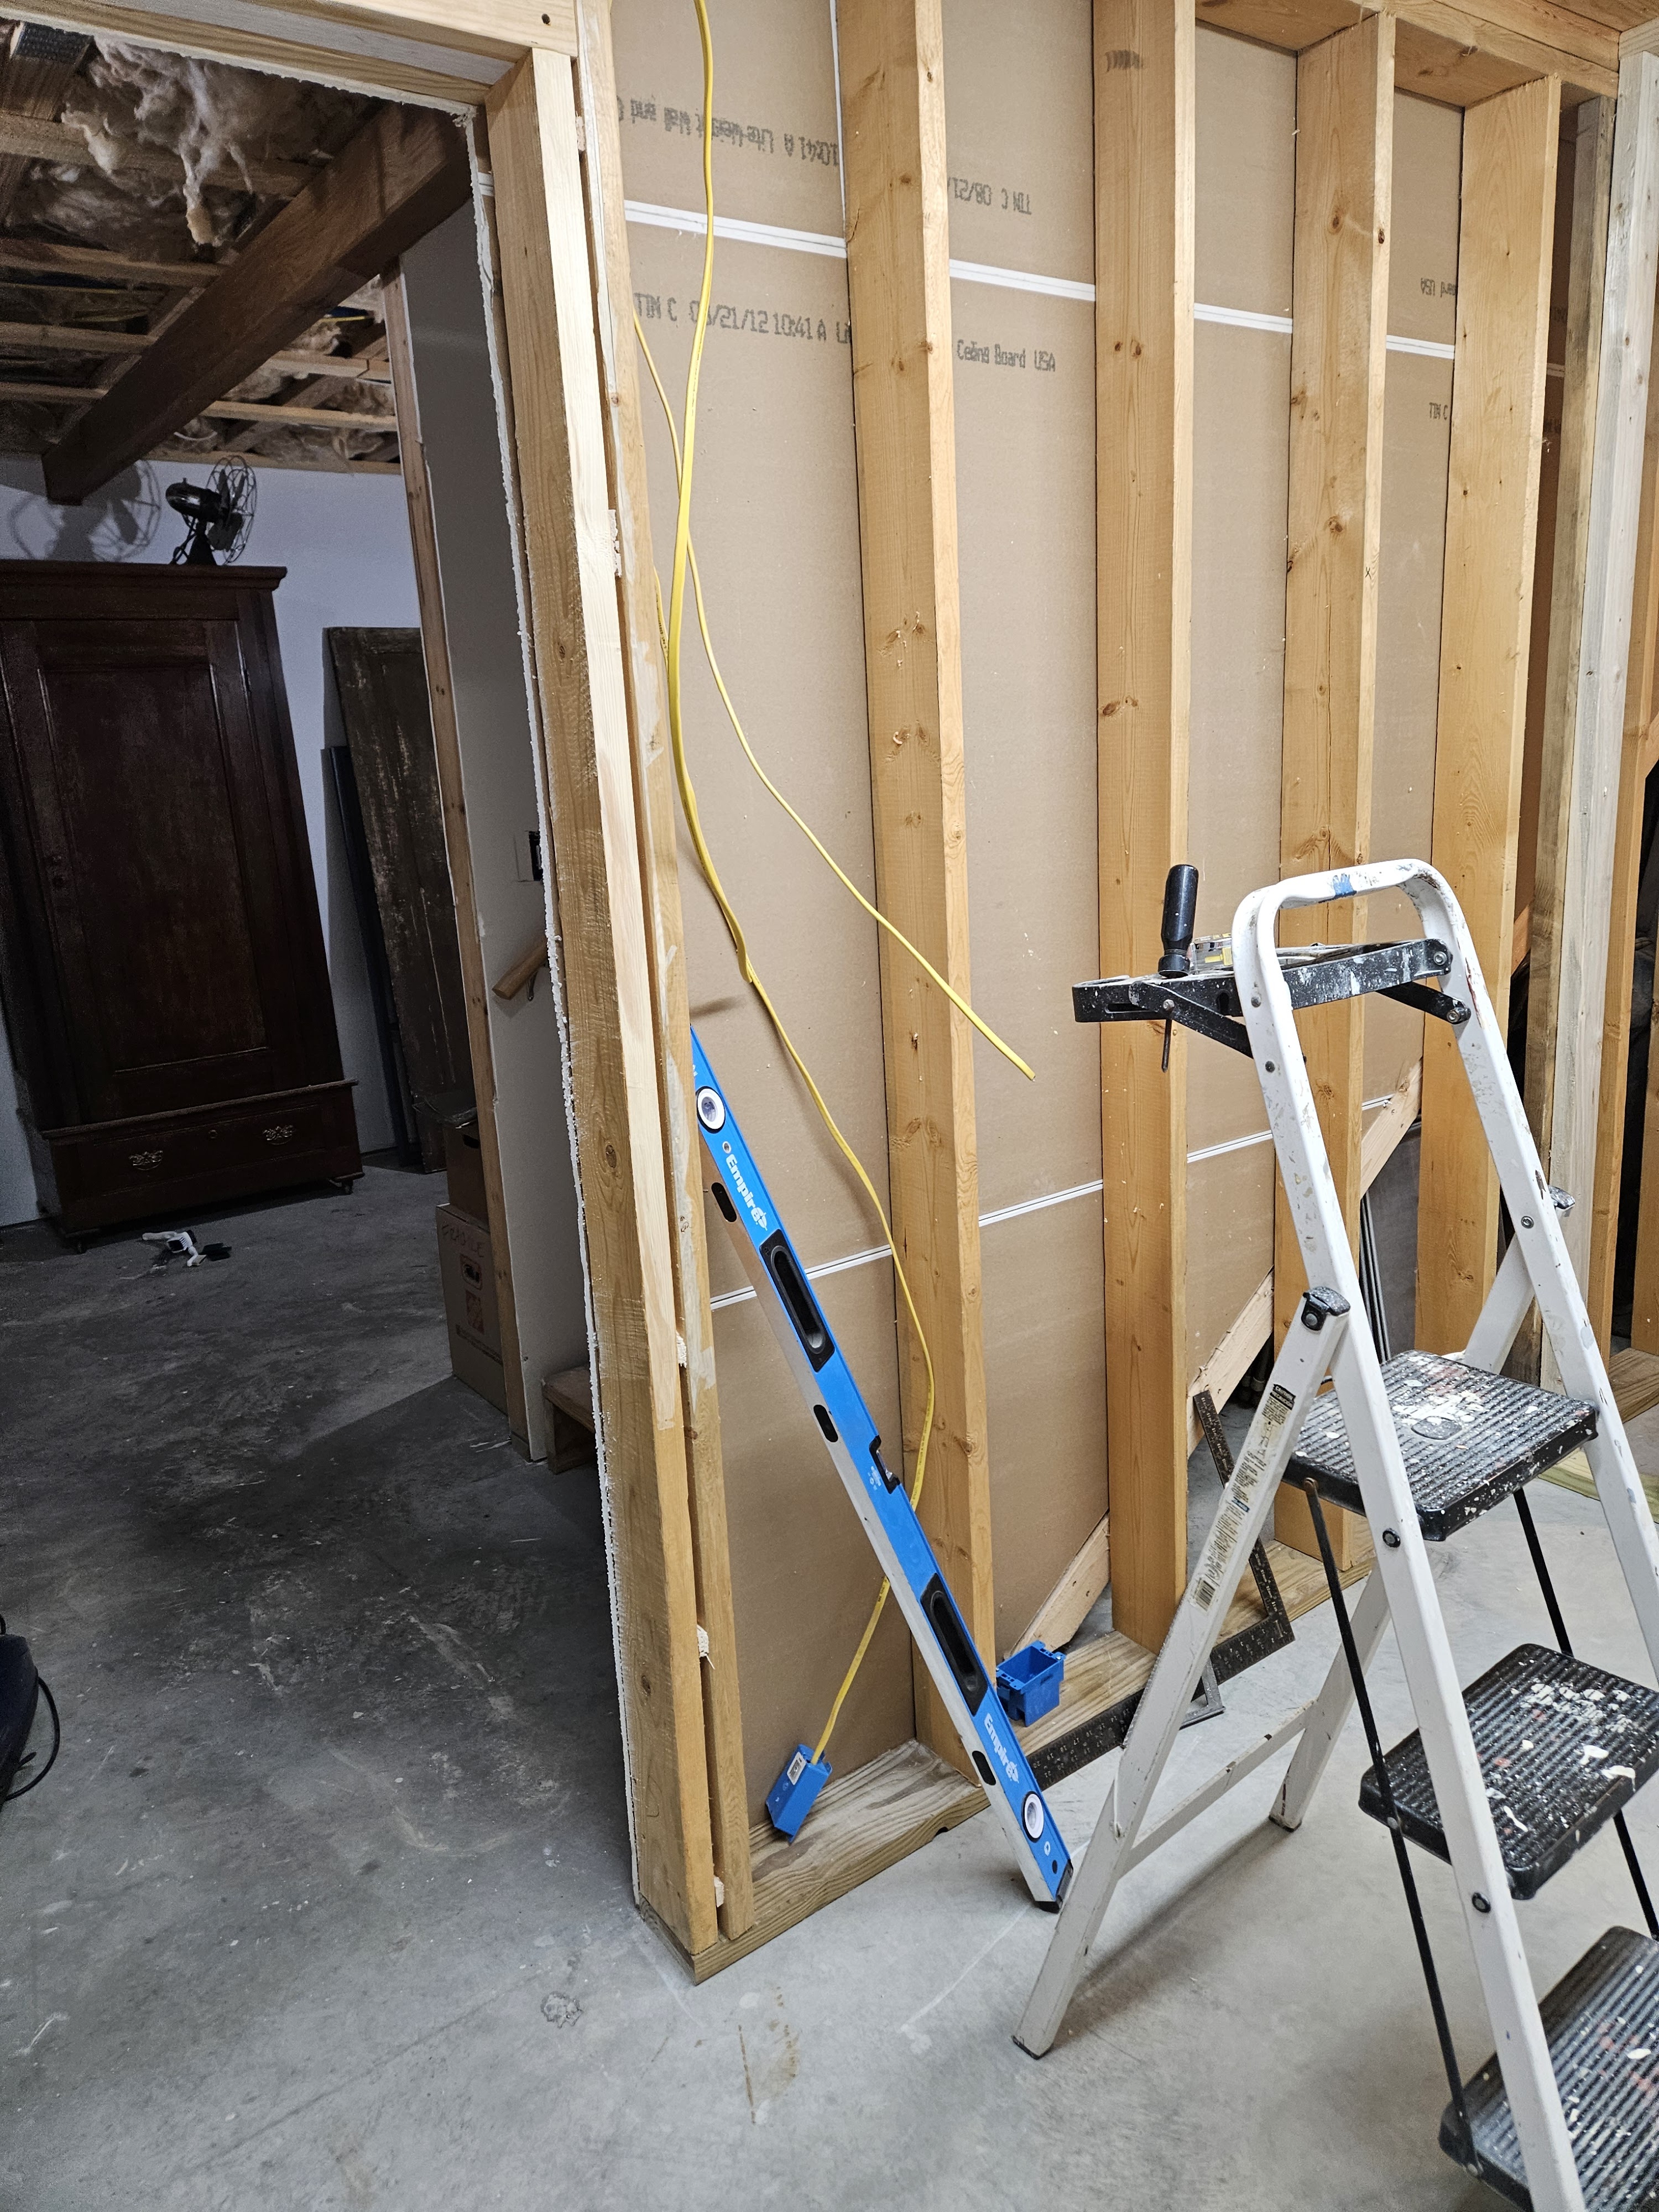
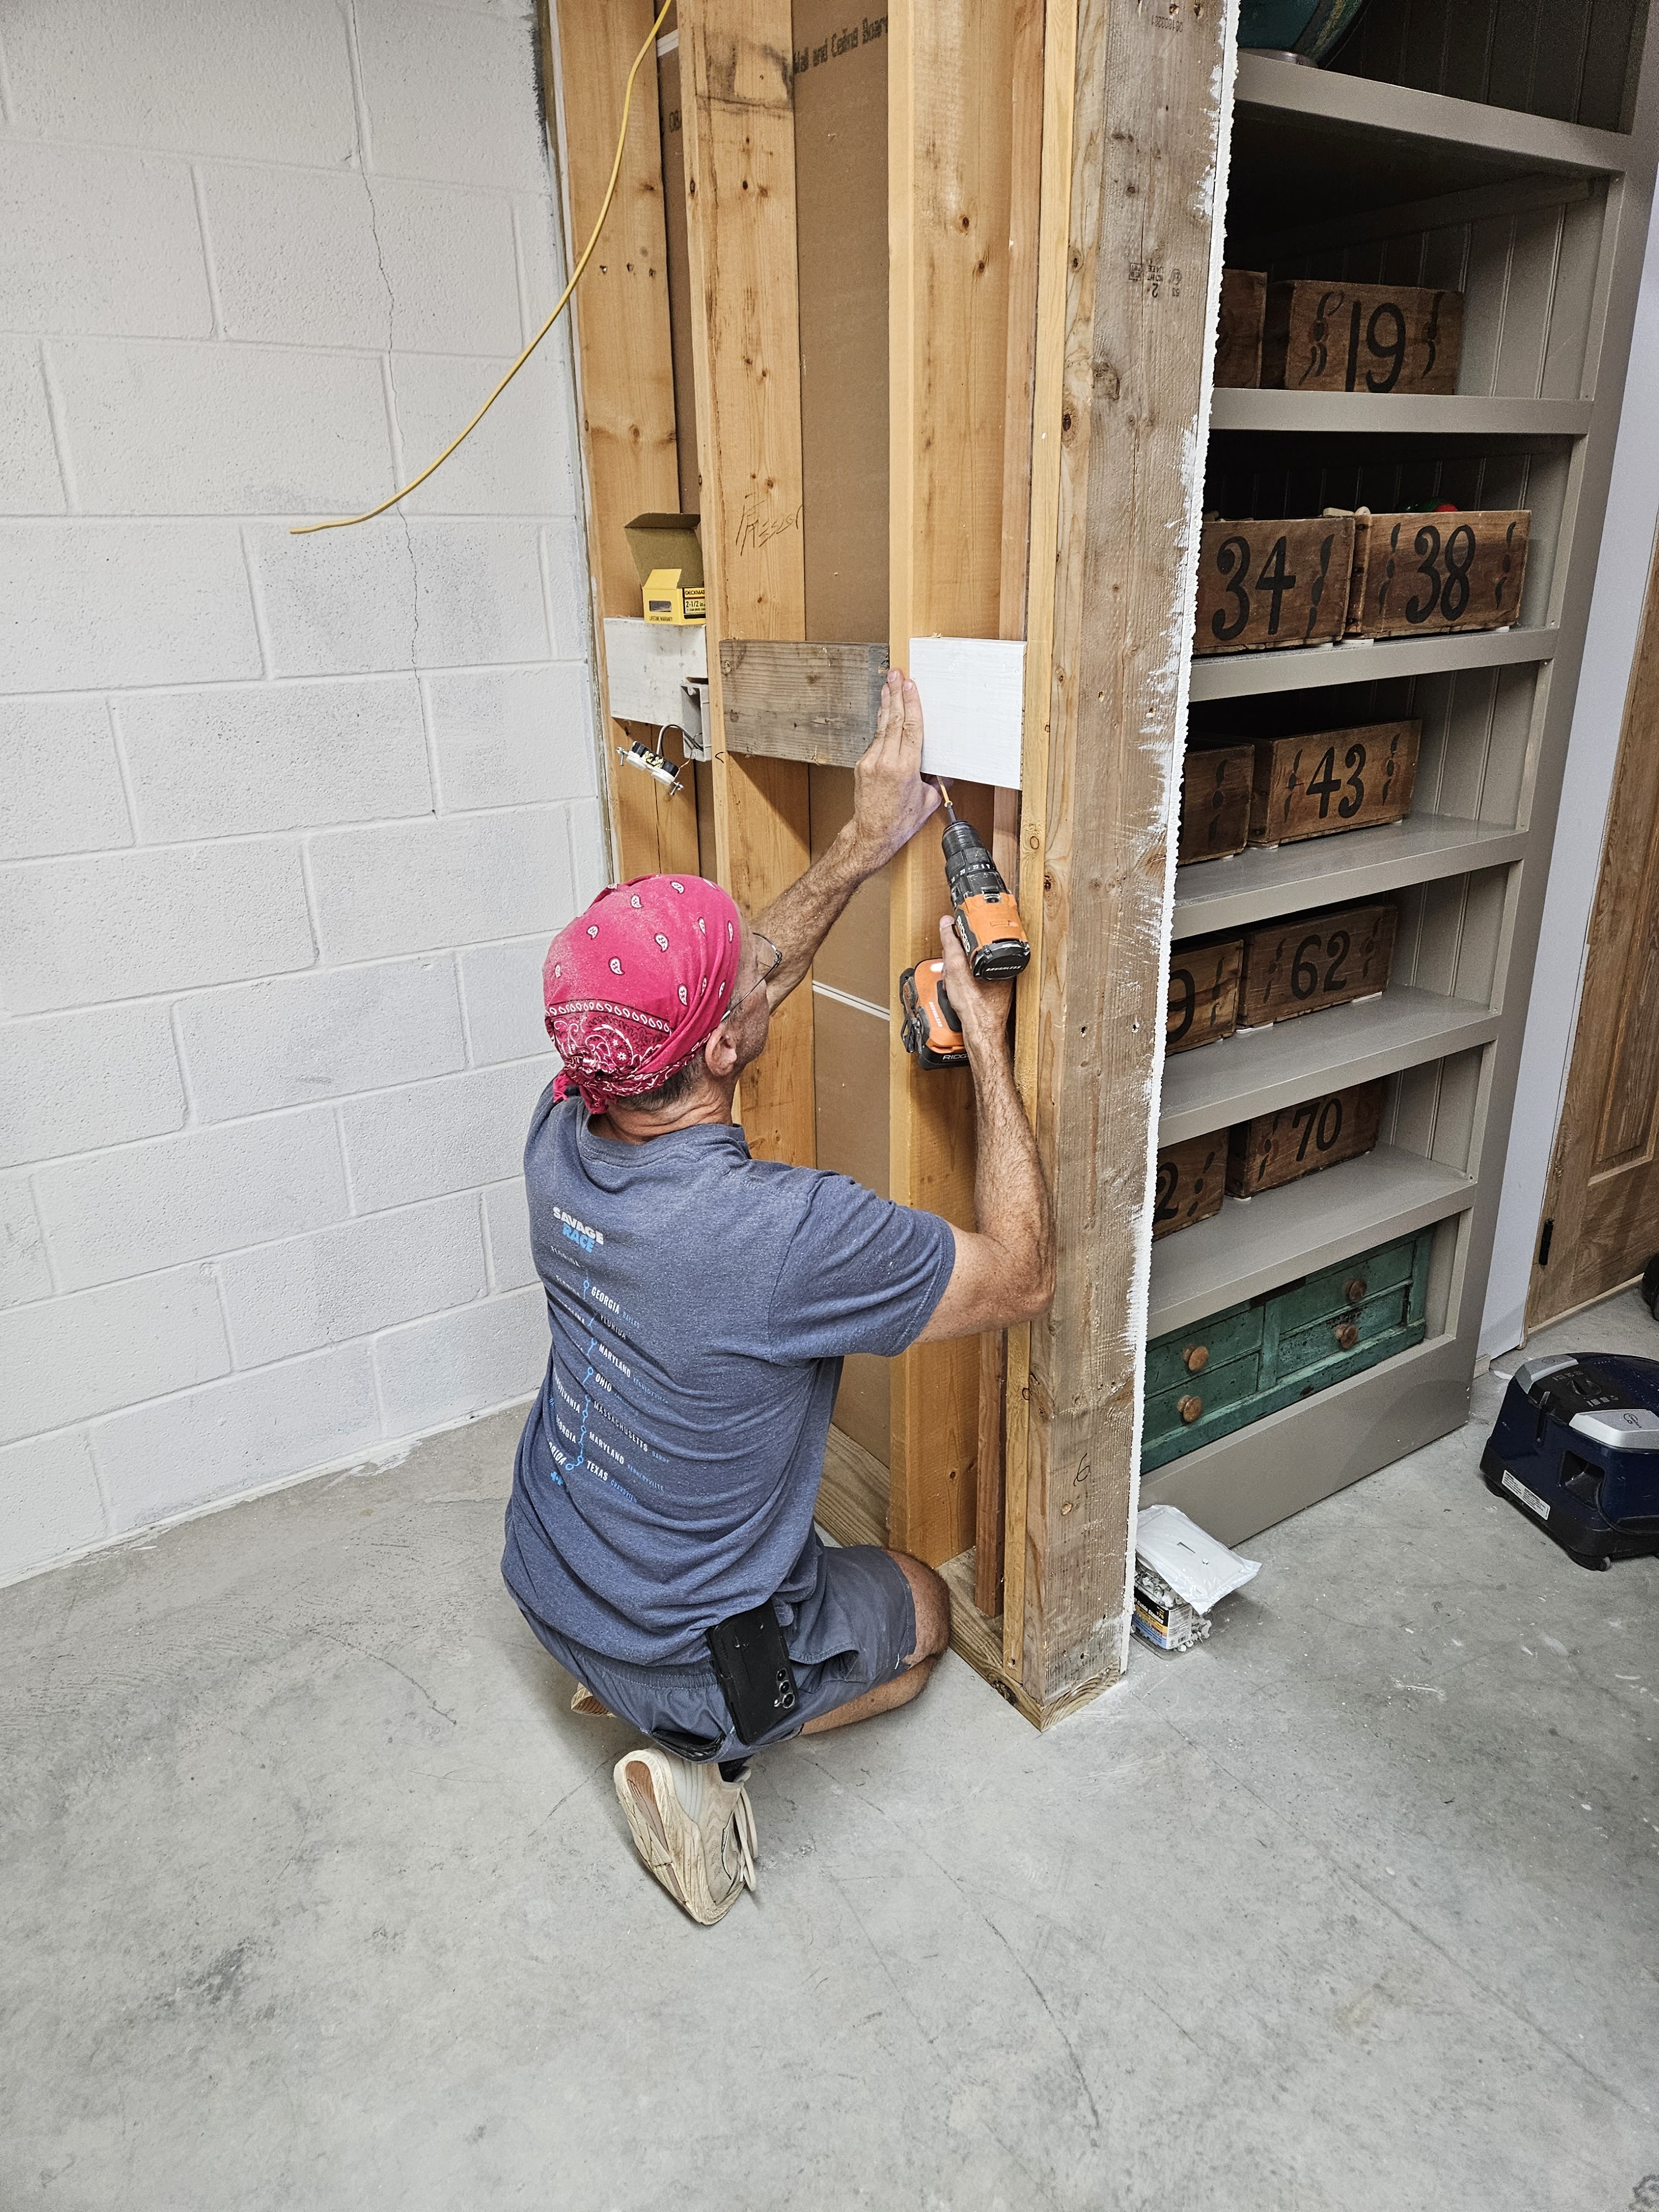
Then it was time to frame the wall that will divide the two spaces. All the original framing in the basement is made up of 2″ x 6″ lumber, but this wall is standard 2″ x 4″. framing We started with a pressure treated board against the floor (to protect it in case there is any moisture). My husband was going to secure it to the floor using tapcon bolts, but his drill was too dull to bore the holes through the concrete. So we pivoted (a little) and decided that we would continue on with the wall and secure it to the floor later. (I placed a pick-up order for the items we needed.)
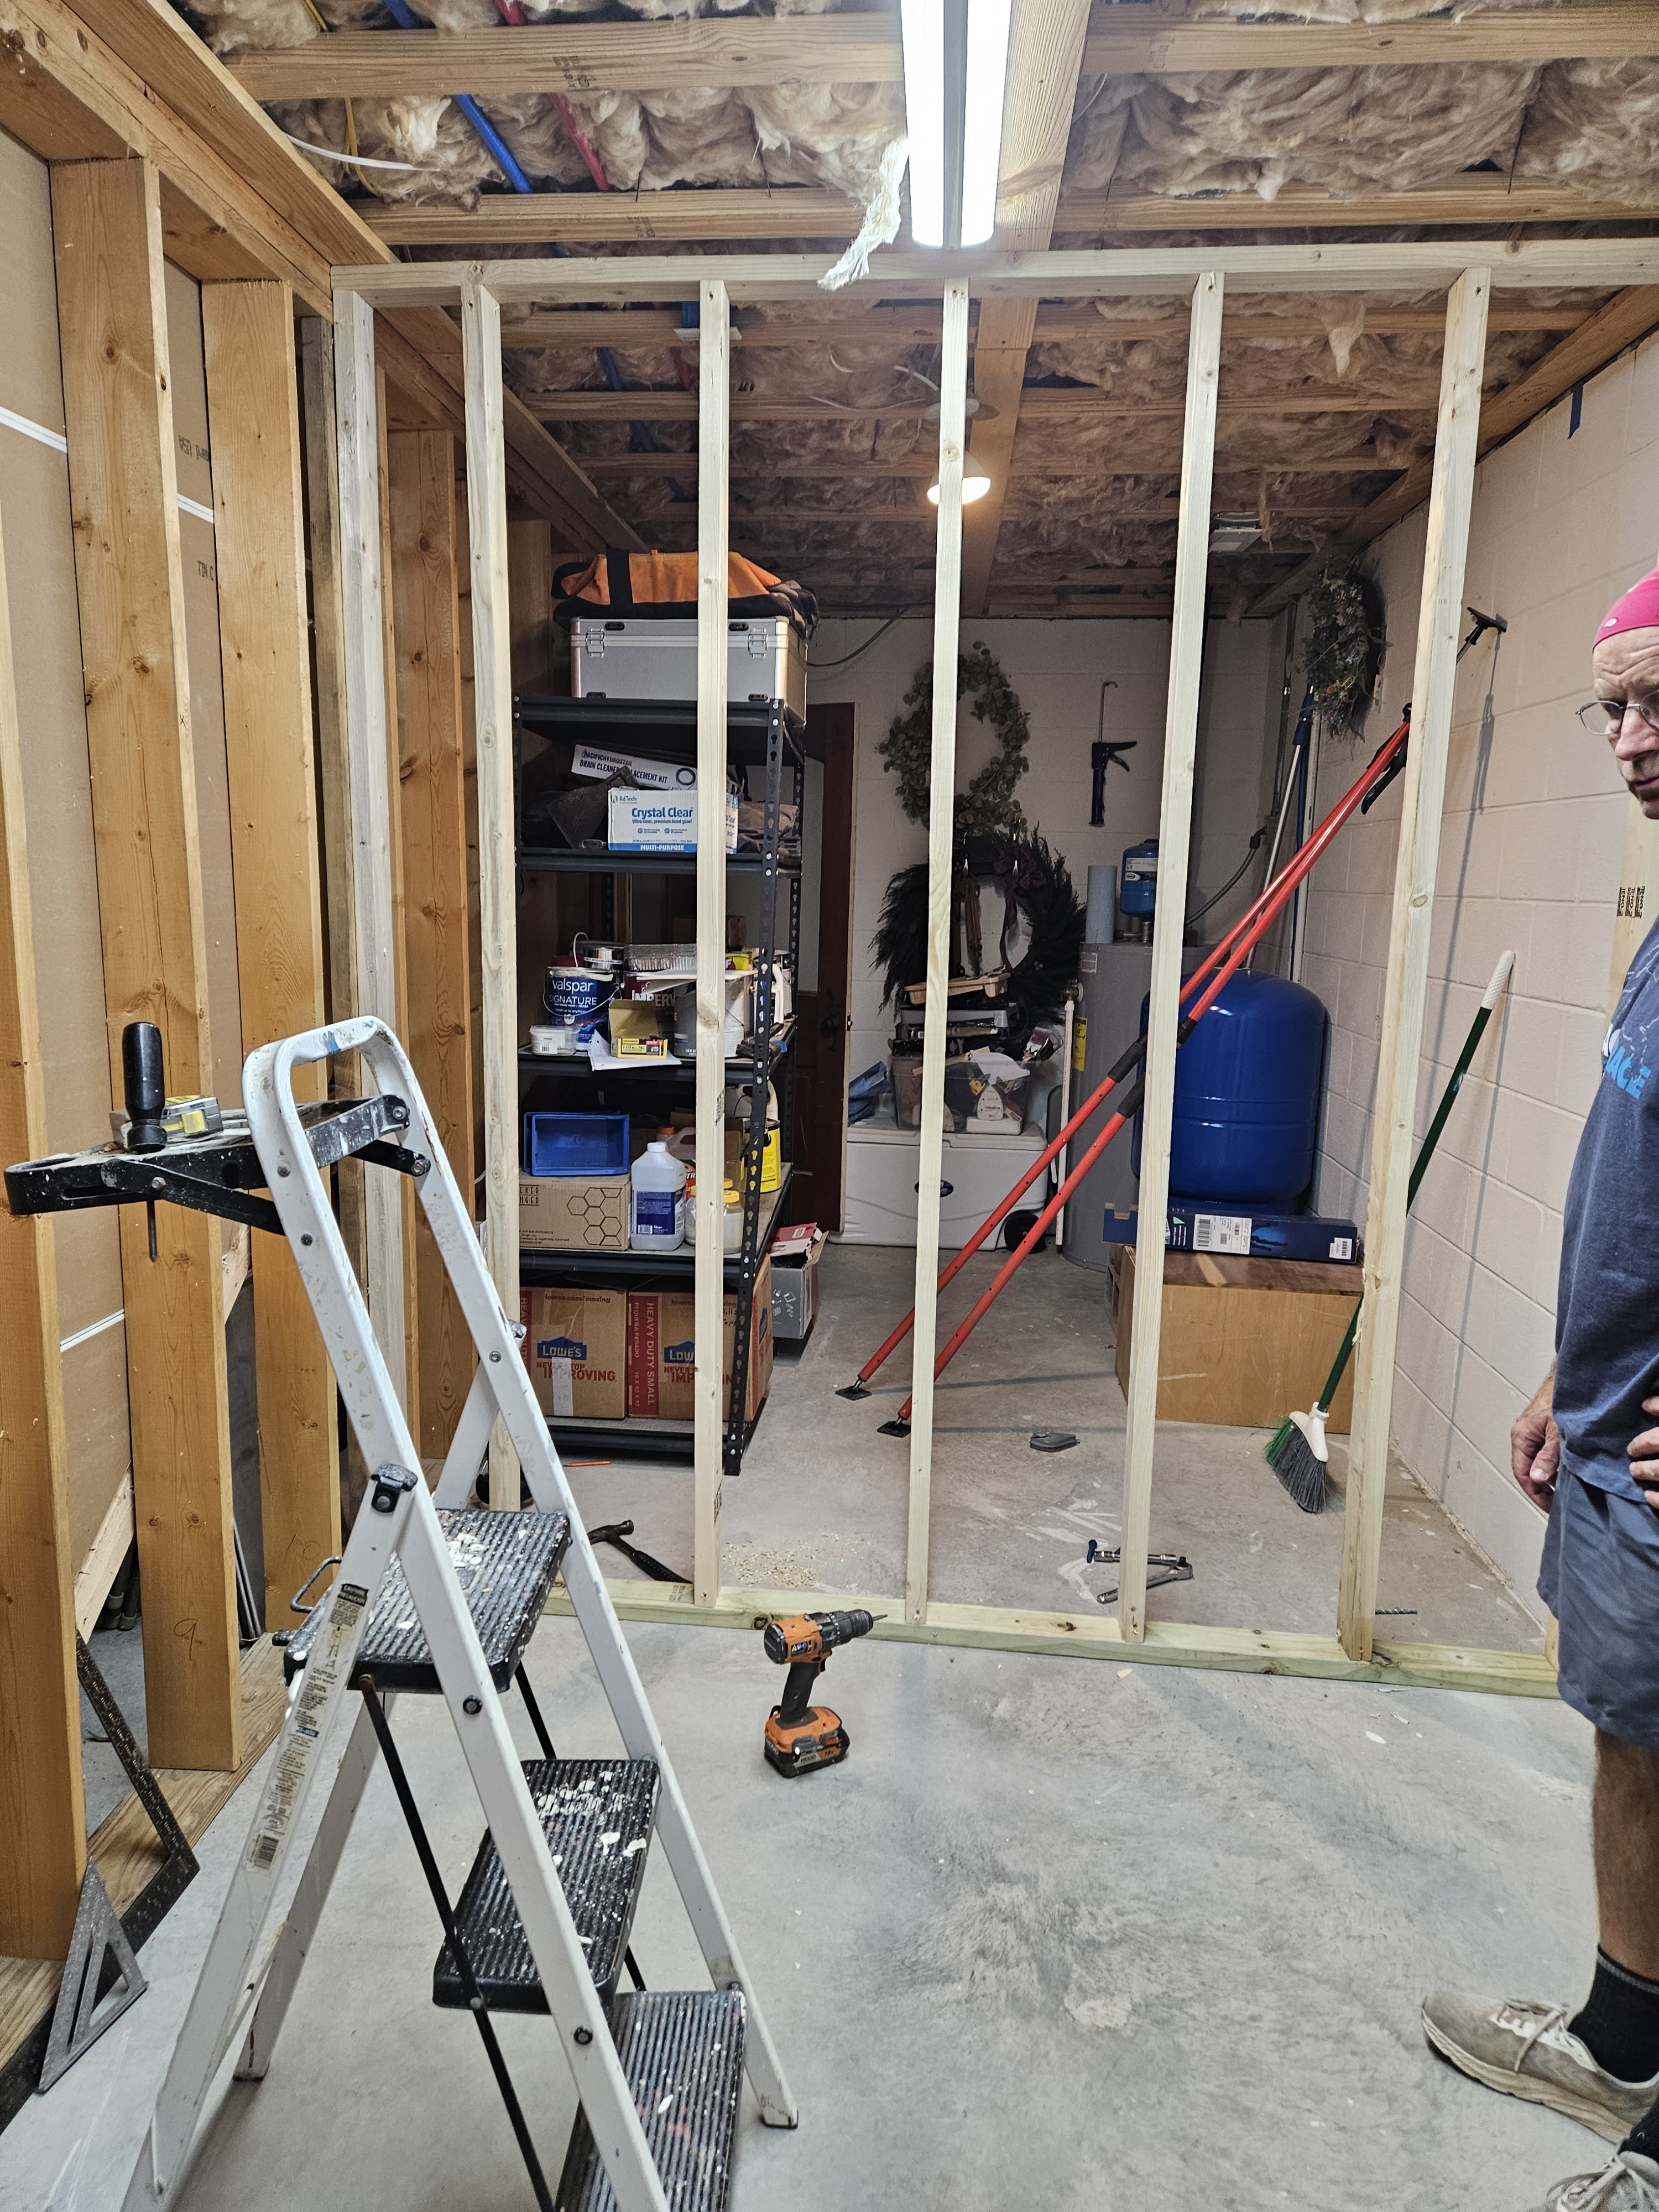
Then it was on to the board on the ceiling. My husband lined it up with the board on the floor. He marked the placement of all the uprights before we installed either board. Then we cut the uprights to length and installed them. The upright that is against the block wall is also pressure treated, and also needs to be secured with tapcon bolts, so the board next to it is not actually attached to anything yet.
We are putting 1/2″ grade B plywood (sanded veneer on one side only) on the framed walls so that we can mount storage solutions to them. We want things to be more organized and easily accessible than they were before–and we need to make the most of this space since it is so much smaller than the original room. (And yes, we have gotten rid of a BUNCH of stuff too.) In order to hang the plywood, we needed to add what is known as a California corner at the inside corner (on the left side of the wall in the photo above.) All you do is add another upright so that you have something to screw the drywall (or in this case, the plywood) to.

We are going to hang most of the plywood horizontally, so we had to add blocking at the mid-point of the wall so we had plenty of support to screw it to.
We accomplished all of this in one day, and I was really happy with that. What I wasn’t so happy about, was that my husband had to work the next day (a Saturday), and then was out of town for a few days.
When he gets back, we will turn our attention to: securing the wall to the floor and block wall with tapcon bolts; securing the last upright and adding the last piece of blocking; getting the plywood hung; and finishing the wiring. At that point, we’ll be finished with the first big push on this room.
As far as finishing it out goes, we will: add beadboard paneling to the framed walls and to the ceiling; and we are going to put down a black VCT tile (like the tiles that they use in schools/hospitals/municipal buildings); and then we’ll refinish the door and get in into a frame and mount it. I am excited about the door because it takes an old mortise lock and it looks like we have one that lines up with the holes for the knob and the lock–but the pocket needs to be just a tiny bit bigger. I may do a post about just the door because it sounds simple, but there are a lot of steps involved to get it ready to hang. To finish it all off, we’ll add a little trim around the door, baseboard and some molding at the ceiling.
Then we’ll move in the shelving units and attach storage solutions to the walls. So, LOTS more to come on this project. Once we have everything put away, then we will move on to my husband’s office.

One thought on “The Ancient Basement–We’re Back At It!”